

Planet WAPC-500, WAPC-1000 Quick Installation Manual
1. Package Contents
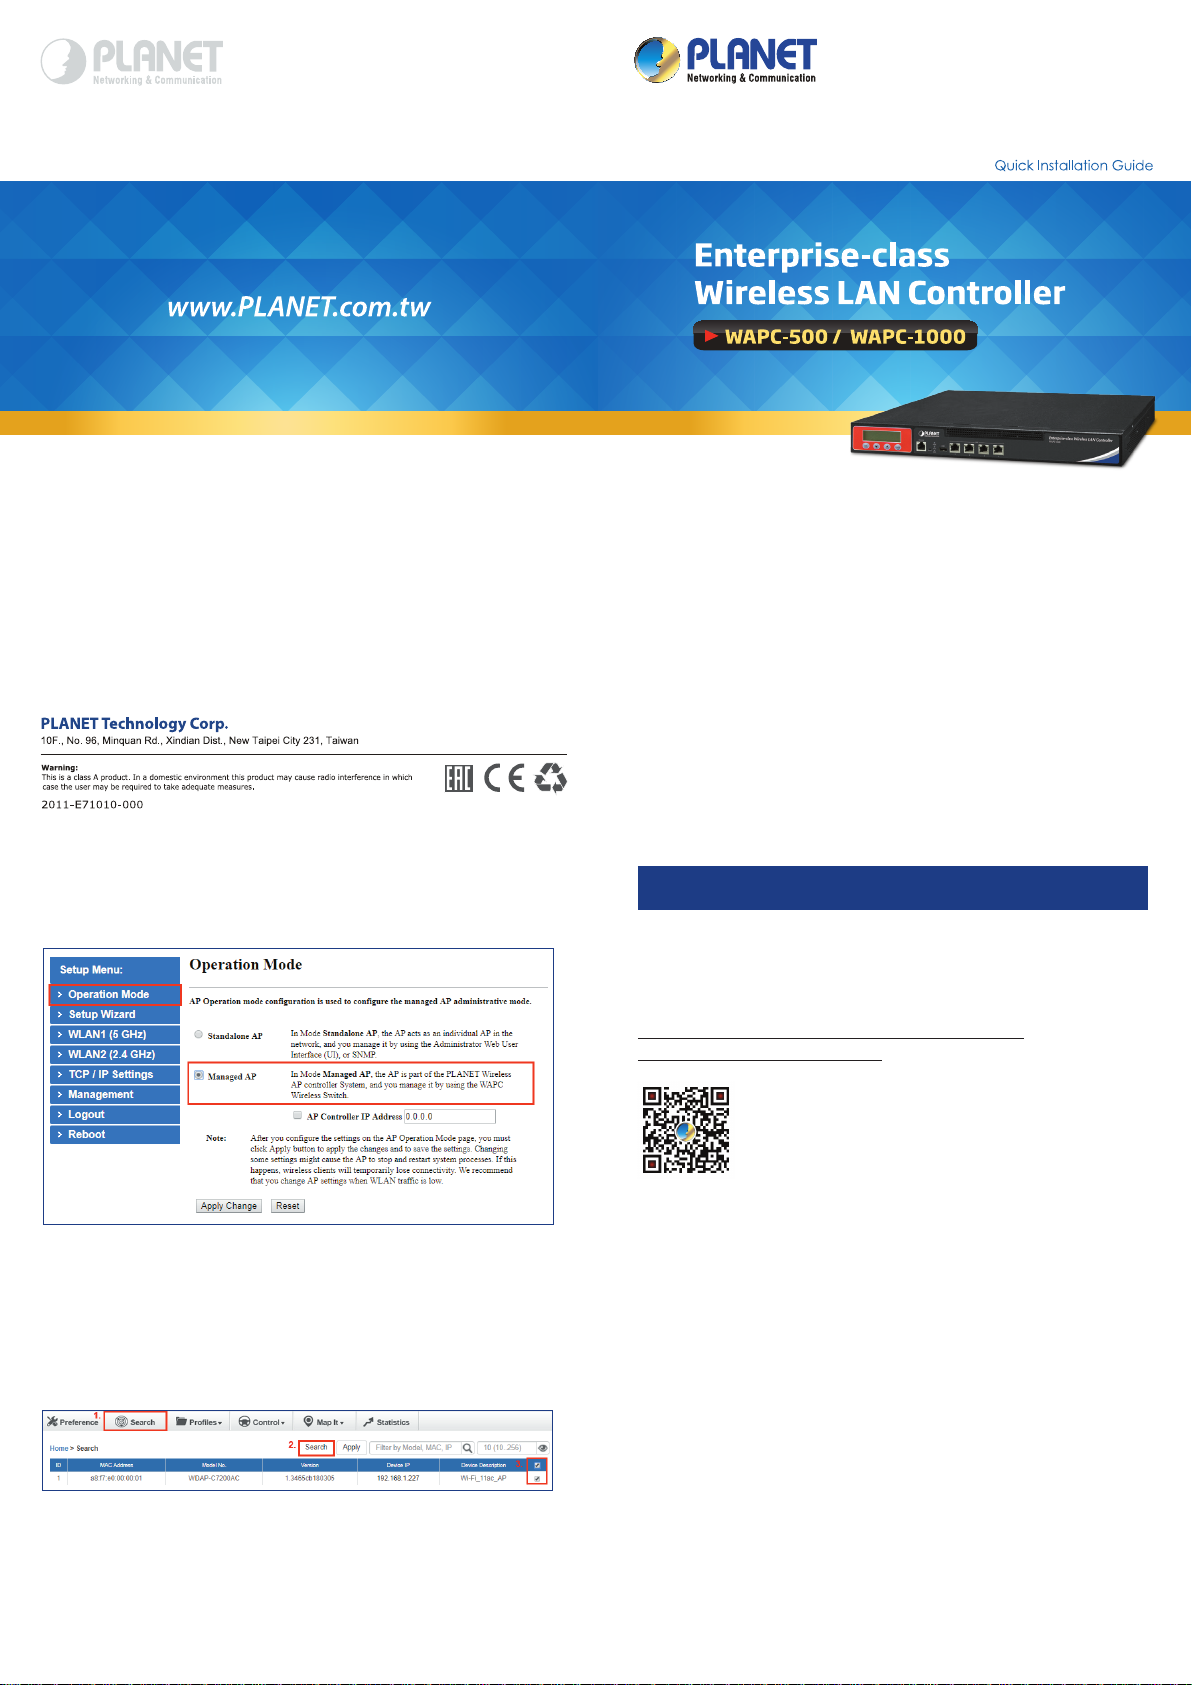
4. Entering into the Web Management
Thank you for purchasing PLANET Wireless LAN Controller. The
descriptions of the models are shown below:
WAPC-500 Enterprise-class WLAN Controller over 500 APs
WAPC-1000 Enterprise-class WLAN Controller over 1000 APs
“WLAN Controller” is used as an alternative name in this
Quick Installation Guide.
Package Contents:
The WLAN Controller x 1
Quick Installation Guide x 1
RS232 to RJ45 Console Cable x 1
Power Cord x 1
Rack-mounting Brackets with Screws x 2
If any item is found missing or damaged, contact local reseller
for replacement.
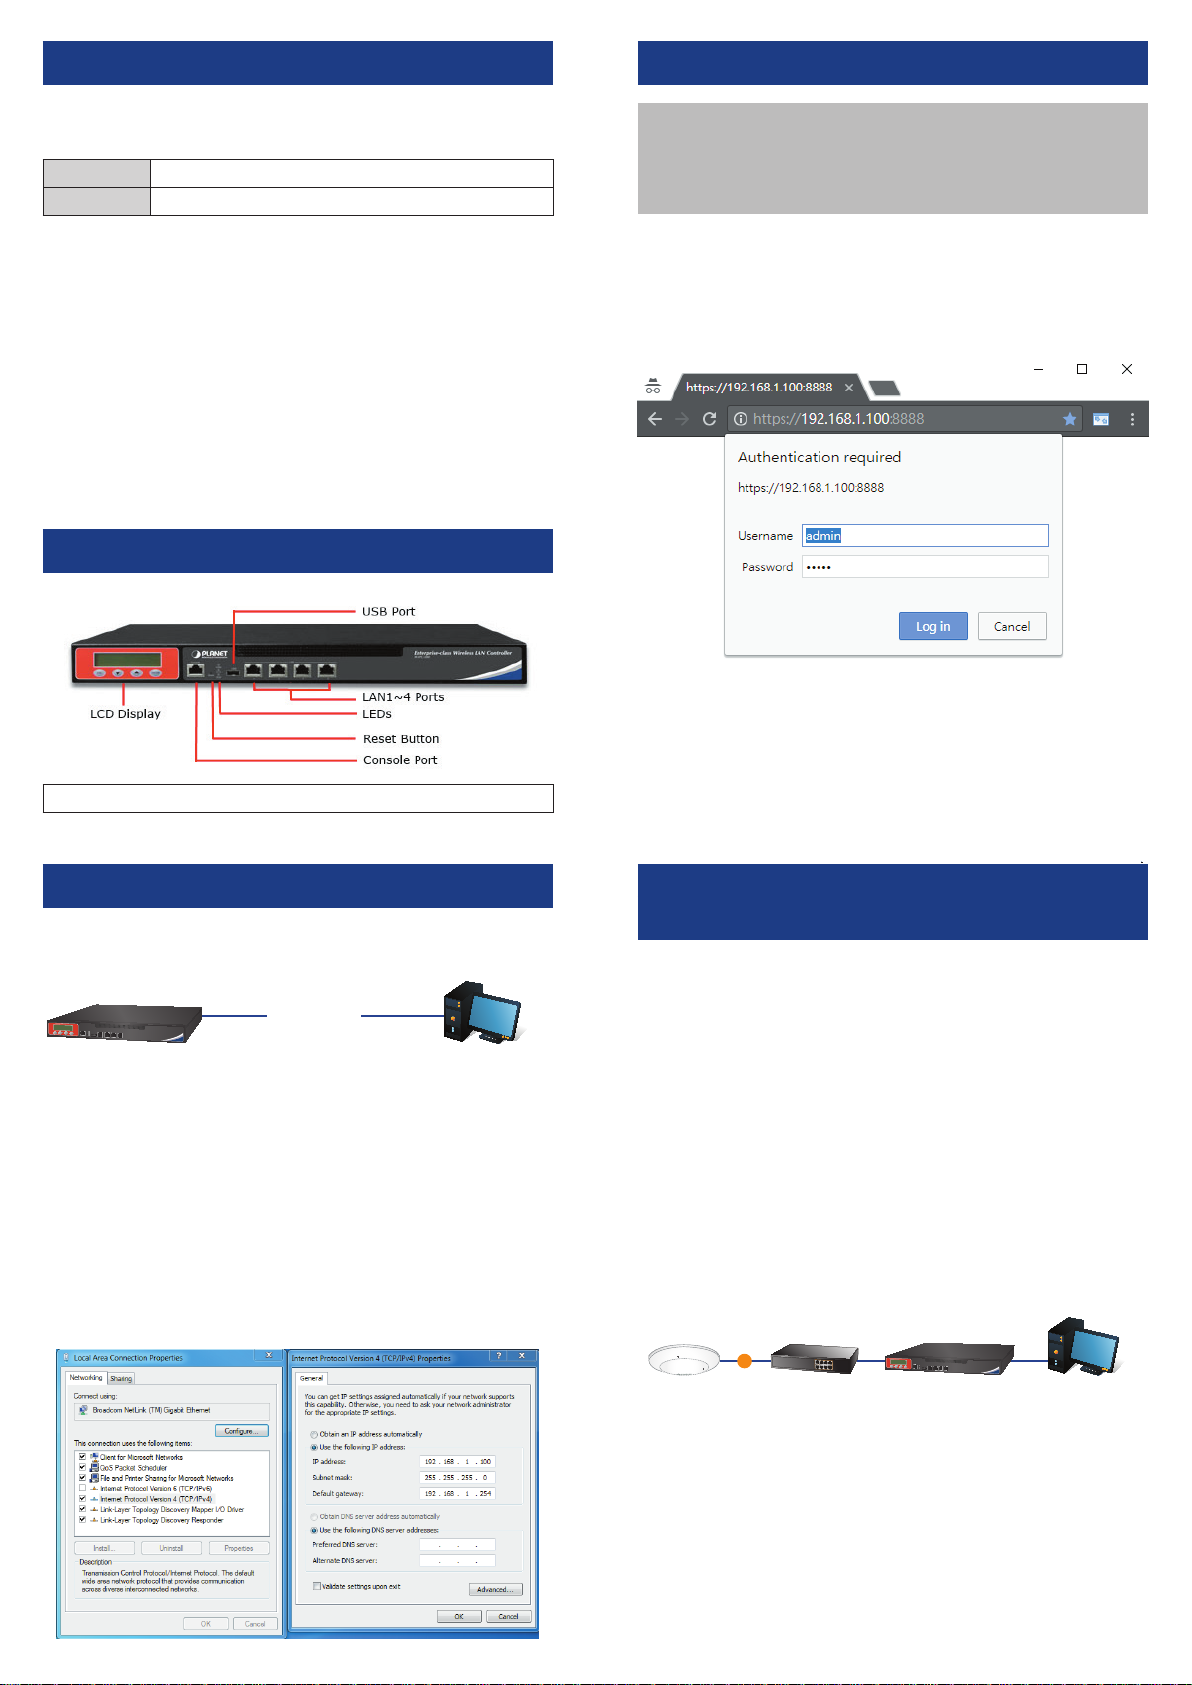
2. Hardware Description
Default IP Address: 192.168.1.100
Default Management Port: 8888
Default Username: admin
Default Password: admin
Launch the Web browser (Google Chrome is recommend) and
enter the default IP address “https://192.168.1.100:8888”.
Then, enter the default username and password shown as
above to logon the system.
] The secure login with SSL (HTTPS) prex is required.
Reset Button < 5 sec: System reboot; > 5 sec: Factory default
3.WiredNetworkConguration
A computer with wired Ethernet connection is required for the
rst-time conguration of the WLAN Controller.
WLAN Controller
RJ45/UTP Cable
IP Address:
192.168.1.100
1. Go to “Control Panel-> Network and Sharing Center->
Change Adapter Settings”
2. Double-click “Local Area Connection”.
3. Select “Internet Protocol version 4 (TCP/IPv4)” and
click “Properties”.
4. Select “Use the following IP address” and then click
the “OK” button twice to save the conguration. For
example, the default IP address of the WLAN Controller is
192.168.1.100, then the manager PC should be set to
192.168.1.x (where x is a number between 1 and 254,
except 100), and the default subnet mask is 255.255.255.0.
PC / Workstation with
Web Browser 192.168.1.x
After logon, connect the WLAN Controller to the managed
network to centrally control the PLANET Smart AP series
5.APDiscoverythroughtheWLAN
Controller
There are different models including indoor and outdoor AP
series that can be managed by WLAN Controller. For the AP
models supporting “Managed AP” mode, please switch them
to “Managed AP” mode. For the AP models that do not
support DHCP IP, please congure them to use a different
static IP before connecting them to the same managed
network. If you prefer to use DHCP IP for the AP models that
support DHCP IP, please ensure the DHCP server exists in the
managed network.
Please regularly check PLANET website for the latest
managed AP compatibility list.
Follow the steps below to set up the AP from the “Standalone
AP” mode to the “Managed AP” mode.
Step 1. Connect the AP, WLAN Controller and your computer
to the same network.
PoE
PoE SwitchManaged AP
WLAN Controller
PC / Workstation with
Web Browser 192.168.1.x
Step 2. Log in to the AP’s Web User Interface and refer to the
picture below to congure the AP to “Managed AP".
Then, click “Apply Change”.
Step 3. In the WLAN Controller management UI, go to
“Search” page to discover and add the managed AP
to the device list.
Then, you can go to “Control-> AP Management”
page to congure pre-dened proles to the managed
AP without logging on to the AP’s web page.
FurtherInformation:
The above steps introduce the simple installations and
congurations of the WLAN Controller. For further congurations
of AP management, please refer to the user manual, which can
be downloaded from the website.
http://www.planet.com.tw/en/support/download.
php?type1=4&model=&type=3
If you have further questions, please contact the local dealer or
distributor where you purchased this product.
For information about further conguration of Managed AP by
using PLANET WLAN Controller, refer to the user manual of
the WAPC WLAN Controller series.
 Loading...