

Page 1
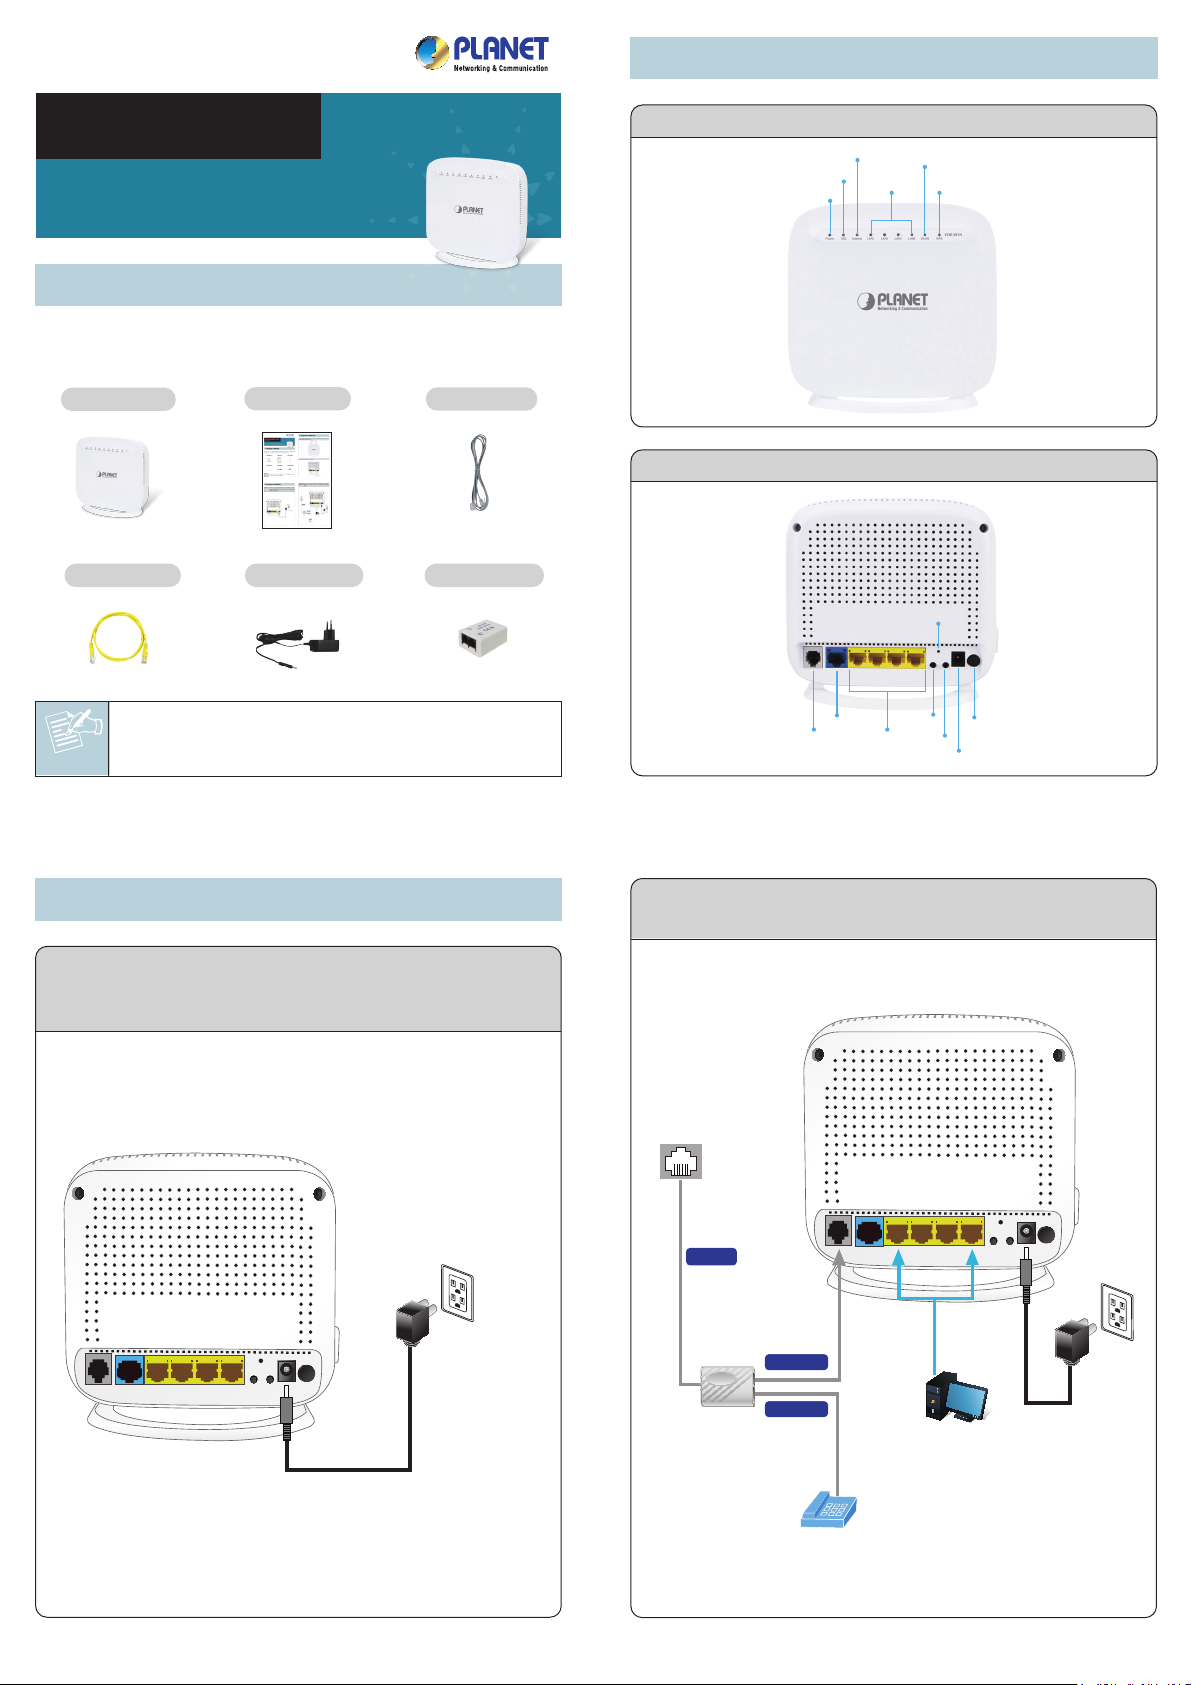
2. Physical Introduction
Quick Installation Guide
VDR-301N
802.11n Wireless VDSL2 Bridge Router
1. Package Contents
Thank you for choosing PLANET VDR-301N. Before installing the
AP, please verify the contents inside the package box.
VDR-301N
RJ45 Cable
Quick Guide
Power Adapter
RJ11 Cable
VDSL Splitter
Front Panel of VDR-301N
Internet
DSL
Power
LAN1~4
Interfaces and Ports of VDR-301N
WLAN
WPS
Reset
If there is any item missing or damaged, please
Note
contact the seller immediately.
– 1 – – 2 –
3. Hardware Installation
Step 1: Connect the Power Adapter to VDR-301N. Check
whether the PWR LED and LAN LED on the front panel
are on accordingly.
Power
LAN1~4
WPS
WLAN
Power
12V DC
DSL
WAN
Step 2: Follow the figure below to connect the network
devices.
Phone
Jack
LINE
RJ11
Power
Power Adapter
Splitter
MODEM
MODEM
PHONE
PHONE
Telephone
– 3 – – 4 –
RJ45
Power
Adapter
PC/Laptop
Page 2
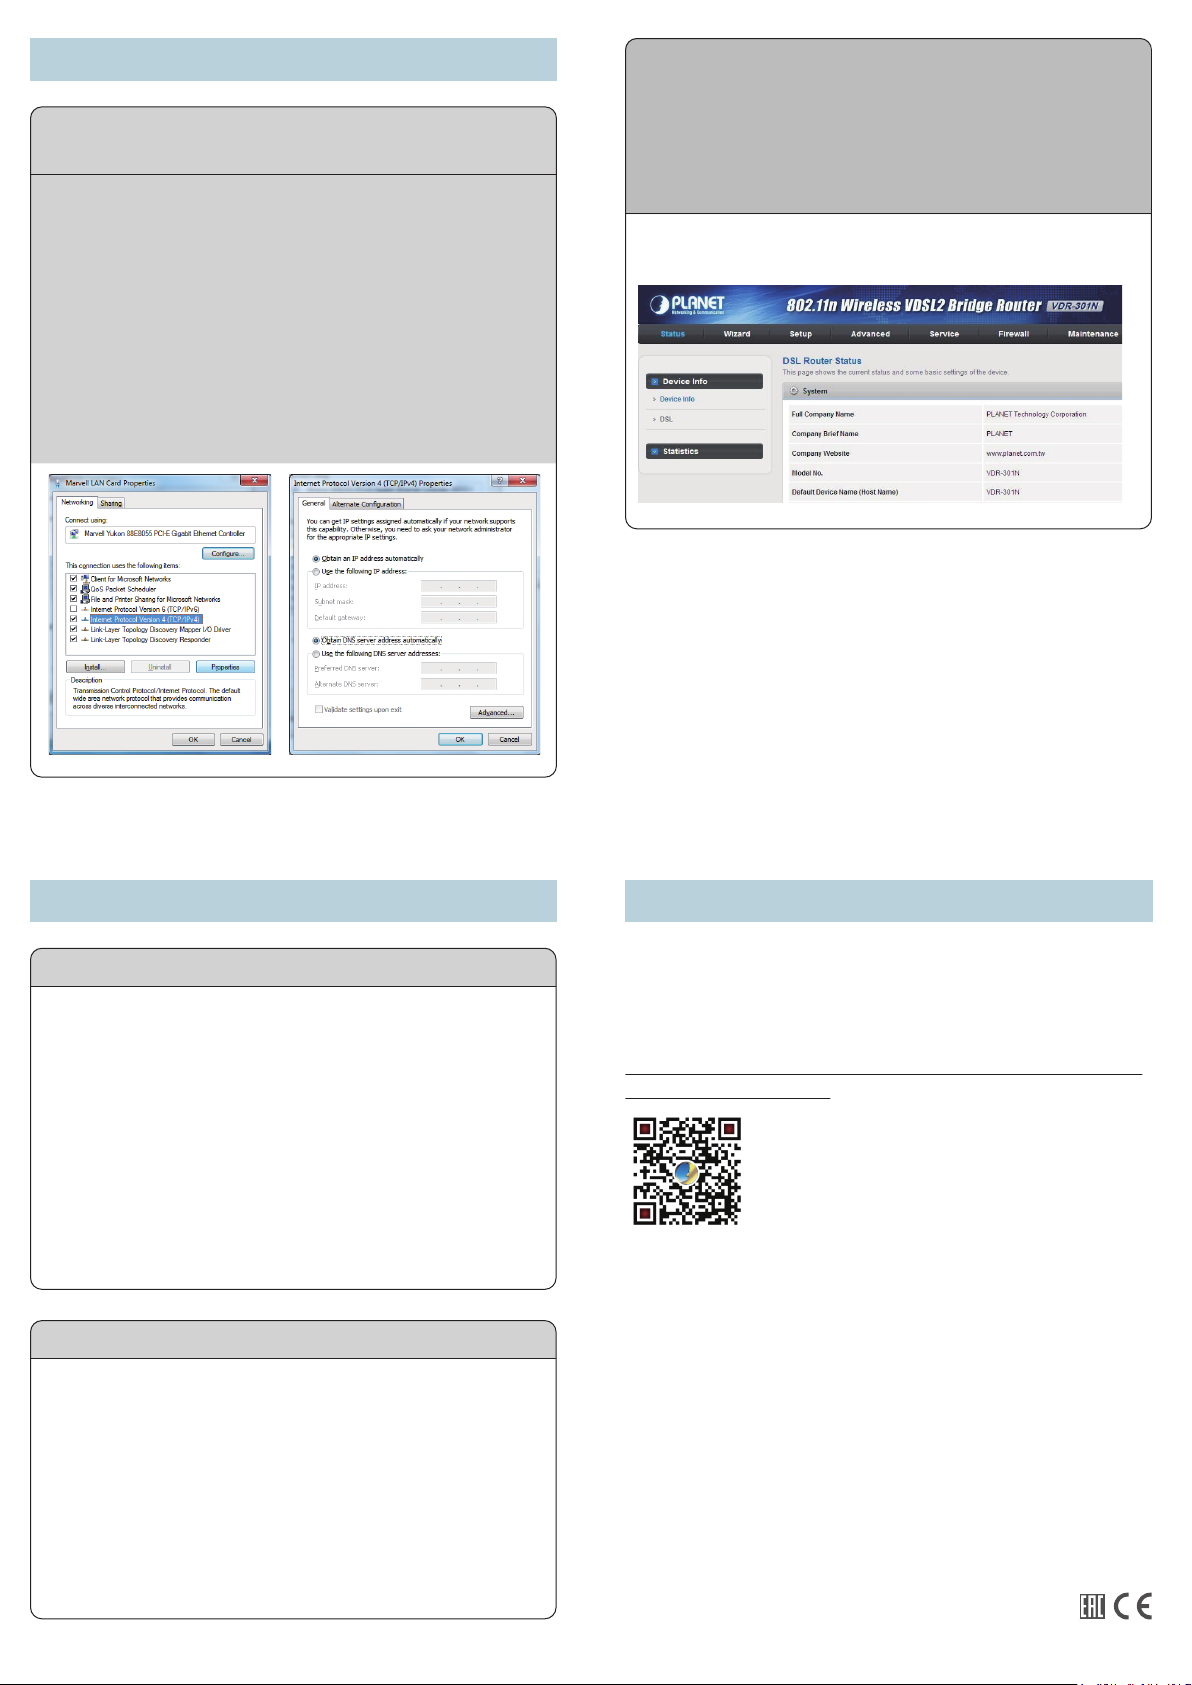
4. Web Login
Steps: Set your computer to get an IP address from the
Wireless Router:
1. Click the “Start” button located at lower-left corner of the
screen.
2. Click “Control Panel”.
3. Double-click “Network and Sharing Center” icon.
4. Click “Change Adapter Settings”.
5. Double-click the “Local Area Connection” icon.
6. Select “Internet Protocol Version 4 (TCP/IPv4)” and
click the “Properties” button.
7. Select “Obtain an IP address automatically” and
“Obtain DNS server address automatically”, and then
click the “OK” button twice to save the configuration.
Default IP Address: 192.168.1.1
Default User Name: admin
Default Password: admin
Default SSID: PLANET_XXXX
(“X” means the last 4 digits of the MAC address.)
Now, you can see the Web management UI of the VDR-301N.
– 5 – – 6 –
5. Broadband Connection for VDSL Further Information
The above steps introduce the simple installation and configura-
VDSL2 Router with PPPoE:
Follow the steps below to set up connection to PPPoE mode.
1. Log in the VDR-301N’s web-based configuration utility.
2. Click “Setup”.
3. Select “DSL WAN”.
4. Choose PTM, and then select the Channel Mode to
“PPPoE”.
5. Select the IP Protocol to “IPv4”.
6. Fill in User Name and Password which are provided by
ISP.
7. After setting it up, press “Add”.
If you need more information about WAN service, please refer
to the User’s Manual.
VDSL2 Router with Bridge:
Follow the steps below to set up connection to Bridge mode.
1. Log in the VDR-301N’s web-based configuration utility.
2. Click “Setup”.
3. Click “DSL WAN”.
4. Choose PTM, and then select the Channel Mode to
“Bridge”.
5. Select the IP Protocol to “IPv4”.
6. Press “Add”.
If you need more information about WAN service, please refer
to the User’s Manual.
– 7 – – 8 –
tions of the VDR-301N. For further configurations of different
operation modes, please refer to the user manual, which can be
downloaded from the website.
http://www.planet.com.tw/en/support/download.php?type1=32
0&model=48957&type=3
If you have further questions, please contact the local dealer or
distributor where you purchased this product.
PLANET Technology Corp.
11F., No. 96, Minquan Rd., Xindian Dist., New Taipei City 231, Taiwan
2011-AC0390-000
 Loading...