

Page 1

Wired / Wireless
Mega-Pixel CMOS PT IP Camera
ICA-M220 / ICA-M220W
Quick Installation Guide
Page 2

Table of Contents
1. Overview ................................................................................................... 3
2. Package Contents ........................................................................................ 4
3. Hardware Installation ................................................................................... 5
4. Web conguration access ............................................................................ 7
5. Cam Viewer Installation .............................................................................. 9
Further Information ...................................................................................14
Page 3

1. Overview
Thank you for purchasing the Mega-Pixel Pan/Tilt Internet Camera. It is versatile
and high image solution of surveillance application. The Mega-Pixel Pan/Tilt Internet
Camera is also a stand-alone camera system with a built-in processor and web
server that provides highest quality video and system performance.
Before you start to use this PT Internet camera, please check the package
contents. If anything is missing, please contact the dealer of purchase and return
the package to claim for missing contents.
3
Page 4

4
2. Package Contents
IP Camera
Power Adapter
Quick Installation Guide
User’s Manual CD
RJ-45 Cable
Mounting Kit
Antenna x 2 (ICA-M220W only)
Page 5
3. Hardware Installation
Note
Before installation, please be sure to read this quick installation guide and user’s
manual (CD) carefully to complete machine installation. This guide shows how to
quick set up the two cameras.
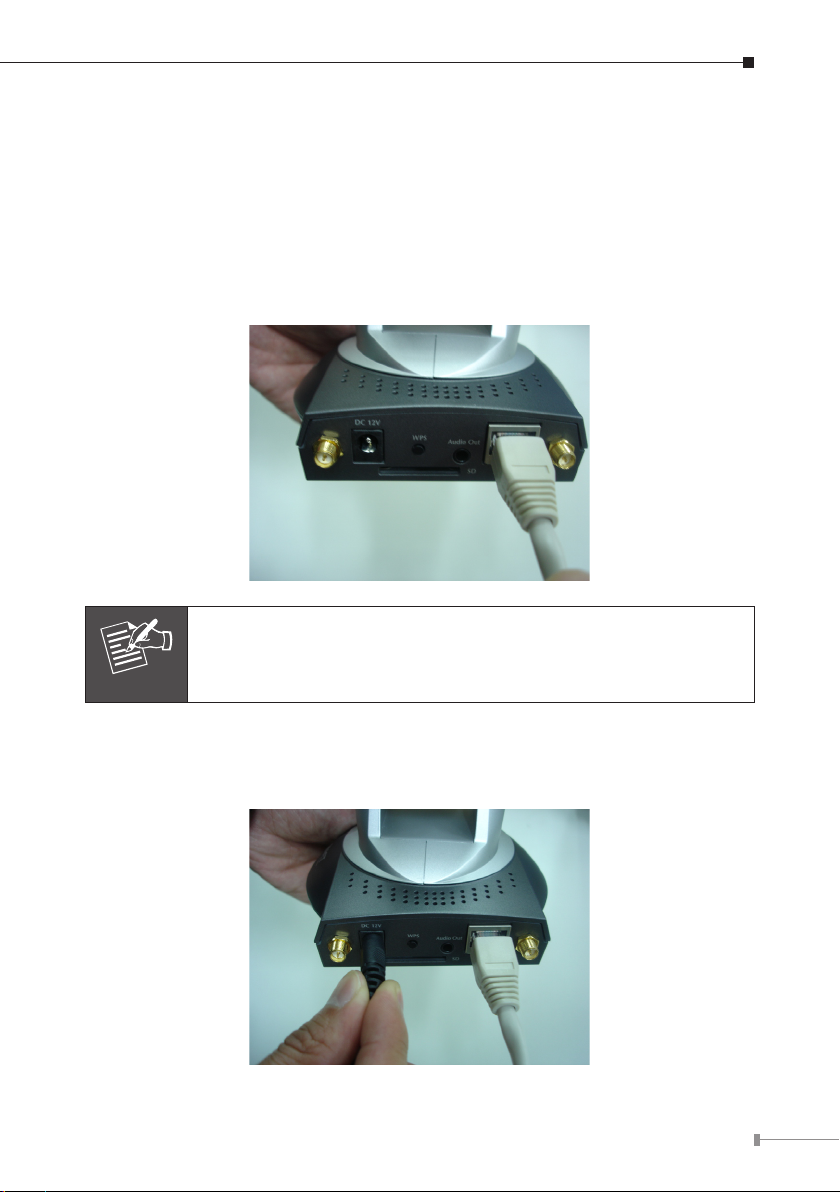
Step 1: Connecting Network
Connect the Ethernet cable to your switch/hub, and connect the other end to the
LAN jack of this IP camera.
For ICA-M220W, you can skip this step if you plan to use wireless
LAN only. In the first time configuration, however, we still suggest
you use wired interface.
Step 2: Connecting AC Power
Plug the power adapter to wall socket, and connect the power connector to the
power jack located at the bottom of the IP camera.
5
Page 6

6
Step 3: Connecting Antennas (ICA-M220W only)
Note
Connect the antennas to the antenna base, located at the back of the camera.
Please verify your wireless connection was enable and configured.
The default Wireless setting of ICA-M220W:
SSID: any
Network Type: Infrastructure
After configured the wireless setting, unplug the Ethernet cable that
network will switch to wireless interface automatically.
Page 7

4. Web conguration access
The ICA-M220 and ICA-M220W camera provides GUI (Web based, Graphical User
Interface) for management and administration.
Step 1 Computer Network Setup
Set your computer’s IP address to 192.168.0.x, where x is an integer between 1 to
254 (except 20 where is being used for the camera by default). If you don’t know
how to do this, please ask your network administrator, or refer to instructions on
chapter 2.3 of user manual (in supplied CD disk)
Step 2 Login Prompt
Use web browser (Internet explorer 5.5 or above) to connect to 192.168.0.20
(type this address in the address bar of web browser) You’ll be prompted to input
user name and password: admin / admin.
Step 3 Activate Installation
After logged on, you could see the following messages appear at the top of
Internet Explorer
7
Page 8

8
Click on the message, and click “Install ActiveX Control…”
When you see this message, click “Install” to install required ActiveX control
You should be able to see the images captured from the camera in the web page
now. For advanced functions, please refer to instructions given in user manual
Page 9

5. Cam Viewer Installation
Note
Note
This chapter will guide you to install the central management software. The PT
Internet Camera can be managed through its web interface. However, to central
control, manage or record the cameras installed in the network Cam Viewer, the
windows-based central management software are required.
The Cam Viewer Pro 30 days trial version installation steps are
similar. Below is the installation of Cam Viewer Lite.
1. Insert the bundled CD disk into the CD-ROM drive to launch the autorun
program. Once completed, a welcome page will appear in IE. Click the “Cam
Viewer Lite” hyperlink, the below InstallShield Wizard dialog box will appear.
If the welcome screen does not appear, click “Start” at the
taskbar. Then, select “Run” and type “X:\Cam Viewer Lite\setup.
exe”, assume “X” is your CD-ROM drive.
2. Selects the language you want. Please select one of the languages and click
“Next” to continue.
9
Page 10

10
3. The welcome screen will display on the screen, please click “Next”.
4. Please read the license agreement and then check “I accept the terms of the
license agreement” if you are agreed and click “Next” to continue the installa-
tion
Page 11

5. Please key in user name and company name for which you want and click
“Next” to continue installation.
6. Check the option “Complete” – all program features will be installed (Requires
the most disk space) and click “Next” to continue installation.
11
Page 12

12
7. “Ready to Install the Program” will appear to prompt you to start the installation.
Note
Please click “Install” to start.
8. Please click “No” to continue.
In above step, when Cam Viewer works with MBM5 (Motherboard
Monitor 5), Cam Viewer will display CPU temperature and fan
speed. Please click “Yes” if you need this function and refer to the
Cam Viewer manual in CD disk for complete installation.
Page 13

9. Click “Finish” to complete the software installation.
Now, you can central manage all the PT Internet Camera installed in your network.
Please refer to the Cam Viewer guide in the CD-ROM for more.
13
Page 14

Further Information
This guide is used to help you startup your PT Internet camera settings. It is also
recommended to check the user manual in CD disk for more details of the system
and user conguration.
14
Page 15

This page is intentionally left blank
Page 16

This page is intentionally left blank
 Loading...