

Page 1
Package Contents
The following items should be included:
• The ADSL2/2+ Wireless VPN Firewall Router Unit
• 1 Cat-5 Ethernet (LAN) cable
• 1 RJ-11 (ADSL) cable
• Power Adapter
• Quick Installation Guide
• CD-ROM containing the on-line manual.
If any of the above items are damaged or missing, please contact your dealer
immediately.
Physical Details
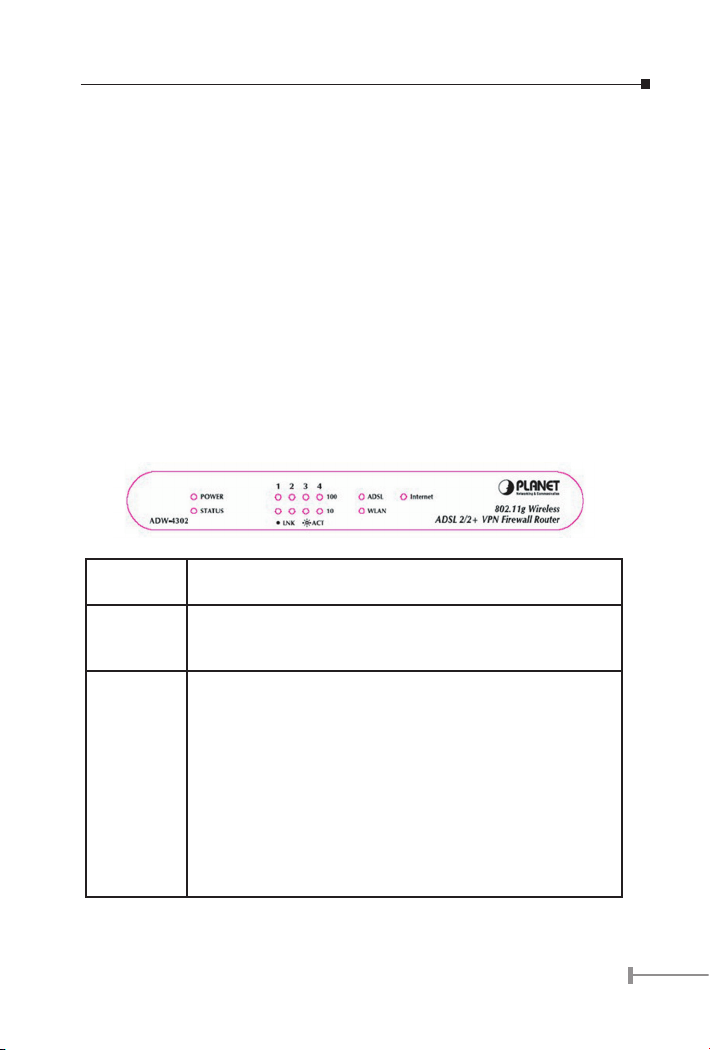
Front-mounted LEDs
PWR LED On - Power on.
Off - No power.
STATUS
LED
LAN For each port, there are 2 LEDs, to indicate the connection speed
Off - Normal operation.
Blinking - This LED blinks during start up, and during a Firm-
ware Upgrade.
(10Base-T or 100Base-T) of each port.
• 100 LNK/ACT - This will be ON if the LAN connection is us
ing 100Base-T, and Blinking if data is being transferred via
the corresponding LAN port.
• 10 LNK/ACT - This will be ON if the LAN connection is using
10Base-T, and Blinking if data is being transferred via the
corresponding LAN port.
• If neither LED is on, there is no active connection on the
corresponding LAN port.
-
1
Page 2
WLAN LED On – Wireless enabled.
Off - No Wireless connections currently exist.
Flashing - Data is being transmitted or received via the Wire-
less access point. This includes “network traffic” as well as user
data.
ADSL On - ADSL connection is available.
Off - No ADSL connection.
Flashing - Data is being transmitted or received via the ADSL
connection.
Internet On - Internet connection is available.
Off - No Internet connection available.
Flashing - Data is being transmitted or received.
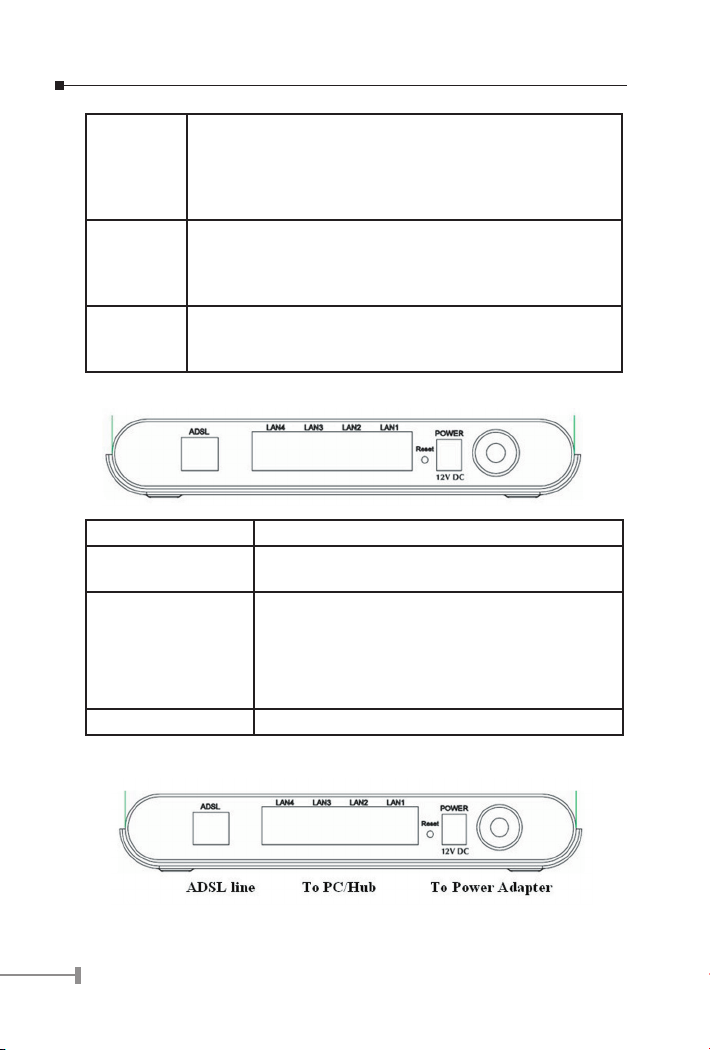
Rear Panel
Power port Connect the supplied power adapter here.
10/100BaseT
LAN connections
Reset Button
(Reset to Defaults)
ADSL port Connect this port to your ADSL line.
Use standard LAN cables (RJ-45 connectors) to con
nect your PCs to these ports.
This button will reset the ADW-4302v2 to the factory
default settings.
To do this, press and hold the Reset Button for five (5)
seconds, until the Status LED is lit, then release the Reset
Button, and wait the ADW-4302v2 to restart using the
factory default values.
-
Installation Procedure
2
Page 3

1. Choose an Installation Site
Select a suitable place on the network to install the ADW-4302v2.
For best Wireless reception and performance, the ADW-
4302v2 should be positioned in a central location with mini
NOTE:
mum obstructions between the ADW-4302v2 and the PCs.
Also, if using multiple Access Points, adjacent Access Points
should use different Channels.
2. Connect LAN Cables
Use standard LAN cables to connect PCs to the Switching Hub ports on the
ADW-4302v2. Both 10Base-T and 100Base-TX connections can be used si
multaneously.
If required, connect any port to a normal port on another Hub, using a stan
dard LAN cable. Any LAN port on the ADW-4302v2 will automatically function
as an “Uplink” port when required.
3. Connect ADSL Cable
Connect the supplied ADSL cable from to the WAN port on the ADW-4302v2
(the RJ-11 connector) to the ADSL terminator provided by your phone com
pany.
4. Power Up
Connect the supplied power adapter to the ADW-4302v2 and power up.
Use only the power adapter provided. Using a different one may cause hard
ware damage.
5. Check the LEDs
• The POWER LED should be ON.
• The STATUS LED should be flash, then turn Off. If it stays on or blinking after
60 seconds, there is a hardware error.
• For each LAN (PC) connection, one of the LAN LEDs should be ON (provided the
PC is also ON.)
• The WLAN LED should be ON
• The ADSL LED should be ON if ADSL line is connected.
-
-
-
-
-
Configuration
The ADW-4302v2 contains a HTTP server. This enables you to connect and configure to it
with using the Web Browser. Your Browser must support JavaScript.
The configuration program has been tested on the following browsers:
• Netscape V4.08 or later
• Netscape 7
3
Page 4

• Internet Explorer V5.01 or later
Preparation
Before attempting to configure the ADW-4302v2, please ensure that:
• Your PC can establish a physical connection to the ADW-4302v2. The PC and
the ADW-4302v2 must be directly connected (using the Hub ports on the ADW-
4302v2) or on the same LAN segment.
• The ADW-4302v2 must be installed and powered ON.
• If the ADW-4302v2’s default IP Address (192.168.0.1) is already used by an
other device, the other device must be turned OFF until the ADW-4302v2 is
allocated a new IP Address during configuration.
Using your Web Browser
To establish a connection from your PC to the ADW-4302v2:
1. After installing the ADW-4302v2 in your LAN, start your PC. If your PC is al-
ready running, restart it.
2. Start your WEB browser.
3. In the Address box, enter “HTTP://” and the IP Address of the ADW-4302v2, as
in this example, which uses the ADW-4302v2’s default IP Address:
HTTP://192.168.0.1
4. When prompted for the User name and Password, enter default user name
admin and password admin.
Setup Wizard
1. Step through the Wizard until finished.
• You need the data supplied by your ISP. Most connection methods require
some data input.
• The common connection types are explained in the following table.
2. On the final screen of the Wizard, run the test and check that an Internet con
nection can be established.
3. If the connection test fails:
• Check all connections, and the front panel LEDs.
• Check that you have entered all data correctly.
-
-
4
Page 5

Common Connection Types
Type Details ISP Data required
Dynamic
IP Address
Static (Fixed)
IP Address
PPPoE, PPPoA You connect to
Your IP Address
is allocated
automatically,
when you con-
nect to you ISP.
Your ISP allo-
cates a perma-
nent IP Address
to you.
Usually, the
connection is
“Always on”.
the ISP only
when required.
The IP address
is usually
allocated
automatically.
a) ADSL parameters (VPI and VCI)
may be required, if they cannot be
detected automatically.
b) Some ISP’s may require you to use
a particular Hostname or Domain
name, or MAC (physical) address.
a) ADSL parameters (VPI and VCI)
may be required, if they cannot be
detected automatically.
b) IP Address allocated to you, and re
lated information, such as Network
Mask, Gateway IP address, and
DNS address.
a) ADSL parameters (VPI and VCI)
may be required, if they cannot be
detected automatically.
b) User name and password are al
ways required.
c) If using a Static (Fixed) IP address,
you need the IP address and re
lated information (Network Mask,
Gateway IP address, and DNS ad
dress)
-
-
-
-
IPoA
(IP over ATM)
Normally, the
connection is
“Always on”.
a) ADSL parameters (VPI and VCI)
may be required, if they cannot be
detected automatically.
b) IP Address allocated to you, and re
lated information, such as Network
Mask, Gateway IP address, and
DNS address.
-
5
Page 6

Home Screen
After finishing the Setup Wizard, you will see the Home screen. When you connect in
future, you will see this screen when you connect. An example screen is shown below.
Further information
If you still have problem on connecting to your ISP, please check the user’s manual on the
bundled CD for detail configuration.
If you have any other questions, please contact the
product or you can contact PLANET directly at the following email address: support@planet.
com.tw
Dealer where you purchased this
6
Page 7

This page is intentionally left blank
Page 8

This page is intentionally left blank
 Loading...