

Page 1

LX1200
QUICK REFERENCE GUIDE
Page 2
Installation
ATTENTION: Install touchscreen driver prior to making cable connections to your PC.
Touchscreen Setup -1.
Refer to the User’s Guide for touch set-up•
Latest t• ouchscreen drivers are available at
http://apps.planar.com/downloads/touchscreen/
SoftKey Set-up -2.
Refer to the User’s Guide for SoftKey set-up instructions.•
Recommended Mounting -3.
Planar recommends an approved mount for in-vehicle use.•
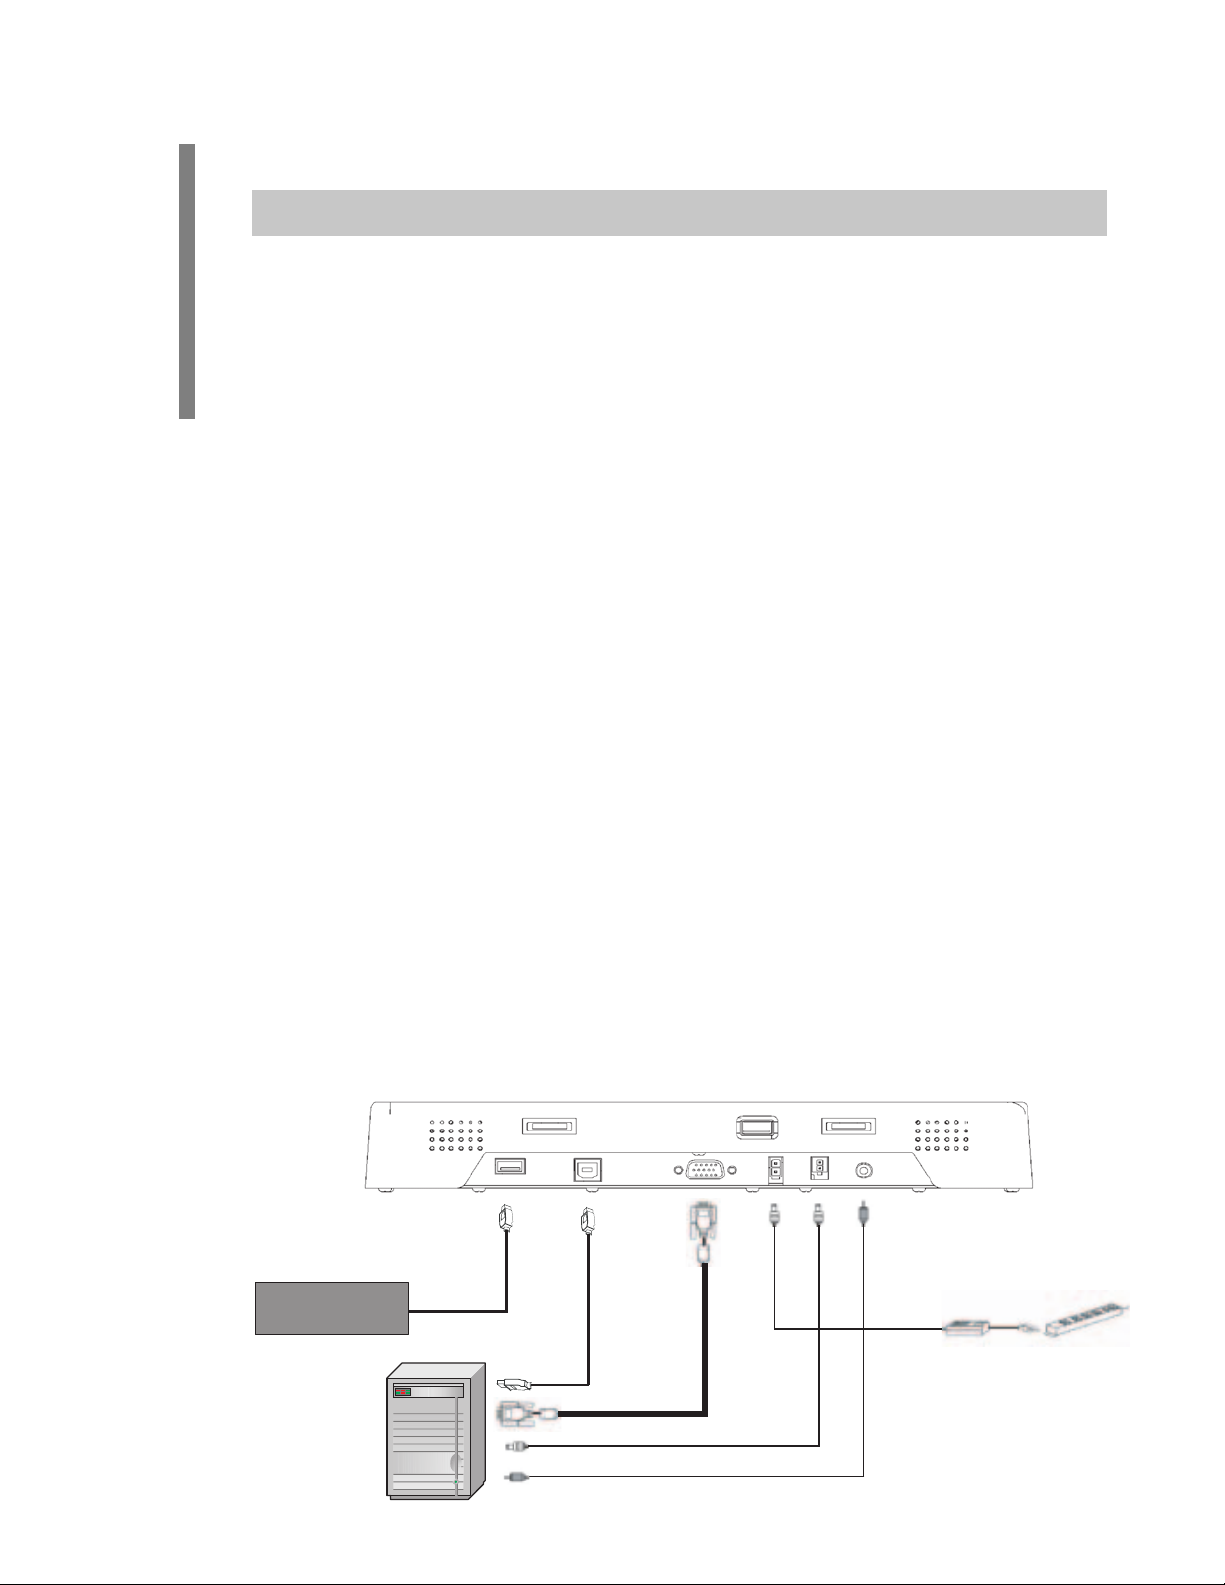
Cable Conn4. ections -
(Sold Separately. Refer to the diagram below). To ensure reliability strain relief as needed.
USB Type B Upstream1.
VGA Video Cable2.
12V Power Input3.
3.5mm Audio Input Cable4.
Remote PC Shutdown/Start Control Cable 5. (See User’s Guide)
Power Up -5.
Connect the video an• d power cables. The unit will display a test screen
as soon as power is applied.
Cleaning -6.
Keyboard
(optional)
Use 5A fuse and a timer switch to avoid draining the battery.•
Power up th• e computer. See the User’s Guide for the LX1200 at
www.planar.com/support for advanced set-up instructions.
Use a clean cloth to cle• an the display. If cleaning uid is required, mild
detergent or IPA can be used, if applied to the cloth rst.
12V
USB
VGA
Remote PC Shutdown/Start
Audio
Power Source
Computer
Page 3

Features and User Controls
USB Type A1.
Dimming Dial -2.
Adjust brightness by turning the dial. Turn o the backlight for video •
blanking by turning the dial clockwise.
Remote PC Shutdown/Start Button -3.
(Sold Separately. Refer to the diagram below). To ensure reliability strain relief as
needed.
This button doesn’t turn o the monitor directly. When connected to a docking •
station it will act as the power button for the computer. When the computer
is turned o , the LED will turn red and the monitor will go into standby. See
User’s Guide for more detail.
Autosync -4. Press button if video is not centered on screen
Instant Off Backlight Button5.
Backlight button will also restart the touchscreen if needed.•
Programmable SoftKey Macro Buttons -6. Refer to the User’s Guide
Speaker Volume7.
Adjust speaker volume by turning the dial.•
Remote PC LED Status Light8.
Green - The display is receiving a video signal from the computer.•
Red - Standby mode. No video signal.•
O - DC Power O or Backlight O .•
Backlight Status Light9.
Green - Backlight On.•
Red - Backlight O .•
O - DC Power O or No Video Signal.•
Features: 2-Port USB Hub,
Video Blanking for Privacy
and Bezel mounted button
controls the Remote PC.
4 9
7
6
1
2
3
8
5
Page 4

Troubleshooting Guide
Power On/Off Issues•
Remote PC power button • (third from right) should be pressed and released to
turn on or o laptop. Similar to the actual laptop power button a press and
hold or repetitive presses will not work.
Ensure cabling is correctly installed and strain relieved.•
Touchscreen Issues•
Backlight button (far right) can be pressed twice to reset touchscreen.•
Ensure latest touchscreen driver is used from -•
http://apps.planar.com/downloads/touchscreen/
Ensure cabling is correctly installed and strain relieved.•
Video Noise or Issues•
Ensure ground strap is used and properly attached from monitor to computer.•
Ensure cabling is correctly installed and strain relieved.•
Thank you for choosing Planar’s LX1200 LCD touchscreen monitor.
Customer Service:
To view online documentation and frequently asked questions, or to send an email to our
technical support sta , please visit:
http://www.planar.com/support
1.866.PLANAR1 (1.866.752.6271)
To receive advanced noti cation of product updates, please register your monitor at
www.planar.com/support.
11/2008
020-0967-00 Rev A
 Loading...