

Page 1
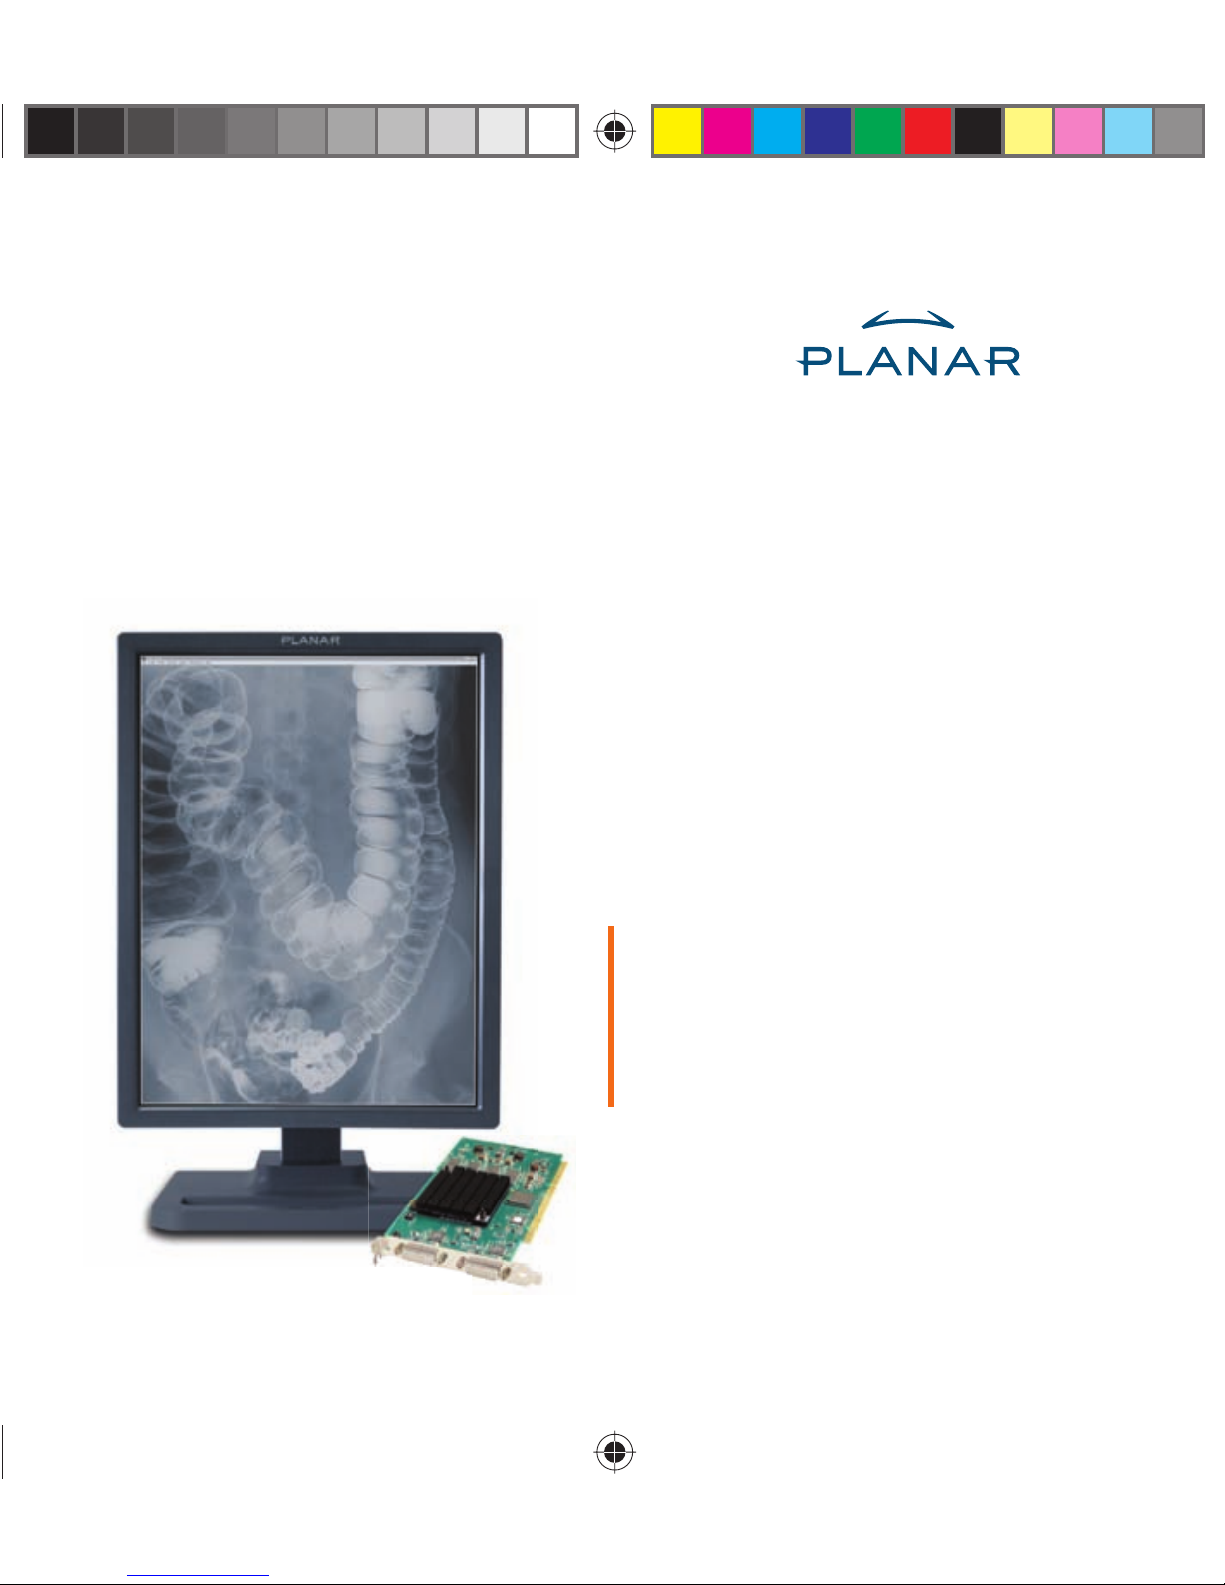
Dome C3i/EX Display
Dome DX2 Display Controller
Dome CXtra Software
Quick Reference
Solaris 2.5.1 to 10
020-0392-01A.indd 1020-0392-01A.indd 1 6/24/06 1:02:06 AM6/24/06 1:02:06 AM
Page 2
Before You Begin
Experienced users and system administrators can follow the instructions in this
document to install a Dome display and Dome DX2 video controller on Solaris
systems. Check the safety precaution below.
Make sure that your display is one of these Planar models and that your system
meets these requirements.
Display Display Controller System Requirements Operating System
Dome C3i
Dome E2
Dome E3
Dome E3c
Dome E5
Dome DX2 • PCI slot per board
• 2 MB hard disk space for
installation of driver, DDX, and
documentation.
• CD-ROM drive
Solaris 2.5.1 to 10
Moving from Dome C3i to Dome EX Display System
When you upgrade from a Dome C3i to a Dome EX display system, you need to
update the rmware on the Dome DX2 board already installed in your computer
system. Install the new driver on the existing Dome C3i display system rst.
The rmware is updated automatically. Then replace the Dome C3i display with
the Dome EX display.
Safety precaution
Wear an antistatic heel or wrist strap
Warning
Avertissement
Avvertenza
Warnung
Advertencia
when installing the board to avoid
damage to computer components.
2
020-0392-01A.indd 2020-0392-01A.indd 2 6/24/06 1:02:09 AM6/24/06 1:02:09 AM
Page 3
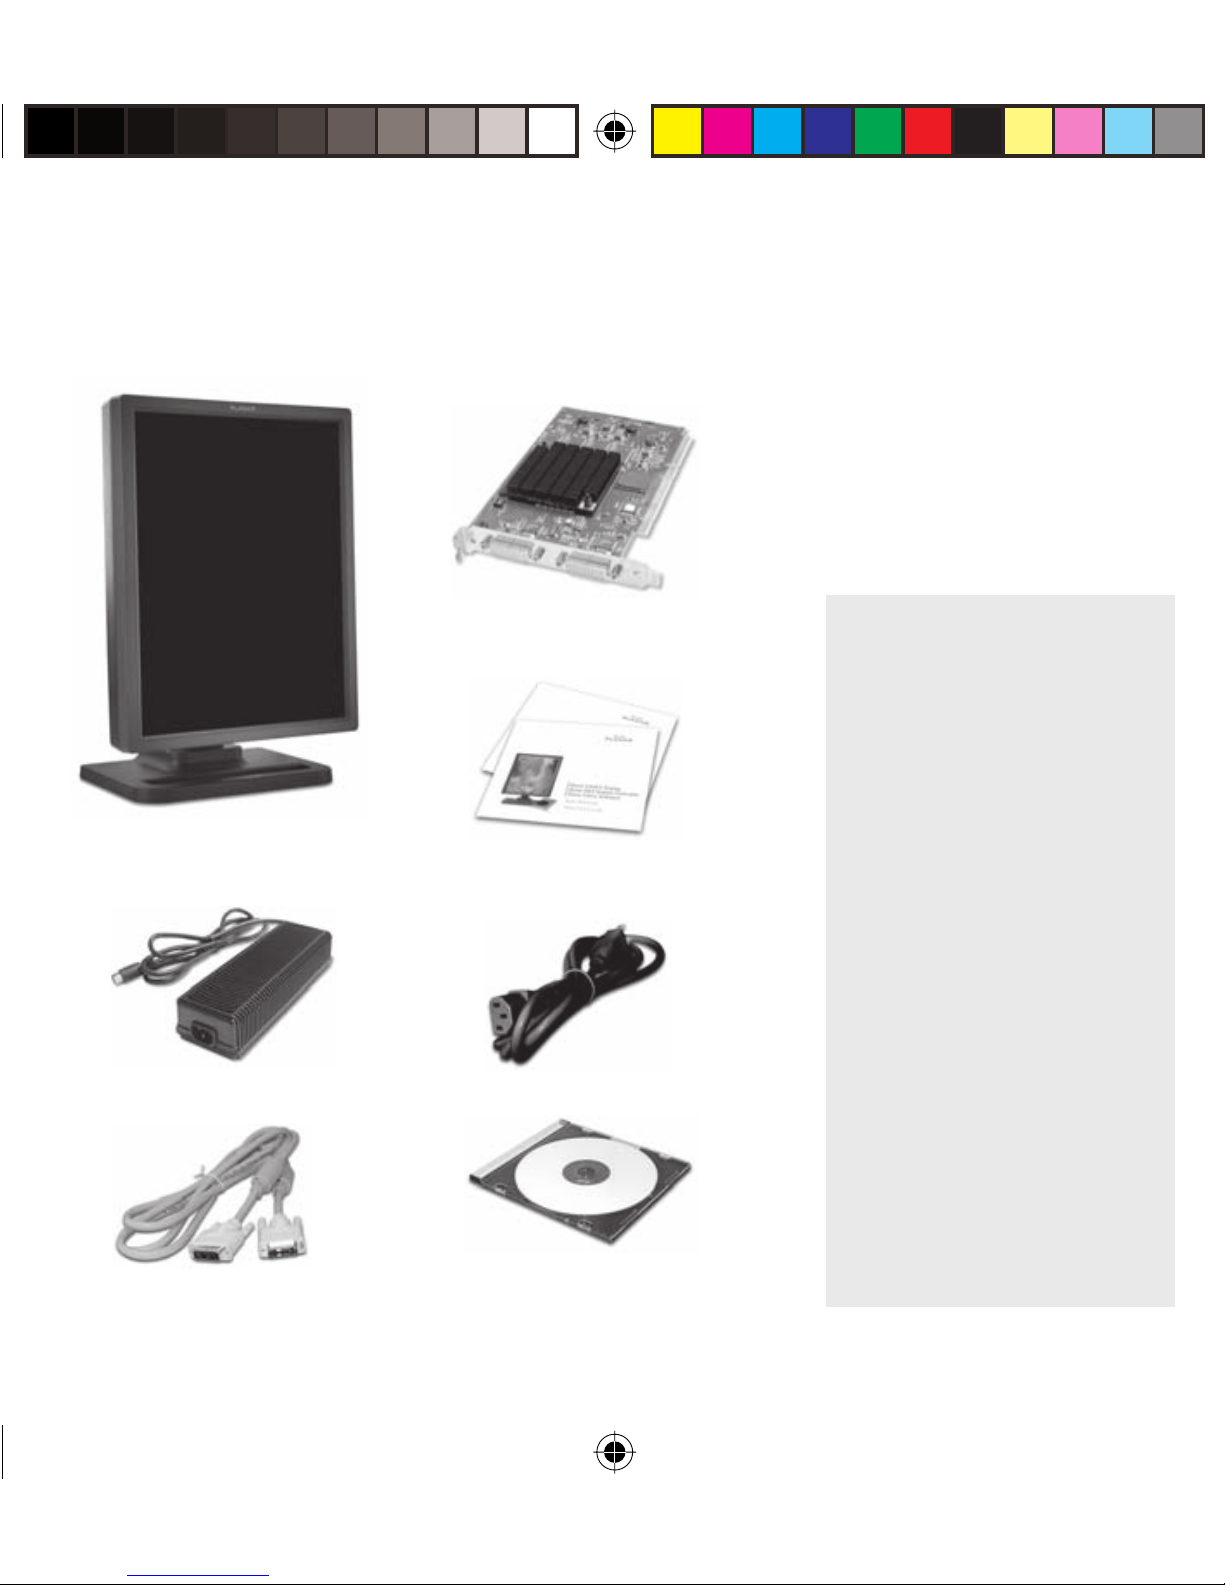
Unpacking the Display
Check the contents of your Dome display package for all the items shown here.
Save the original packaging materials for storage and shipping.
Dome digital
at panel
Power block
Dome DX2
display controller
Quick reference
Power cord
Guidelines
• Use both hands to lift
or adjust the display.
• Avoid touching the
display screen.
• Do not set up the
display in areas with
sudden temperature
changes and strong
light sources.
• Do not block the
vents on the back
of the display.
• Do not remove
the back cover
or disassemble
Display driver and
DVI-to-DVI video cable
020-0392-01A.indd 3020-0392-01A.indd 3 6/24/06 1:02:12 AM6/24/06 1:02:12 AM
Dome CXtra CD
the display.
3
Page 4
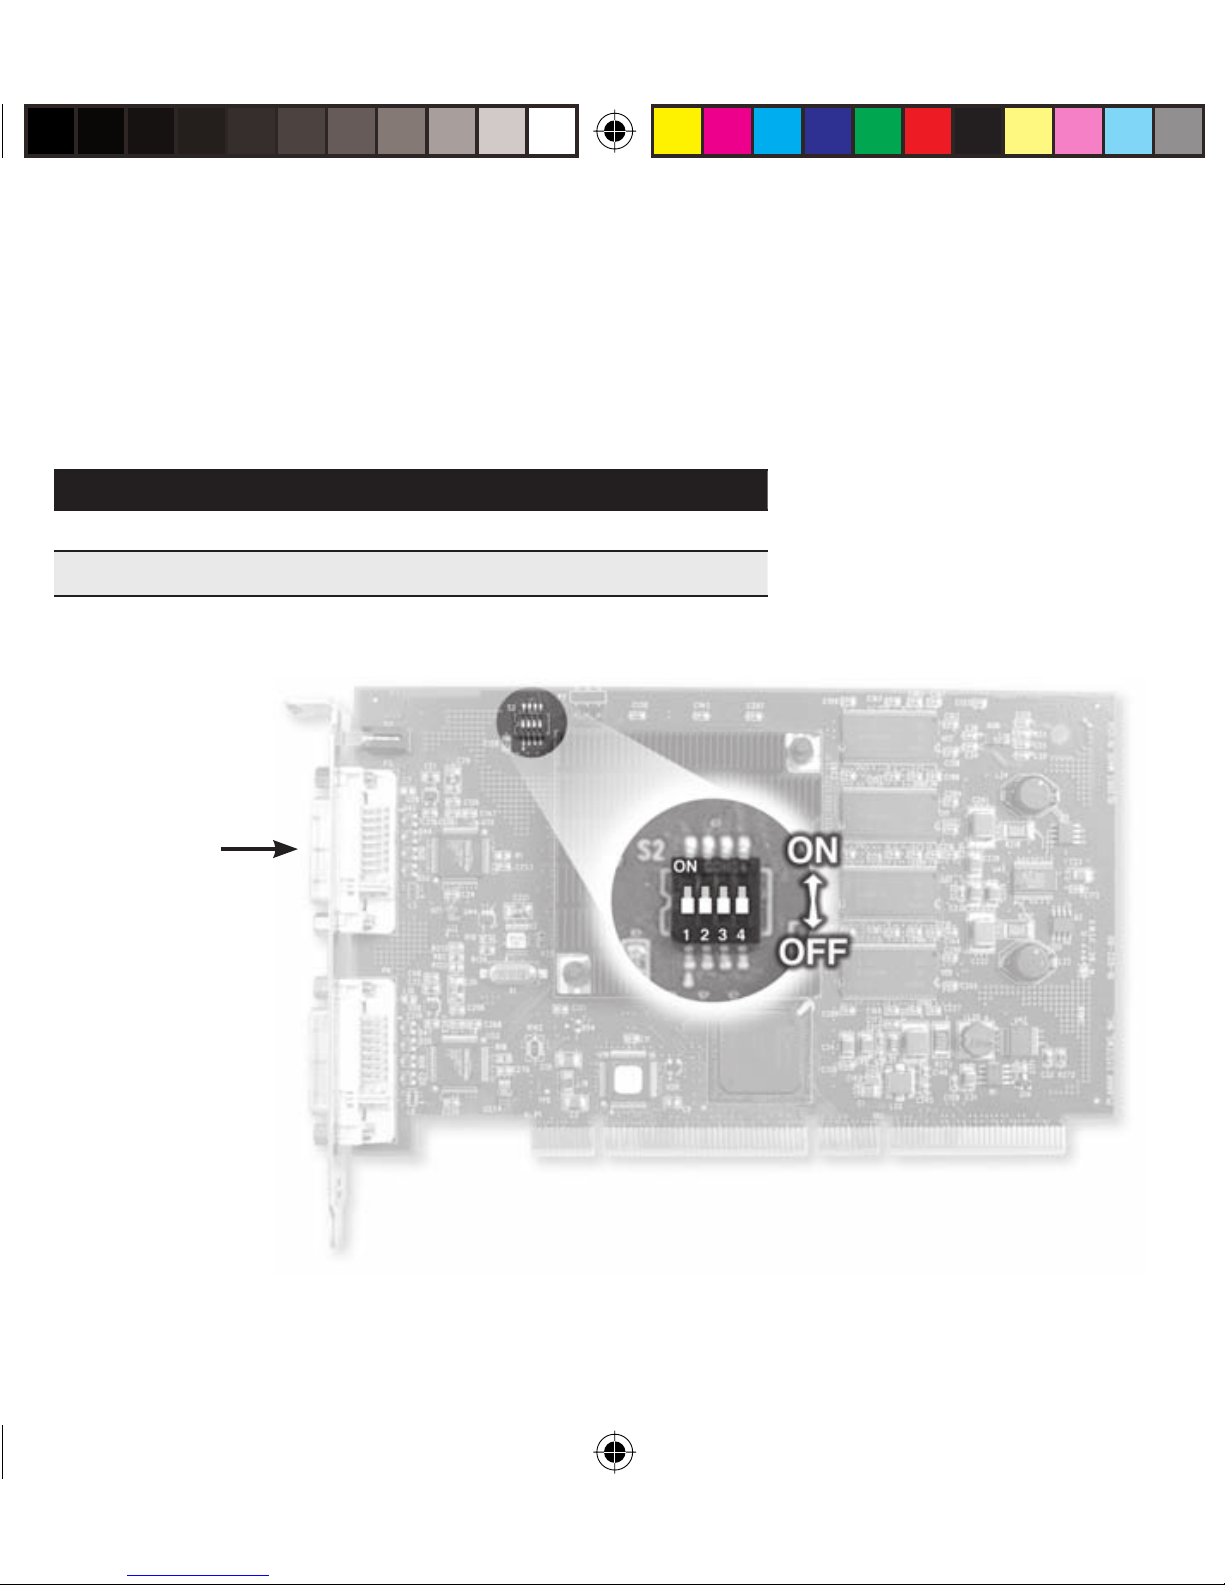
Setting the DIP Switch
Disable VGA and enable EPROM on DIP switch S2.
Slide switch 1 into the OFF position to disable VGA.
Slide switch 2 into the ON position to enable EPROM.
DIP Switch S2 Function Position
1 VGA OFF
2 EPROM ON
Video #1
port
4
020-0392-01A.indd 4020-0392-01A.indd 4 6/24/06 1:02:15 AM6/24/06 1:02:15 AM
Page 5
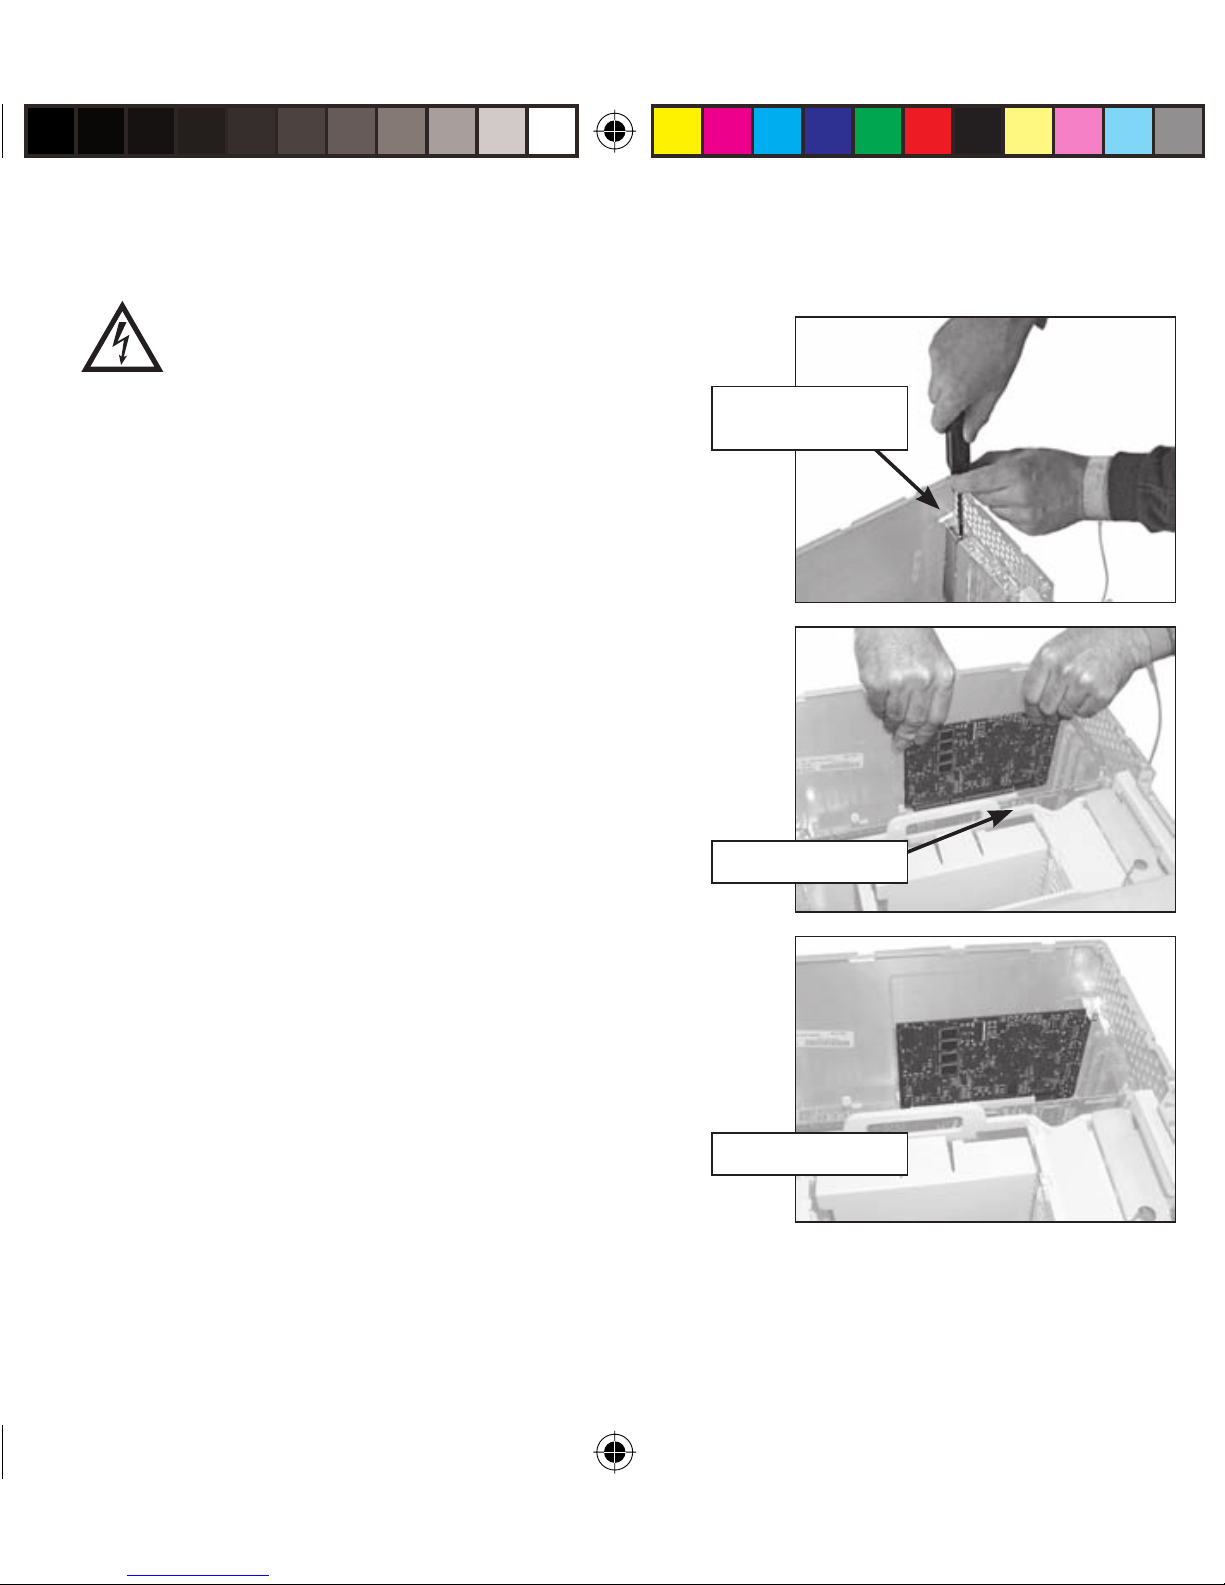
Installing the Display Controller
Turn your computer o . Leave the power
cord plugged into the grounded outlet.
To install the controller
1 Turn o all peripherals. Disconnect all
cables from the back of your computer.
2 Remove the computer cover.
3 Remove the blank bracket from the
available PCI slot.
4 Insert the display controller into the PCI slot,
align the connector pins, and press the board
down until it is rmly seated.
5 Secure the mounting bracket.
6 Reattach the computer cover and the
the peripherals.
When installing multiple DX2 display
controllers, install all boards before you
Remove blank
bracket
Open PCI slot
install the driver.
Installed board
020-0392-01A.indd 5020-0392-01A.indd 5 6/24/06 1:02:15 AM6/24/06 1:02:15 AM
5
Page 6

Identifying the Components
Review these illustrations to identify
display controls and ports.
Note the di erence between the
connector plates on the Dome C3i
and the Dome EX displays.
Dome C3i
Dome EX
6
020-0392-01A.indd 6020-0392-01A.indd 6 6/24/06 1:02:15 AM6/24/06 1:02:15 AM
Page 7

1 2
Legend
1 Reset button
1
2
2 LED lights
3
3 DVI port to connect
the display to the
DX2 display controller
4
4 DVI cable
5
5 USB upstream port
6
6 USB downstream port
7
7 USB downstream port
8
8 Power input port
9
9 Power cord
3
8
4
9
765
7
020-0392-01A.indd 7020-0392-01A.indd 7 6/24/06 1:02:16 AM6/24/06 1:02:16 AM
Page 8

Connecting the DVI Cable and Power Cord
Use only the cable and power cord supplied with the Dome display.
To connect the cables
1 Press the PUSH button on the desk stand cover and remove the stand cover.
See page 9 for how to thread the cable and cord on the desk stand.
2 Plug one end of the DVI cable into the DVI connector port. Tighten the
thumbscrews to secure the connection.
3 Plug the power cord into the power input port.
4 Plug the other end of the DVI cable into the video port on the installed
display controller. Use DVI port #1 for single display installation or for
the rst display of a dual setup.
5 Plug the other end of the power
cord into a grounded outlet.
6 Reattach the stand cover.
7 Power on your display rst,
then the computer.
Connection for a single display or
the fi rst display of a dual setup
DX2 display
controller installed
DVI cable
8
020-0392-01A.indd 8020-0392-01A.indd 8 6/24/06 1:02:16 AM6/24/06 1:02:16 AM
Page 9

Threading the DVI Cable and Power Cord
To remove the stand cover,
press the PUSH button on
the desk stand (just above
the USB hub) and pull the
stand cover down and out
to remove it.
Thread the DVI cable and
the power cord through
the back of the stand. Make
sure the cable and cord are
seated in the notches.
To reattach the stand cover,
align the hooks with the
slots on the stand. Press
the cover into place. A click
sound signals a secure
connection.
9
020-0392-01A.indd 9020-0392-01A.indd 9 6/24/06 1:02:16 AM6/24/06 1:02:16 AM
Page 10

Installing the Display Driver
Before you install the driver, be sure to install all DX2 display controllers and
connect all Dome displays rst, then boot up your system to install the driver.
See exception on page 2 if you are upgrading your display system from
a Dome C3i to a Dome EX unit.
Installation preparation
Installing the DX2/PCI driver on your Sun host requires about 500 KB of
free space. The reference guides require an additional 2 MB.
To install the driver
1 Boot up with the -r option.
2 Log on as root.
3 Insert the DOME DX2 Solaris driver CD.
4 Mount the CD device if the system does not
automount it. Then type:
cd /cdrom/012_0006_*
5 To transfer the software packages to
the system, type:
pkgadd -d dx2pciZZZ.pkg
where ZZZ = the revision of
the driver CD.
Version con ict
If a previous version of the
driver software exists on your
system, remove it before
you install the new package.
Type pkgrm, and select the
DOMEdx2 and DOMEmdlib
packages for removal. Do
not remove the DOMEmdlib
package already installed if it
is newer than the one on the
driver CD.
Check the versions listed on
the driver CD to get the
software revision.
10
020-0392-01A.indd 10020-0392-01A.indd 10 6/24/06 1:02:17 AM6/24/06 1:02:17 AM
Page 11

This message appears:
The following packages are available:
1 DOMEmdlib DOME MD library
(sparc) 1.2.x
2 DOMEdx2 DOME Dx2PCI Display Support
(sparc) 1.1.x
3 DOMEcxtra Solaris CXtra Support for DOME
Flat Panels (sparc) 1.0.x
Select package(s) you wish to process (or ‘all’ to process all packages).
(default:all) [?,??,q]:
6 Press <Return> to install all packages.
Messages appear, followed by this prompt:
Do you want to continue with the installation of the package [y,n,?]
7 Type y .
Messages describe the progress of the installation. When the installation
is finished, these messages appear:
Installation of <DOMEmdlib> was successful.
Installation of <DOMEdx2> was successful.
Installation of <DOMEcxtra> was successful.
Refer to the display manual on the driver CD for how to con gure
display settings.
11
020-0392-01A.indd 11020-0392-01A.indd 11 6/24/06 1:02:17 AM6/24/06 1:02:17 AM
Page 12

Console Modifi cation
The console appears, by default, on the rst head of the rst board in the system’s
probe list. You can change the console with the pci-probe-list environment
variable. If you want to change the console without altering the probe list,
change the output-device environment variable instead. You can use the setenv
command to change environment variables.
To use the setenv command
1 Power on or halt the system to get to the ok> prompt.
2 Type:
setenv output-device <device node>
These examples describe how to change the
console in Ultra™ 10 and Ultra 30 systems.
For more details, refer to your Sun documentation.
3 To make the DX2 board the console in an
Ultra 10 system, type:
setenv output-device /pci/DOME,Dx2PCI
For an Ultra 30 system, which has two PCI buses, type:
setenv output-device /pci@X/DOME,Dx2PCI
where X depends on the location of the board.
For example, if the board is installed in the PCI66 slot, at location
1f,2000, type:
setenv output-device /pci@1f,2000/DOME,Dx2PCI
4 Reboot the system.
Setenv command
The device node portion
of the setenv command
di ers for di erent Sun
systems and board
locations.
12
020-0392-01A.indd 12020-0392-01A.indd 12 6/24/06 1:02:17 AM6/24/06 1:02:17 AM
Page 13

Interpreting LED Status Lights
A
B
LED A indicates the
digital-link status
between the display
controller and the
interface.
LED B indicates the
display-panel status;
it shows any faults
currently in the panel.
For more information,
refer to Dome C3i/EX
Display User’s Guide.
13
020-0392-01A.indd 13020-0392-01A.indd 13 6/24/06 1:02:17 AM6/24/06 1:02:17 AM
Page 14

Enhancements with Dome CXtra Software
The Dome CXtra™ application ships on the Dome DX2 Solaris driver installation
CD. The Dome CXtra software is automatically loaded with the default driver
installation and added to the CDE Application Manager.
The Dome CXtra software enhances the functionality of Dome displays for
viewing medical images.
The advantages of Dome CXtra includes consistent grayscale presentation
of images, as a result of conformance with the DICOM Grayscale Standard
display function. Speci cally, the Dome display is fully calibrated to the DICOM
response curve. It uses an embedded RightLight™ sensor to provide continuous
luminance stability, guaranteeing consistent image quality and adherence to
DICOM standards. This sensor works with the digital interface board that is
built into the back of the Dome display.
For more information on Dome CXtra, refer to the software manual on
the driver CD.
14
020-0392-01A.indd 14020-0392-01A.indd 14 6/24/06 1:02:18 AM6/24/06 1:02:18 AM
Page 15

Cleaning the LCD Screen
Use a dry, clean, lint-free cotton cloth to remove
surface dust from the display screen. Do not use
chemically treated dust cloths.
To remove grease or organic contaminants,
follow this procedure:
1 Disconnect the power supply from the display.
2 Dampen a soft, clean cloth with a small amount
of isopropyl alcohol.
3 Wipe the display screen gently with the
dampened cloth.
4 Use a dry, clean, lint-free cotton cloth to wipe
o the residue.
Do not spray or use
acetone, toluene, or
harsh solvents on the
display case or screen.
Chemical cleansers
may cause damage to
the display.
020-0392-01A.indd 15020-0392-01A.indd 15 6/24/06 1:02:18 AM6/24/06 1:02:18 AM
Do not touch the LCD
screen with your ngers.
Skin oils are hard to
remove from the screen.
Do not saturate the
cleaning cloth. Liquid
that drips on the glass
may seep into the
display case.
15
Page 16

America Sales
Planar Systems, Inc.
1195 NW Compton Drive
Beaverton, OR 97006-1992 USA
(503) 748-1100 phone
(503) 748-1493 fax
Europe Sales
European Representative
Planar Systems, Inc.
Olarinluoma 9, P. O. Box 46
FIN-02201 Espoo, Finland
+ 358 9 420 01 phone
+ 358 9 420 0200 fax
Medical Sales
Planar Systems, Inc.
400 Fifth Avenue
vertrieb@planar.com
medicalsupport@planar.com
www.planar.com
Waltham, MA 02451-8738 USA
(781) 895-1155 phone
(781) 895-1133 fax
Asia-Pacifi c Sales
Planar Systems, Inc.
388 Nan Jing West Road, Suite 3905
Shanghai Peoples Republic of China
+ 86 21 6334 5050 phone
Customer Support
Visit www.planar.com
E-mail: medicalsupport@planar.com
Call (866) PLANAR1
+ 86 21 6334 6339 fax
sales@planar.com.cn
support@planar.com.cn
www.planar.com.cn
Download the full versions of the Dome Display and Dome CXtra user’s guides and the latest driver from
the Planar web site.
Copyright © 2006 Planar Systems, Inc. Planar, Dome, Dome CXtra, and RightLight are either registered trademarks or
trademarks of Planar Systems, Inc. Technical information in this document is subject to change without notice.
020-0392-01A
020-0392-01A.indd 16020-0392-01A.indd 16 6/24/06 1:02:19 AM6/24/06 1:02:19 AM
 Loading...