

Page 1

Dome CX Displays
Dome DX/DX2 Display Controller
Dome CXtra Software
QUICK REFERENCE
Windows XP
Windows 2000
cx-QSUG-6 7/13/04 10:31 AM Page 1
Page 2
2
Before You Begin
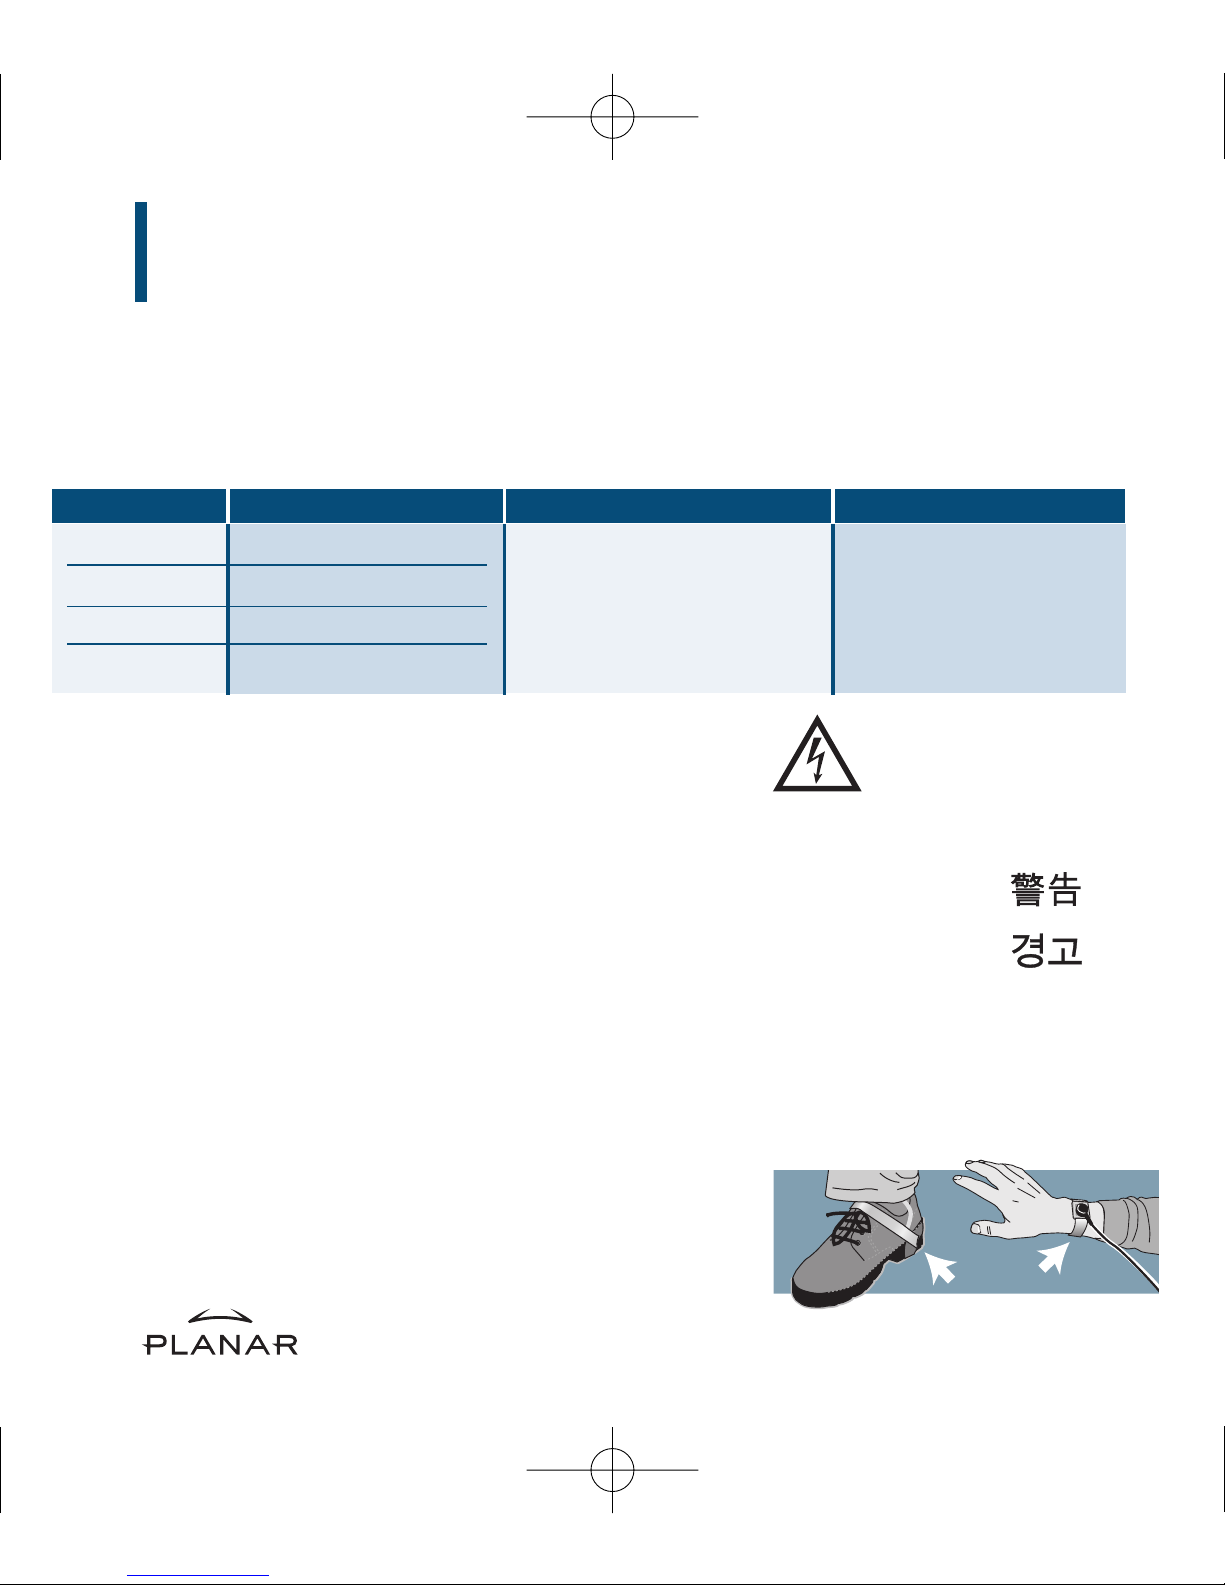
This quick reference provides instructions for installation of the Dome C2, C3, C3i, or C5i
display system. Note that the location of the DIP switch differs on the DX and DX2 display
controllers, but both boards have identical instructions for installation and are supported by
the same driver. Check that your system meets these requirements.
Operating System
Windows XP/2000
Warning
Avertissement
Avvertenza
Advertencia
Warnung
Wear an antistatic heel or wrist
strap when installing the controller
and display to avoid damage to
computer components.
Increasing the PCI Bus Performance
(PCICacheMode registry entry)
On systems with 64-bit PCI slots, use the display driver
to enable write-combining for the display controller.
Enabling this function can improve video performance
on the board by 100% or more.The results: faster
image loads, increased window and level speed, and
enhanced system performance.
For more information, visit www.planar.com.
System Requirements
•
PCI slot per board
•
50 MB hard disk space
•
256 MB RAM
•
CD-ROM drive
CX Display Display Controller
Dome C2 DX
Dome C3 DX
Dome C3i DX2
Dome C5i DX
cx-QSUG-6 7/13/04 10:31 AM Page 2
Page 3
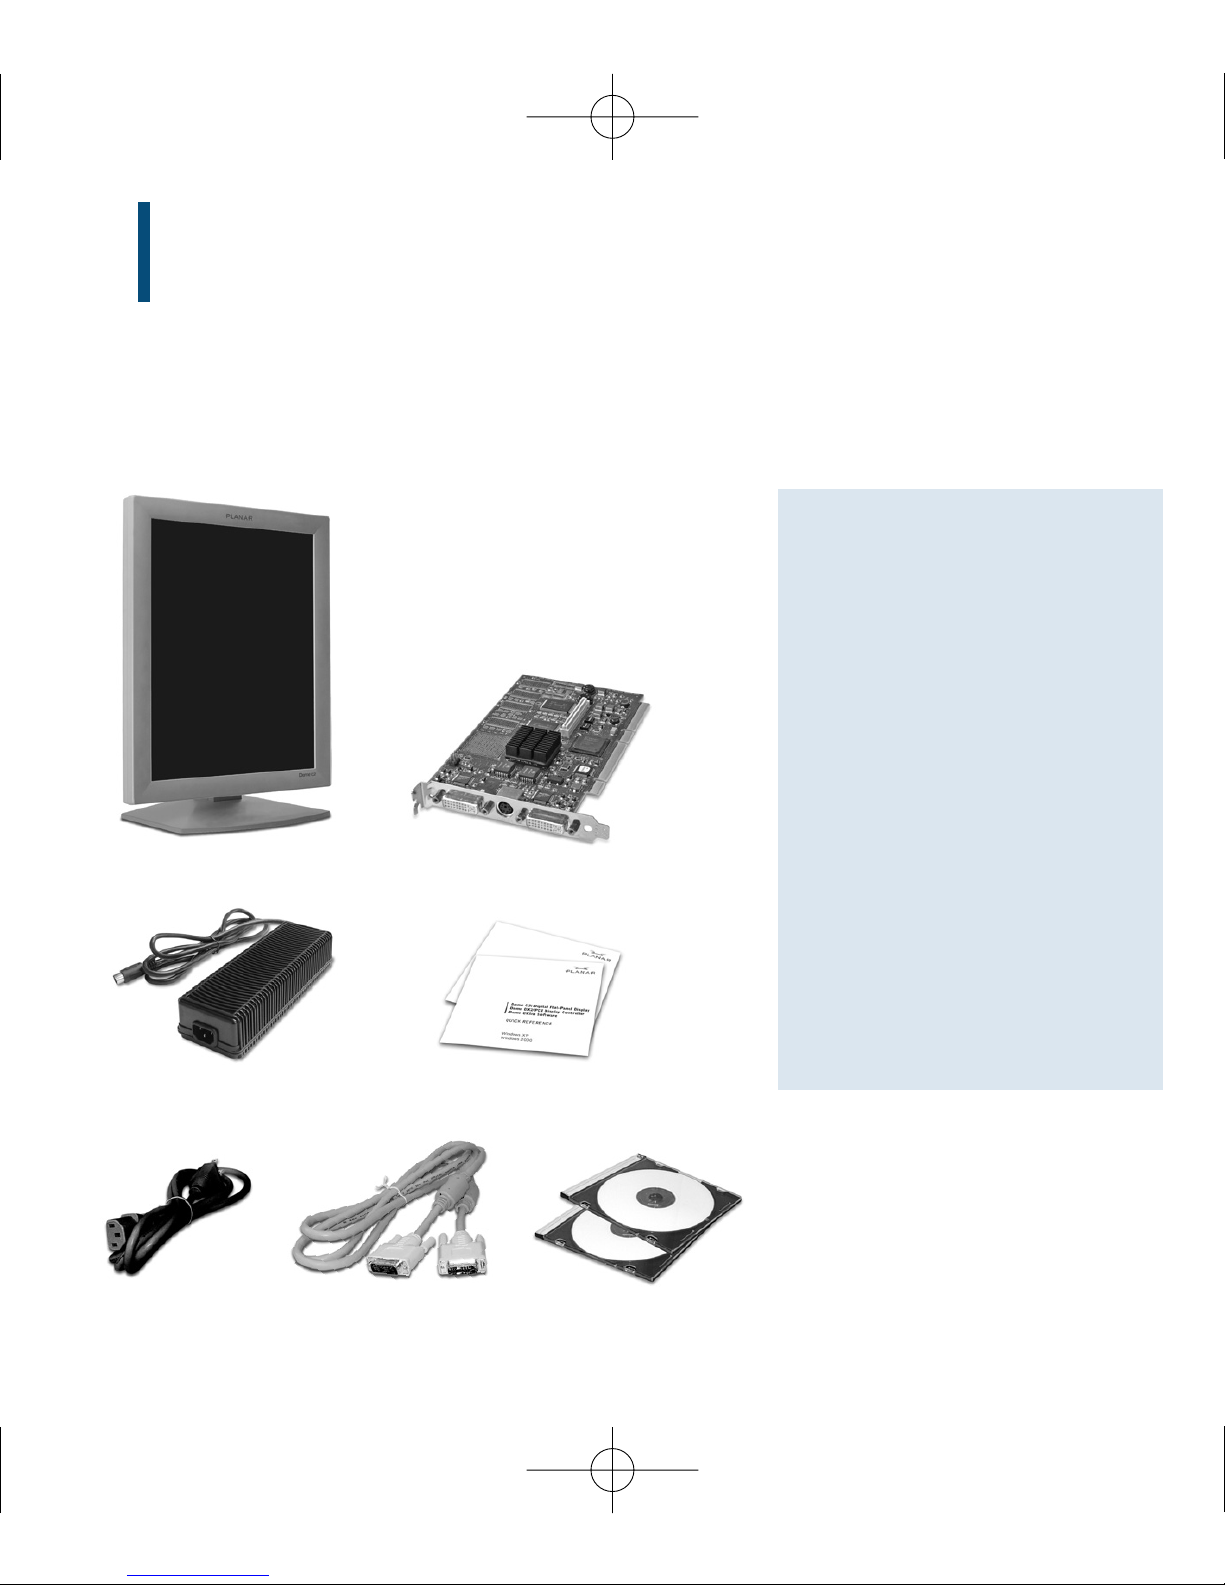
Check the contents of your Dome CX display package for all the items shown here.
Save the original packing materials for storage and shipping.
3
Guidelines
• Use both hands to lift
or adjust the display.
• Avoid touching the
display screen.
• Do not set up the display
in areas with sudden
temperature changes
and strong light sources.
• Do not block the vents on
the back of the display.
• Do not remove the back
cover or disassemble
the display.
Unpacking the Display
1
Dome CX digital flat panel
Dome display controller
DVI-to-DVI video cable Dome display driver
and Dome CXtra CDs
CX power block
Dome CX and Dome CXtra
quick references
Power cord
cx-QSUG-6 7/13/04 10:31 AM Page 3
Page 4
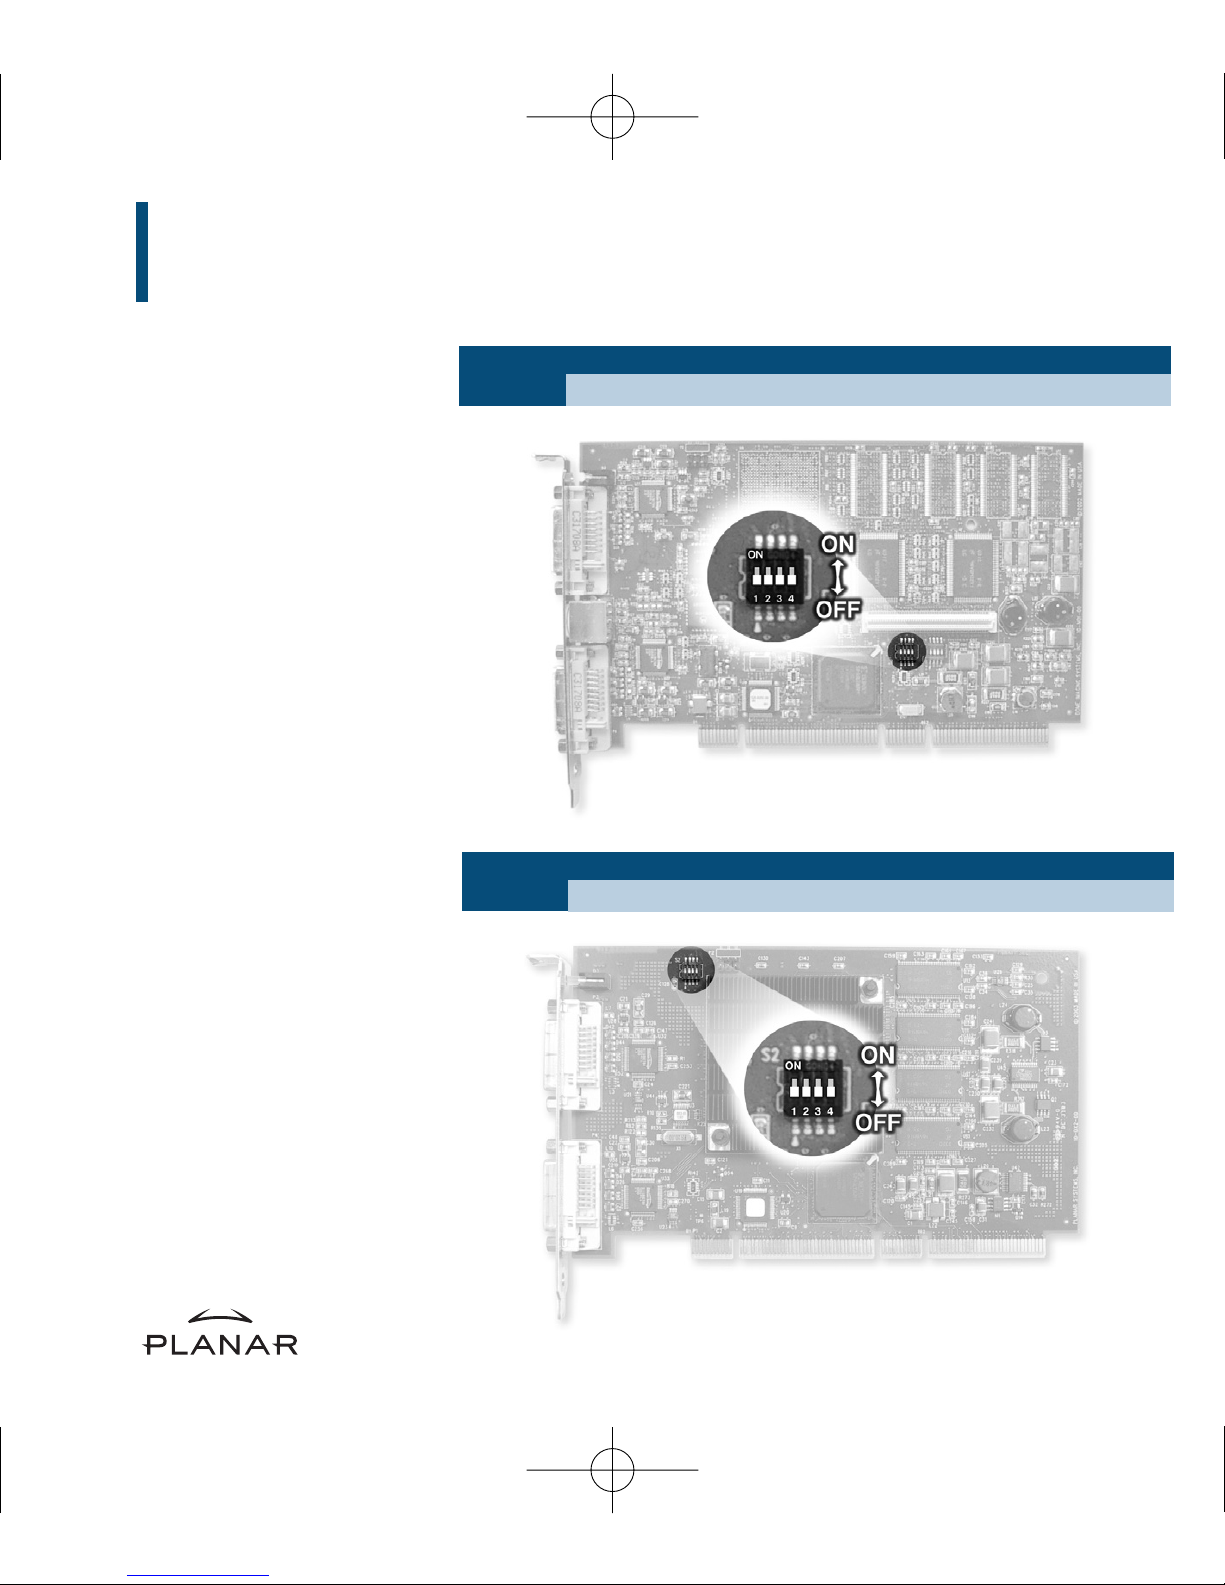
DX
DIP Switch S2 Enable VGA Disable VGA
1 ON OFF
For either the DX or DX2
display controller, slide switch 1
on DIP switch S2 into the ON
position to enable VGA mode.
Enable VGA on only one (1)
board when you install multiple
boards. Disable VGA on
all boards if you are using
a separate VGA card.
4
Setting DIP Switch S2
2
DX2
DIP Switch S2 Enable VGA Disable VGA
1 ON OFF
cx-QSUG-6 7/19/04 11:05 AM Page 4
Page 5

Turn your computer off. Leave the power cord
plugged into the grounded outlet.
To install the controller
1 Turn off all peripherals.Disconnect all cables from
the back of your computer.
2 Remove the computer cover.
3 Remove the blank bracket from the
available PCI slot.
4 Insert the display controller into the PCI slot,
align the connector pins, and press the
board down until it is firmly seated.
5 Secure the mounting bracket.
6 Reattach the computer cover and the peripherals.
When installing multiple display controllers,
install all boards before you install the driver.
Display controller
installed
5
Installing the Display Controller
3
Remove blank
bracket
Open 64-bit
PCI slot
cx-QSUG-6 7/13/04 10:31 AM Page 5
Page 6
6
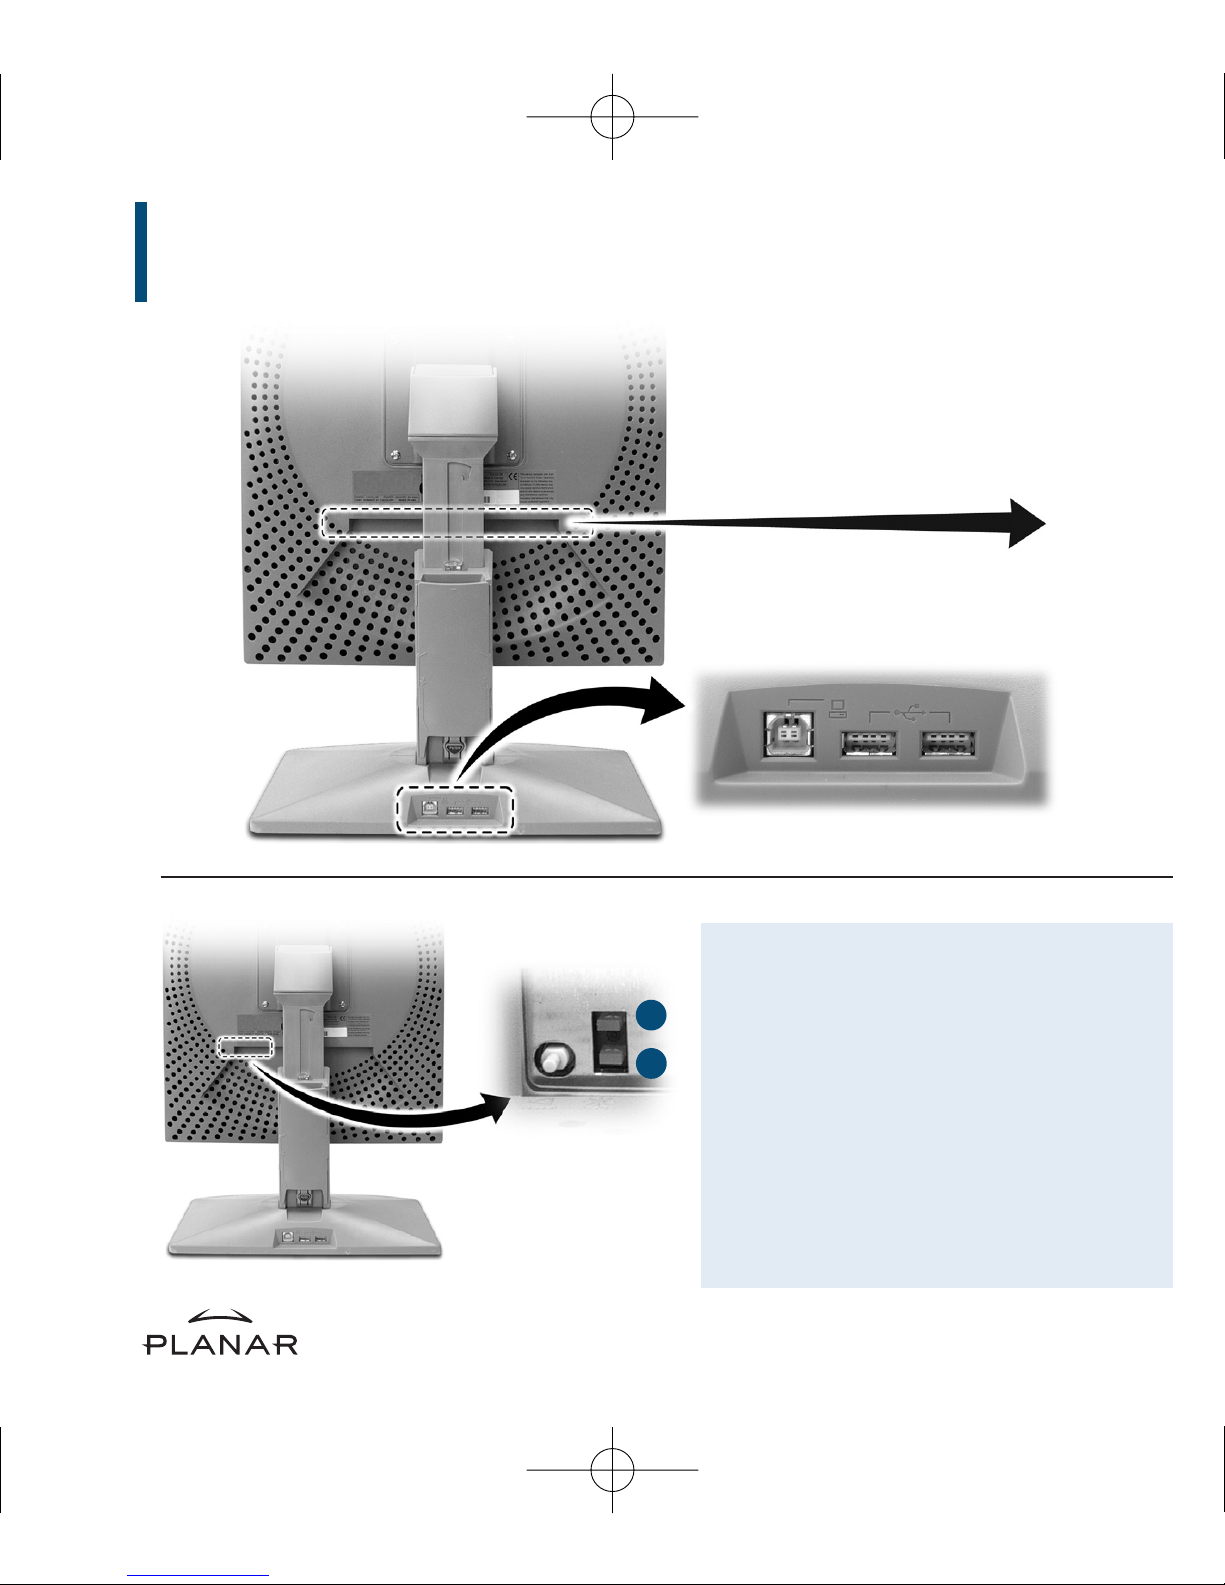
Interpreting LED Status Lights
LED A indicates the digital-link status
between the display controller and
the interface.
LED B indicates the display-panel
status; it shows any faults currently
in the panel.
For more information, see the
Dome CX Display Reference Guide.
Connector plate
USB ports on desktop stand
Locate your specific CX display to the right
Identifying Controls and Connectors
4
A
B
cx-QSUG-6 7/13/04 10:31 AM Page 6
Page 7

C2
C3
C3i/C5i
7
Reset LEDs PowerDVI ADVI B
USB USB
Reset LEDs Power DVI
USB USB
Reset LEDs PowerDVI
Specific Connector Plates
cx-QSUG-6 7/13/04 10:31 AM Page 7
Page 8

Connection for
a single display
DVI cable
Display
controller
installed
Use only the cable and power cord
supplied with the Dome CX display.
1 Press the PUSH button on the desk
stand cover and remove the stand
cover. See page 9 for how to
thread the cable and cord on
the desk stand.
2 Plug one end of the DVI cable into
the DVI connector port. Tighten
the thumbscrews to secure the
connection.
3 Plug the power cord into the
power input port.
4 Plug the other end of the DVI
cable into the video port on
the installed display controller.
Use DVI port #1 if you are installing
only one display.
5 Plug the other end of the power
cord into a grounded outlet.
6 Reattach the stand cover.
7 Power on your display first, then
the computer.
Power cord DVI cable
See your panel configuration on page 7.
8
Connecting the Board, Display, and Power Supply
5
cx-QSUG-6 7/13/04 10:31 AM Page 8
Page 9

9
To remove the stand cover,
press the PUSH button on the
desk stand (just above the
USB hub) and pull the stand
cover down and out to
remove it.
Thread the DVI cable and the
power cord through the back
of the stand. Make sure the
cable and cord are seated in
the notches.
To reattach the stand cover,
align the hooks with the slots
on the stand. Press the cover
into place. A click sound
signals a secure connection.
Threading the DVI Cable and Power Cord
cx-QSUG-6 7/13/04 10:31 AM Page 9
Page 10

If necessary, remove the previously installed 63-WINDX driver before you install the
63-W2KDXPCI driver.
To remove the 63-WINDX driver
1 Log on with administrator privileges.
2 Insert the WINDX CD. Open the CD folder.
3 Browse to the Win2k directory.
4 Double-click Setup.exe.
5 Select Remove to uninstall the driver.
6 Restart the computer.
To install driver
1 Log on with administrator privileges.The InstallShield Wizard reports new hardware.
2 Click Cancel.You must run Setup.exe to install
the driver.
3 Insert the W2KDXPCI CD. Open the CD folder.
4 Double-click Setup.exe.
10
Installing the Display Driver on Windows XP/2000
6
cx-QSUG-6 7/13/04 10:31 AM Page 10
Page 11

5 Click Next to proceed through installation and start
copying files.
6 Click Yes on the Digital Signature Not Found dialog
box for each display you install. (On Windows XP
systems, the Hardware Installation dialog box is
equivalent. Click Continue Anyway to proceed.)
7 Select Yes, I want to restart my computer now,
and click Finish.
To enable display
1 Log on with administrator privileges.
2 Right-click the desktop.
Select Properties > Settings.
3 Select the display icon.
4 Select Extend my Windows desktop onto this monitor. Click Apply.
5 Click OK.
11
cx-QSUG-6 7/13/04 10:31 AM Page 11
Page 12

1 Log on with administrator privileges.
2 Right-click the desktop. Select Properties > Settings.
3 Select Default Monitor and DOME DX/PCI Properties.
4 Activate Extend my Windows desktop onto this monitor.
5 Select Advanced > DOME.
6 Choose a resolution. Click Apply.
7 Click OK until you return to the desktop.
12
Changing Display Properties on Windows XP/2000
7
cx-QSUG-6 7/13/04 10:31 AM Page 12
Page 13

13
Dome CX display Resolution available Palette available Bits per pixel
C2 1200 x 1600 Dynamic gray 8
1600 x 1200 Nonlinear gray
Static gray
1200 x 1600 True color 32
1600 x 1200
C3/C3i gray 1536 x 2048 Dynamic gray 8
2048 x 1536 Nonlinear gray
3072 x 2048* Static gray
4096 x 1536
†
1536 x 2048 True color 32
2048 x 1536
3072 x 2048*
4096 x 1536
†
C3 color 1536 x 2048 Color 8
2048 x 1536
3072 x 2048*
4096 x 1536
†
1536 x 2048 True color 32
2048 x 1536
3072 x 2048*
4096 x 1536
†
C5i 2048 x 2560 Dynamic gray 8
2560 x 2048 Nonlinear gray
4096 x 2560* Static gray
5120 x 2048
†
* Single desktop in portrait mode on a dual-display system
† Single desktop in landscape mode on a dual-display system
Dome CX Display Resolutions and Palette Options
cx-QSUG-6 7/13/04 10:31 AM Page 13
Page 14

14
Through value-added services, the Dome CXtra monitoring and calibration software enhances
the functionality of Dome CX displays.
All Dome CX displays ship with the CX Edition Base Package.The CX Edition Validation
Package is sold separately.
CX Edition Base Package
• Reporting service. Access service information, view events and history, and check
events related to error conditions.
• RightLight service. Check DICOM conformance and calibrate the display based on
the DICOM Grayscale Standard Display Function. (Photometer required.)
• Backlight Saver service. Schedule sleep for the display backlights.
• Privilege service. Limit users who can change display parameters.
CX Edition Validation Package
• AAPM TG18 Test service. Use recommendations from the American Association of
Physicists in Medicine,Task Group 18 to evaluate the display.
• DIN Acceptance Test service. Perform the German standard test for measuring
display performance.
• QuickSwitch service. Change the orientation of the software display.
• Test Patterns service.View test patterns that demonstrate the image quality of
the display.
• Enterprise Management service. Manage displays from a central location using
any SNMP console application.
Using Dome CXtra
8
cx-QSUG-6 7/13/04 10:31 AM Page 14
Page 15

15
1 Unplug the power supply before cleaning
the display.
2 Dampen a soft, clean cloth with water or
a mild cleanser.
3 Wipe the screen gently with the dampened cloth.
4 Use a dry, soft, clean cloth to wipe off the residue.
Always wipe off water and other stains
immediately to avoid damage to the screen.
Do not use or spray liquid,
aerosol, ammonia, or other
alcohol-based cleaners on
the display or screen.
Some chemical cleaners
may damage the display
and its case.
Do not touch the LCD screen
with your fingers. Skin oils
are hard to remove from
the screen.
Do not saturate the cleaning
cloth. Liquid that drips
on the glass may seep
into the display case.
Cleaning the LCD Screen
cx-QSUG-6 7/13/04 10:31 AM Page 15
Page 16

America Sales
Planar Systems, Inc.
1195 NW Compton Drive
Beaverton, OR 97006-1992 USA
phone + 1 (503) 748-1100
fax + 1 (503) 748-1493
Medical Sales
Planar Systems, Inc.
400 Fifth Avenue
Waltham, MA 02451-8738 USA
phone + 1 (781) 895-1155
fax + 1 (781) 895-1133
Europe & Asia-Pacific Sales
Planar Systems, Inc.
Olarinluoma 9, P. O. Box 46
FIN-02201 Espoo, Finland
phone + 358 9 420 01
fax + 358 9 420 0200
For more information
Download full versions of the Dome CX Display and Dome CXtra
reference guides and the latest driver from the Planar web site.
Customer Support
• Visit www.planar.com
• E-mail medicalsupport@planar.com
• Call (866) PLANAR1
Copyright © 2004 Planar Systems, Inc. Planar,Dome,CXtra, RightLight, and QuickSwitch are either registered trademarks
or trademarks of Planar Systems, Inc.Technical information in this document is subject to change without notice.
020-0361-00A
cx-QSUG-6 7/13/04 10:31 AM Page a
 Loading...