

Page 1
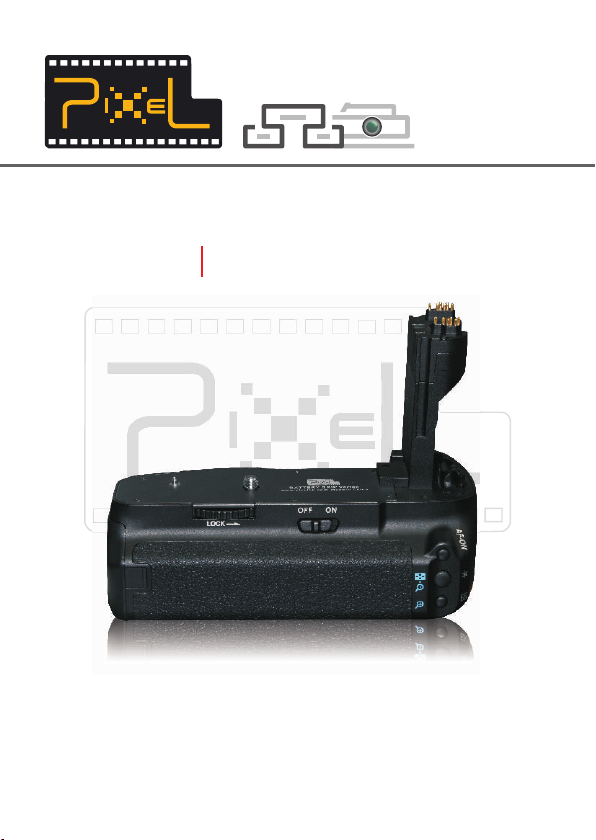
Battery Grip
电池盒兼手柄
Vertax
For Canon 5D Mar k II
E-6
Instruction Manual
使用说明书
Page 2
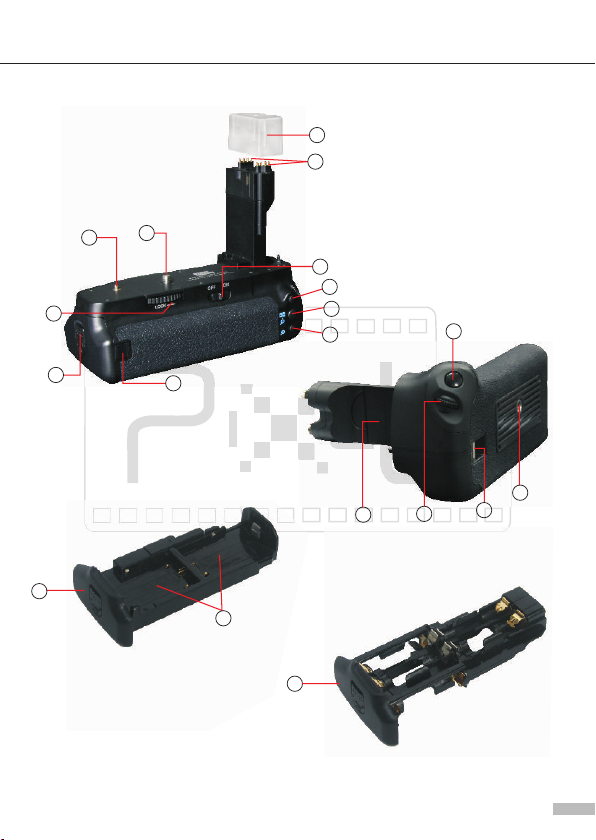
Name of each part (部件名称)
3
4
5
1
2
11
10
9
8
12
6
17
7
16
15
14
13
18
19
1
Page 3
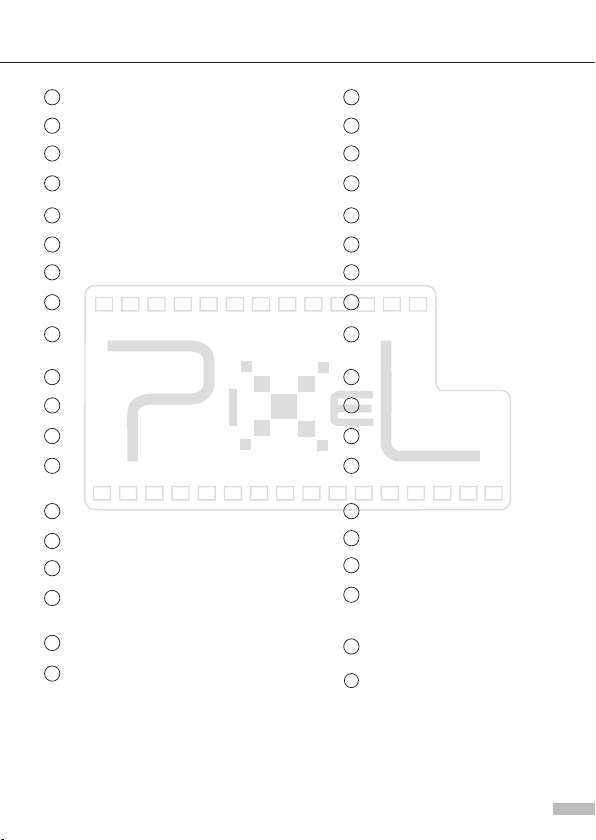
Name of each part (部件名称)
1 1
Prote cti ve co ver
2 2
Elect ric al co nta cts
3 3
Mount ing S cre w
4 4
Guide p in
5 5
Locki ng ri ng
6 6
Batte ry ma gaz ine r elease handle
7 7
DC cord m oun t
8 8
AF poin t sel ect ion /Magnify Butt on
AE lock /FE l ock / Ind ex/Reduce
9 9
butto n
AF star t but ton
10 10
11 11
Vertic al- gri p ope ration switch
Shutt er bu tto n
12 12
Camer a bat ter y com partment
13 13
cover s lot
14 14
Main Di al
Hand st rap m oun t
15
Tri pod s ock et
16
Batte ry Ma gaz ine B GM-E9L
17
(for LP -E6 )
18
Batte ry pa ck co mpa rtment
19
Batte ry Ma gaz ine B GM-E9A
(for si ze- AA/ LR6 b atteries)
保护盖
电子触点
固定螺钉
定位销
装卸旋钮
电池 把手仓锁
直流电源线插孔
自动对焦点选择/放大按钮
自动曝光锁/闪光曝光锁/
索引/缩小按钮
自动对焦启动按钮
纵向位置操作开关
快门按钮
相机电池仓盖槽
主拨盘
15
手提带环
16
三脚架接孔
17
电池夹BGM-E9L
(LP-E6用)
18
电池仓
19
电池夹BGM-E9A
(AA/LR6尺寸电池用)
2
Page 4
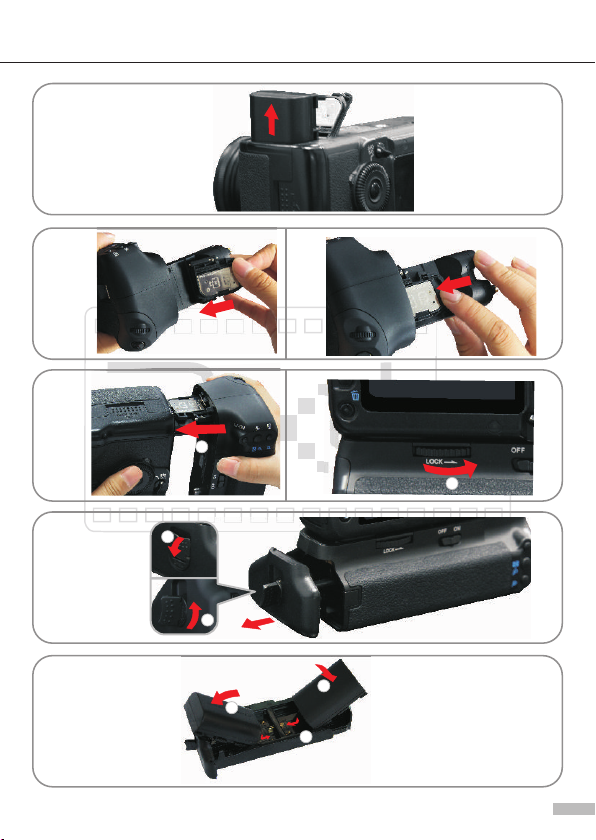
Basic O perat e (基本操作)
1
2- 1 2- 2
3- 1 3- 2
1
2
4
5
1
2
2
2
1
3
Page 5
Basic O perat e (基本操作)
6- 1
1
7
8- 1
1
9
6- 2
2
8- 2
2
4
Page 6

Battery Grip Ver tax
Instruction s
Thank y ou for purch asing a PIXE L produc t.
The Vert ax is a batter y grip that ca n hold 2pcs ba ttery LP-E 6 or 6pcs size
AA/LR 6 batterie s. It is also eq uipped wit h a vertical -grip shut ter button ,
main di al, etc. to en able shoot ing in the sam e way as with ho rizontal g rip.
Attach to the Camera
1. Remo ve the batte ry from the ca mera.(Fi g.1)
2. Remo ve the camer a battery co mpartmen t cover.
3. Inse rt the detac hed cover in to its stora ge slot to ens ure that it wi ll not be
lost. ( Fig.2-1)
When ta king out the c over, press l ightly on th e cover hing e and pull it ou t
upwar d at a slanted a ngle. (Fig .2-2)
4. Remo ve the prote ction cove r, and then ins ert the elec trical con tacts into
the cam era batter y compartm ent (Fig.3 -1)
5. Align t he attachm ent screw wi th the camer a's tripod s ocket, and t hen
turn th e attach/d etach knob t o tighten se curely. (F ig.3-2)
Do not furth er push ope n the battery c ompartment cover when it is alrea dy
opene d. Do ing s o man y damage its hing e.
Be s ure t o attac h the b attery gri p to the ca mer a before ins ert ing the b att eri es.
The results of the battery ch eck ma y n ot be dis pla yed pr ope rly if y ou att ach
the bat ter y gri p to th e camera with the b att eri es al ready inside.
Befor e movin g th e ba tte ry g rip fro m th e ca mer a, b e su re t o tu rn t he c ame ra' s
power s witch t o (off), and take out the b att eries. Aft er r emo vin g the bat teries,
attac h the p rot ect ive cover to the el ect ric al co ntacts.
Lithi um Batt ery Installation
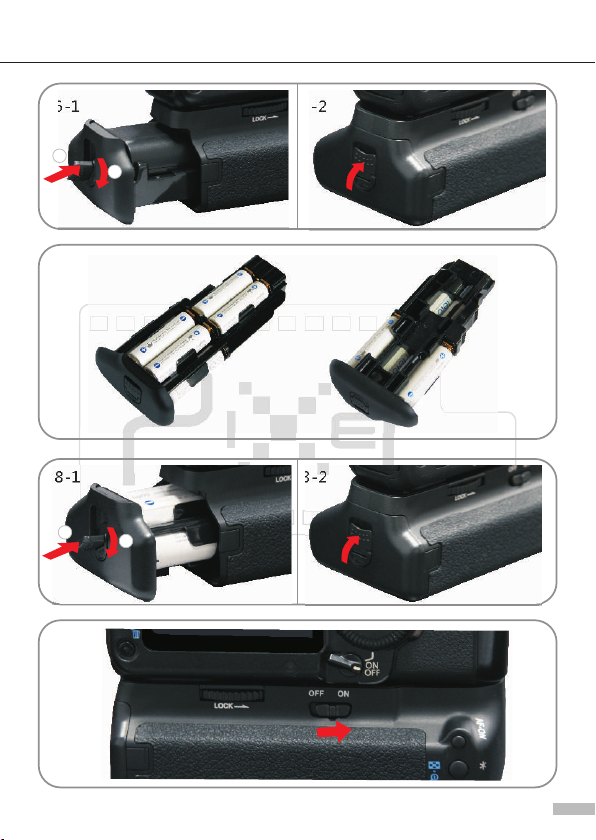
1. After f lip pin g out t he release hand le, t urn i t as sh own by the arrow, an d the n
pull ou t the b att ery m agazine (BGM- E9L ). (F ig. 4)
2. Inse rt on e or tw o Bat tery LP-E6 into t he ba tte ry ma gazine (for LP- E6) . (Fi g.5 )
3. Attac h the b att ery m agazine into th e bat ter y gri p. (Fig.6-1) Af ter a tta chi ng,
check t hat t he ba tte ry magazine is se cur ely a tta ched to the batte ry gr ip.
4. Clos e the r ele ase h andle. (Fig.6 -2)
If only one batt ery is used, it may be inserted in either the right or left side.
If two battery packs are inserted, po wer is supp lied simultane ously by both
batteries. Two batteri es with different charging levels can be inserted and used
without any pr oblems.
Removing the battery packs or size – AA/LR6 batteries from the battery grip
when the camer a will not be used for an extended period.
5
Page 7
AA/LR6 Battery Installation
1. Inse rt th e bat ter ies into the Batt ery M aga zin e BGM-E9A (for Bat ter ies ). (F ig.7)
Make su re th e +an d –bat tery contacts a re pr ope rly o riented as show n in th e
figur e.
2. Attac h the b att ery m agazine into th e bat ter y gri p. (Fig.8-1)
3. Clos e the r ele ase h andle. (Fig.8 -2)
Less im age s can be shot w hen u sing si ze- AA/ LR6 batter ies . Also, th e num ber
of possi ble sh ots ma y vary de pending on the batte rie s bran d and sto rage
condi tio ns, so usa ge of s ize-AA/L R6 batteries is rec omm end ed onl y for
emerg enc ies .
When usin g with non-r ech arg abl e size AA/LR6 bat teries, plea se use when
tempe rat ure i s above 20℃ . The camera may not w ork when used in l ow
tempe rat ure o r whe n old and new batte rie s are u sed t ogether.
Using the Battery Grip
1. Turni ng th e ver tic al-grip opera tio n swi tch t o (ON)(Fig.9) mak e the b att ery
grip bu tto ns an d dia l function in the s ame w ay as t hos e on the camera.
2. When s hoo tin g in th e horizontal- gri p pos iti on, turn the vert ica l-g rip o peration
switc h to (O FF) s o tha t you d o not accide nta lly u se th e buttons or dial o n the
batte ry gr ip.
3. Th e battery power l eve l can b e checked on the ca mer a.
Specifications
Batte ry: 1 o r 2 of LP -E6 B att ery, Or 6pc s AA/LR 6 Alkaline Ba tte ry
Power s wit ch: C ame ra' s Power Swit ch
Wor king tempe rat ure : 0℃-+4 0℃
Wor king humid ity : 85% O r Les s
Dimen sio ns: Ap pro x.1 50.1(W)x 116.7(H)x8 4.9 (D) mm
Wei ght: Approx.24 8.8 g (wi tho ut batteries an d bat ter y mag azine)
The pro duc t spe cif ications and ex ter ior a re su bjected to chan ge wi tho ut no tice.
This man ual informa tio n is update d at 1st Oct, 2011 . If you wi sh to use th is
produ ct com bin ed with oth er Pix el products pu bli she d after this date ; plea se
consu lt wi th th e PIX EL deale r for f urt her i nformation.
Now you can sta rt to use inc red ibl e PIXEL prod uct. If you hav e any questi on,
pleas e con tac t you r local dealer or v isi t to ht tp: //www.pixelh k.c om.
6
Page 8

电池盒兼手柄 电池盒兼手柄 E-6
使用说明书使用说明书
感谢你购买品色产品。
E-6是一个 可以装两个电池LP-E6或6个AA/LR6尺寸电池的电池盒兼手柄。
本电池手柄还配有纵向位置快门按钮、主拨盘等,使你在纵向拍摄时与横向拍
摄时的操作方式相同。
在使用本产品之前,请务必仔细阅读本使用说明书。
请务必妥善保管好本书,以便日后能随时查阅。
请在充分理解内容的基础上,正确使用。
安装到相机
1.从相机中取出电池。(图1)
2.卸下相机电池仓盖。
3.将卸下的电池仓盖插入存放区,以免丢失(图2-1)。
当取出电池仓盖时,请轻轻的按住电池仓盖的转轴,并以倾斜的角度向上将
其拉出。(图2-2)
4.卸下保护盖,然后将电子触点部插入相机电池仓。(图3-1)
5.将固定螺钉与相机三脚架接孔对准,然后拧紧装卸旋钮。(图3-2)
当电 池仓盖已打开时 ,请不要继续推开仓 盖。这样做可能 会损 坏电池仓盖得
转轴。
在插 入电池之前,请 务必先将电池手柄安 装到相机上。如 果您 将已装入电池
的电池手柄安装到相机上,则相机可能无法正确地显示电池电量检测结果。
将电 池手柄从相 机上卸下之 前, 请务必先将 相机 的电源开关 拨到(OFF)位置
并取出电池。取出电池后,请为电子触点安装保护盖。
安装锂电电池
电池仓锁把手
1. 拨出 后,按照箭头所示反向转动,然后拉出电池夹
(BGM- E9L)。(图4)
2.在电池夹(LP-E6用)中装入单个或两个电池 LP-E6。(图5)
3.将电池夹装入电池手柄。(图6-1)
4.关闭电池仓锁把手。(图6-2)
如果只使用单个电池,可将其装在右侧或左侧。
如果安装了两个电池,则两个电池同时供电。可装入两个电量不同的电池并
且使用起来不会有任何问题。
长时间不使用相机时,请从电池手柄中取出锂电电池。
7
Page 9
装入 尺寸电池AA/LR6
1.将电池装入电池夹 A 尺寸用 。 图7
按照图示所 示,确保电池的正负触点朝向正确。
2.将电池夹装入电池手柄。(图8-1 )
3.关闭电池仓锁把手。(图8-2)
AA/LR6
使用 尺寸电池时,能够拍摄的图像较少。此外,根据电池的品牌和存
放条件,能够拍摄的图像张数可能不同,因此建议您只在紧急的情况下使用
AA/LR6尺寸电池。
利用非充电式AA/LR6尺寸电池时,请在20℃以上的温度下使用6个相同品牌
的新电池。在低温条件下或新旧电池混合使用时,相机可能不工作。
BGM-E9 (AA/LR6 ) ( )
使用电池手柄
1.将纵向位置操作开关转到 位置 以使用电池 手柄按钮和拨盘功 能与
相机相应部 分的功能相同。
2.在进行横向位置拍摄时,请将纵向位置开关转到(OFF)位置,以免不小心使
用电池手柄 上的按钮或拨盘。
3.可以在相机上查看电池电量。
(ON) (图9)
规格
电源
电源开关
工作温度范围
工作湿度范围
尺寸
重量
产品规格及外观如有变化,恕不另行通知。
本说明书中 的信息更新至2011年10月01日,如果要与此日期之后发布的产
品组合使用,有关信息请向品色经销商咨询。
现在 ,你可以体验无 与伦 比的品色产品。 如有 任何 疑问可以向当地 经销 商
咨询,或登陆 http://www.pixelhk.cn查询
制造商:品 色(香港)企业有 限公司
地 址:香港九 龙荔枝角青山道70 4号合兴工业大厦4楼
电 话:(852 ) 2384-118 8
(1)一个或两个电池LP-E6
(2)6个AA/LR6尺寸碱性电池
相机的电源开关
0℃-+40℃
85%或更小
约150.1(宽)x1 16.7(高)x84 .9(厚)mm
约248.8克(不含电池和电池夹的重量)
PS M31 V10 .01
8
 Loading...