

Page 1
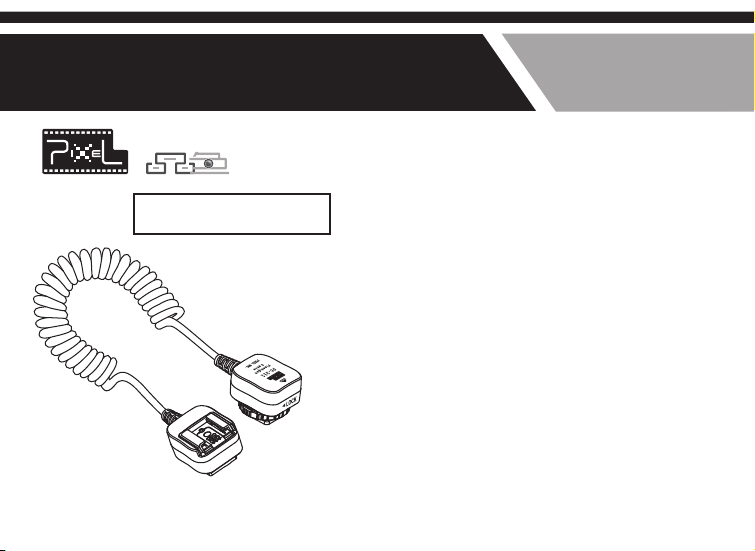
Flashgun Cable
FC-311 FC-312 FC-313 FC-314
Thank you for pu rchasing the
high-perfo rmance PIXEL product
Product Manual
TTL Cord
Overview
Thank you f or p urchasi ng t he h igh-end P IX EL
product T TL Co rd. It can co nt ro l the off -c amera
flash to wo rk m ore flexi bl y by d iff er en t angle s,
while wit h sa me functi on s wh en the flas h is o n
the camer a.
Before us in g this prod uc t, p lease rea d th is
manual ca re fully to be m or e fa miliar wi th i ts
functio n.
Page 2

Included items
Cautions
Please ch ec k whether a ll o f th e items are
include d af ter openi ng t he p acking, i f mi ssing,
please co nt act the dea le r.
Flash off -camera c ab le
Hot shoe pr ot ection co ve r
Instruc ti on manual
1Pc
1Pc
1 set
1. Make sur e bo th of the cam er a an d flash a re t ur ned
off b ef or e install in g it.
2. It belon gs t o the elect ro ni c acces so ri es, it may no t
be used nor ma lly due to ex te rn al fact or s, w hile it’s
rare to see , do n’t worry !
3. Do not pul l th e wires whe n us in g it.
4. Make sur e th is device a wa y fr om stro ng s ho ck.
5. Do not sto re t he device i n th e hi gh temper at ure
environ me nt.
6. Please k ee p it dry, do n ot c ontact wi th i t by w et
hand, nor i mm erse it in wa te r or e xpose i t in r ai n
7. Do not use t he p roduct in f la mm able and ex pl osive
circums ta nces; oth er wi se it wil l le ad t o explosi on
or fire
Page 3
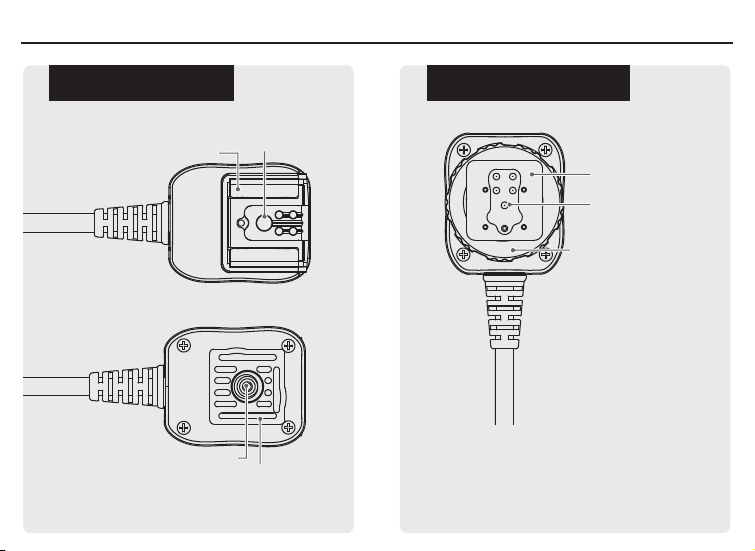
The name of each part
Flash conn ec ti ng s id e Camera con ne ct in g si de
Hot shoe mou nt
Quick rele as e pl at e sc re w
the fixed ho t sh oe m ou nt
Connecting point
Hot shoe foo t
Connecting point
Hot shoe holding nut
Page 4
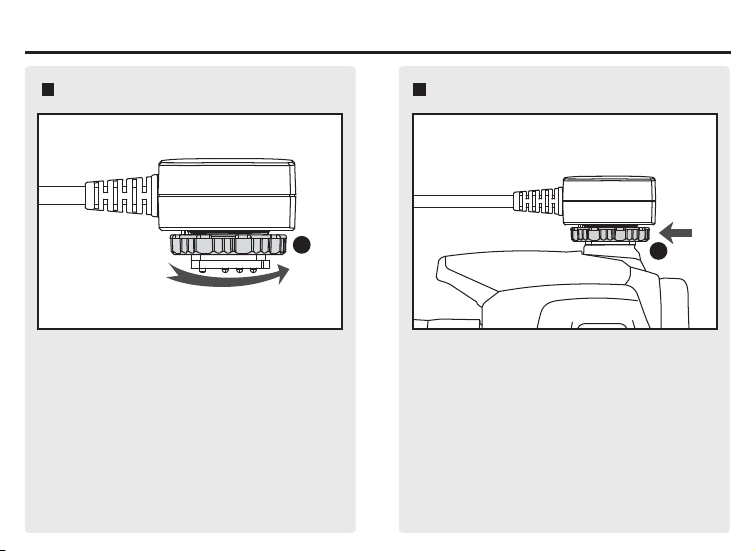
Installation
Install t he c amera con ne ct ing sideInstall t he c amera con ne ct ing sideInstall t he c amera con ne ct ing sideInstall t he c amera con ne ct ing side
1
1.
Please ma ke s ure the cam er a po wer is
turned of f, rotate t he s crew as the p ic tu re
to loosen i t.
2
2. Insert t he c amera con ne ct ing sid e to t he
camera ho t sh oe mount.
Page 5
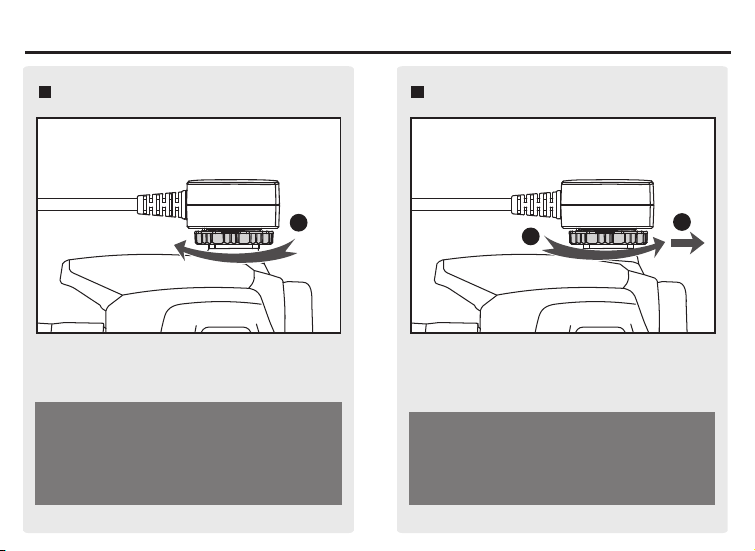
Installation
Install t he c amera con ne ct ing sideInstall t he c amera con ne ct ing side
3
3. Rota te the sc rew as the pic ture to t ighte n it.
Make sure the camera connecting side is
installed in the right place, lock it to avoid
it sliding from the camera.
Remove the ca mera conne ctin g sideRemove the ca mera conne ctin g side
1
Turn off the ca mer a; rotate it as the picture to
loo sen it enough, then pull it out from the
cam era .
Do not pull i t ou t by force.
2
Page 6
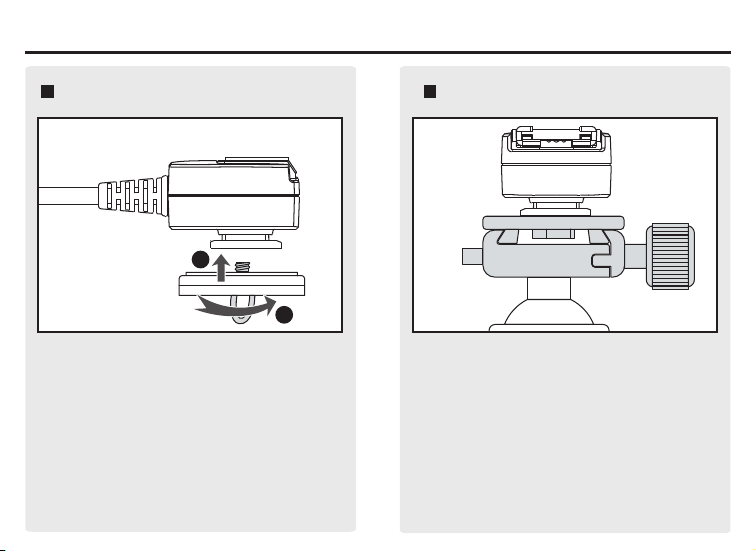
Installation
Install t he f lash conn ec ti ng sideInstall t he f lash conn ec ti ng side Install t he f lash conn ec ti ng sideInstall t he f lash conn ec ti ng side
1
2
1. Follow t he f igure to in st al l the fla sh
connect in g side to the Q ui ck S hoe.
2. Instal l Qu ick Shoe to t he t ri pod hea d.
Page 7
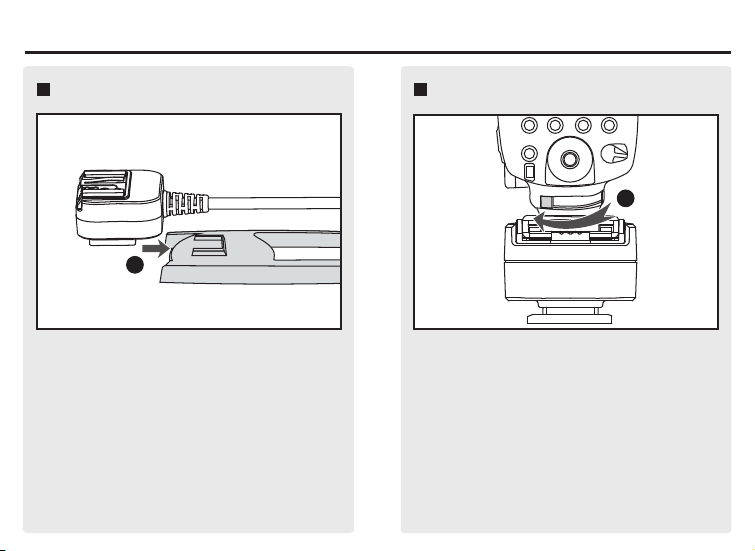
Installation
Install t he c amera con ne ct ing sideInstall t he c amera con ne ct ing side
1
或者将闪光灯连 接端 直接插入闪光灯 支
Or instal l th e flash con ne ct ing side to t he
架进行固定。
flash bra ck et accord in g to t he pictur e.
Install t he f lashInstall t he f lash
1
Mak e sure the fla sh is turned off, th en insert
it to the flas h connecting side an d lock it.
Page 8

Model and product parameterModel and product parameter
Model
FC-3 11/S 1.8
FC-3 11/M 3.6
FC-3 11/L 10.0
FC-3 12/S 1.8
FC-3 12/M 3.6
FC-3 12/L 10.0
FC-3 13/S 1.8
FC-3 13/M 3.6
FC-3 13/L 10.0
FC-3 14/S 1.8
FC-3 14/M 3.6
FC-3 14/L 10.0
(The data wa s up da te d on 1 st M ay , 20 11; the latest product will be subjec t to t he a ct ua l
paramete r. )
Coil ed Cable
Leng th(m)
Off-ca mera
dist ance(cm)
0-80
0-180
0-700
0-80
0-180
0-700
0-80
0-180
0-700
0-80
0-180
0-700
Comp atible
Cano n version
came ra and flash
Niko n version
came ra and flash
Sony v ersion
came ra and flash
Olym pus or
Pana sonic version
came ra and flash
Weight (g)
75
122
253
75
122
253
75
122
253
75
122
253
Page 9

Now you can star t to use the incredible PIXEL product. If you
have any question, please cont act the local dea ler or visit to
http://www. pixelhk.com.
This instruction manual is updated at June, . If you
1st 2011
want the new released product information after this date,
please contact to PIXEL dealer for further information.
Ro H S
PSM4 6 V10.02
 Loading...