

Page 1

26100 8 V10.0 1
Wireless Live View Remote Control
无线图像可视快门线
Page 2

Contents
Overvie w 03
Ca ution s before us e 04
Feature s of Expert 05
Include d items 06
Name of eac h part
Usage
Battery I nstalla tion 10
Tur n power ON an d OFF 11
Sync Code -Matchi ng
Channel a djustme nt
Holding E xpert Transm itter 14
Connect w ith the cam era 15
Switchi ng Signal S ource 16
Enlarge a nd review 1 7
Sleep/Wake -up mode 1 8
07
10
12
13
1
Page 3
Contents
LCD Brigh tness adj ustment 18
Volume adj ustment 18
Menu 19
Remote Sh ooting 21
PIXEL Ex pert Sp eci ficat ion s 22
Thi s manual is current update of 1st May, 2011. Please contact to
PIXEL distributor for f urther informa ti on , if interestin g of the
combining usage with prod uc ts r eleased after this day.
Overview
Thank you v ery much fo r purchas ing PIX EL high -perfor mance pro duct
Firs t of al l, tha nk you for pu rchasin g PIXE L's Expe rt. This i s moni toring t he len s view
or the CM OS v iew on tr ansmitt er. R eceiver si de s upports s ingle shoot ing, [BUL B]
shootin g and dela y sho oting. The t ransm itter supports audi o and vide o inp uts, and
CMOS came ra lens; th e receive r suppo rt s audio a nd video ou tputs to TV.
Please r ead th is man ua l and m ake su re ful ly under stand before u sing t he produ ct. Wi th
this manu al, you wil l easily ha ndle th e op erati on method a nd the atte ntive thi ngs.
32
Page 4
Cautions before use
Make su re th e camer a and E xpert a re po wered o ff befor e install de vic e.
As th is is an el ectronic pr oduct ac cesso ry; some of th e env iro nment ca use s may af fec t the
worki ng. H oweve r thi s is hard ly ev er to get this s ituation .
When co nne cted th e rem ote cab le wi th the de vic e, do not pull t he wi res.
This pr odu ct can' t be st rong vi bra tion, or may l ead to produ ct fa ilure .
For a lo ng time non -use, ple ase turned off the vie w tr ans mitte r and the receiver 's power an d
remov e the b atter y.
Do no t put it in h igh t emp eratu re, such a s a clos ed ca r u nder direct s unlight, the contr ol panel
and oth er hi gh-te mpe ratur e are as.
Keep dry, do not use wet hand contac t wit h the prod uct, the p roduc t mus t not be imm ers ed in
water o r exp osed to r ain , and thi s may l ead to no t wor k properly .
Do not us e fla mmabl e gas es in vio lat ion of th is wa rning may ca use a n explo sio n or fire .
Becau se t his pro duc t in clu de b atter y, reg ardin g how to u se a nd char ge b att ery, ple ase ope rate it
stric tly a ccord ing t o relat ed ru les, other wise may cau se ex plosi on, f ire or ph ysi cal inj ury .
4
Features of Expert
ISM 2.4 GHz f reque ncy c hanne l whi ch qual ifi ed CE or FCC sta nda rd.
Opera tin g range u p to 20 0M
Real- tim e monit ori ng surr oun d envir onm ent vie w fro m CMOS or came ra le ns dire ctl y
Suppo rt si ngle, B ULB a nd dela y sho oting .
3.5in ch TFT scre en; resolut ion of 320 x 2 40; 10 leve ls LCD back li ght brig htn ess adju stm ents;
sleep m ode s ettin g.
Wide ch oic es of pow er: r echar gea ble bat ter ies, alkal ine b atter ies , carbo n bat terie s, et c.
Stron g com patib ili ty: sui tab le for di fferen t cameras wi th di ffe rent co nne ctor.
Scree n sho ts func tio n: save d isp lay ima ges i n receiver f or re feren ce; a nd avai lab le for re -vi ew.
Enlar ge mo vemen t: su pport e nla rges un der C OS live -vi ew mode a nd fo ur-di rec tion mo vin g.
Vid eo outp ut: v ideo an d aud io outp ut to T V.
M
5
Page 5
Included items
Name of each part
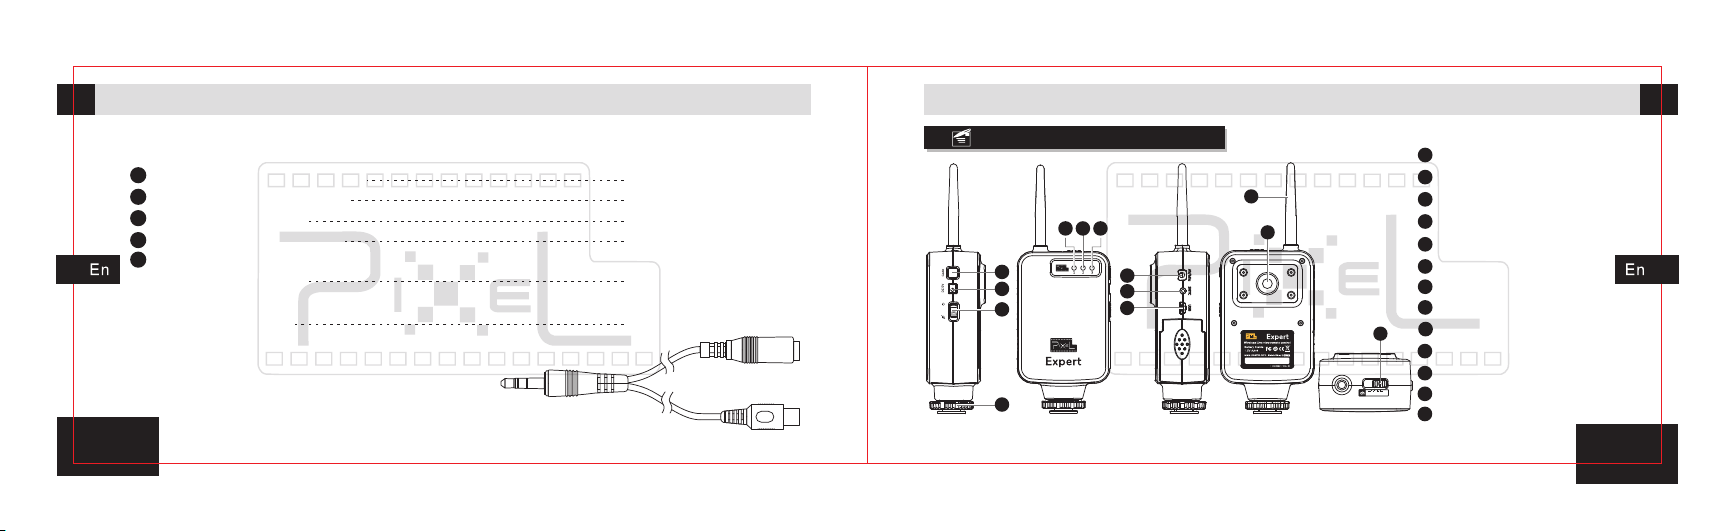
Pleas e che ck all in clu ded ite ms af ter ope n the p acking, an d PIX EL Ex per t with th e fol lowin g ite ms:
1
Exper t T ran smitter 1 pc
2
Exper t Rec eiver
3
Instr uct ion Man ual
4
Shutt er co nnect ing c able pc 2
5
Vid eo Conn ect ing Cab le
Canon
Nikon 2 pc
6
or
Optio nal A ccess ori es
A/V Con nec ting Ca ble
1pc
1 pc
3
pc
Expert T ransmit ter
765
1
2
3
4
8
9
10
Code ma tch ing but ton
1
2
1
1
2
1
13
33
22
11
Power s ock et
3
Power s wit ch
4
Hot sho e loc knut
5
Power L ED in dicat or
6
Statu s LED i ndica tor
Shoot ing L ED indi cat or
7
Vid eo/Au dio s ignal i npu t
8
Shoot ing o utput s ock et
9
10
USB soc ket
11
Anten na
44
12
CMOS Le ns
13
Chann el sw itch
7
Page 6
Name of each part Name of each part
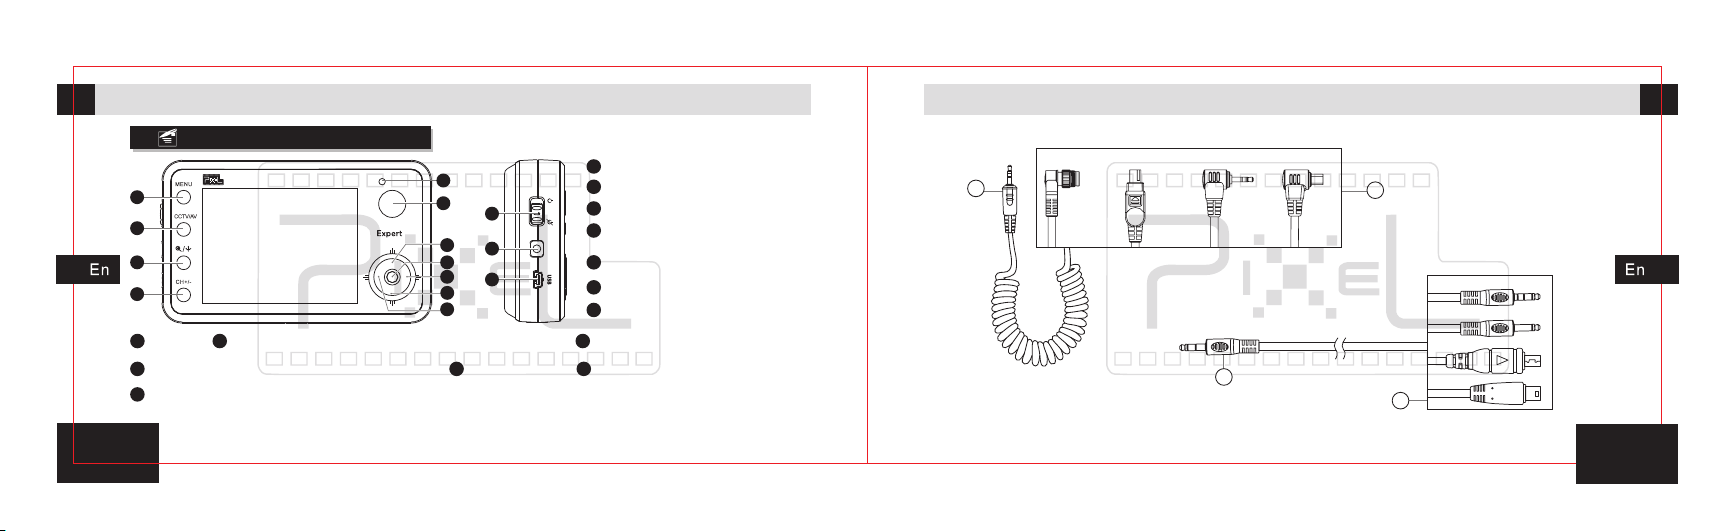
Expert Re ceiver
DC0 DC2
1
2
3
4
8
OK
Scree n bri ghtne ss re duce/ lef t shift b utt on
11
14
USB Soc ket
Scree n bri ghtne ss in creas e/r ight sh ift b utton
9
5
6
7
8
9
10
11
12
Power s wit ch
1
MENU Bu tto n
CMOS an d cam era vie w but ton
2
Vid eo enla rge /Revi ew bu tton
12
13
14
3
Chann el sw itch/ sle ep and
4
AV/Audio
wake- up bu tton
5
Statu s LED i ndica tor
6
Shutt er
Volume u p/U p shift b utt on
7
10
Volume d own /Down s hif t butto n
Audio o utp ut/AV signa l out put
13
1
side
A
Shutt er co nnect ing c able
E3 N3
Vid eo Conn ect ing Cab le
3
B side
A/V inp ut pl ug
Camera co nnectin g side
2
4
ST
VC
EG
DC
8
9
Page 7
UsageUsage
1 0
Battery I nstalla tion
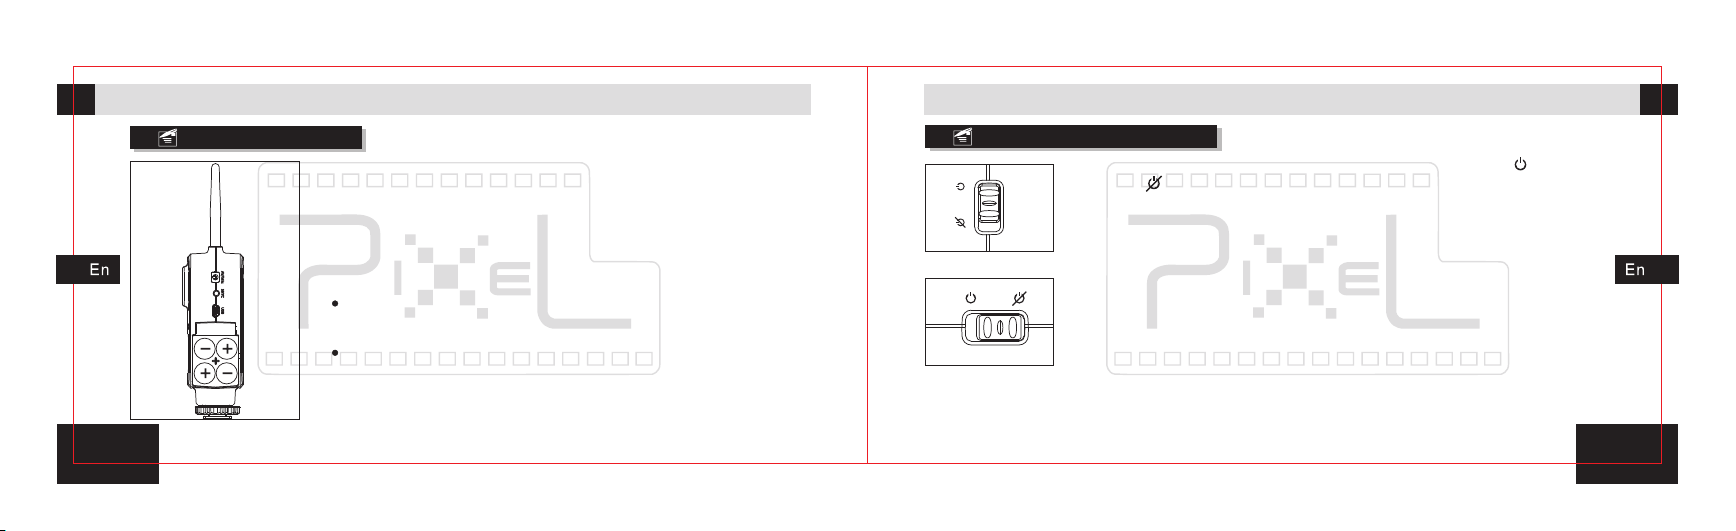
1. Slid e and o pen bat ter y hatch .
Trans mit ter use s 4 AA ba tteri es; a vailable t o use rechar gea ble or
alkal ine b atter y.
2. Inst all t he batt ery a ccord ing t o the signs on t he battery h atc h.
When usi ng 1.2 V 2400 mA batter y, st andby for 10 0 hours, worki ng
time ov er 10 h ours.
When th e bat tery is l ow, P OWER LE D IND ICATOR wou ld flash as re d.
The bat ter y shoul d be re place d or re charg ed im mediatel y.
Turn power O N and OFF
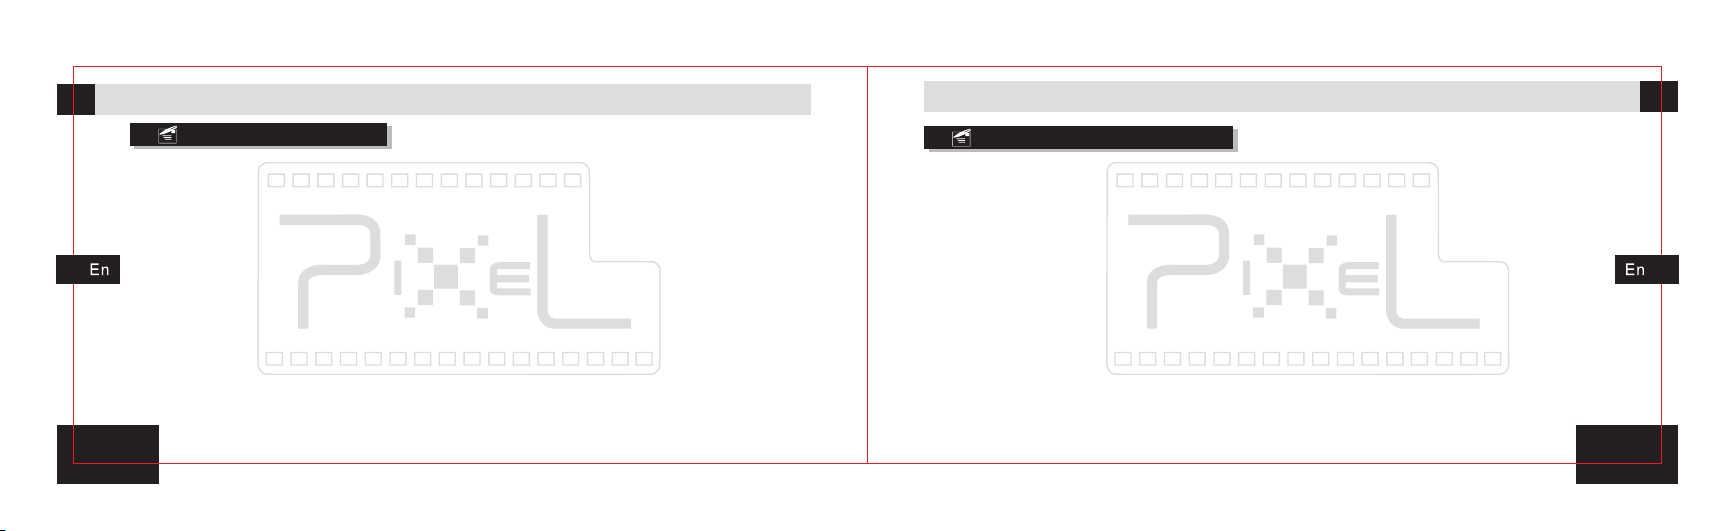
Tra nsm itter and rec eiver both have a po wer s wit ch. M ove it t o [ ] turn on ;
move it t o [ ] tur n off .
Expert Transmitter:
When power on, the POWE R LED continuously bright as red. When th e power
supply voltage is not a ble to maintain equipment working, th e POWER LED would
flash quickly.
Exper t Trans mit ter
Exper t Re ceive r
* When the power supply v oltage is not able to maintain equipmen t working, the screen wo uld shows
image of power low, and t hen the STATUS LED would quickly flash red.
Expert Receiver:
When turn on the power, the S TATUS LED shows the receiver is on; the STATUS
LED off a fter starting up, and the screen shows [PIXEL Expert] and begin s to
search signal of tran smitter; LCD screen shows the image aft er received the signal .
* If fail to search out signals under the same channel, the screen w ould shows
[Disconnected], u ntil it gets the same chan nel.
* If fail to search out signals under the same channel, switch rec eiver channel to
search other channe ls signal.
1 1
Page 8
UsageUsage
Sync Code -Matchi ng
1. Pres s [ME NU] ent ers t o the men u.
2. Pres s the r ight or l eft b utton m ove t o [SYNC] pag e.
3. Pres s the u p or down b utt on move t o [YE S].
4. Pres s [OK ], the STATU S LED fla sh as r ed, the scre en shows [Sy nci ng…], and t hen r eceiv er ge ts
into Sy nc Co de-Ma tch ing.
5. Pres s and h old [Co de] o n trans mit ter for t wo se c, the STATU S LED flash re d, an d the tra nsm itter
gets in to Sy nc Code -Ma tchin g.
6. Fini shi ng Sync C ode -Matc hin g, the STATU S LED of trans mit ter and r ece iver off to ex it th e Sync
Code- Mat ching s tat us. If tr ans mitter and r ece iver ar e in th e same ch ann el, rec eiv er woul d rec eive
image s sen t by tran smi tter.
* If tran smi tter an d rec eiver f ail t o sync code wi th each othe r wit hin 15 se c, bo th will e xit S ync Cod e Match ing .
* Produ cts w ithou t cod e-mat chi ng are or igi nally u nde r no code stat e, ca n recei ve si gnals r ega rdles s
chann els .
1 2
Channel adjustment
Exper t Tran smitt er:
Direc tly s lide th e Cha nnel Sw itc h to the ch ann el you need. W hen p ower on , the t imes STATU S LED
blink s how s the cha nne l at pres ent .
Exper t Rec eiver :
When po wer o n, the cu rre nt chan nel w ould be s how n on the top lef t cor ner of th e scr een. Sl igh tly
press [ CHA NNEL SW ITC H/WAKE U P] to cha nge t he chan nel .
Switc hin g the cha nne ls of rec eiv er can mo nit or the image f rom d iff erent c han nels.
[CHAN NEL S WITCH /WAKE UP ] but ton has t he fu nctio n of sl eep and w ake -up mod e. Ho ld and press
it to get i nto t he slee p or wa ke-up m ode .
1 3
1 3
Page 9
MIC
H
D
M
I
O
UT
A
N
OUT
UsageUsage
Holding E xpert Tran smitter
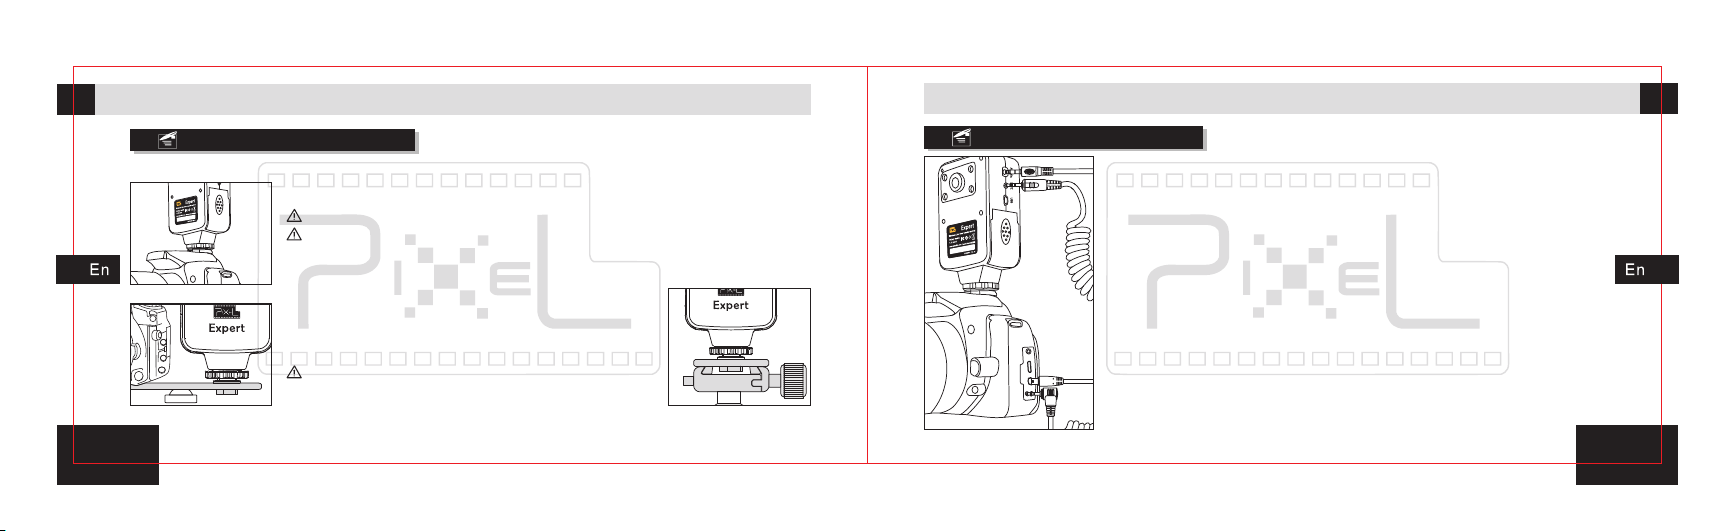
Ava ilabl e to ho ld the tr ans mitte r on ho t shoe, rack o r tripod.
1.Hol d the t ransm itt er on the h ot sh oe of camera .
Lock th e hot s hoe loc knu ts.
Loose n the h ot shoe l ock nut fir st wh en you remov e
the tra nsm itter . Do no t forci bly p ull out it, in o rder to
avoid d ama ge to the t ran smitt er an d camer a.
2.Fix t he tr ansmi tte r on the ra ck of c amera acce ssory.
3.Fix t he tr ansmi tte r on the tr ipo d.
Make su re th e trans mit ter is he ld fi rmly so that w ill
not fal l dow n.
1 4
(Pict ure 1)
(Pict ure 2) (Pict ure 3)
Connect w ith the cam era
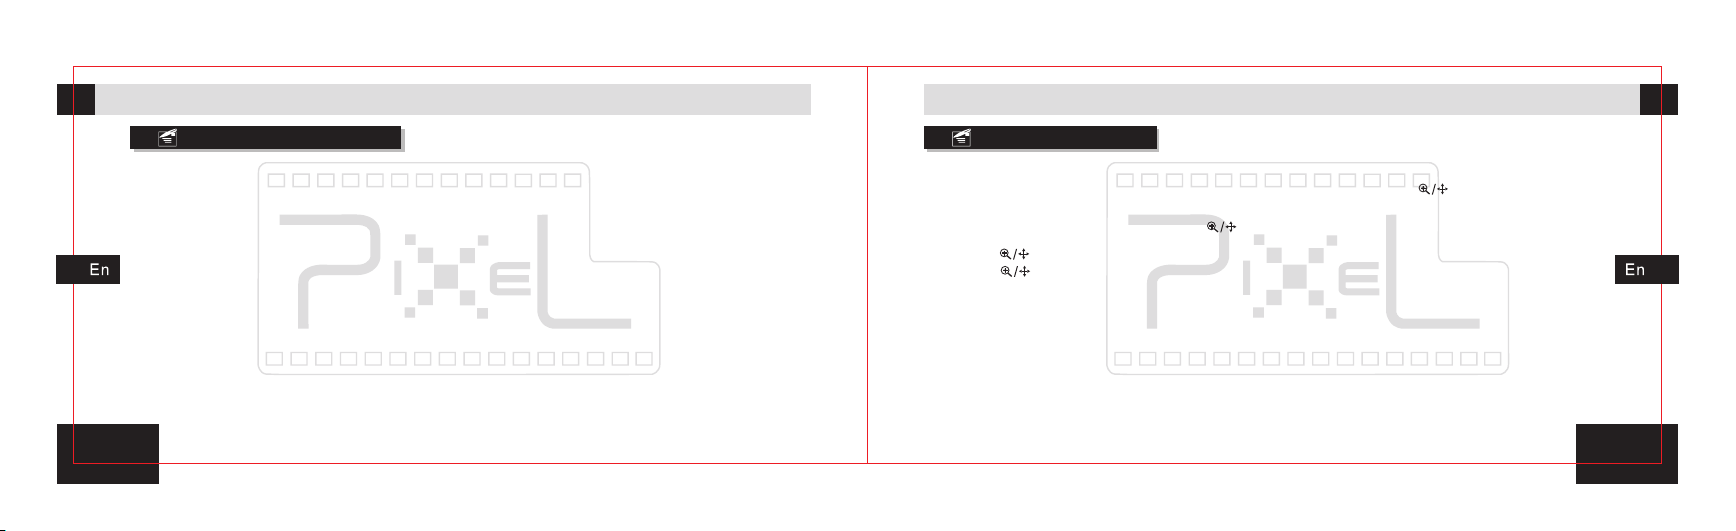
1 .
Inser t shutt er rele ase cab le A side to tra nsm itter s hutte r relea se
socke t, an other s ide i nsert t o cam era shutte r release so cke t.
*T he shutt er ca ble has v ariou s mode ls to ma tch wi th di ffe rent
camer a.
2.
Inser t vide o cabl e B sid e to tran smitter A/ V sock et, in ser t anot her
side to c ame ra A/V out put .
*The vi deo c able ha s var ious mo del s to matc h wit h different cam era .
1 5
Page 10
UsageUsage
Switchi ng Signal S ource
Recei ver d irect s to co nvert t he in put sig nal s ource of tra nsm itter.
Press [ CCT V/AV] w hen c amera 's LV mo de is o n and AV signal has co nne cted to t ran smitt er, th e input
signa l sou rce of tr ans mitte r wil l conve rt be tween AV and CCTV.
1 6
Enlarge a nd review
1.
Under t he CM OS mode , sli ghtly p res s the Enl arg e and Check bu tto n [ ] to enla rge d ispla y
funct ion , and the S cre en disp lay e ffe ct will be mag nified one t ime s. Pres s [up /down ]/[ right /le ft]
to move t he di splay ing s cope. P res s [ ] again to exi t enl arge di spl ay func tio n.
Press [ ] f or tw o sec to ge t in Revie w mode; L CD shows the s ave d pictu re in t he rece ive r.
2.
Press [ ] a gai n to exit R evi ew mode .
In revi ew mo de, ava ila ble to pa gin g-thr oug h, delete or d ele te all im age s in rece ive r.
3.
4.
Press [ rig ht/le ft] t o page th rou gh the saved i mage.
Press [ OK] t o exit de let e menu, p res s [up/down ] to select th e cho ice, pr ess [ OK] to co nfi rm the
5.
choic e.
Ava ilabl e to de lete on e or de lete al l ima ges.
1 7
Page 11
Sleep/Wake -up mode Menu
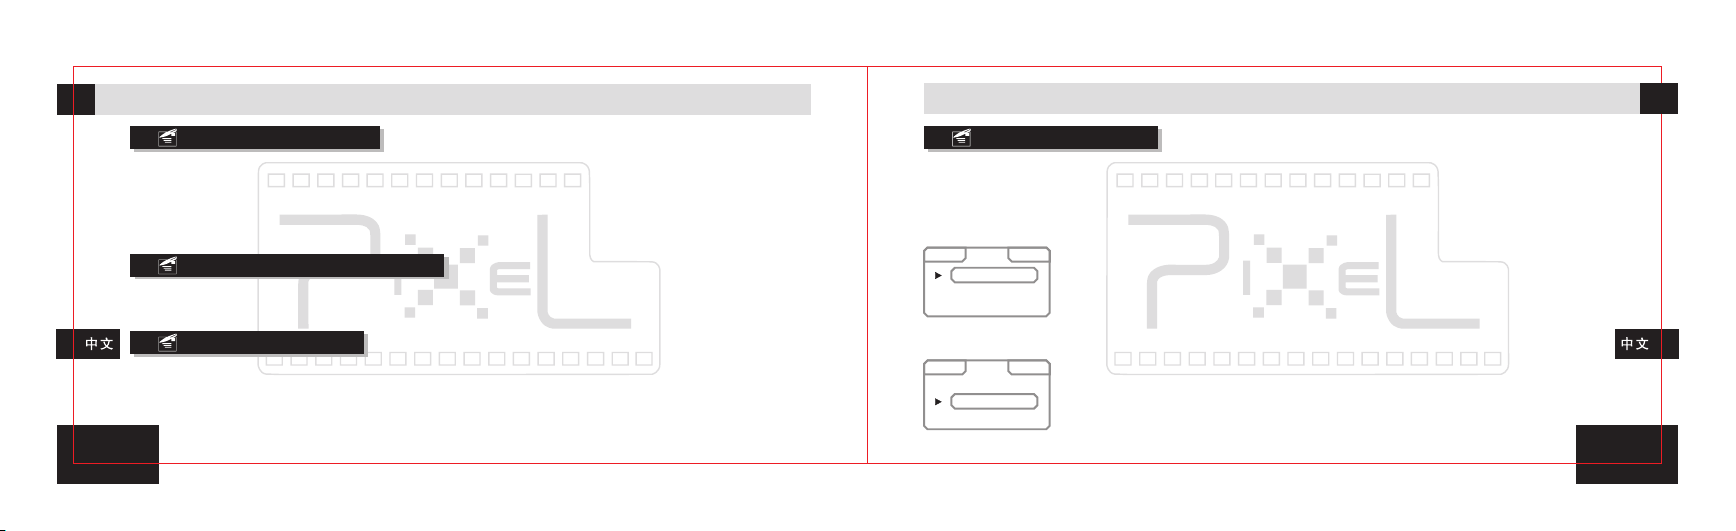
Under o per ation s tat us, hol d [CH ANNEL S WIT CH/WAK E UP] f or two se c, an d the scr een w ill get i nto
sleep ing m ode.
Under s lee ping mo de, h old [CH ANN EL SWIT CH/ WAKE UP] f or tw o sec, an d the s creen w ill g et into
monit or mo de.
*Sett ing s leep mo de in m enu.
LCD Brigh tness adj ustment
Under o per ation s tat us, pre ss [r ight/ lef t] to adjust t he sc reen br igh tness . The L CD brig htn ess is
divid ed in to ten gr ade s; the cu rre nt grad e is sh own on the rig ht bo ttom co rne r when ad jus ting.
Volume a djustme nt
Under o per ation s tat us, pre ss [u p/dow n] to a djust the vo lum e. The vo lum e is divi ded i nto ten g rad es;
the cur ren t grade i s sho wn on the r igh t botto m cor ner when adj ust ing.
*Rece ive r would h ave t he audi o out put whe n tra nsmitter h as au dio inp ut.
1 8
UsageUsage
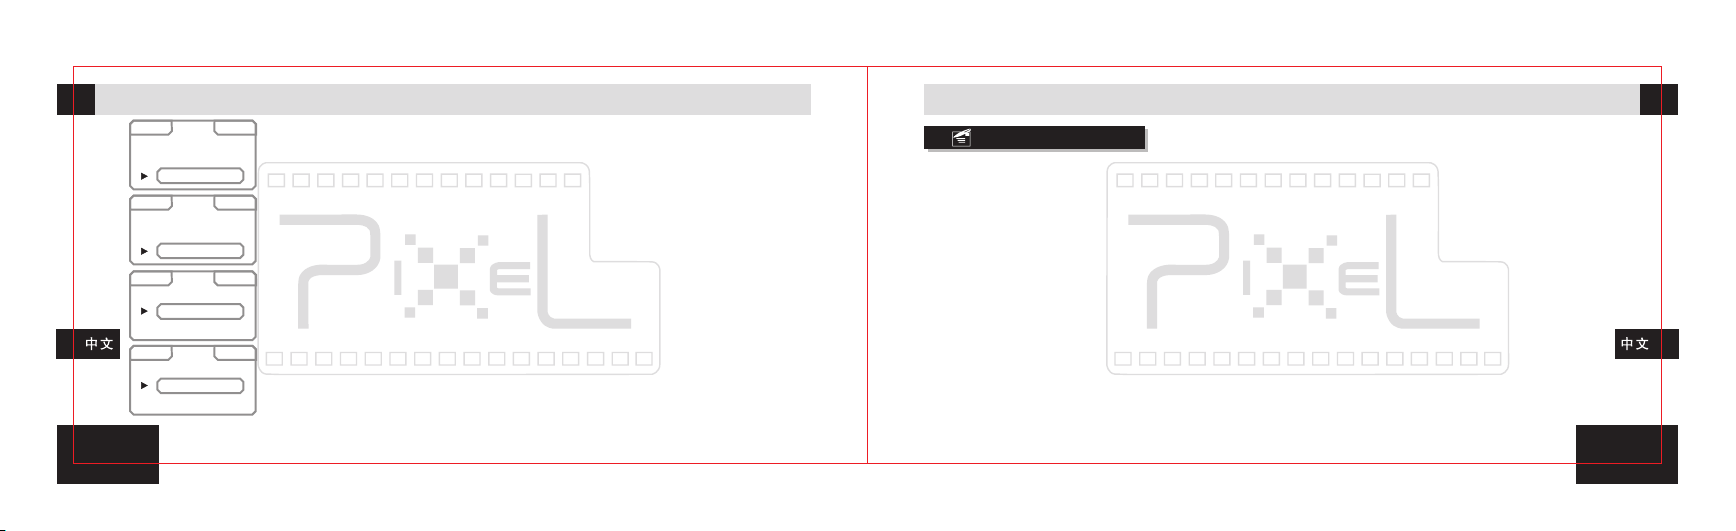
1. Pres s [ME NU] to en ter t he menu .
2. Pres s [ri ght/l eft ] to sele ct su bmenu. Pre ss [u p/dow n] to s elect i tem s in subm enu .
3. Pres s [OK ] to exec ute t he sele cte d item.
S YN C
S AV E
S LE EP
O FF
1 M I N
3 M I N
S YN C
Y ES
N O
SLEEP:
Sleep ing m ode set tin g: No Sle ep (O FF), On e min ute int o Sle ep(1 MI N), T hree
minut es in to Slee p(3 M IN), Fi ve mi nutes i nto S leep(5 MIN ), Seve n min utes
into Sl eep (7 MIN) .
SYNC:
S LE EP
Sync co de- match ing s ettin g: en ter cod e-m atching mo de (Y ES), ex it co dematch ing m ode (NO ).
1 9
Page 12
2 0
D RI V E
AVO UT
VER
S AV E
BEF ORE
AFT ER
OFF
D RI V E
SIN GLE
CON TINU
DEL AY S2
AVO UT
TV
TFT L CD
VER
TX 00 0.000
RX 01 5.013
S YN C
SAVE: Scree n shot sa vin g sett ing: Save be for e taking the sh ot (BE FORE),
Save 1. 8 sec after ta kin g the sho t (AF TER), N o sav ing (OF F).
S AV E
DRIVE: Shut ter fu nct ion se tting: Si ngle s hooting ( SINGL E), Continuou s
shoot ing (CO NTI NU), 2s ec De lay sho oti ng (DEL AY 2S), 5se c Del ay shoo ting
(DELAY 5S ), 10se c Del ay shoo tin g (DELAY 10 S).
AVOU T: Vid eo output s ett ing: Ext ernal AV vide o i nterf ace (TV), L CD displ ay
D RI V E
scree n (TF T LCD).
*With conne cte d exte rnal moni tor, random ly to swi tch be twe en the exter nal
monit or an d the LCD d isp lay.
AVO UT
VER: Ver sio n c hecki ng f unction: to ch eck th e v ers ion of tr ansmi tte r a nd
recei ver.
UsageUsage
Remote Sh ooting
Singl e Sho oting :
Set the r ece iver sh utt er func tio n as single sh ooting (SI NGL E), and s et th e camer a shu tter fu nct ion as
singl e sho oting .
Conti nuo us shoo tin g:
Set the r ece iver sh utt er func tio n as continu ous shooti ng (C ONTIN U), a nd set th e cam era shu tte r
funct ion a s conti nuo us shoo tin g.
BULB:
Set the r ece iver sh utt er func tio n as continu ous shooti ng (C ONTIN U), a nd set th e cam era shu tte r
funct ion a s BULB.
Delay s hoo ting:
Set the r ece iver sh utt er func tio n as two sec del ay shootin g (DE LAY 2S ), and se t the c amera s hut ter
funct ion a s singl e sho oting .
Half pr ess r eceiv er sh utter r ele ase but ton t o focus; ful l pre ss the re cei ver shu tte r relea se bu tton to
shoot a fte r two sec .
*Thre e gra des of de lay t ime: 2 se c, 5 se c, and 10 sec.
2 1
Page 13

PIXEL Expert Specifications
Type:
Distance: 200 meters
Transmitter: Standby time: 1 00 hours
Working ti me: 1 0 hours
Recei ver : Stan dby time: 500 hou rs
Dimen sio ns: Tr ans mitte r: 62.6 mm×39 .2m m×166 mm
(W×H× D)
Wei ght:
ISM 2.4 GHz f reque ncy c hanne l whi ch qual ifi ed CE or FCC sta nda rd.
Wor kin g time: 12 hou rs
Rec eiver :
Transm itt er:
Receive r:
12 2mm ×27.9mm× 73.4mm
88.5 (without b att ery)
12 8(wit hou t battery)
Now you can start to use unique high-performance PIXEL pr oduct
Expert. If you hav e any questions, you can cont ac t the local
distributor. Or visit the w eb site http://www.pixelhk. co m.
2 2
 Loading...