

Page 1
Toothpick Bridge Tester
User Guide
Structures such as bridges and towers can be tested by applying weight to them. The weight used to test the
structure is a bucket lled with sand. When testing a bridge, suspend the bucket from a block resting on the
roadbed of the bridge. This simulates a heavy truck driving across the bridge. When testing a tower, simply set
the bucket on top of the tower or suspend the bucket from a block resting on top of the tower.
Two Approaches to Testing Structures
Pass/Fail Test: One approach is to test the bridge or tower with a known weight (amount of sand) to see if the
structure can support it. There are two possible outcomes to this test: The structure passes by supporting the
weight, or it collapses under the weight and fails the test.
Destructive Test: With a destructive test, the structure is broken to determine the maximum weight capacity of the
structure. During a destructive test, weight (amount of sand) is gradually added to the structure until it collapses.
When the structure collapses, the amount of sand is recorded.
You should nd the following items inside your Toothpick Bridge Tester bucket:
• Test block • Eyebolt • Hex nut
• Washer • Nylon cord • Measuring stick (attached to inside of bucket)
In addition to these items, you will need some sand. Sand is inexpensive and sold in bulk at most hardware stores
and lumberyards. Some hardware stores also sell bagged sand.
Caution: Testing structures can be messy! To prevent the sand from spilling, try placing a stool, books, or other
object under the bucket so it will not fall very far if the structure breaks. For a pass/fail test, you can place the lid
on the bucket before starting the test. Consider testing the structures outside or in a garage if possible.
Measuring the Sand
Use the measuring stick adhered to the inside of the bucket to get an approximate scale measurement of the
sand. (The actual weight varies depending on how wet or dry the sand is.)
Testing a Structure
1. Pass the threaded end of the eyebolt through the hole in the test block.
2. On the other side of the test block, place the washer on the eyebolt shaft. Thread the hex nut onto the shaft to
secure the eyebolt to the test block.
3. Tie one end of the nylon cord to the ring end of the eyebolt.
4. Place the test block on the roadbed of the bridge. If testing a tower, place the test block on top of the tower.
The cord should be hanging down from the center of the structure.
18938 V0211
Page 2
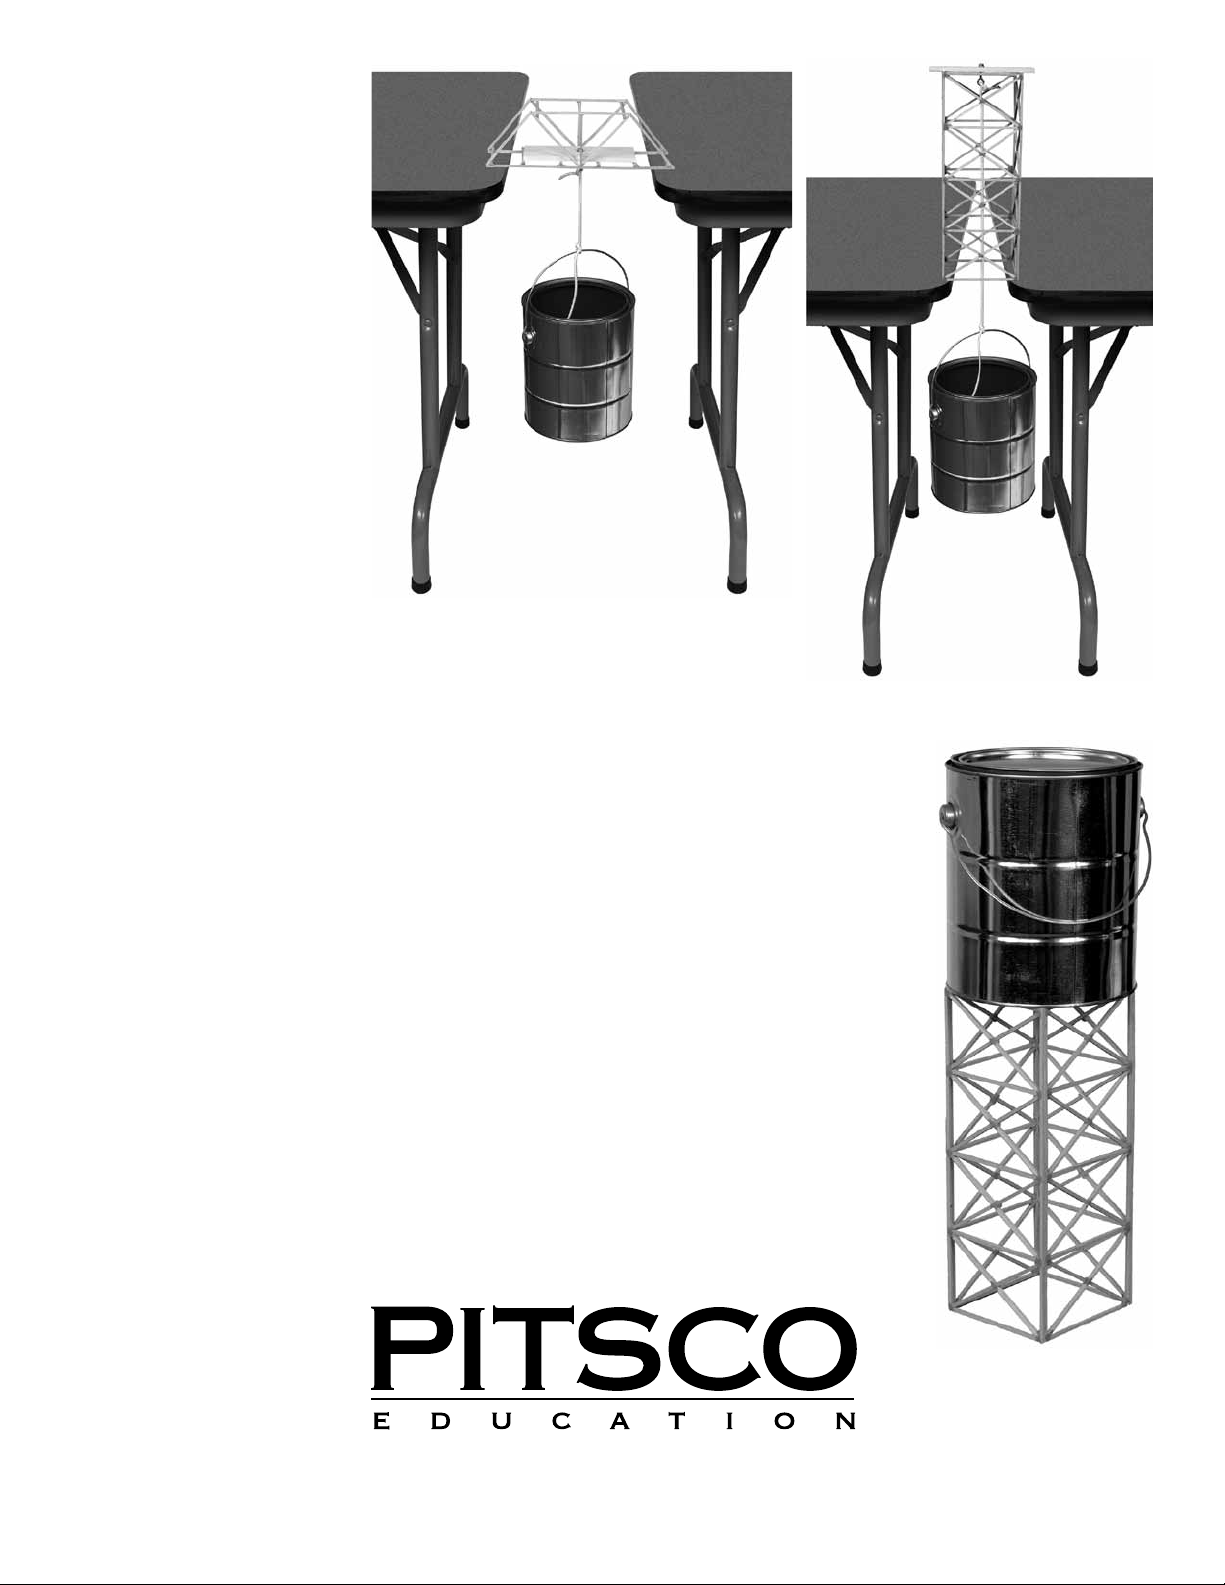
5. Tie the opposite end of
the cord to the bucket
handle. Carefully place
the bridge or tower
across two chairs or
tables of the same height
as shown in Figures 1 and
2. Make sure the bucket
is hanging straight down
from the center of the
structure.
6. Add sand to the bucket.
If conducting a pass/fail
test, pre-measure the
sand before adding it to
the bucket. If conducting
a destructive test, continue to gradually add sand
until the structure breaks,
then measure the weight
of the sand.
Figure 1
Alternative for Towers
1. Place the bucket on top of the tower (Figure 3).
2. Add sand to the bucket.
Note: If conducting a pass/fail test, add the sand, place the lid on the bucket, and
then place the bucket on the tower. This will reduce the chance of a mess.
Warranty
Pitsco provides a one-year limited warranty against defects in manufacturing on all items purchased. In a warranty situation, Pitsco will arrange for the return of defective items for evaluation. Qualified Pitsco staff will determine warranty coverage and notify the customer. Items
under warranty will be repaired or replaced at Pitsco’s discretion. Customers will be billed for all
costs associated with non-warranty items.
Figure 2
P.O. Box 1708 • Pittsburg, KS 66762
www.pitsco.com
Toll-Free Orders 800-835-0686
Figure 3
18938 V0211
 Loading...