

Pioneer DJ DDJ-SX User guide

http://pioneerdj.com/support/
D
DJ
-
SX
DJ CONTROLLER
The Pioneer DJ support site shown above offers FAQs, information on software and various other types of
information and services to allow you to use your product in greater comfort.
””””TRAKTOR PRO 2”
Sett ings File Import Guide
0
Before start
Before start
Before startBefore start
–Important-
Pioneer provides a settings file exclusively for use with the Native
Instruments “TRAKTOR PRO 2” DJ software. TRAKTOR PRO 2 can be
controlled from this unit by importing this file.
■ A computer on which TRAKTOR PRO 2 is installed is required.
■ Windows users need an exclusive ASIO driver. Please follow the
Operating Instructions of DDJ-SX to install the ASIO driver software
included with DDJ-SX in advance (*Mac OS X users do not have to
install this driver software).
■ To operate TRAKTOR PRO 2 using this unit’s buttons, see the
separate “DDJ-SX Hardware Diagram for TRAKTOR PRO 2” (PDF file)
table of supported functions.
Notice:
・Pioneer will accept no responsibility whatsoever for damages
resulting from downloading or installing this settings file.
Operation of this settings file is not guaranteed.
・Users should take full responsibility for downloading, installing
and using this settings file.
・The specifications of this settings file are subject to change
without notice.
・Please note that services regarding this settings file may be
terminated without notice.
Disclaimer:
Please note that Pioneer will accept no responsibility whatsoever for loss or damage to the customer’s computer caused by
the operations based on the information in this Guide. It is
advised to use this information at your own risk and on your own
responsibility.
Backing up the current settings
Backing up the current settings
Backing up the current settings Backing up the current settings
file
file
filefile
We recommend backing up using the procedure below so that the
current settings can be restored if necessary.
― This operation is not necessary for those using TRAKTOR PRO 2
for the first time.
1.
1. Select
Select
1.1.
SelectSelect
screen.
screen.
screen.screen.
2.
2. On the [Preferences] window, click [Export].
On the [Preferences] window, click [Export].
2. 2.
On the [Preferences] window, click [Export].On the [Preferences] window, click [Export].
3.
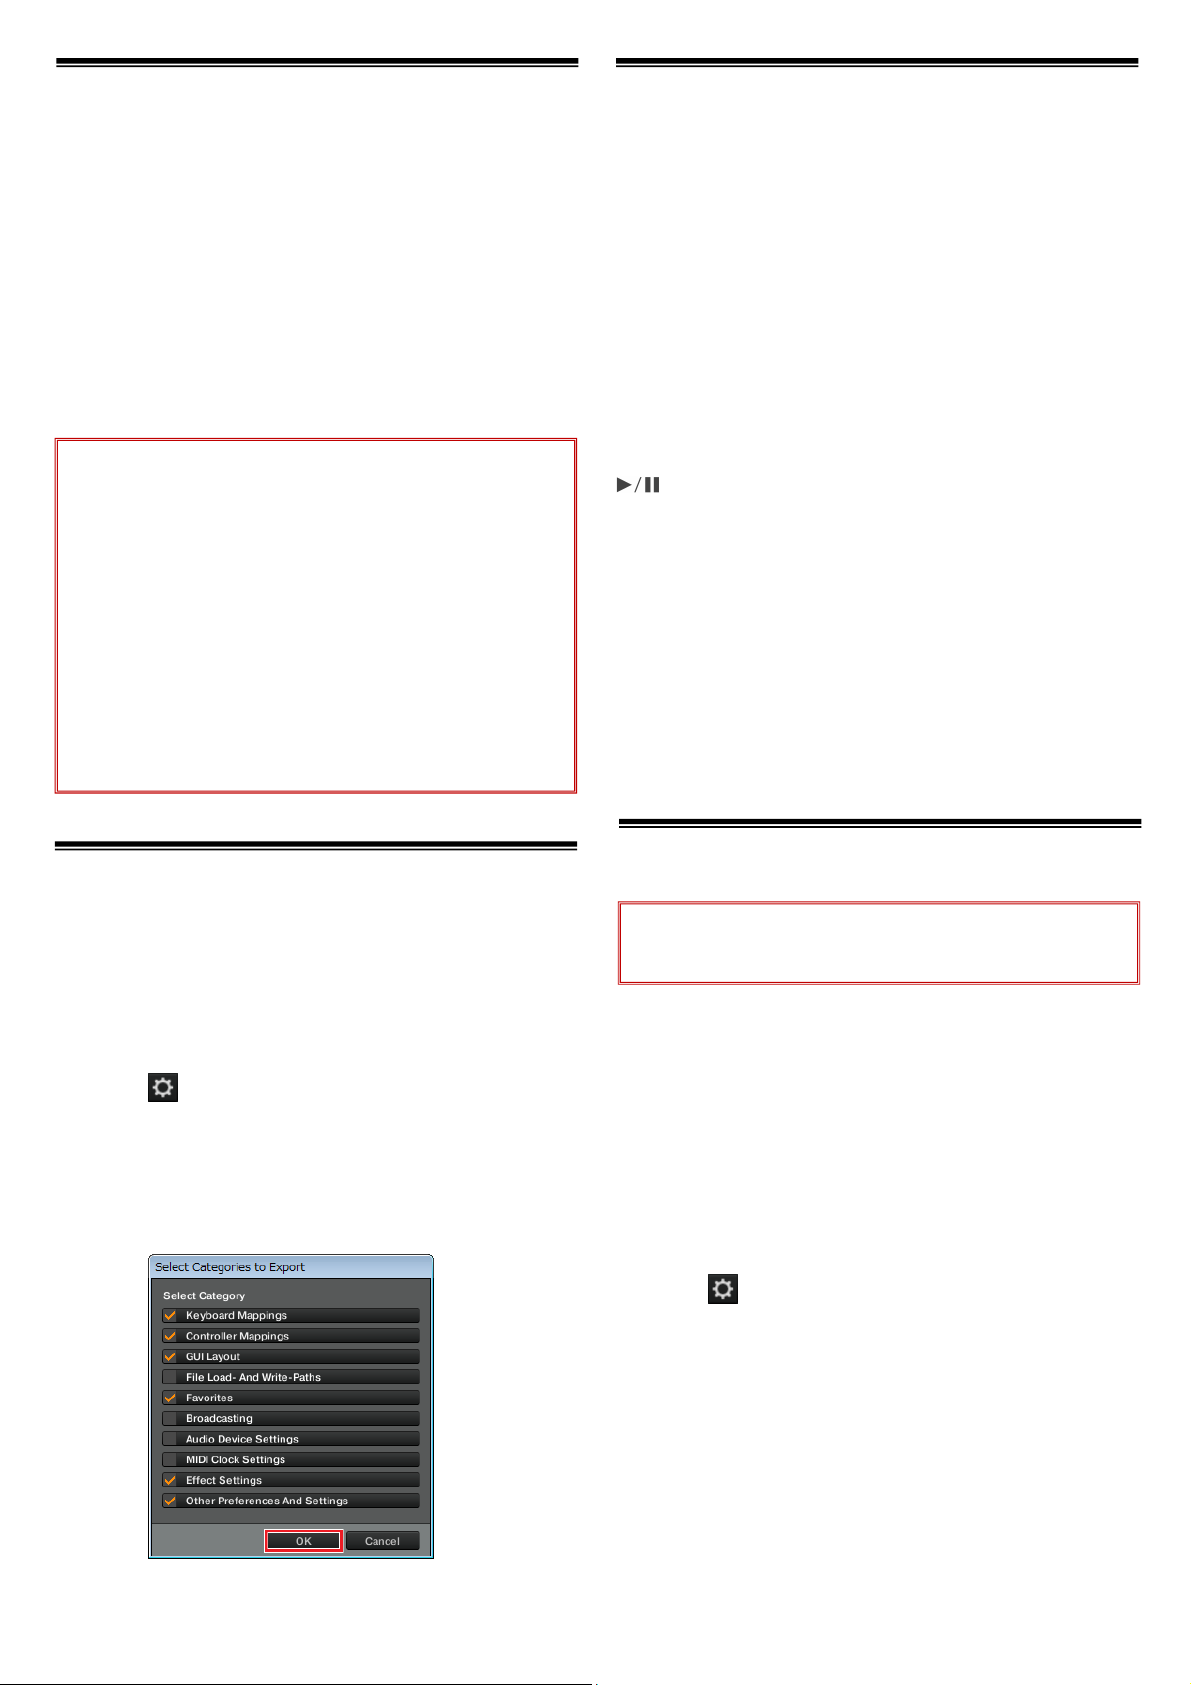
3. Check the items to be backed up, then click [OK].
Check the items to be backed up, then click [OK].
3. 3.
Check the items to be backed up, then click [OK].Check the items to be backed up, then click [OK].
Give the file an easily identifiable name (e.g.: BackUp.tsi) and save it
in the desired location.
((((Preference
Preference)))) in the upper right of the
PreferencePreference
in the upper right of the
in the upper right of the in the upper right of the
Using DJ software other than
Using DJ software other than
Using DJ software other thanUsing DJ software other than
Serato DJ
Serato DJ
Serato DJSerato DJ
To use this unit as a controller for operating DJ software other than
Serato DJ, change this setting.
●
By default, the unit is set to use Serato DJ.
1.
1. Disconnect the USB cable from your computer.
Disconnect the USB cable from your computer.
1. 1.
Disconnect the USB cable from your computer.Disconnect the USB cable from your computer.
When the utility settings mode is started up while this unit and a
computer are connected by USB cable, the set status may not be
displayed properly.
2.
2. Press the [S
Press the [STANDBY/ON] switch on this unit’s rear
2. 2.
Press the [SPress the [S
panel to set this unit’s power to standby.
panel to set this unit’s power to standby.
panel to set this unit’s power to standby.panel to set this unit’s power to standby.
Set this unit’s power to the standby mode.
3.
3. While pressing both the [SHIFT] and [PLAY/PAUSE
While pressing both the [SHIFT] and [PLAY/PAUSE
3. 3.
While pressing both the [SHIFT] and [PLAY/PAUSEWhile pressing both the [SHIFT] and [PLAY/PAUSE
]]]] buttons on the left deck, press the [STANDBY
buttons on the left deck, press the [STANDBY
buttons on the left deck, press the [STANDBYbuttons on the left deck, press the [STANDBY
/ON] switch on this unit’s rear
/ON] switch on this unit’s rear panel.
/ON] switch on this unit’s rear/ON] switch on this unit’s rear
The utility settings mode is launched.
4.
4. Press the [KEY LOCK] button on the left deck.
Press the [KEY LOCK] button on the left deck.
4. 4.
Press the [KEY LOCK] button on the left deck.Press the [KEY LOCK] button on the left deck.
● [KEY LOCK
KEY LOCK] button off: Setting to use Serato DJ
KEY LOCKKEY LOCK
● [KEY LOCK
KEY LOCK] button lit: Setting to use DJ software other
KEY LOCKKEY LOCK
5.
5. Press the [STANDBY/ON] switch
5. 5.
panel to set this unit’s power to standby.
panel to set this unit’s power to standby.
panel to set this unit’s power to standby.panel to set this unit’s power to standby.
To save the settings, set the [STANDBY/ON
rear panel to standby and quit the utility settings mode.
Importing a settings file
Importing a settings file
Importing a settings fileImporting a settings file
1111.
. Save the settings file.
. .
Unzip the downloaded file and save it below location depend on
your computer.
―
My Documents¥Native Instruments¥Traktor 2.x.x¥Settings
―
Documents/Native Instruments/Traktor 2.x.x/Settings
2222.
. Connect DDJ
. .
cable, then turn on the power of DDJ
cable, then turn on the power of DDJ----SX
cable, then turn on the power of DDJcable, then turn on the power of DDJ
3333.... Launch TR
4444.
. Select
. .
screen.
screen.
screen.screen.
than Serato DJ
Press the [STANDBY/ON] switch on this unit’s rear
Press the [STANDBY/ON] switchPress the [STANDBY/ON] switch
Note: When another settings file has been imported before, this
procedure may not operate properly. In this case, delete the imported
settings file before performing this operation. For details, see “Deleting
the settings file” on page 2.
Save the settings file.
Save the settings file.Save the settings file.
For
For Windows
Windows PC
For For
Windows Windows
For
For Mac OS X
Mac OS X Users
For For
Mac OS X Mac OS X
Connect DDJ----SX
Connect DDJConnect DDJ
Launch TRAKTOR PRO 2.
Launch TRLaunch TR
Select
Select Select
TANDBY/ON] switch on this unit’s rear
TANDBY/ON] switch on this unit’s rear TANDBY/ON] switch on this unit’s rear
panel.
panel. panel.
on this unit’s rear
on this unit’s rearon this unit’s rear
STANDBY/ON] switch on this unit’s
STANDBY/ONSTANDBY/ON
PC Users
Users
PCPC
UsersUsers
Users
UsersUsers
SX and a computer using the USB
and a computer using the USB
SXSX
and a computer using the USB and a computer using the USB
SX.
SXSX
AKTOR PRO 2.
AKTOR PRO 2.AKTOR PRO 2.
(Preference) in the upper right of the
(Preference) in the upper right of the
(Preference) in the upper right of the (Preference) in the upper right of the
.
. .
5555.
. Click [Import] on the [Preferences] window.
Click [Import] on the [Preferences] window.
. .
Click [Import] on the [Preferences] window.Click [Import] on the [Preferences] window.
Select the “PIONEER_DDJ
6666.
. Click [OK] to load the settings file.
Click [OK] to load the settings file.
. .
Click [OK] to load the settings file.Click [OK] to load the settings file.
[Audio Device Settings] is not selected at this stage. Tick the
checkbox of [Audio Device Settings] and press [OK
PIONEER_DDJ----SX
PIONEER_DDJPIONEER_DDJ
SX_Vxxx.tsi
SXSX
_Vxxx.tsi” file saved in step 1.
_Vxxx.tsi_Vxxx.tsi
OK].
OKOK
1
 Loading...