

Page 1

SOFTWARE ENTERTAINMENT CONTROLLER
SEP-C1
DJS Control Guide
Page 2

DJS Control Guide
Please read the following sections of the SEP-C1 Operating instructions (printed version) thoroughly before using your SEP-C1:
“INSTALLATION GUIDELINES”, “CONNECTIONS”, “PARTS AND THEIR FUNCTIONS” and “USING DJ SOFTWARE”.
It is necessary to install the driver software before connecting a SEP-C1 to your computer.
Please read the section “ABOUT THE DRIVER PROGRAM” in your SEP-C1 Operating instructions.
Install DJS and when you wish to use it, please be sure to read the conditions of the Software End User License Agreement. For more
information on the DJS Software End User License Agreement, its minimum operating environment, installation procedures, and the
Operating instructions (PDF file) please refer to the section, “ABOUT DJS SOFTWARE” in your SEP-C1 Operating instructions.
Table of Contents
Chapter 1 Controlling DJS
1-1 Connecting to your SEP-C1 to a computer . . . . . . . . . . . . . . . . . . . . . . . . . . . . . . . . . . . . . . . . . . . 3
1-2 Operating a DJS Player . . . . . . . . . . . . . . . . . . . . . . . . . . . . . . . . . . . . . . . . . . . . . . . . . . . . . . . . . . 4
1-3 Operating a DJS List . . . . . . . . . . . . . . . . . . . . . . . . . . . . . . . . . . . . . . . . . . . . . . . . . . . . . . . . . . . . 5
1-4 Operating the DJS Mixer . . . . . . . . . . . . . . . . . . . . . . . . . . . . . . . . . . . . . . . . . . . . . . . . . . . . . . . . . 6
1-5 Operating the DJS Effecter . . . . . . . . . . . . . . . . . . . . . . . . . . . . . . . . . . . . . . . . . . . . . . . . . . . . . . . 7
Chapter 2 Upgrading SEP-C1
2-1 User Registration . . . . . . . . . . . . . . . . . . . . . . . . . . . . . . . . . . . . . . . . . . . . . . . . . . . . . . . . . . . . . . . 8
2-2 Updating the Firmware . . . . . . . . . . . . . . . . . . . . . . . . . . . . . . . . . . . . . . . . . . . . . . . . . . . . . . . . . . . 9
Using the Support Site . . . . . . . . . . . . . . . . . . . . . . . . . . . . . . . . . . . . . . . . . . . . . . . . . . . . . . . . . . . . . . . . 10
Trial Period and User Registration . . . . . . . . . . . . . . . . . . . . . . . . . . . . . . . . . . . . . . . . . . . . . . . . . . . . . . . 10
●Copying of copyrighted materials such as music is unlawful unless permitted by a legal exception or consented to by the
rightowners.
Music recorded from CDs, etc. is protected by the copyright laws of each country, as well as by international agreements. The person
who makes such a recording, himself, bears full responsibility for legal compliance in the use thereof.
* Pioneer and DJS are trademarks or registered trademarks of the Pioneer Corporation.
* Microsoft and Windows are registered trademarks of the Microsoft Corporation of the United States and other countries. The formal name of
Windows is the Microsoft Windows Operating System.
* MPEG Layer-3 audio coding technology licensed from Fraunhofer IIS and Thomson multimedia.
Supply of this product only conveys a license for private, non-commercial use and does not convey a license nor imply any right to use this product
in any commercial (i.e. revenue-generating) real time broadcasting (terrestrial, satellite, cable and/or any other media), broadcasting/streaming via
internet, intranets and/or other networks or in other electronic content distribution systems, such as pay-audio or audio-on-demand applications. An
independent license for such use is required. For details, please visit http://www.mp3licensing.com.
* All other company names and names of products are either the trademarks or registered trademarks of their respective company(ies).
©2008 PIONEER CORPORATION. All rights reserved.
DJS Ver. 1.601
2
Page 3

1
Chapter 1 Controlling DJS
It is necessary to install the driver software before connecting a SEP-C1 to your
computer. Please do not connect the SEP-C1 to your computer until you have finished
installing the driver software.
For information on how to install the driver software, please refer to “ABOUT THE
DRIVER PROGRAM” in the Operating Instructions of your SEP-C1.
When 2 or more SEP-C1s are connected
If you connect two or more SEP-C1s to your computer, only the first SEP-C1 will be
able to operate DJS.
1-1 Connecting to your SEP-C1 to a computer
Connect the SEP-C1 to your computer with a USB cable and a USB auxiliary power cable. For
information on each of the cables that come with the SEP-C1 as well as each type of the SEP-C1’s
cable jacks, please refer to “CONNECTIONS” in the operating instructions of your SEP-C1.
1 Connect the 5V connector on the back of your SEP-C1 to the USB
port on your computer with a USB auxiliary power cable.
2 Connect the PC connector on the back of your SEP-C1 to the USB
port on your computer with a USB cable.
3 Start up your computer.
• It is also possible to start up your computer first and then make the connections to
your SEP-C1.
Warning!
Updating your Version of DJS
In order to use your SEP-C1 in conjunction with
DJS, it is necessary to update DJS to version
1.600 or later. Please refer to the DJS User’s
Manual for directions on how to update your
version of DJS.
→ ‘Using the Support Site’
Warning!
SEP-C1 Power Supply
The power for the SEP-C1 is supplied from a
USB port on your computer. Connect the USB
cable and USB auxiliary power cable directly to
your computer’s USB ports. Do not connect them
to a USB hub or any other kind of USB splitter.
Starting up DJS
Start up DJS after making the connections to the
of your SEP-C1.Also,take care to close DJS
before disconnecting of your SEP-C1.
DJS Ver. 1.601
3
Page 4
1
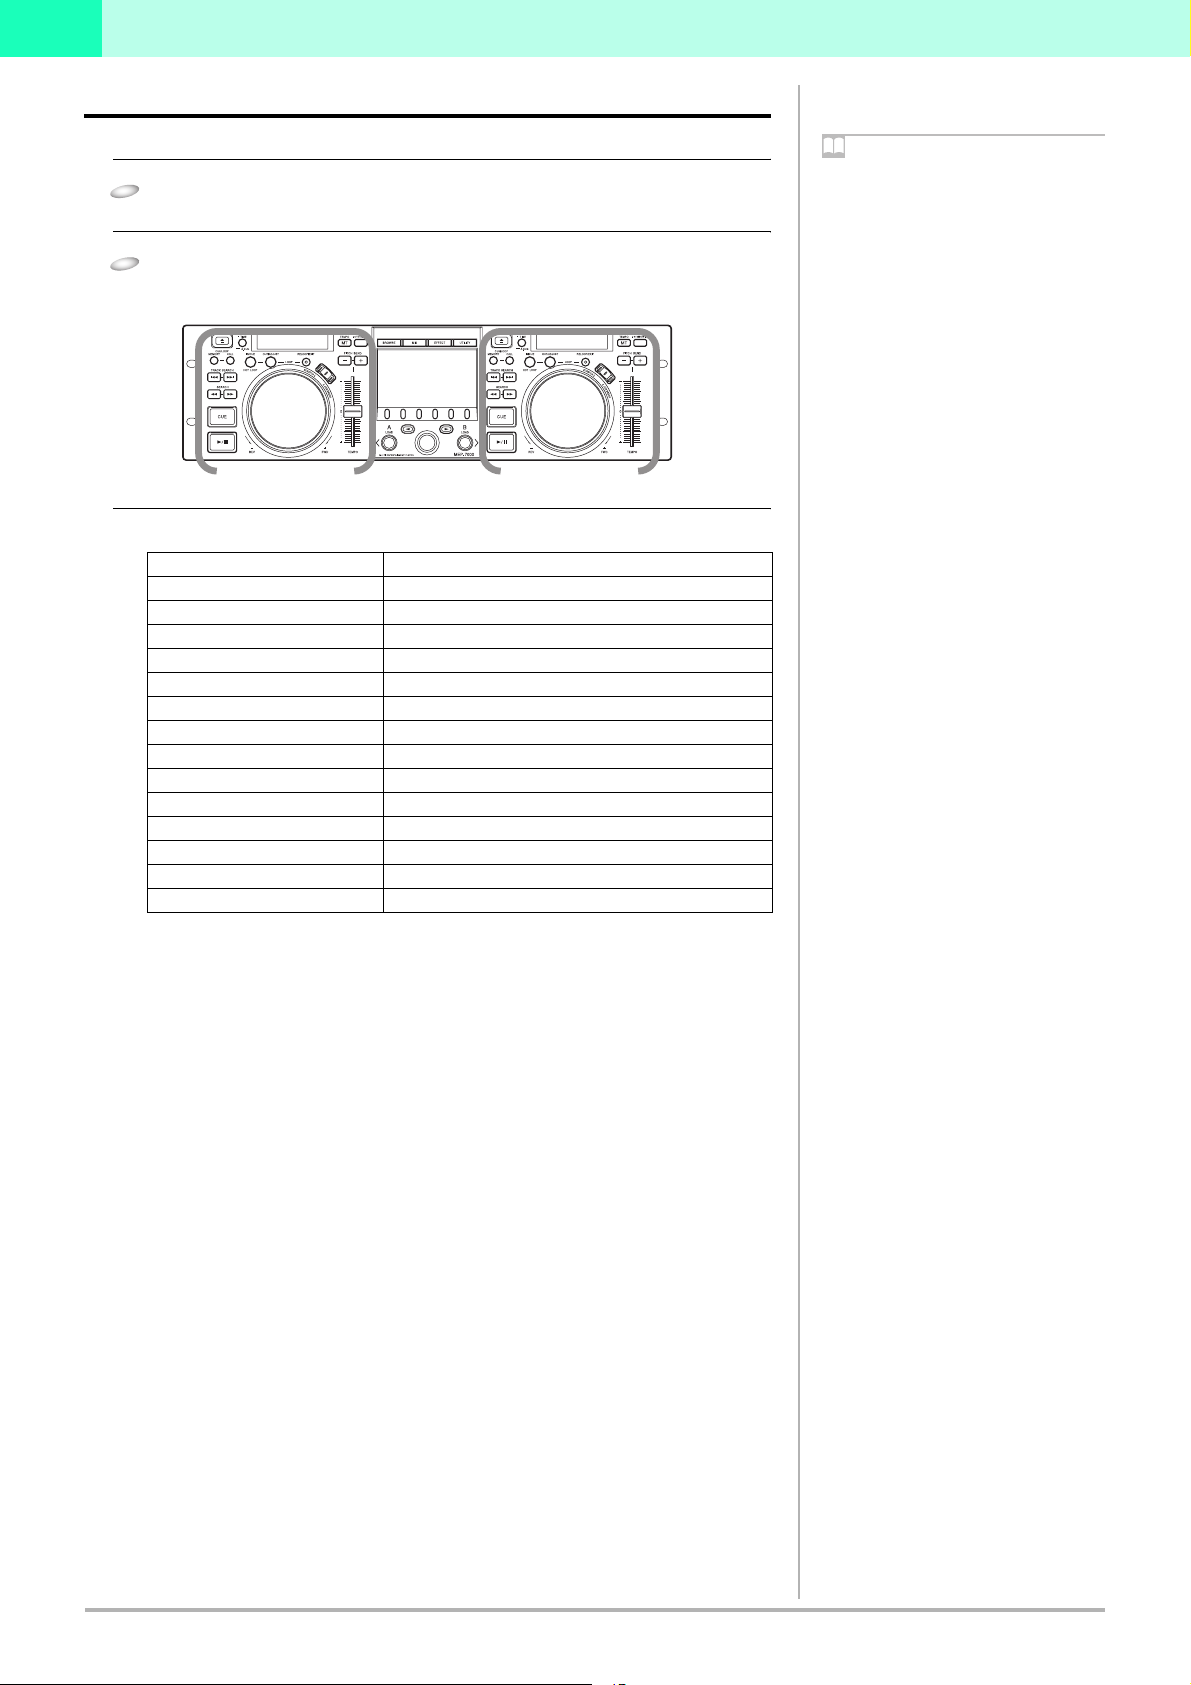
1-2 Operating a DJS Player
You can use your SEP-C1 to operate either Player A or Player B on the [DJ Play] screen.
1 Start up DJS.
• Once DJS starts up, the [DJ Play] screen is displayed.
2 Operate either Controller A or Controller B.
• When you operate the various controls on your SEP-C1, such as the jog dial or the
tempo control slider, it operates the player in the [DJ Play] screen.
Controller A
Functions that are Linked with the [DJ Play] Screen (Player Functions)
SEP-C1 Operation Buttons Controls Linked on the [DJ Play] Screen
PLAY/PAUSE PLAY/PAUSE Button
CUE CUE Button
SEARCH SEARCH Buttons
TRACK SEARCH TRACK SEARCH Buttons
TIME/A.CUE TIME MODE / AUTO CUE Button
IN/CUE IN/CUE Button
OUT/ADJUST OUT/ADJUST
RELOOP/EXIT RELOOP/EXIT
MASTER TEMPO MASTER TEMPO Button
TEMPO ±6/10/16/WIDE
TEMPO TEMPO Control Slider
JOG (–REV/+FWD) Jog Dial
PITCH BEND PITCH BEND Button
SCRATCH SCRATCH Button
TEMPO Control Range Button
For information on functions of buttons, please refer to “Parts and Their Functions”
in the SEP-C1 operating instructions and in the DJS User Manual.
Controller B
Note
Spin (when in scratch mode)
If you spin the jog dial of your SEP-C1 very
quickly, even after you let go of it, it will continue
playing at the speed and in the direction that the
jog dial is rotating until it stops. You cannot do
this spin play with the mouse.
Simultaneous Operations
The following operations can be performed at the
same time from the SEP-C1.
・If you rotate the jog dial while holding down
the SEARCH button, it accelerates the search
play speed.
・While playing a cue point sample, if you hold
down the CUE button, you can operate controls
like the jog dial or the PITCH BEND button.
・When playing a cue point sample, if you hold
down the CUE button and the press the PLAY
button, even if you let go of the CUE button, it
keeps on playing without returning to the cue
point.
・When playing a cue point sample, if you hold
down the CUE button and press a loop
operating button (IN/CUE), the playback point
is recorded as the cue point. When you release
the CUE button, it returns to the cue point and
stands by.
・When you are in the SCRATCH JOG mode, if
you hold down the jog dial and press the CUE
button, the playback point is recorded as the
CUE point. When you release the jog dial, it
returns to the cue point and stands by.
・When in the SCRATCH JOG mode, if you hold
down the jog dial and press a loop operating
button (IN/CUE), the playback point is
recorded as the cue point. Even when you
release the jog dial, it continues playing
without returning to the CUE point.
Unlinked Player Functions
The following SEP-C1 buttons do not link up with
the [DJ Play] screen.
・CUE/LOOP MEMORY Button
・CUE/LOOP CALL Button
・JOG DIAL Button
・EJECT Button
4
DJS Ver. 1.601
Page 5

1
1-3 Operating a DJS List
You can use the SEP-C1 to operate track lists or play lists on the [DJ Play] screen.
1
BROWSE button
2 Center Display
4Select UP button
Rotary Selector
6
7 LOAD A Button
3 Function Buttons (6) :
- [ All ]
- [ (Category 1) ]
- [ (Category 2) ]
- [ (Category 3) ]
- [ (Category 4) ]
- [ (Category 5) ]
5 Select DOWN button
8 LOAD B Button
1 Press the BROWSE button.
2 Operate the track list or play list.
• You can use the controls of your SEP-C1, like the function buttons, the rotary
selector, select DOWN or UP buttons to work with the track list or play list that is
displayed in the [DJ Play] screen.
Connect the USB port on the back of your SEP-C1’s control unit to a USB port on
your computer with a USB cable.
Selecting a category (only with track lists)
The headers that are displayed at the top of the category column in the track list
on the [DJ Play] screen, namely [All] and the five categories, are automatically
assigned to the six function buttons. When you press a function button, the songs
in the corresponding category are displayed.
Aligning the selected line with the song you want to play
SEP-C1 Operation Buttons Functions that are Linked with the [DJ Play] screen
Rotary Selector (Rotate) Rotate it clockwise and the selected line moves downwards.
Rotate it counterclockwise and the selected line moves
upwards.
Select DOWN button (Push)
Select UP button (Push)
Rotary Selector (Rotate) If the selected line is on a category, such as genre, artist/
If a list is closed, it opens the list.
If a list is open, the line moves to the right.
If a list is open, the line moves to the left.
If you move it to the last line on the left, it closes the list.
album, etc., it displays the list of songs in the selected
category.
If the selected line is on a song, the three choices,
[CANCEL], [LOAD A] and [LOAD B] are shown on the
center display.
Note
Track Lists and Play Lists
The format of music lists can be switched on the
[Play Style] settings screen in DJS Preferences.
On the settings menu on the left hand side of
Preferences, click [Play Style] to open the [Play
Style] settings screen.
BROWSE Button
If you press the BROWSE button, the BROWSE
screen is displayed in the center display.
Function Button
In the [BROWSE] screen the function for directly
selecting and displaying a category is assigned.
Note
Display of Category Columns
The category columns on the [DJ Play] screen are
displayed in the order of [All], [Artist-Album],
Top Category and Other Categories.
The display order of the Top Category can be
switched by dragging and dropping it on the [DJ
Play] screen.
Vertical Scrolling
If you move the selected line to the top (or the
bottom), the list will scroll vertically and display
the selected line.
When using a play list
When the format of the music list is in Play List,
the line cannot be moved to the left or right. If you
press the select DOWN button, the list gets wider;
if you press the select UP button, the list gets
narrower.
3 After lining up the selected line on the song you wish to play, press
either the LOAD A or the LOAD B button.
• LOAD A Button (Loads a song) :
The selected song is loaded onto DJS Player A.
• LOAD B Button (Loads a song) :
The selected song is loaded onto DJS Player B.
Using the Rotary Selector
You can use the rotary selector dial for operations instead of pressing the LOAD A
or LOAD B buttons.
1 With the selected line on the song you wish to play, if you press the rotary selector,
the three choices [CANCEL], [LOAD A] and [LOAD B] are displayed in the
center
2 Rotate the rotary selector dial to select [LOAD A] (or [LOAD B]) and then when
you press the rotary selector dial, the selected song is loaded on Player A (or
Player B).
Note
When using a play list
When the format of the music list is in Play List,
the selected song is loaded and goes into standby
mode.
LOAD LOCK Settings
When the SEP-C1’s LOAD LOCK settings is ON,
songs cannot be loaded onto the player that is
currently playing. Songs can only be loaded when
the player is in either standby or paused. For
information on turning the LOAD LOCK setting
ON/OFF, please refer to “USING THE UTILITY”
in your SEP-C1 Operating Instructions.
DJS Ver. 1.601
5
Page 6

1
1-4 Operating the DJS Mixer
You can use the SEP-C1 to operate the mixer on the [DJ Play] screen in DJS.
1 MIX Button
3 Select UP button
Rotary Selector
5
6 LOAD A Button
2 Function Buttons (6) :
-[CUT-IN]
-[ZIP]
-[ECHO]
-[CROSS FADE]
-[BPM SYNC]
-(EMPTY)
4 Select DOWN button
7 LOAD B Button
1 Press the MIX button.
2 Set the mixing parameters.
• Use the function buttons, select UP button, and select DOWN button to set up
mixing.
Functions that are Linked with the [DJ Play] Screen (Mix Functions)
SEP-C1 Operation Buttons Functions that are Linked with the [DJ Play] screen
Function [CUT-IN] MIX Mode : CUT-IN
Function [ZIP] MIX Mode : ZIP
Function [ECHO] MIX Mode : ECHO
Function [CROSS FADE]
Function [BPM SYNC] The playback speed for the slave is merged to that of the
Select UP Button BEAT ADJUST : Player A
Select DOWN Button BEAT ADJUST : Player B
MIX Mode : CROSS FADE
master.
3 Press either the LOAD A or the LOAD B button.
• LOAD A Button (Start Mix or Auto Mix) :
Starts the cross fader in the [DJ Play] screen moving from the Player B side toward
Player A. When Player A is the master, it does not start moving.
While it is moving, if you decide you want to return in the other direction, press the
LOAD B button.
• LOAD B Button (Start Mix or Auto Mix) :
Starts the cross fader in the [DJ Play] screen moving from the Player A side toward
Player B. When Player B is the master, it does not start moving.
While it is moving, if you decide you want to return in the other direction, press the
LOAD A button.
Specify the speed of cross fader movement (beats).
The cross fader movement speed (beats) can be specified for each mix mode. If
you press the rotary selector, the menu for selecting the possible beats is
displayed on the [DJ Play] screen; rotate the rotary selector to your selection and
then press the rotary selector.
Note
DJS Mixer Functions (Internal Mixer)
When you use the DJS mixer functions, it makes
the DJS settings on the internal mixer. For more
information, please refer to sections “1-1 Using
the DJS Mixer Function” and “8-4 Mixer and
Sound Card Settings” in your DJS User’s Manual.
MIX Button
If you press the MIX button, the MIX screen is
displayed in the center display.
Function Buttons
On the [MIX] screen, four mix mode selections
and BPM sync are assigned.
When using an external mixer
Only the BPM sync function can be used when
the DJS mixer is set to an external mixer.
Note
Master & Slave
The first player that starts playing is the master,
the other player becomes the slave. The master
and slave switch roles under the following
circumstances.
・When the cross fader is moved all the way to
the slave side
・When the master is paused while both players
are playing together
・When the song on the master is changed while
both players are playing together
BEAT Adjust
(Player A - Player B)
While listening to the song being played, set the
beat location. Press either the select UP or the
select DOWN button on the first beat of a 4-count.
Switching between MIX and AUTO
MIX
Toggle between Mix and Auto Mix by rightclicking on either the [Mix] or the [Auto Mix]
button on the [DJ Play] screen.
Mix
The cross fader moves in the specified number of
beats.
Auto Mix
The cross fader moves in the specified number of
beats. During Auto Mix, the playback speed and
beat position of the slave are automatically
synchronized with the playback speed and beat
position of the master.
Manual Operation of the Cross Fader
Instead of pressing the LOAD A or the LOAD B buttons, you can rotate the rotary
selector to manually move the cross fader. Rotating it clockwise moves the cross
fader’s slider to the right, counterclockwise to the left.
During a Mix or even an Auto Mix, you can rotate the rotary selector to move the
cross fader manually.
DJS Ver. 1.601
6
Page 7

1
1-5 Operating the DJS Effecter
You can use the SEP-C1 to operate the Effecter on the [DJ Play] screen in DJS.
2 Function Buttons (6) :
1
EFFECT Button
3 Select UP button
Rotary Selector
5
6 LOAD A Button
-[INPUT SELECT]
-[DELAY/ECHO]
-[PAN /TR AN S]
-[FILTER/FRANGER]
-[REVERB/PITCH]
-[AUTO/TAP]
4 Select DOWN button
7 LOAD B Button
1 Press the EFFECT button.
2 Set the effect parameters.
• Use the function buttons, LOAD A button, LOAD B button, select UP and select
DOWN buttons to make the settings.
Functions that are Linked with the [DJ Play] Screen (Effect Functions)
SEP-C1 Operation Buttons Functions that are Linked with the [DJ Play] screen
Function [INPUT SELECT] Switches Channels : Channel A, Channel B, Master
Function [DELAY / ECHO] Select Effect : Delay / Echo
Function [PAN / TRANS] Select Effect : Pan / Trans
Function [FILTER / FRANGER] Select Effect : Filter / Franger
Function [REVERB / PITCH] Select Effect : Reverb / Pitch
Function [AUTO / TAP] Switches BPM Display : AUTO / TAP
LOAD A Button TA P I n p u t
LOAD B Button TA P I n p u t
Select UP Button Effect Beat : Down
Select DOWN Button Effect Beat : Up
3 Operating with the Rotary Selector
• If you rotate the rotary selector, you can adjust the level and depth of effects
(balance between the original music on the selected channel and the sound effect of
the selected effect).
• If you press the rotary dial, the effect comes ON and the sound effect is output on
the selected channel. Pressing it again makes the effect go OFF.
Note
EFFECT Button
If you press the EFFECT button, the EFFECT
sscreen is displayed in the center display.
Function Buttons
In the EFFECT screen, the eight effect selections,
channel switching and BPM display switching
are assigned.
When using an external mixer
The EFFECT screen cannot be used when the DJS
mixer is set to an external mixer.
Note
Channel Switching
Select the channel for applying the sound effects,
from among channel A, channel B and the master.
Effect Selection
You can select from the eight kinds of effects that
are assigned to the four function buttons.
BPM Display Switch
You can select a BPM (beat per minute) display
that is either AUTO or TAP.
BPM (AUTO)
The BPM value that is detected in the song on the
selected channel is displayed.
BPM (TAP)
When you press either the LOAD A or LOAD B
button twice or more in succession, the interval
between presses is displayed as the BPM.
Effect Beat
The cycle (timing) of the sound effects, such as
reverb, transition and echo, is set based on the
displayed BPM. This cycle (timing) can be
adjusted using the select UP or the select DOWN
buttons. However, if the pitch is selected in the
effect selection, you can use the select UP or
select DOWN buttons to adjust the pitch.
DJS Ver. 1.601
7
Page 8

2
Chapter 2 Upgrading SEP-C1
The software that is originally incorporated into hardware products such as the
SEP-C1 and is used to control the hardware is called firmware.
Once you complete the DJS user registration process, you can update the version of
your SEP-C1’s firmware.
Before registering the user and updating the firmware version…
Log on to your computer as a user with administrator privileges and connect the
computer to the internet.
2-1 User Registration
The trial period for using DJS without registering a user is 60 days. Once this period expires,
you will not be able to use DJS. So, please complete user registration within sixty days of
installing DJS. Once you complete user registration, support services such as version updating
become available to you. → ‘Using the Support Site’
1 After clicking [Help] on the DJS menu, click [User Registration].
• Once you click [User Registration], the [User Registration Selections] screen
opens.
2 After the [User Registration Selections] screen opens, click [Online
Registration] and then [Next].
• After you click [Next], the [Online Registration] screen opens.
sa
Warning!
In Windows Vista
Follow the steps below to make the administrator
settings.
1. Log on as a user who has been established as
the administrator for the computer.
2. Right click the [DJS] shortcut icon on the
desktop and then click on [Properties].
3. Click the [Compatibility] tab in the [DJS
Properties].
4. Click on [Run this program as the
administrator.] so the check box is ON.
5. Click [OK] and then close the [DJS Properties]
window.
Note
After the Trial Period Ends
Once the 60 days elapse, DJS will not start up and
a message prompting you to register a user is
displayed.
Note
Privacy Protection Policy
The personal information of our customers is
collected by the Pioneer Group for the
following purposes.
1. In order to provide after sales service on
purchased products.
2. In order to send our customers emails with
important information about our products or
related events.
3. In order to reflect the results of customer
questionnaires in our product design.
If you don’t have internet access (Offline Registration)
If for some reason, such as not having internet access, you cannot register online,
please fill out the User Registration Card with your key code and the necessary
information and mail it in. After we receive your user registration card at our offices, we
will send you a registration ID so you can release the trial period.
‘Trial Period and User Registration’
→
3 Fill in the required information on the [Online Registration] screens
and then click [Send].
• [Online Registration] consists of three screens, namely User Information 1/2, User
Information 2/2 and a Confirmation of Information screen.
• When you click [Send], the information you entered will be registered on our
server and the [Registration ID Complete] message will be displayed.
4 After the [Registration ID Complete] message is displayed, click [OK].
• Once you click [OK], the [Registration ID Complete] message closes.
Pioneer maintains strict controls over the personal
information we collect from our customers, in line
with our Privacy Protection Policy. To view the
Pioneer Privacy Protection Policy, please visit our
home page at (http://www.prodjnet.com/
privacy.html).
Offline Registration (Key Code
Display)
After you click [Offline Registration] and
[Display Key Code], when you click [Next], the
[Key Code] screen opens. Write the key code on
the User Registration Card and mail it.
Offline Registration (Entering the
Registration ID)
After you click [Offline Registration] and [Enter
Registration ID], when you click [Next], the
[Enter your Registration ID] screen opens. Please
enter the registration ID that we sent to you.
Warning!
User Information (Login Name and
Password)
Please take care so you do not forget the Login
Name and Password you entered as user
information because you will need them in order
to receive service, such as for updating software
versions, etc.
8
DJS Ver. 1.601
Page 9

2
2-2 Updating the Firmware
You can use DJS to update the firmware of your SEP-C1 to the latest version.
In order to download the update package and run the update program, connect your
computer to the internet and Log on as a user who has been set up as a computer
administrator.
Before Updating the Version of the Firmware
If you have not complete the user registration process, you will not be able to run the
updater for your SEP-C1.
Consequently, please complete user registration. → ‘2-1 User Registration’
Before starting up DJS, connect your SEP-C1 and your computer with an auxiliary USB
power cable and then connect the SEP-C1 and the computer with a USB cable.
→ ‘1-1 Connecting to your SEP-C1 to a computer’
When you have two or more SEP-C1s
It is not possible to update more than one SEP-C1 at a time. So please connect one
unit to your computer at a time.
1 After clicking [Help] on the DJS menu, click [Version Up].
• Once you click [Version Up], it checks our server for whether there is an update
package or not; if there is, the [Update Package Detected] screen opens.
• If there is not an update package newer than the version currently being used, it is
not possible to update the software.
2 After the [Update Package Detected] screen opens, click the [SEP-C1
Firmware] check box ON and then click [Yes].
• Once you click [Yes], the update package start downloading. Once the download
finishes, the [Starting Version Update] message opens.
Warning!
In Windows Vista
Follow the steps below to make the administrator
settings.
1. Log on as a user who has been established as
the administrator for the computer.
2. Right click the [DJS] shortcut icon on the
desktop and then click on [Properties].
3. Click the [Compatibility] tab in the [DJS
Properties].
4. Click on [Run this program as the
administrator.] so the check box is ON.
5. Click [OK] and then close the [DJS Properties]
window.
Before connecting your SEP-C1
It is necessary to install driver software on your
computer. Please do not connect the SEP-C1 to
your computer until you have finished installing
the driver software. For information on how to
install the driver software, please refer to
“ABOUT THE DRIVER PROGRAM” in the
Operating Instructions of your SEP-C1.
Note
Login Name and Password
Once you access our server, you will prompted for
the Login Name and the Password you specified
when you registered as a user.
Note
Multiple Update Packages
If update packages other than the firmware for
your SEP-C1 are detected, such as for the DJS
software, the manual, SEP-C1 driver software,
and so on, they will be displayed all together in
the [Update Package Detected] screen.
If you click their check box(es) and select them,
the selected update packages are downloaded and
one update runs after another.
Update package detected when DJS
starts up
If you log on to your computer as a user with
administrator privileges and your computer is
connected to the internet and your SEP-C1 is
connected to your computer, every time you start
up DJS, it will check our server to see if there are
any update packages; if there are, the [Update
Package Detected] screen will open.
3 After the [Starting Version Update] message is displayed, click [OK].
• Once you click [OK], the update starts. Once the update finishes, the [Update
Complete] message opens.
4 After the [Update Complete] message is displayed, click [OK].
• Once you click [OK], the [Update Complete] message closes.
5 After closing down DJS, remove both the USB auxiliary power cable
and the USB cable from your SEP-C1 and your computer.
Note
Starting and Finishing Updates
If you selected more than one update package, the
Starting Update and Update Complete messages
are displayed repeatedly. If an update package for
DJS software is selected, DJS will close
temporarily and then start back up automatically.
Checking the Firmware Version
For information on how to check your SEP-C1’s
firmware version, please refer to “USING THE
UTILITY” in the SEP-C1 Operating Instructions.
If you fail to close down DJS and completely
disconnect your SEP-C1 and the computer, the
firmware upgrade will not take effect.
DJS Ver. 1.601
9
Page 10

3
Using the Support Site
Before contacting us about how to use DJS or with technical questions, please check the User’s Manual recorded on the DJS CD-ROM as well
as the FAQ on the DJS support site.
To connect to the DJS support site, click [File] on the DJS menu and then click [Internet].
When using the DJS support site, it is necessary to enter the login name and password you specified when you registered as a DJS user.
When using the DJS support site, please have the following details at hand when you contact us: customer’s name, product name,
installation key, model and specs of the computer (CPU, amount of memory, peripheral devices connected, etc.), version of the operating
system and a detailed description of the problem you are experiencing.
We are only able to provide support for DJS users who have completed user registration. Please take care of the login name and password
you specified during user registration in the same way as the installation key and registration ID so you do not forget them.
* For information about installation of DJS or how to complete user registration, please refer to the User’s Manual that is recorded on
the DJS CD-ROM.
If you experience difficulties in installing the software or completing user registration, please refer to our home page on the internet.
Information on Installation and User Registration
http://www.prodjnet.com/djs/support
* If you have questions about your computer, peripheral devices or technical questions, such as about combinations with products
other than those we support, please check with the manufacturer of the device or contact the sales outlet.
There are DJS version updates scheduled in order to improve the performance and add functionality. By completing the user registration,
you not only gain access to our support site, but it also allows you to download the updater program. By all means update your version of
DJS with this updater program so you can always have the latest version to use.
Trial Period and User Registration
DJS has a trial period, which lasts for 60 days after installing the software. This trial period is the length of time you can user DJS without
registering as a user. Once this trial period expires, you will not be able to enjoy using DJS anymore, so be sure to complete user registration
within 60 days of installing the software.
Online user registration is available for our customers who are connected to the internet.
→ ‘2-1 User Registration’
If you do not have an internet connection, please fill out the required information on the oUser Registration Card and mail it in.
→ ‘Addressing the User Registration Card’
→ ‘User Registration Card’
Precautions about Filling in the User Registration card
• A login name and a password are required in order to make sure of your identity when using our customer support service.
• Please specify an 8 to 10 digit alphanumeric login name and password in the appropriate columns on the user registration card.
• Please affix the Installation Key Sticker for User Registration in the Software Installation Key box on the user registration card.
• Please enter the language you selected when you installed DJS in the Software Language box on the user registration card. The 8
languages are English, French, German, Italian, Dutch, Spanish, Traditional Chinese and Japanese.
• You can check your Key Code on the DJS screen. → ‘Offline Registration (Key Code Display)’
• Transfer the 8 digit alphanumeric code shown on the screen into the Key Code column of the user registration card.
• Please print neatly so it is possible to distinguish between 1 and 7, 1 and the letter I and between 2 and the letter Z. Also, please enter
the number 0 (zero) with a diagonal line so it may be distinguished from the letter O.
After we receive your user registration card at our offices, we will send you a registration ID so you can release the trial period.
→ ‘Offline Registration (Entering the Registration ID)’
10
DJS Ver. 1.601
Page 11

3
Addressing the User Registration Card
The addresses for user registration cards are as follows. Please take care to use the address appropriate to where you live
as each region has its own address.
North America
PIONEER ELECTRONICS (USA) INC.
BUSINESS SOLUTIONS DIVISION, PRO AUDIO GROUP
2265 East 220th Street, Long Beach, CA 90810, U.S.A
Europe
PIONEER EUROPE NV
MULTIMEDIA DIVISION
Pioneer House, Hollybush Hill, Stoke Poges, Slough SL2 4QP U.K.
South Asia, Southeast Asia
PIONEER ELECTRONICS ASIACENTRE PTE. LTD.
MULTIMEDIA DEPARTMENT
253 Alexandra Road, #04-01, Singapore 159936
Hong Kong
PIONEER (HK) LIMITED
SALES AND MARKETNG DEPARTMENT
Suite 901-906, 9th Floor World Commerce Centre, Harbour City 11 Canton Road, Tsim Sha Tsui Kowloon, Hong Kong
Taiwan
PIONEER HIGH FIDELITY TAIWAN CO., LTD.
SALES DIVISION, INDUSTRIAL ELECTRONIC SECTION
13F, No. 44, Sec. 2, Jhongshan N. Road, Taipei City, Taiwan
Oceania
PIONEER ELECTRONICS AUSTRALIA PTY. LTD.
178-184 Boundary Road, Braeside, Victoria 3195, Australia
Middle East, Africa
PIONEER GULF, FZE.
Lob 11-017, Jabel Ali Free Zone, P.O.Box 61226, Jabel Ali, Dubai, U.A.E.
Central & South America
PIONEER INTERNATIONAL LATIN AMERICA, S.A.
SALES DEPARTMENT
Plaza Credicorp Bank Panama, 50 Street, #120, 14th Floor
P.O. Box 0816-01361, Panama, Rep of Panama
Mexico
PIONEER ELCTRONICS DE MEXICO, S.A. DE C.V.
Blvd. Manuel Avila Camacho No. 138, Piso 10, Col. Lomas de
Chapultepec, Mexico, D.F. C.P. 111000 Deleg. Miguel Hidalgo
DJS Ver. 1.601
11
Page 12

User Registration
Questionnaire
Thank you for purchasing this PIONEER product! Please complete the following and address to PIONEER. Information indicated by
bold text is required for registration. When registered, we will send your Registration ID to you by mail. Do not forget these answers.
Login name
(at least 8 and not more than 10 characters)
Password
(at least 8 and not more than 10 characters)
Pioneer Use Only: Your Registration ID
Software Installation Key
Software name and version number
Software language
Key Code
E-mail address
Please paste Installation Key sticker
Pioneer collects information about our customers for the following purposes only.
1. To provide user support services.
2. To provide customers with information on products and events by e-mail.
3. To collect questionnaires, analyze them, and use the results for product planning.
* Private information collected from users is strictly protected in accordance with our Privacy Policy.
* Please see our policy for protecting your personal information, which may be found on our home page at
(http:// www.prodjnet.com/privacy.html).
Questionnaire
Dealer
(Your answers will remain confidential and will be used to make product Improvements, so that we may better serve you.)
Sex
Male Female
Age
Your favorite club
(Location) (Club)
Which of the following best describes yourself ? (Please select one)
Club DJ
Owner (Shop type: )
How long have you been engaged as a DJ?
Mobile DJ Bedroom (Hobby) DJ
Other
year(s)
What kind of music will you play on the DJS?
House
Dance Classic Rock FunkTechno Alternative Break Beat
Garage Latin R&B OtherSwing WaveOld School
Trance Ambient Hip-Hop/Rap JazzJungle/Drum & Bass
What magazines do you subscribe to?
PIONEER CORPORATION
How did you learn about this product?
Catalog
Show
Friend
Music instrument shop Audio shop
PC shop Pioneer homepage
Magazine
Other
Dealer's homepage
Why did you decide to buy this product?
Price
Reliability Design Brand Other
Size Function Easy operation
Thank you for your answers. Once the user registration is complete, we will send you a registration ID that will
allow you override the 60 day trial period. Please write your name, address and phone number below.
Middle NameFirst Name
Last Name
Address
Postal CodeState, Province
Country
FAXTelephone
 Loading...