

Page 1
Black plate (1,1)
Operation Manual
Multi-CD control High power Cassette player with
RDS tuner
KEH-P2030R
KEH-P2033R
English
DeutschEspañol
<CZR2959-A>1
Page 2
Black plate (2,1)
Contents
Thank you for buying this Pioneer product.
Please read through these operating instructions so you will know how to operate
your model properly. After you have finished reading the instructions, put them away
in a safe place for future reference.
Before You Start
About this unit 3
About this manual 3
Precautions 3
In case of trouble 3
Protecting your unit from theft 3
Removing the front panel 3
Attaching the front panel 4
Whats What
Head unit 5
Power ON/OFF
Turning the unit on 7
Selecting a source 7
Turning the unit off 7
Tuner
Listening to the radio 8
Storing and recalling broadcast
frequencies 8
Tuning in strong signals 9
Storing the strongest broadcast
frequencies 9
RDS
Introduction of RDS operation 10
Switching the RDS display 10
Receiving PTY alarm broadcasts 10
Selecting alternative frequencies 10
Using PI Seek 11
Using Auto PI Seek for preset
stations 11
Limiting stations to regional
programming 11
Receiving traffic announcements 11
Responding to the TP alarm 12
PTY list 12
Cassette Player
Playing a tape 13
Radio intercept 13
Multi-CD Player
Playing a CD 14
Changing the display 14
Repeating play 14
Pausing CD playback 15
50-disc multi-CD player 15
Audio Adjustments
Introduction of audio adjustments 16
Using balance adjustment 16
Using the BTB (bass treble booster) 16
Adjusting BTB 17
Adjusting loudness 17
Adjusting source levels 17
Initial Settings
Adjusting initial settings 18
Setting the FM tuning step 18
Switching Auto PI Seek 18
Additional Information
Cassette player 19
Cassette tapes 19
Cleaning the playback head 19
Specifications 20
2
En
<CZR2959-A>2
Page 3
Black plate (3,1)
HHHHHHHHHHHHHH
Before You Start
About this unit
This product complies with the EMC Directives
(89/336/EEC, 92/31/EEC) and CE Marking Directive (93/68/EEC).
The tuner frequencies on this unit are allocated for use in Western Europe, Asia, the
Middle East, Africa and Oceania. Use in other
areas may result in improper reception. The
RDS function operates only in areas with FM
stations broadcasting RDS signals.
About this manual
This unit features a number of sophisticated
functions ensuring superior reception and operation. All the functions have been designed
for the easiest possible use, but many are not
self-explanatory. This operation manual will
help you benefit fully from this productspotential and to maximize your listening enjoyment.
We recommend that you familiarize yourself
with the functions and their operation by reading through the manual before you begin
using this unit. It is especially important that
you read and observe precautions on this
page and in other sections.
Precautions
! The Pioneer CarStereo-Pass is for use only
in Germany.
! Keep this manual handy as a reference for
operating procedures and precautions.
! Always keep the volume low enough so you
can hear sounds outside of the car.
! Protect this product from moisture.
! If the battery is disconnected or dis-
charged, the preset memory will be erased
and must be reprogrammed.
In case of trouble
Should this product fail to operate properly,
contact your dealer or nearest authorized Pioneer Service Station.
Protecting your unit from
theft
The front panel can be detached from the
head unit and stored in the protective case
provided to discourage theft.
! Keep the front panel closed while driving.
Important
! Never use force or grip the display and the
buttons tightly when removing or attaching.
! Avoid subjecting the front panel to excessive
shocks.
! Keep the front panel out of direct sunlight and
high temperatures.
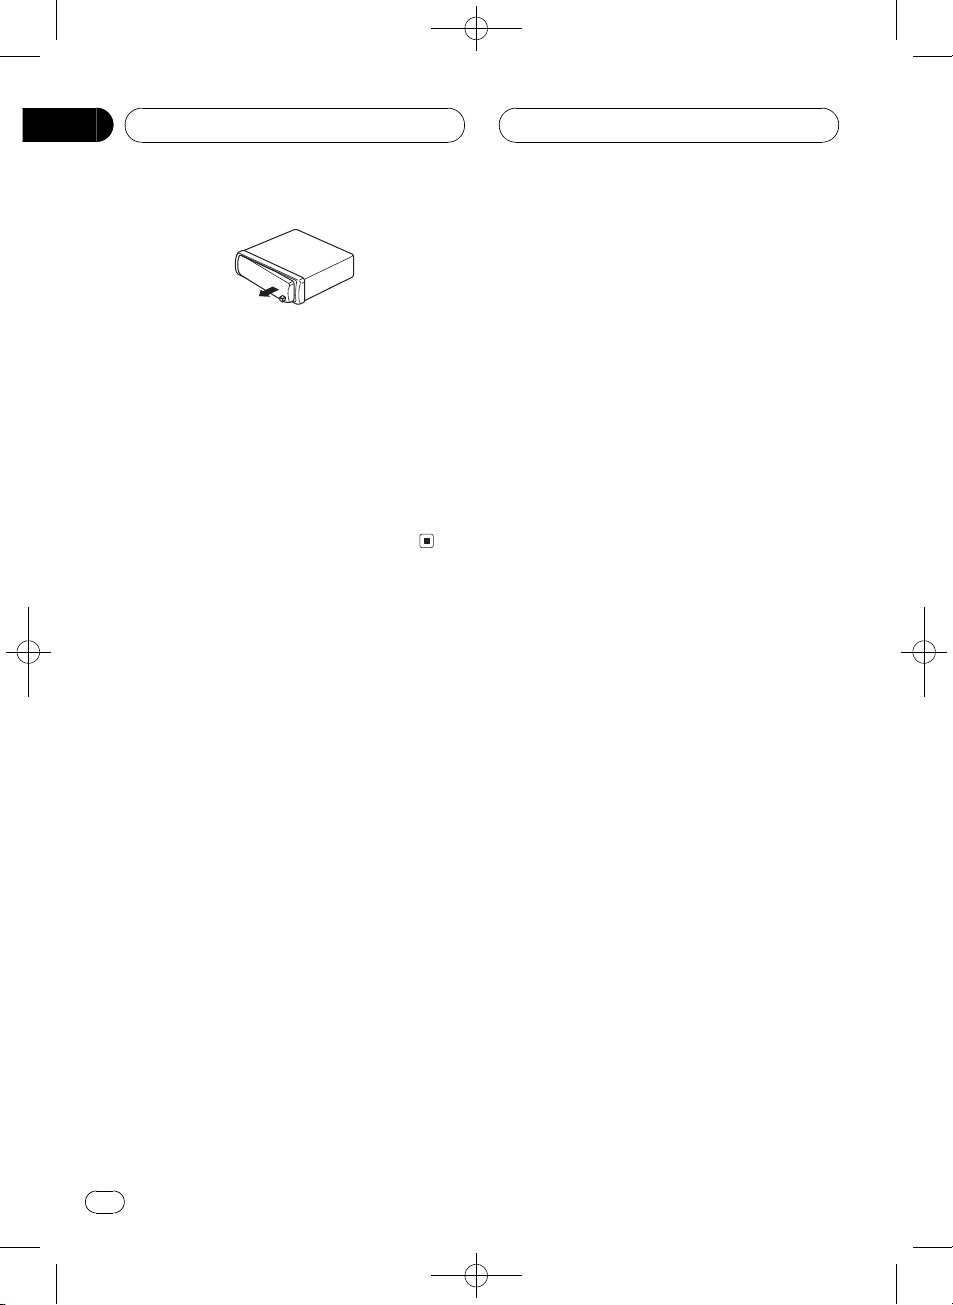
Removing the front panel
1 Press DETACH to release the front
panel.
Press DETACH and the right side of the panel
is released from the head unit.
2 Grab the front panel and remove.
Grab the right side of the front panel and pull
away to the left. The front panel will be detached from the head unit.
Section
01
English
<CZR2959-A>3
En
3
Page 4
Black plate (4,1)
Section
01
Before You Start
3 Put the front panel into the protective
case provided for safe keeping.
Attaching the front panel
1 Place the front panel flat against the
head unit.
2 Press the front panel into the face of
the head unit until it is firmly seated.
HHHHHHHHHHHHHH
4
En
<CZR2959-A>4
Page 5
Black plate (5,1)
abcd
HHHHHHHHHHHHHH
Whats What
3
4
2
1
e
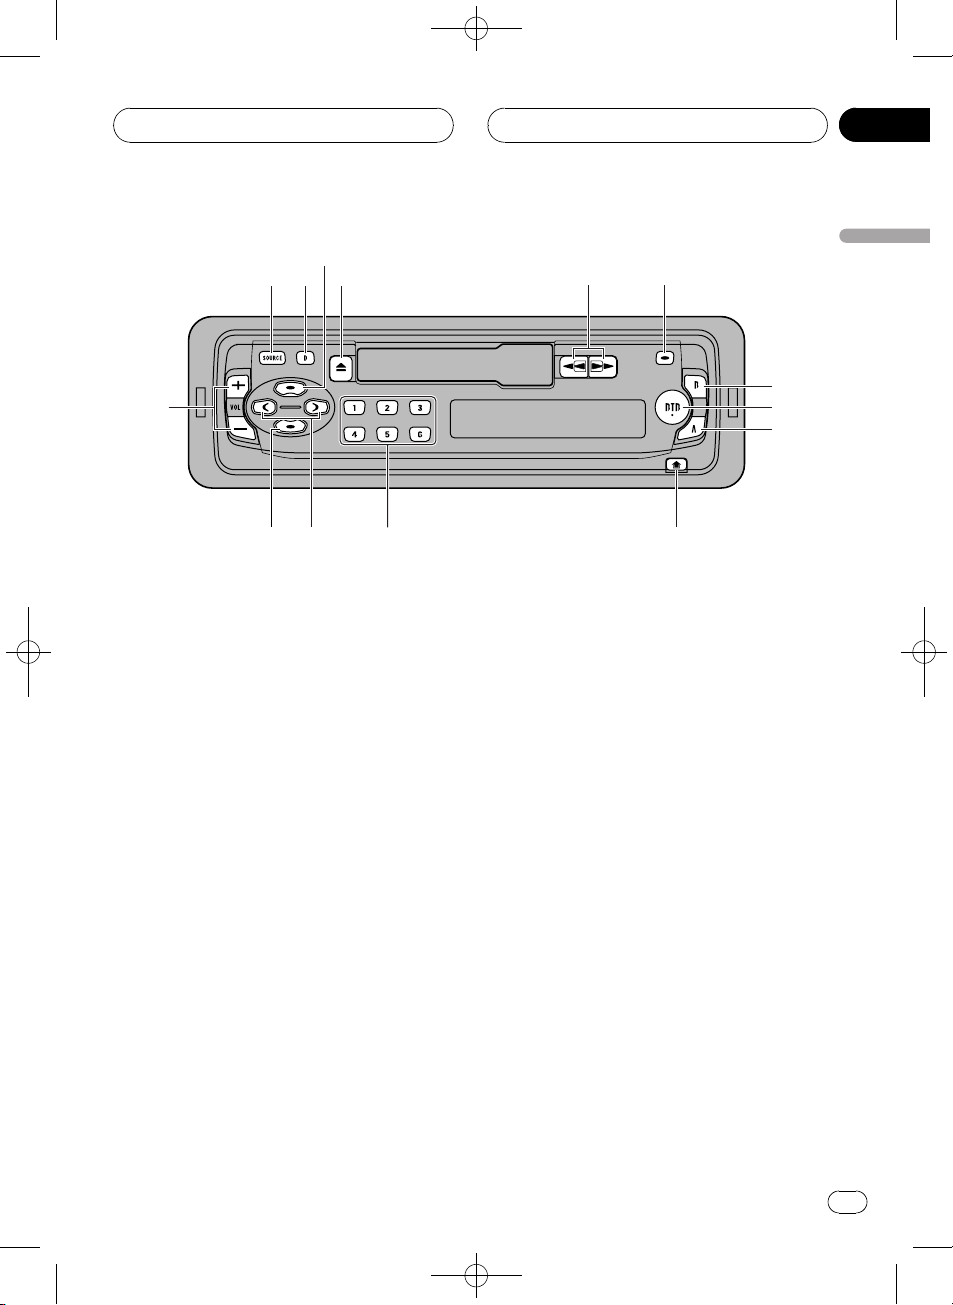
Head unit
1 SOURCE button
This unit is turned on by selecting a source.
Press to cycle through all of the available
sources.
2 DISP/REG button
Press to select different displays.
Press and hold to turn the regional function
on or off.
Also, press to control external unit.
5
6
7
8
9
Press and hold to turn BSM function on or
off when tuner is selected as a source.
Press to turn pause on or off when multi-CD
is selected as a source.
Press and hold to turn repeat on or off when
multi-CD is selected as a source.
Also, press to control external unit.
7 BAND button
Press to select among two FM and MW/LW
bands and cancel the control mode of functions.
Section
02
English
3 TA/AF button
Press to turn TA function on or off. Press
and hold to turn AF function on or off.
4 TAPE EJECT button
Press to eject a tape from your cassette
player.
5 m/n buttons
Press to fast forward or rewind the tape.
6 LOCAL/BSM button
Press to turn local function on or off when
tuner is selected as a source.
8 BTB button
Press to select various BTB (bass treble
booster) setting.
9 AUDIO button
Press to select various sound quality controls.
a DETACH button
Press to remove the front panel from the
head unit.
<CZR2959-A>5
En
5
Page 6
Black plate (6,1)
Section
02
Whats What
b 16 buttons
Press for preset tuning and disc number
search when using a multi-CD player.
Also, press to control external unit.
c c/d buttons
Press to do manual seek tuning. Also used
for controlling functions.
d LOUDNESS button
Press to turn loudness on or off.
e VOLUME button
Press to increase or decrease the
volume.
HHHHHHHHHHHHHH
6
En
<CZR2959-A>6
Page 7
Black plate (7,1)
HHHHHHHHHHHHHH
Power ON/OFF
Turning the unit on
% Press SOURCE to turn the unit on.
When you select a source the unit is turned
on.
Selecting a source
You can select a source you want to listen to.
To switch to the cassette player, load a cassette tape in this unit (refer to page 13).
% Press SOURCE to select a source.
Press SOURCE repeatedly to switch between
the following sources:
TunerCassette playerMulti-CD player
External unit
Notes
! In the following cases, the sound source will
not change:
When a unit corresponding to each source
is not connected to this unit.
When no cassette is set in this unit.
When no magazine is set in the multi-CD
player.
! External unit refers to a Pioneer product (such
as one available in the future) that, although
incompatible as a source, enables control of
basic functions by this unit. Only one external
unit can be controlled by this unit.
! When this units blue/white lead is connected
to the cars auto-antenna relay control terminal, the cars antenna extends when this
units source is turned on. To retract the antenna, turn the source off.
Section
03
English
Turning the unit off
% Press SOURCE and hold until the unit
turns off.
<CZR2959-A>7
En
7
Page 8
Black plate (8,1)
4
Section
04
Tuner
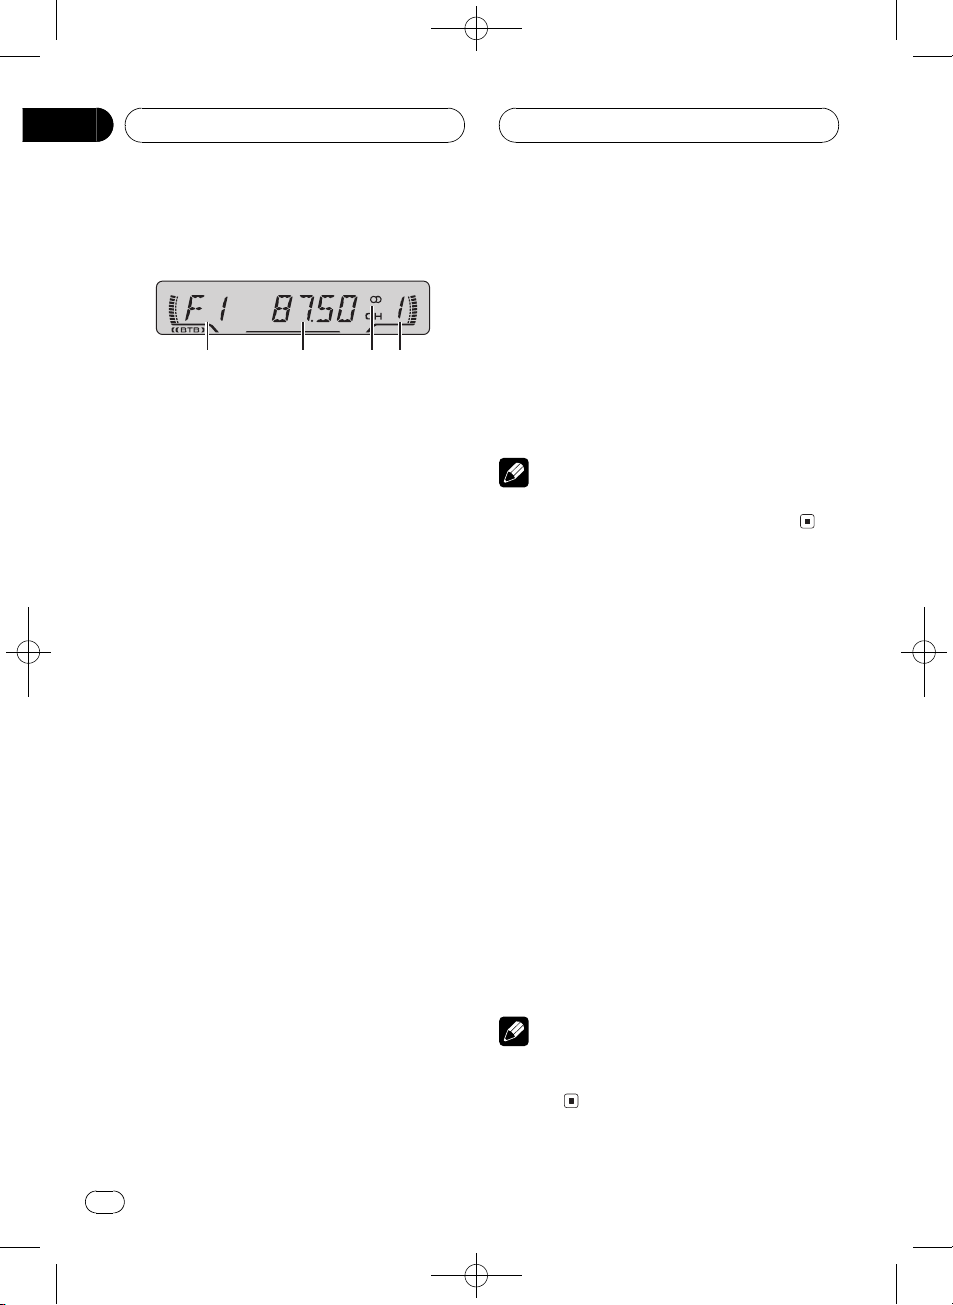
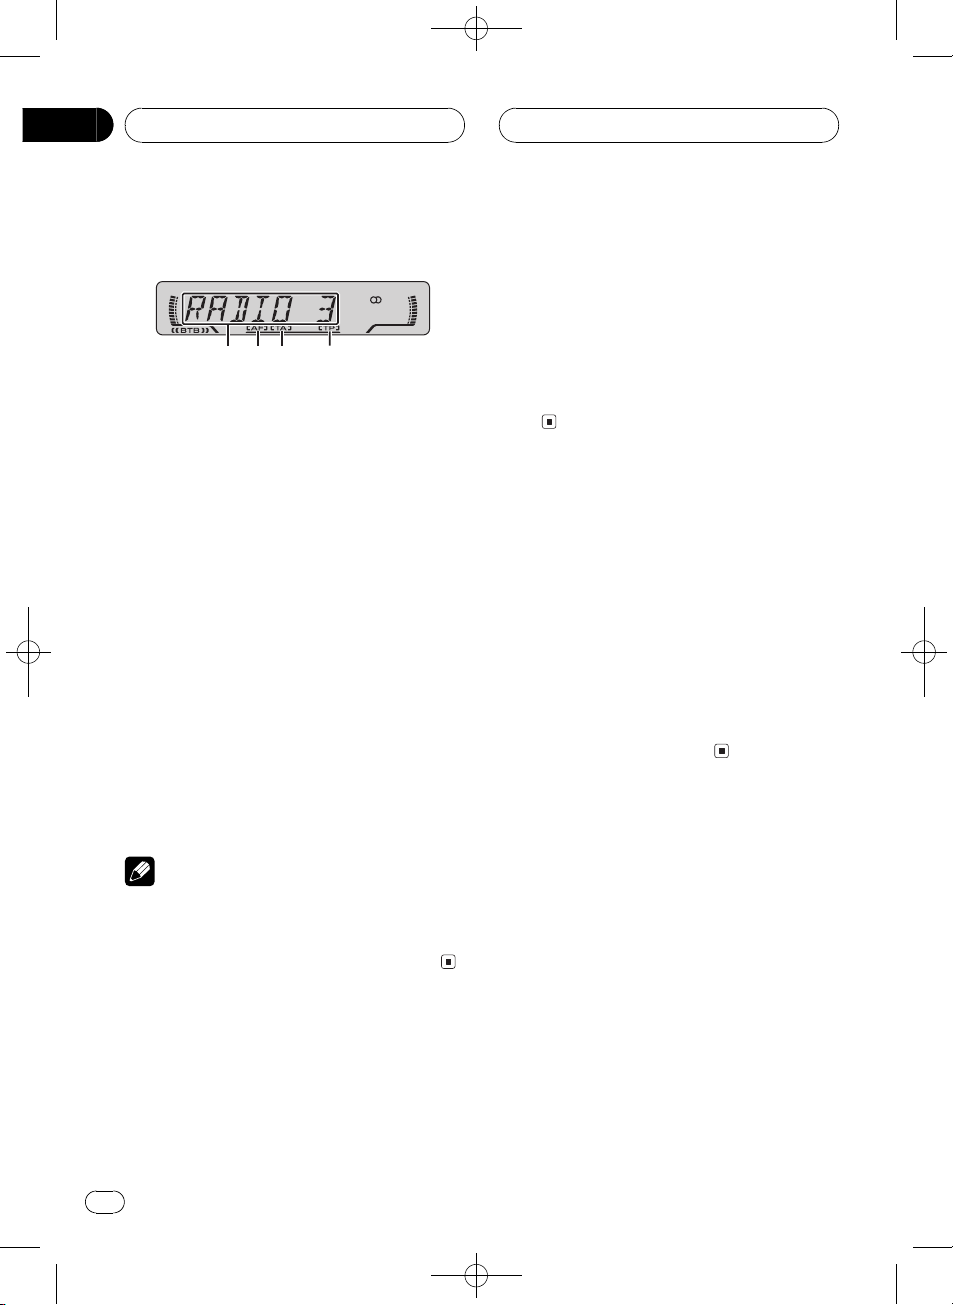
Listening to the radio
1
This units AF (alternative frequencies search)
function can be turned on and off. AF should
be off for normal tuning operation (refer to
page 10).
1 Band indicator
Shows which band the radio is tuned to,
MW, LW or FM.
2 Frequency indicator
Shows to which frequency the tuner is
tuned.
3 Stereo (5) indicator
Shows that the frequency selected is being
broadcast in stereo.
4 Preset number indicator
Shows what preset has been selected.
1 Press SOURCE to select the tuner.
2 Use VOLUME to adjust the sound level.
When you press VOLUME up/+, the volume is
raised and when pressed down/, the volume
is lowered.
3 Press BAND to select a band.
Press BAND until the desired band is displayed, F1, F2 for FM or MW/LW.
4 To perform manual tuning, press c or
d with quick presses.
The frequencies move up or down step by
step.
23
HHHHHHHHHHHHHH
5 To perform seek tuning, press and hold
c or d for about one second and release.
The tuner will scan the frequencies until a
broadcast strong enough for good reception is
found.
# You can cancel seek tuning by pressing either
c or d with a quick press.
# If you press and hold c or d you can skip
broadcasting stations. Seek tuning starts as soon
as you release the buttons.
Note
When the frequency selected is being broadcast
in stereo the stereo (5) indicator will light.
Storing and recalling
broadcast frequencies
If you press any of the preset tuning buttons
16 you can easily store up to six broadcast
frequencies for later recall with the touch of a
button.
% When you find a frequency that you
want to store in memory press a preset
tuning button 16 and hold until the preset
number stops flashing.
The number you have pressed will flash in the
preset number indicator and then remain lit.
The selected radio station frequency has been
stored in memory.
The next time you press the same preset tuning button 16 the radio station frequency is
recalled from memory.
Note
Up to 12 FM stations, 6 for each of the two FM
bands, and 6 MW/LW stations can be stored in
memory.
8
En
<CZR2959-A>8
Page 9
Black plate (9,1)
HHHHHHHHHHHHHH
Tuner
Tuning in strong signals
Local seek tuning lets you tune in only those
radio stations with sufficiently strong signals
for good reception.
1 Press LOCAL/BSM to turn local seek
tuning on.
LOC appears in the display.
2 When you want to return to normal
seek tuning, press LOCAL/BSM to turn local
seek tuning off.
Storing the strongest
broadcast frequencies
BSM (best stations memory) lets you automatically store the six strongest broadcast frequencies under preset tuning buttons 16 and
once stored there you can tune in to those frequencies with the touch of a button.
Section
04
English
% Press LOCAL/BSM and hold until the
BSM turns on.
BSM begins to flash. While BSM is flashing
the six strongest broadcast frequencies will be
stored under preset tuning buttons 16 in
order of their signal strength. When finished,
BSM stops flashing.
# To cancel the storage process, press
LOCAL/BSM.
Note
Storing broadcast frequencies with BSM may replace broadcast frequencies you have saved
using 16.
<CZR2959-A>9
En
9
Page 10
Black plate (10,1)
23 4
Section
05
RDS
Introduction of RDS operation
1
RDS (radio data system) is a system for providing information along with FM broadcasts.
This inaudible information provides such features as program service name, program type,
traffic announcement standby and automatic
tuning, intended to aid radio listeners in finding and tuning in to a desired station.
1 Program service name
Shows the type of broadcast program.
2 AF indicator
Shows when AF (alternative frequencies
search) function is on.
3 TA indicator
Shows when TA (traffic announcement
standby) function is on.
HHHHHHHHHHHHHH
% Press DISP/REG to switch the display.
Press DISP/REG repeatedly to switch between
the following settings:
Program service namePTY information
Frequency
PTY (program type ID code) information is
listed on page 12.
# PTY information and the frequency of the current station appears on the display for eight seconds.
Receiving PTY alarm
broadcasts
PTY alarm is a special PTY code for announcements regarding emergencies such as natural
disasters. When the tuner receives the radio
alarm code, ALARM appears on the display
and the volume adjusts to the TA volume.
When the station stops broadcasting the
emergency announcement, the system returns to the previous source.
! An emergency announcement can be can-
celled by pressing TA/AF.
4 TP indicator
Shows when a TP station is tuned in.
Notes
! RDS service may not be provided by all sta-
tions.
! RDS functions like AF and TA are only active
when your radio is tuned to a RDS station.
Switching the RDS display
When you tune in a RDS station its program
service name is displayed. If you want to know
the frequency you can.
10
En
Selecting alternative
frequencies
If you are listening to a broadcast and the reception becomes weak or there are other problems, the unit will automatically search for a
different station in the same network which is
broadcasting a stronger signal.
! AF is on as a default.
1 Press TA/AF and hold until the AF turns
on.
AF indicator is displayed.
2 Press TA/AF and hold until the AF turns
off.
<CZR2959-A>10
Page 11
Black plate (11,1)
HHHHHHHHHHHHHH
RDS
Notes
! Only RDS stations are tuned in during seek
tuning or BSM when AF is on.
! When you recall a preset station, the tuner
may update the preset station with a new frequency from the stations AF list. (This is only
available when using presets on the F1 band.)
No preset number appears on the display if
the RDS data for the station received differs
from that for the originally stored station.
! Sound may be temporarily interrupted by an-
other program during a AF frequency search.
! When the tuner is tuned to a non-RDS station
the AF indicator flashes.
! AF can be turned on or off independently for
each FM band.
Using PI Seek
If the unit fails to find a suitable alternative frequency, or if you are listening to a broadcast
and the reception becomes weak, the unit will
automatically search for a different station
with the same programming. During the
search, PI SEEK is displayed and the output is
muted. The muting is discontinued after completion of the PI Seek, whether or not a different station is found.
Using Auto PI Seek for preset
stations
When preset stations cannot be recalled, as
when travelling long distances, the unit can
be set to perform PI Seek during preset recall.
! The default setting for Auto PI Seek is off.
See Switching Auto PI Seek on page 18.
Limiting stations to regional
programming
When AF is used to automatically retune frequencies, the regional function limits the se-
lection to stations broadcasting regional
programs.
% Press DISP/REG and hold until the regional function turns on or off.
Notes
! Regional programming and regional networks
are organized differently depending on the
country (i.e., they may change according to
the hour, state or broadcast area).
! The preset number may disappear on the dis-
play if the tuner tunes in a regional station
which differs from the originally set station.
! The regional function can be turned on or off
independently for each FM band.
Receiving traffic
announcements
TA (traffic announcement standby) lets you receive traffic announcements automatically, no
matter what source you are listening to. TA
can be activated for both a TP station (a station that broadcasts traffic information) or an
enhanced other networks TP station (a station
carrying information which cross-references
TP stations).
1 Tune in a TP or enhanced other networks TP station.
When you are tuned into a TP or enhanced
other networks TP station the TP indicator will
light.
2 Press TA/AF to turn traffic announcement standby on.
Press TA/AF and the TA indicator appears in
the display. The tuner will standby for traffic
announcements.
# To turn traffic announcements standby off,
press TA/AF again.
Section
05
English
<CZR2959-A>11
En
11
Page 12
Black plate (12,1)
Section
05
RDS
3 Use VOLUME to adjust the TA volume
when a traffic announcement begins.
When you press VOLUME up/+, the volume is
raised and when pressed down/, the volume
is lowered.
The newly set volume is stored in memory and
recalled for subsequent traffic announcements.
4 Press TA/AF while a traffic announcement is being received to cancel the announcement.
The tuner returns to the original source but remains in the standby mode until TA/AF is
pressed again.
Notes
! The system switches back to the original
source following traffic announcement reception.
! Only TP and enhanced other networks TP sta-
tions are tuned in during seek tuning or BSM
when TA is on.
Responding to the TP alarm
When a TP or enhanced other networksTP
station is lost due to a weak signal the TP indicator is extinguished and a series of short
beeps, about five seconds long, sound to remind you to select another TP or enhanced
other networks TP station.
% When listening to the tuner, tune in another TP or enhanced other networksTP
station.
PTY list
Specific Type of program
NEWS News
AFFAIRS Current affairs
HHHHHHHHHHHHHH
Specific Type of program
INFO General information and advice
SPORT Sports
WEATHER Weather reports/meteorological infor-
mation
FINANCE Stock market reports, commerce,
trading, etc.
POP MUS Popular music
ROCK MUS Contemporary modern music
EASY MUS Easy listening music
OTH MUS Non categorized music
JAZZ Jazz
COUNTRY Country music
NAT MUS National music
OLDIES Oldies music, golden oldies
FOLK MUS Folk music
L.CLASS Light classical music
CLASSIC Serious classical music
EDUCATE Educational programs
DRAMA All radio plays and serials
CULTURE National or regional culture
SCIENCE Nature, science and technology
VARIED Light entertainment
CHILDREN Childrens
SOCIAL Social affairs
RELIGION Religion affairs or services
PHONE IN Phone In
TOURING Travel programs, not for announce-
ments about traffic problems
LEISURE Hobbies and recreational activities
DOCUMENT Documentaries
12
En
<CZR2959-A>12
Page 13
Black plate (13,1)
1
HHHHHHHHHHHHHH
Cassette Player
Playing a tape
1 Tape direction indicator
Shows the direction of the tape transport.
1 Insert a cassette tape into the cassette
loading slot.
Playback will automatically start.
Cassette loading slot
# You can eject a cassette tape by pressing
TAPE EJECT.
Note
Do not insert anything other than a cassette tape
into the cassette loading slot.
Radio intercept
Radio intercept allows you to listen to the
radio during tape fast-forwarding/rewinding.
% Press 6 to turn radio intercept on or
off.
Section
06
English
2 After a cassette tape has been inserted,
press SOURCE to select the cassette player.
Press SOURCE until cassette player is selected
as the source.
3 Use VOLUME to adjust the sound level.
When you press VOLUME up/+, the volume is
raised and when pressed down/, the volume
is lowered.
4 To perform fast forward or rewind,
press m or n.
# You can cancel fast forward or rewind by
pressing m or n in the opposite direction
lightly.
5 To change the direction of the tape
transport, press m and n simultaneously.
<CZR2959-A>13
En
13
Page 14
Black plate (14,1)
1
2
Section
07
Multi-CD Player
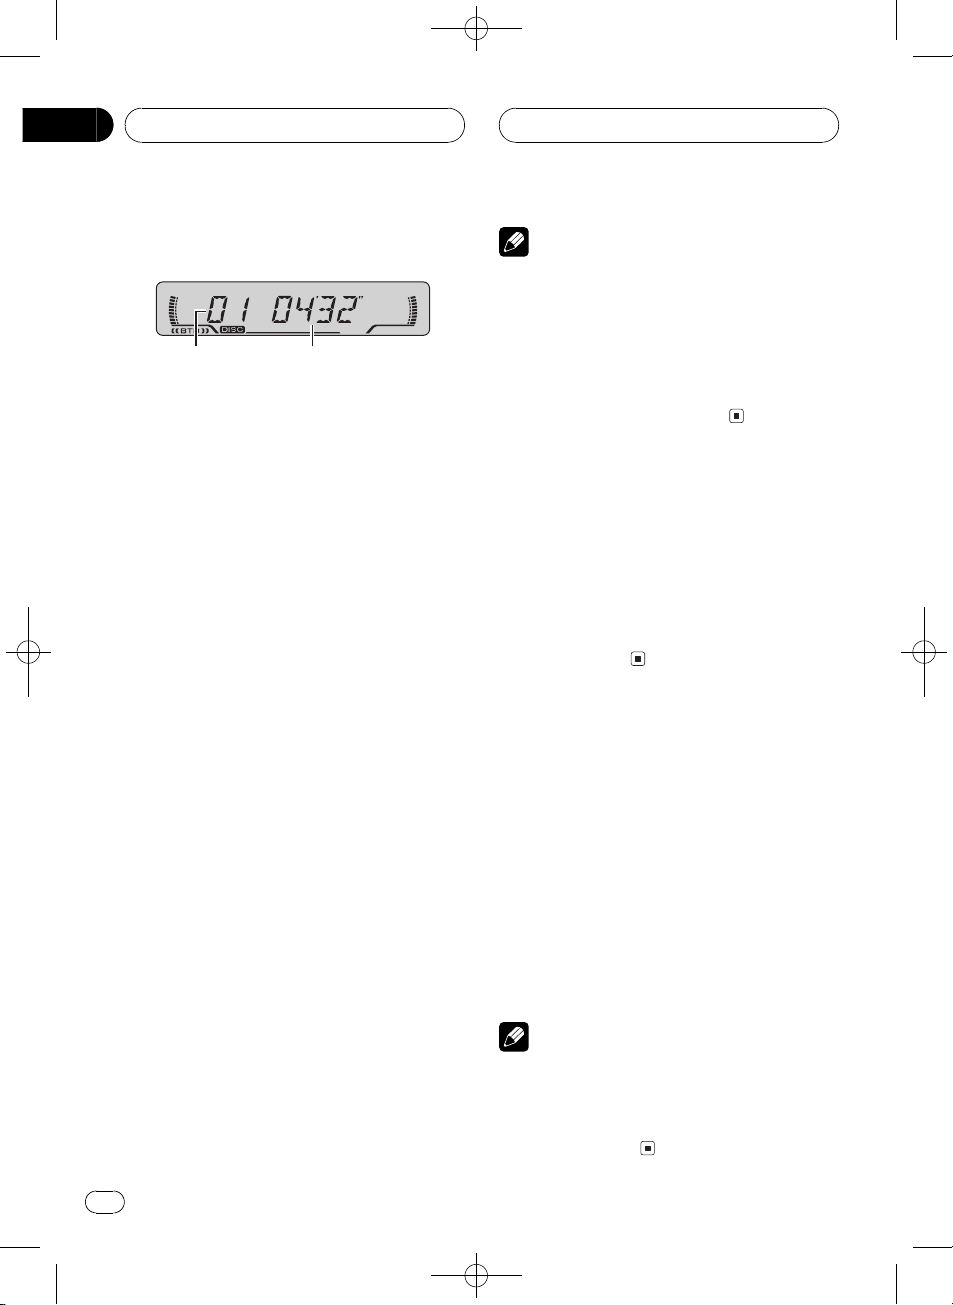
Playing a CD
You can use this unit to control a multi-CD
player, which is sold separately.
1 Disc number indicator
Shows the disc currently playing.
2 Play time indicator
Shows the elapsed playing time of the current track.
1 Press SOURCE to select the multi-CD
player.
2 Use VOLUME to adjust the sound level.
When you press VOLUME up/+, the volume is
raised and when pressed down/, the volume
is lowered.
3 Select a disc you want to listen to with
the 16 buttons.
For discs located at 1 to 6, press the corresponding number button.
If you want to select a disc located at 7 to 12,
press and hold the corresponding numbers
such as 1 for disc 7, until the disc number appears in the display.
4 To perform fast forward or reverse,
press and hold c or d.
HHHHHHHHHHHHHH
Notes
! When the multi-CD player performs the pre-
paratory operations, READY is displayed.
! If the multi-CD player does not operate prop-
erly, an error message such as ERROR-11
may be displayed. Refer to the multi-CD player
owners manual.
! If there are no discs in the multi-CD player ma-
gazine, NO DISC is displayed.
Changing the display
You can change the display.
% Press DISP/REG to switch the display.
Press DISP/REG repeatedly to switch the display in the following order:
Disc number and track number Disc number and play time
Repeating play
There are three repeat play ranges for the
multi-CD player: MCD (multi-CD player repeat), TRK (one-track repeat) and DSC (disc repeat).
% Press and hold LOCAL/BSM repeatedly
to select the desired repeat range.
! MCD Repeat all discs in the multi-CD
player
! TRK Repeat just the current track
! DSC Repeat the current disc
5 To skip back or forward to another
track, press c or d.
Pressing d skips to the start of the next track.
Pressing c once skips to the start of the current track. Pressing again will skip to the previous track.
14
En
Notes
! If you select other discs during repeat play,
the repeat play range changes to MCD.
! If you perform track search or fast forward/re-
verse during TRK, the repeat play range
changes to DSC.
<CZR2959-A>14
Page 15
Black plate (15,1)
HHHHHHHHHHHHHH
Multi-CD Player
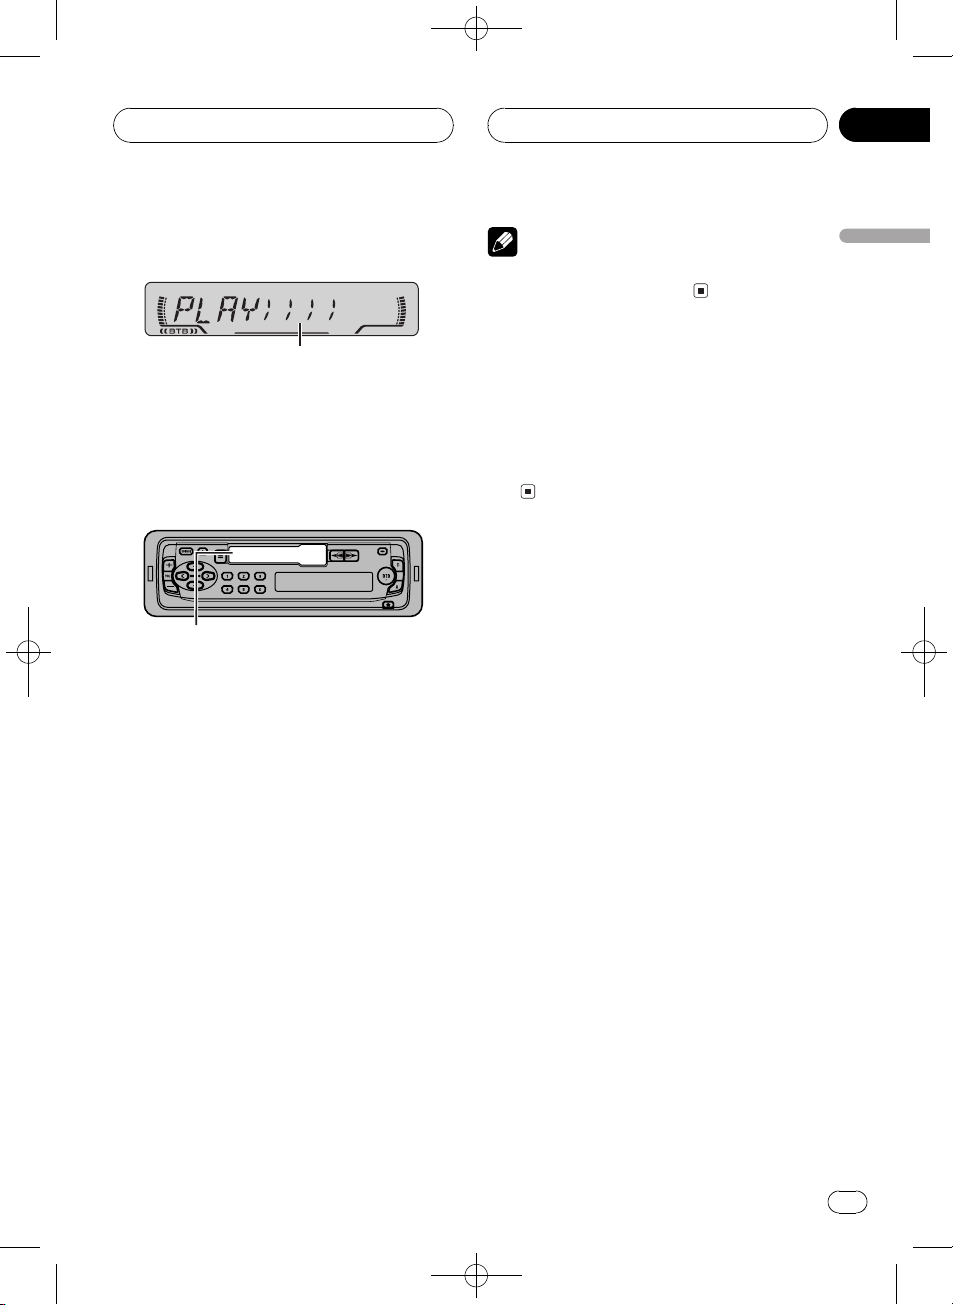
Pausing CD playback
Pause lets you temporarily stop playback of
the CD.
1 Press LOCAL/BSM to turn pause on.
PAUSE appears in the display. Play of the cur-
rent track pauses.
2 Press LOCAL/BSM to turn pause off.
Play will resume at the same point that you
turned pause on.
50-disc multi-CD player
50-disc multi-CD players can not be operated
with this unit.
Section
07
English
<CZR2959-A>15
En
15
Page 16
Black plate (16,1)
1
3
Section
08
Audio Adjustments
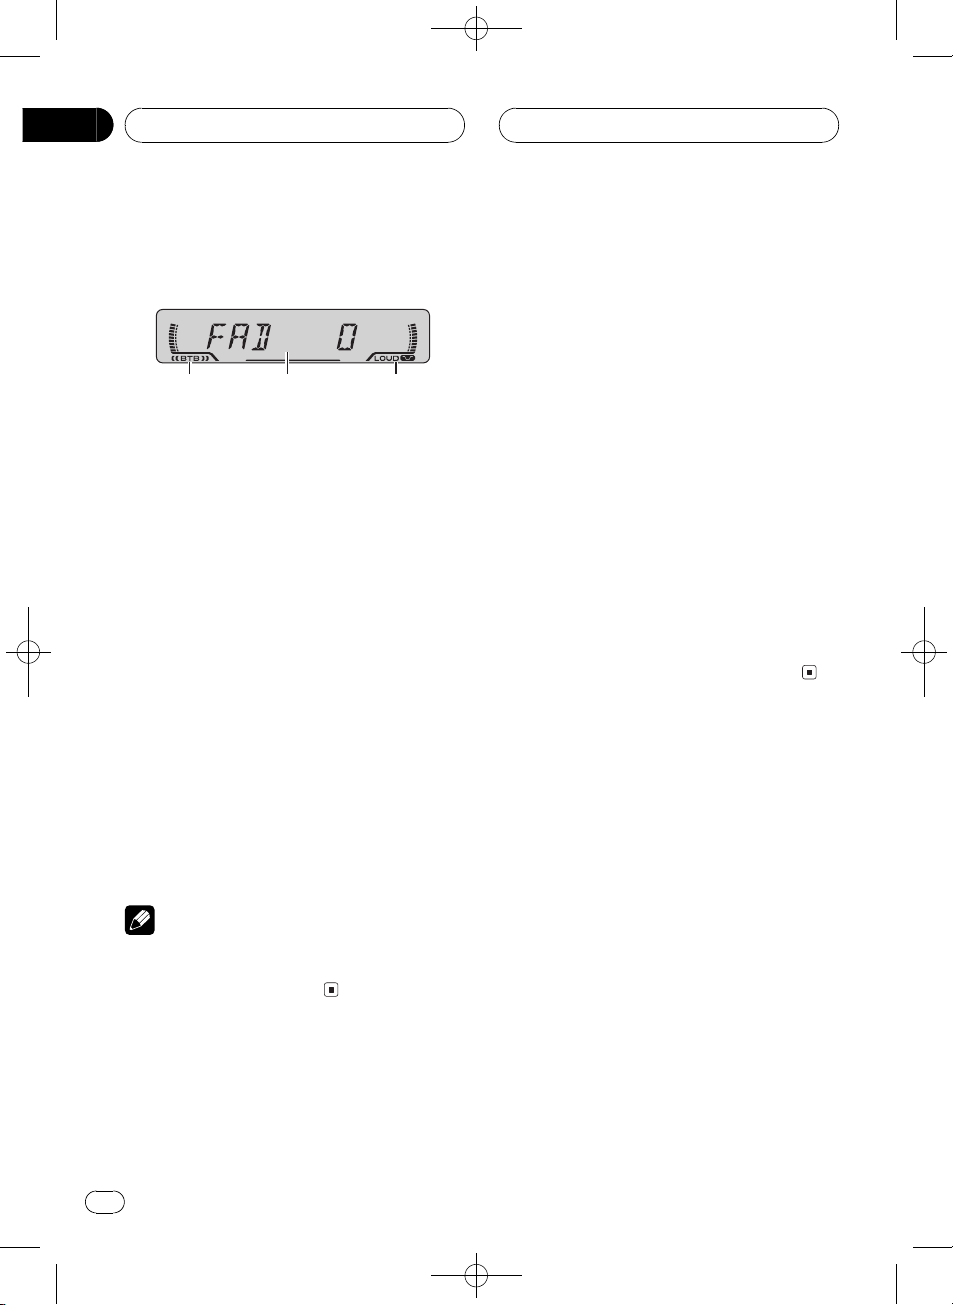
Introduction of audio
adjustments
2
1 BTB indicator
Shows when the BTB other than FLAT is selected.
2 Audio display
Shows the audio adjustments status.
3 LOUD indicator
Appears in the display when loudness is
turned on.
% Press AUDIO to display the audio function names.
Press AUDIO repeatedly to switch between
the following audio functions:
FAD (balance adjustment)BAS (bass adjust-
ment)TRE (treble adjustment)LOUD
(loudness)SLA (source level adjustment)
# When selecting the FM tuner as the source,
you cannot switch to SLA.
# To return to the display of each source, press
BAND.
Note
If you do not operate the audio function within
about 30 seconds, the display is automatically returned to the source display.
HHHHHHHHHHHHHH
1 Press AUDIO to select FAD.
Press AUDIO until FAD appears in the display.
# If the balance setting has been previously adjusted, BAL will be displayed.
2 Press VOLUME up/+ or down/ to adjust front/rear speaker balance.
Each press of VOLUME up/+ or down/
moves the front/rear speaker balance towards
the front or the rear.
FAD F15 FAD R15 is displayed as the front/
rear speaker balance moves from front to rear.
# FAD 0 is the proper setting when only two
speakers are used.
3 Press c or d to adjust left/right speaker
balance.
When you press c or d, BAL 0 is displayed.
Each press of c or d moves the left/right
speaker balance towards the left or the right.
BAL L 9 BAL R 9 is displayed as the left/right
speaker balance moves from left to right.
Using the BTB (bass treble
booster)
There are five stored BTB settings such as
DYNAMIC, POWER, MAX, CUSTOM and
FLAT that can easily recall at any time.
! CUSTOM is an adjusted BTB setting that
you create.
! When FLAT is selected no supplement or
correction is made to the sound. This is
useful to check effect of the BTB settings
by switching alternatively between FLAT
and set BTB setting.
Using balance adjustment
You can select a fader/balance setting that
provides an ideal listening environment in all
occupied seats.
16
En
% Press BTB to select the desired BTB setting.
Press BTB repeatedly to switch between the
following BTB setting:
MAXCUSTOMFLATDYNAMIC
POWER
<CZR2959-A>16
Page 17
Black plate (17,1)
HHHHHHHHHHHHHH
Audio Adjustments
Adjusting BTB
You can adjust the currently selected BTB setting as desired. Adjusted BTB settings are
memorized in CUSTOM.
Adjusting bass
You can adjust the bass level.
1 Press AUDIO to select BAS.
Press AUDIO until BAS appears in the display.
2 Press VOLUME up/+ or down/ to adjust the bass level.
Each press of VOLUME up/+ or down/ increases or decreases the bass level. +6 6 is
displayed as the level is increased or decreased.
Adjusting treble
You can adjust the treble level.
1 Press AUDIO to select TRE.
Press AUDIO until TRE appears in the display.
Section
08
# To turn loudness off, press VOLUME down/.
English
3 Press c or d to select a desired level.
Each press of c or d selects level in the following order:
LOW (low)HI (high)
Note
You can also turn loudness on or off by pressing
LOUDNESS.
Adjusting source levels
SLA (source level adjustment) lets you adjust
the volume level of each source to prevent radical changes in volume when switching between sources.
! Settings are based on the volume level of
the FM tuner, which remains unchanged.
1 Compare the FM tuner volume level
with the level of the source you wish to adjust.
2 Press VOLUME up/+ or down/ to adjust the treble level.
Each press of VOLUME up/+ or down/ increases or decreases the treble level. +6 6
is displayed as the level is increased or
decreased.
Adjusting loudness
Loudness compensates for deficiencies in the
low- and high-sound ranges at low volume.
1 Press AUDIO to select LOUD.
Press AUDIO until LOUD appears in the display.
2 Press VOLUME up/+ to turn loudness
on.
LOUD indicator is displayed.
2 Press AUDIO to select SLA.
Press AUDIO until SLA appears in the display.
3 Press VOLUME up/+ or down/ to adjust the source volume.
Each press of VOLUME up/+ or down/ increases or decreases the source volume.
SLA +4 SLA 4 is displayed as the source volume is increased or decreased.
Notes
! Since the FM tuner volume is the control, it is
not possible to apply source level adjustments
to the FM tuner.
! The MW/LW tuner volume level can also be
adjusted with source level adjustments.
En
<CZR2959-A>17
17
Page 18
Black plate (18,1)
Section
09
Initial Settings
Adjusting initial settings
Initial settings lets you perform initial set up of
different settings for this unit.
1 Press SOURCE and hold until the unit
turns off.
2 Press AUDIO and hold until STEP appears in the display.
Press AUDIO repeatedly to switch between
the following settings:
STEP (FM tuning step)A-PI (Auto PI Seek)
Use the following instructions to operate each
particular setting.
# To cancel initial settings, press BAND.
# You can also cancel initial settings by holding
down AUDIO until the unit turns off.
HHHHHHHHHHHHHH
Note
The tuning step remains at 50 kHz during manual
tuning.
Switching Auto PI Seek
The unit can automatically search for a different station with the same programming, even
during preset recall.
1 Press AUDIO to select A-PI.
Press AUDIO repeatedly until A-PI appears in
the display.
2 Press VOLUME up/+ or down/ to
switch the Auto PI seek on or off.
Pressing VOLUME up/+ or down/ will turn
A-PI on or off and that status will be displayed
(e.g., A-PI :ON).
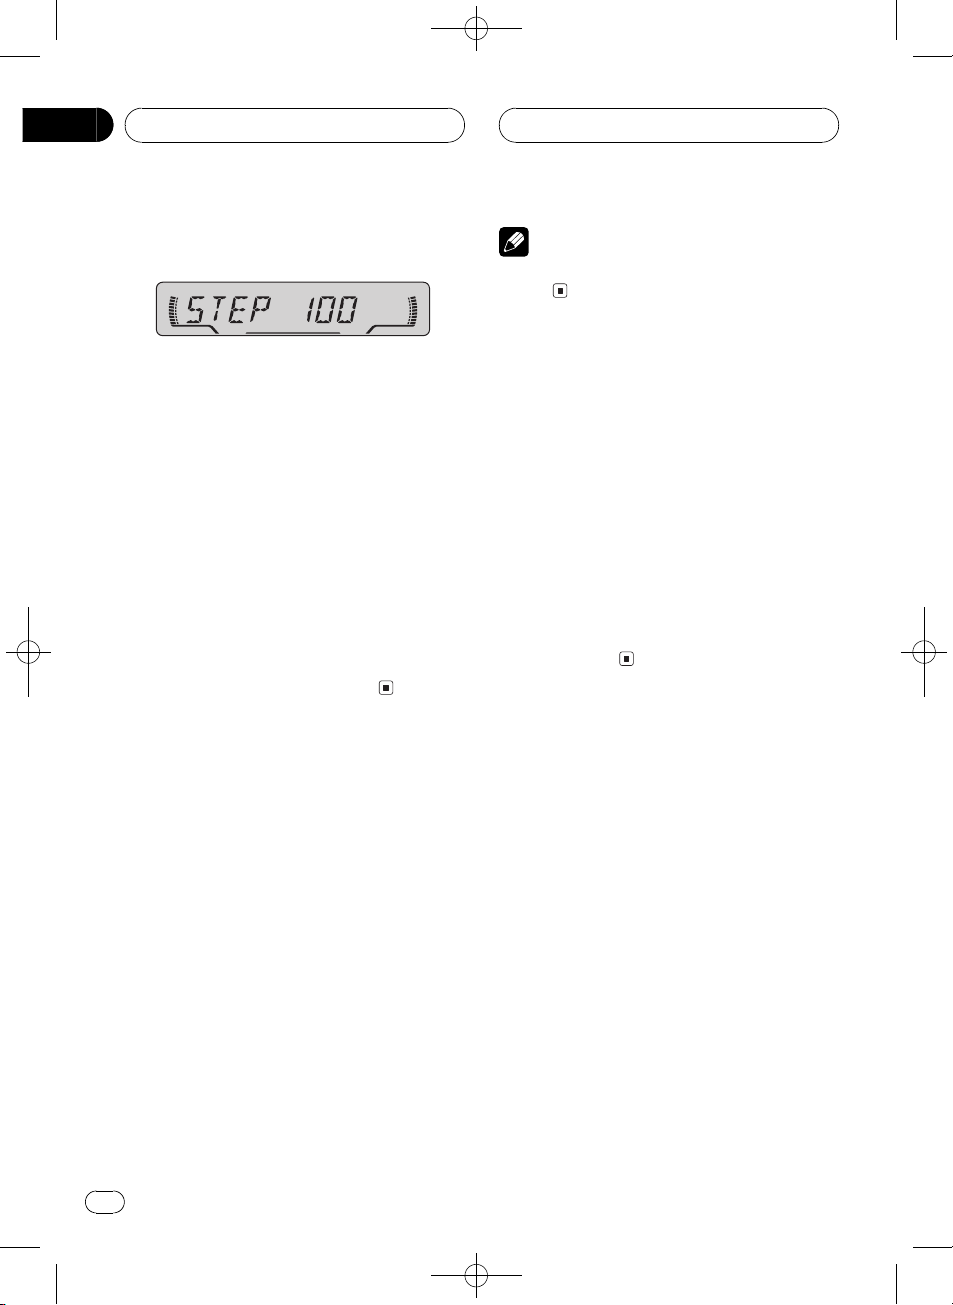
Setting the FM tuning step
Normally the FM tuning step employed by
seek tuning is 50 kHz. When AF or TA is on,
the tuning step automatically changes to 100
kHz. It may be preferable to set the tuning step
to 50 kHz when AF is on.
1 Press AUDIO to select STEP.
Press AUDIO repeatedly until STEP appears in
the display.
2 Press c or d to select the FM tuning
step.
Pressing c or d will switch the FM tuning
step between 50 kHz and 100 kHz while AF or
TA is on. The selected FM tuning step will appear in the display.
18
En
<CZR2959-A>18
Page 19
Black plate (19,1)
HHHHHHHHHHHHHH
Additional Information
Cassette player
! A loose or warped label on a cassette tape
may interfere with the eject mechanism of
the unit or cause the cassette to become
jammed in the unit. Avoid using such
tapes or remove such labels from the cassette before attempting use.
! Be sure to eject tape when the vehicles
ignition is turned off. Leaving the tape in
the unit can deform the pinch roller causing wow and flutter during tape
playback.
Cassette tapes
! Loose tapes should be rewound with the
aid of a pencil and unevenly wound tapes
rewound with the use of the fast forward
function.
! A loose, torn or warped label on a cassette
tape can jam the cassette player. Do not
use cassette tapes with loose, torn or
warped labels.
! Cassette tapes longer than C-90 (90-minute
tapes) can cause the tape to jam in the cassette player. Do not use tapes longer than
C-90.
! Cassette tapes exposed to high tempera-
tures may warp and jam the cassette
player. Keep cassettes out of direct sunlight
or places where there are high temperatures.
! Store unused tapes in a tape case where
there is no danger of them becoming
loose, dirty or dusty.
Cleaning the playback head
If the head becomes dirty, the sound quality
will get bad and there will be sound dropouts
and other problems. If you have any of these
problems the head may need cleaning.
Appendix
English
<CZR2959-A>19
En
19
Page 20
Black plate (20,1)
Appendix
Additional Information
Specifications
General
Power source ............................. 14.4 V DC (10.8 15.1 V al-
lowable)
Grounding system ................... Negative type
Max. current consumption
..................................................... 8.5 A
Dimensions (W × H × D):
Chassis ............................... 1 78 × 50 × 155 mm
Nose ..................................... 188 × 58 × 20 mm
Weight .......................................... 1.4 kg
Audio
Maximum power output ....... 40 W × 4
Continuous power output ...22 W × 4 (DIN 45324,
+B=14.4 V)
Load impedance ...................... 4 W (4 8 W allowable)
Preout max output level/output impedance
..................................................... 2.2 V/1 kW
Bass/Treble:
Bass
Freq ue ncy ................ 100 Hz
Gain ............................ ±12dB
Treble
Freq ue ncy ................ 10k Hz
Gain ............................ ±12dB
Loudness contour
Low ....................................... +7 dB (100 Hz), +4 dB (10
kHz)
High ..................................... +10 dB (100 Hz), +6.5 dB
(10 kHz)
(volume: 30 dB)
HHHHHHHHHHHHHH
Distortion ..................................... 0.3 % (at 65 dBf, 1 kHz,
stereo)
Frequency response ............... 30 15,000 Hz (±3 dB)
Stereo separation .................... 40 dB (at 65 dBf, 1 kHz)
MW tuner
Freq ue ncy range ...................... 531 1,602 kHz (9 kHz)
Usable sensitivity ..................... 18 µV (S/N: 20 dB)
Selectivity .................................... 50 dB (± 9 kHz)
LW tuner
Freq ue ncy range ...................... 153 281 kHz
Usable sensitivity ..................... 30 µV (S/N: 20 dB)
Selectivity .................................... 50 dB (± 9 kHz)
Note
Specifications and the design are subject to possible modifications without notice due to improvements.
Cassette player
Tape ................................................ Compact cassette tape (C-
Tape speed .................................. 4.8 cm/sec
Fast forward/rewinding time
..................................................... Approx. 100 sec (C-60)
Wow & flutter ............................. 0.13 % (WRMS)
Frequency response ............... 30 16,000 Hz (±3 dB)
Stereo separation .................... 45 dB
Signal-to-noise ratio ............... 52 dB (IEC -A network)
30 C-90)
FM tuner
Freq ue ncy range ...................... 87.5 108.0 MHz
Usable sensitivity ..................... 9 dBf (0.8 µV/75 W, mono,
50 dB quieting sensitivity ..... 15 dBf (1.7 µV/75 W, mono)
Signal-to-noise ratio ............... 70 dB (IEC -A network)
20
En
S/N: 30 dB)
<CZR2959-A>20
Page 21

Black plate (21,1)
Contenido
Gracias por haber comprado este producto Pioneer.
Sírvase leer con detención estas instrucciones sobre la operación de modo que
aprenda el modo de operar correctamente su modelo. Una vez que haya leído las in-
strucciones, consérvelas en un lugar seguro para consultarlas en el futuro.
Antes de empezar
Acerca de este producto 22
Acerca de este manual 22
Precauciones 22
En caso de problemas 22
Protección del producto contra robo 22
Extracción del panel delantero 22
Colocación del panel delantero 23
Qué es cada cosa
Unidad principal 24
Encendido y Apagado
Encendido del sistema 26
Selección de una fuente 26
Apagado del sistema 26
Sintonizador
Audición de radio 27
Almacenaje y llamada de frecuencias 27
Sintonización de señales fuertes 28
Almacenaje de las frecuencias de radio más
fuertes 28
RDS
Introducción a la operación RDS 29
Cambio de la visualización RDS 29
Recepción de transmisiones de alarma
PTY 29
Selección de frecuencias alternativas 30
Uso de la búsqueda PI 30
Uso de la búsqueda PI para emisoras
preajustadas 30
Limitación de las emisoras para
programación regional 30
Recepción de anuncios de tráfico 31
Respuesta a la alarma TP 31
Lista PTY 31
Lector de cassette
Reproducción de una cinta 33
Intercepción de radio 33
Lector de Multi-CD
Reproducción de un CD 34
Cambio de la visualización 34
Repetición de reproducción 34
Pausa de la reproducción de un CD 35
Lector de Multi-CD de 50 discos 35
Ajustes de audio
Introducción a los ajustes de audio 36
Uso del ajuste del balance 36
Uso de la función BTB (intensificación de
graves y agudos) 36
Ajuste de BTB 37
Ajuste de la sonoridad 37
Ajuste de los niveles de la fuente 37
Ajustes iniciales
Configuración de los ajustes iniciales 39
Ajuste del paso de sintonización de FM 39
Cambio de la búsqueda PI automática 39
Informaciones adicionales
Lector de cassette 40
Cassettes 40
Limpieza de la cabeza de reproducción 40
Especificaciones 41
Español
<CZR2959-A>21
21
Es
Page 22

Black plate (22,1)
Sección
01
Antes de empezar
Acerca de este producto
Este producto cumple con las Directivas EMC
(89/336/CEE, 92/31/CEE) y Directiva de Marcación CE (93/68/CEE).
Las frecuencias del sintonizador en este producto están asignadas para uso en Europa
Occidental, Asia, Oriente Medio, Africa y
Oceanía. El uso en otras áreas puede resultar
en una recepción incorrecta. Las funciones
RDS funcionan solamente en áreas con emisoras FM que transmiten señales RDS.
Acerca de este manual
Este producto viene con diversas funciones
sofisticadas que aseguran una recepción y operación superior. Todas las funciones han sido
proyectadas para facilitar su uso al máximo,
pero muchas funciones requieren explicación.
El propósito de este manual de instrucciones
es ayudarle a beneficiarse completamente del
potencial del producto y maximizar su disfrute
de audición.
Se recomienda familiarizarse con las funciones y operaciones leyendo con detención el
manual antes de usar el producto. Es especialmente importante leer y observar las precauciones en esta página y en otras secciones.
HHHHHHHHHHHHHH
! Proteja este producto de la humedad.
! Si se desconecta o se descarga la batería,
la memoria preajustada se borrará y se
debe reprogramarla.
En caso de problemas
Cuando este producto no funciona correctamente, comuníquese con su concesionario o
centro de servicio Pioneer autorizado.
Protección del producto
contra robo
El panel delantero se puede extraer de la unidad principal y se almacenar en su caja protectora proveída como una medida antirrobo.
! Mantenga cerrado el panel delantero mien-
tras conduce.
Importante
! Nunca presione ni agarre la pantalla y los bo-
tones con fuerza excesiva al extraer o colocar
el panel delantero.
! Evite sujetar el panel delantero a impactos ex-
cesivos.
! Mantenga el panel delantero fuera del al-
cance de los rayos de luz del sol o alta temperaturas.
Precauciones
! El CarStereo-Pass Pioneer es para uso sola-
mente en Alemania.
! Mantenga este manual a mano como una
referencia para los procedimientos de operación y precaución.
! Siempre mantenga el volumen suficiente-
mente bajo de modo que pueda escuchar
los sonidos fuera del coche.
22
Es
Extracción del panel delantero
1 Presione DETACH para soltar el panel
delantero.
Presione DETACH y el lado derecho del panel
se suelta de la unidad principal.
<CZR2959-A>22
Page 23

Black plate (23,1)
HHHHHHHHHHHHHH
Antes de empezar
2 Agarre el panel delantero y extráigalo.
Agarre el lado derecho del panel delantero y
tire de él hacia la izquierda. El panel delantero
sale de la unidad principal.
3 Coloque el panel delantero en su caja
protectora proveída para almacenamiento
seguro.
Colocación del panel delantero
1 Coloque el panel delantero de modo
plano contra la unidad principal.
2 Presione el panel delantero hacia la
cara de la unidad principal hasta que se
asiente firmemente.
Sección
01
Español
<CZR2959-A>23
23
Es
Page 24

Black plate (24,1)
abcd
Sección
02
Qué es cada cosa
e
Unidad principal
1 Botón SOURCE
Este sistema se activa seleccionando una
fuente. Presione para pasar por todas las
fuentes disponibles.
2 Botón DISP/REG
Presione para seleccionar las diferentes visualizaciones.
Mantenga presionado para activar o desactivar la función regional.
Presione también para controlar la unidad
externa.
3 Botón TA/AF
Presione para activar o desactivar la función
TA. Presione y mantenga presionado para
activar o desactivar la función AF.
4 Botón TAPE EJECT
Presione para expulsar una cinta del lector
de cassette.
5 Botones m/n
Presione para el avance rápido o retroceso.
1
2
HHHHHHHHHHHHHH
3
4
6 Botón LOCAL/BSM
7 Botón BAND
8 Botón BTB
5
6
7
8
9
Presione para activar o desactivar la función
local cuando se selecciona el sintonizador
como la fuente.
Presione y mantenga presionado para activar o desactivar la función BSM cuando se
selecciona el sintonizador como la fuente.
Presione para activar o desactivar la pausa
cuando se selecciona el lector de Multi-CD
como la fuente.
Presione y mantenga presionado para activar o desactivar la reproducción repetida
cuando se selecciona el lector de Multi-CD
como la fuente.
Presione también para controlar la unidad
externa.
Presione para seleccionar entre dos bandas
FM y la banda MW/LW, y cancelar el modo
de control de funciones.
Presione para seleccionar los diversos
ajustes de BTB (intensificación de graves y
agudos).
24
Es
<CZR2959-A>24
Page 25

Black plate (25,1)
HHHHHHHHHHHHHH
Qué es cada cosa
9 Botón AUDIO
Presione para seleccionar los diversos controles de calidad del sonido.
a Botón DETACH
Presione para extraer el panel delantero de
la unidad principal.
b Botones 16
Presione para la sintonización preajustada y
búsqueda de número de disco cuando utilice un lector Multi-CD.
Presione también para controlar la unidad
externa.
c Botones c/d
Presione para realizar la sintonización por
búsqueda manual. También se usan para
controlar las funciones.
d Botón LOUDNESS
Presione para activar o desactivar la sonoridad.
Sección
02
Español
e Botón VOLUME
Presione para aumentar o disminuir el
volumen.
<CZR2959-A>25
25
Es
Page 26

Black plate (26,1)
Sección
03
Encendido y Apagado
Encendido del sistema
% Presione SOURCE para encender el sistema.
Cuando se selecciona una fuente, la unidad
se encende.
Selección de una fuente
Puede seleccionar la fuente que desea escuchar. Para cambiar al lector de cassette, coloque un cassette en esta unidad (refiérase a la
página 33).
% Presione SOURCE para seleccionar una
fuente.
Presione SOURCE repetidamente para cambiar entre las siguientes fuentes:
SintonizadorLector de cassetteLector
de Multi-CDUnidad externa
HHHHHHHHHHHHHH
Apagado del sistema
% Presione SOURCE hasta que se apague
el sistema.
Notas
! En los siguientes casos, la fuente sonora no
cambiará:
Cuando el producto correspondiente a
cada fuente no está conectado a este sistema.
Cuando no hay una cinta cargada en el
sistema.
Cuando no hay un cargador cargado en el
lector de Multi-CD.
! Por unidad externa se entiende un producto
Pioneer (como el que pueda estar disponible
en el futuro) que, si bien es incompatible
como fuente, permite que este sistema controle funciones básicas. Sólo una unidad externa se puede controlar con este sistema.
! Si el cable azul/blanco de este producto está
conectado al terminal de control de relé de
antena automática del automóvil, la antena
del automóvil se extiende cuando se enciende
el producto. Para retraer la antena, apague el
producto.
26
Es
<CZR2959-A>26
Page 27

Black plate (27,1)
4
HHHHHHHHHHHHHH
Sintonizador
Audición de radio
1
La función AF (búsqueda de frecuencias alternativas) de este producto se puede activar y
desactivar. Se debe desactivar la función AF
para la operación de sintonización normal (refiérase a la página 30).
1 Indicador de banda
Visualiza cuál banda la radio está sintonizada: MW, LW o FM.
2 Indicador de frecuencia
Visualiza la frecuencia en que el sintonizador está sintonizado.
3 Indicador de estéreo (5)
Visualiza que la frecuencia seleccionada
está siendo transmitida en estéreo.
4 Indicador del número preajustado
Visualiza la emisora preajustada seleccionada.
1 Presione SOURCE para seleccionar el
sintonizador.
2 Utilice VOLUME para ajustar el nivel de
sonido.
Presione VOLUME + para aumentar el volumen, y VOLUME para disminuir el volumen.
3 Presione BAND para seleccionar una
banda.
Presione BAND hasta que se visualice la
banda deseada: F1, F2 para FM o MW/LW.
23
4 Para realizar la sintonización manual,
presione c o d rápidamente.
Las frecuencias se desplazan hacia arriba o
hacia abajo paso por paso.
5 Para realizar la sintonización por búsqueda, presione c o d durante aproximadamente un segundo y suelte.
El sintonizador explorará las frecuencias hasta
que encuentre una emisora con suficiente intensidad para una buena recepción.
# Se puede cancelar la sintonización por búsqueda presionando c o d rápidamente.
# Si mantiene presionado c o d, puede saltar
las emisoras. La sintonización por búsqueda empieza así que se suelta el botón.
Nota
Cuando la frecuencia seleccionada está siendo
transmitida en estéreo, el indicador de estéreo
(5) se ilumina.
Almacenaje y llamada de
frecuencias
Si se presiona uno de los botones de sintonización preajustada 16, se puede fácilmente
almacenar hasta seis frecuencias de emisoras
para una llamada subsiguiente con la presión
de un botón.
% Cuando encuentre una frecuencia que
desea almacenar en la memoria, presione
un botón de sintonización preajustada 16
hasta que el número preajustado pare de
destellar.
El número seleccionado destellará en el indicador de número preajustado en la memoria y
permanecerá iluminado. La frecuencia de la
emisora seleccionada ha sido almacenada en
la memoria.
Sección
04
Español
<CZR2959-A>27
27
Es
Page 28

Black plate (28,1)
Sección
04
Sintonizador
Cuando presione el mismo botón de sintonización preajustada 16 en la próxima vez, la frecuencia de la emisora se llamará de la
memoria.
Nota
Hasta 12 emisoras FM, 6 para cada una de las
dos bandas FM, y 6 emisoras MW/LW se pueden
almacenar en la memoria.
Sintonización de señales
fuertes
La sintonización por búsqueda local le permite
sintonizar solamente las emisoras con señales
suficientemente fuertes para una buena recepción.
HHHHHHHHHHHHHH
% Mantenga presionado LOCAL/BSM
hasta que se active la función BSM.
BSM comienza a destellar. Mientras BSM está
destellando, las seis emisoras más fuertes se
almacenan en los botones de sintonización
preajustada 16 en el orden de las señales
más fuertes. Cuando se completa la operación, BSM para de destellar.
# Para cancelar el proceso de almacenaje, presione LOCAL/BSM.
Nota
Almacenar frecuencias con BSM puede reemplazar las frecuencias que han sido almacenadas
usando 16.
1 Presione LOCAL/BSM para activar la
sintonización por búsqueda local.
LOC aparece en la pantalla.
2 Cuando desee volver a la sintonización
por búsqueda normal, presione
LOCAL/BSM para desactivar la sintonización por búsqueda local.
Almacenaje de las frecuencias
de radio más fuertes
La función BSM (memoria de las mejores emisoras) le permite almacenar automáticamente
las seis emisoras más fuertes bajo los botones
de sintonización preajustada 16. Después de
almacenadas, las emisoras más fuertes se
pueden sintonizar con la presión de un botón.
28
Es
<CZR2959-A>28
Page 29

Black plate (29,1)
23 4
HHHHHHHHHHHHHH
RDS
Introducción a la operación
RDS
1
RDS (sistema de datos de radio) es un sistema
para proveer informaciones con las transmisiones FM. Estas informaciones inaudibles
proveen funciones como el nombre del servicio de programa, tipo de programa, espera por
anuncio de tráfico y sintonización automática,
con el propósito de ayudar a los oyentes de
radio a encontrar y sintonizar una emisora deseada.
1 Nombre de servicio de programa
Visualiza el tipo de programa que está siendo transmitido.
2 Indicador AF
Visualiza cuando la función AF (búsqueda
de frecuencias alternativas) está activada.
3 Indicador TA
Visualiza cuando la función TA (espera por
anuncio de tráfico) está activada.
4 Indicador TP
Visualiza cuando una emisora TP está sintonizada.
Cambio de la visualización
RDS
Cuando se sintoniza una emisora RDS, se visualiza su nombre de servicio de programa.
Se puede saber la frecuencia en que está.
% Presione DISP/REG para cambiar la visualización.
Presione DISP/REG repetidamente para cambiar entre los siguientes ajustes:
Nombre de servicio de programaInformación PTYFrecuencia
La información PTY (código de identificación
de tipo de programa) se enumera en la página
31.
# La información PTY y la frecuencia de la emisora actual aparecen en la pantalla durante ocho
segundos.
Recepción de transmisiones
de alarma PTY
La alarma PTY es un código PTY especial para
anuncio de emergencias tales como desastres
naturales. Cuando el sintonizador recibe el
código de alarma de radio, aparece ALARM
en la pantalla y el volumen se ajusta al volumen TA. Cuando la emisora deja de transmitir
el anuncio de emergencia, el sistema vuelve a
la fuente precedente.
! Un anuncio de emergencia se puede can-
celar presionando TA/AF.
Sección
05
Español
Notas
! El servicio RDS puede no se proveer por todas
las emisoras.
! Las funciones RDS como AF y TA son activas
solamente cuando la radio está sintonizada a
una emisora RDS.
<CZR2959-A>29
29
Es
Page 30

Black plate (30,1)
Sección
05
RDS
Selección de frecuencias
alternativas
Si está escuchando a una transmisión y la recepción se pone débil o ocurren otros problemas, la unidad busca automáticamente una
emisora diferente en la misma red que esté
transmitiendo una señal más fuerte.
! Normalmente se deja la función AF activa-
da.
1 Mantenga presionado TA/AF hasta que
se active la función AF.
Aparece el indicador AF.
2 Mantenga presionado TA/AF hasta que
se desactive la función AF.
Notas
! Solamente las emisoras RDS se sintonizan
durante la sintonización por búsqueda o BSM
cuando la función AF está activada.
! Cuando se llama a una emisora preajustada,
el sintonizador puede actualizar la emisora
preajustada con una nueva frecuencia de la
lista AF de emisoras. (Eso está solamente disponible cuando se usan los preajustes en la
banda F1.) No se visualiza ningún número
preajustado en la pantalla si los datos RDS
para la emisora recibida difieren de los datos
para la emisora almacenada originalmente.
! El sonido puede se interrumpir temporal-
mente por otro programa durante la búsqueda de frecuencia AF.
! Cuando el sintonizador está sintonizado a una
emisora no RDS, el indicador AF destella.
! La función AF se puede activar y desactivar en
forma independiente por cada banda FM.
Uso de la búsqueda PI
Si la unidad falla para encontrar una frecuencia alternativa apropiada, o si usted está escuchando a una transmisión y la recepción se
HHHHHHHHHHHHHH
pone débil, la unidad buscará automáticamente una emisora diferente con la misma
programación. Durante la búsqueda, se visualiza PI SEEK y la salida se silencia. El silenciamiento termina después de la búsqueda PI, si
se encuentra o no una emisora diferente.
Uso de la búsqueda PI para
emisoras preajustadas
Cuando no se pueden llamar a las emisoras
preajustadas, cuando, por ejemplo, se viaja
largas distancias, se puede ajustar la unidad
para realizar la búsqueda PI durante la llamada de emisoras preajustadas.
! El ajuste predefinido para la búsqueda PI
es desactivado. Consulte Cambio de la bús-
queda PI automática en la página 39.
Limitación de las emisoras para
programación regional
Cuando se usa AF para resintonizar frecuencias automáticamente, la función regional limita la selección para emisoras que transmiten
programas regionales.
% Mantenga presionado DISP/REG hasta
que se active o se desactive la función regional.
Notas
! La programación regional y redes regionales
se organizan diferentemente dependiendo del
país (o sea, pueden cambiar de acuerdo a la
hora, estado o área de transmisión).
! El número preajustado puede desaparecer de
la pantalla si el sintonizador sintoniza una
emisora regional que difiere de la emisora
ajustada originalmente.
! La función regional se puede activar o desacti-
var independientemente para cada banda
FM.
30
Es
<CZR2959-A>30
Page 31

Black plate (31,1)
HHHHHHHHHHHHHH
RDS
Recepción de anuncios de
tráfico
La función TA (espera por anuncio de tráfico)
le permite recibir anuncios de tráfico automáticamente, independientemente de la fuente
que esté escuchando. La función TA se puede
activar tanto para una emisora TP (una emisora que transmite informaciones de tráfico)
como para una emisora TP de otra red realzada (una emisora que provee informaciones
que hace referencias a emisoras TP).
1 Sintonice una emisora TP o emisora TP
de otra red realzada.
Cuando se está sintonizado en una emisora
TP o emisora TP de otra red realzada, el indicador TP se ilumina.
2 Presione TA/AF para activar la espera
por anuncio de tráfico.
Presione TA/AF y el indicador TA aparecerá
en la pantalla. El sintonizador espera por anuncios de tráfico.
# Para desactivar la espera por anuncio de tráfico, presione TA/AF de nuevo.
3 Utilice VOLUME para ajustar el volumen TA cuando comienza un anuncio de
tráfico.
Presione VOLUME + para aumentar el volumen, y VOLUME para disminuir el volumen.
El nuevo volumen ajustado se almacena en la
memoria y se usa para los anuncios de tráfico
subsecuentes.
4 Presione TA/AF mientras un anuncio de
tráfico está siendo recibido para cancelar el
anuncio.
El sintonizador vuelve a la fuente original pero
permanece en el modo de espera hasta que
se presione TA/AF de nuevo.
Notas
! El sistema cambia de nuevo ala fuente origi-
nal después de la recepción de anuncio de
tráfico.
! Solamente las emisoras TP y emisoras TP de
otra red realzada se sintonizan durante la sintonización por búsqueda o BSM cuando la
función TA está activada.
Respuesta a la alarma TP
Cuando una emisora TP o emisora TP de otra
red realzada se pierde debido a una señal
débil, el indicador TP desaparece y una serie
de tonos cortos suenan durante aproximadamente cinco segundos para que seleccione
otra emisora TP o emisora TP de otra red realzada.
% Cuando escucha al sintonizador, sintonice otra emisora TP o TP de otra red realzada.
Lista PTY
Específico Tipo de programa
NEWS Noticias
AFFAIRS Temas de actualidad
INFO Información general y consejos
SPORT Programas deportivos
WEATHER Informes del tiempo/Información me-
teorológica
FINANCE Informes del mercado de valores, co-
mercio, operaciones de compraventa,
etc.
POP MUS Música popular
ROCK MUS Música moderna contemporánea
EASY MUS Música fácil de escuchar
OTH MUS Música sin categoría
Sección
05
Español
<CZR2959-A>31
31
Es
Page 32

Black plate (32,1)
Sección
05
RDS
Específico Tipo de programa
JAZZ Jazz
COUNTRY Música campera
NAT MUS Música nacional
OLDIES Música antigua, programas basados
en la Edad de Oro
FOLK MUS Música folklórica
L.CLASS Música clásica ligera
CLASSIC Música clásica seria
EDUCATE Programas educacionales
DRAMA Todas las obras y seriales de radio
CULTURE Cultura nacional y regional
SCIENCE Naturaleza, ciencia y tecnología
VARIED Entretenimiento ligero
CHILDREN Programas para niños
SOCIAL Temas sociales
RELIGION Programas o servicios de asuntos reli-
giosos
PHONE IN Programas basados en teléfono
TOURING Programas de viaje, sin anuncios de
problemas de tráfico
LEISURE Pasatiempos favoritos y a actividades
recreativas
DOCUMENT Programas documentales
HHHHHHHHHHHHHH
32
Es
<CZR2959-A>32
Page 33

Black plate (33,1)
1
HHHHHHHHHHHHHH
Lector de cassette
Reproducción de una cinta
1 Indicador de dirección de transporte de
la cinta
Visualiza la dirección de transporte de la
cinta.
1 Coloque una cinta en la abertura para
cinta.
La reproducción comenzará automáticamente.
Sección
06
5 Para cambiar la dirección de transporte
de la cinta, presione simultanéamente m
y n.
Nota
No coloque nada que no sea una cinta en la abertura para cinta.
Español
Intercepción de radio
La intercepción de radio le permite escuchar
la radio durante el avance rápido/rebobinado
de la cinta.
% Presione 6 para activar o desactivar la
intercepción de radio.
Abertura para cinta
# Se puede expulsar una cinta presionando
TAPE EJECT.
2 Después de colocar la cinta, presione
SOURCE para seleccionar el lector de cassette.
Presione SOURCE hasta seleccionar el lector
de cassette como la fuente.
3 Utilice VOLUME para ajustar el nivel de
sonido.
Presione VOLUME + para aumentar el volumen, y VOLUME para disminuir el volumen.
4 Para realizar el avance rápido o rebobinado, presione m o n .
# El avance rápido o rebobinado se puede cancelar presionando suavemente m o n en la
dirección opuesta.
<CZR2959-A>33
33
Es
Page 34

Black plate (34,1)
1
2
Sección
07
Lector de Multi-CD
Reproducción de un CD
Se puede usar este sistema para controlar un
lector de Multi-CD, que se vende separadamente.
1 Indicador de número de disco
Visualiza el disco que está siendo reproducido actualmente.
2 Indicador de tiempo de reproducción
Visualiza el tiempo transcurrido de reproducción de la pista actual.
1 Presione SOURCE para seleccionar el
lector de Multi-CD.
2 Utilice VOLUME para ajustar el nivel de
sonido.
Presione VOLUME + para aumentar el volumen, y VOLUME para disminuir el volumen.
HHHHHHHHHHHHHH
actual. Presionar de nuevo salta a la pista precedente.
Notas
! Mientras el lector de Multi-CD realiza las oper-
aciones preparatorias, se visualiza READY.
! Si el lector de Multi-CD no funciona apropia-
damente, un mensaje de error como
ERROR-11 puede aparecer. Refiérase a el
manual de instrucciones del lector de MultiCD.
! Si no hay discos en el cargador de CD del lec-
tor de Multi-CD, se visualiza NO DISC.
Cambio de la visualización
Se puede cambiar la visualización.
% Presione DISP/REG para cambiar la visualización.
Presione DISP/REG repetidamente para cambiar la visualización en el siguiente orden:
Número de disco y número de pista Número de disco y tiempo de reproducción
3 Seleccione un disco con los botones
16.
Para discos localizados en 1 a 6, presione el
botón numérico correspondiente.
Si se desea seleccionar un disco localizado en
7 a 12, presione el número (tal como 1 para 7)
hasta que el número del disco aparezca en la
pantalla.
4 Para realizar el avance rápido o retroceso, mantenga presionado c o d.
5 Para saltar hacia atrás o hacia adelante
para otra pista, presione c o d.
Presionar d salta al inicio de la próxima pista.
Presionar c una vez salta al inicio de la pista
34
Es
Repetición de reproducción
Hay tres gamas de repetición para el lector de
Multi-CD: MCD (repetición de todos los discos
en el lector de Multi-CD), TRK (repetición de
una pista) y DSC (repetición de disco).
% Presione LOCAL/BSM repetidamente
para seleccionar la gama de repetición deseada.
! MCD Repite todos los discos en el lector
de Multi-CD
! TRK Repite solamente la pista actual
! DSC Repite el disco actual
<CZR2959-A>34
Page 35

Black plate (35,1)
HHHHHHHHHHHHHH
Lector de Multi-CD
Notas
! Si se seleccionan otros discos durante la re-
producción repetida, la gama de repetición
cambia a MCD.
! Si se realiza la búsqueda musical o avance rá-
pido/retroceso durante la repetición TRK,la
gama de repetición cambia a DSC.
Pausa de la reproducción
de un CD
La pausa le permite parar temporalmente la
reproducción del CD.
1 Presione LOCAL/BSM para activar la
pausa.
PAUSE aparece en la pantalla. La reproduc-
ción de la pista actual se detiene.
Sección
07
Español
2 Presione LOCAL/BSM para desactivar la
pausa.
La reproducción continuará desde el mismo
punto donde la pausa ha sido activada.
Lector de Multi-CD de 50
discos
Los lectores de Multi-CD de 50 discos no se
pueden operar con este sistema.
35
Es
<CZR2959-A>35
Page 36

Black plate (36,1)
1
3
Sección
08
Ajustes de audio
Introducción a los ajustes
de audio
2
1 Indicador BTB
Aparece cuando se selecciona la función
BTB en lugar de FLAT.
2 Visualización de audio
Visualiza el estado de los ajustes de audio.
3 Indicador LOUD
Aparece en la pantalla cuando se activa la
sonoridad.
% Presione AUDIO para visualizar los
nombres de las funciones de audio.
Presione AUDIO repetidamente para cambiar
entre las siguientes funciones de audio:
FAD (ajuste del balance)BAS (ajuste de
graves)TRE (ajuste de agudos)LOUD (sonoridad)SLA (ajuste del nivel de fuente)
# Cuando seleccione el sintonizador FM como
la fuente, no se puede cambiar a SLA.
# Para volver a la visualización de cada fuente,
presione BAND.
Nota
Si no se opera la función de audio dentro de
aproximadamente 30 segundos, la pantalla
vuelve automáticamente a la visualización de la
fuente.
HHHHHHHHHHHHHH
Uso del ajuste del balance
Se puede seleccionar el ajuste de potenciómetro/balance que proporciona un entorno de
audición ideal en todos os asientos ocupados.
1 Presione AUDIO para seleccionar FAD.
Presione AUDIO hasta que FAD aparezca en
la pantalla.
# Si el ajuste de balance ha sido ajustado previamente, se visualiza BAL.
2 Presione VOLUME arriba/+ o abajo/
para ajustar el balance de los altavoces delanteros/traseros.
Cada presión de VOLUME arriba/+ o abajo/
mueve el balance de los altavoces delanteros/
traseros hacia adelante o hacia atrás.
FAD F15 FAD R15 se visualiza mientras el
balance de los altavoces delanteros/traseros
se mueve hacia adelante o hacia atrás.
# FAD 0 es el ajuste apropiado cuando se usan
solamente dos altavoces.
3 Presione c o d para ajustar el balance
de los altavoces izquierdos/derechos.
Cuando se presiona c o d, se visualiza BAL 0.
Cada presión de c o d mueve el balance de
los altavoces izquierdos/derechos hacia la izquierda o hacia la derecha.
BAL L 9 BAL R 9 se visualiza mientras se
mueve el balance de los altavoces izquierdos/
derechos hacia la izquierda o hacia la derecha.
Uso de la función BTB
(intensificación de graves y
agudos)
Hay cinco ajustes de BTB almacenados tales
como DYNAMIC, POWER, MAX, CUSTOM y
FLAT, que se pueden llamar con facilidad en
cualquier momento.
36
Es
<CZR2959-A>36
Page 37

Black plate (37,1)
HHHHHHHHHHHHHH
Ajustes de audio
! CUSTOM es un valor de BTB ajustado crea-
do por el usuario.
! Cuando se selecciona FLAT, no se intro-
duce ningún suplemento ni corrección en
el sonido. Esto es útil para verificar el efecto de los ajustes de la función BTB cambiándose alternativamente entre FLAT y
otro ajuste de BTB.
% Presione BTB para seleccionar el ajuste
de BTB deseado.
Presione BTB repetidamente para cambiar
entre los siguientes ajustes de BTB:
MAXCUSTOMFLATDYNAMIC
POWER
Ajuste de BTB
Puede configurar el ajuste de BTB seleccionado según desee. Los ajustes de BTB configurados se memorizan en CUSTOM.
Ajuste de graves
Puede ajustar el nivel de graves.
1 Presione AUDIO para seleccionar BAS.
Presione AUDIO hasta que BAS aparezca en
la pantalla.
2 Presione VOLUME arriba/+ o abajo/
para ajustar el nivel de graves.
Cada presión de VOLUME arriba/+ o abajo/
aumenta o disminuye el nivel de graves. Se visualiza +6 -6 mientras se aumenta o disminuye el nivel.
Sección
08
2 Presione VOLUME arriba/+ o abajo/
para ajustar el nivel de agudos.
Cada presión de VOLUME arriba/+ o abajo/
aumenta o disminuye el nivel de agudos. Se visualiza +6 -6 mientras se aumenta o disminuye el nivel.
Español
Ajuste de la sonoridad
La sonoridad compensa las deficiencias en
las gamas de sonido bajas y altas cuando se
escucha en volumen bajo.
1 Presione AUDIO para seleccionar LOUD.
Presione AUDIO hasta que LOUD aparezca
en la pantalla.
2 Presione VOLUME arriba/+ para activar
la sonoridad.
Aparece el indicador LOUD.
# Para desactivar la sonoridad, presione
VOLUME abajo/.
3 Presione c o d para seleccionar el nivel
deseado.
Cada presión de c o d selecciona el nivel en
el siguiente orden:
LOW (bajo)HI (alto)
Nota
También se puede activar o desactivar la sonoridad presionando LOUDNESS.
Ajuste de agudos
Puede ajustar el nivel de agudos.
1 Presione AUDIO para seleccionar TRE.
Presione AUDIO hasta que TRE aparezca en
la pantalla.
Ajuste de los niveles de la
fuente
La función SLA (ajuste de nivel de fuente) le
permite ajustar el nivel de volumen de cada
fuente para evitar cambios radicales en el volumen cuando se cambia entre fuentes.
Es
<CZR2959-A>37
37
Page 38

Black plate (38,1)
Sección
08
Ajustes de audio
! Los ajustes se basan en el nivel de volumen
del sintonizador FM, que permanece inalterado.
1 Compare el nivel de volumen del sintonizador FM con el de la fuente que desea
ajustar.
2 Presione AUDIO para seleccionar SLA.
Presione AUDIO hasta que SLA aparezca en
la pantalla.
3 Presione VOLUME arriba/+ o abajo/
para ajustar el volumen de la fuente.
Cada presión de VOLUME arriba/+ o abajo/
aumenta o disminuye el volumen de la fuente.
SLA +4 SLA 4 se visualiza mientras se aumenta o disminuye el volumen de la fuente.
Notas
! Como el volumen del sintonizador FM es el
control, no es posible aplicar los ajustes de
nivel de fuente al sintonizador FM.
! El nivel del volumen del sintonizador MW/LW
también se puede ajustar con el ajuste de
nivel de fuente.
HHHHHHHHHHHHHH
38
Es
<CZR2959-A>38
Page 39

Black plate (39,1)
HHHHHHHHHHHHHH
Ajustes iniciales
Configuración de los
ajustes iniciales
Los ajustes iniciales le permiten realizar una
configuración inicial de los diferentes ajustes
de este sistema.
1 Presione SOURCE hasta que se apague
el sistema.
2 Mantenga presionado AUDIO hasta
que STEP aparezca en la pantalla.
Presione AUDIO repetidamente para cambiar
entre los siguientes ajustes:
STEP (paso de sintonización de FM)A-PI
(búsqueda PI automática)
Siga las siguientes instrucciones para operar
cada ajuste particular.
# Para cancelar los ajustes iniciales, presione
BAND.
# También se puede cancelar los ajustes iniciales presionando AUDIO hasta que se apague
el sistema.
Ajuste del paso de
sintonización de FM
Normalmente, el paso de sintonización de FM
usado por la sintonización por búsqueda es 50
kHz. Cuando la función AF o TA está activada,
el paso de sintonización cambia automáticamente a 100 kHz. Puede ser preferible ajustar
el paso de sintonización a 50 kHz cuando la
función AF está activada.
2 Presione c o d para seleccionar el paso
de sintonización de FM.
Al presionar c o d se cambiará el paso de sintonización de FM entre 50 kHz y 100 kHz mientras la función AF o TA está activada. El paso
de sintonización de FM seleccionado aparecerá en la pantalla.
Nota
El paso de sintonización permanece en 50 kHz
durante la sintonización manual.
Cambio de la búsqueda PI
automática
La unidad puede buscar automáticamente
una emisora diferente con el mismo programa, aún durante la llamada de emisoras preajustadas.
1 Presione AUDIO para seleccionar A-PI.
Presione AUDIO repetidamente hasta que
A-PI aparezca en la pantalla.
2 Presione VOLUME arriba/+ o abajo/
para activar o desactivar la búsqueda PI
automática.
Al presionar VOLUME arriba/+ o abajo/ se
activará o desactivará A-PI y se visualizará en
la pantalla el estado correspondiente
(A-PI :ON, por ejemplo).
Sección
09
Español
1 Presione AUDIO para seleccionar STEP.
Presione AUDIO repetidamente hasta que
STEP aparezca en la pantalla.
<CZR2959-A>39
39
Es
Page 40

Black plate (40,1)
Apéndice
Informaciones adicionales
Lector de cassette
! Una etiqueta floja u ondulada en un cas-
sette puede alterar el funcionamiento del
mecanismo de expulsión del lector o causar el atascamiento de la cinta en la unidad. Evite utilizar estos cassettes o quite la
etiqueta del cassette antes de usarlo.
! Retire el cassette del lector cuando el
motor del vehículo esté apagado. Si se deja
el cassette en el lector, se puede deformar
el rodillo de presión, lo que generará ruidos
durante la reproducción de la cinta.
Cassettes
! Las cintas flojas se deben rebobinar con la
ayuda de un lápiz y las bobinadas de manera irregular se deben rebobinar utilizando
la función de avance rápido.
! Una etiqueta floja u ondulada en un cas-
sette puede causar problemas en el mecanismo de expulsión del lector de cassette.
No utilice cassettes con etiquetas flojas u
onduladas.
! Cassettes con duración superior a C-90
(cintas de 90 minutos) pueden causar el
atascamiento de la cinta en el lector de
cassette. No utilice cintas más largas que
C-90.
! Los cassettes expuestos a altas tempera-
turas pueden deformarse y atascar el lector
de cassette. Mantenga los cassettes donde
no queden expuestos a los rayos solares directos o altas temperaturas.
HHHHHHHHHHHHHH
! Almacene los cassettes en sus cajas donde
no hay el peligro de que las cintas queden
sueltas o expuestas al polvo o suciedad.
Limpieza de la cabeza de
reproducción
Si la cabeza se ensucia, la calidad de sonido
se deteriora y haberá saltos del sonido y otros
problemas. Cuando esto ocurra, limpie la cabeza de reproducción.
40
Es
<CZR2959-A>40
Page 41

Black plate (41,1)
HHHHHHHHHHHHHH
Informaciones adicionales
Especificaciones
General
Fuente de alimentación ........ 14,4 V CC (10,8 15,1 V per-
misible)
Sistema de conexión a tierra
..................................................... Tipo negativo
Consumo de energía máximo
..................................................... 8,5 A
Dimensiones (An × Al × Pr):
Bastidor .............................. 17 8 × 50 × 155 mm
Cara anterior .................... 188 × 5 8 × 20 mm
Peso ............................................... 1,4 kg
Audio
Potencia de salida máxima
..................................................... 40 W × 4
Potencia de salida continua
..................................................... 22 W × 4 (DIN 45324,
+B=14,4 V)
Impedancia de carga .............4 W (4 8 W permisible)
Nivel de salida máx. de la salida de preamplificador (Preout)/impedancia de salida
..................................................... 2,2 V/1 kW
Graves/Agudos:
Graves
Frecuencia .............. 100 Hz
Ganancia ................. ±12dB
Agudos
Frecuencia .............. 10k Hz
Ganancia ................. ±12dB
Contorno de sonoridad
Bajo ...................................... +7 dB (100 Hz), +4 dB (10
kHz)
Alto ....................................... +10 dB (100 Hz), +6,5 dB
(10 kHz)
(volumen: 30 dB)
Sensibilidad utilizable ........... 9 dBf (0,8 µV/75 W, mono,
Señal/ruido: 30 dB)
Umbral de silenciamiento a 50 dB
..................................................... 15 dBf (1,7 µV/75 W, mono)
Relación de señal a ruido .... 70 dB (red IEC-A)
Distorsión .................................... 0,3 % (a 65 dBf, 1 kHz, estér-
eo)
Respuesta de frecuencia ..... 30 15.000 Hz (±3 dB)
Separación estéreo ................. 40 dB (a 65 dBf, 1 kHz)
Sintonizador MW
Gama de frecuencias ............ 531 1,602 kHz (9 kHz)
Sensibilidad utilizable ........... 18 µV (Señal/ruido: 20 dB)
Selectividad ................................ 50 dB (±9 kHz)
Sintonizador LW
Gama de frecuencias ............ 153 281 kHz
Sensibilidad utilizable ........... 30 µV (Señal/ruido: 20 dB)
Selectividad ................................ 50 dB (±9 kHz)
Nota
Las especificaciones y el diseño están sujetos a
posibles modificaciones sin previo aviso debido a
mejoramientos.
Apéndice
Español
Lector de cassette
Cinta .............................................. Cinta de cassette compacto
(C-30 C-90)
Velocidad de la cinta .............. 4,8 cm/seg.
Tiempo de avance rápido/rebobinado
..................................................... Aprox. 100 seg. (C-60)
Lloro y trémolo .......................... 0,13 % (WRMS)
Respuesta de frecuencia ..... 30 16.000 Hz (±3 dB)
Separación estéreo ................. 45 dB
Relación de señal a ruido .... 52 dB (red IEC-A)
Sintonizador FM
Gama de frecuencias ............ 87,5 108 MHz
<CZR2959-A>41
41
Es
Page 42

Black plate (42,1)
Inhalt
Vielen Dank, dass Sie sich für dieses Pioneer-Produkt entschieden
haben.
Lesen Sie diese Bedienungsanleitung bitte aufmerksam durch, so dass Sie mit der richtigen
Bedienungsweise Ihres Modells vertraut werden. Nachdem Sie die Bedienungsanleitung gele-
sen haben, sollten Sie sie an einer sicheren Stelle griffbereit aufbewahren.
Bevor Sie beginnen
Zu diesem Gerät 43
Zu dieser Anleitung 43
Vorsichtsmaßregeln 43
Im Störungsfalle 43
Diebstahlschutz 44
Abnehmen der Frontplatte 44
Anbringen der Frontplatte 44
Die einzelnen Teile
Hauptgerät 45
Ein-/Ausschalten
Einschalten des Geräts 47
Wählen einer Programmquelle 47
Ausschalten des Geräts 47
Tuner
Rundfunkempfang 48
Speichern und Abrufen von
Sendefrequenzen 48
Abstimmen von Stationen mit starken
Sendesignalen 49
Speichern von Stationen mit den stärksten
Sendesignalen 49
RDS
Einführung zum RDS-Betrieb 50
Umschalten der RDS-Anzeige 50
Empfangen von PTY-Alarm-Sendungen 50
Wählen alternativer Frequenzen 50
Gebrauch von PI-Suchlauf 51
Gebrauch von Auto PI Seek für
gespeicherte Stationen 51
Begrenzen von Stationen auf
regionale Programmierung 51
Empfang von Verkehrsdurchsagen 52
Vorgehensweise bei einem TPAlarm 52
PTY-Liste 52
Kassettenspieler
Abspielen eines Kassettenbands 54
Radio-Zwischenschaltung 54
Multi-CD-Player
Abspielen einer CD 55
Ändern der Anzeige im Display 55
Wiederholwiedergabe 55
Pausieren der CD-Wiedergabe 56
50-Disc-Multi-CD-Player 56
Audio-Einstellungen
Einführung zu Audio-Einstellungen 57
Gebrauch der Balance-Einstellung 57
Verwenden von BTB (Höhen- und
Tiefenverstärkung) 57
Anpassen von BTB-Einstellungen 58
Einstellen von Loudness 58
Einstellen von Programmquellenpegeln 59
Grundeinstellungen
Bestimmen der Grundeinstellungen 60
Einstellen des UKW-Kanalrasters 60
Umschalten von Auto-PI-Suchlauf 60
Zusätzliche Informationen
Kassettenspieler 61
Kassettenbänder 61
Reinigen des Wiedergabekopfes 61
Technische Daten 62
42
De
<CZR2959-A>42
Page 43

Black plate (43,1)
HHHHHHHHHHHHHH
Bevor Sie beginnen
Zu diesem Gerät
Dieses Produkt entspricht den EMC-Richtlinien (89/336/EEC, 92/31/EEC) und CE-Markierungsrichtlinien (93/68/EEC).
Die Tuner-Frequenzen dieses Geräts sind für
Westeuropa, Asien, den Mittleren Osten, Afrika und Ozeanien bestimmt. Gebrauch in anderen Gebieten kann zu mangelhaftem Empfang
führen. Die RDS-Funktion arbeitet nur in Gebieten mit UKW-Sendern, die RDS-Signale
ausstrahlen.
Zu dieser Anleitung
Dieses Gerät zeichnet sich durch zahlreiche
fortschrittliche Funktionen aus, die hervorragenden Empfang und Betrieb gewährleisten.
Bei der Entwicklung wurde größter Wert auf
Bedienungsfreundlichkeit aller Funktionen gelegt. Dennoch müssen viele Bedienungsschritte näher erläutert werden. Diese
Bedienungsanleitung soll dazu beitragen,
dass Sie das Potential dieses Produkts voll
ausschöpfen und so zu maximalem Hörgenuss gelangen können.
Wir empfehlen, dass Sie sich mit den Funktionen des Geräts und deren Bedienungsverfahren vertraut machen, indem Sie die
Bedienungsanleitung lesen, bevor Sie mit
dem tatsächlichen Betrieb beginnen. Besonders wichtig ist, dass Sie die Vorsichtsmaßregeln auf Seite 43 und an anderen Stellen
beachten.
Vorsichtsmaßregeln
Wichtig
Bitte tragen Sie sofort die 14-stellige eingravierte Serien-Nummer und das Kaufdatum (Rechnungsdatum) in den beiliegenden Pioneer
Car Stereo-Pass ein, Stempel des Händlers
nicht vergessen.
Der ausgefüllte Pioneer Car Stereo-Pass ist für
den Fall des Diebstahls ein wichtiges Dokument des Eigentumsnachweises.
Bewahren Sie ihn daher an einem sicheren Ort
auf, also keinesfalls im Kraftfahrzeug.
Im Entwendungsfall geben Sie der Polizei die
eingetragene, eingravierte Serien-Nummer
und das Kaufdatum durch Vorlage des Passes
bekannt.
! Auf der Unterseite des Geräts wurde eine
14-stellige Serien-Nummer eingraviert.
! Bewahren Sie dieses Handbuch zum
Nachschlagen stets griffbereit auf.
! Wählen Sie stets eine Lautstärke, bei der
Sie Umgebungsgeräusche noch deutlich
wahrnehmen können.
! Setzen Sie dieses Produkt keiner Feuchtig-
keit aus.
! Durch Abtrennen oder Entladung der Batt-
erie wird der Stationsspeicher gelöscht und
muss in diesem Fall neu programmiert
werden.
Im Störungsfalle
Falls dieses Produkt nicht richtig funktionieren
sollte, wenden Sie sich bitte an Ihren Händler
oder an eine Pioneer-Kundendienststelle in
Ihrer Nähe.
Abschnitt
01
Deutsch
<CZR2959-A>43
De
43
Page 44

Black plate (44,1)
Abschnitt
01
Bevor Sie beginnen
Diebstahlschutz
Zur Diebstahlverhinderung kann die Frontplatte vom Hauptgerät abgenommen und im
mitgelieferten Schutzgehäuse aufbewahrt werden.
! Halten Sie die Frontplatte während der
Fahrt geschlossen.
Wichtig
! Zum Abnehmen oder Anbringen der Front-
platte darf auf keinen Fall Gewalt angewendet
werden. d.h. fassen Sie das Display und die
Tasten nicht zu stark an.
! Achten Sie darauf, die Frontplatte keinen über-
mäßigen Erschütterungen auszusetzen.
! Setzen Sie die Frontplatte weder direkter Son-
nenbestrahlung noch hohen Temperaturen
aus.
HHHHHHHHHHHHHH
Anbringen der Frontplatte
1 Setzen Sie die Frontplatte flach am
Hauptgerät an.
2 Drücken Sie die Frontplatte in die Vorderseite des Hauptgeräts, bis sie sicher
sitzt.
Abnehmen der Frontplatte
1 Drücken Sie DETACH, um die Frontplatte zu entriegeln.
Drücken Sie DETACH und die rechte Seite der
Platte löst sich vom Hauptgerät.
2 Nehmen Sie die Frontplatte ab.
Fassen Sie die Frontplatte an der rechten Seite
an und ziehen Sie sie nach links ab. Die Frontplatte wird dadurch vom Hauptgerät getrennt.
3 Bewahren Sie die Frontplatte zur Sicherheit im mitgelieferten Schutzgehäuse
auf.
44
De
<CZR2959-A>44
Page 45

Black plate (45,1)
abcd
HHHHHHHHHHHHHH
Die einzelnen Teile
3
4
2
1
e
Hauptgerät
1 Taste SOURCE
Dieses Gerät wird durch die Wahl einer Programmquelle eingeschaltet. Betätigen der
Taste zum Durchlaufen aller verfügbaren
Programmquellen.
2 Taste DISP/REG
Zur Wahl verschiedener Anzeigen.
Drücken und halten Sie gedrückt, um die
Regionalfunktion ein- oder auszuschalten.
Dient auch zur Steuerung des externen
Geräts.
3 Taste TA/AF
Drücken, um die TA-Funktion ein- oder auszuschalten. Drücken und gedrückt halten,
um die AF-Funktion ein- oder auszuschalten.
5
6
7
8
9
5 Tasten m/n
Drücken, um das Band schnell vor- oder
rückzuspulen.
6 Taste LOCAL/BSM
Drücken, um die Lokalfunktion ein- oder
auszuschalten, wenn Tuner als Programmquelle gewählt ist.
Drücken und gedrückt halten, um die BSMFunktion ein- oder auszuschalten, wenn
Tuner als Programmquelle gewählt ist.
Drücken, um Pause ein- oder auszuschalten, wenn Multi-CD-Player als Programmquelle gewählt ist.
Drücken und gedrückt halten, um Wiederholwiedergabe ein- oder auszuschalten,
wenn Multi-CD-Player als Programmquelle
gewählt ist.
Dient auch zur Steuerung des externen
Geräts.
Abschnitt
02
Deutsch
4 Taste TAPE EJECT
Zum Auswerfen einer Kassette vom Kassettenspieler.
7 Taste BAND
Zur Wahl von UKW (2 Bänder) und MW/LW
sowie zur Aufhebung des Funktionssteuermodus.
<CZR2959-A>45
De
45
Page 46

Black plate (46,1)
Abschnitt
02
Die einzelnen Teile
8 Taste BTB
Zur Wahl verschiedener BTB-Einstellungen
(Höhen- und Tiefenverstärkung).
9 Taste AUDIO
Zur Wahl verschiedener Klangregler.
a Taste DETACH
Zum Abnehmen der Frontplatte vom Hauptgerät.
b Tasten 16
Für Vorwahlabstimmung (Stationsspeicher)
und Disc-Nummernsuche bei Gebrauch
eines Multi-CD-Players.
Dient auch zur Steuerung des externen
Geräts.
c Tasten c/d
Drücken, um die Suchlaufabstimmung
manuell auszuführen. Dient auch zur Funktionssteuerung.
HHHHHHHHHHHHHH
d Taste LOUDNESS
Drücken, um Loudness ein- oder auszuschalten.
e Taste VOLUME
Zur Erhöhung oder Verminderung der
Lautstärke.
46
De
<CZR2959-A>46
Page 47

Black plate (47,1)
HHHHHHHHHHHHHH
Ein-/Ausschalten
Einschalten des Geräts
% Drücken Sie SOURCE, um das Gerät einzuschalten.
Das Gerät wird durch Wahl einer Programmquelle eingeschaltet.
Wählen einer Programmquelle
Wählen Sie die Programmquelle für die Wiedergabe. Zum Umschalten auf den Kassettenspieler legen Sie eine Kassette in dieses Gerät
ein (siehe Seite 54).
% Drücken Sie SOURCE, um eine Programmquelle zu wählen.
Drücken Sie SOURCE wiederholt, um
zwischen den folgenden Programmquellen
umzuschalten:
TunerKassettenspielerMulti-CD-Player
Externes Gerät
Abschnitt
03
Ausschalten des Geräts
% Drücken und halten Sie SOURCE
gedrückt, bis das Gerät ausschaltet.
Deutsch
Hinweise
! In den folgenden Fällen ändert sich die Ton-
programmquelle nicht:
Wenn nicht für jede Programmquelle ein
Gerät angeschlossen ist.
Wenn keine Kassette in diesem Gerät ein-
gesetzt ist.
Wenn kein Magazin im Multi-CD-Player
eingesetzt ist.
! Der Begriff Externes Gerät bezieht sich auf
ein Pioneer-Produkt (z.B. ein solches, das
noch in Entwicklung ist), das, obwohl als Programmquelle inkompatibel, die Steuerung der
Hauptfunktionen durch dieses Gerät ermöglicht. Mit diesem Gerät kann nur ein externes
Gerät gesteuert werden.
! Durch den Anschluss des blau/weißen Kabels
dieses Geräts an die Automatikantennenrelais-Steuerklemme des Wagens wird die Antenne ausgefahren, sobald das Gerät
eingeschaltet wird. Zum Einfahren der Antenne schalten Sie die Programmquelle
aus.
De
47
<CZR2959-A>47
Page 48

Black plate (48,1)
4
Abschnitt
04
Tuner
Rundfunkempfang
1
Die AF-Funktion (Alternativfrequenz-Suchlauf)
dieses Geräts kann ein- und ausgeschaltet
werden. Für den normalen Abstimmbetrieb
sollte AF ausgeschaltet sein (siehe Seite 50).
1 Wellenbereichsanzeige
Zeigt, auf welchen Wellenbereich das Radio
abgestimmt ist, MW, LW oder UKW.
2 Frequenzanzeige
Zeigt an, auf welche Frequenz der Tuner abgestimmt ist.
3 Stereo-Anzeige (5)
Zeigt an, dass der empfangene Sender ein
Stereo-Programm ausstrahlt.
4 Stationsnummernanzeige
Zeigt, welche Vorprogrammierung gewählt
ist.
1 Drücken Sie SOURCE, um den Tuner zu
wählen.
2 Mit VOLUME wird die Lautstärke eingestellt.
Durch Drücken von VOLUME + wird die
Lautstärke erhöht, durch Drücken von
VOLUME wird sie abgesenkt.
3 Zur Wahl eines Wellenbereichs drücken
Sie BAND.
Drücken Sie BAND, bis der gewünschte Wellenbereich angezeigt wird, F1, F2 für UKW oder
MW/LW.
23
HHHHHHHHHHHHHH
4 Für manuelle Abstimmung tippen Sie c
oder d kurz an.
Die Frequenz wird schrittweise erhöht oder gemindert.
5 Für Suchlaufabstimmung drücken Sie c
oder d etwa eine Sekunde lang.
Der Tuner durchläuft den Frequenzbereich, bis
er einen empfangswürdigen Sender gefunden
hat.
# Durch kurzes Antippen von c oder d kann
die Suchlaufabstimmung aufgehoben werden.
# Durch Gedrückthalten von c oder d können
Rundfunkstationen übersprungen werden. Die
Suchlaufabstimmung beginnt, sobald die Tasten
losgelassen werden.
Hinweis
Bei Empfang eines Stereo-Programms leuchtet
die Stereo-Anzeige (5).
Speichern und Abrufen von
Sendefrequenzen
Durch Drücken einer der Stationstasten 16
können mühelos bis zu sechs Sendefrequenzen gespeichert und dann jederzeit per Tastendruck abgerufen werden.
% Zum Speichern einer abgestimmten
Frequenz drücken Sie eine der Stationstasten 16 und halten Sie diese gedrückt, bis
die Stationsnummer zu blinken aufhört.
Die Nummer der Taste, die Sie gedrückt
haben, blinkt in der Stationsnummernanzeige
und leuchtet dann ständig. Die gewählte Senderfrequenz ist nun gespeichert.
Beim nächsten Druck auf die gleiche Stationstaste 16 wird die Senderfrequenz vom Speicher abgerufen.
48
De
<CZR2959-A>48
Page 49

Black plate (49,1)
HHHHHHHHHHHHHH
Tuner
Hinweis
Bis zu 12 UKW-Sender, 6 für jedes der zwei UKWBänder, und 6 MW/LW-Sender können gespeichert werden.
Abstimmen von Stationen
mit starken Sendesignalen
Mit Lokal-Suchlaufabstimmung wird nur nach
empfangswürdigen Stationen mit ausreichender Signalstärke gesucht.
1 Drücken Sie LOCAL/BSM, um die LokalSuchlauf-Abstimmung einzuschalten.
LOC erscheint im Display.
2 Um auf die normale Suchlauf-Abstimmung zurückzuschalten, drücken Sie
LOCAL/BSM, um die Lokal-Suchlauf-Abstimmung auszuschalten.
Abschnitt
04
Hinweis
Durch Speichern von Frequenzen mit BSM
können bereits unter 16 gespeicherte Frequenzen durch neue ersetzt werden.
Deutsch
Speichern von Stationen mit
den stärksten Sendesignalen
Mit BSM (Best-Sender-Memory) lassen sich
die sechs stärksten Sender automatisch den
Stationstasten 16 zuordnen, speichern, und
dann per Tastendruck abrufen.
% Drücken und halten Sie LOCAL/BSM
gedrückt, bis die BSM-Funktion eingeschaltet wird.
BSM beginnt zu blinken. Während BSM blinkt,
werden die sechs stärksten Senderfrequenzen
in der Reihenfolge ihrer Signalstärke den Stationstasten 16 zugewiesen und im Stationsspeicher abgelegt. Wenn dieser Vorgang
abgeschlossen ist, hört BSM zu blinken auf.
# Zum Abbrechen des Speichervorgangs,
drücken Sie LOCAL/BSM.
<CZR2959-A>49
De
49
Page 50

Black plate (50,1)
23 4
Abschnitt
05
RDS
Einführung zum RDS-Betrieb
1
Das Radio-Datensystem (RDS) dient zur Übertragung spezieller Informationen in Kombination mit UKW-Programmen. Diese nicht
hörbaren Informationen bieten Merkmale wie
Programm-Service-Name, Programmtyp, Verkehrsdurchsage-Bereitschaft und automatische Abstimmung, damit der Hörer
gewünschte Sender schneller auffinden und
abstimmen kann.
1 Programm-Service-Name
Zeigt den Typ des Rundfunkprogramms.
2 AF-Anzeige
Erscheint, wenn die AF-Funktion (Alternativfrequenz-Suchlauf) eingeschaltet ist.
3 TA-Anzeige
Erscheint, wenn die TA-Funktion (Verkehrsdurchsagebereitschaft) eingeschaltet ist.
4 TP-Anzeige
Erscheint, wenn eine TP-Station abgestimmt
ist.
Hinweise
! RDS-Service wird unter Umständen nicht von
allen Stationen geboten.
! RDS-Funktionen, wie AF und TA, sind nur wirk-
sam, wenn eine RDS-Station abgestimmt
ist.
HHHHHHHHHHHHHH
Umschalten der RDS-Anzeige
Bei Abstimmung einer RDS-Station wird
deren Programm-Service-Name angezeigt.
Zum Anzeigen der Frequenz.
% Drücken Sie DISP/REG, um die Anzeige
umzuschalten.
Drücken Sie DISP/REG wiederholt, um
zwischen den folgenden Einstellungen umzuschalten:
Programm-Service-NamePTY-Information
Frequenz
PTY-Information (Programmtyp-Kenncode) ist
auf Seite 52 aufgeführt.
# PTY-Information und die Frequenz der momentanen Station werden acht Sekunden lang angezeigt.
Empfangen von PTY-AlarmSendungen
Der PTY-Alarm ist ein spezieller PTY-Code für
Notstandsankündigungen, wie z.B. bei Naturkatastrophen. Wenn der Tuner den Radioalarmcode empfängt, erscheint ALARM im
Display, und die Lautstärke wird auf den TAPegel eingestellt. Bei Stopp der Notstandsankündigung schaltet das System auf die vorige Programmquelle zurück.
! Notstandsankündigungen können durch
Drücken von TA/AF aufgehoben
werden.
Wählen alternativer
Frequenzen
Wenn das Empfangssignal schwach wird oder
andere Probleme während des Empfangs auftreten, sucht das Gerät automatisch nach
50
De
<CZR2959-A>50
Page 51

Black plate (51,1)
HHHHHHHHHHHHHH
RDS
einem anderen Sender mit größerer Signalstärke im selben Netzwerk.
! Standardmäßig ist AF ist eingeschaltet.
1 Drücken und halten Sie TA/AF
gedrückt, bis die AF-Funktion eingeschaltet
wird.
Die AF-Anzeige erscheint.
2 Drücken und halten Sie TA/AF
gedrückt, bis die AF-Funktion ausgeschaltet wird.
Hinweise
! Nur RDS-Stationen werden während Suchlau-
fabstimmung oder BSM abgestimmt, wenn
AF eingeschaltet ist.
! Wenn Sie eine programmierte Station abru-
fen, kann der Tuner diese mit einer neuen Frequenz aus der Stations-AF-Liste aktualisieren.
(Gilt nur bei Gebrauch des Stationsspeichers
für das F1 Band.) Es erscheint keine Stationsnummer im Display, wenn die RDS-Daten für
die empfangene Station von denen für die
ursprünglich gespeicherte Station abweichen.
! Während eines AF-Frequenzsuchlaufs kann
der Ton vorübergehend durch ein anderes Programm unterbrochen werden.
! Wenn der Tuner auf eine Nicht-RDS-Station
abgestimmt wird, blinkt die AF-Anzeige.
! AF kann für jedes UKW-Band unabhängig ein-
oder ausgeschaltet werden.
Gebrauch von PI-Suchlauf
Wenn keine geeignete Alternativfrequenz gefunden werden kann, oder wenn Sie gerade
eine Sendung hören und der Empfang
schwach wird, sucht das Gerät automatisch
nach einer anderen Station mit derselben Programmierung. Während des Suchlaufs wird
PI SEEK angezeigt, und der Ausgang wird
stummgeschaltet. Nach Abschluss des PI-Su-
chlaufs, ob erfolgreich oder nicht, wird die
Stummschaltung aufgehoben.
Gebrauch von Auto PI Seek für
gespeicherte Stationen
Wenn gespeicherte Stationen nicht abgerufen
werden können, wie z.B. bei Langstreckenfahrten, kann das Gerät auf PI-Suchlauf auch
während Stationsabrufs eingestellt werden.
! Standardmäßig ist der automatische PI-Su-
chlauf ausgeschaltet. Siehe Umschalten
von Auto-PI-Suchlauf auf Seite 60.
Begrenzen von Stationen auf
regionale Programmierung
Wenn AF zur automatischen Neuabstimmung
von Frequenzen verwendet wird, beschränkt
die Regionalfunktion die Auswahl auf Sender,
die regionale Programme ausstrahlen.
% Drücken und halten Sie DISP/REG
gedrückt, um die Regionalfunktion einoder auszuschalten.
Hinweise
! Regionale Programmierung und regionale
Netzwerke sind je nach Land verschieden organisiert (d.h. sie können sich nach Stunde,
Staat und Empfangsgebiet ändern).
! Die Stationsnummer kann ausgehen, wenn
der Tuner einen regionalen Sender abstimmt,
der von der ursprünglich eingestellten Station
verschieden ist.
! Die Regionalfunktion kann unabhängig für
jedes UKW-Band ein- oder ausgeschaltet
werden.
Abschnitt
05
Deutsch
<CZR2959-A>51
De
51
Page 52

Black plate (52,1)
Abschnitt
05
RDS
Empfang von
Verkehrsdurchsagen
Mit TA (Verkehrsdurchsagebereitschaft)
können Verkehrsmeldungen automatisch
empfangen werden, ungeachtet dessen,
welche Programmquelle gerade gehört wird.
Die TA-Funktion kann sowohl für eine TP-Station (ein Sender, der Verkehrsdurchsagen ausstrahlt) als auch für eine Erweiterte
Programmketten-Informations-TP-Station (ein
Sender, der Informationen mit Querverweis
auf TP-Stationen bietet) aktiviert werden.
1 Stimmen Sie eine TP- oder Erweiterte
Programmketten-Informations-TP-Station
ab.
Bei Abstimmung einer TP- oder einer Erweiterten Programmketten-Informations-TP-Station
leuchtet die TP-Anzeige.
2 Drücken Sie TA/AF, um die Verkehrsdurchsagebereitschaft einzuschalten.
Drücken Sie TA/AF, und die TA-Anzeige
erscheint im Display. Der Tuner ist auf Bereitschaft zum Empfang von Verkehrsmeldungen geschaltet.
# Zum Ausschalten der Verkehrsdurchsagebereitschaft drücken Sie TA/AF erneut.
3 Mit VOLUME können Sie die TALautstärke einstellen, wenn eine Verkehrsdurchsage startet.
Durch Drücken von VOLUME + wird die
Lautstärke erhöht, durch Drücken von
VOLUME wird sie abgesenkt.
Die neu eingestellte Lautstärke wird gespeichert und für nachfolgende Verkehrsmeldungen abgerufen.
4 Durch Drücken von TA/AF während
Empfangs einer Verkehrsmeldung wird
diese abgebrochen.
Der Tuner schaltet auf die ursprüngliche Programmquelle zurück, bleibt jedoch auf Be-
HHHHHHHHHHHHHH
reitschaft geschaltet, bis TA/AF erneut
gedrückt wird.
Hinweise
! Bei Beendigung einer Verkehrsmeldung
schaltet das System auf die ursprüngliche
Programmquelle zurück.
! Nur TP- und Erweiterte Programmketten-Infor-
mations-TP-Stationen werden während Suchlaufabstimmung oder BSM abgestimmt,
wenn TA eingeschaltet ist.
Vorgehensweise bei einem TPAlarm
Wenn eine TP- oder Erweiterte Programmketten-Informations-TP-Station wegen eines
schwachen Sendesignals nicht mehr empfangen werden kann, erlischt die TP-Anzeige, und
mehrere kurze Pieptöne werden der Reihe
nach abgegeben, etwa fünf Sekunden lang,
um Sie darauf aufmerksam zu machen, daß
Sie eine andere TP- oder Erweiterte Programmketten-Informations-TP-Station wählen sollten.
% Wenn das System gerade auf Tuner
geschaltet ist, stimmen Sie eine andere TPoder Erweiterte Programmketten-Informations-TP-Station ab.
PTY-Liste
Spezifisch Programmtyp
NEWS Nachrichten
AFFAIRS Tagesereignisse
INFO Allgemeine Informationen und Tipps
SPORT Sport
WEATHER Wetterberichte/Wetterinformationen
FINANCE Aktien, Wirtschaft, Handel usw.
POP MUS Populäre Musik
52
De
<CZR2959-A>52
Page 53

Black plate (53,1)
HHHHHHHHHHHHHH
RDS
Spezifisch Programmtyp
ROCK MUS Zeitgenössische moderne Musik
EASY MUS Leichte Hörmusik
OTH MUS Nicht-kategorisierte Musik
JAZZ Jazz
COUNTRY Country-Stil
NAT MUS Landesmusik
OLDIES Oldies, Goldene Oldies
FOLK MUS Volksmusik
L.CLASS Leichte klassische Musik
CLASSIC Ernste klassische Musik
EDUCATE Bildungsprogramme
DRAMA Alle Rundfunkspiele und Programm-
serien
CULTURE Nationale oder regionale Kultur
SCIENCE Natur, Wissenschaft und Technologie
VARIED Leichte Unterhaltung
CHILDREN Kinderprogramme
SOCIAL Soziales
RELIGION Religiöse Angelegenheiten/Services
PHONE IN Telefongesprächsprogramme
TOURING Reiseprogramme (ohne Verkehrsinfor-
mationen)
LEISURE Freizeit und Hobby
DOCUMENT Dokumentarsendungen
Abschnitt
05
Deutsch
<CZR2959-A>53
De
53
Page 54

Black plate (54,1)
1
Abschnitt
06
Kassettenspieler
Abspielen eines
Kassettenbands
1 Bandlaufrichtungsanzeige
Zeigt die Bandlaufrichtung an.
1 Legen Sie eine Kassette in den Kassetten-Ladeschacht ein.
Die Wiedergabe startet automatisch.
HHHHHHHHHHHHHH
Hinweis
In den Kassetten-Ladeschacht darf kein anderer
Gegenstand als eine Kassette eingeschoben
werden.
Radio-Zwischenschaltung
Mit der Funktion Radio-Zwischenschaltung
können Sie während des schnellen Bandvoroder Bandrücklaufs Radio hören.
% Drücken Sie 6, um die RadioZwischenschaltung ein- oder
auszuschalten.
Kassetten-Ladeschacht
# Durch Drücken von TAPE EJECT wird die Kas-
sette ausgeworfen.
2 Nachdem Sie eine Kassette eingesetzt
haben, drücken Sie SOURCE, um den Kassettenspieler anzuwählen.
Drücken Sie SOURCE, bis Kassettenspieler als
Programmquelle gewählt ist.
3 Mit VOLUME wird die Lautstärke eingestellt.
Durch Drücken von VOLUME + wird die
Lautstärke erhöht, durch Drücken von
VOLUME wird sie abgesenkt.
4 Für schnellen Vor- oder Rücklauf
drücken Sie m oder n.
# Schneller Vor- oder Rücklauf kann durch
leichtes Drücken von m oder n in die entgegengesetzte Richtung aufgehoben werden.
5 Zum Ändern der Bandlaufrichtung
drücken Sie gleichzeitig m und n.
54
De
<CZR2959-A>54
Page 55

Black plate (55,1)
1
2
HHHHHHHHHHHHHH
Multi-CD-Player
Abspielen einer CD
Mit diesem Gerät kann ein als Sonderzubehör
erhältlicher Multi-CD-Player gesteuert werden.
1 Disc-Nummer-Anzeige
Zeigt die momentan spielende Disc.
2 Wiedergabezeitanzeige
Zeigt die abgelaufene Spielzeit des momentanen Titels.
1 Drücken Sie SOURCE, um den Multi-CDPlayer anzuwählen.
2 Mit VOLUME wird die Lautstärke eingestellt.
Durch Drücken von VOLUME + wird die
Lautstärke erhöht, durch Drücken von
VOLUME wird sie abgesenkt.
3 Wählen Sie die gewünschte Disc mit
den Tasten 16.
Für Discs an Positionen 1 bis 6 drücken Sie
die entsprechende Zifferntaste.
Zur Wahl von Discs an Positionen 7 bis 12
drücken und halten Sie die entsprechende Zifferntaste gedrückt, z.B. 1 für Disc 7, bis die
Disc-Nummer im Display erscheint.
4 Für schnellen Vorlauf oder Rücklauf
drücken und halten Sie c oder d gedrückt.
neutes Drücken wird zum vorigen Titel
gesprungen.
Hinweise
! Wenn der Multi-CD-Player die Vorbereitungss-
chritte ausführt, wird READY angezeigt.
! Wenn der Multi-CD-Player nicht richtig funk-
tioniert, kann eine Fehlermeldung, wie z.B.
ERROR-11 angezeigt werden. Siehe Multi-CDPlayer-Bedienungsanleitung.
! Wenn sich keine Disc im Multi-CD-Player-Ma-
gazin befindet, wird NO DISC angezeigt.
Ändern der Anzeige im
Display
Sie können die Anzeige im Display umschalten.
% Drücken Sie DISP/REG, um die Anzeige
umzuschalten.
Drücken Sie DISP/REG wiederholt, um die
verfügbaren Anzeigen in der folgenden Reihenfolge zu durchlaufen:
Disc-Nummer und Titelnummer Disc-Nummer und Wiedergabezeit
Wiederholwiedergabe
Drei Wiederholwiedergabebereiche stehen für
den Multi-CD-Player zur Verfügung: MCD
(Multi-CD-Player-Wiederholung), TRK (Einzeltitel-Wiederholung) und DSC (Disc-Wiederholung).
Abschnitt
07
Deutsch
5 Um zu einem anderen Titel vor- oder
zurückzuspringen, drücken Sie c oder d.
Durch Drücken von d wird zum Anfang des
nächsten Titels gesprungen. Durch einmaliges
Drücken von c wird zum Anfang des momentanen Titels zurückgesprungen. Durch er-
% Drücken und halten Sie LOCAL/BSM
gedrückt, um den gewünschten Wiederholbereich zu wählen.
! MCD Wiederholung aller Discs im Multi-
CD-Player
De
<CZR2959-A>55
55
Page 56

Black plate (56,1)
Abschnitt
07
Multi-CD-Player
! TRK Nur Wiederholung des momentanen
Titels
! DSC Wiederholung der momentanen Disc
Hinweise
! Wenn während Wiederholwiedergabe andere
Discs gewählt werden, ändert sich der Wiederholwiedergabebereich zu MCD.
! Falls während TRK Titelsuchlauf oder schnel-
ler Vor-/Rücklauf aktiviert wird, ändert sich der
Wiederholwiedergabebereich zu DSC.
Pausieren der CD-Wiedergabe
Die Wiedergabe einer CD kann vorübergehend
gestoppt werden.
1 Drücken Sie LOCAL/BSM, um Pause einzuschalten.
PAUSE erscheint im Display. Die Wiedergabe
des momentanen Titels wird auf Pause
geschaltet.
HHHHHHHHHHHHHH
2 Drücken Sie LOCAL/BSM, um Pause auszuschalten.
Die Wiedergabe wird von der Pausenstelle ab
fortgesetzt.
50-Disc-Multi-CD-Player
50-Disc-Multi-CD-Player können mit diesem
Gerät nicht verwendet werden.
56
De
<CZR2959-A>56
Page 57

Black plate (57,1)
1
3
HHHHHHHHHHHHHH
Audio-Einstellungen
Einführung zu AudioEinstellungen
2
1 BTB-Anzeige
Erscheint, wenn eine andere BTB-Einstellung als FLAT gewählt wird.
2 Audio-Display
Zeigt den Audio-Einstellstatus.
3 LOUD-Anzeige
Erscheint im Display, wenn Loudness eingeschaltet ist.
% Drücken Sie AUDIO, um die AudioFunktionsbezeichnungen zur Anzeige zu
bringen.
Drücken Sie AUDIO wiederholt, um zwischen
den folgenden Audio-Funktionen umzuschalten:
FAD (Balance-Einstellung)BAS (Bassein-
stellung)TRE (Hochtoneinstellung)LOUD
(Loudness)SLA (Programmquellen-Pegeleinstellung)
# Bei Wahl des UKW-Tuners als Programmquelle kann nicht auf SLA geschaltet werden.
# Zum Zurückschalten auf die Anzeige jeder
Programmquelle drücken Sie BAND.
Gebrauch der BalanceEinstellung
Sie können eine Überblend-/Balance-Einstellung wählen, die eine ideale Hörumgebung für
alle Insassen bietet.
1 Drücken Sie AUDIO, um FAD zu
wählen.
Drücken Sie AUDIO, bis FAD angezeigt wird.
# Wenn die Balance zuvor eingestellt worden
ist, wird BAL angezeigt.
2 Betätigen Sie VOLUME + oder , um die
Front-/Heck-Lautsprecherbalance einzustellen.
Mit jedem Druck auf VOLUME + oder wird
der Lautstärkeschwerpunkt nach vorn oder
hinten verlagert.
FAD F15 FAD R15 wird bei Verlagerung des
Lautstärkeschwerpunkts von vorne nach hinten angezeigt.
# FAD 0 ist die richtige Einstellung, wenn nur
zwei Lautsprecher in Gebrauch sind.
3 Betätigen Sie c oder d, um die Links-/
Rechts-Lautsprecherbalance einzustellen.
Wenn c oder d gedrückt wird, wird BAL 0 angezeigt. Mit jedem Druck auf c oder d wird
der Lautstärkeschwerpunkt nach links oder
rechts verlagert.
BAL L 9 BAL R 9 wird angezeigt, während
der Lautstärkeschwerpunkt von links nach
rechts verlagert wird.
Abschnitt
08
Deutsch
Hinweis
Falls die Audio-Funktion nicht innerhalb von 30
Sekunden aktiviert wird, schaltet das Display
automatisch wieder auf die Programmquellenanzeige zurück.
Verwenden von BTB (Höhenund Tiefenverstärkung)
Zur Verfügung stehen fünf gespeicherte BTBEinstellungen, die jederzeit mühelos abgerufen werden können: DYNAMIC, POWER,
MAX, CUSTOM und FLAT.
De
<CZR2959-A>57
57
Page 58

Black plate (58,1)
Abschnitt
08
Audio-Einstellungen
! Bei CUSTOM handelt es sich dabei um
eine spezielle BTB-Einstellung, die Sie
selbst erstellen können.
! Bei der Auswahl von FLAT wird keinerlei
Ergänzung oder Korrektur am Ton vorgenommen. Das kann sich als hilfreich erweisen, wenn die Wirkung einer BTBEinstellung geprüft werden soll: Das
Umschalten zwischen FLAT und der
gewählten BTB-Einstellung ermöglicht
einen Vergleich.
% Drücken Sie BTB, um die gewünschte
BTB-Einstellung zu wählen.
Drücken Sie BTB wiederholt, um zwischen
den folgenden BTB-Einstellungen umzuschalten:
MAXCUSTOMFLATDYNAMIC
POWER
Anpassen von BTB-Einstellungen
Sie können die jeweils gewählte BTB-Einstellung wunschgemäß anpassen. Die von Ihnen
angepassten BTB-Einstellungen werden unter
CUSTOM gespeichert.
Einstellen der tiefen Töne
Sie können den Bass-Pegel einstellen.
1 Drücken Sie AUDIO, um BAS zu wählen.
Drücken Sie AUDIO, bis BAS im Display angezeigt wird.
2 Betätigen Sie VOLUME + oder ,um
den Bass-Pegel einzustellen.
Mit jedem Druck auf VOLUME + oder wird
der Bass-Pegel erhöht oder vermindert. +6
6 wird angezeigt, während der Pegel erhöht
oder vermindert wird.
HHHHHHHHHHHHHH
1 Drücken Sie AUDIO, um TRE zu wählen.
Drücken Sie AUDIO, bis TRE im Display angezeigt wird.
2 Betätigen Sie VOLUME + oder ,um
den Hochton-Pegel einzustellen.
Mit jedem Druck auf VOLUME + oder wird
der Hochton-Pegel erhöht oder vermindert. +6
6 wird angezeigt, während der Pegel erhöht
oder vermindert wird.
Einstellen von Loudness
Die Loudness-Funktion schafft einen Ausgleich für die Schwäche des menschlichen
Gehörs bei der Wahrnehmung von leisen
Tönen im Tiefen- und Höhenbereich.
1 Drücken Sie AUDIO, um LOUD zu
wählen.
Drücken Sie AUDIO, bis LOUD angezeigt
wird.
2 Drücken Sie VOLUME +, um Loudness
einzuschalten.
Die LOUD-Anzeige erscheint.
# Drücken Sie VOLUME , um Loudness aus-
zuschalten.
3 Drücken Sie c oder d, um den Pegel
wunschgemäß einzustellen.
Mit jedem Druck auf c oder d wird der Pegel
in der nachstehenden Reihenfolge gewählt:
LOW (Niedrig)HI (Hoch)
Hinweis
Sie können auch LOUDNESS drücken, um Loudness ein- oder auszuschalten.
Einstellen der hohen Töne
Sie können den Hochton-Pegel einstellen.
58
De
<CZR2959-A>58
Page 59

Black plate (59,1)
HHHHHHHHHHHHHH
Audio-Einstellungen
Einstellen von Programmquellenpegeln
Mit SLA (Programmquellen-Pegeleinstellung)
kann der Lautstärkepegel jeder Programmquelle eingestellt werden, um plötzliche
Lautstärkeänderungen beim Umschalten von
Programmquellen zu vermeiden.
! Die Einstellungen beruhen auf der UKW-
Lautstärke, die unverändert bleibt.
1 Vergleichen Sie die UKW-TunerLautstärke mit dem Pegel der Programmquelle, die Sie einstellen wollen.
2 Drücken Sie AUDIO, um SLA zu wählen.
Drücken Sie AUDIO, bis SLA angezeigt wird.
3 Betätigen Sie VOLUME + oder , um die
Programmquellen-Lautstärke einzustellen.
Mit jedem Druck auf VOLUME + oder wird
die Programmquellen-Lautstärke erhöht oder
vermindert.
SLA +4 SLA 4 wird angezeigt, während die
Programmquellen-Lautstärke erhöht oder vermindert wird.
Abschnitt
08
Deutsch
Hinweise
! Da die UKW-Tuner-Lautstärke maßgebend ist,
kann die Programmquellen-Pegeleinstellung
für den UKW-Tuner nicht durchgeführt werden.
! Die MW/LW-Tuner-Lautstärke kann mit SLA
ebenfalls eingestellt werden.
<CZR2959-A>59
De
59
Page 60

Black plate (60,1)
Abschnitt
09
Grundeinstellungen
Bestimmen der
Grundeinstellungen
Die Grundeinstellungen bestimmen die Ausgangswerte für verschiedene Geräteeinstellungen.
1 Drücken und halten Sie SOURCE
gedrückt, bis das Gerät ausschaltet.
2 Drücken und halten Sie AUDIO
gedrückt, bis STEP angezeigt wird.
Drücken Sie AUDIO wiederholt, um zwischen
den folgenden Einstellungen umzuschalten:
STEP (UKW-Kanalraster)A-PI (Auto-PI-Suchlauf)
Gehen Sie für jede einzelne Einstellung gemäß
nachfolgenden Anweisungen vor.
# Zum Verlassen der Grundeinstellungen
drücken Sie BAND.
# Sie können die Grundeinstellungen auch verlassen, indem Sie AUDIO gedrückt halten, bis
das Gerät ausschaltet.
Einstellen des UKWKanalrasters
Bei Suchlaufabstimmung wird normalerweise
das 50-kHz-UKW-Kanalraster verwendet.
Wenn AF oder TA eingeschaltet ist, ändert sich
das Kanalraster automatisch zu 100 kHz. Es
könnte vorteilhaft sein, das Kanalraster für AFBetrieb auf 50 kHz einzustellen.
HHHHHHHHHHHHHH
2 Drücken Sie c oder d, um die UKW-Kanalraster-Funktion zu wählen.
Durch Drücken von c oder d wird das UKWKanalraster zwischen 50 kHz und 100 kHz umgeschaltet, wenn AF oder TA eingeschaltet ist.
Das jeweils gewählte UKW-Kanalraster wird
im Display angezeigt.
Hinweis
Bei manueller Abstimmung bleibt das Kanalraster auf 50 kHz eingestellt.
Umschalten von Auto-PISuchlauf
Das System kann automatisch nach einer anderen Station mit derselben Programmierung
suchen, selbst bei einem Stationsabruf.
1 Drücken Sie AUDIO, um A-PI zu wählen.
Drücken Sie AUDIO wiederholt, bis A-PI angezeigt wird.
2 Betätigen Sie VOLUME + oder ,um
Auto-PI-Suchlauf ein- oder auszuschalten.
Durch Drücken von VOLUME + oder wird
A-PI zwischen dem Ein- und Ausschaltzustand
umgeschaltet und der jeweils gewählte Status
wird angezeigt (z.B. A-PI :ON).
1 Drücken Sie AUDIO, um STEP zu
wählen.
Drücken Sie AUDIO wiederholt, bis STEP angezeigt wird.
60
De
<CZR2959-A>60
Page 61

Black plate (61,1)
HHHHHHHHHHHHHH
Zusätzliche Informationen
Kassettenspieler
! Ein lose aufgeklebtes oder gewelltes Etikett
auf einer Kassette kann dazu führen, dass
der Auswurfmechanismus des Geräts behindert oder die Kassette im Gerät blockiert
wird. Sie sollten diese Art von Kassetten deshalb besser nicht verwenden oder die
störenden Etiketten von den Kassetten entfernen, bevor Sie sie verwenden.
! Achten Sie darauf, dass die eingelegte Kas-
sette ausgeworfen ist, wenn die Zündung
des Wagens ausgeschaltet wird. Wenn Sie
ein Band im Gerät lassen, kann es zu einer
Verformung der Klemmrolle und damit zu
Gleichlaufschwankungen beim späteren
Abspielen kommen.
Kassettenbänder
! Gelockerte Bänder sollten mithilfe eines
Stiftes und ungleichmäßig aufgewickelte
Bänder mithilfe der Schnellvorlauf-Funktion neu aufgewickelt werden.
! Ein lose aufgeklebtes, gerissenes oder ver-
welltes Etikett auf einer Kassette kann sich
im Kassettenspieler stauen. Verwenden Sie
keine Kassettenbänder mit losen, gerissenen oder verwellten Etiketten.
! Kassettenbänder mit einer Spieldauer von
länger als C-90 (über 90 Minuten) können
sich im Kassettenspieler stauen. Verwenden Sie keine längeren Kassettenbänder
als C-90.
! Kassettenbänder, die hohen Temperaturen
ausgesetzt sind, können sich verwellen
und im Kassettenspieler stauen. Halten Sie
Kassetten von direkter Sonnenbestrahlung
fern und legen Sie sie nicht an Stellen ab,
an denen hohe Temperaturen auftreten
können.
! Bewahren Sie nicht benutzte Kassetten in
deren Gehäusen auf, so dass sie sich nicht
lockern, verstauben oder verschmutzen
können.
Reinigen des
Wiedergabekopfes
Wenn der Tonkopf schmutzig wird, nimmt die
Klangqualität ab, Tonaussetzer und andere
Störungen treten auf. Falls Sie eine derartige
Störung bemerken, muss der Tonkopf unter
Umständen gereinigt werden.
Anhang
Deutsch
<CZR2959-A>61
De
61
Page 62

Black plate (62,1)
Anhang
Zusätzliche Informationen
Technische Daten
Allgemein
Stromversorgung ..................... 14,4 V Gleichspannung (Tol-
eranz 10,8 15,1 V)
Erdungssystem ......................... Negativ
Max. Leistungsaufnahme .... 8,5 A
Abmessungen (B × H × T):
Einbaugröße .................... 178 × 50 × 155 mm
Frontfläche ........................ 188 × 58 × 20 mm
Gewicht ........................................ 1,4 kg
Audio
Max. Ausgangsleistung ....... 40 W × 4
Dauer-Ausgangsleistung ..... 22 W × 4 (DIN 45324,
+B=14,4 V)
Lastimpedanz ............................ 4 W (4 8 W zulässig)
Max. Preout-Ausgangspegel/Ausgangsimpedanz
..................................................... 2,2 V/1 kW
Tiefe/Hohe:
Tiefe Töne
Freq ue nz .................. 100 Hz
Verstärkung ............ ±12 dB
Hohe Töne
Freq ue nz .................. 10k Hz
Verstärkung ............ ±12 dB
Loudness-Kontur
Niedrig ................................ +7 dB (100 Hz), +4 dB (10
kHz)
Hoch .................................... +10 dB (100 Hz), +6,5 dB
(10 kHz)
(Lautstärke: 30 dB)
HHHHHHHHHHHHHH
Verzerrungen ............................. 0,3 % (bei 65 dBf, 1 kHz,
Stereo)
Frequenzgang ........................... 30 15.000 Hz (±3 dB)
Stereotrennung ........................ 40 dB (bei 65 dBf, 1 kHz)
MW-Tuner
Frequenzbereich ...................... 531 1.602 kHz (9 kHz)
Nutzempfindlichkeit ............... 18 µV (Signal-Rauschab-
stand: 20 dB)
Trennschärfe .............................. 50 dB (±9 kHz)
LW-Tuner
Frequenzbereich ...................... 153 281 kHz
Nutzempfindlichkeit ............... 30 µV (Signal-Rauschab-
stand: 20 dB)
Trennschärfe .............................. 50 dB (±9 kHz)
Hinweis
Änderungen der technischen Daten und des Designs jederzeit vorbehalten.
Kassettenspieler
Band .............................................. Kompakt-Kassettenband (C-
Bandlaufgeschwindigkeit ...4,8 cm/s
Umspulzeit ................................. ca. 100 s (C -60)
Gleichlaufschwankungen ...0,13 % (Effektiv)
Frequenzgang ........................... 30 16.000 Hz (±3 dB)
Stereotrennung ........................ 45 dB
Signal-Rauschabstand ......... 52 dB (IEC-A-Netz)
30 C-90)
UKW-Tuner
Frequenzbereich ...................... 87,5 108,0 MHz
Nutzempfindlichkeit ............... 9 dBf (0,8 µV/75 W, Mono,
50-dB-Geräuschberuhigung
..................................................... 15 dBf (1,7 µV/75 W, Mono)
Signal-Rauschabstand ......... 70 dB (IEC-A-Netz)
62
De
Signal-Rauschabstand: 30
dB)
<CZR2959-A>62
Page 63

HHHHHHHHHHHHHH
Black plate (63,1)
Deutsch
<CZR2959-A>63
De
63
Page 64

Black plate (64,1)
PIONEER CORPORATION
4-1, MEGURO 1-CHOME, MEGURO-KU, TOKYO 153-8654, JAPAN
PIONEER ELECTRONICS (USA) INC.
P.O. Box 1540, Long Beach, California 90801-1540, U.S.A.
TEL: (800) 421-1404
PIONEER EUROPE NV
Haven 1087, Keetberglaan 1, B-9120 Melsele, Belgium
TEL: (0) 3/570.05.11
PIONEER ELECTRONICS ASIACENTRE PTE. LTD.
253 Alexandra Road, #04-01, Singapore 159936
TEL: 65-6472-1111
PIONEER ELECTRONICS AUSTRALIA PTY. LTD.
178-184 Boundary Road, Braeside, Victoria 3195, Australia
TEL: (03) 9586-6300
PIONEER ELECTRONICS OF CANADA, INC.
300 Allstate Parkway, Markham, Ontario L3R OP2, Canada
TEL: (905) 479-4411
PIONEER ELECTRONICS DE MEXICO, S.A. de C.V.
San Lorenzo 1009 3er. Piso Desp. 302
Col. Del Valle Mexico, D.F. C.P. 03100
TEL: 55-5688-52-90
<KSNZX/02H00000>
Published byPioneer Corporation.
Copyright © 2002 by Pioneer Corporation.
All rights reserved.
Printed in Malaysia
<CZR2959-A> EW
<CZR2959-A>64
 Loading...