

Page 1

Owner’s Manual
Mode d’emploi
Bluetooth adapter
Adaptateur Bluetooth
CD-BTB200
English FrançaisDeutschEspañol
Page 2
2
En
Page 3

Contents
Thank you for buying this Pioneer product.
Please read through these operating instructions so you will know how to operate
your model properly. After you have finished reading the instructions, keep this man-
ual in a safe place for future reference.
English
Before You Start
About this unit 5
Operating environment 5
Visit our website 5
About this manual 5
In case of trouble 6
About Bluetooth 6
Resetting this unit 6
– Resetting this unit without erasing the
data about phone 6
– Resetting this unit with clearing all
memory 7
Bluetooth Telephone
Hands-free phoning with cellular phones
featuring Bluetooth wireless
technology 8
About the telephone source 9
– Standby mode 9
Setting up for hands-free phoning 9
Basic operation of hands-free phoning 10
– Making a phone call 10
– Taking a phone call 10
Introduction of advanced hands-free phoning
operation 11
Connecting a cellular phone 12
– Searching for available cellular
phones 12
– Using a cellular phone to initiate a
connection 12
Disconnecting a cellular phone 13
Registering connected cellular phone 13
Deleting a registered phone 13
Connecting to a registered cellular
phone 14
– Connecting to a registered phone
manually 14
– Connecting to a registered phone
automatically 14
Using the Phone Book 14
– Transferring entries to the Phone
Book 15
– Changing the Phone Book display
order 15
– Calling a number in the Phone
Book 15
– Searching a number in the Phone
Book 16
– Editing the name of a Phone Book
entry 16
– Editing phone numbers 17
– Clearing a Phone Book entry 17
Clearing memory 17
Using the Call History 18
– Displaying the Call History 18
– Calling a number from the Call
History 18
Using preset numbers 18
– Assigning preset numbers 18
– Recalling preset numbers 19
Making a call by entering phone number 19
Echo canceling and noise reduction 19
Switching the ring tone 19
Setting the automatic rejecting 20
Setting the automatic answering 20
Displaying BD (Bluetooth Device)
address 20
Bluetooth Audio
Listening to songs on BT Audio (Bluetooth
audio player) 21
Connecting a Bluetooth audio player 22
Playing songs on Bluetooth audio player 22
Disconnecting a Bluetooth audio player 23
Displaying BD (Bluetooth Device)
address 23
En
3
Page 4

Contents
Initial Settings
Entering PIN code for Bluetooth wireless
connection 24
Operating with different head units
Using as an external unit 25
Function compatibility charts 26
– Head unit group 1 26
– Head unit group 2 27
– Head unit group 3 29
– Head unit group 4 30
Connecting a cellular phone 31
– Using a cellular phone to initiate a
connection 32
Registering connected cellular phone 32
Disconnecting a cellular phone 32
Voice recognition 32
Setting the automatic answering 33
Connecting to a registered phone
automatically 33
Setting the ring tone 33
Displaying the device information of this
unit 33
Connecting a Bluetooth audio player 34
Disconnecting a Bluetooth audio player 34
Connections
Connecting the units 36
Additional Information
Error messages 40
Specifications 40
Installation
Installing this unit 37
– Mounting with Velcro fasteners 37
Installing the microphone 37
– When installing the microphone on the
sun visor 38
– When installing the microphone on the
steering column 38
Adjusting the microphone angle 39
4
En
Page 5
Before You Start
If you want to dispose this product, do not mix
it with general household waste. There is a separate collection system for used electronic
products in accordance with legislation that requires proper treatment, recovery and recycling.
Private households in the 25 member states of
the EU, in Switzerland and Norway may return
their used electronic products free of charge
to designated collection facilities or to a retailer (if you purchase a similar new one).
For countries not mentioned above, please
contact your local authorities for the correct
method of disposal.
By doing so you will ensure that your disposed
product undergoes the necessary treatment,
recovery and recycling and thus prevent potential negative effects on the environment
and human health.
Section
01
English
! Always keep the volume low enough so that
you can hear sounds from outside the vehicle.
! Protect this unit from moisture.
! Should this product fail to operate properly,
contact your dealer or nearest authorized
Pioneer Service Station.
Operating environment
This unit should be used within the temperature ranges shown below.
Operating temperature range: -10 °C to +60 °C
(14 °F to 140 °F)
EN300328 ETC test temperature: -20 °C and
+55 °C (-4 °F and 131 °F)
Visit our website
Visit us at the following site:
About this unit
This unit is the adapter for a Pioneer head unit
to connect cellular phone featuring Bluetooth
wireless technology for hands-free and listen
to songs on Bluetooth audio player.
! This unit is designed for use in vehicles
only.
CAUTION
! Do not allow this unit to come into contact
with liquids. Electrical shock could result.
Also, this unit damage, smoke, and overheat
could result from contact with liquids.
! Keep this manual handy as a reference for op-
erating procedures and precautions.
! Register your product. We will keep the de-
tails of your purchase on file to help you
refer to this information in the event of an
insurance claim such as loss or theft.
! We offer the latest information about
Pioneer Corporation on our website.
About this manual
Operate this unit with the connected head
unit. Instructions in this manual use AVHP7800DVD (Russian model) as an example of
head unit.
! When using with AVH-P6800DVD (Russian
model), refer to the operation manual supplied with it for operating instructions.
En
5
Page 6
Section
01
Before You Start
! When using the head units other than
AVH-P7800DVD (Russian model) and AVHP6800DVD (Russian model), refer to Using
as an external unit on page 25.
We recommend that you familiarize yourself
with the functions and their operation by reading through the manual before you begin
using this unit. It is especially important that
you read and observe WARNING s and CAU-
TIONs in this manual.
In case of trouble
Should this product fail to operate properly,
contact your dealer or nearest authorized
Pioneer Service Station.
About Bluetooth
Bluetooth is a short-range wireless radio connectivity technology that is developed as a
cable replacement for mobile phones, handheld PCs and other devices. Bluetooth operates in 2.4 GHz frequency range and transmits
voice and data at speeds up to 1 megabit per
second. Bluetooth was launched by a special
interest group (SIG) that comprises of Ericsson
Inc., Intel Corp., Nokia Corp., Toshiba and IBM
in 1998, and it is currently developed by nearly
2 000 companies worldwide.
! The Bluetooth word mark and logos are
owned by the Bluetooth SIG, Inc. and any
use of such marks by Pioneer Corporation
is under license. Other trademarks and
trade names are those of their respective
owners.
Resetting this unit
CAUTION
Pressing RESET button of this unit with the ignition switch ON (ACC ON) erasing the contents of
the unit’s memory.
Resetting this unit without
erasing the data about phone
Pressing RESET button of this unit lets you
reset the unit to its initial settings without
erasing the data about phone. However the
value of the following settings are cleared:
! PHONEBOOK NAME VIEW
! AUTO ANSWER
! REFUSE ALL CALLS
! RING TONE
! AUTO CONNECT
! ECHO CANCEL
When using as an external unit, the value of
the following settings are cleared:
! automatic answering
! automatic connection
! ring tone
This unit must be reset under the following
conditions:
! Prior to using this unit for the first time
after installation
! When this unit and the head unit are re-
connected
! If the unit fails to operate properly
! When strange or incorrect messages ap-
pear on the display
! If there appear to be problems with the op-
eration of the Hands-free Phoning function
1 Turn the ignition switch OFF.
6
En
Page 7
Before You Start
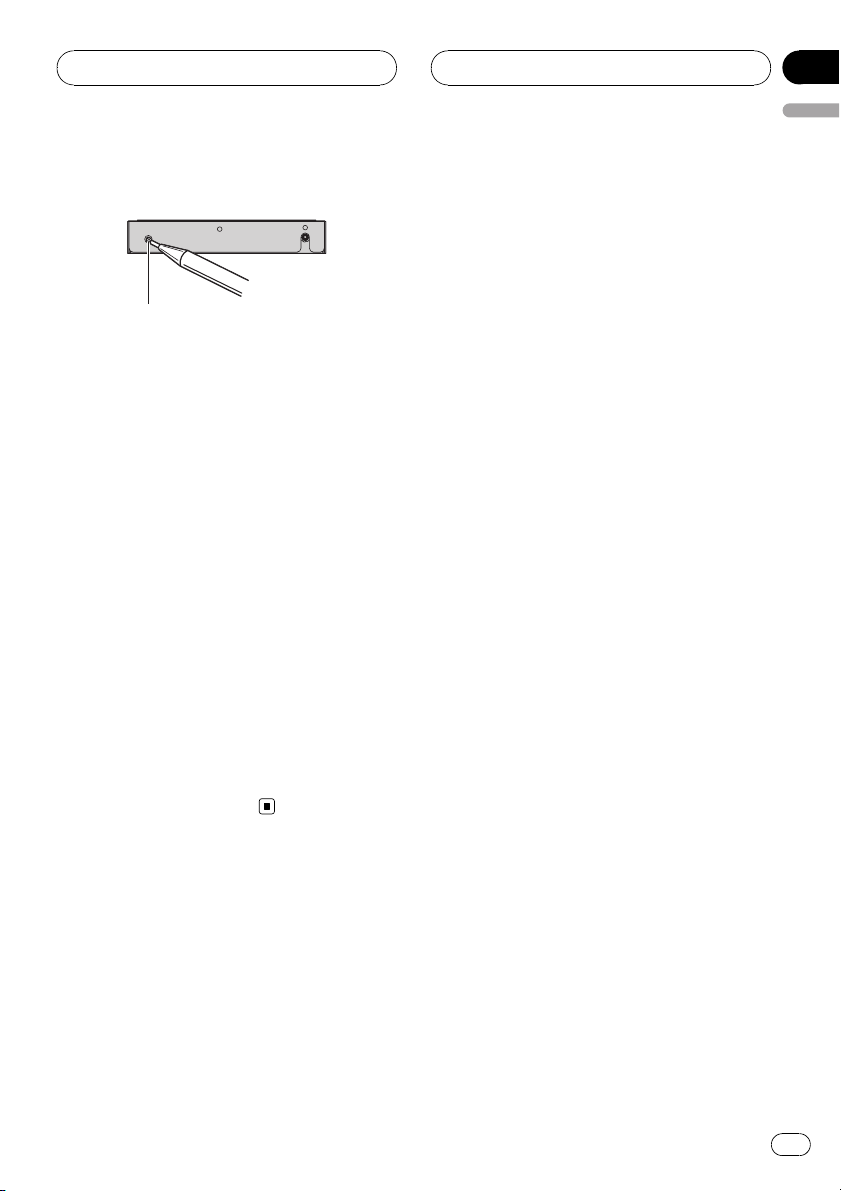
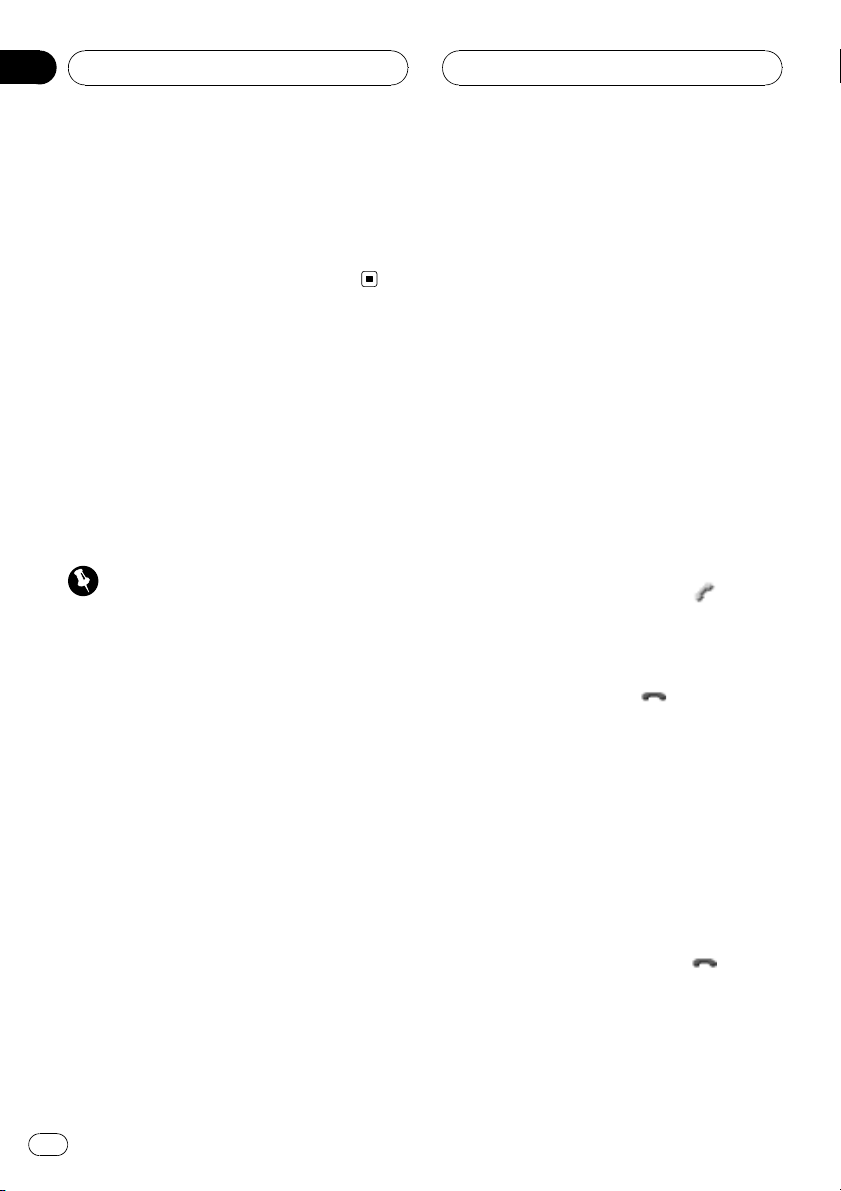
2 Press RESET with a pen tip or other
pointed instrument.
RESET button
Resetting this unit with
clearing all memory
To protect personal and private information,
data about the phone stored in this unit can
be deleted.
1 Turn the ignition switch to ACC or ON
position.
2 Press RESET with a pen tip or other
pointed instrument.
All memory is now completely cleared.
# It takes about 10 seconds to delete the data.
To make it sure, leave the ignition switch ACC or
ON position for 10 seconds aft er you operate the
deletion.
# Please confirm if all data have been completely cleared. For confirmation of the data status,
refer to Registering connected cellular phone on
page 13. If all phone’s statuses are blank, data
has been completely cleared.
Section
01
English
En
7
Page 8
1
3
4
c
2
678
9
a
b
5
Section
02
Bluetooth Telephone
Hands-free phoning with
cellular phones featuring
Bluetooth wireless technology
If your cellular phone features Bluetooth wireless technology, you can use this adapter to
connect to a Pioneer head unit for hands-free,
wireless calls, even while driving.
Important
Since this unit is on standby to connect with your
cellular phones via Bluetooth wireless technology, using this unit without running the engine
can result in battery drainage.
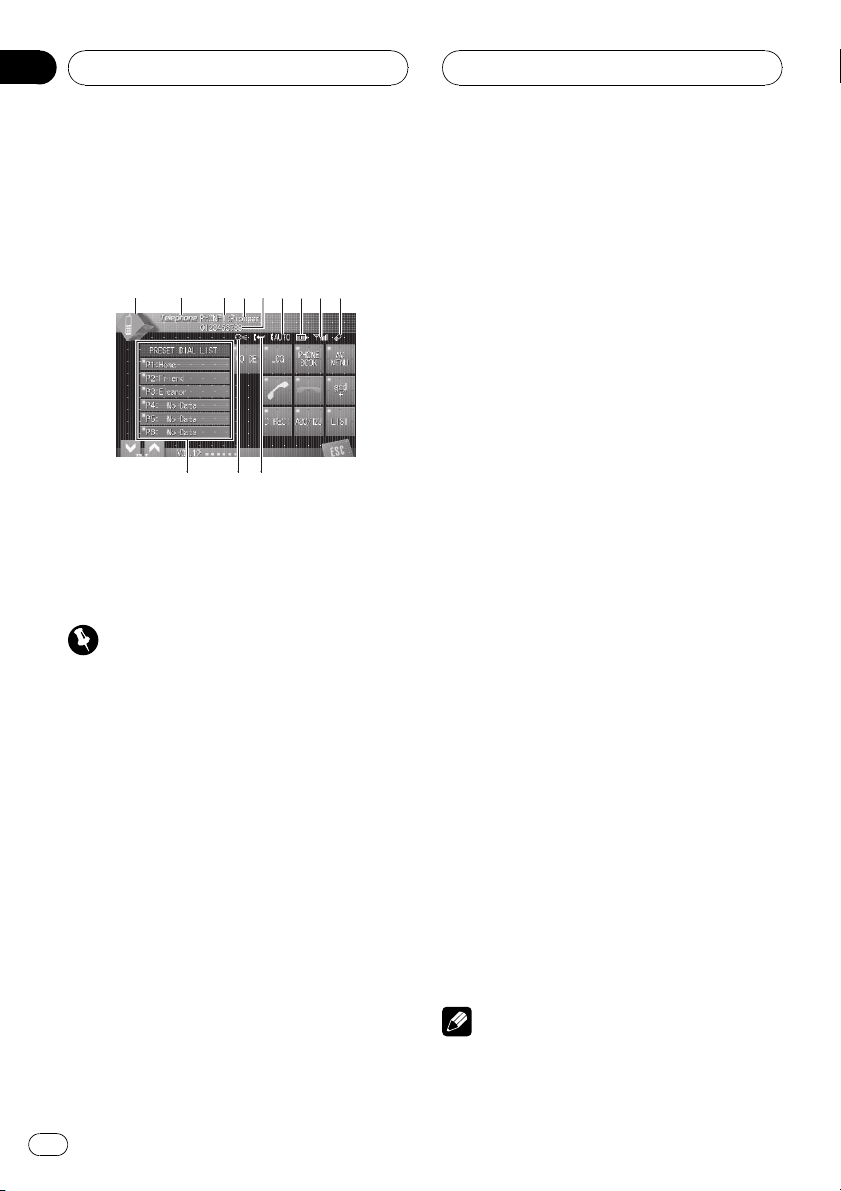
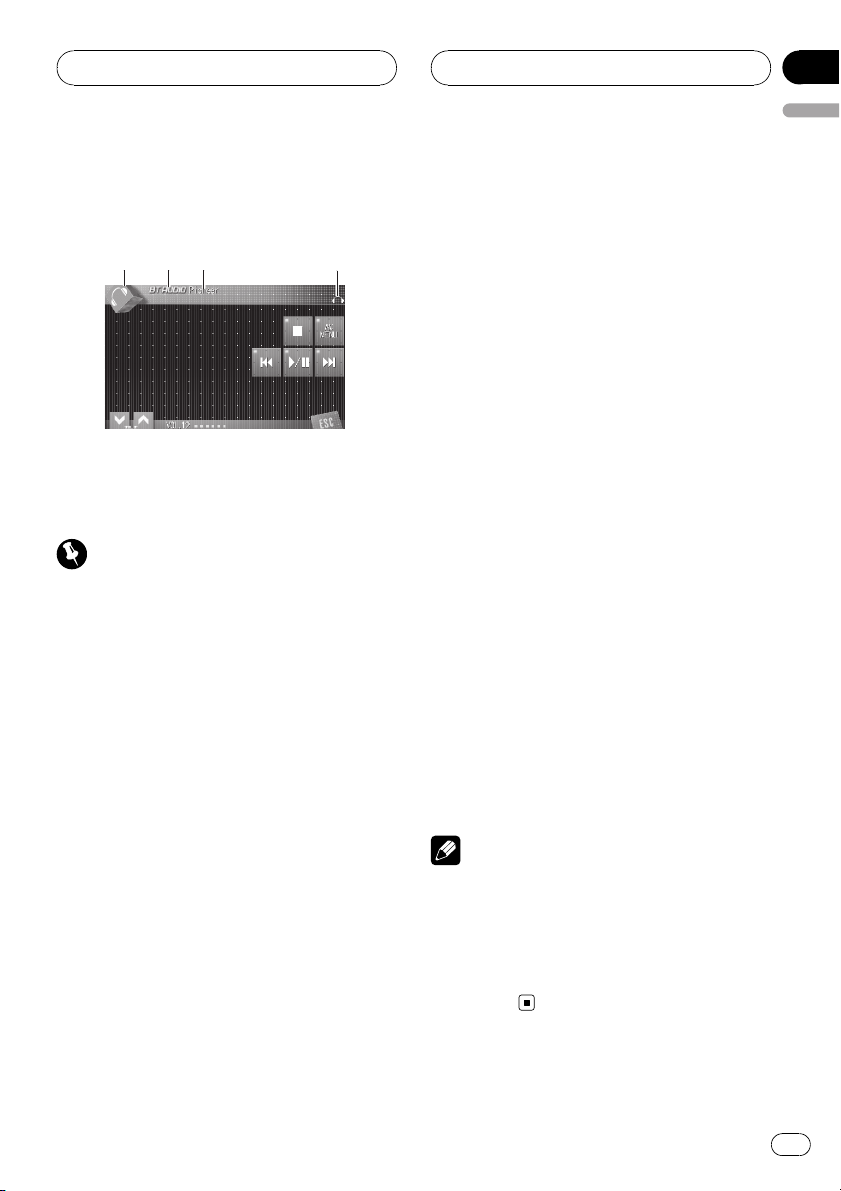
1 Source icon
Shows which source has been selected.
2 Source name
Shows the selected source name.
3 Phone number
Shows the phone number you selected.
4 User number indicator
Shows the registration number of the cellular phone.
5 Device name
Shows the device name of the cellular
phone.
6 Voice recognition indicator
Shows when the voice recognition function
is on (for more details, refer to Voice recogni-
tion on page 10).
7 Incoming call notice indication
Shows when an incoming call has been received and not checked yet.
8 Automatic answering indicator
Shows when the automatic answering function is on (for more details, refer to Setting
the automatic answering on page 20).
9 Battery strength indicator
Shows the battery strength of cellular
phone.
! Battery strength indicator may differ
from the actual battery strength.
! If the battery strength is not available,
nothing is displayed in the battery
strength indicator area.
a Signal level indicator
Shows the signal strength of cellular phone.
! Signal level indicator may differ from the
actual signal level.
! Depending on the cellular phones featur-
ing Bluetooth wireless technology, radio
field intensity is not available.
b Telephone indicator
Shows when a phone connection using
Bluetooth wireless technology is established (for more details, refer to Connecting
a cellular phone on page 12).
c Preset dial list display
Shows the Preset dial list.
Notes
! This unit’s phone call reception is on standby
when ignition switch is set to ACC or ON.
8
En
Page 9

Bluetooth Telephone
Section
02
English
! The line-of-sight distance between this unit
and your cellular phone must be 10 meters or
less for sending and receiving voice and data
via Bluetooth wireless technology. However,
the transmission distance may become shorter than the estimated distance, depending on
the environment in use.
! In order to use Bluetooth wireless technology,
devices must be able to interpret certain profiles. This unit is compatible with the following
profiles.
— GAP (Generic Access Profile)
— SDP (Service Discovery Protocol)
— OPP (Object Push Profile)
— HSP (Head Set Profile)
— HFP (Hands Free Profile)
— A2DP (Advanced Audio Distribution Pro-
file)
— AVRCP (Audio/Video Remote Control Pro-
file)
! When you use RDS (radio data system) or
DAB (digital audio broadcasting) and turn the
announcement standby on, phone call may be
interrupted by receiving an announcement
signal.
! When phone is selected as a source, volume
and equalizer curve are automatically changed to suitable settings for the phone source.
When the source is returned to another
source, volume and equalizer settings automatically return to the original setting.
! Equalizer curve for the phone source is
fixed.
About the telephone source
Standby mode
Once connected via Bluetooth wireless technology, the head unit will remain on telephone
source standby in the background all the
while the connection is sustained. This means
you can freely use the other functions of the
head unit, but still be ready to receive a call.
% Touch the source icon and then touch
Telephone to select the telephone.
# When the source icon is not displayed, you
can display it by touching the screen.
Setting up for hands-free
phoning
Before you can use the hands-free phoning
function you will need to set up the unit for
use with your cellular phone. This entails establishing a Bluetooth wireless connection between this unit and your phone, registering
your phone with this unit, and adjusting the
volume level.
1 Connection
For detailed instructions on connecting your
phone to this unit via Bluetooth wireless technology, refer to Connecting a cellular phone on
page 12.
# Your phone should now be temporarily connected; however, to make best use of the technology, we recommend you register the phone to
this unit.
2 Registration
To register your temporarily connected phone,
refer to Registering connected cellular phone
on page 13.
3 Volume adjustment
Adjust the earpiece volume on your cellular
phone for comfort. When adjusted, the volume
level is memorized in this unit as the default
setting.
# Caller’s voice volume and ring volume may
vary depending on the type of cellular phones.
# If the difference between the ring volume and
caller’s voice volume is big, overall volume level
may become unstable.
En
9
Page 10
Section
02
Bluetooth Telephone
# Before disconnecting cellular phone from this
unit, make sure to adjust the volume to proper
level. If the volume has been muted (zero level)
on your cellular phone, the volume level of your
cellular phone remains muted even after the cellular phone is disconnected from this unit.
Basic operation of handsfree phoning
These are the basic operations to use handsfree phoning via Bluetooth wireless technology. More advanced hands-free phoning operations are explained starting on Introduction
of advanced hands-free phoning operation on
the next page.
Important
Advanced operations that require your attention
such as dialing numbers on the monitor, using
phone book, etc., are prohibited while you are
driving. When you need to use these advanced
operations, stop your vehicle in a safe place and
operate.
Making a phone call
Voice recognition
If your cellular phone features voice recognition technology, you can make a call by voice
commands.
! Operation varies depending on the type of
your cellular phone. Refer to the instruction
manual that came with your cellular phone
for detailed instructions.
! This function can be operated only when
the connection is established with HFP
(Hands Free Profile).
1 Touch VOICE to turn the voice recognition function on.
Voice dial icon appears on the information bar.
Voice recognition function is now ready.
# If your cellular phone does not feature voice
recognition function, you can not touch VOICE.
2 Pronounce the name of your contact.
Taking a phone call
Answering an incoming call
Even when a source other than Telephone is
selected or when this unit is turned off, you
can still answer incoming calls. If you set this
unit to automatically answering incoming
calls, refer to Setting the automatic answering
on page 20.
1 When a call comes in, touch
# If the private mode is selected on the cellular
phone, hands-free phoning may not be performed.
2 To end the call, touch .
The estimated call time appears in the display
(this may differ slightly from the actual call
time).
# You may hear a noise when you disconnect
the phone.
Rejecting an incoming call
You can reject an incoming call. To reject all
incoming calls automatically, refer to Setting
the automatic rejecting on page 20.
% When a call comes in, touch
The call is rejected.
.
.
10
En
Page 11

1
Bluetooth Telephone
Section
02
English
Note
The manually rejected call is recorded in missed
call history list. About the missed call history list,
refer to Using the Call Histor y on page 18.
Answering a call waiting
If while you are talking on the phone another
call comes in, the number (or name if it is in
your phone book) of the new caller appears on
the display to signal that you have a call waiting. You can put the first caller on hold while
you answer the call waiting, or you can choose
to reject the call.
1 Touch
2 Touch
# The caller you have been talking to is now on
hold. To end the call, both you and your caller
need to hang up the phone.
# While your callers hold the line, touching
switches between callers.
to answer a call waiting.
to end the call.
Rejecting a call waiting
If you would rather not interrupt your current
call to answer a call waiting, you can reject it.
% Touch
# The number you have rejected is not added to
the call history list.
to reject a call waiting.
Introduction of advanced
hands-free phoning operation
Important
To perform this operation, be sure to park your vehicle and apply the parking brake.
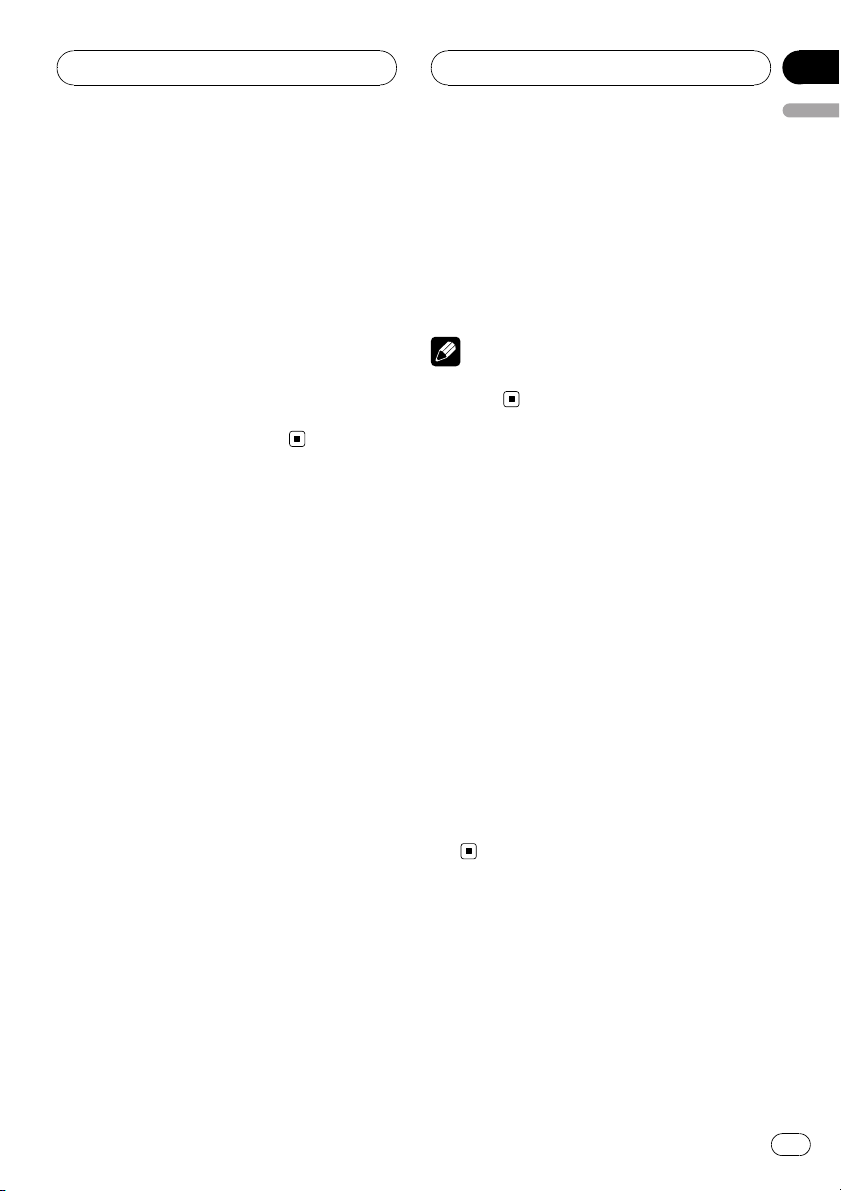
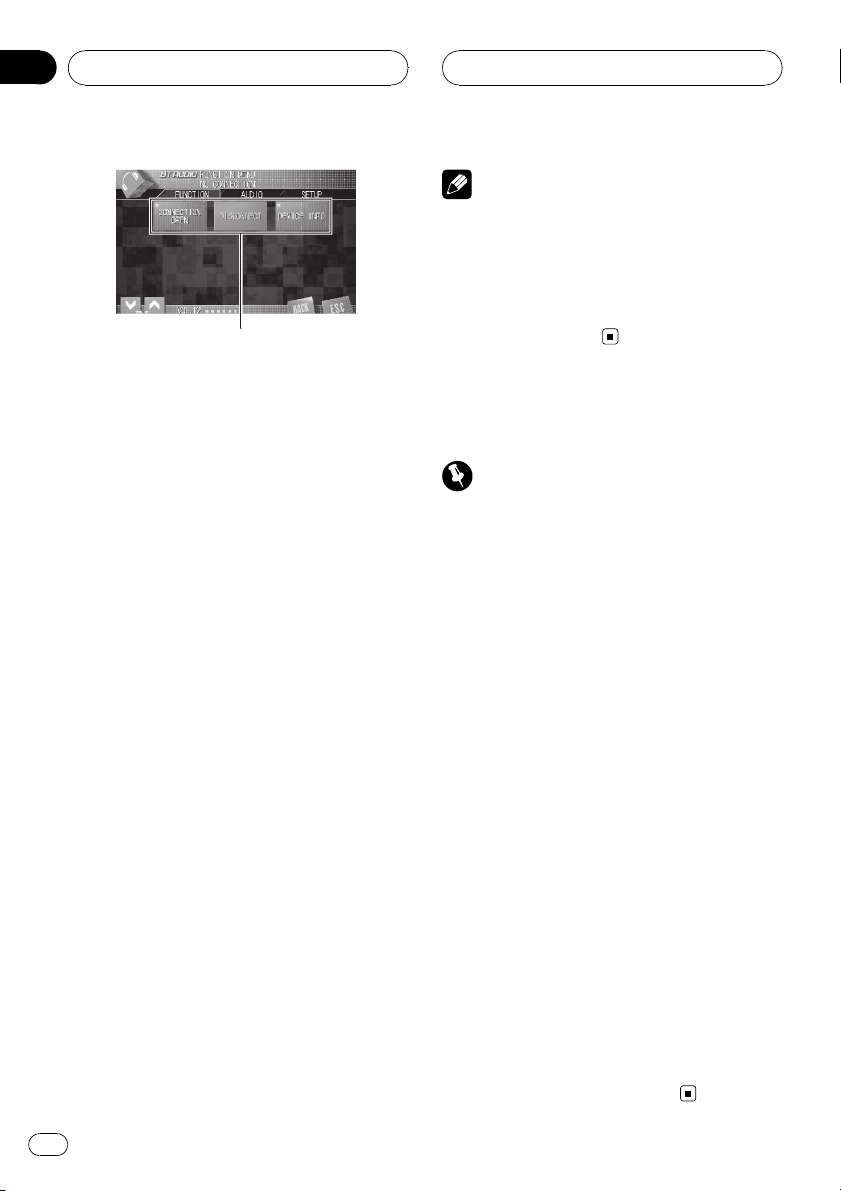
1 Function display
Shows the function names.
1 Select Telephone as a source.
2 Touch AV MENU to display MENU.
MENU appears on the display.
# When AV MENU is not displayed, you can dis-
play it by touching the screen.
# You can also display MENU by clicking the
joystick.
3 Touch FUNCTION to display the function names.
The function names are displayed and operable ones are highlighted.
# To return to the previous display, touch BACK.
# To return to the playback display, touch
ESC.
En
11
Page 12

Section
02
Bluetooth Telephone
Connecting a cellular phone
To use a phone wirelessly with this unit, it is
necessary first to establish a connection using
Bluetooth wireless technology. There are several ways you can do this.
! Connection is normally established by HFP,
which gives you a full control of functions
available on the telephone source. How-
ever, in some cases when you make con-
nection from your cellular phone, the
connection may be made by HSP and sev-
eral functions may not be available.
! A phone may be connected via Bluetooth
wireless technology but not yet registered
with this unit. In this case it is said to be
temporarily connected, and the available
features are limited. To take full advantage
of all the features available, we recommend
you register your phone with this unit.
Refer to Registering connected cellular
phone on the next page for more on this.
Searching for available cellular
phones
You can have this unit search for any available
phones in the area that have Bluetooth wireless technology, then select which you want to
connect to from a list displayed on-screen.
1 Touch PHONE CONNECT on the function
menu.
2 Touch Search to search for available cellular phones.
While searching, SEARCHING is displayed.
When available cellular phones featuring
Bluetooth wireless technology are found, device names or Name Not Found (if names
cannot be obtained) are displayed.
# If this unit fails to find any available cellular
phones, NOT FOUND is displayed.
3 Touch the device name you want to
connect.
While connecting, CONNECTING is displayed.
To complete the connection, please check the
device name (Pioneer BT unit) and enter the
link code on your cellular phone. If the connection is established, CONNECTED is displayed.
# The link code is set to 0000 as default. You
can change this code in the initial setting. Refer
to Entering PIN code for Bluetooth wireless con-
nection on page 24.
Using a cellular phone to
initiate a connection
Putting the unit in Connection open mode allows you to establish a Bluetooth wireless connection from your phone. You may need to
refer to the operation manual that came with
your phone if you are unsure how to initiate a
connection from your phone.
1 Touch PHONE CONNECT on the function
menu.
2 Touch CONNECTION OPEN.
The unit is now on standby for connection
from cellular phone.
3 Use cellular phone to connect to this
unit.
# Operation varies depending on the type of
your cellular phone. Refer to the instruction manual that came with your cellular phone for detailed instructions.
# You may need to enter the link code on your
cellular phone to complete the connection.
# The link code is set to 0000 as default. You
can change this code in the initial setting. Refer
to Entering PIN code for Bluetooth wireless con-
nection on page 24.
12
En
Page 13
Bluetooth Telephone
Section
02
English
Disconnecting a cellular phone
When you are done using your phone with this
unit, you can close the Bluetooth wireless connection.
1 Touch PHONE CONNECT on the function
menu.
2 Touch DISCONNECT to disconnect the
currently connected cellular phone from
this unit.
After the disconnection is completed,
NO CONNECTION is displayed.
Registering connected
cellular phone
You can register a phone that is temporarily
connected to this unit in order to take full advantage of the features available with Bluetooth wireless technology. A total of five
phones can be registered: three user cellular
phones and two guest phones. When registered as a user phone, all the possible functions are available for use. When registered as
a guest phone, some functions are limited.
1 Touch PHONE REGISTER on the function
menu.
2 Touch and hold one of the registration
assignments to register the currenctly connected phone.
Select from the following:
1 (user 1)—2 (user 2)—3 (user 3)—G (guest 1)
— G (guest 2)
If the registration is succeeded, the device
name of the connected phone is displayed in
the selected assignment.
# If the assignment is empty, the device name is
not displayed. If the assignment is already taken,
the device name appears. To replace an assign-
ment with a new phone, first delete the current
assignment. For more detailed instructions, see
Deleting a registered phone on this page.
# If the registration failed, device name of the
connected phone is not displayed in the selected
assignment. In this case, return to step 1 and try
again.
Note
Audio adjustment can be set independently for
each user.
Deleting a registered phone
If you no longer need to use a registered
phone with this unit, you can delete it from the
registration assignment for another phone.
1 Touch PHONE REGISTER on the function
menu.
2 Touch DELETE next to the device name
you want to delete.
A confirmation display appears. Touch YES to
delete the phone.
# It takes about 10 seconds to delete the data.
To make it sure, leave the ignition switch ACC or
ON position for 10 seconds aft er you operate the
deletion.
# To cancel deleting a registered phone, touch
NO.
En
13
Page 14

Section
02
Bluetooth Telephone
Connecting to a registered
cellular phone
Once your phone is registered with this unit it
is a simple matter to establish a Bluetooth
wireless connection, either manually by selecting a registration assignment, or automatically
when a registered phone is within range.
Connecting to a registered
phone manually
Select a phone from the registration assignments to connect to the phone manually.
1 Touch PHONE CONNECT on the function
menu.
2 Touch DIRECT CONNECT.
3 Touch the device name you want to
connect.
While connecting, CONNECTING is flashing.
If the connection is established, CONNECTED
is displayed.
Connecting to a registered
phone automatically
When Automatic Connection is active the unit
will automatically establish a connection with
a registered phone when it comes into range.
! If this unit fails to find registered phones,
this unit connects automatically to a phone
registered as 1 (user 1).
! This feature may not work with all phones.
If your registered phone fails to connect
with automatic connection, use the manual
connection method explained in Connect-
ing to a registered phone manually on this
page.
! With some cellular phones, you may be re-
quired to make a confirmation on the cellu-
lar phone in connecting to this unit. In
such case, the connection may not be
made until you confirm it on the phone
even if the Automatic Connection of this
unit is set to on. If possible, set your cellular phone to not seeking a confirmation for
the Bluetooth connection. For details,
please refer to the operation manual that
came with your cellular phone.
! This feature is not possible if you are play-
ing back songs on your Bluetooth audio
player via Bluetooth wireless technology. In
such case, stop the playback and switch to
another source for your cellular phone to
connect to this unit through this function.
! While you are operating in the function
menu of Telephone source or BT AUDIO
source, this unit does not initiate an automatic connection to your registered phone.
! This feature cannot be set for each different
user phone.
% Touch AUTO CONNECT on the function
menu to turn the Automatic Connection
function on.
If your cellular phone is set ready for Bluetooth
wireless connection, the connection to this
unit will be automatically established.
# To turn automatic connection off, touch
AUTO CONNECT again.
Using the Phone Book
The Phone Book can store up to 500 names
and numbers. Use the Phone Book to browse
for numbers on the unit’s display and select
numbers to call. Names and phone numbers
stored in a registered user phone’s address
book can be transferred to the Phone Book, allowing you to fill the Phone Book quickly and
easily with your contacts.
14
En
Page 15

Bluetooth Telephone
Section
02
English
! The maximum number of characters which
can be displayed is different depending on
your cellular phone. This unit can display
up to 24 to 48 letters.
Transferring entries to the
Phone Book
To populate the Phone Book you can transfer
the numbers in a registered user phone’s address book.
The Phone Book can hold a total of 500 entries; 300 from User 1, 150 from User 2, and 50
from User 3.
! Once the transferring Phone Book function
starts, the Bluetooth connection is disconnected and the hands-free phoning is not
possible. In order to restart the hands-free
phoning, connect your cellular phone to
this unit again. If the automatic connection
of this unit is turned on, however, the connection will be automatically established
several tens of seconds after the phone is
disconnected for the transferring.
! Some symbols used in the phone number
of the phone book entries cannot be transferred to this unit. Only +, # and * can be
correctly recognized by this unit.
! With some cellular phones, it may not be
possible to transfer whole phone book at a
time. In this case, transfer phone book entries one by one from your phone by using
your cellular phone.
! Depending on the cellular phone con-
nected via Bluetooth wireless technology,
this unit cannot display the Phone Book
correctly. (Some characters may be
garbled.)
! If the phone book in the cellular phone con-
tains image data, phone book may not be
correctly transferred.
1 Touch PHONEBOOK TRANSFER on the
function menu.
2 Touch START to turn the Phone Book
Transfer function on.
The Phone Book Transfer is now on standby.
3 Use cellular phone to perform phone
book transfer.
Perform phone book transfer using the cellular phone. For detailed instruction on this,
refer to the instruction manual that came with
your cellular phone.
# While transferring the phone book, hourglass
icon is displayed.
# The display indicates how many entries have
been transferred and the total number to be
transferred.
# To cancel the transferring process, touch
STOP.
4 Completed is displayed and phone
book transfer is completed.
Changing the Phone Book
display order
You can choose to display the Phone Book
sorted alphabetically by first name or last
name.
! With some cellular phones, this feature
may not be possible.
% Touch PHONEBOOK NAME VIEW on the
function menu to turn Phone Book Name
View function on.
Display order for the Phone Book is changed.
# To change to the other display order, touch
PHONEBOOK NAME VIEW again.
Calling a number in the Phone
Book
You can select the entry in the Phone Book
and make the call.
En
15
Page 16

Section
02
Bluetooth Telephone
1 Touch PHONE BOOK to display the
Phone Book.
2 Touch a Phone Book entry you want to
call.
The display is switched to the Phone Book edit
display.
# Touch PREV or NEXT to display other phone
book entries.
3 Touch phone number of the Phone
Book entry you want to call.
If several phone numbers are entered to an
entry, touch one you want to call.
The display returns to the normal display and
the Phone Book entry you selected is displayed on the information bar.
4 Touch
The estimated call time appears in the display
(this may differ slightly from the actual call
time).
# For an international call, touch add "+" to add
+ to the phone number.
5 To end the call, touch .
The estimated call time appears in the display
(this may differ slightly from the actual call
time).
to make a call.
Searching a number in the
Phone Book
After finding the number in the Phone Book
you want to call, you can select the entry and
make the call.
1 Touch PHONE BOOK to display the
Phone Book.
2 Touch SEARCH to display the Phone
Book search display.
3 Touch an alphabet letter to select the
first letter of the name you are looking for.
4 Touch ENTER to show entries starting
with the letter you chose.
The display shows the first six Phone Book entries starting with that letter (e.g. “Ben”,
“Brian” and “Burt” when “B” is selected).
# Touch PREV or NEXT to display other phone
book entries.
# To refine the search with a different letter,
touch CLEAR.
5 Touch a Phone Book entry and make a
call.
See step two to five on Calling a number in the
Phone Book on the previous page for how to
do this.
Editing the name of a Phone
Book entry
You can edit the names of Phone Book entries.
Each name can be up to 16 characters long.
1 Touch PHONE BOOK to display the
Phone Book.
2 Select a Phone Book entry you want to
edit.
See step two to three on Calling a number in
the Phone Book on the previous page for how
to do this.
3 Touch EDIT next to the Phone Book
entry name.
The display is changed to the Phone Book edit
display.
4 Touch 123 or ABC to select the desired
character type.
Touching ABC switches the character types in
the following order.
16
En
Page 17

Bluetooth Telephone
Section
02
English
Alphabet (upper case), numbers and symbols
—alphabet (lower case)—numbers and symbols—Russian characters
# Only when you use a Russian model, you can
switch the character type to Russian.
5 Touch a letter to enter.
# To delete a character and leave a space, touch
.
6 Touch MEMORY to store the new
name.
Editing phone numbers
You can edit the phone numbers of Phone
Book entries.
1 Touch PHONE BOOK to display the
Phone Book.
2 Select a Phone Book entry you want to
edit.
See step two to three on Calling a number in
the Phone Book on page 15 for how to do this.
3 Touch EDIT next to the phone number
you want to edit.
The display is changed to the Phone Book dial
edit display.
4 Touch 0—9 to input numbers.
# For an international call, touch add "+" to add
+ to the phone number.
# Touch CLEAR to delete the number.
5 Touch c or d to move the cursor and
edit the number.
Repeat these steps until you have finished
changing.
6 Touch ENTER to store the new number.
Clearing a Phone Book entry
You can delete Phone Book entries in the
Phone Book one by one.
To clear all of your entries in the Phone Book,
refer to Clearing memory on this page.
1 Touch PHONE BOOK to display the
Phone Book.
2 Select a Phone Book entry you want to
delete.
See step two to three on Calling a number in
the Phone Book on page 15 for how to do this.
3 Touch DELETE to delete the Phone Book
entry.
A confirmation display appears. Touch YES to
delete the entry.
# It takes about 10 seconds to delete the data.
To make it sure, leave the ignition switch ACC or
ON position for 10 seconds aft er you operate the
deletion.
# If you do not want to clear a Phone Book entry
that you have selected, touch NO.
Clearing memory
You can clear memory of each item; Phone
Book, dialled/received/missed call history list
and preset phone number.
1 Touch CLEAR MEMORY on the function
menu.
2 Touch CLEAR next to the item you want
to delete from the memory.
Select from the following:
PHONE BOOK (phone book)—DIALED CALLS
(dialled call history)—RECEIVED CALLS (received call history)—MISSED CALLS (missed
call history)—PRESET DIALS (preset phone
numbers)
En
17
Page 18

Section
02
Bluetooth Telephone
After selecting a desired item, a confirmation
display appears. Touch OK to delete the memory.
# If you want to clear all the Phone Book,
dialled/received/missed call history list and preset phone number, touch CLEAR ALL.
# It takes about 10 seconds to delete the data.
To make it sure, leave the ignition switch ACC or
ON position for 10 seconds aft er you operate the
deletion.
# If you do not want to clear memory that you
have selected, touch CANCEL.
Using the Call History
The 12 most recent calls made (dialled), received and missed, are stored in the Call History. You can browse the Call History and call
numbers from it.
Displaying the Call History
The Call History is divided into three groups:
Missed calls, Dialled calls, and Received calls.
You can see the number (and name if the
number is in the Phone Book).
% Touch LOG to display the Call History.
Touching LOG repeatedly switches between
the following call histories:
Missed call — Dialled call — Received call
# If no phone numbers have been stored in the
selected list, nothing is displayed.
# You can switch between phone number and
name (if entered) by touching ABC/123.
Calling a number from the Call
History
1 Display the list and select a phone number.
Display the phone number you want to make a
call.
2 Touch a phone number or name (if entered) you want to call.
The display returns to the normal display and
the phone number you selected is displayed
on the information bar.
# Touch PREV or NEXT to display other phone
number or name (if entered).
3 Touch to make a call.
The estimated call time appears in the display
(this may differ slightly from the actual call
time).
# For an international call, touch add "+" to add
+ to the phone number.
4 To end the call, touch .
Using preset numbers
Assigning preset numbers
Numbers that you dial frequently can be assigned to presets for quick recall.
You can assign up to six frequently called
phone numbers to number presets (P 1-P 6).
1 Select a desired phone number from
the Phone Book or the Call History.
See the instructions explained in previous
pages for how to select a desired phone number from the Phone Book or the Call History.
The display should now be the normal display
and the selected phone number is displayed
on the information bar.
18
En
Page 19

Bluetooth Telephone
Section
02
English
2 Touch LIST to display preset numbers
P 1-P 6.
3 Keep touching one of P 1-P 6 to preset
the phone number.
The phone number you selected is stored in
presets.
# Up to 30 phone numbers (six phone numbers
for each of the three registered phones and two
guest phones) can be stored in memory.
Recalling preset numbers
You can easily recall the preset phone numbers.
1 Touch LIST to display preset numbers
P 1-P 6.
Preset numbers P 1-P 6 appear in the display.
2 Touch one of preset numbers P 1-P 6.
The selected phone number should now be
displayed on the information bar.
3 Touch
4 To end the call, touch
The estimated call time appears in the display
(this may differ slightly from the actual call
time).
to make a call.
.
2 Touch 0—9 to input numbers.
# For an international call, touch add "+" to add
+ to the phone number.
# Touch CLEAR to delete the number.
# Up to 24 digits can be entered.
3 When you completed entering the
number, touch
4 To end the call, touch
The estimated call time appears in the display
(this may differ slightly from the actual call
time).
to make a call.
.
Echo canceling and noise
reduction
When you are operating hands-free phoning
in the vehicle, you may hear undesired echo.
This function reduces the echo and noise and
keeps a certain sound quality.
! This feature cannot be set for each different
user phone.
% Touch ECHO CANCEL on the function
menu to turn Echo Cancel function on.
# To turn echo canceling off, touch
ECHO CANCEL again.
Making a call by entering
phone number
You can make a call by directly entering phone
numbers on this unit.
1 Touch DIRECT to display the direct dial
display.
Switching the ring tone
The unit offers you to turn the ring tone for incoming calls on or off.
! The ring tone you select for this unit has no
effect on the ring tone used by your phone.
If you do not want your phone and this unit
to ring at the same time, we recommend
you turn the ring tone of one or the other
off.
En
19
Page 20
Section
02
Bluetooth Telephone
% Touch RING TONE on the function menu
to turn the ring tone on.
# To turn the ring tone off, touch RING TONE
again.
Setting the automatic
rejecting
If this function is on, this unit automatically rejects all incoming calls.
! This feature cannot be set for each different
user phone.
! The rejected call is not memorized in re-
ceived or missed call history list.
% Touch REFUSE ALL CALLS on the function menu to turn the automatic call rejection on.
ON appears in the display.
# To turn the automatic call rejection off, touch
REFUSE ALL CALLS again.
Setting the automatic
answering
If this function is on, this unit automatically
answers all incoming calls.
! This feature cannot be set for each different
user phone.
is prioritized and all incoming calls are automatically rejected.
Displaying BD (Bluetooth
Device) address
Each device featuring Bluetooth wireless technology is allocated a unique 48-bit device address. Each device address consists of a 12digit of hexadecimal string.
You can display the BD address of your cellular phone and this unit.
Should this unit fails to operate properly and
you consult with dealer for repair, you may be
asked to indicate the system versions of this
unit and of Bluetooth module. You can display
the versions and confirm them.
% Touch DEVICE INFO on the function
menu to display the BD address.
Various information regarding the bluetooth
wireless technology are displayed.
! BD ADDRESS (system address)
! SYSTEM NAME (system name)
! SYSTEM VER. (version)
! BT MODULE VER. (Bluetooth module
version)
% Touch AUTO ANSWER on the function
menu to turn the automatic answer on.
ON appears in the display.
# To turn the automatic answer off, touch
AUTO ANSWER again.
Note
If both the automatic reject and automatic answer functions are set to on, the automatic reject
20
En
Page 21
132
4
Bluetooth Audio
Section
03
English
Listening to songs on BT Audio
(Bluetooth audio player)
If you connect this adapter to a Pioneer head
unit, you can control a Bluetooth audio player
via Bluetooth wireless technology.
Important
! This unit can control a Bluetooth audio player
via A2DP or AVRCP profile. Bluetooth audio
players (or Bluetooth adapters) compatible
with those profiles can be connected to this
unit.
— A2DP profile (Advanced Audio Distribution
Profile): Only playing back songs on your
audio player is possible.
— AVRCP profile (Audio/Video Remote Con-
trol Profile): Playing back, pausing, selecting songs, etc., are possible.
! Since there are a number of Bluetooth audio
players available on the market, operations
with your Bluetooth audio player using this
unit vary in great range. Please refer to the instruction manual that came with your Bluetooth audio player as well as this manual
while operating your player on this unit.
! Information about songs (e.g. the elapsed
playing time, song title, song index, etc.) cannot be displayed on this unit.
! While you are listening to songs on your Blue-
tooth audio player, please refrain from operating on your cellular phone as much as
possible. If you try operating on your cellular
phone, the signal from your cellular phone
may cause a noise on the song playback.
! When you are talking on the cellular phone
connected to this unit via Bluetooth wireless
technology, the song playback from your Bluetooth audio player connected to this unit is
muted.
! Even if while you are listening to song on your
Bluetooth audio player you switch to another
source, the playback of song continues to
elapse.
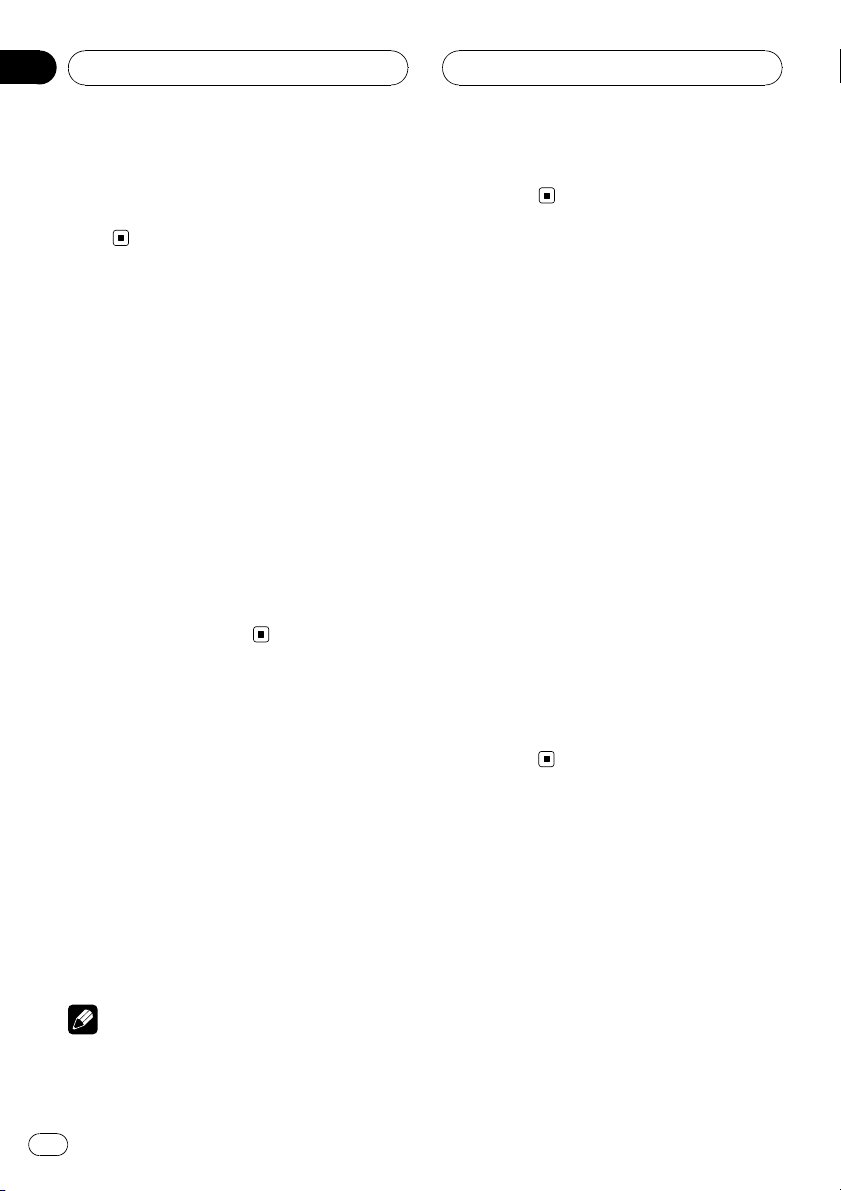
1 Source icon
Shows which source has been selected.
2 Source name
Shows the selected source name.
3 Device name
Shows the device name of the connected
Bluetooth audio player (or Bluetooth adapter).
4 Bluetooth audio indicator
Shows when a Bluetooth audio player connection is established (for more details,
refer to Connecting a Bluetooth audio player
on the next page).
% Touch the source icon and then touch
BT AUDIO to select the Bluetooth audio
source.
Note
The line-of-sight distance between this unit and
your cellular phone must be 10 meters or less for
sending and receiving voice and data via Bluetooth wireless technology. However, the transmission distance may become shorter than the
estimated distance, depending on the environment in use.
En
21
Page 22
1
Section
03
Bluetooth Audio
Note
Before you can use audio players you may need
to enter the PIN code into this unit. If your player
requires a PIN code to establish a connection,
look for the code on the player or in its accompanying documentation. Enter the PIN code referring to Entering PIN code for Bluetooth wireless
connection on page 24.
Connecting a Bluetooth
audio player
1 Function display
Shows the function names.
For this unit to control your Bluetooth audio
player it needs to establish a Bluetooth wireless connection.
This function initiates the connection via Bluetooth wireless technology.
1 Touch AV MENU to display MENU.
MENU appears on the display.
# When AV MENU is not displayed, you can dis-
play it by touching the screen.
# You can also display MENU by clicking the
joystick.
2 Touch FUNCTION to display the function names.
The function names are displayed and operable ones are highlighted.
# To return to the previous display, touch BACK.
# To return to the playback display, touch ESC.
3 Touch CONNECTION OPEN.
ON is displayed. This unit is now on standby
for connection from Bluetooth audio player.
If your Bluetooth audio player is set ready for
Bluetooth wireless connection, connection to
this unit will be automatically established.
Playing songs on Bluetooth
audio player
Important
Operation varies depending on the type of your
Bluetooth audio player. Refer to the instruction
manual that came with your Bluetooth audio
player for detailed instructions.
1 Touch f.
Playback starts.
# When you want to pause a song, touch f
again.
2 To skip back or forward to another
track, touch o or p.
Touching p skips to the start of the next
track. Touching o once skips to the start of
the current track. Touching it again will skip to
the previous track.
# You can also skip back or forward to another
track by pressing c or d button or moving the
joystick left or right.
3 To perform fast forward or reverse,
keep touching o or p.
# You can also perform fast reverse/fast forward
by pressing and holding c or d button or holding
the joystick left or right.
# When you perform fast forward or reverse,
there is a sound or not. This difference depends
on the Bluetooth audio player which you use.
22
4 To stop playback, touch g.
En
Page 23

Bluetooth Audio
Section
03
English
Disconnecting a Bluetooth
audio player
When you are done using your Bluetooth
audio player with this unit, you can close the
Bluetooth wireless connection.
1 Touch AV MENU to display MENU.
MENU appears on the display.
# When AV MENU is not displayed, you can dis-
play it by touching the screen.
# You can also display MENU by clicking the
joystick.
2 Touch FUNCTION to display the function names.
The function names are displayed and operable ones are highlighted.
# To return to the previous display, touch BACK.
# To return to the playback display, touch ESC.
3 Touch DISCONNECT.
After the disconnection is completed,
Disconnected is displayed.
Displaying BD (Bluetooth
Device) address
Each device featuring Bluetooth wireless technology is allocated a unique 48-bit device address. Each device address consists of a 12digit of hexadecimal string.
You can display the BD address of this unit.
Should this unit fails to operate properly and
you consult with dealer for repair, you may be
asked to indicate the system versions of this
unit and of Bluetooth module. You can display
the versions and confirm them.
# You can also display MENU by clicking the
joystick.
2 Touch FUNCTION to display the function names.
The function names are displayed and operable ones are highlighted.
# To return to the previous display, touch BACK.
# To return to the playback display, touch ESC.
3 Touch DEVICE INFO to display the BD
address.
Various information regarding the bluetooth
wireless technology are displayed.
! BD ADDRESS (system address)
! SYSTEM NAME (system name)
! SYSTEM VER. (version)
! BT MODULE VER. (Bluetooth module
version)
1 Touch AV MENU to display MENU.
MENU appears on the display.
# When AV MENU is not displayed, you can dis-
play it by touching the screen.
En
23
Page 24

Section
04
Initial Settings
Entering PIN code for
Bluetooth wireless connection
With some Bluetooth audio players, you may
be required to enter to this unit in advance
PIN code of your Bluetooth audio player, in
order to set this unit ready for a connection
from your Bluetooth audio player.
1 Touch the source icon and then touch
OFF to turn this unit off.
# When the source icon is not displayed, you
can display it by touching the screen.
2 Touch AV MENU and then touch INITIAL
to display the function names.
The function names are displayed and operable ones are highlighted.
# When AV MENU is not displayed, you can dis-
play it by touching the screen.
# You can also display MENU by clicking the
joystick.
# To go to the next group of function names,
touch NEXT.
# To return to the previous group of function
names, touch PREV.
# To return to the previous display, touch BACK.
# To return to the display of each source, touch
ESC.
3 Touch PINCODE INPUT.
PIN code input display appears.
4 Touch 0—9 to input the PIN code of
your Bluetooth audio player.
# Touch C to delete the number.
5 After inputting PIN code (up to 16 digits), touch ENTER.
The PIN code you entered is stored in this
unit.
24
En
Page 25

Operating with different
head units
Section
05
English
Using as an external unit
The following head units operate this unit as
an external unit. For more details about the external unit, refer to the head unit’s manual.
! 1KEY to 6KEY doesn’t be used to operate
this unit.
! When selecting TEL as a source,
AUTO/MANUAL (A/M) doesn’t be used to
operate this unit.
! When selecting BT AUDIO as a source,
FUNC3 (F3)/FUNCTION3 and FUNC4 (F4)/
FUNCTION4 doesn’t be used to operate
this unit.
Head unit group 1
The following head units featuring FUNCTION
button operation or SOFT KEY operation.
DEH-P9600MP, DEX-P90RS, DEH-P7700MP,
DEH-P7600MP, DEH-P77MP
DEH-P6700MP, DEH-P6600R, DEH-P5900MP,
DEH-P5800MP, DEH-P5700MP, DEH-P5600MP,
DEH-P55BT
*2
, DEH-P4800MP, DEH-P3600MP,
DEH-P2600R, DEH-P40MP, DVH-P580MP,
DVH-P5000MP, KEH-P7020R, KEH-P6020R
Head unit group 2
The following head units featuring
MULTI-CONTROL operation.
DEH-P8600MP, DEH-P88RS, DEH-P80MP,
DEH-P70BT
*2
Head unit group 3
The following head units featuring touch
panel key operation.
AVH-P7500DVDN, AVH-P6600DVD, AVHP5700DVD
*1
, DEH-P6800MP,
Important
! Since this unit is on standby to connect with
your cellular phones via Bluetooth wireless
technology, using this unit without running
the engine can result in battery drainage.
! In order to use Bluetooth wireless technology,
devices must be able to interpret certain profiles. When using as an external unit, this unit
is compatible with the following profiles.
— GAP (Generic Access Profile)
— SDP (Service Discovery Protocol)
— HSP (Head Set Profile)
— HFP (Hands Free Profile)
— A2DP (Advanced Audio Distribution Pro-
file)
— AVRCP (Audio/Video Remote Control Pro-
file)
! This unit can control a Bluetooth audio player
via A2DP or AVRCP profile. Bluetooth audio
players (or Bluetooth adapters) compatible
with those profiles can be connected to this
unit.
— A2DP profile (Advanced Audio Distribution
Profile): Only playing back songs on your
audio player is possible.
— AVRCP profile (Audio/Video Remote Con-
trol Profile): Playing back, pausing, selecting songs, etc., are possible.
! When using this unit as an external unit, the
PIN code is set to 0000. You can not change
the PIN code. This unit can connect only the
Bluetooth audio player which request 0000 as
the PIN code or does not request any PIN
code.
Head unit group 4
RS-D7R, RS-D7RN
*1It is necessary to use remote control (sold separately) to perform the operations by a/b/c/d.
2
*
You can use this unit as an external unit to control only the Bluetooth audio functions.
En
25
Page 26
Section
05
Operating with different
head units
! Since there are a number of Bluetooth audio
players available on the market, operations
with your Bluetooth audio player using this
unit vary in great range. Please refer to the instruction manual that came with your Bluetooth audio player as well as this manual
while operating your player on this unit.
! Information about songs (e.g. the elapsed
playing time, song title, song index, etc.) cannot be displayed on this unit.
! While you are listening to songs on your Blue-
tooth audio player, please refrain from operating on your cellular phone as much as
possible. If you try operating on your cellular
phone, the signal from your cellular phone
may cause a noise on the song playback.
! When you are talking on the cellular phone
connected to this unit via Bluetooth wireless
technology, the song playback from your Bluetooth audio player connected to this unit is
muted.
! Even if while you are listening to song on your
Bluetooth audio player you switch to another
source, the playback of song continues to
elapse.
! Operation varies depending on the type of
your cellular phone and Bluetooth audio
player. Refer to the instruction manual that
came with them for detailed instructions.
Notes
! This unit’s phone call reception is on standby
when ignition switch is set to ACC or ON.
! The line-of-sight distance between this unit
and your cellular phone must be 10 meters or
less for sending and receiving voice and data
via Bluetooth wireless technology. However,
the transmission distance may become shorter than the estimated distance, depending on
the environment in use.
! TEL and BT AUDIO are set to the same vo-
lume and the same SLA (Source Level Adjustment) volume. Change the volume value for
TEL or BT AUDIO each time, if needed.
! If the remote control have PGM button, you
can perform following operations with it:
— When selecting TEL as a source, you can
scroll a phone number in the call history.
— When selecting BT AUDIO as a source,
you can pause a song.
Function compatibility charts
Head unit group 1
Controls of Bluetooth telephone
Select TEL/BT AUDIO
as a source
Switch between TEL
and BT AUDIO
Put the unit in VOICE
*
ON mode
Take a phone call
End a call Press b.
Display the received/
missed call history
Display the dialled
call history
Select a phone number from the dialled
or received/missed
call history
Make a call
Press SOURCE.
When selecting TEL/BT
AUDIO as a source, press
BAND.
When selecting TEL as a
source, press and hold
BAND.
When a call comes in, press
a.
Press c.
Press d.
When displaying the dialled
or received/missed call history, press c or d.
If you want to return to the
telephone standby display,
press b.
When selecting a phone
number from the dialled and
received call history, press a.
* You can use this function if your cellular phone features voice recognition technology.
26
En
Page 27
Operating with different
head units
Section
05
English
Controls of Bluetooth telephone
Select a function
Scroll a phone number in the call history
Put the unit in
C.OPEN mode
Put the unit in RE-
GIST mode
Put the unit in DIS-
CONN. mode
Turn the automatic
answering on or off
Turn the automatic
connection on or off
Turn the ring tone on
or off
Display and switch
the device information
Controls of Bluetooth audio
Select TEL/BT AUDIO
as a source
Switch between TEL
and BT AUDIO
Skip back or forward
to another song
Fast forward/re-
*2
verse
When selecting TEL as a
source, press FUNCTION
(FUNC).
When selecting TEL as a
source, press a or b in
FUNC1 (F1).
When selecting TEL as a
source, press and hold a or
b in FUNC1 (F1).
When selecting TEL as a
source, press a or b in
FUNC2 (F2).
When selecting TEL as a
source, press and hold a or
b in FUNC2 (F2).
When selecting TEL as a
source, press a or b in
FUNC3 (F3).
When selecting TEL as a
source, press and hold a or
b in FUNC3 (F3).
When selecting TEL as a
source, press a or b in
FUNC4 (F4).
When selecting TEL as a
source, press and hold a or
b in FUNC4 (F4).
Press SOURCE.
When selecting TEL/BT
AUDIO as a source, press
BAND.
When selecting BT AUDIO
*1
as a source, press c or d.
When selecting BT AUDIO
as a source, press and hold
c or d.
Controls of Bluetooth audio
Select a function
Pause a song
Put the unit in
C.OPEN mode
Play songs
Put the unit in DIS-
CONN. mode
Switch between
AUTO and MANUAL
When selecting BT AUDIO
as a source, press FUNC-
TION (FUNC).
When selecting BT AUDIO
as a source, press a or b in
FUNC1 (F1).
When selecting BT AUDIO
as a source, press and hold
a or b in FUNC1 (F1).
When selecting BT AUDIO
as a source, press a or b in
FUNC2 (F2).
When selecting BT AUDIO
as a source, press and hold
a or b in FUNC2 (F2).
When selecting BT AUDIO
as a source, press c or d in
AUTO/MANUAL (A/M).
Note
When using as an external unit, this unit doesn't
automatically return to the original source after a
phone call. Select a desired source manually
after a phone call.
Head unit group 2
Controls of Bluetooth telephone
Select TEL/BT AUDIO
as a source
Switch between TEL
and BT AUDIO
Put the unit in VOICE
*3
ON mode
Take a phone call
Press SOURCE.
When selecting TEL/BT
AUDIO as a source, press
BAND.
When selecting TEL as a
source, press and hold
BAND.
When a call comes in, push
MULTI-CONTROL up.
*1You can use this function when you select AUTO in AUTO/MANUAL (A/M).
2
*
You can use this function when you select MANUAL in AUTO/MANUAL (A/M).
3
*
You can use this function if your cellular phone features voice recognition technology.
En
27
Page 28
Section
05
Operating with different
head units
Controls of Bluetooth telephone
End a call
Display the received/
missed call history
Display the dialled
call history
Select a phone number from the dialled
or received/missed
call history
Make a call
Select a function
Scroll a phone number in the call history
Put the unit in
C.OPEN mode
Put the unit in RE-
GIST mode
Put the unit in DIS-
CONN. mode
Turn the automatic
answering on or off
Turn the automatic
connection on or off
Push MULTI-CONTROL
down.
Push MULTI-CONTROL left.
Push MULTI-CONTROL
right.
When displaying the dialled
or received/missed call history, push MULTI-CONTROL
left or right.
If you want to return to the
telephone standby display,
push MULTI-CONTROL
down.
When selecting a phone
number from the dialled and
received call history, push
MULTI-CONTROL up.
When selecting TEL as a
source, use MULTI-CON-
TROL.
When selecting TEL as a
source, press MULTI-CON-
TROL in FUNC1 (F1).
When selecting TEL as a
source, press and hold
MULTI-CONTROL in FUNC1
(F1).
When selecting TEL as a
source, press MULTI-CON-
TROL in FUNC2 (F2).
When selecting TEL as a
source, press and hold
MULTI-CONTROL in FUNC2
(F2).
When selecting TEL as a
source, press MULTI-CON-
TROL in FUNC3 (F3).
When selecting TEL as a
source, press and hold
MULTI-CONTROL in FUNC3
(F3).
Controls of Bluetooth telephone
Turn the ring tone on
or off
Display and switch
the device information
Controls of Bluetooth audio
Select TEL/BT AUDIO
as a source
Switch between TEL
and BT AUDIO
Skip back or forward
to another song
Fast forward/re-
*2
verse
Select a function
Pause a song
Put the unit in
C.OPEN mode
Play songs
When selecting TEL as a
source, press MULTI-CON-
TROL in FUNC4 (F4).
When selecting TEL as a
source, press and hold
MULTI-CONTROL in FUNC4
(F4).
Press SOURCE.
When selecting TEL/BT
AUDIO as a source, press
BAND.
When selecting BT AUDIO
as a source, push MULTI-
*1
CONTROL left or right.
When selecting BT AUDIO
as a source, push and hold
MULTI-CONTROL left or
right.
When selecting BT AUDIO
as a source, use MULTI-
CONTROL.
When selecting BT AUDIO
as a source, press MULTI-
CONTROL in FUNC1 (F1).
When selecting BT AUDIO
as a source, press and hold
MULTI-CONTROL in FUNC1
(F1).
When selecting BT AUDIO
as a source, press MULTI-
CONTROL in FUNC2 (F2).
*1You can use this function when you select AUTO in AUTO/MANUAL (A/M).
2
*
You can use this function when you select MANUAL in AUTO/MANUAL (A/M).
28
En
Page 29
Operating with different
head units
Section
05
English
Controls of Bluetooth audio
Put the unit in DISCONN. mode
Switch between
AUTO and MANUAL
When selecting BT AUDIO
as a source, press and hold
MULTI-CONTROL in FUNC2
(F2).
When selecting BT AUDIO
as a source, press MULTI-
CONTROL in AUTO/MANUAL (A/M).
Note
When using as an external unit, this unit doesn't
automatically return to the original source after a
phone call. Select a desired source manually
after a phone call.
Head unit group 3
Controls of Bluetooth telephone
Select TEL/BT AUDIO
as a source
Switch between TEL
and BT AUDIO
Put the unit in VOICE
*1
ON mode
Take a phone call
End a call Touch b.
Display the received/
missed call history
Display the dialled
call history
Select a phone number from the dialled
or received/missed
call history
Press SOURCE.
When selecting TEL/BT
AUDIO as a source, touch
BAND.
When selecting TEL as a
source, keep touching
BAND.
When a call comes in, toucha.
Tou ch c.
Tou ch d.
When displaying the dialled
or received/missed call history, touch c or d.
If you want to return to the
telephone standby display,
touch b.
Controls of Bluetooth telephone
When selecting a phone
Make a call
Select a function
Scroll a phone number in the call history
Put the unit in
C.OPEN mode
Put the unit in RE-
GIST mode
Put the unit in DIS-
CONN. mode
Turn the automatic
answering on or off
Turn the automatic
connection on or off
Turn the ring tone on
or off
Display and switch
the device information
Controls of Bluetooth audio
Select TEL/BT AUDIO
as a source
Switch between TEL
and BT AUDIO
Skip back or forward
to another song
number from the dialled and
received call history, touch
a.
When selecting TEL as a
source, touch AV MENU and
then touch FUNCTION.
When selecting TEL as a
source, touch ab in FUNC-
TION1.
When selecting TEL as a
source, keep touching ab in
FUNCTION1.
When selecting TEL as a
source, touch ab in FUNC-
TION2.
When selecting TEL as a
source, keep touching ab in
FUNCTION2.
When selecting TEL as a
source, touch ab in FUNC-
TION3.
When selecting TEL as a
source, keep touching ab in
FUNCTION3.
When selecting TEL as a
source, touch ab in FUNC-
TION4.
When selecting TEL as a
source, keep touching ab in
FUNCTION4.
Press SOURCE.
When selecting TEL/BT
AUDIO as a source, press
BAND.
When selecting BT AUDIO
*2
as a source, touch c or d.
*1You can use this function if your cellular phone features voice recognition technology.
2
*
You can use this function when you select AUTO in AUTO/MANUAL (A/M).
En
29
Page 30
Section
05
Operating with different
head units
Controls of Bluetooth audio
Fast forward/re-
*1
verse
Select a function
Pause a song
Put the unit in
C.OPEN mode
Play songs
Put the unit in DIS-
CONN. mode
Switch between
AUTO and MANUAL
When selecting BT AUDIO
as a source, keep touching c
or d.
When selecting BT AUDIO
as a source, touch AV
MENU and then touch
FUNCTION.
When selecting BT AUDIO
as a source, touch ab in
FUNCTION1.
When selecting BT AUDIO
as a source, keep touching
ab in FUNCTION1.
When selecting BT AUDIO
as a source, touch ab in
FUNCTION2.
When selecting BT AUDIO
as a source, keep touching
ab in FUNCTION2.
When selecting BT AUDIO
as a source, touch c or d in
AUTO/MANUAL (A/M).
Note
When using as an external unit, this unit doesn't
automatically return to the original source after a
phone call. Select a desired source manually
after a phone call.
Head unit group 4
Controls of Bluetooth telephone
Select TEL/BT AUDIO
as a source
Switch between TEL
and BT AUDIO
Press SOURCE (AUX).
When selecting TEL/BT
AUDIO as a source, press
BAND.
Controls of Bluetooth telephone
Put the unit in VOICE
*2
ON mode
Take a phone call
End a call Press b.
Display the received/
missed call history
Display the dialled
call history
Select a phone number from the dialled
or received/missed
call history
Make a call
Select a function
Scroll a phone number in the call history
Put the unit in
C.OPEN mode
Put the unit in RE-
GIST mode
Put the unit in DIS-
CONN. mode
Turn the automatic
answering on or off
Turn the automatic
connection on or off
When selecting TEL as a
source, press and hold
BAND.
When a call comes in, press
a.
Press c.
Press d.
When displaying the dialled
or received/missed call history, press c or d.
If you want to return to the
telephone standby display,
press b.
When selecting a phone
number from the dialled and
received call history, press a.
When selecting TEL as a
source, open the cover of the
remote control.
When selecting TEL as a
source, press FUNCTION
button 1.
When selecting TEL as a
source, press and hold
FUNCTION button 1.
When selecting TEL as a
source, press FUNCTION
button 2.
When selecting TEL as a
source, press and hold
FUNCTION button 2.
When selecting TEL as a
source, press FUNCTION
button 3.
When selecting TEL as a
source, press and hold
FUNCTION button 3.
*1You can use this function when you select MANUAL in AUTO/MANUAL (A/M).
2
*
You can use this function if your cellular phone features voice recognition technology.
30
En
Page 31

Operating with different
head units
Section
05
English
Controls of Bluetooth telephone
Turn the ring tone on
or off
Display and switch
the device information
Controls of Bluetooth audio
Select TEL/BT AUDIO
as a source
Switch between TEL
and BT AUDIO
Skip back or forward
to another song
Fast forward/re-
*2
verse
Select a function
Pause a song
Put the unit in
C.OPEN mode
Play songs
Put the unit in DIS-
CONN. mode
Switch between
AUTO and MANUAL
When selecting TEL as a
source, press FUNCTION
button 4.
When selecting TEL as a
source, press and hold
FUNCTION button 4.
Press SOURCE (AUX).
When selecting TEL/BT
AUDIO as a source, press
BAND.
When selecting BT AUDIO
*1
as a source, press c or d.
When selecting BT AUDIO
as a source, press and hold
c or d.
When selecting BT AUDIO
as a source, open the cover
of the remote control.
When selecting BT AUDIO
as a source, press FUNC-
TION button 1.
When selecting BT AUDIO
as a source, press and hold
FUNCTION button 1.
When selecting BT AUDIO
as a source, press FUNC-
TION button 2.
When selecting BT AUDIO
as a source, press and hold
FUNCTION button 2.
When selecting BT AUDIO
as a source, press FUNC-
TION button 5.
Note
When using as an external unit, this unit doesn't
automatically return to the original source after a
phone call. Select a desired source manually
after a phone call.
Connecting a cellular phone
To use a phone wirelessly with this unit, it is
necessary first to establish a connection using
Bluetooth wireless technology.
! Connection is normally established by HFP,
which gives you a full control of functions
available on the telephone source. However, in some cases when you make connection from your cellular phone, the
connection may be made by HSP and several functions may not be available.
! A phone may be connected via Bluetooth
wireless technology but not yet registered
with this unit. In this case it is said to be
temporarily connected, and the available
features are limited. To take full advantage
of all the features available, we recommend
you register your phone with this unit.
Refer to Registering connected cellular
phone on the next page for more on this.
! If this unit is used as an external unit, this
unit does not search for available cellular
phones. Use your cellular phone to establish connection.
*1You can use this function when you select AUTO in AUTO/MANUAL (A/M).
2
*
You can use this function when you select MANUAL in AUTO/MANUAL (A/M).
En
31
Page 32

Section
05
Operating with different
head units
Using a cellular phone to
initiate a connection
Putting the unit in C.OPEN mode allows you to
establish a Bluetooth wireless connection
from your phone. You may need to refer to the
operation manual that came with your phone
if you are unsure how to initiate a connection
from your phone.
1 Put the unit in C.OPEN mode
Refer to Function compatibility charts on page
26.
# Before you put the unit in C.OPEN mode
NO TEL is displayed.
2 Use cellular phone to connect to this
unit.
When the connection is established, TEL is
displayed.
# Operation varies depending on the type of
your cellular phone. Refer to the instruction manual that came with your cellular phone for detailed instructions.
# You may need to enter the link code on your
cellular phone to complete the connection.
Registering connected
cellular phone
You can register a phone that is temporarily
connected to this unit in order to take full advantage of the features available with Bluetooth wireless technology. Only one cellular
phone can be registered.
1 Put the unit in REGIST mode
Refer to Function compatibility charts on page
26.
Before you put the unit in REGIST mode TEL is
displayed.
2 Use cellular phone to register to this
unit.
When the registration is completed, TEL REG.
is displayed.
# Operation varies depending on the type of
your cellular phone. Refer to the instruction manual that came with your cellular phone for detailed instructions.
# You may need to enter the link code on your
cellular phone to complete the connection.
Disconnecting a cellular phone
When you are done using your phone with this
unit, you can close the Bluetooth wireless connection.
% Put the unit in DISCONN. mode
Refer to Function compatibility charts on page
26.
After the disconnection is completed, NO TEL
is displayed.
Voice recognition
If your cellular phone features voice recognition technology, you can make a call by voice
commands.
! Operation varies depending on the type of
your cellular phone. Refer to the instruction
manual that came with your cellular phone
for detailed instructions.
! This function can be operated only when
the connection is established with HFP
(Hands Free Profile).
1 Put the unit in VOICE ON mode.
2 Pronounce the name of your contact.
32
En
Page 33

Operating with different
head units
Section
05
English
Setting the automatic
answering
If this function is on, this unit automatically
answers all incoming calls.
% Turn the automatic answering on or off
Refer to Function compatibility charts on page
26.
The status will be displayed (e.g.,
ANSW ON).
Connecting to a registered
phone automatically
When Automatic Connection is active the unit
will automatically establish a connection with
a registered phone when it comes into range.
! This feature may not work with all phones.
! With some cellular phones, you may be re-
quired to make a confirmation on the cellular phone in connecting to this unit. In
such case, the connection may not be
made until you confirm it on the phone
even if the Automatic Connection of this
unit is set to on. If possible, set your cellular phone to not seeking a confirmation for
the Bluetooth connection. For details,
please refer to the operation manual that
came with your cellular phone.
! This feature is not possible if you are play-
ing back songs on your Bluetooth audio
player via Bluetooth wireless technology. In
such case, stop the playback and switch to
another source for your cellular phone to
connect to this unit through this function.
% Turn the automatic connection on or
off
Refer to Function compatibility charts on page
26.
The status will be displayed (e.g., AUTO ON).
# When you turn the automatic connection on
and this unit is searching for the registered cellular phone, SEARCH is displayed.
# When you turn the automatic connection on
and this unit is establishing a connection with
the registered cellular phone, WAIT is displayed.
Setting the ring tone
The unit offers you to turn the ring tone for incoming calls on or off.
The ring tone you select for this unit has no effect on the ring tone used by your phone. If
you do not want your phone and this unit to
ring at the same time, we recommend you
turn the ring tone of one or the other off.
% Turn the ring tone on or off.
Refer to Function compatibility charts on page
26.
The status will be displayed (e.g., BEEP ON).
Displaying the device
information of this unit
You can display the device information of this
unit such as the BD address and the device
name.
Should this unit fails to operate properly and
you consult with dealer for repair, you may be
asked to indicate the system versions of this
unit and of Bluetooth module. You can display
the versions and confirm them.
! Each device featuring Bluetooth wireless
technology is allocated a unique 48-bit device address. Each device address consists
of a 12-digit of hexadecimal string.
En
33
Page 34

Section
05
Operating with different
head units
% Display and switch the device information
Refer to Function compatibility charts on page
26.
Each time you operate according to Function
compatibility charts the information changes
in the following order:
BD (Bluetooth Device) address—Device name
(PIONEER)—System version—Bluetooth module version
# On your cellular phone, you can confirm the
device name of this unit as Pioneer BT unit.
Connecting a Bluetooth
audio player
For this unit to control your Bluetooth audio
player it needs to establish a Bluetooth wireless connection.
This function initiates the connection via Bluetooth wireless technology.
Important
When using this unit as an external unit, the PIN
code is set to 0000. You can not change the PIN
code. This unit can connect only the Bluetooth
audio player which request 0000 as the PIN code
or does not request any PIN code.
2 Use the Bluetooth audio player to connect to this unit.
When the connection is established,
BT AUDIO is displayed.
# Operation varies depending on the type of
your Bluetooth audio player. Refer to the instruction manual that came with your Bluetooth audio
player for detailed instructions.
# You may need to enter the link code on your
Bluetooth audio player to complete the connection.
Disconnecting a Bluetooth
audio player
When you are done using your Bluetooth
audio player with this unit, you can close the
Bluetooth wireless connection.
% Put the unit in DISCONN. mode.
Refer to Function compatibility charts on page
26.
After the disconnection is completed,
NO AUDIO is displayed.
1 Put the unit in C.OPEN mode
Refer to Function compatibility charts on page
26.
This unit is now on standby for connection
from Bluetooth audio player.
If your Bluetooth audio player is set ready for
Bluetooth wireless connection, connection to
this unit will be automatically established.
# Before you put the unit in C.OPEN mode
NO AUDIO is displayed.
34
En
Page 35

Connections
Section
06
English
Important
! This unit can not be installed in a vehicle that
does not have an ACC (accessory) position on
the ignition switch.
C
C
A
F
F
O
ACC position
O
N
S
T
A
R
T
O
F
N
F
O
T
No ACC position
S
T
A
R
! Use this unit in other than the following condi-
tions could result in fire or malfunction.
— Vehicles with a 12-volt battery and negative
grounding.
! To prevent short-circuit, overheating or mal-
function, be sure to follow the directions
below.
— Disconnect the negative terminal of the
battery before installation.
— Secure the wiring with cable clamps or ad-
hesive tape. To protect the wiring, wrap adhesive tape around them where they lie
against metal parts.
— Place all cables away from moving parts,
such as gear shift and seat rails.
— Place all cables away from hot places,
such as near the heater outlet.
— Do not pass the yellow cable through a
hole into the engine compartment to connect to a battery.
— Cover any disconnected cable connectors
with insulating tape.
— Do not shorten any cables.
— Never cut the insulation of the power cable
of this unit in order to share the power to
other equipment. Current capacity of the
cable is limited.
— Use a fuse of the rating prescribed.
! Refer to the owner’s manual for details on
connecting the power amp and other units,
then make connections correctly.
! IP-BUS connectors are color-coded. Be sure
to connect connectors of the same color.
Cord function may differ according to the product, even if cord color is the same. When connecting this system, be sure to check all
manuals and connect cords correctly.
En
35
Page 36

Section
06
Connections
Connecting the units
Head unit
Microphone (supplied)
This unit
Fuse (3 A)
Yellow
To terminal always supplied
with power regardless of
ignition switch position.
Black (ground)
To vehicle (metal) body.
IP-BUS cable
Black
To IP-BUS input
(blue)
3 m
Black
Blue
IP-BUS cable
Multi-CD player
(sold separately)
36
En
Page 37

Installation
Section
07
English
Important
! Check all connections and systems before
final installation.
! Do not use unauthorized parts. The use of un-
authorized parts may cause malfunctions.
! Consult with your dealer if installation re-
quires drilling of holes or other modifications
of the vehicle.
! Install the unit where it does not get in the dri-
ver’s way and cannot injure the passenger if
there is a sudden stop, like an emergency
stop.
! When installing this unit, be sure to make suf-
ficient space on its top surface. There is an antenna under the top surface and covering it
may cause trouble to the radio transmission
and reception.
! Depending on the location of this unit, some
noise could be heard during playback of the
songs on Bluetooth audio player. In this situation, move this unit so as to reduce noise.
! When mounting this unit, make sure none of
the leads are trapped between this unit and
the surrounding metalwork or fittings.
! Do not mount this unit near the heater outlet,
where it would be affected by heat, or near the
doors, where rainwater might splash onto it.
! Before drilling any mounting holes always
check behind where you want to drill the
holes. Do not drill into the gas line, brake line,
electrical wiring or other important parts.
! If this unit installed in the passenger compart-
ment, anchor it securely so it does not break
free while the vehicle is moving, and cause injury or an accident.
! If this unit is installed under a front seat,
make sure it does not obstruct seat movement. Route all leads and cords carefully
around the sliding mechanism so they do not
caught or pinched in the mechanism and
cause a short-circuit.
Installing this unit
Mounting with Velcro fasteners
Thoroughly wipe off the surface before affixing
the Velcro fasteners.
! If the Velcro fasteners (hard) adhere to the
car mat directly, you may install this unit
without using the Velcro fasteners (soft).
% Mount this unit using the Velcro fasteners.
This unit
Velcro fastener (hard)
Velcro fastener (soft)
Car mat or chassis
Installing the microphone
CAUTION
It is extremely dangerous to allow the microphone lead to become wound around the steering column or gearstick. Be sure to install the
unit in such a way that it will not obstruct driving.
Note
Install the microphone in a position and orientation that will enable it to pick up the voice of the
person operating the system.
En
37
Page 38

t.
e
p
ps
e
de
the vehicle.
p
d
.
p
Section
07
Installation
When installing the
microphone on the sun visor
1 Install the microphone on the microphone clip.
To this uni
icrophon
icrophone cli
2 Install the microphone clip on the sun
visor.
With the sun visor up, install the microphone
clip. (Lowering the sun visor reduces the recognition rate for voice operations.)
icrophone cli
Clam
Use clamps to secure th
lead where necessary insi
When installing the microphone
on the steering column
1 Install the microphone on the microphone clip.
icrophone
icrophone cli
Fit the microphone lea
into the groove
2 Install the microphone clip on the steering column.
Double-sided tape
Install the microphone clip on
the rear side of the steering
column.
38
Clamps
Use clamps to secure the lead where
necessary inside the vehicle.
En
Page 39

Installation
Adjusting the microphone
angle
The microphone angle can be adjusted by
moving forward or backward the microphone
clip angle.
Section
07
English
En
39
Page 40

Appendix
Additional Information
Error messages
When you contact your dealer or your nearest
Pioneer Service Center, be sure to record the
error message.
Message Cause Action
ERROR-10 Built-in Blue-
tooth unit encountered an
error
ERROR-80 Built-in FLASH
ROM encountered an error
Turn the ignition
OFF and ON.
Turn the ignition
OFF and ON.
Specifications
General
Power source ............................. 14.4 V DC (10.8 V to 15.1 V
allowable)
Max. current consumption
..................................................... 0.2 A
Dimensions (W × H × D) ...146 × 25 × 90 mm
Weight .......................................... 0.37 kg
Version .......................................... Bluetooth 1.2 certified
Output power ............................ +4 dBm Max.
(Power class 2)
Profile ............................................ GAP (Generic Access Pro-
file)
SDP (Service Discovery Protocol)
HSP (Head Set Profile)
HFP (Hands Free Profile)
A2DP (Advanced Audio Distribution Profile)
AVRCP (Audio Video Remote Control Profile)
OPP (Object Push Profile)
Note
Specifications and the design are subject to possible modifications without notice due to improvements.
40
En
Page 41

Contenido
Gracias por haber comprado este producto Pioneer.
Lea con detenimiento estas instrucciones sobre el funcionamiento del aparato,
para que pueda darle el mejor uso posible. Una vez que las haya leído, conserve
este manual en un lugar seguro para consultarlo en el futuro.
Español
Antes de comenzar
Acerca de esta unidad 43
Ambiente de funcionamiento 43
Visite nuestro sitio Web 43
Acerca de este manual 44
En caso de problemas 44
Acerca de Bluetooth 44
Reposición de la unidad 44
– Restablecimiento de la unidad sin
borrar los datos de teléfono 45
– Reposición de la unidad borrando toda
la memoria 45
Teléfono Bluetooth
Función manos libres con teléfonos móviles
provistos de tecnología inalámbrica
Bluetooth 46
Información sobre la fuente telefónica 47
– Modo de espera 47
Configuración de la función manos
libres 47
Funciones básicas manos libres 48
– Realización de una llamada
telefónica 48
– Aceptación de una llamada
telefónica 49
Introducción al uso avanzado de la función
manos libres 50
Conexión de un teléfono móvil 50
– Búsqueda de los teléfonos móviles
disponibles 50
– Uso de un teléfono móvil para iniciar
una conexión 51
Desconexión de un teléfono móvil 51
Registro del teléfono móvil conectado 52
Eliminación de un teléfono registrado 52
Conexión a un teléfono móvil registrado 52
– Conexión manual a un teléfono
registrado 52
– Conexión automática a un teléfono
registrado 53
Uso del Directorio de teléfonos 53
– Transferencia de entradas al Directorio
de teléfonos 53
– Cambio del orden de visualización del
Directorio de teléfonos 54
– Llamada a un número del Directorio de
teléfonos 54
– Búsqueda de un número en el
Directorio de teléfonos 55
– Edición del nombre de una entrada del
Directorio de teléfonos 55
– Edición de números de teléfono 56
– Borrado de una entrada del Directorio
de teléfonos 56
Borrado de la memoria 56
Uso del Historial de llamadas 57
– Visualización del Historial de
llamadas 57
– Llamada a un número desde el
Historial de llamadas 57
Uso de números prefijados 58
– Asignación de números prefijados 58
– Recuperación de números
predefinidos 58
Realización de una llamada ingresando el
número de teléfono 58
Cancelación del eco y reducción de
ruido 59
Cambio del tono de llamada 59
Ajuste del rechazo automático 59
Ajuste de la respuesta automática 59
Visualización de la dirección BD (Bluetooth
Device) 60
Bluetooth Audio
Escuchar canciones en BT Audio
(reproductor de audio Bluetooth) 61
41
Es
Page 42

Contenido
Conexión de un reproductor de audio
Bluetooth 62
Reproducción de canciones en el
reproductor de audio Bluetooth 62
Desconexión de un reproductor de audio
Bluetooth 63
Visualización de la dirección BD (Bluetooth
Device) 63
Ajustes iniciales
Ingreso del código PIN para la conexión
inalámbrica Bluetooth 64
Funcionamiento con diferentes unidades
principales
Uso como una unidad externa 65
Tablas de compatibilidad de funciones 66
– Grupo 1 de unidades principales 66
– Grupo 2 de unidades principales 68
– Grupo 3 de unidades principales 69
– Grupo 4 de unidades principales 71
Conexión de un teléfono móvil 72
– Uso de un teléfono móvil para iniciar
una conexión 72
Registro del teléfono móvil conectado 73
Desconexión de un teléfono móvil 73
Reconocimiento de voz 73
Ajuste de la respuesta automática 73
Conexión automática a un teléfono
registrado 73
Cambio del tono de llamada 74
Visualización de la información del
dispositivo de esta unidad 74
Conexión de un reproductor de audio
Bluetooth 75
Desconexión de un reproductor de audio
Bluetooth 75
Instalación
Instalación de esta unidad 78
– Montaje con sujetadores de Velcro 78
Instalación del micrófono 79
– Instalación del micrófono en el
parasol 79
– Instalación del micrófono en la
columna de dirección 79
Ajuste del ángulo del micrófono 80
Información adicional
Mensajes de error 81
Especificaciones 81
Conexiones
Conexión de las unidades 77
42
Es
Page 43

Antes de comenzar
Si desea deshacerse de este producto, no lo
mezcle con los residuos generales de su
hogar. De conformidad con la legislación vigente, existe un sistema de recogida distinto
para los productos electrónicos que requieren
un procedimiento adecuado de tratamiento,
recuperación y reciclado.
Las viviendas privadas en los 25 estados
miembros de la UE, en Suiza y Noruega pueden devolver gratuitamente sus productos
electrónicos usados en las instalaciones de recolección previstas o bien en las instalaciones
de minoristas (si adquieren un producto similar nuevo).
En el caso de los países que no se han mencionado en el párrafo anterior, póngase en
contacto con sus autoridades locales a fin de
conocer el método de eliminación correcto.
Al actuar siguiendo estas instrucciones, se
asegurará de que el producto de desecho se
somete a los procesos de tratamiento, recuperación y reciclaje necesarios, con lo que se
previenen los efectos negativos potenciales
para el entorno y la salud humana.
PRECAUCIÓN
! No permita que esta unidad entre en contacto
con líquidos, ya que ello puede producir una
descarga eléctrica. Además, el contacto con
líquidos puede causar daños en la unidad,
humo y recalentamiento.
! Conserve este manual a mano para que
pueda consultar los procedimientos de operación y las precauciones cuando sea necesario.
! Mantenga siempre el volumen lo suficiente-
mente bajo como para que pueda escuchar
los sonidos que provienen del exterior del vehículo.
! Proteja esta unidad de la humedad.
! En caso de que este producto no funcione co-
rrectamente, comuníquese con su concesionario o el Servicio técnico oficial Pioneer más
próximo a su domicilio.
Ambiente de funcionamiento
Esta unidad se debe usar dentro de las gamas
de temperaturas que se indican a continuación.
Gama de temperatura de funcionamiento: -10
°C a +60 °C (14 °F a 140 °F)
Temperatura de prueba EN300328 ETC: -20 °C
a +55 °C (-4 °F a 131 °F)
Sección
01
Español
Acerca de esta unidad
Esta unidad es el adaptador de una unidad
principal Pioneer que permite conectar un teléfono móvil provisto de tecnología inalámbrica Bluetooth para utilizar la función manos
libres y escuchar canciones en el reproductor
de audio Bluetooth.
! Esta unidad está diseñada para ser utili-
zada únicamente en vehículos.
Visite nuestro sitio Web
Visítenos en el siguiente sitio:
43
Es
Page 44

Sección
01
Antes de comenzar
! Registre su producto. Conservaremos los
datos de su compra archivados para que
pueda consultar esta información en caso
de que deba efectuar un reclamo a la compañía de seguros por pérdida o robo.
! En nuestro sitio Web ofrecemos la informa-
ción más reciente acerca de Pioneer
Corporation.
Acerca de este manual
Haga funcionar esta unidad con la unidad
principal conectada. En las instrucciones de
este manual se utiliza el reproductor AVHP7800DVD (Russian model) como ejemplo de
unidad principal.
! Cuando utilice esta unidad con AVH-
P6800DVD (Russian model), consulte el
manual suministrado para las instrucciones de funcionamiento.
! Si se utilizan unidades principales distintas
de AVH-P7800DVD (Russian model) y AVHP6800DVD (Russian model), consulte Uso
como una unidad externa en la página 65.
Le recomendamos que se familiarice con las
funciones y su operación leyendo el manual
antes de utilizar esta unidad. Es muy importante que lea y observe los mensajes de AD-
VERTENCIA y PRECAUCIÓN en este
manual.
Acerca de Bluetooth
Bluetooth es una tecnología inalámbrica de
conectividad por radio de corto alcance, desarrollada para sustituir los cables de los teléfonos móviles, ordenadores de bolsillo y otros
dispositivos. Bluetooth opera a una frecuencia
de 2,4 GHz y permite transmitir voz y datos a
velocidades de hasta 1 megabit por segundo.
Bluetooth fue lanzado por parte de un Grupo
de Interés Especial (SIG) integrado por Ericsson Inc., Intel Corp., Nokia Corp., Toshiba e
IBM en 1998 y en la actualidad está siendo desarrollado por alrededor de 2 000 compañías a
nivel mundial.
! La marca literal y los logotipos Bluetooth
son propiedad de Bluetooth SIG, Inc., y
cualquier uso de dichas marcas por
Pioneer Corporation se hace bajo licencia.
Otras marcas y nombres comerciales son
propiedad de sus respectivos
propietarios.
Reposición de la unidad
En caso de problemas
En caso de que este producto no funcione correctamente, comuníquese con su concesionario o el Servicio técnico oficial Pioneer más
próximo a su domicilio.
44
Es
PRECAUCIÓN
Presionar el botón RESET de la unidad con la
llave de contacto en la posición ON (ACC ON) le
permite borrar el contenido de la memoria de la
unidad.
Page 45

Antes de comenzar
Sección
01
Restablecimiento de la unidad
sin borrar los datos de teléfono
Presionar el botón RESET de esta unidad le
permite restablecer la unidad a sus ajustes iniciales sin borrar los datos del teléfono. Sin embargo, se borran los valores de los ajustes
siguientes:
! PHONEBOOK NAME VIEW
! AUTO ANSWER
! REFUSE ALL CALLS
! RING TONE
! AUTO CONNECT
! ECHO CANCEL
Cuando se utiliza como una unidad externa,
se borran los valores de los ajustes siguientes:
! respuesta automática
! conexión automática
! tono de llamada
Se debe reposicionar la unidad en las siguientes condiciones:
! Antes de utilizar esta unidad por primera
vez después de su instalación
! Cuando se reconectan la unidad y la uni-
dad principal
! Si la unidad no funciona correctamente
! Cuando aparecen mensajes extraños o in-
correctos en el display
! Si se presentan problemas al operar la fun-
ción manos libres
Reposición de la unidad
borrando toda la memoria
Para proteger su información personal y privada, es posible eliminar los datos sobre el teléfono almacenados en esta unidad.
1 Gire la llave de contacto a la posición
ACC (accesorio) u ON (encendido).
2 Pulse RESET con la punta de un lapicero
u otro instrumento con punta.
La memoria se borra ahora completamente.
# Se tarda unos 10 segundos en eliminar los
datos. Para confirmar esta acción, deje la llave de
encendido en la posición ACC u ON durante 10
segundos después de realizar la eliminación.
# Confirme que todos los datos hayan sido borrados completamente. Para verificar el estado de
los datos, consulte Registro del teléfono móvil co-
nectado en la página 52. Si todos los estados del
teléfono están en blanco, significa que los datos
han sido borrados por completo.
Español
1 Gire la llave de contacto a la posición
OFF (apagado).
2 Pulse RESET con la punta de un lapicero
u otro instrumento con punta.
Botón RESET
45
Es
Page 46

1
3
4
c
2
678
9
a
b
5
Sección
02
Teléfono Bluetooth
Función manos libres con
teléfonos móviles
provistos de tecnología
inalámbrica Bluetooth
Si su teléfono móvil posee tecnología inalámbrica Bluetooth, puede utilizar este adaptador para
conectarlo a una unidad principal Pioneer para
hacer llamadas inalámbricas de manos libres,
incluso al conducir.
Importante
Puesto que esta unidad se encuentra en espera
para conectar con sus teléfonos móviles mediante la tecnología inalámbrica Bluetooth, utilizarla
sin encender el motor puede descargar la batería.
1 Icono de fuente
Muestra la fuente seleccionada.
4 Indicador del número de usuario
Muestra el número de registro del teléfono
móvil.
5 Nombre del dispositivo
Muestra el nombre del dispositivo del teléfono móvil.
6 Indicador de reconocimiento de voz
Aparece cuando está activada la función de
reconocimiento de voz (para obtener más
información, consulte Reconocimiento de
voz en la página 48).
7 Indicación de aviso de llamada en espera
Aparece cuando se ha recibido una llamada
externa que no ha sido revisada todavía.
8 Indicador de respuesta automática
Aparece cuando está activada la función de
respuesta automática (para obtener más información, consulte Ajuste de la respuesta
automática en la página 59).
9 Indicador de potencia de la batería
Muestra la potencia de la batería del teléfono móvil.
! El indicador de potencia de la batería
puede diferir de la potencia real de la
misma.
! Si no hay potencia en la batería, no se vi-
sualizará nada en el área del indicador
de potencia de la batería.
2 Nombre de la fuente
Muestra el nombre de la fuente seleccionada.
3 Número de teléfono
Muestra el número de teléfono que ha seleccionado.
46
Es
a Indicador de nivel de señal
Muestra la intensidad de la señal del teléfono móvil.
! El indicador de nivel de señal puede dife-
rir del nivel de señal real.
! Dependiendo de los teléfonos móviles
con tecnología inalámbrica Bluetooth, la
intensidad de campo de radio puede no
estar disponible.
Page 47

Teléfono Bluetooth
Sección
02
b Indicador de teléfono
Este indicador se muestra cuando se establece una conexión telefónica con tecnología inalámbrica Bluetooth (consulte
Conexión de un teléfono móvil en la página
50 para más información).
c Visualización de la lista de marcaciones
predefinidas
Muestra la lista de marcaciones predefinidas.
Notas
! La recepción de llamadas telefónicas de esta
unidad entra en espera cuando la llave de
contacto está en la posición ACC (accesorio)
u ON (encendido).
! La distancia de visibilidad entre esta unidad y
su teléfono móvil deber ser de 10 metros o inferior para el envío y recepción de voz y datos
mediante la tecnología inalámbrica Bluetooth.
Sin embargo, la distancia de transmisión
puede llegar a ser más corta que la distancia
estimada, dependiendo del entorno en que se
utilice.
! Para utilizar la tecnología inalámbrica Blue-
tooth, los dispositivos deben ser capaces de
interpretar ciertos perfiles. Esta unidad es
compatible con los siguientes perfiles.
— GAP (Generic Access Profile)
— SDP (Service Discovery Protocol)
— OPP (Object Push Profile)
— HSP (Head Set Profile)
— HFP (Hands Free Profile)
— A2DP (Advanced Audio Distribution Profi-
le)
— AVRCP (Audio/Video Remote Control Profi-
le)
! Cuando utiliza RDS (sistema de datos de
radio) o DAB (transmisión de audio digital) y
activa la espera por anuncio de tráfico, es posible interrumpir una llamada telefónica recibiendo una señal por anuncio de tráfico.
! Cuando el teléfono está seleccionado como
fuente, el volumen y la curva de ecualización
cambian automáticamente a los ajustes adecuados para la fuente telefónica. Cuando se
vuelve a otra fuente, los ajustes del volumen y
el ecualizador se restablecen automáticamente a sus valores originales.
! Se establece la curva de ecualización para la
fuente telefónica.
Información sobre la
fuente telefónica
Modo de espera
Cuando la unidad principal esté conectada a
través de tecnología inalámbrica Bluetooth,
seguirá en espera de fuente telefónica en segundo plano siempre que se mantenga la conexión. Por consiguiente, podrá utilizar
libremente las demás funciones de la unidad y
al mismo tiempo recibir llamadas.
% Toque el icono de fuente y luego,
Telephone para seleccionar el teléfono.
# Si no se visualiza el icono de fuente, toque la
pantalla para poder visualizarlo.
Configuración de la función
manos libres
Antes de poder hacer uso de la función
manos libres, deberá configurar la unidad
para su utilización con el teléfono móvil. Esto
conlleva establecer una conexión inalámbrica
Bluetooth entre esta unidad y su teléfono, registrar su teléfono en esta unidad, y ajustar el
nivel de volumen.
Español
47
Es
Page 48

Sección
02
Teléfono Bluetooth
1 Conexión
Para ver instrucciones detalladas sobre cómo
conectar su teléfono a esta unidad mediante
la tecnología inalámbrica Bluetooth, consulte
Conexión de un teléfono móvil en la página 50.
# Su teléfono estará ahora conectado temporalmente. Sin embargo, para hacer un mejor uso de
la tecnología, recomendamos que registre el teléfono en esta unidad.
2 Registro
Para registrar el teléfono conectado temporalmente, consulte Registro del teléfono móvil co-
nectado en la página 52.
3 Ajuste del volumen
Ajuste el volumen del audífono de su teléfono
móvil hasta que le resulte cómodo. Una vez
ajustado, el nivel de volumen se memorizará
en la unidad como el ajuste predefinido.
# El volumen de voz de la persona que llama y
el volumen del timbre pueden variar según el tipo
de teléfono móvil.
# Si la diferencia entre el volumen del timbre y
el volumen de la persona que llama es demasiado grande, el nivel de volumen general puede volverse inestable.
# Antes de desconectar el teléfono móvil de
esta unidad, no olvide ajustar el volumen a un
nivel adecuado. Si el volumen ha sido silenciado
(nivel cero) en su teléfono móvil, permanecerá silenciado incluso después de que desconecte el
teléfono de esta unidad.
Importante
Las operaciones avanzadas que exigen concentración, tales como marcar números en la pantalla, usar el directorio de teléfonos, etc, están
prohibidas mientras conduce. Cuando tenga que
utilizar estas funciones avanzadas, detenga su vehículo en un lugar seguro.
Realización de una llamada
telefónica
Reconocimiento de voz
Si su teléfono móvil posee tecnología de reconocimiento de voz, puede hacer una llamada
mediante comandos de voz.
! El funcionamiento es diferente según el
tipo de teléfono móvil. Consulte el manual
de su teléfono móvil para ver más instrucciones.
! Esta función se puede utilizar únicamente
cuando la conexión se establece mediante
un HFP (Hands Free Profile).
1 Toque VOICE para activar la función de
reconocimiento de voz.
El icono de marcación por voz se muestra en
la barra de información. Ahora la función de
reconocimiento de voz está lista.
# Si su teléfono móvil no incluye una función de
reconocimiento de voz, no puede tocar VOICE.
2 Pronuncie el nombre de su contacto.
Funciones básicas manos
libres
A continuación se indican las funciones básicas para utilizar manos libres a través de la
tecnología inalámbrica Bluetooth. En Introduc-
ción al uso avanzado de la función manos libres
en la página 50 se explican las funciones más
avanzadas y cómo utilizarlas.
48
Es
Page 49

Teléfono Bluetooth
Sección
02
Aceptación de una llamada
telefónica
Atender una llamada entrante
Incluso si se selecciona una fuente distinta de
Telephone o si la unidad está apagada, podrá
contestar llamadas entrantes. Si desea hacer
que esta unidad rechace automáticamente
todas las llamadas entrantes, consulte Ajuste
de la respuesta automática en la página 59.
1 Cuando entre una llamada, toque
# Si en el teléfono móvil está seleccionado el
modo privado, puede que la función manos libres
no esté disponible.
2 Para finalizar la llamada, toque .
El tiempo estimado de la llamada aparece en
el display (esto puede diferir ligeramente del
tiempo de llamada real).
# Puede que escuche un ruido al desconectar el
teléfono.
Rechazo de una llamada entrante
Puede rechazar una llamada entrante. Para rechazar automáticamente todas las llamadas
entrantes, consulte Ajuste del rechazo automá-
tico en la página 59.
.
llamada entrante (o nombre de la persona si figura en el directorio de teléfonos) aparecerá
en el display para indicarle que tiene la llamada en espera. Puede poner en espera a la persona de la primera llamada mientras usted
responde la llamada entrante; o bien rechazar
la llamada.
1 Toque
espera.
2 Toque
# La persona con la que ha estado hablando
quedará a la espera. Para finalizar la llamada, la
persona con la que ha hablado también debe colgar el teléfono.
# Mientras las llamadas están en espera, si toca
podrá alternar entre las llamadas.
para contestar la llamada en
para finalizar la llamada.
Rechazo de una llamada en espera
Si desea no interrumpir su llamada actual
para responder una llamada entrante, puede
rechazarla.
% Toque
entrante.
# El número que ha rechazado no se incluye en
la lista del historial de llamadas.
para rechazar una llamada
Español
% Cuando entre una llamada, toque
Se rechazará la llamada.
Nota
La llamada rechazada se registra en la lista de
historial de llamadas perdidas. Para obtener información sobre la lista de historial de llamadas
perdidas, consulte Uso del Historial de llamadas
en la página 57.
Atender una llamada en espera
Si le entra otra llamada telefónica mientras
está hablando por teléfono, el número de la
.
49
Es
Page 50

1
Sección
02
Teléfono Bluetooth
Introducción al uso avanzado
de la función manos libres
Importante
Para realizar esta operación, asegúrese de estacionar el vehículo y poner el freno de mano.
1 Visualización de función
Muestra los nombres de las funciones.
1 Seleccione Telephone como fuente.
2 Toque AV MENU para visualizar MENU.
MENU aparece en el display.
# Si no se visualiza AV MENU, toque la pantalla
para poder visualizarlo.
# También se puede visualizar MENU haciendo
clic en el joystick.
3 Toque FUNCTION para visualizar los
nombres de las funciones.
Se visualizan los nombres de las funciones y
las que se pueden usar aparecen resaltadas.
# Para volver a la visualización anterior, toque
BACK.
# Para volver a la visualización de reproducción,
toque ESC.
Conexión de un teléfono
móvil
Para utilizar un teléfono de forma inalámbrica
con esta unidad, en primer lugar es necesario
establecer una conexión con la tecnología inalámbrica Bluetooth. Existen varias formas de
realizar esto.
! La conexión se establece normalmente me-
diante HFP, que le otorga un pleno control
de las funciones disponibles sobre la fuente telefónica. Sin embargo, en algunos
casos cuando se realiza la conexión desde
su teléfono móvil, puede que ésta se haga
mediante HSP y que algunas funciones no
se estén disponibles.
! Un teléfono se puede conectar a través de
tecnología inalámbrica Bluetooth sin estar
registrado con esta unidad. En este caso, el
teléfono estará temporalmente conectado
pero con las funciones disponibles limitadas. Para aprovechar completamente
todas las funciones disponibles, se recomienda registrar su teléfono en esta unidad. Consulte Registro del teléfono móvil
conectado en la página 52 para obtener
más información.
Búsqueda de los teléfonos
móviles disponibles
Puede hacer que esta unidad busque los teléfonos disponibles en el área que tengan tecnología inalámbrica Bluetooth, y luego
seleccionar el teléfono al que desea conectarse en una lista visualizada en la pantalla.
1 Toque PHONE CONNECT en el menú de
funciones.
50
Es
Page 51

Teléfono Bluetooth
Sección
02
2 Toque Search para hacer una búsqueda
de los teléfonos móviles disponibles.
Mientras se realiza la búsqueda, se mostrará
SEARCHING. Cuando se encuentren los teléfonos móviles disponibles que tengan tecnología inalámbrica Bluetooth, se mostrarán los
nombres de los dispositivos o
Name Not Found (si no se pueden obtener
los nombres).
# Si la unidad no puede encontrar ningún teléfono móvil, se mostrará NOT FOUND.
3 Toque el nombre del dispositivo que
desee conectar.
Mientras se realiza la conexión, se mostrará
CONNECTING. Para completar la conexión,
verifique el nombre del dispositivo (Pioneer
BT unit) e ingrese el código de enlace de su teléfono móvil. Si la conexión se establece, se visualizará CONNECTED.
# El ajuste predefinido del código de enlace es
0000. Puede cambiar este código en el ajuste inicial. Consulte Ingreso del código PIN para la cone-
xión inalámbrica Bluetooth en la página 64.
Uso de un teléfono móvil para
iniciar una conexión
Si ajusta la unidad en el modo
Connection open podrá establecer una conexión inalámbrica Bluetooth desde su teléfono.
Es posible que tenga que consultar el manual
de funcionamiento de su teléfono si no está
seguro de cómo iniciar una conexión desde el
teléfono.
3 Uso del teléfono móvil para la conexión
a esta unidad.
# El funcionamiento es diferente según el tipo
de teléfono móvil. Consulte el manual de su teléfono móvil para ver más instrucciones.
# Es posible que tenga que introducir el código
de enlace en su teléfono móvil para completar la
conexión.
# El ajuste predefinido del código de enlace es
0000. Puede cambiar este código en el ajuste inicial. Consulte Ingreso del código PIN para la cone-
xión inalámbrica Bluetooth en la página 64.
Desconexión de un
teléfono móvil
Cuando haya terminado de utilizar el teléfono
en esta unidad, puede desactivar la conexión
Bluetooth.
1 Toque PHONE CONNECT en el menú de
funciones.
2 Toque DISCONNECT para desconectar
de la unidad el teléfono móvil conectado
actualmente.
Una vez completada la desconexión, aparece
NO CONNECTION.
Español
1 Toque PHONE CONNECT en el menú de
funciones.
2 Toque CONNECTION OPEN.
La unidad está ahora en espera de una conexión desde un teléfono móvil.
51
Es
Page 52

Sección
02
Teléfono Bluetooth
Registro del teléfono móvil
conectado
Puede registrar un teléfono que esté conectado temporalmente a esta unidad con el fin
de aprovechar al máximo las funciones de la
tecnología inalámbrica Bluetooth. Es posible
registrar un total de cinco teléfonos: tres teléfonos móviles y dos teléfonos de invitado.
Cuando se registre como teléfono de usuario,
se podrán utilizar todas las funciones posibles. Cuando se registre como teléfono de invitado, algunas funciones quedarán limitadas.
1 Toque PHONE REGISTER en el menú de
funciones.
2 Toque prolongadamente una de las
asignaciones de registro para registrar el
teléfono actualmente conectado.
Seleccione de entre las siguientes opciones:
1 (usuario 1)—2 (usuario 2)—3 (usuario 3)—G
(invitado 1)—G (invitado 2)
Si el registro se ha realizado correctamente, el
nombre del dispositivo del teléfono conectado
se mostrará en la asignación seleccionada.
# Si la asignación está vacía, el nombre del dispositivo no se muestra. Si ya se ha adoptado la
asignación, aparecerá el nombre del dispositivo.
Si desea volver a fijar una asignación en un
nuevo teléfono, en primer lugar debe eliminar la
asignación actual. Para obtener instrucciones detalladas, consulte Eliminación de un teléfono re-
gistrado en esta página.
# Si el registro no se ha realizado correctamente, el nombre del dispositivo del teléfono conectado no se mostrará en la asignación
seleccionada. En este caso, vuelva al paso 1 e inténtelo de nuevo.
Eliminación de un teléfono
registrado
Si ya no necesita utilizar un teléfono registrado en esta unidad, puede eliminarlo de la asignación de registro para utilizar otro teléfono.
1 Toque PHONE REGISTER en el menú de
funciones.
2 Toque DELETE junto al nombre del dispositivo que desee eliminar.
Se mostrará una pantalla de confirmación.
Toque YES para eliminar el teléfono.
# Se tarda unos 10 segundos en eliminar los
datos. Para confirmar esta acción, deje la llave de
encendido en la posición ACC u ON durante 10
segundos después de realizar la eliminación.
# Para cancelar la eliminación de un teléfono
registrado, toque NO.
Conexión a un teléfono
móvil registrado
Cuando su teléfono está registrado en esta
unidad es fácil establecer una conexión Bluetooth, ya sea manualmente seleccionando
una asignación de registro o automáticamente cuando el teléfono registrado se encuentre
dentro del alcance.
Conexión manual a un teléfono
registrado
Seleccione un teléfono de entre las asignaciones de registro para conectarse manualmente
al teléfono.
Nota
El ajuste de audio se puede fijar independientemente para cada usuario.
52
Es
1 Toque PHONE CONNECT en el menú de
funciones.
2 Toque DIRECT CONNECT.
Page 53

Teléfono Bluetooth
Sección
02
3 Toque el nombre del dispositivo que
desee conectar.
Al conectarse, parpadeará CONNECTING.Si
la conexión se establece, se visualizará
CONNECTED.
Conexión automática a un
teléfono registrado
Cuando la Conexión automática esté activa, la
unidad establecerá automáticamente una conexión a un teléfono registrado cuando se encuentre dentro de cobertura.
! Si la unidad no puede encontrar ningún te-
léfono registrado, se conecta automáticamente a un teléfono registrado como 1
(usuario 1).
! Es posible que esta característica no fun-
cione con todos los teléfonos. Si su teléfono registrado no se puede conectar con la
Conexión automática, utilice el método de
conexión manual que se describe en Cone-
xión manual a un teléfono registrado en la
página anterior.
! Con algunos teléfonos móviles, es posible
que tenga que realizar una confirmación
en el teléfono móvil al conectarlo a esta
unidad. En este caso, es posible que no
pueda realizar la conexión hasta que la
confirme en el teléfono, incluso si activa la
Conexión automática de esta unidad. Si es
posible, ajuste su teléfono móvil para que
no busque una confirmación para la conexión Bluetooth. Para obtener detalles, consulte el manual de funcionamiento
suministrado con su teléfono móvil.
! Es posible que no funcione esta caracterís-
tica si está reproduciendo canciones en su
reproductor de audio Bluetooth a través de
tecnología inalámbrica Bluetooth. En tal
caso, detenga la reproducción o cambie a
otra fuente para que su teléfono móvil
pueda conectarse a esta unidad por medio
de esta función.
! Cuando utiliza la unidad en el menú de
funciones de la fuente Telephone ola
fuente BT AUDIO, la unidad no realiza una
conexión automática a su teléfono registrado.
! Esta función no se puede configurar para
cada teléfono de usuario distinto.
% Toque AUTO CONNECT en el menú de
funciones para activar la función de Conexión automática.
Si su teléfono móvil está preparado para la conexión inalámbrica Bluetooth, se establecerá
automáticamente la conexión a esta unidad.
# Para desactivar la reproducción automática,
vuelva a tocar AUTO CONNECT.
Uso del Directorio de
teléfonos
El Directorio de teléfonos permite almacenar
hasta 500 nombres y números. Utilice el Directorio de teléfonos para buscar números en el
display de la unidad y seleccionar números
para llamar. Los nombres y los números de teléfono almacenados en una libreta de direcciones de un teléfono de usuario registrado se
pueden transferir al Directorio de teléfonos, lo
que permite que se llene de contactos de
forma rápida y sencilla.
! El número máximo de caracteres que se
pueden mostrar es diferente según el modelo de teléfono móvil. La unidad puede
mostrar de 24 a 48 letras.
Transferencia de entradas al
Directorio de teléfonos
Para rellenar el Directorio de teléfonos puede
transferir los números almacenados en una libreta de direcciones de un teléfono de usuario
registrado.
Español
53
Es
Page 54

Sección
02
Teléfono Bluetooth
El Directorio de teléfonos puede almacenar un
total de 500 registros; 300 del usuario 1, 150
del usuario 2 y 50 del usuario 3.
! Cuando se inicia la función del Directorio
de teléfonos, la conexión Bluetooth se des-
conecta y no se puede utilizar la función de
teléfono de manos libres. Para reiniciar la
función de teléfono de manos libres, co-
necte de nuevo su teléfono móvil a esta
unidad. Sin embargo, si se activa la cone-
xión automática de esta unidad, la cone-
xión se establecerá automáticamente unas
décimas de segundo después de que el te-
léfono se haya desconectado para la trans-
ferencia.
! Algunos símbolos utilizados en el número
teléfono del directorio de teléfonos no se
pueden transferir a esta unidad. Esta uni-
dad sólo reconoce los símbolos +, # y *.
! En algunos teléfonos móviles, es posible
que no se pueda transferir todo el Directo-
rio de teléfonos de una vez. En este caso,
transfiera una a una las entradas del Direc-
torio de teléfonos desde su teléfono a tra-
vés de su teléfono móvil.
! Según el teléfono móvil conectado a través
de tecnología inalámbrica Bluetooth, esta
unidad podría no visualizar correctamente
el Directorio de teléfonos. (Algunos carac-
teres pueden ser confusos).
! Si el Directorio de teléfonos del teléfono
móvil contiene datos de imagen, puede
ocurrir que no se transfiera correctamente.
3 Utilice el teléfono móvil para realizar la
transferencia del Directorio de teléfonos.
Realice la transferencia del Directorio de teléfonos utilizando el teléfono móvil. Para obtener más información, consulte el manual de
instrucciones del teléfono móvil.
# Mientras se transfiere el Directorio de teléfonos, aparece el icono de un reloj de arena.
# El display indica cuántas entradas se han
transferido y el número total que se transferirán.
# Para cancelar el proceso de transferencia,
toque STOP.
4 Aparece Completed y se completa la
transferencia del Directorio de teléfonos.
Cambio del orden de visualización
del Directorio de teléfonos
Puede seleccionar alfabéticamente el Directorio de teléfonos por nombre o apellido.
! Es posible que esta función no esté dispo-
nible en algunos teléfonos móviles.
% Toque PHONEBOOK NAME VIEW en el
menú de funciones para activar la función
de visualización de nombres del directorio
de teléfonos.
Se cambiará el orden de visualización del Directorio de teléfonos.
# Para cambiar a otro orden de visualización,
toque de nuevo PHONEBOOK NAME VIEW.
1 Toque PHONEBOOK TRANSFER en el
menú de funciones.
2 Toque START para activar la función de
transferencia del Directorio de teléfonos.
La función de transferencia del Directorio del
teléfonos quedará en espera.
54
Es
Llamada a un número del
Directorio de teléfonos
Puede seleccionar una entrada del Directorio
de teléfonos y hacer la llamada.
1 Toque PHONE BOOK para visualizar el
Directorio de teléfonos.
Page 55

Teléfono Bluetooth
Sección
02
2 Toque una entrada del Directorio de teléfonos a la que desee llamar.
Se mostrará la pantalla de edición del Directorio de teléfonos.
# Toque PREV o NEXT para mostrar otras entra-
das del directorio de teléfonos.
3 Toque el número de teléfono de la entrada del Directorio de teléfonos a la que
desee llamar.
Si va a introducir varios números de teléfono
en una entrada, toque un número al que
desee llamar.
Se mostrará el display normal y la entrada del
Directorio de teléfonos que ha seleccionado
aparecerá en la barra de información.
4 Toque
El tiempo estimado de la llamada aparece en
el display (esto puede diferir ligeramente del
tiempo de llamada real).
# Si desea realizar una llamada internacional,
toque add "+" para incluir + en el número de teléfono.
5 Para finalizar la llamada, toque .
El tiempo estimado de la llamada aparece en
el display (esto puede diferir ligeramente del
tiempo de llamada real).
para hacer una llamada.
Búsqueda de un número en el
Directorio de teléfonos
Después de encontrar el número al que desea
llamar en el Directorio de teléfonos, puede seleccionar la entrada y efectuar la llamada.
1 Toque PHONE BOOK para visualizar el
Directorio de teléfonos.
2 Toque SEARCH para visualizar la pantalla de búsqueda del Directorio de teléfonos.
3 Toque una letra del alfabeto para seleccionar la primera letra del nombre que está
buscando.
4 Toque ENTER para mostrar las entradas
que empiezan por la letra que ha seleccionado.
El display muestra las seis primeras entradas
del Directorio de teléfonos que empiezan por
dicha letra (p.ej.: “Ben”, “Brian” y “Burt” cuando “B” está seleccionado).
# Toque PREV o NEXT para mostrar otras entra-
das del directorio de teléfonos.
# Para definir la búsqueda con una letra diferente, toque CLEAR.
5 Toque una entrada del Directorio de teléfonos y efectúe la llamada.
Consulte los pasos 2 a 5 en Llamada a un número del Directorio de teléfonos en la página
anterior para el procedimiento.
Edición del nombre de una entrada
del Directorio de teléfonos
Puede editar los nombres de las entradas del
Directorio de teléfonos. Cada nombre puede
tener una longitud de hasta 16 caracteres.
1 Toque PHONE BOOK para visualizar el
Directorio de teléfonos.
2 Seleccione una entrada del Directorio
de teléfonos que desee editar.
Consulte los pasos 2 al 3 en Llamada a un número del Directorio de teléfonos en la página
anterior para el procedimiento.
3 Toque EDIT junto al nombre de la entrada del Directorio de teléfonos.
Se mostrará la pantalla de edición del Directorio de teléfonos.
Español
55
Es
Page 56

Sección
02
Teléfono Bluetooth
4 Toque 123 o ABC para seleccionar el
tipo de carácter deseado.
Al tocar ABC se cambiarán los tipos de caracteres en el siguiente orden.
Alfabeto (mayúsculas), números y símbolos—
alfabeto (minúsculas)—números y símbolos—
caracteres rusos
# Puede cambiar el tipo de carácter a ruso sólo
cuando utiliza un modelo ruso de teléfono móvil.
5 Toque una letra para introducirla.
# Toque para eliminar un carácter y dejar un
espacio.
6 Toque MEMORY para guardar el nuevo
nombre.
Edición de números de teléfono
Puede editar los números de teléfono de las
entradas del Directorio de teléfonos.
1 Toque PHONE BOOK para visualizar el
Directorio de teléfonos.
2 Seleccione una entrada del Directorio
de teléfonos que desee editar.
Consulte los pasos 2 al 3 en Llamada a un número del Directorio de teléfonos en la página 54
para el procedimiento.
3 Toque EDIT junto al número de teléfono
que desee editar.
Se mostrará la pantalla de edición de marcación del Directorio de teléfonos.
5 Toque c o d para mover el cursor y
editar el número.
Repita estos pasos hasta que termine.
6 Toque ENTER para guardar el nuevo número.
Borrado de una entrada del
Directorio de teléfonos
Puede eliminar entradas del Directorio de teléfonos una a una.
Para borrar todas las entradas del Directorio
de teléfonos, consulte Borrado de la memoria
en esta página.
1 Toque PHONE BOOK para visualizar el
Directorio de teléfonos.
2 Seleccione una entrada del Directorio
de teléfonos que desee eliminar.
Consulte los pasos 2 al 3 en Llamada a un número del Directorio de teléfonos en la página 54
para el procedimiento.
3 Toque DELETE para eliminar la entrada
del Directorio de teléfonos.
Se mostrará una pantalla de confirmación.
Toque YES para eliminar la entrada.
# Se tarda unos 10 segundos en eliminar los
datos. Para confirmar esta acción, deje la llave de
encendido en la posición ACC u ON durante 10
segundos después de realizar la eliminación.
# Toque NO si no desea borrar la entrada del Di-
rectorio de teléfonos que ha seleccionado.
4 Toque 0—9 para introducir los números.
# Si desea realizar una llamada internacional,
toque add "+" para incluir + en el número de teléfono.
# Toque CLEAR para eliminar el número.
56
Es
Borrado de la memoria
Puede borrar la memoria de cada elemento:
Directorio de teléfonos, lista de historial de llamadas marcadas/recibidas/perdidas y número
de teléfono prefijado.
Page 57

Teléfono Bluetooth
Sección
02
1 Toque CLEAR MEMORY en el menú de
funciones.
2 Toque CLEAR junto al elemento que
desea eliminar de la memoria.
Seleccione de entre las siguientes opciones:
PHONE BOOK (directorio de teléfonos)—
DIALED CALLS (historial de llamadas marca-
das)—RECEIVED CALLS (historial de llamadas
recibidas)—MISSED CALLS (historial de llamadas perdidas)—PRESET DIALS (números
de teléfono predefinidos)
Se mostrará una pantalla de confirmación
después de seleccionar el elemento deseado.
Toque OK para eliminar la memoria.
# Si desea borrar todo el Directorio de teléfonos,
lista del historial del llamadas marcadas/recibidas/perdidas y número de teléfono prefijado,
toque CLEAR ALL.
# Se tarda unos 10 segundos en eliminar los
datos. Para confirmar esta acción, deje la llave de
encendido en la posición ACC u ON durante 10
segundos después de realizar la eliminación.
# Si no desea borrar la memoria que ha seleccionado, toque CANCEL.
Uso del Historial de llamadas
Las 12 últimas llamadas realizadas (marcadas), recibidas y perdidas se almacenan en el
Historial de llamadas. Puede realizar una búsqueda en el Historial de llamadas y llamar a
los números desde éste.
Visualización del Historial de
llamadas
El Historial de llamadas se divide en tres grupos: Llamadas perdidas, Llamadas marcadas
y Llamadas recibidas. Puede ver el número (y
el nombre si el número está en el Directorio
de teléfonos).
% Toque LOG para mostrar el historial de
llamadas.
Si toca LOG varias veces se alternará entre los
siguientes historiales de llamadas:
Llamada perdida — Llamada marcada — Llamada recibida
# Si no se han almacenado números de teléfono en la lista seleccionada, no se visualizará
nada.
# Puede alternar entre el número de teléfono y
el nombre (si se ha introducido), tocando
ABC/123.
Llamada a un número desde el
Historial de llamadas
1 Visualice la lista y seleccione un número
de teléfono.
Visualice el número de teléfono al que desea
llamar.
2 Toque un número de teléfono o un
nombre (si se ha introducido) al que desee
llamar.
Se mostrará el display normal, y el número de
teléfono que ha seleccionado aparecerá en la
barra de información.
# Toque PREV o NEXT para mostrar otro núme-
ro de teléfono o nombre (si se ha introducido).
3 Toque para hacer una llamada.
El tiempo estimado de la llamada aparece en
el display (esto puede diferir ligeramente del
tiempo de llamada real).
# Si desea realizar una llamada internacional,
toque add "+" para incluir + en el número de teléfono.
4 Para finalizar la llamada, toque .
Español
57
Es
Page 58

Sección
02
Teléfono Bluetooth
Uso de números prefijados
Asignación de números prefijados
Es posible asignar a la memoria los números
que marca frecuentemente, para volver a marcarlos rápidamente.
Es posible asignar a números prefijados
(P 1-P 6) hasta seis números de teléfono utilizados con más frecuencia.
1 Seleccione un número de teléfono del
Directorio de teléfonos o del historial de
llamadas.
Consulte las instrucciones descritas en las páginas anteriores sobre cómo seleccionar un
número de teléfono del Directorio de teléfonos
o del historial de llamadas.
Se mostrará la pantalla normal, y el número
de teléfono que ha seleccionado se mostrará
en la barra de información.
2 Toque LIST para visualizar los números
predefinidos P 1-P 6.
3 Mantenga pulsado uno de los números
P 1-P 6 para predefinir el número de teléfono.
El número de teléfono que ha seleccionado se
almacenará en los números predefinidos.
# Se puede almacenar en la memoria hasta 30
números de teléfono (seis números de teléfono
para cada uno de los tres teléfonos registrados y
dos teléfonos de invitado).
2 Toque uno de los números predefinidos
P 1-P 6.
El número de teléfono seleccionado se mostrará en la barra de información.
3 Toque
4 Para finalizar la llamada, toque
El tiempo estimado de la llamada aparece en
el display (esto puede diferir ligeramente del
tiempo de llamada real).
para hacer una llamada.
.
Realización de una llamada
ingresando el número de
teléfono
Puede realizar una llamada ingresando directamente números de teléfono en la unidad.
1 Toque DIRECT para mostrar la pantalla
de marcación directa.
2 Toque 0—9 para introducir los números.
# Si desea realizar una llamada internacional,
toque add "+" para incluir + en el número de teléfono.
# Toque CLEAR para eliminar el número.
# Se puede ingresar hasta 24 dígitos.
3 Si ha terminado de ingresar el número,
toque
para hacer una llamada.
Recuperación de números
predefinidos
Es posible recuperar fácilmente los números
de teléfono predefinidos.
1 Toque LIST para visualizar los números
predefinidos P 1-P 6.
Los números de presintonías P 1-P 6 se mostrarán en el display.
58
Es
4 Para finalizar la llamada, toque
El tiempo estimado de la llamada aparece en
el display (esto puede diferir ligeramente del
tiempo de llamada real).
.
Page 59

Teléfono Bluetooth
Sección
02
Cancelación del eco y
reducción de ruido
Cuando usa la función manos libres en el vehículo, puede que escuche un eco no deseado. Esta función reduce el ruido y el eco, y
mantiene una cierta calidad de sonido.
! Esta función no se puede configurar para
cada teléfono de usuario distinto.
% Toque ECHO CANCEL en el menú de
funciones para activar la función de cancelación de eco.
# Para desactivar la cancelación de eco, vuelva
a tocar ECHO CANCEL.
Cambio del tono de llamada
La unidad le permite activar o desactivar el
tono de las llamadas entrantes.
! El tono de llamada que seleccione para
esta unidad no tiene efecto en el tono de
llamada utilizado por su teléfono. Si no
desea que su teléfono y esta unidad suenen al mismo tiempo, se recomienda desactivar el tono de llamada de uno de los
dispositivos.
! La llamada rechazada no se memoriza en
la lista del historial de llamadas recibidas o
perdidas.
% Toque REFUSE ALL CALLS en el menú
de funciones para activar la función de rechazo automático de llamada.
ON aparece en el display.
# Para desactivar el rechazo automático de llamada, vuelva a tocar REFUSE ALL CALLS.
Ajuste de la respuesta
automática
Si esta función está activada, la unidad contestará automáticamente todas las llamadas
entrantes.
! Esta función no se puede configurar para
cada teléfono de usuario distinto.
% Toque AUTO ANSWER en el menú de
funciones para activar la respuesta automática.
ON aparece en el display.
# Para desactivar la respuesta automática, vuelva a tocar AUTO ANSWER.
Español
% Toque RING TONE en el menú de funciones para activar el tono de llamada.
# Para desactivar el tono de llamada, vuelva a
tocar RING TONE.
Ajuste del rechazo automático
Si esta función está activada, la unidad rechazará automáticamente todas las llamadas entrantes.
! Esta función no se puede configurar para
cada teléfono de usuario distinto.
Nota
Si las funciones de rechazo automático y respuesta automática están activadas, el rechazo
automático tendrá prioridad, y todas las llamadas
entrantes se rechazarán automáticamente.
Es
59
Page 60

Sección
02
Teléfono Bluetooth
Visualización de la dirección
BD (Bluetooth Device)
Cada dispositivo que posee tecnología inalámbrica Bluetooth recibe una dirección de dispositivo única de 48 bits. Cada dirección del
dispositivo está formada por una cadena hexadecimal de 12 dígitos.
Puede visualizar la dirección BD de su teléfono móvil y esta unidad.
Si se produce un fallo de funcionamiento en
la unidad y debe ponerse en contacto con un
concesionario para que realice la reparación,
es posible que tenga que indicar la versión del
sistema de esta unidad y el módulo Bluetooth.
Puede visualizar las versiones y confirmarlas.
% Toque DEVICE INFO en el menú de funciones para seleccionar la dirección BD.
Se mostrará diferente información sobre la
tecnología inalámbrica Bluetooth.
! BD ADDRESS (dirección del sistema)
! SYSTEM NAME (nombre del sistema)
! SYSTEM VER. (versión)
! BT MODULE VER. (versión del módulo
Bluetooth)
60
Es
Page 61

132
4
Bluetooth Audio
Sección
03
Escuchar canciones en BT
Audio (reproductor de
audio Bluetooth)
Al conectar este adaptador a una unidad principal Pioneer, es posible controlar un reproductor
de audio Bluetooth a través de tecnología inalámbrica Bluetooth.
Importante
! Esta unidad permite controlar un reproductor
de audio Bluetooth a través de un perfil A2DP
o AVRCP. Los reproductores de audio Bluetooth (o los adaptadores Bluetooth) compatibles con estos perfiles pueden conectarse a
este perfil.
— Perfil A2DP (Advanced Audio Distribution
Profile): Es posible reproducir únicamente
canciones en su reproductor de audio.
— Perfil AVRCP (Audio/Video Remote Control
Profile): Es posible reproducir, realizar pausas, seleccionar canciones, etc.
! Ya que hay varios reproductores de audio
Bluetooth disponibles en el mercado, las funciones que puede realizar su reproductor de
audio Bluetooth utilizando esta unidad pueden ser muy diferentes. Consulte el manual
de instrucciones de su reproductor de audio
Bluetooth, así como este manual, mientras
utilice su reproductor con esta unidad.
! No es posible mostrar en esta unidad informa-
ción sobre las canciones (ej.: tiempo de reproducción transcurrido, título de la canción,
índice de canciones, etc.).
! Mientras escucha canciones en su reproduc-
tor de audio Bluetooth, no realice operaciones
innecesarias en su teléfono móvil. Si intenta
realizar una operación en su teléfono móvil, la
señal de su teléfono móvil puede ocasionar
ruido en la reproducción de canciones.
! Cuando habla con el teléfono móvil conectado
a esta unidad a través de tecnología inalámbrica Bluetooth, la reproducción de canciones
del reproductor de audio Bluetooth conectado
a esta unidad se silencia.
! Incluso si está escuchando un canción en su
reproductor de audio Bluetooth y cambia a
otra fuente, la reproducción de la canción
continúa.
1 Icono de fuente
Muestra la fuente seleccionada.
2 Nombre de la fuente
Muestra el nombre de la fuente seleccionada.
3 Nombre del dispositivo
Muestra el nombre del dispositivo del reproductor de audio Bluetooth (o adaptador
Bluetooth).
4 Indicador de audio Bluetooth
Este indicador se muestra cuando se establece una conexión del reproductor de
audio Bluetooth (consulte Conexión de un
reproductor de audio Bluetooth en la página
siguiente para más información).
% Toque el icono de fuente y luego,
BT AUDIO para seleccionar la fuente de
audio Bluetooth.
Nota
La distancia de visibilidad entre esta unidad y su
teléfono móvil deber ser de 10 metros o inferior
para el envío y recepción de voz y datos mediante
la tecnología inalámbrica Bluetooth. Sin embargo, la distancia de transmisión puede llegar a ser
más corta que la distancia estimada, dependiendo del entorno en que se utilice.
Español
61
Es
Page 62

1
Sección
03
Bluetooth Audio
Conexión de un reproductor
de audio Bluetooth
1 Visualización de función
Muestra los nombres de las funciones.
tooth, se establecerá automáticamente la
conexión a esta unidad.
Nota
Antes de que pueda utilizar algunos reproductores de audio, es necesario que introduzca el código PIN en esta unidad. Si su reproductor requiere
un código PIN para establecer una conexión, localice el código en el reproductor o en su documentación. Consulte Ingreso del código PIN para
la conexión inalámbrica Bluetooth en la página 64
para obtener instrucciones sobre cómo ingresar
el código PIN.
Para que la unidad pueda controlar su reproductor de audio Bluetooth debe establecer
una conexión inalámbrica Bluetooth.
Esta función inicia la conexión a través de tecnología inalámbrica Bluetooth.
1 Toque AV MENU para visualizar MENU.
MENU aparece en el display.
# Si no se visualiza AV MENU, toque la pantalla
para poder visualizarlo.
# También se puede visualizar MENU haciendo
clic en el joystick.
2 Toque FUNCTION para visualizar los
nombres de las funciones.
Se visualizan los nombres de las funciones y
las que se pueden usar aparecen resaltadas.
# Para volver a la visualización anterior, toque
BACK.
# Para volver a la visualización de reproducción,
toque ESC.
3 Toque CONNECTION OPEN.
Se visualiza ON. La unidad estará en espera
de conexión desde el reproductor de audio
Bluetooth.
Si su reproductor de audio Bluetooth está preparado para la conexión inalámbrica Blue-
Reproducción de canciones
en el reproductor de audio
Bluetooth
Importante
El funcionamiento es diferente según el reproductor de audio Bluetooth. Consulte el manual
de su reproductor de audio Bluetooth para ver
más instrucciones.
1 Toque f.
Se inicia la reproducción.
# Toque de nuevo f si desea detener la can-
ción.
2 Para retroceder o avanzar hasta otra
pista, toque o o p.
Si toca p, se salta al principio de la pista siguiente. Si toca o una vez, se salta al principio de la pista actual. Si toca otra vez, se salta
a la pista anterior.
# También se puede retroceder o avanzar a otra
pista, presionando el botón c o d, o moviendo
hacia la izquierda o hacia la derecha el joystick.
62
Es
Page 63

Bluetooth Audio
Sección
03
3 Para realizar el avance o retroceso rápido, toque continuamente o o p.
# También se puede realizar el retroceso rápido/
avance rápido, manteniendo presionado el botón
c o d, o sosteniendo en la posición izquierda o
derecha el joystick.
# Cuando seleccione el avance rápido o retroceso, puede haber un sonido o no. Esto depende
del reproductor de audio Bluetooth que utilice.
4 Para detener la reproducción, toque
g.
Desconexión de un
reproductor de audio
Bluetooth
Cuando haya terminado de utilizar el reproductor de audio Bluetooth en esta unidad,
puede desactivar la conexión inalámbrica
Bluetooth.
1 Toque AV MENU para visualizar MENU.
MENU aparece en el display.
# Si no se visualiza AV MENU, toque la pantalla
para poder visualizarlo.
# También se puede visualizar MENU haciendo
clic en el joystick.
2 Toque FUNCTION para visualizar los
nombres de las funciones.
Se visualizan los nombres de las funciones y
las que se pueden usar aparecen resaltadas.
# Para volver a la visualización anterior, toque
BACK.
# Para volver a la visualización de reproducción,
toque ESC.
3 Toque DISCONNECT.
Una vez completada la desconexión, aparece
Disconnected.
Visualización de la dirección
BD (Bluetooth Device)
Cada dispositivo que posee tecnología inalámbrica Bluetooth recibe una dirección de dispositivo única de 48 bits. Cada dirección del
dispositivo está formada por una cadena hexadecimal de 12 dígitos.
Puede visualizar la dirección BD de esta unidad.
Si se produce un fallo de funcionamiento en
la unidad y debe ponerse en contacto con un
concesionario para que realice la reparación,
es posible que tenga que indicar la versión del
sistema de esta unidad y el módulo Bluetooth.
Puede visualizar las versiones y confirmarlas.
1 Toque AV MENU para visualizar MENU.
MENU aparece en el display.
# Si no se visualiza AV MENU, toque la pantalla
para poder visualizarlo.
# También se puede visualizar MENU haciendo
clic en el joystick.
2 Toque FUNCTION para visualizar los
nombres de las funciones.
Se visualizan los nombres de las funciones y
las que se pueden usar aparecen resaltadas.
# Para volver a la visualización anterior, toque
BACK.
# Para volver a la visualización de reproducción,
toque ESC.
3 Toque DEVICE INFO para visualizar la dirección BD.
Se mostrará diferente información sobre la
tecnología inalámbrica Bluetooth.
! BD ADDRESS (dirección del sistema)
! SYSTEM NAME (nombre del sistema)
! SYSTEM VER. (versión)
! BT MODULE VER. (versión del módulo
Bluetooth)
Español
63
Es
Page 64

Sección
04
Ajustes iniciales
Ingreso del código PIN para
la conexión inalámbrica
Bluetooth
En algunos reproductores de audio Bluetooth,
es posible que tenga que ingresar previamente el código PIN de su reproductor de audio
Bluetooth en esta unidad para que esté lista
para una conexión desde su reproductor.
1 Toque el icono de fuente y luego OFF
para apagar esta unidad.
# Si no se visualiza el icono de fuente, toque la
pantalla para poder visualizarlo.
2 Toque AV MENU y luego toque INITIAL
para visualizar los nombres de las funciones.
Se visualizan los nombres de las funciones y
las que se pueden usar aparecen resaltadas.
# Si no se visualiza AV MENU, toque la pantalla
para poder visualizarlo.
# También se puede visualizar MENU haciendo
clic en el joystick.
# Para ir al siguiente grupo de nombres de funciones, toque NEXT.
# Para volver al grupo anterior de nombres de
funciones, toque PREV.
# Para volver a la visualización anterior, toque
BACK.
# Para volver a la visualización de cada fuente,
toque ESC.
5 Después de ingresar el código PIN
(hasta 16 dígitos), toque ENTER.
El código PIN ingresado se almacena en la
unidad.
3 Toque PINCODE INPUT.
Se mostrará la pantalla de ingreso de código
PIN.
4 Toque 0—9 para ingresar el código PIN
de su reproductor de audio Bluetooth.
# Toque C para eliminar el número.
64
Es
Page 65

Funcionamiento con
diferentes unidades
principales
Sección
05
Uso como una unidad externa
Las siguientes unidades principales funcionan
en esta unidad como unidad externa. Para obtener más detalles sobre la unidad externa,
consulte el manual de la unidad principal.
! 1KEY a 6KEY no se usan para hacer fun-
cionar esta unidad.
! Cuando seleccione TEL como fuente,
AUTO/MANUAL (A/M) no se usa para
hacer funcionar esta unidad.
! Cuando seleccione BT AUDIO como fuen-
te, FUNC3 (F3)/FUNCTION3 y FUNC4 (F4)/
FUNCTION4 no se usan para hacer funcionar esta unidad.
Grupo 1 de unidades principales
Las siguientes unidades utilizan el botón
FUNCTION o utilizan una SOFT KEY (tecla de
función variable).
DEH-P9600MP, DEX-P90RS, DEH-P7700MP,
DEH-P7600MP, DEH-P77MP
DEH-P6700MP, DEH-P6600R, DEH-P5900MP,
DEH-P5800MP, DEH-P5700MP, DEH-P5600MP,
DEH-P55BT
*2
, DEH-P4800MP, DEH-P3600MP,
DEH-P2600R, DEH-P40MP, DVH-P580MP,
DVH-P5000MP, KEH-P7020R, KEH-P6020R
Grupo 2 de unidades principales
Las siguientes unidades principales utilizan el
MULTI-CONTROL.
DEH-P8600MP, DEH-P88RS, DEH-P80MP,
DEH-P70BT
*2
Grupo 3 de unidades principales
Las siguientes unidades principales utilizan el
teclado táctil.
AVH-P7500DVDN, AVH-P6600DVD, AVHP5700DVD
*1
, DEH-P6800MP,
Grupo 4 de unidades principales
RS-D7R, RS-D7RN
Importante
! Puesto que esta unidad se encuentra en espe-
ra para conectar con sus teléfonos móviles
mediante la tecnología inalámbrica Bluetooth,
utilizarla sin encender el motor puede descargar la batería.
! Para utilizar la tecnología inalámbrica Blue-
tooth, los dispositivos deben ser capaces de
interpretar ciertos perfiles. Cuando la unidad
se utiliza como unidad externa, es compatible
con los siguientes perfiles.
— GAP (Generic Access Profile)
— SDP (Service Discovery Protocol)
— HSP (Head Set Profile)
— HFP (Hands Free Profile)
— A2DP (Advanced Audio Distribution Profi-
le)
— AVRCP (Audio/Video Remote Control Profi-
le)
! Esta unidad permite controlar un reproductor
de audio Bluetooth a través de un perfil A2DP
o AVRCP. Los reproductores de audio Bluetooth (o los adaptadores Bluetooth) compatibles con estos perfiles pueden conectarse a
este perfil.
— Perfil A2DP (Advanced Audio Distribution
Profile): Es posible reproducir únicamente
canciones en su reproductor de audio.
— Perfil AVRCP (Audio/Video Remote Control
Profile): Es posible reproducir, realizar pausas, seleccionar canciones, etc.
Español
*1Es necesario utilizar el mando a distancia (se vende por separado) para ejecutar las operaciones de
a/b/c/d.
2
*
Puede utilizar esta unidad como una unidad externa para controlar sólo las funciones de audio
Bluetooth.
Es
65
Page 66

Sección
05
Funcionamiento con
diferentes unidades
principales
! Cuando utiliza esta unidad como una unidad
externa, el código PIN se ajusta a 0000.Noes
posible cambiar el código PIN. Esta unidad
sólo puede conectar el reproductor audio
Bluetooth que solicite 0000 como código PIN
o que no solicite ningún código PIN.
! Ya que hay varios reproductores de audio
Bluetooth disponibles en el mercado, las funciones que puede realizar su reproductor de
audio Bluetooth utilizando esta unidad pueden ser muy diferentes. Consulte el manual
de instrucciones de su reproductor de audio
Bluetooth, así como este manual, mientras
utilice su reproductor con esta unidad.
! No es posible mostrar en esta unidad informa-
ción sobre las canciones (ej.: tiempo de reproducción transcurrido, título de la canción,
índice de canciones, etc.).
! Mientras escucha canciones en su reproduc-
tor de audio Bluetooth, no realice operaciones
innecesarias en su teléfono móvil. Si intenta
realizar una operación en su teléfono móvil, la
señal de su teléfono móvil puede ocasionar
ruido en la reproducción de canciones.
! Cuando habla con el teléfono móvil conectado
a esta unidad a través de tecnología inalámbrica Bluetooth, la reproducción de canciones
del reproductor de audio Bluetooth conectado
a esta unidad se silencia.
! Incluso si está escuchando un canción en su
reproductor de audio Bluetooth y cambia a
otra fuente, la reproducción de la canción
continúa.
! El funcionamiento es diferente según el tipo
de teléfono móvil y el reproductor de audio
Bluetooth. Consulte el manual de los dos dispositivos para ver más instrucciones.
Notas
! La recepción de llamadas telefónicas de esta
unidad entra en espera cuando la llave de
contacto está en la posición ACC (accesorio)
u ON (encendido).
! La distancia de visibilidad entre esta unidad y
su teléfono móvil deber ser de 10 metros o inferior para el envío y recepción de voz y datos
mediante la tecnología inalámbrica Bluetooth.
Sin embargo, la distancia de transmisión
puede llegar a ser más corta que la distancia
estimada, dependiendo del entorno en que se
utilice.
! TEL y BT AUDIO se ajustan al mismo volumen
y al mismo volumen SLA (ajuste del nivel de
fuente). Si es necesario, cambie el valor de volumen de TEL o BT AUDIO cada vez.
! Si el mando a distancia incluye el botón PGM,
puede realizar las siguientes operaciones con
él:
— Puede desplazar un número de teléfono en
el historial de llamadas cuando seleccione
TEL como fuente.
— Puede detener una canción cuando selec-
cione BT AUDIO como fuente.
Tablas de compatibilidad
de funciones
Grupo 1 de unidades principales
Controles del teléfono Bluetooth
Seleccionar TEL/BT
AUDIO como fuente
Cambiar entre TEL y
BT AUDIO
Ajuste la unidad en
modo VOICE ON
Aceptación de una
llamada telefónica
Presione SOURCE.
Presione BAND cuando se-
leccione TEL/BT AUDIO
como fuente.
Mantenga presionado BAND
cuando seleccione TEL como
*
fuente.
Cuando entre una llamada,
presione a.
* Puede utilizar esta función si su teléfono móvil incluye tecnología de reconocimiento de voz.
66
Es
Page 67

Funcionamiento con
diferentes unidades
principales
Sección
05
Controles del teléfono Bluetooth
Finalización de una
llamada
Visualización del historial de llamadas recibidas/perdidas
Visualización del historial de llamadas
marcadas
Seleccione un número de teléfono del historial de llamadas
marcadas o recibidas
Realización de una
llamada
Seleccionar una función
Desplazarse por los
números de teléfono
en el historial de llamadas
Ajuste de la unidad
en modo C.OPEN
Ajuste de la unidad
en modo REGIST
Ajuste de la unidad
en modo DISCONN.
Activar o desactivar
la respuesta automática
Activar o desactivar
la conexión automática
Presione b.
Presione c.
Presione d.
Presione c o d cuando
muestre el historial de llamadas marcadas o recibidas.
Presione b si desea regresar
a la pantalla de espera telefónica.
Presione a cuando seleccione un número de teléfono
del historial de llamadas
marcadas y recibidas.
Presione FUNCTION (FUNC)
cuando seleccione TEL como
fuente.
Presione a o b en FUNC1
(F1) cuando seleccione TEL
como fuente.
Mantenga presionado a o b
en FUNC1 (F1) cuando seleccione TEL como fuente.
Presione a o b en FUNC2
(F2) cuando seleccione TEL
como fuente.
Mantenga presionado a o b
en FUNC2 (F2) cuando seleccione TEL como fuente.
Presione a o b en FUNC3
(F3) cuando seleccione TEL
como fuente.
Mantenga presionado a o b
en FUNC3 (F3) cuando seleccione TEL como fuente.
Controles del teléfono Bluetooth
Activar o desactivar
el tono de llamada
Mostrar y cambiar la
información del dispositivo
Controles del audio Bluetooth
Seleccionar TEL/BT
AUDIO como fuente
Cambiar entre TEL y
BT AUDIO
Saltar para retroceder
o avanzar a otra can-
*1
ción
Avance rápido/retro-
*2
ceso
Seleccionar una función
Poner en pausa una
canción
Ajuste de la unidad
en modo C.OPEN
Reproducir canciones
Ajuste de la unidad
en modo DISCONN.
Cambiar entre AUTO
y MANUAL
Presione a o b en FUNC4
(F4) cuando seleccione TEL
como fuente.
Mantenga presionado a o b
en FUNC4 (F4) cuando seleccione TEL como fuente.
Presione SOURCE.
Presione BAND cuando seleccione TEL/BT AUDIO
como fuente.
Presione c o d cuando seleccione BT AUDIO como
fuente.
Mantenga presionado c o d
cuando seleccione BT
AUDIO como fuente.
Presione FUNCTION (FUNC)
cuando seleccione BT
AUDIO como fuente.
Presione a o b en FUNC1
(F1) cuando seleccione BT
AUDIO como fuente.
Mantenga presionado a o b
en FUNC1 (F1) cuando seleccione BT AUDIO como fuente.
Presione a o b en FUNC2
(F2) cuando seleccione BT
AUDIO como fuente.
Mantenga presionado a o b
en FUNC2 (F2) cuando seleccione BT AUDIO como fuente.
Presione c o d en AUTO/
MANUAL (A/M) cuando seleccione BT AUDIO como
fuente.
Español
*1Puede usar esta función si selecciona AUTO en AUTO/MANUAL (A/M).
2
*
Puede usar esta función si selecciona MANUAL en AUTO/MANUAL (A/M).
67
Es
Page 68

Sección
05
Funcionamiento con
diferentes unidades
principales
Nota
Cuando la unidad se utiliza como unidad externa,
ésta no se ajusta a la fuente original automáticamente después de una llamada telefónica. Seleccione manualmente la fuente que desee después
de una llamada telefónica.
Grupo 2 de unidades principales
Controles del teléfono Bluetooth
Seleccionar TEL/BT
AUDIO como fuente
Cambiar entre TEL y
BT AUDIO
Ajuste la unidad en
modo VOICE ON
Aceptación de una
llamada telefónica
Finalización de una
llamada
Visualización del historial de llamadas recibidas/perdidas
Visualización del historial de llamadas
marcadas
Seleccione un número de teléfono del historial de llamadas
marcadas o recibidas
Realización de una
llamada
Presione SOURCE.
Presione BAND cuando se-
leccione TEL/BT AUDIO
como fuente.
Mantenga presionado BAND
cuando seleccione TEL como
*
fuente.
Cuando entre una llamada,
presione MULTI-CONTROL
arriba.
Pulse MULTI-CONTROL
hacia abajo.
Pulse MULTI-CONTROL
hacia la izquierda.
Pulse MULTI-CONTROL
hacia la derecha.
Pulse MULTI-CONTROL iz-
quierda o derecha cuando
muestre el historial de llamadas marcadas o recibidas.
Pulse MULTI-CONTROL
abajo si desea regresar a la
pantalla de espera telefónica.
Pulse MULTI-CONTROL
hacia arriba cuando seleccione un número de teléfono
del historial de llamadas
marcadas y recibidas.
Controles del teléfono Bluetooth
Seleccionar una función
Desplazarse por los
números de teléfono
en el historial de llamadas
Ajuste de la unidad
en modo C.OPEN
Ajuste de la unidad
en modo REGIST
Ajuste de la unidad
en modo DISCONN.
Activar o desactivar
la respuesta automática
Activar o desactivar
la conexión automática
Activar o desactivar
el tono de llamada
Mostrar y cambiar la
información del dispositivo
Controles del audio Bluetooth
Seleccionar TEL/BT
AUDIO como fuente
Cambiar entre TEL y
BT AUDIO
Utilice MULTI-CONTROL
cuando seleccione TEL como
fuente.
Presione MULTI-CONTROL
en FUNC1 (F1) cuando selec-
cione TEL como fuente.
Mantenga presionado
MULTI-CONTROL en FUNC1
(F1) cuando seleccione TEL
como fuente.
Presione MULTI-CONTROL
en FUNC2 (F2) cuando selec-
cione TEL como fuente.
Mantenga presionado
MULTI-CONTROL en FUNC2
(F2) cuando seleccione TEL
como fuente.
Presione MULTI-CONTROL
en FUNC3 (F3) cuando selec-
cione TEL como fuente.
Mantenga presionado
MULTI-CONTROL en FUNC3
(F3) cuando seleccione TEL
como fuente.
Presione MULTI-CONTROL
en FUNC4 (F4) cuando selec-
cione TEL como fuente.
Mantenga presionado
MULTI-CONTROL en FUNC4
(F4) cuando seleccione TEL
como fuente.
Presione SOURCE.
Presione BAND cuando se-
leccione TEL/BT AUDIO
como fuente.
* Puede utilizar esta función si su teléfono móvil incluye tecnología de reconocimiento de voz.
68
Es
Page 69

Funcionamiento con
diferentes unidades
principales
Sección
05
Controles del audio Bluetooth
Saltar para retroceder
o avanzar a otra can-
*1
ción
Avance rápido/retro-
*2
ceso
Seleccionar una función
Poner en pausa una
canción
Ajuste de la unidad
en modo C.OPEN
Reproducir canciones
Ajuste de la unidad
en modo DISCONN.
Cambiar entre AUTO
y MANUAL
Pulse MULTI-CONTROL
hacia la izquierda o hacia la
derecha cuando seleccione
BT AUDIO como fuente.
Mantenga pulsado MULTI-
CONTROL hacia la izquierda
o hacia la derecha cuando
seleccione BT AUDIO como
fuente.
Utilice MULTI-CONTROL
cuando seleccione BT
AUDIO como fuente.
Presione MULTI-CONTROL
en FUNC1 (F1) cuando seleccione BT AUDIO como fuente.
Mantenga presionado
MULTI-CONTROL en FUNC1
(F1) cuando seleccione BT
AUDIO como fuente.
Presione MULTI-CONTROL
en FUNC2 (F2) cuando seleccione BT AUDIO como fuente.
Mantenga presionado
MULTI-CONTROL en FUNC2
(F2) cuando seleccione BT
AUDIO como fuente.
Presione MULTI-CONTROL
en AUTO/MANUAL (A/M)
cuando seleccione BT
AUDIO como fuente.
Nota
Cuando la unidad se utiliza como unidad externa,
ésta no se ajusta a la fuente original automáticamente después de una llamada telefónica. Seleccione manualmente la fuente que desee después
de una llamada telefónica.
Grupo 3 de unidades principales
Controles del teléfono Bluetooth
Seleccionar TEL/BT
AUDIO como fuente
Cambiar entre TEL y
BT AUDIO
Ajuste la unidad en
modo VOICE ON
Aceptación de una
llamada telefónica
Finalización de una
llamada
Visualización del historial de llamadas recibidas/perdidas
Visualización del historial de llamadas
marcadas
Seleccione un número de teléfono del historial de llamadas
marcadas o recibidas
Realización de una
llamada
Seleccionar una función
Desplazarse por los
números de teléfono
en el historial de llamadas
Ajuste de la unidad
en modo C.OPEN
Presione SOURCE.
Toque BAND cuando seleccione TEL/BT AUDIO como
fuente.
Mantenga pulsado BAND
cuando seleccione TEL como
*3
fuente.
Cuando entre una llamada,
toque a.
Toque b.
Toque c.
Toque d.
Toque c o d cuando muestre el historial de llamadas
marcadas o recibidas.
Toque b si desea regresar a
la pantalla de espera telefónica.
Toque a cuando seleccione
un número de teléfono del
historial de llamadas marcadas y recibidas.
Toque AV MENU y luego
FUNCTION cuando seleccione TEL como fuente.
Toque ab en FUNCTION1
cuando seleccione TEL como
fuente.
Mantenga pulsado ab en
FUNCTION1 cuando seleccione TEL como fuente.
Español
*1Puede usar esta función si selecciona AUTO en AUTO/MANUAL (A/M).
2
*
Puede usar esta función si selecciona MANUAL en AUTO/MANUAL (A/M).
3
*
Puede utilizar esta función si su teléfono móvil incluye tecnología de reconocimiento de voz.
69
Es
Page 70

Sección
05
Funcionamiento con
diferentes unidades
principales
Controles del teléfono Bluetooth
Ajuste de la unidad
en modo REGIST
Ajuste de la unidad
en modo DISCONN.
Activar o desactivar
la respuesta automática
Activar o desactivar
la conexión automática
Activar o desactivar
el tono de llamada
Mostrar y cambiar la
información del dispositivo
Controles del audio Bluetooth
Seleccionar TEL/BT
AUDIO como fuente
Cambiar entre TEL y
BT AUDIO
Saltar para retroceder
o avanzar a otra can-
*1
ción
Avance rápido/retro-
*2
ceso
Seleccionar una función
Poner en pausa una
canción
Toque ab en FUNCTION2
cuando seleccione TEL como
fuente.
Mantenga pulsado ab en
FUNCTION2 cuando seleccione TEL como fuente.
Toque ab en FUNCTION3
cuando seleccione TEL como
fuente.
Mantenga pulsado ab en
FUNCTION3 cuando seleccione TEL como fuente.
Toque ab en FUNCTION4
cuando seleccione TEL como
fuente.
Mantenga pulsado ab en
FUNCTION4 cuando seleccione TEL como fuente.
Presione SOURCE.
Presione BAND cuando se-
leccione TEL/BT AUDIO
como fuente.
Toque c o d cuando seleccione BT AUDIO como fuente.
Mantenga pulsado c o d
cuando seleccione BT
AUDIO como fuente.
Toque AV MENU y luego
FUNCTION cuando seleccione BT AUDIO como fuente.
Toque ab en FUNCTION1
cuando seleccione BT
AUDIO como fuente.
Controles del audio Bluetooth
Ajuste de la unidad
en modo C.OPEN
Reproducir canciones
Ajuste de la unidad
en modo DISCONN.
Cambiar entre AUTO
y MANUAL
Mantenga pulsado ab en
FUNCTION1 cuando seleccione BT AUDIO como fuente.
Toque ab en FUNCTION2
cuando seleccione BT
AUDIO como fuente.
Mantenga pulsado ab en
FUNCTION2 cuando seleccione BT AUDIO como fuente.
Toque c o d en AUTO/MA-
NUAL (A/M) cuando seleccione BT AUDIO como
fuente.
Nota
Cuando la unidad se utiliza como unidad externa,
ésta no se ajusta a la fuente original automáticamente después de una llamada telefónica. Seleccione manualmente la fuente que desee después
de una llamada telefónica.
*1Puede usar esta función si selecciona AUTO en AUTO/MANUAL (A/M).
2
*
Puede usar esta función si selecciona MANUAL en AUTO/MANUAL (A/M).
70
Es
Page 71

Funcionamiento con
diferentes unidades
principales
Sección
05
Grupo 4 de unidades principales
Controles del teléfono Bluetooth
Seleccionar TEL/BT
AUDIO como fuente
Cambiar entre TEL y
BT AUDIO
Ajuste la unidad en
modo VOICE ON
Aceptación de una
llamada telefónica
Finalización de una
llamada
Visualización del historial de llamadas recibidas/perdidas
Visualización del historial de llamadas
marcadas
Seleccione un número de teléfono del historial de llamadas
marcadas o recibidas
Realización de una
llamada
Seleccionar una función
Desplazarse por los
números de teléfono
en el historial de llamadas
Ajuste de la unidad
en modo C.OPEN
Presione SOURCE (AUX).
Presione BAND cuando se-
leccione TEL/BT AUDIO
como fuente.
Mantenga presionado BAND
cuando seleccione TEL como
*1
fuente.
Cuando entre una llamada,
presione a.
Presione b.
Presione c.
Presione d.
Presione c o d cuando
muestre el historial de llamadas marcadas o recibidas.
Presione b si desea regresar
a la pantalla de espera telefónica.
Presione a cuando seleccione un número de teléfono
del historial de llamadas
marcadas y recibidas.
Abra la tapa del mando a distancia cuando seleccione
TEL como fuente.
Presione el botón FUNCTION
1 cuando seleccione TEL
como fuente.
Mantenga presionado el
botón FUNCTION 1 cuando
seleccione TEL como fuente.
Controles del teléfono Bluetooth
Ajuste de la unidad
en modo REGIST
Ajuste de la unidad
en modo DISCONN.
Activar o desactivar
la respuesta automática
Activar o desactivar
la conexión automática
Activar o desactivar
el tono de llamada
Mostrar y cambiar la
información del dispositivo
Controles del audio Bluetooth
Seleccionar TEL/BT
AUDIO como fuente
Cambiar entre TEL y
BT AUDIO
Saltar para retroceder
o avanzar a otra can-
*2
ción
Avance rápido/retro-
*3
ceso
Seleccionar una función
Poner en pausa una
canción
Presione el botón FUNCTION
2 cuando seleccione TEL
como fuente.
Mantenga presionado el
botón FUNCTION 2 cuando
seleccione TEL como fuente.
Presione el botón FUNCTION
3 cuando seleccione TEL
como fuente.
Mantenga presionado el
botón FUNCTION 3 cuando
seleccione TEL como fuente.
Presione el botón FUNCTION
4 cuando seleccione TEL
como fuente.
Mantenga presionado el
botón FUNCTION 4 cuando
seleccione TEL como fuente.
Presione SOURCE (AUX).
Presione BAND cuando seleccione TEL/BT AUDIO
como fuente.
Presione c o d cuando seleccione BT AUDIO como
fuente.
Mantenga presionado c o d
cuando seleccione BT
AUDIO como fuente.
Abra la tapa del mando a distancia cuando seleccione BT
AUDIO como fuente.
Presione el botón FUNCTION
1 cuando seleccione BT
AUDIO como fuente.
Español
*1Puede utilizar esta función si su teléfono móvil incluye tecnología de reconocimiento de voz.
2
*
Puede usar esta función si selecciona AUTO en AUTO/MANUAL (A/M).
3
*
Puede usar esta función si selecciona MANUAL en AUTO/MANUAL (A/M).
71
Es
Page 72

Sección
05
Funcionamiento con
diferentes unidades
principales
Controles del audio Bluetooth
Ajuste de la unidad
en modo C.OPEN
Reproducir canciones
Ajuste de la unidad
en modo DISCONN.
Cambiar entre AUTO
y MANUAL
Nota
Cuando la unidad se utiliza como unidad externa,
ésta no se ajusta a la fuente original automáticamente después de una llamada telefónica. Seleccione manualmente la fuente que desee después
de una llamada telefónica.
Mantenga presionado el
botón FUNCTION 1 cuando
seleccione BT AUDIO como
fuente.
Presione el botón FUNCTION
2 cuando seleccione BT
AUDIO como fuente.
Mantenga presionado el
botón FUNCTION 2 cuando
seleccione BT AUDIO como
fuente.
Presione el botón FUNCTION
5 cuando seleccione BT
AUDIO como fuente.
Conexión de un teléfono
móvil
Para utilizar un teléfono de forma inalámbrica
con esta unidad, en primer lugar es necesario
establecer una conexión con la tecnología inalámbrica Bluetooth.
! La conexión se establece normalmente me-
diante HFP, que le otorga un pleno control
de las funciones disponibles sobre la fuente telefónica. Sin embargo, en algunos
casos cuando se realiza la conexión desde
su teléfono móvil, puede que ésta se haga
mediante HSP y que algunas funciones no
se estén disponibles.
! Un teléfono se puede conectar a través de
tecnología inalámbrica Bluetooth sin estar
registrado con esta unidad. En este caso, el
teléfono estará temporalmente conectado
pero con las funciones disponibles limitadas. Para aprovechar completamente
todas las funciones disponibles, se recomienda registrar su teléfono en esta unidad. Consulte Registro del teléfono móvil
conectado en la página siguiente para obtener más información.
! Si la unidad se usa como una unidad exter-
na, no realiza la búsqueda de los teléfonos
móviles disponibles. Use su teléfono móvil
para establecer conexión.
Uso de un teléfono móvil para
iniciar una conexión
Si ajusta la unidad en el modo C.OPEN podrá
establecer una conexión inalámbrica Bluetooth desde su teléfono. Es posible que tenga
que consultar el manual de funcionamiento
de su teléfono si no está seguro de cómo iniciar una conexión desde el teléfono.
1 Ajuste de la unidad en modo C.OPEN
Consulte Tablas de compatibilidad de funciones
en la página 66.
# Antes de ajustar la unidad en el modo
C.OPEN, se mostrará NO TEL.
2 Uso del teléfono móvil para la conexión
a esta unidad.
Si la conexión se establece, se visualizará TEL.
# El funcionamiento es diferente según el tipo
de teléfono móvil. Consulte el manual de su teléfono móvil para ver más instrucciones.
# Es posible que tenga que introducir el código
de enlace en su teléfono móvil para completar la
conexión.
72
Es
Page 73

Funcionamiento con
diferentes unidades
principales
Sección
05
Registro del teléfono móvil
conectado
Puede registrar un teléfono que esté conectado temporalmente a esta unidad con el fin
de aprovechar al máximo las funciones de la
tecnología inalámbrica Bluetooth. Sólo es posible registrar un teléfono móvil.
1 Ajuste de la unidad en modo REGIST
Consulte Tablas de compatibilidad de funciones
en la página 66.
Antes de ajustar la unidad en el modo
REGIST, se mostrará TEL.
2 Use el teléfono móvil para hacer el registro en esta unidad.
Una vez completado el registro, aparece
TEL REG.
# El funcionamiento es diferente según el tipo
de teléfono móvil. Consulte el manual de su teléfono móvil para ver más instrucciones.
# Es posible que tenga que introducir el código
de enlace en su teléfono móvil para completar la
conexión.
Desconexión de un
teléfono móvil
Cuando haya terminado de utilizar el teléfono
en esta unidad, puede desactivar la conexión
Bluetooth.
% Ajuste de la unidad en modo DISCONN.
Consulte Tablas de compatibilidad de funciones
en la página 66.
Una vez completada la desconexión, aparece
NO TEL.
Reconocimiento de voz
Si su teléfono móvil posee tecnología de reconocimiento de voz, puede hacer una llamada
mediante comandos de voz.
! El funcionamiento es diferente según el
tipo de teléfono móvil. Consulte el manual
de su teléfono móvil para ver más instrucciones.
! Esta función se puede utilizar únicamente
cuando la conexión se establece mediante
un HFP (Hands Free Profile).
1 Ajuste la unidad en modo VOICE ON.
2 Pronuncie el nombre de su contacto.
Ajuste de la respuesta
automática
Si esta función está activada, la unidad contestará automáticamente todas las llamadas
entrantes.
% Activar o desactivar la respuesta automática
Consulte Tablas de compatibilidad de funciones
en la página 66.
Se mostrará el estado (ej.: ANSW ON).
Conexión automática a un
teléfono registrado
Cuando la Conexión automática esté activa, la
unidad establecerá automáticamente una conexión a un teléfono registrado cuando se encuentre dentro de cobertura.
! Es posible que esta característica no fun-
cione con todos los teléfonos.
Español
73
Es
Page 74

Sección
05
Funcionamiento con
diferentes unidades
principales
! Con algunos teléfonos móviles, es posible
que tenga que realizar una confirmación
en el teléfono móvil al conectarlo a esta
unidad. En este caso, es posible que no
pueda realizar la conexión hasta que la
confirme en el teléfono, incluso si activa la
Conexión automática de esta unidad. Si es
posible, ajuste su teléfono móvil para que
no busque una confirmación para la conexión Bluetooth. Para obtener detalles, consulte el manual de funcionamiento
suministrado con su teléfono móvil.
! Es posible que no funcione esta caracterís-
tica si está reproduciendo canciones en su
reproductor de audio Bluetooth a través de
tecnología inalámbrica Bluetooth. En tal
caso, detenga la reproducción o cambie a
otra fuente para que su teléfono móvil
pueda conectarse a esta unidad por medio
de esta función.
% Activar o desactivar la conexión automática
Consulte Tablas de compatibilidad de funciones
en la página 66.
Se mostrará el estado (ej.: AUTO ON).
# Se muestra SEARCH cuando activa la cone-
xión automática y la unidad busca el teléfono
móvil registrado.
# Se muestra WAIT cuando activa la conexión
automática y la unidad establece una conexión
con el teléfono móvil registrado.
Cambio del tono de llamada
La unidad le permite activar o desactivar el
tono de las llamadas entrantes.
El tono de llamada que seleccione para esta
unidad no tiene efecto en el tono de llamada
utilizado por su teléfono. Si no desea que su
teléfono y esta unidad suenen al mismo tiempo, se recomienda desactivar el tono de llamada de uno de los dispositivos.
% Activar o desactivar el tono de llamada.
Consulte Tablas de compatibilidad de funciones
en la página 66.
Se mostrará el estado (ej.: BEEP ON).
Visualización de la
información del dispositivo
de esta unidad
Puede mostrar la información del dispositivo
de esta unidad, por ejemplo la dirección BD y
el nombre del dispositivo.
Si se produce un fallo de funcionamiento en
la unidad y debe ponerse en contacto con un
concesionario para que realice la reparación,
es posible que tenga que indicar la versión del
sistema de esta unidad y el módulo Bluetooth.
Puede visualizar las versiones y confirmarlas.
! Cada dispositivo que posee tecnología ina-
lámbrica Bluetooth recibe una dirección de
dispositivo única de 48 bits. Cada dirección
está formada por una cadena hexadecimal
de 12 dígitos.
% Mostrar y cambiar la información del
dispositivo
Consulte Tablas de compatibilidad de funciones
en la página 66.
Cada vez que realiza una operación según lo
indicado en Tablas de compatibilidad de funcio-
nes, la información cambia en el orden siguiente:
Dirección BD (Bluetooth Device)—Nombre
del dispositivo (PIONEER)—Versión del sistema—Versión del módulo Bluetooth
# Puede confirmar el nombre del dispositivo de
esta unidad como Pioneer BT unit en su teléfono
móvil.
74
Es
Page 75

Funcionamiento con
diferentes unidades
principales
Sección
05
Conexión de un reproductor
de audio Bluetooth
Para que la unidad pueda controlar su reproductor de audio Bluetooth debe establecer
una conexión inalámbrica Bluetooth.
Esta función inicia la conexión a través de tecnología inalámbrica Bluetooth.
Importante
Cuando utiliza esta unidad como una unidad externa, el código PIN se ajusta a 0000. No es posible cambiar el código PIN. Esta unidad sólo
puede conectar el reproductor audio Bluetooth
que solicite 0000 como código PIN o que no solicite ningún código PIN.
1 Ajuste de la unidad en modo C.OPEN
Consulte Tablas de compatibilidad de funciones
en la página 66.
La unidad estará en espera de conexión desde
el reproductor de audio Bluetooth.
Si su reproductor de audio Bluetooth está preparado para la conexión inalámbrica Bluetooth, se establecerá automáticamente la
conexión a esta unidad.
# Antes de ajustar la unidad en el modo
C.OPEN, se mostrará NO AUDIO.
Desconexión de un
reproductor de audio
Bluetooth
Cuando haya terminado de utilizar el reproductor de audio Bluetooth en esta unidad,
puede desactivar la conexión inalámbrica
Bluetooth.
% Ajuste la unidad en modo DISCONN.
Consulte Tablas de compatibilidad de funciones
en la página 66.
Una vez completada la desconexión, aparece
NO AUDIO.
Español
2 Utilice el reproductor de audio Bluetooth que se conectará a esta unidad.
Si la conexión se establece, se visualizará
BT AUDIO.
# El funcionamiento es diferente según el reproductor de audio Bluetooth. Consulte el manual
de su reproductor de audio Bluetooth para ver
más instrucciones.
# Es posible que tenga que introducir el código
de enlace en su reproductor de audio Bluetooth
para completar la conexión.
75
Es
Page 76

Sección
06
Conexiones
Importante
! Esta unidad no puede instalarse en un ve-
hículo que no tenga una posición ACC (accesorio) en la llave de contacto.
C
C
A
F
F
O
Posición
ACC
O
N
S
T
A
R
T
O
F
N
F
O
S
T
A
R
T
Sin posición
ACC
! El uso de esta unidad en unas condiciones
distintas de las indicadas a continuación, podría causar un incendio o un fallo de funcionamiento.
— Vehículos con una batería de 12 voltios y
conexión a tierra negativa.
! Para evitar cortocircuitos, sobrecalentamiento
o fallos de funcionamiento, asegúrese de seguir las siguientes instrucciones.
— Desconecte el terminal negativo de la bate-
ría antes de la instalación.
— Asegure el cableado con pinzas para ca-
bles o cinta adhesiva. Para proteger el cableado, envuelva con cinta adhesiva las
partes en donde esté en contacto con piezas metálicas.
— Coloque todos los cables alejados de las
partes móviles, como la palanca de cambios y los rieles de los asientos.
— Coloque todos los cables alejados de luga-
res calientes, como cerca de la salida del
calefactor.
— No pase el cable amarillo a través de un
orificio en el compartimiento del motor
para conectarlo a la batería.
— Cubra con cinta aislante los conectores de
cables que queden desconectados.
— No acorte ningún cable.
— Nunca corte el aislamiento del cable de ali-
mentación de esta unidad para compartir
la corriente con otros equipos. La capacidad de corriente del cable es limitada.
— Utilice un fusible con la tensión nominal
indicada.
! Consulte el manual del propietario para obte-
ner detalles acerca de la conexión del amplificador de potencia y otras unidades, y luego
haga las conexiones de manera correcta.
! Los conectores IP-BUS vienen con codifica-
ción de color. Asegúrese de conectar correctamente los conectores del mismo color.
La función del cable puede variar según el producto, aunque el color del cable sea el mismo.
A la hora de conectar este sistema, asegúrese
de consultar todos los manuales y conectar los
cables correctamente.
76
Es
Page 77

Conexiones
Conexión de las unidades
Sección
06
Español
77
Es
Page 78

Sección
07
Instalación
Importante
! Compruebe todas las conexiones y sistemas
antes de la instalación final.
! No utilice piezas no autorizadas. El uso de pie-
zas no autorizadas puede causar fallos de funcionamiento.
! Consulte a su concesionario si para la instala-
ción es necesario perforar orificios o hacer
otras modificaciones al vehículo.
! Instale la unidad en un lugar donde no obsta-
culice los movimientos del conductor y no
pueda causar lesiones al pasajero en caso de
una detención repentina, como un frenado de
emergencia.
! Cuando instale esta unidad, asegúrese de que
existe espacio suficiente sobre su superficie
superior. Hay una antena debajo de la superficie superior; si la cubre, se puede dificultar la
transmisión y la recepción de radio.
! Según la ubicación de esta unidad, es posible
que se escuche ruido durante la reproducción
de las canciones en el reproductor de audio
Bluetooth. En este caso, mueva la unidad
para reducir el ruido.
! Al montar esta unidad, asegúrese de que nin-
guno de los cables quede atrapado entre esta
unidad y los accesorios o piezas metálicas
que la rodeen.
! No monte esta unidad cerca de la salida del
calefactor, en donde podría resultar afectada
por el calor, o cerca de las puertas, donde
puede sufrir salpicaduras de agua de lluvia.
! Antes de perforar orificios de montaje, siem-
pre revise detrás de donde desee hacer la perforación. No perfore hacia la línea de
combustible, la línea de frenos, el cableado
eléctrico u otras partes importantes.
! Si la unidad se instala en el compartimiento
del pasajero, fíjela firmemente de modo que
no se suelte cuando el vehículo se encuentre
en movimiento, pudiendo causar lesiones o
un accidente.
! Si la unidad se instala debajo de uno de los
asientos delanteros, asegúrese de que no obs-
truya el movimiento del asiento. Direccione
todos los cables y cordones cuidadosamente
alrededor del mecanismo de deslizamiento,
de modo que no queden atascados o atrapados en el mecanismo y sufran un cortocircuito.
Instalación de esta unidad
Montaje con sujetadores de Velcro
Limpie completamente la superficie antes de
fijar los sujetadores de Velcro.
! Si los sujetadores de Velcro (duros) se ad-
hieren directamente al tapete del automóvil, puede instalar esta unidad sin utilizar
los sujetadores de Velcro (suaves).
% Monte esta unidad usando los sujetadores de Velcro.
Esta unidad
Sujetador de Velcro (duro)
Sujetador de Velcro (suave)
Tapete o chasís del automóvil
78
Es
Page 79

Instalación
Instalación del micrófono
PRECAUCIÓN
Es muy peligroso que el cable del micrófono se
enrolle alrededor de la columna de dirección o la
palanca de cambios. Asegúrese de instalar la
unidad de tal forma que no dificulte la conducción.
Nota
Instale el micrófono en una posición y orientación que permita detectar la voz de la persona
que utiliza el sistema.
Instalación del micrófono en el
parasol
1 Instale el micrófono en la abrazadera
del micrófono.
Sección
07
Español
Instalación del micrófono en la
columna de dirección
1 Instale el micrófono en la abrazadera
del micrófono.
2 Instale la abrazadera del micrófono en
el parasol.
Levante el parasol e instale la abrazadera del
micrófono (si lo baja se reducirá el reconocimiento de las operaciones de voz).
2 Instale la abrazadera del micrófono en
la columna de dirección.
Es
79
Page 80

Sección
07
Instalación
Ajuste del ángulo del
micrófono
Es posible ajustar el ángulo del micrófono desplazando adelante o atrás el ángulo de la abrazadera del micrófono.
80
Es
Page 81

Información adicional
Apéndice
Mensajes de error
Cuando contacte con su concesionario o con
el servicio técnico Pioneer más cercano, asegúrese de anotar el mensaje de error.
Mensaje Causa Acción
ERROR-10 La unidad Blue-
tooth incorporada encontró un
error
ERROR-80 La unidad FLASH
ROM incorporada encontró un
error
Gire la llave de contacto a la posición
OFF (apagado) y
ON (encendido).
Gire la llave de contacto a la posición
OFF (apagado) y
ON (encendido).
Especificaciones
Generales
Fuente de alimentación ........14,4 V CC (10,8 a 15,1 V per-
misible)
Consumo máximo de corriente
..................................................... 0,2 A
Dimensiones (An × Al × Pr)
..................................................... 146 × 25 × 90 mm
Peso ............................................... 0,37 kg
Versión .......................................... Certificada para Bluetooth
1.2
Potencia de salida ................... +4 dBm Máx.
(Clase de potencia 2)
Per fil .............................................. GAP (Generic Access Profi-
le)
SDP (Service Discovery Protocol)
HSP (Head Set Profile)
HFP (Hands Free Profile)
A2DP (Advanced Audio Distribution Profile)
AVRCP (Audio Video Remote Control Profile)
OPP (Object Push Profile)
Nota
Las especificaciones y el diseño están sujetos a
posibles modificaciones sin previo aviso.
Español
81
Es
Page 82

Inhalt
Vielen Dank, dass Sie sich für dieses Pioneer-Produkt
entschieden haben.
Lesen Sie sich diese Bedienungsanleitung bitte aufmerksam durch, um sich mit
der richtigen Bedienungsweise für Ihr Modell vertraut zu machen. Anschließend
sollten Sie die Bedienungsanleitung an einem sicheren Ort griffbereit aufbewahren.
Bevor Sie beginnen
Zu diesem Gerät 84
Betriebsumgebung 84
Unsere Website 84
Zu dieser Anleitung 85
Im Störungsfall 85
Zu Bluetooth 85
Zurücksetzen dieses Geräts 85
– Zurücksetzen dieses Geräts ohne
Löschen der Telefondaten 86
– Zurücksetzen dieses Geräts und
Löschen des gesamten Speichers 86
Bluetooth-Telefon
Telefonieren im Freisprechmodus mit einem
Bluetooth-fähigen Mobiltelefon 87
Zur Telefon-Programmquelle 88
– Standby-Modus 88
Einrichten des Freisprech-Telefonierens 88
Grundlegende Bedienvorgänge beim
Freisprech-Telefonieren 89
– Tätigen eines Anrufs 89
– Entgegennehmen eines Anrufs 90
Einführung zu weiterführenden Operationen
beim Freisprech-Telefonieren 91
Aufbauen einer Verbindung zu einem
Mobiltelefon 91
– Suchen nach verfügbaren
Mobiltelefonen 91
– Starten des Verbindungsaufbaus über
das Mobiltelefon 92
Trennen der Verbindung zu einem
Mobiltelefon 92
Registrieren eines verbundenen
Mobiltelefons 93
Löschen eines registrierten
Mobiltelefons 93
Aufbauen einer Verbindung zu einem
registrierten Mobiltelefon 94
– Manuelles Aufbauen einer Verbindung
zu einem registrierten Telefon 94
– Automatisches Aufbauen einer
Verbindung zu einem registrierten
Telefon 94
Gebrauch des Adressbuchs 95
– Übertragen von Einträgen in das
Adressbuch 95
– Ändern der Anzeigereihenfolge der
Adressbucheinträge 96
– Anrufen einer im Adressbuch
gespeicherten Nummer 96
– Suchen nach einer Nummer im
Adressbuch 97
– Bearbeiten des Namens in einem
Adressbucheintrag 97
– Bearbeiten der Telefonnummer in
einem Adressbucheintrag 98
– Löschen eines
Adressbucheintrags 98
Löschen des Speichers 99
Gebrauch der Anruflisten 99
– Anzeigen der Anruflisten 99
– Anrufen einer in den Anruflisten
gespeicherten Nummer 99
Gebrauch vorprogrammierter
Nummern 100
– Vorprogrammieren von
Nummern 100
– Abrufen vorprogrammierter
Nummern 100
Tätigen eines Anrufs durch Eingabe der
Rufnummer 101
Echo- und Geräuschunterdrückung 101
Umschalten des Klingeltons 101
Einstellen der automatischen
Rufabweisung 101
Einstellen der automatischen
Rufannahme 102
Anzeigen der Bluetooth-Geräteadresse (BD-
Adresse) 102
82
De
Page 83

Inhalt
Bluetooth Audio
Wiedergabe von Musiktiteln auf einem BT-
Audiogerät (Bluetooth-Audio-Player) 103
Aufbauen einer Verbindung zu einem
Bluetooth-Audio-Player 105
Abspielen von Titeln auf dem Bluetooth-
Audio-Player 105
Trennen der Verbindung zu einem Bluetooth-
Audio-Player 106
Anzeigen der Bluetooth-Geräteadresse (BD-
Adresse) 106
Grundeinstellungen
Eingeben des PIN-Codes für den Aufbau
einer Bluetooth-Wireless-Verbindung 108
Unterschiedliche Bedienung je nach
Hauptgerät
Gebrauch als externes Gerät 109
Kompatibilität der Funktionen 111
– Hauptgeräte - Gruppe 1 111
– Hauptgeräte - Gruppe 2 112
– Hauptgeräte - Gruppe 3 114
– Hauptgeräte - Gruppe 4 115
Aufbauen einer Verbindung zu einem
Mobiltelefon 117
– Starten des Verbindungsaufbaus über
das Mobiltelefon 117
Registrieren eines verbundenen
Mobiltelefons 117
Trennen der Verbindung zu einem
Mobiltelefon 118
Spracherkennung 118
Einstellen der automatischen
Rufannahme 118
Automatisches Aufbauen einer Verbindung
zu einem registrierten Telefon 118
Einstellen des Ruftons 119
Anzeigen der Geräteinformationen für dieses
Gerät 119
Aufbauen einer Verbindung zu einem
Bluetooth-Audio-Player 120
Trennen der Verbindung zu einem Bluetooth-
Audio-Player 120
Anschlüsse
Anschließen der Geräte 122
Installation
Installieren dieses Geräts 123
– Anbringen mithilfe von
Klettverschlüssen 123
Installieren des Mikrofons 124
– Installieren des Mikrofons auf der
Sonnenblende 124
– Installieren des Mikrofons auf der
Lenksäule 124
Anpassen des Mikrofonwinkels 125
Zusätzliche Informationen
Fehlermeldungen 126
Technische Daten 126
Deutsch
De
83
Page 84

Abschnitt
01
Bevor Sie beginnen
Mischen Sie dieses Produkt, wenn Sie es entsorgen wollen, nicht mit gewöhnlichen Haushaltsabfällen. Es gibt ein getrenntes
Sammelsystem für gebrauchte elektronische
Produkte, über das die richtige Behandlung,
Rückgewinnung und Wiederverwertung
gemäß der bestehenden Gesetzgebung gewährleistet wird.
Privathaushalte in den 25 Mitgliedsstaaten der
EU, in der Schweiz und in Norwegen können
ihre gebrauchten elektronischen Produkte an
vorgesehenen Sammeleinrichtungen kostenfrei zurückgeben oder aber an einen Händler
zurückgeben (wenn sie ein ähnliches neues
Produkt kaufen).
Bitte wenden Sie sich in den Ländern, die
oben nicht aufgeführt sind, hinsichtlich der
korrekten Verfahrensweise der Entsorgung an
die örtliche Kommunalverwaltung.
Auf diese Weise stellen Sie sicher, dass das zu
entsorgende Produkt der notwendigen Behandlung, Rückgewinnung und Wiederverwertung unterzogen wird, und so mögliche
negative Einflüsse auf die Umwelt und die
menschliche Gesundheit vermieden
werden.
VORSICHT
! Dieses Gerät darf keinesfalls mit Flüssigkeiten
in Berührung kommen, da dies einen elektrischen Schlag verursachen könnte. Darüber
hinaus kann der Kontakt mit Flüssigkeit eine
Beschädigung des Geräts, Rauchentwicklung
und Überhitzung nach sich ziehen.
! Bewahren Sie diese Anleitung zum Nach-
schlagen stets griffbereit auf.
! Wählen Sie stets eine Lautstärke, bei der Sie
Umgebungsgeräusche noch deutlich wahrnehmen können.
! Setzen Sie dieses Gerät keiner Feuchtigkeit
aus.
! Sollte dieses Produkt nicht ordnungsgemäß
funktionieren, dann wenden Sie sich bitte an
Ihren Händler oder an die nächstgelegene
Pioneer-Kundendienststelle.
Betriebsumgebung
Dieses Gerät sollte innerhalb der nachstehend
angegebenen Temperaturbereiche verwendet
werden.
Betriebstemperatur: -10 °C bis +60 °C (14 °F
bis 140 °F)
EN300328 ETC-Testtemperatur: -20 °C bis +55
°C (-4 °F bis 131 °F)
Zu diesem Gerät
Dieses Gerät fungiert als Adapter für ein
Hauptgerät von Pioneer und ermöglicht unter
Rückgriff auf die Bluetooth Wireless-Technologie den Aufbau einer Freisprechverbindung
mit einem Mobiltelefon sowie die Wiedergabe
von Musik auf einem Bluetooth-Audio-Player.
! Dieses Gerät ist ausschließlich für eine Ver-
wendung in Kraftfahrzeugen vorgesehen.
84
De
Unsere Website
Besuchen Sie uns auf folgender Website:
Page 85

Bevor Sie beginnen
Abschnitt
01
! Registrieren Sie Ihr Produkt. Wir speichern
die Detaildaten Ihres Produktkaufs in einer
Datei, sodass wir Ihnen diese Informationen bei Verlust oder Diebstahl des Produkts jederzeit für Ihre Versicherung
bereitstellen können.
! Auf unserer Website finden Sie die jeweils
neuesten Informationen der Pioneer
Corporation.
Zu dieser Anleitung
Die Bedienung dieses Geräts erfolgt über das
jeweils angeschlossene Hauptgerät. In dieser
Anleitung wird auf das Gerät AVH-P7800DVD
(Russian model) als mögliches Hauptgerät
Bezug genommen.
! Wenn Sie das Hauptgerät AVH-P6800DVD
(Russian model) verwenden, halten Sie
sich an die Anweisungen in der zugehörigen Bedienungsanleitung.
! Bei Verwendung eines anderen Hauptge-
räts als AVH-P7800DVD (Russian model)
und AVH-P6800DVD (Russian model) siehe
Gebrauch als externes Gerät auf Seite 109.
Wir empfehlen Ihnen, sich vor dem eigentlichen Betrieb mit den Funktionen des Geräts
und deren Bedienung vertraut zu machen,
indem Sie sich die Bedienungsanleitung
durchlesen. Beachten Sie dabei besonders die
Hinweise WARNUNG und VORSICHT und
halten Sie sich daran.
Zu Bluetooth
Bluetooth ist eine Technologie für drahtlose
Funkverbindungen von kurzer Reichweite. Sie
wurde als Alternative zu drahtgestützten Verbindungen für Mobiltelefone, Handheld-PCs
und andere Geräte entwickelt. Bluetooth nutzt
das 2,4-GHz-Frequenzband und überträgt
Sprache und Daten mit einer Geschwindigkeit
von bis zu 1 MBit pro Sekunde. Die Markteinführung von Bluetooth im Jahre 1998 geht auf
die Bluetooth SIG (Special Interest Group) zurück. Zu diesem Unternehmensverband gehören Ericsson Inc., Intel Corp., Nokia Corp.,
Toshiba und IBM. Derzeit wird Bluetooth weltweit von nahezu 2 000 Unternehmen entwikkelt.
! Bluetooth-Wortmarke und -Logos sind Ei-
gentum der Bluetooth SIG, Inc. Jede Nutzung dieser Marken durch die Pioneer
Corporation erfolgt unter entsprechender
Lizenz. Andere Marken und Markennamen
sind Eigentum ihrer jeweiligen Besitzer.
Zurücksetzen dieses Geräts
Deutsch
Im Störungsfall
Sollte dieses Produkt nicht ordnungsgemäß
funktionieren, dann wenden Sie sich bitte an
Ihren Händler oder an die nächstgelegene
Pioneer-Kundendienststelle.
VORSICHT
Wenn Sie bei eingeschalteter Zündung (der Zündschalter befindet sich in der Position ON bzw.
ACC ON) die Taste RESET auf diesem Gerät drükken, wird der Inhalt des Gerätespeichers gelöscht.
De
85
Page 86

Abschnitt
01
Bevor Sie beginnen
Zurücksetzen dieses Geräts
ohne Löschen der Telefondaten
Durch Drücken der Taste RESET können Sie
das Gerät auf seine ursprünglichen Einstellungen zurücksetzen, ohne dabei die telefonspezifischen Daten zu löschen. Allerdings gehen
dabei folgende Einstellungen verloren:
! PHONEBOOK NAME VIEW
! AUTO ANSWER
! REFUSE ALL CALLS
! RING TONE
! AUTO CONNECT
! ECHO CANCEL
Bei einer Verwendung als externes Gerät werden folgende Einstellungen gelöscht:
! Automatische Rufannahme
! Automatischer Verbindungsaufbau
! Rufton
Das Gerät muss in den folgenden Fällen zurückgesetzt werden:
! Vor der ersten Verwendung dieses Geräts
nach der Installation
! Nach einem Neuanschluss dieses Geräts
an das Hauptgerät
! Bei einer Betriebsstörung des Geräts
! Bei Anzeige ungewöhnlicher oder eindeu-
tig falscher Meldungen auf dem Display
! Bei Auftreten einer Funktionsstörung in
Verbindung mit dem Freisprech-Telefonieren
Zurücksetzen dieses Geräts und
Löschen des gesamten Speichers
Um den Schutz persönlicher und privater Informationen zu gewährleisten, können die in
diesem Gerät gespeicherten telefonspezifischen Daten gelöscht werden.
1 Schalten Sie die Zündung ein (Position
ON) bzw. positionieren Sie den Zündschalter auf ACC.
2 Drücken Sie RESET mit Hilfe eines Kugelschreibers oder eines anderen spitz zulaufenden Gegenstands.
Der gesamte Speicher wird vollständig gelöscht.
# Der Löschvorgang nimmt in etwa 10 Sekunden in Anspruch. Um eine erfolgreiche Durchführung des Vorgangs zu gewährleisten, sollten Sie
den Zündschlüssel nach der Bestätigung 10 Sekunden in der Position ACC bzw. ON belassen.
# Vergewissern Sie sich, dass alle Daten vollständig gelöscht wurden. Für Informationen zur
Prüfung des Datenstatus siehe Registrieren eines
verbundenen Mobiltelefons auf Seite 93. Wenn
das Display für den Status aller Telefone leer
bleibt, wurden alle Daten gelöscht.
1 Schalten Sie die Zündung aus (OFF).
2 Drücken Sie RESET mit Hilfe eines Kugelschreibers oder eines anderen spitz zulaufenden Gegenstands.
Taste RESET
86
De
Page 87

1
3
4
c
2
678
9
a
b
5
Bluetooth-Telefon
Abschnitt
02
Telefonieren im
Freisprechmodus mit
einem Bluetooth-fähigen
Mobiltelefon
Wenn Ihr Mobiltelefon die Bluetooth WirelessTechnologie unterstützt, können Sie über diesen Adapter eine Verbindung zu einem PioneerHauptgerät herstellen und im Freisprechmodus
telefonieren - selbst während des Fahrens.
Wichtig
Da dieses Gerät kontinuierlich auf VerbindungsStandby geschaltet ist, um jederzeit per Bluetooth eine Verbindung zu Ihrem Mobiltelefon herstellen zu können, kann eine Verwendung des
Geräts bei ausgeschaltetem Motor eine Entleerung der Fahrzeugbatterie zur Folge haben.
1 Programmquellensymbol
Zeigt an, welche Programmquelle gewählt
ist.
2 Programmquellenname
Zeigt den Namen der gewählten Programmquelle an.
3 Telefonnummer
Zeigt die von Ihnen ausgewählte Telefonnummer an.
4 Benutzernummer-Anzeige
Zeigt die Registrierungsnummer des Mobiltelefons an.
5 Gerätename
Zeigt den Gerätenamen des Mobiltelefons
an.
6 Spracherkennungsanzeige
Erscheint, wenn die Spracherkennungsfunktion eingeschaltet ist (für weitere Einzelheiten siehe Spracherkennung auf Seite
89).
7 Hinweis „Eingehender Anruf“
Erscheint, wenn ein Anruf (in Abwesenheit)
empfangen und noch nicht geprüft wurde.
8 Anzeige „Automatische Rufannahme”
Erscheint, wenn die Funktion zur automatischen Rufannahme eingeschaltet ist (für
weitere Einzelheiten siehe Einstellen der au-
tomatischen Rufannahme auf Seite 102).
9 Akku-Ladestandsanzeige
Zeigt den Ladestand des Mobiltelefon-Akkus
an.
! Der angezeigte Akku-Ladestand kann
sich vom tatsächlichen Ladestand des
Akkus unterscheiden.
! Wenn keine Angaben zum Akku-Lade-
stand verfügbar sind, bleibt der für die
Ladestandsanzeige vorgesehene Bereich
im Display leer.
a Signalstärke-Anzeige
Zeigt die Stärke des Signalempfangs für das
Mobiltelefon an.
! Die angezeigte Signalstärke kann sich
von der tatsächlich empfangenen Signalstärke unterscheiden.
! Je nach verwendetem Bluetooth-Mobilte-
lefon sind möglicherweise keine Angaben zur Funkfeldstärke verfügbar.
Deutsch
De
87
Page 88

Abschnitt
02
Bluetooth-Telefon
b Telefonanzeige
Erscheint, wenn unter Rückgriff auf die
Bluetooth Wireless-Technologie eine Verbindung zu einem Telefon hergestellt wurde
(für detaillierte Informationen hierzu siehe
Aufbauen einer Verbindung zu einem Mobiltelefon auf Seite 91).
c Anzeige der voreingestellten Rufnummern
Zeigt die Liste der voreingestellten Rufnummern an.
Hinweise
! Der Empfang von Telefonanrufen über dieses
Gerät wird auf Standby geschaltet, sobald der
Zündschlüssel in die Position ACC oder ON
gedreht wird.
! Die Entfernung (Sichtlinie) zwischen diesem
Gerät und Ihrem Mobiltelefon darf für das
Senden und Empfangen von Sprache und
Daten per Bluetooth nicht mehr als zehn
Meter betragen. Je nach Umgebung fällt die
Übertragungsentfernung u. U. noch geringer
aus als diese geschätzte Entfernung.
! Um auf die Bluetooth Wireless-Technologie
zurückgreifen zu können, müssen Geräte bestimmte Profile interpretieren können. Dieses
Gerät ist mit den nachstehend aufgeführten
Profilen kompatibel.
— GAP (Generic Access Profile)
— SDP (Service Discovery Protocol)
— OPP (Object Push Profile)
— HSP (Head Set Profile)
— HFP (Hands Free Profile)
— A2DP (Advanced Audio Distribution Profi-
le)
— AVRCP (Audio/Video Remote Control Profi-
le)
! Wenn Sie RDS (Radio-Daten-System) oder
DAB (Digital-Audio-Rundfunk) verwenden
und die Durchsagebereitschaft einschalten,
kann ein Anruf durch den Empfang eines
Durchsagesignals unterbrochen werden.
! Bei der Wahl des Telefons als Programmquel-
le werden Lautstärke und Equalizer-Kurve automatisch auf eine für die Telefonquelle
geeignete Einstellung geschaltet. Wenn Sie zu
einer anderen Programmquelle zurückkehren,
kehren auch die Lautstärke und die EqualizerKurve zu ihrer ursprünglichen Einstellung zurück.
! Die Equalizer-Kurve für die Telefon-Programm-
quelle ist fest voreingestellt.
Zur Telefon-Programmquelle
Standby-Modus
Nach dem Aufbau einer Bluetooth-WirelessVerbindung verbleibt das Hauptgerät im Hintergrund im Telefon-Standbymodus, solange
die Verbindung aufrecht erhalten wird. Damit
können Sie alle anderen Funktionen des
Hauptgeräts uneingeschränkt bedienen und
dennoch jederzeit einen Anruf empfangen.
% Berühren Sie das Programmquellensymbol und danach Telephone, um das Telefon zu wählen.
# Wenn das Programmquellensymbol nicht angezeigt wird, können Sie es durch Berühren des
Bildschirms einblenden.
Einrichten des FreisprechTelefonierens
Damit Sie auf die Freisprechfunktion zurückgreifen können, müssen Sie das Gerät für eine
Verwendung mit dem Mobiltelefon einrichten.
Dazu gehört der Aufbau einer Bluetooth-Verbindung zwischen diesem Gerät und Ihrem
Mobiltelefon, die Registrierung des Mobiltelefons im Gerät und die Anpassung des Lautstärkepegels.
88
De
Page 89

Bluetooth-Telefon
Abschnitt
02
1 Aufbauen einer Verbindung
Für detaillierte Anweisungen zum Aufbau
einer Verbindung zwischen Ihrem Telefon und
diesem Gerät per Bluetooth siehe Aufbauen
einer Verbindung zu einem Mobiltelefon auf
Seite 91.
# Ihr Telefon ist dann vorübergehend mit diesem Gerät verbunden. Um die bereitgestellte
Technologie optimal nutzen zu können, sollten
Sie das Telefon im Gerät registrieren.
2 Registrieren des Mobiltelefons
Anweisungen zur Registrierung eines vorübergehend verbundenen Mobiltelefons finden Sie
unter Registrieren eines verbundenen Mobiltele-
fons auf Seite 93.
3 Einstellen der Lautstärke
Stellen Sie die Lautstärke des Telefonhörers
auf einen für Sie komfortablen Pegel ein. Der
eingestellte Lautstärkepegel wird dann als
Standardeinstellung im Gerät gespeichert.
# Die Lautstärke der Stimme des Anrufers und
diejenige des Klingeltons können je nach Typ des
Mobiltelefons unterschiedlich ausfallen.
# Wenn der Unterschied zwischen Klingeltonund Stimmlautstärke zu groß ausfällt, kann es zu
einer Instabilität des globalen Lautstärkepegels
kommen.
# Bevor Sie die Verbindung zwischen Ihrem Mobiltelefon und dem Gerät trennen, stellen Sie sicher, dass die Lautstärke auf einen geeigneten
Pegel eingestellt ist. Wenn Sie Ihr Mobiltelefon
stummgeschaltet haben (Lautstärkepegel Null),
bleibt diese Einstellung auch nach der Verbindungstrennung für das Telefon aktiv.
Grundlegende
Bedienvorgänge beim
Freisprech-Telefonieren
Nachfolgend werden alle grundlegenden
Schritte für ein Telefonieren im Freisprechmodus per Bluetooth beschrieben. Weiterführende Operationen beim Freisprech-Telefonieren
werden ab Einführung zu weiterführenden Ope-
rationen beim Freisprech-Telefonieren auf Seite
91 behandelt.
Deutsch
Wichtig
Komplexere Bedienvorgänge, die Ihre gesamte
Aufmerksamkeit beanspruchen, wie z. B. das
Wählen einer Nummer auf dem Display oder die
Verwendung des Adressbuchs usw., dürfen nicht
während des Fahrens ausgeführt werden. Wenn
Sie einen derartigen Bedienvorgang ausführen
müssen, halten Sie Ihr Fahrzeug zuerst an einem
sicheren Ort an.
Tätigen eines Anrufs
Spracherkennung
Wenn Ihr Mobiltelefon die Spracherkennungsfunktion unterstützt, können Sie Ihren Anruf
über gesprochene Befehle tätigen.
! Die Bedienung dieser Funktion fällt je nach
dem Typ Ihres Mobiltelefons unterschiedlich aus. Detaillierte Anweisungen hierzu
können Sie der Bedienungsanleitung Ihres
Mobiltelefons entnehmen.
! Diese Funktion ist nur verfügbar, wenn eine
Verbindung per HFP (Hands Free Profile)
hergestellt wird.
1 Berühren Sie VOICE, um die Spracherkennungsfunktion einzuschalten.
In der Informationsleiste wird das Symbol der
Spracherkennung angezeigt. Die Spracherkennungsfunktion ist jetzt einsatzbereit.
De
89
Page 90

Abschnitt
02
Bluetooth-Telefon
# Wenn Ihr Mobiltelefon keine Spracherkennung unterstützt, ist die Taste VOICE nicht verfügbar.
2 Sprechen Sie den Namen des gewünschten Teilnehmers.
Entgegennehmen eines Anrufs
Annehmen eines eingehenden Anrufs
Auch wenn eine andere Programmquelle als
Telephone gewählt wurde oder das Gerät
sogar ausgeschaltet ist, können Sie einen eingehenden Anruf annehmen. Wenn Sie die automatische Rufannahme für das Gerät
einschalten möchten, siehe Einstellen der au-
tomatischen Rufannahme auf Seite 102.
1 Wenn ein Anruf eingeht, berühren Sie
.
# Wenn auf dem Mobiltelefon der Privatmodus
gewählt wurde, ist der Freisprechmodus ggf.
nicht verfügbar.
2 Um den Anruf zu beenden, berühren
Sie
.
Im Display wird die geschätzte Anrufdauer angezeigt (diese weicht ggf. leicht von der tatsächlichen Anrufdauer ab).
# Beim Trennen der Verbindung ist u. U. ein Geräusch zu vernehmen.
Abweisen eines eingehenden Anrufs
Sie können einen eingehenden Anruf auch abweisen. Weitere Hinweise zum Abweisen aller
eingehenden Anrufe finden Sie unter Einstel-
len der automatischen Rufabweisung auf Seite
101.
% Wenn ein Anruf eingeht, berühren Sie
.
Der Anruf wird abgewiesen.
Hinweis
Der manuell abgewiesene Anruf wird in der Liste
der Anrufe in Abwesenheit aufgezeichnet. Für Informationen zu dieser Liste siehe Gebrauch der
Anruflisten auf Seite 99.
Annehmen eines anklopfenden Anrufs
Wenn ein Anruf eingeht, während Sie bereits
telefonieren, wird die Nummer des zweiten Anrufers (oder dessen Name, wenn dieser im
Adressbuch gespeichert ist) im Display angezeigt, um Sie darauf zu verweisen, dass ein
Anruf auf Annahme wartet. Sie können den ersten Anruf dann halten und den anklopfenden
Anruf annehmen. Oder Sie weisen den anklopfenden Anruf ab.
1 Berühren Sie
, um einen anklopfen-
den Anruf anzunehmen.
2 Berühren Sie
, um den Anruf zu be-
enden.
# Das Gespräch, das Sie gerade geführt haben,
wird gehalten. Um den Anruf zu beenden, müssen sowohl Sie als auch der Anrufer auflegen.
# Wenn ein Anruf gehalten wird und der Anrufer
in der Leitung bleibt, können Sie durch Berühren
der Taste
zwischen den Anrufen umschalten.
Abweisen eines anklopfenden Anrufs
Wenn Sie das laufende Gespräch nicht unterbrechen möchten, um einen anklopfenden
Anruf anzunehmen, können Sie diesen abweisen.
% Berühren Sie
, um einen anklopfen-
den Anruf abzuweisen.
# Die Nummer des abgewiesenen Anrufs wird
nicht in der Liste der Anrufe in Abwesenheit
hinzugefügt.
90
De
Page 91

1
Bluetooth-Telefon
Abschnitt
02
Einführung zu
weiterführenden Operationen
beim Freisprech-Telefonieren
Wichtig
Halten Sie Ihr Fahrzeug an einem sicheren Ort an
und ziehen Sie die Handbremse fest, um diesen
Vorgang auszuführen.
1 Funktionsdisplay
Zeigt die Namen der Funktionen an.
1 Wählen Sie Telephone als Programmquelle.
2 Berühren Sie AV MENU, um MENU anzuzeigen.
MENU erscheint im Display.
# Wenn AV MENU nicht angezeigt wird, können
Sie die Anzeige durch Berühren des Bildschirms
bewirken.
# Sie können MENU auch durch Klicken mit
dem Joystick einblenden.
3 Berühren Sie FUNCTION, um die Namen
der Funktionen anzuzeigen.
Die Funktionsnamen werden angezeigt und
bedienbare Funktionen hervorgehoben.
# Zum Zurückschalten auf die jeweils vorhergehende Anzeige berühren Sie BACK.
# Zum Zurückschalten zur Wiedergabeanzeige
berühren Sie ESC.
Aufbauen einer Verbindung
zu einem Mobiltelefon
Um mit diesem Gerät ein Telefon drahltlos verwenden zu können, muss zunächst eine Verbindung über die Bluetooth WirelessTechnologie hergestellt werden. Dazu sind verschiedene Möglichkeiten gegeben.
! Die Verbindung wird normalerweise mithil-
fe des HFP-Profils aufgebaut. Dies erlaubt
Ihnen die volle Kontrolle der verfügbaren
Funktionen der Telefon-Programmquelle.
Wenn Sie allerdings die Verbindung mithilfe Ihres Mobiltelefons herstellen, wird in einigen Fällen die Verbindung über das HSPProfil aufgebaut. Einige Funktionen stehen
in diesem Fall nicht zur Verfügung.
! Es kann per Bluetooth eine Verbindung zu
einem Telefon hergestellt werden, welches
noch nicht in diesem Gerät registriert ist. In
diesem Fall spricht man von einer vorübergehenden Verbindung, bei der nur bestimmte Funktionen zur Verfügung stehen.
Um den gesamten Funktionsumfang nutzen zu können, sollten Sie das Telefon in
diesem Gerät registrieren. Für weitere Einzelheiten diesbezüglich siehe Registrieren
eines verbundenen Mobiltelefons auf Seite
93.
Suchen nach verfügbaren
Mobiltelefonen
Dieses Gerät sucht in einem bestimmten Umkreis nach allen verfügbaren Mobiltelefonen,
die die Bluetooth Wireless-Technologie unterstützen. In der anschließend angezeigten Liste
können Sie dann das Telefon auswählen, zu
dem Sie eine Verbindung herstellen möchten.
1 Berühren Sie PHONE CONNECT im
Funktionsmenü.
Deutsch
De
91
Page 92

Abschnitt
02
Bluetooth-Telefon
2 Berühren Sie Search, um nach verfügbaren Mobiltelefonen zu suchen.
Während des Suchvorgangs wird SEARCHING
angezeigt. Sobald verfügbare, Bluetooth-fähige Mobiltelefone identifiziert werden, werden
die entsprechenden Gerätenamen oder die
Angabe Name Not Found (wenn keine
Namen abgerufen werden können) angezeigt.
# Sollte das Gerät keine verfügbaren Mobiltelefone identifizieren, dann wird NOT FOUND angezeigt.
3 Berühren Sie den Gerätenamens des Telefons, zu dem Sie eine Verbindung aufbauen möchten.
Während des Verbindungsaufbaus wird
CONNECTING angezeigt. Um den Verbindungsaufbau abzuschließen, prüfen Sie den
Gerätenamen (Pioneer BT unit) und geben
Sie auf Ihrem Mobiltelefon den Verbindungscode ein. Sobald die Verbindung hergestellt
ist, wird CONNECTED angezeigt.
# Standardmäßig wird 0000 als Verbindungsco-
de verwendet. Sie können diesen Code allerdings
in den Grundeinstellungen ändern. Siehe Einge-
ben des PIN-Codes für den Aufbau einer BluetoothWireless-Verbindung auf Seite 108.
Starten des Verbindungsaufbaus
über das Mobiltelefon
Wenn Sie das Gerät in den Modus
Connection open setzen, können Sie eine
Bluetooth-Verbindung ausgehend von Ihrem
Telefon herstellen. Wenn Ihnen die genaue
Vorgehensweise für den Aufbau einer Verbindung über Ihr Mobiltelefon nicht bekannt ist,
dann schlagen Sie diese in der Bedienungsanleitung des Telefons nach.
2 Berühren Sie CONNECTION OPEN.
Damit wird das Gerät auf Standby für einen
Verbindungsaufbau ausgehend vom Mobiltelefon geschaltet.
3 Verwenden Sie das Mobiltelefon, um
eine Verbindung zum Gerät herzustellen.
# Die Bedienung dieser Funktion fällt je nach
dem Typ Ihres Mobiltelefons unterschiedlich aus.
Detaillierte Anweisungen hierzu können Sie der
Bedienungsanleitung Ihres Mobiltelefons entnehmen.
# Gegebenenfalls müssen Sie den Verbindungscode auf Ihrem Mobiltelefon eingeben, um den
Verbindungsaufbau abzuschließen.
# Standardmäßig wird 0000 als Verbindungsco-
de verwendet. Sie können diesen Code allerdings
in den Grundeinstellungen ändern. Siehe Einge-
ben des PIN-Codes für den Aufbau einer BluetoothWireless-Verbindung auf Seite 108.
Trennen der Verbindung zu
einem Mobiltelefon
Wenn Sie Ihr Telefon nicht mehr benötigen,
können Sie die Bluetooth-Verbindung zwischen Telefon und Gerät trennen.
1 Berühren Sie PHONE CONNECT im
Funktionsmenü.
2 Berühren Sie DISCONNECT, um die derzeit bestehende Verbindung zwischen Mobiltelefon und Gerät zu trennen.
Sobald die Verbindung getrennt ist, erscheint
NO CONNECTION im Display.
1 Berühren Sie PHONE CONNECT im
Funktionsmenü.
92
De
Page 93

Bluetooth-Telefon
Abschnitt
02
Registrieren eines
verbundenen Mobiltelefons
Wenn Sie ein Telefon, zu dem eine vorübergehende Verbindung hergestellt wurde, registrieren, können Sie alle mit der Bluetooth
Wireless-Technologie bereitstehenden Funktionen uneingeschränkt nutzen. Insgesamt können fünf Telefone registriert werden: Drei
Benutzertelefone und zwei Gasttelefone. Bei
einer Registrierung als Benutzertelefon stehen
sämtliche Funktionen zur Verfügung. Bei einer
Registrierung als Gasttelefon ist die Verfügbarkeit mancher Funktionen eingeschränkt.
1 Berühren Sie PHONE REGISTER im Funktionsmenü.
2 Halten Sie eine der Registrierungen berührt, um das derzeit verbundene Telefon
zu registrieren.
Zur Auswahl stehen folgende Elemente:
1 (Benutzer 1)—2 (Benutzer 2)—3 (Benutzer
3)—G (Gast 1)—G (Gast 2)
Nach erfolgreicher Registrierungszuweisung
wird der Gerätename des verbundenen Telefons für die gewählte Registrierung angezeigt.
# Wenn einer Registrierung kein Telefon zugewiesen wurde, wird kein Gerätename angezeigt.
Für bereits verwendete Registrierungen wird der
entsprechende Gerätename im Display ausgewiesen. Um eine bereits vergebene Registrierung
einem neuen Telefon zuzuweisen, müssen Sie zuerst die derzeitige Zuweisung löschen. Für detaillierte Anweisungen hierzu siehe Löschen eines
registrierten Mobiltelefons auf Seite 93.
# Sollte die Registrierungszuweisung misslingen, dann wird der Gerätename des verbundenen
Telefons nicht für die gewählte Registrierung angezeigt. Kehren Sie in diesem Fall zu Schritt 1 zurück und versuchen Sie es erneut.
Hinweis
Die Audio-Einstellungen können für jedes Telefon
separat vorgenommen werden.
Löschen eines registrierten
Mobiltelefons
Wenn Sie ein registriertes Telefon nicht mehr
mit diesem Gerät verwenden möchten, können Sie es in den Registrierungszuweisungen
löschen und damit Platz für ein anderes Telefon schaffen.
1 Berühren Sie PHONE REGISTER im Funktionsmenü.
2 Berühren Sie DELETE neben dem Gerätenamen des Telefons, dessen Registrierung gelöscht werden soll.
Die Bestätigung des Vorgangs wird angezeigt.
Berühren Sie YES, um die Telefonregistrierung
zu löschen.
# Der Löschvorgang nimmt in etwa 10 Sekunden in Anspruch. Um eine erfolgreiche Durchführung des Vorgangs zu gewährleisten, sollten Sie
den Zündschlüssel nach der Bestätigung 10 Sekunden in der Position ACC bzw. ON belassen.
# Um den Löschvorgang für die Telefonregistrierung abzubrechen, berühren Sie NO.
Deutsch
De
93
Page 94

Abschnitt
02
Bluetooth-Telefon
Aufbauen einer
Verbindung zu einem
registrierten Mobiltelefon
Wenn Sie Ihr Mobiltelefon in diesem Gerät registriert haben, ist der Aufbau einer WirelessVerbindung per Bluetooth das reinste Kinderspiel. Sie können die Verbindung entweder
manuell durch Auswahl einer Registrierung
herstellen oder der Verbindungsaufbau erfolgt
automatisch, wenn sich das registrierte Telefon innerhalb des Sende-/Empfangsbereichs
befindet.
Manuelles Aufbauen einer
Verbindung zu einem
registrierten Telefon
Wählen Sie unter den Registrierungszuweisungen das Telefon, zu dem Sie manuell eine
Verbindung herstellen möchten.
1 Berühren Sie PHONE CONNECT im
Funktionsmenü.
2 Berühren Sie DIRECT CONNECT.
3 Berühren Sie den Gerätenamens des Telefons, zu dem Sie eine Verbindung aufbauen möchten.
Während des Verbindungsaufbaus blinkt die
Meldung CONNECTING im Display. Sobald
die Verbindung hergestellt ist, wird
CONNECTED angezeigt.
Automatisches Aufbauen einer
Verbindung zu einem
registrierten Telefon
Wenn die Funktion für den automatischen Verbindungsaufbau eingeschaltet wurde, stellt
das Gerät automatisch eine Verbindung zu
einem registrierten Telefon her, sobald sich
dieses innerhalb des Sende-/Empfangsbereichs befindet.
! Falls dieses Gerät kein registriertes Telefon
orten kann, wird es sich automatisch mit
dem Telefon, dass als 1 (Benutzer 1) registriert wurde, verbinden.
! Diese Funktion steht eventuell nicht mit
allen Mobiltelefonen zur Verfügung. Sollte
mit Hilfe der Funktion zum automatischen
Verbindungsaufbau keine Verbindung zu
Ihrem registrierten Telefon hergestellt werden können, dann greifen Sie auf die manuelle Verbindungsmethode zurück (siehe
die Beschreibung unter Manuelles Aufbau-
en einer Verbindung zu einem registrierten
Telefon auf Seite 94).
! Bei manchen Mobiltelefonen müssen Sie
ggf. den Aufbau einer Verbindung zu diesem Gerät auf dem Telefon bestätigen. In
diesem Fall kommt die Verbindung unter
Umständen erst nach der Verbindungsbestätigung auf dem Telefon zu Stande, selbst
wenn auf diesem Gerät der automatische
Verbindungsaufbau eingeschaltet wurde.
Falls möglich, sollten Sie auf Ihrem Mobiltelefon die Bestätigung einer Bluetooth-Verbindung deaktivieren. Detaillierte Angaben
hierzu können Sie der Bedienungsanleitung Ihres Mobiltelefons entnehmen.
! Diese Funktion ist nicht verfügbar, wenn
Sie unter Rückgriff auf die Bluetooth-Wireless-Technologie Musiktitel auf Ihrem Bluetooth-Audio-Player abspielen. Beenden Sie
in diesem Fall die Wiedergabe und schalten
Sie auf eine andere Programmquelle um,
damit über die Bluetooth-Funktion eine Verbindung zwischen Mobiltelefon und Gerät
hergestellt werden kann.
! Während der Bedienung des Funktions-
menüs für die Programmquelle Telephone
oder BT AUDIO ist kein automatischer Verbindungsaufbau zu einem registrierten Telefon möglich.
! Diese Funktion kann nicht separat für jedes
Mobiltelefon eingestellt werden.
94
De
Page 95

Bluetooth-Telefon
Abschnitt
02
% Berühren Sie AUTO CONNECT im Funktionsmenü, um den automatischen Verbindungsaufbau einzuschalten.
Wenn Sie Ihr Mobiltelefon auf Standby für den
Aufbau einer Bluetooth-Verbindung eingestellt
haben, wird automatisch eine Verbindung zu
diesem Gerät hergestellt.
# Zum Ausschalten des automatischen Verbindungsaufbaus berühren Sie AUTO CONNECT
erneut.
Gebrauch des Adressbuchs
Im Adressbuch können bis zu 500 Namen und
Rufnummern gespeichert werden. Sie können
das Adressbuch auf dem Display des Geräts
nach einer Nummer durchsuchen und eine
Nummer auswählen, die angerufen werden
soll. Die in einem registrierten Telefon gespeicherten Namen und Nummern können in das
Adressbuch übertragen werden, sodass Ihnen
Ihre Kontakte schnell und einfach zur Verfügung stehen.
! Wie viele Zeichen maximal angezeigt wer-
den können, hängt von Ihrem Mobiltelefon
ab. Auf diesem Gerät können 24 bis 48
Buchstaben angezeigt werden.
lich. Um das Freisprechtelefonieren erneut
zu aktivieren, müssen Sie eine neue Verbindung zwischen dem Mobiltelefon und diesem Gerät aufbauen. Wenn der
automatische Verbindungsaufbau auf dem
Gerät eingeschaltet wurde, erfolgt der Verbindungsaufbau mehrere Sekunden (mind.
zehn) nach der Trennung der Telefonverbindung für den Übertragungsvorgang automatisch.
! Einige Symbole, die in den im Adressbuch
des Telefons gespeicherten Rufnummern
verwendet werden, können nicht in dieses
Gerät übertragen werden. Nur die Zeichen
„+“, „#“ und „*“ werden von diesem Gerät
ordnungsgemäß erkannt.
! Bei manchen Mobiltelefonen ist die Über-
tragung eines ganzen Adressbuchs in
einem Schritt ggf. nicht möglich. In diesem
Fall müssen Sie die gespeicherten Einträge
ausgehend von Ihrem Mobiltelefon einzeln
übertragen.
! Je nach dem per Bluetooth verbundenen
Mobiltelefon kann das Adressbuch u. U.
nicht ordnungsgemäß auf dem Gerät angezeigt werden (manche Zeichen erscheinen
evtl. verformt).
! Wenn das Adressbuch im Mobiltelefon
Bilddaten umfasst, wird es ggf. nicht fehlerfrei übertragen.
Deutsch
Übertragen von Einträgen in
das Adressbuch
Um das Adressbuch schnell mit Einträgen zu
füllen, können Sie die in einem registrierten
Telefon gespeicherten Rufnummern übertragen.
Das Adressbuch kann insgesamt 500 Einträge
aufnehmen: 300 von Benutzer 1, 150 von Benutzer 2 und 50 von Benutzer 3.
! Nach dem Start der Adressbuchübertra-
gung wird die Bluetooth-Verbindung ge-
trennt, ein Telefonieren im
Freisprechmodus ist dann nicht mehr mög-
1 Berühren Sie PHONEBOOK TRANSFER
im Funktionsmenü.
2 Berühren Sie START, um die Adressbuchübertragung einzuschalten.
Die Adressbuchübertragung ist auf Standby
geschaltet.
De
95
Page 96

Abschnitt
02
Bluetooth-Telefon
3 Verwenden Sie Ihr Mobiltelefon, um
das Adressbuch zu übertragen.
Führen Sie die Adressbuch-Übertragung ausgehend von Ihrem Mobiltelefon durch. Detaillierte Anweisungen hierzu können Sie der
Bedienungsanleitung Ihres Mobiltelefons entnehmen.
# Während der Übertragung des Adressbuchs
wird ein Sanduhr-Symbol angezeigt.
# Im Display wird die Anzahl der bereits übertragenen sowie die Anzahl der insgesamt zu übertragenden Einträge ausgewiesen.
# Zum Abbrechen der Übertragung berühren
Sie STOP.
4 Completed erscheint im Display, d. h.
die Adressbuch-Übertragung ist abgeschlossen.
Ändern der Anzeigereihenfolge
der Adressbucheinträge
Für die Anzeige der Adressbucheinträge können Sie zwischen einer alphabetischen Sortierung nach Vor- und nach Nachnamen wählen.
! Mit manchen Mobiltelefonen steht diese
Funktion ggf. nicht zur Verfügung.
% Berühren Sie PHONEBOOK NAME VIEW
im Funktionsmenü, um die Anzeigefunktion für die Adressbucheinträge einzuschalten.
Die Anzeigereihenfolge der Adressbucheinträge wird geändert.
# Um zur anderen Anzeigereihenfolge zu wechseln, berühren Sie PHONEBOOK NAME VIEW
erneut.
Anrufen einer im Adressbuch
gespeicherten Nummer
Sie können den gewünschten Eintrag im
Adressbuch auswählen und die entsprechende Nummer direkt anrufen.
1 Berühren Sie PHONE BOOK, um das
Adressbuch anzuzeigen.
2 Berühren Sie den Eintrag im Adressbuch, dessen Nummer angerufen werden
soll.
Der Bildschirm zur Adressbuchbearbeitung
erscheint.
# Durch Berühren von PREV oder NEXT können
Sie zu anderen Einträgen im Adressbuch umschalten.
3 Berühren Sie die Rufnummer im gewählten Adressbucheintrag, die angerufen
werden soll.
Wenn für einen Eintrag mehrere Telefonnummern eingegeben wurden, berühren Sie die
gewünschte Nummer.
Das Display kehrt zur normalen Anzeige zurück, wobei der von Ihnen gewählte Adressbucheintrag in der Informationsleiste angezeigt
wird.
4 Berühren Sie
gen.
Im Display wird die geschätzte Anrufdauer angezeigt (diese weicht ggf. leicht von der tatsächlichen Anrufdauer ab).
# Bei einem Anruf ins Ausland berühren Sie
add "+", um der Rufnummer ein Pluszeichen (+)
hinzuzufügen.
, um den Anruf zu täti-
96
De
5 Um den Anruf zu beenden, berühren
Sie
.
Im Display wird die geschätzte Anrufdauer angezeigt (diese weicht ggf. leicht von der tatsächlichen Anrufdauer ab).
Page 97

Bluetooth-Telefon
Abschnitt
02
Suchen nach einer Nummer im
Adressbuch
Suchen Sie im Adressbuch nach der Nummer,
die Sie anrufen möchten. Wählen Sie den entsprechenden Adressbucheintrag und tätigen
Sie Ihren Anruf.
1 Berühren Sie PHONE BOOK, um das
Adressbuch anzuzeigen.
2 Berühren Sie SEARCH, um den Bildschirm für Suchvorgänge im Adressbuch
anzuzeigen.
3 Berühren Sie einen Buchstaben, um den
ersten Buchstaben des gesuchten Namens
zu identifizieren.
4 Berühren Sie ENTER, um Einträge anzuzeigen, die mit dem gewählten Buchstaben
beginnen.
Im Display werden die ersten sechs Adressbucheinträge angezeigt, die mit dem gewählten
Buchstaben beginnen (bei Auswahl des Buchstabens „B“ werden z.B. die Einträge „Barbara“, „Beate“, „Bernhard“, „Berthold“, „Bettina“
und „Brigitte“ angezeigt).
# Durch Berühren von PREV oder NEXT können
Sie zu anderen Einträgen im Adressbuch umschalten.
# Um mit einem anderen Buchstaben eine
Suche durchzuführen, berühren Sie CLEAR.
Bearbeiten des Namens in
einem Adressbucheintrag
Sie können die Namen in den Einträgen in
Ihrem Adressbuch wunschgemäß bearbeiten.
Jeder Name kann dabei bis zu 16 Zeichen umfassen.
1 Berühren Sie PHONE BOOK, um das
Adressbuch anzuzeigen.
2 Wählen Sie den Eintrag im Adressbuch,
der bearbeitet werden soll.
Siehe hierzu die Schritte 2 bis 3 unter Anrufen
einer im Adressbuch gespeicherten Nummer
auf Seite 96.
3 Berühren Sie EDIT neben dem Namen
im Adressbucheintrag.
Auf dem Display erscheint der Bildschirm zur
Adressbuchbearbeitung.
4 Berühren Sie 123 oder ABC, um den gewünschten Zeichentyp zu wählen.
Durch Berühren von ABC werden die verfügbaren Zeichentypen in der folgenden Reihenfolge durchlaufen.
Alphabet (Großbuchstaben), Ziffern und Symbole—Alphabet (Kleinbuchstaben)—Ziffern
und Symbole—Russische Schriftzeichen
# Das Umschalten zu den russischen Schriftzeichen ist nur möglich, wenn Sie ein russisches
Gerätemodell verwenden.
Deutsch
5 Berühren Sie den gewünschten Adressbucheintrag und tätigen Sie Ihren Anruf.
Siehe hierzu die Schritte 2 bis 5 unter Anrufen
einer im Adressbuch gespeicherten Nummer
auf Seite 96.
5 Berühren Sie den jeweils einzugebenden Buchstaben.
# Zum Löschen eines Buchstabens und Einfügen einer Leerstelle berühren Sie .
6 Berühren Sie MEMORY, um den neuen
Namen zu speichern.
De
97
Page 98

Abschnitt
02
Bluetooth-Telefon
Bearbeiten der Telefonnummer
in einem Adressbucheintrag
Sie können die Telefonnummern in den Einträgen in Ihrem Adressbuch wunschgemäß bearbeiten.
1 Berühren Sie PHONE BOOK, um das
Adressbuch anzuzeigen.
2 Wählen Sie den Eintrag im Adressbuch,
der bearbeitet werden soll.
Siehe hierzu die Schritte 2 bis 3 unter Anrufen
einer im Adressbuch gespeicherten Nummer
auf Seite 96.
3 Berühren Sie EDIT neben der Telefonnummer im Adressbucheintrag, die Sie bearbeiten möchten.
Auf dem Display erscheint der Bildschirm zur
Bearbeitung der Adressbuchnummern.
4 Berühren Sie 0—9, um die gewünschten Ziffern einzugeben.
# Bei einem Anruf ins Ausland berühren Sie
add "+", um der Rufnummer ein Pluszeichen (+)
hinzuzufügen.
# Durch Berühren von CLEAR können Sie die
gesamte Nummer löschen.
Wenn Sie alle Einträge im Adressbuch gleichzeitig löschen möchten, siehe Löschen des
Speichers auf Seite 99.
1 Berühren Sie PHONE BOOK, um das
Adressbuch anzuzeigen.
2 Wählen Sie den Eintrag im Adressbuch,
der gelöscht werden soll.
Siehe hierzu die Schritte 2 bis 3 unter Anrufen
einer im Adressbuch gespeicherten Nummer
auf Seite 96.
3 Berühren Sie DELETE, um den gewählten Adressbucheintrag zu löschen.
Die Bestätigung des Vorgangs wird angezeigt.
Berühren Sie YES, um den Eintrag zu löschen.
# Der Löschvorgang nimmt in etwa 10 Sekunden in Anspruch. Um eine erfolgreiche Durchführung des Vorgangs zu gewährleisten, sollten Sie
den Zündschlüssel nach der Bestätigung 10 Sekunden in der Position ACC bzw. ON belassen.
# Wenn Sie den gewählten Adressbucheintrag
doch nicht löschen möchten, berühren Sie
NO.
5 Berühren Sie c oder d, um den Cursor
zu versetzen und die Nummer bedarfsgerecht zu bearbeiten.
Wiederholen Sie diese Schritte für alle erforderlichen Zahlenänderungen.
6 Berühren Sie ENTER, um die neue Rufnummer zu speichern.
Löschen eines Adressbucheintrags
Sie können die Einträge in Ihrem Adressbuch
einzeln löschen.
98
De
Page 99

Bluetooth-Telefon
Abschnitt
02
Löschen des Speichers
Für jedes Element kann der zugehörige Speicher gelöscht werden: Adressbuch, Liste der
getätigten Anrufe, Liste der empfangenen Anrufe, Liste der Anrufe in Abwesenheit und vorprogrammierte Rufnummern.
1 Berühren Sie CLEAR MEMORY im Funktionsmenü.
2 Berühren Sie CLEAR neben dem Element, das aus dem Speicher entfernt werden soll.
Zur Auswahl stehen folgende Elemente:
PHONE BOOK (Adressbuch)—DIALED CALLS
(Liste der getätigten Anrufe)—
RECEIVED CALLS (Liste der empfangenen Anrufe)—MISSED CALLS (Liste der Anrufe in Abwesenheit)—PRESET DIALS (Vorprogrammierte Rufnummern)
Nach der Auswahl des gewünschten Elements
wird eine Bestätigung des Vorgangs angezeigt. Berühren Sie OK, um das gewählte Element aus dem Speicher zu löschen.
# Wenn alle Elemente aus dem Speicher entfernt werden sollen, d.h. das Adressbuch, die
Liste der getätigten/empfangenen Anrufe und der
Anrufe in Abwesenheit sowie die vorprogrammierten Rufnummern, dann berühren Sie
CLEAR ALL.
# Der Löschvorgang nimmt in etwa 10 Sekunden in Anspruch. Um eine erfolgreiche Durchführung des Vorgangs zu gewährleisten, sollten Sie
den Zündschlüssel nach der Bestätigung 10 Sekunden in der Position ACC bzw. ON belassen.
# Wenn Sie das gewählte Element doch nicht
löschen möchten, berühren Sie CANCEL.
rufe in Abwesenheit gespeichert. Sie können
die Anruflisten durchlaufen und die darin enthaltenen Nummern direkt anrufen.
Anzeigen der Anruflisten
Die Anruflisten bestehen aus drei Listen: Liste
der Anrufe in Abwesenheit, Liste der getätigten Anrufe und Liste der empfangenen Anrufe.
Für jeden Anruf wird die zugehörige Rufnummer (sowie der Name des Teilnehmers, wenn
die Nummer im Adressbuch enthalten ist) angezeigt.
% Berühren Sie LOG, um die Anruflisten
anzuzeigen.
Mit jedem Berühren von LOG wird in der folgenden Reihenfolge zwischen den verschiedenen Anruflisten umgeschaltet:
Anrufe in Abwesenheit — Getätigte Anrufe —
Empfangene Anrufe
# Wenn in der gewählten Liste keine Rufnummern enthalten sind, bleibt die Anzeige leer.
# Durch das Berühren von ABC/123 können Sie
zwischen der Anzeige der Rufnummer und der
des Namens des Teilnehmers (sofern dieser eingegeben wurde) umschalten.
Anrufen einer in den Anruflisten
gespeicherten Nummer
1 Zeigen Sie die Liste an und wählen Sie
die gewünschte Rufnummer.
Zeigen Sie die Telefonnummer an, die Sie anrufen möchten.
Deutsch
Gebrauch der Anruflisten
In den Anruflisten werden die 12 zuletzt getätigten und empfangenen Anrufe sowie die An-
De
99
Page 100

Abschnitt
02
Bluetooth-Telefon
2 Berühren Sie die Telefonnummer oder
den Namen (sofern dieser eingegeben
wurde) des Teilnehmers, den Sie anrufen
möchten.
Das Display kehrt zur normalen Anzeige zurück, wobei die von Ihnen gewählte Telefonnummer in der Informationsleiste angezeigt
wird.
# Durch Berühren von PREV oder NEXT können
Sie eine andere Telefonnummer bzw. einen anderen Namen (sofern eingegeben) anzeigen.
3 Berühren Sie , um den Anruf zu tätigen.
Im Display wird die geschätzte Anrufdauer angezeigt (diese weicht ggf. leicht von der tatsächlichen Anrufdauer ab).
# Bei einem Anruf ins Ausland berühren Sie
add "+", um der Rufnummer ein Pluszeichen (+)
hinzuzufügen.
4 Um den Anruf zu beenden, berühren
Sie
.
Gebrauch vorprogrammierter
Nummern
Vorprogrammieren von Nummern
Rufnummern, die Sie häufig verwenden, können als vorprogrammierte Nummern gespeichert und dann direkt abgerufen werden.
Sie können die sechs von Ihnen am häufigsten
verwendeten Telefonnummern als vorprogrammierte Nummern speichern (P 1-P 6).
1 Wählen Sie eine Telefonnummer im
Adressbuch oder in den Anruflisten.
Anweisungen zur Auswahl einer Rufnummer
im Adressbuch oder in einer der Anruflisten
finden Sie auf den vorhergehenden Seiten.
Das Display sollte zur normalen Anzeige zurückgekehrt sein, wobei die von Ihnen gewähl-
te Telefonnummer in der Informationsleiste
angezeigt wird.
2 Berühren Sie LIST, um die vorprogrammierten Nummern P 1-P 6 anzuzeigen.
3 Berühren Sie eine der vorprogrammierten Nummern P 1-P 6 etwas länger, um die
gewählte Telefonnummer zuzuweisen.
Die von Ihnen gewählte Telefonnummer
wurde als vorprogrammierte Nummer gespeichert.
# Im Speicher können bis zu 30 Telefonnummern (6 Nummern für jedes der 3 registrierten
Benutzertelefone und der 2 Gasttelefone) abgelegt werden.
Abrufen vorprogrammierter
Nummern
Die vorprogrammierten Telefonnummern können ganz einfach abgerufen werden.
1 Berühren Sie LIST, um die vorprogrammierten Nummern P 1-P 6 anzuzeigen.
Die vorprogrammierten Rufnummern P 1-P 6
werden im Display angezeigt.
2 Berühren Sie eine der vorprogrammierten Nummern P 1-P 6.
Die zugewiesene Telefonnummer sollte in der
Informationsleiste angezeigt werden.
3 Berühren Sie
gen.
4 Um den Anruf zu beenden, berühren
Sie
.
Im Display wird die geschätzte Anrufdauer angezeigt (diese weicht ggf. leicht von der tatsächlichen Anrufdauer ab).
, um den Anruf zu täti-
100
De
 Loading...