

Page 1

Avid® NewsCutter
Getting Started Guide
Release 2.0
a
tools for storytellers®
®
Page 2

© 1998 – 2000 Avid Technology, Inc. All rights reserved.
Avid NewsCutter Getting Started Guide • Part 0130-04672-01 Rev. A • November 2000
2
Page 3

Contents
Chapter 1 Introduction
About NewsCutter . . . . . . . . . . . . . . . . . . . . . . . . . . . . . . . . . . . . . . . . . . 14
NewsCutter Hardware. . . . . . . . . . . . . . . . . . . . . . . . . . . . . . . . . . . . . . . 15
Starting Your System . . . . . . . . . . . . . . . . . . . . . . . . . . . . . . . . . . . . . . . . 16
Starting NewsCutter . . . . . . . . . . . . . . . . . . . . . . . . . . . . . . . . . . . . . . . . 17
Electronic Licensing . . . . . . . . . . . . . . . . . . . . . . . . . . . . . . . . . . . . . 17
How to Proceed . . . . . . . . . . . . . . . . . . . . . . . . . . . . . . . . . . . . . . . . . 18
Using Help. . . . . . . . . . . . . . . . . . . . . . . . . . . . . . . . . . . . . . . . . . . . . . . . . 18
Opening and Closing the Help System . . . . . . . . . . . . . . . . . . . . 19
Understanding the Topic Window. . . . . . . . . . . . . . . . . . . . . . . . . 19
Getting Help for Windows and Dialog Boxes. . . . . . . . . . . . . . . 20
Getting Help for Screen Objects . . . . . . . . . . . . . . . . . . . . . . . . . . 21
Keeping Help Available. . . . . . . . . . . . . . . . . . . . . . . . . . . . . . . . . . 21
Restoring Help from the Taskbar . . . . . . . . . . . . . . . . . . . . . . 22
Using Alt+Tab to Restore Help . . . . . . . . . . . . . . . . . . . . . . . . 22
Finding Information Within the Help . . . . . . . . . . . . . . . . . . . . . 22
Using the Contents List . . . . . . . . . . . . . . . . . . . . . . . . . . . . . . 23
Using the Index . . . . . . . . . . . . . . . . . . . . . . . . . . . . . . . . . . . . . 23
Using the Search Feature . . . . . . . . . . . . . . . . . . . . . . . . . . . . . 24
Using the Glossary. . . . . . . . . . . . . . . . . . . . . . . . . . . . . . . . . . . 24
Creating a Favorites List . . . . . . . . . . . . . . . . . . . . . . . . . . . . . . . . . 25
Using the Browse Buttons. . . . . . . . . . . . . . . . . . . . . . . . . . . . . . . . 26
Printing Help Topics. . . . . . . . . . . . . . . . . . . . . . . . . . . . . . . . . . . . . 26
Using Online Documentation . . . . . . . . . . . . . . . . . . . . . . . . . . . . . . . . 27
3
Page 4

Chapter 2 About NewsCutter
Basic Editing Steps. . . . . . . . . . . . . . . . . . . . . . . . . . . . . . . . . . . . . . . . . . 28
Understanding the Pieces. . . . . . . . . . . . . . . . . . . . . . . . . . . . . . . . . . . . 30
Organizing Your Work with Projects and Bins . . . . . . . . . . . . . . . . . 31
How Media Is Stored. . . . . . . . . . . . . . . . . . . . . . . . . . . . . . . . . . . . . . . . 33
The Attic Folder . . . . . . . . . . . . . . . . . . . . . . . . . . . . . . . . . . . . . . . . . . . . 34
Chapter 3 Starting Your Project
Starting NewsCutter . . . . . . . . . . . . . . . . . . . . . . . . . . . . . . . . . . . . . . . . 36
Creating a User . . . . . . . . . . . . . . . . . . . . . . . . . . . . . . . . . . . . . . . . . . . . . 36
Creating a Project . . . . . . . . . . . . . . . . . . . . . . . . . . . . . . . . . . . . . . . . . . . 37
Opening an Existing Project. . . . . . . . . . . . . . . . . . . . . . . . . . . . . . . . . . 38
Understanding the Project Window. . . . . . . . . . . . . . . . . . . . . . . . . . . 39
Working with Bins. . . . . . . . . . . . . . . . . . . . . . . . . . . . . . . . . . . . . . . . . . 41
Creating a Bin . . . . . . . . . . . . . . . . . . . . . . . . . . . . . . . . . . . . . . . . . . 42
About Bin Views. . . . . . . . . . . . . . . . . . . . . . . . . . . . . . . . . . . . . . . . 43
Text View. . . . . . . . . . . . . . . . . . . . . . . . . . . . . . . . . . . . . . . . . . . 43
Frame View . . . . . . . . . . . . . . . . . . . . . . . . . . . . . . . . . . . . . . . . . 44
Script View . . . . . . . . . . . . . . . . . . . . . . . . . . . . . . . . . . . . . . . . . 45
Creating a Quick Transition Bin . . . . . . . . . . . . . . . . . . . . . . . . . . . . . . 46
About Trash . . . . . . . . . . . . . . . . . . . . . . . . . . . . . . . . . . . . . . . . . . . . . . . . 47
Customizing Your Work Environment. . . . . . . . . . . . . . . . . . . . . . . . . 48
Mapping Keys and Buttons. . . . . . . . . . . . . . . . . . . . . . . . . . . . . . . 49
Setting Up Workspaces . . . . . . . . . . . . . . . . . . . . . . . . . . . . . . . . . . 49
Chapter 4 Recording
Selecting Settings for Recording. . . . . . . . . . . . . . . . . . . . . . . . . . . . . . 52
The Record Tool . . . . . . . . . . . . . . . . . . . . . . . . . . . . . . . . . . . . . . . . . . . . 53
The Audio Tool . . . . . . . . . . . . . . . . . . . . . . . . . . . . . . . . . . . . . . . . . . . . . 56
The Video Input Tool. . . . . . . . . . . . . . . . . . . . . . . . . . . . . . . . . . . . . . . . 58
Recording Preparations Check List . . . . . . . . . . . . . . . . . . . . . . . . . . . 60
Recording to the Timeline . . . . . . . . . . . . . . . . . . . . . . . . . . . . . . . . . . . 61
4
Page 5

Recording and Logging at the Same Time. . . . . . . . . . . . . . . . . . . . . . 62
Recording On-the-Fly. . . . . . . . . . . . . . . . . . . . . . . . . . . . . . . . . . . . 63
Recording from an IN Point to an OUT Point. . . . . . . . . . . . . . . 65
Batch Recording . . . . . . . . . . . . . . . . . . . . . . . . . . . . . . . . . . . . . . . . . . . . 66
Rerecording a Sequence . . . . . . . . . . . . . . . . . . . . . . . . . . . . . . . . . . . . . 67
Chapter 5 Getting Ready to Edit
Using the Command Palette. . . . . . . . . . . . . . . . . . . . . . . . . . . . . . . . . . 69
Using the Tool Palette . . . . . . . . . . . . . . . . . . . . . . . . . . . . . . . . . . . . . . . 73
Mapping Buttons to the Tool Palette. . . . . . . . . . . . . . . . . . . . . . . 74
Mapping Menu Commands to the Tool Palette . . . . . . . . . . . . . 75
Using the Keyboard Palette . . . . . . . . . . . . . . . . . . . . . . . . . . . . . . . . . . 76
Mapping Buttons to the Keyboard . . . . . . . . . . . . . . . . . . . . . . . . 76
Mapping Menu Commands to the Keyboard . . . . . . . . . . . . . . . 77
Using W orkspaces . . . . . . . . . . . . . . . . . . . . . . . . . . . . . . . . . . . . . . . . . . 78
Modifying Workspaces . . . . . . . . . . . . . . . . . . . . . . . . . . . . . . . . . . . . . . 79
Controlling Playback. . . . . . . . . . . . . . . . . . . . . . . . . . . . . . . . . . . . . . . . 80
Using Position Bars and Position Indicators. . . . . . . . . . . . . . . . 80
Using Buttons. . . . . . . . . . . . . . . . . . . . . . . . . . . . . . . . . . . . . . . . . . . 81
The Play Button . . . . . . . . . . . . . . . . . . . . . . . . . . . . . . . . . . . . . 82
Step Buttons . . . . . . . . . . . . . . . . . . . . . . . . . . . . . . . . . . . . . . . . 83
Using Keys . . . . . . . . . . . . . . . . . . . . . . . . . . . . . . . . . . . . . . . . . . . . . 83
J-K-L Keys (Three-Button Play) . . . . . . . . . . . . . . . . . . . . . . . 83
Home, End, and Arrow Keys. . . . . . . . . . . . . . . . . . . . . . . . . . 85
Using the Mouse . . . . . . . . . . . . . . . . . . . . . . . . . . . . . . . . . . . . . . . . 85
Stepping with the Mouse. . . . . . . . . . . . . . . . . . . . . . . . . . . . . 85
Shuttling with the Mouse . . . . . . . . . . . . . . . . . . . . . . . . . . . . 86
Marking IN and OUT Points . . . . . . . . . . . . . . . . . . . . . . . . . . . . . . . . . 87
Creating Subclips. . . . . . . . . . . . . . . . . . . . . . . . . . . . . . . . . . . . . . . . . . . 87
Chapter 6 Creating a First Cut
Viewing Your Clips . . . . . . . . . . . . . . . . . . . . . . . . . . . . . . . . . . . . . . . . . 90
5
Page 6

Navigating in the Timeline . . . . . . . . . . . . . . . . . . . . . . . . . . . . . . . . . . 94
Using the Position Indicator. . . . . . . . . . . . . . . . . . . . . . . . . . . . . . 94
Using the A and S keys . . . . . . . . . . . . . . . . . . . . . . . . . . . . . . . . . . 95
Displaying More or Less Detail. . . . . . . . . . . . . . . . . . . . . . . . . . . 95
Using the Scroll Bar . . . . . . . . . . . . . . . . . . . . . . . . . . . . . . . . . . . . . 96
Using the Track Selector Panel . . . . . . . . . . . . . . . . . . . . . . . . . . . . . . . 96
Selecting Tracks. . . . . . . . . . . . . . . . . . . . . . . . . . . . . . . . . . . . . . . . . 98
Patching Tracks . . . . . . . . . . . . . . . . . . . . . . . . . . . . . . . . . . . . . . . . . 99
Monitoring Tracks. . . . . . . . . . . . . . . . . . . . . . . . . . . . . . . . . . . . . . 100
Making the First Edit. . . . . . . . . . . . . . . . . . . . . . . . . . . . . . . . . . . . . . . 101
Using Digital Audio Scrub . . . . . . . . . . . . . . . . . . . . . . . . . . . . . . 101
Splicing-in Versus Overwriting Audio and Video. . . . . . . . . . 102
Splicing-in or Overwriting an Audio Clip. . . . . . . . . . . . . . . . . 103
Splicing or Overwriting Video into a Sequence . . . . . . . . . . . . . . . 103
Marking Clips for Storyboarding. . . . . . . . . . . . . . . . . . . . . . . . . . . . 105
Using the Go to IN and Go to OUT Buttons. . . . . . . . . . . . . . . . . . . 107
Moving to the Head or Tail of a Shot . . . . . . . . . . . . . . . . . . . . . . . . . 107
Undoing an Edit . . . . . . . . . . . . . . . . . . . . . . . . . . . . . . . . . . . . . . . . . . . 108
Redoing an Edit . . . . . . . . . . . . . . . . . . . . . . . . . . . . . . . . . . . . . . . . . . . 108
Splicing a Shot into the Middle of a Sequence . . . . . . . . . . . . . . . . 109
Chapter 7 Refining the Edit
Editing in Segment Mode. . . . . . . . . . . . . . . . . . . . . . . . . . . . . . . . . . . 110
Guidelines for Editing in Segment Mode . . . . . . . . . . . . . . . . . 111
Identifying Segment Mode Buttons . . . . . . . . . . . . . . . . . . . . . . 111
Rearranging Footage with Extract/Splice-in Mode. . . . . . . . . . 111
Removing Footage with Extract/Splice-in Mode . . . . . . . . . . . 112
Removing Footage with Lift/Overwrite Mode . . . . . . . . . . . . . 112
Overwriting Shots into a Sequence . . . . . . . . . . . . . . . . . . . . . . . . . . 113
Rearranging Shots. . . . . . . . . . . . . . . . . . . . . . . . . . . . . . . . . . . . . . 114
Overwriting with the Three-Point Edit . . . . . . . . . . . . . . . . . . . 114
Removing Footage with Lift . . . . . . . . . . . . . . . . . . . . . . . . . . . . . 115
6
Page 7

Basic Trim Procedures . . . . . . . . . . . . . . . . . . . . . . . . . . . . . . . . . . . . . . 116
Trim Using Top and Tail Buttons . . . . . . . . . . . . . . . . . . . . . . . . . 116
Entering Trim Mode . . . . . . . . . . . . . . . . . . . . . . . . . . . . . . . . . . . . 117
Selecting Between Trim Sides . . . . . . . . . . . . . . . . . . . . . . . . . . . 119
Sync Locking Tracks. . . . . . . . . . . . . . . . . . . . . . . . . . . . . . . . . . . . 120
Performing a Basic Trim. . . . . . . . . . . . . . . . . . . . . . . . . . . . . . . . . 121
Dual-Roller Trimming . . . . . . . . . . . . . . . . . . . . . . . . . . . . . . . . . . 122
Single-Roller Trimming. . . . . . . . . . . . . . . . . . . . . . . . . . . . . . . . . 123
Exiting Trim Mode . . . . . . . . . . . . . . . . . . . . . . . . . . . . . . . . . . . . . 124
Audio Editing . . . . . . . . . . . . . . . . . . . . . . . . . . . . . . . . . . . . . . . . . . . . . 125
Adjusting Audio Level. . . . . . . . . . . . . . . . . . . . . . . . . . . . . . . . . . 125
Adjusting Audio Pan . . . . . . . . . . . . . . . . . . . . . . . . . . . . . . . . . . . 126
Chapter 8 Adding Effects
Effects Editing. . . . . . . . . . . . . . . . . . . . . . . . . . . . . . . . . . . . . . . . . . . . . 129
Creating Motion Effects . . . . . . . . . . . . . . . . . . . . . . . . . . . . . . . . . . . . 130
Creating Freeze Frame Effects . . . . . . . . . . . . . . . . . . . . . . . . . . . 130
Creating Variable Speed and Strobe Motion Effects. . . . . . . . 131
Displaying the Effect Palette . . . . . . . . . . . . . . . . . . . . . . . . . . . . . . . . 131
Effect Types . . . . . . . . . . . . . . . . . . . . . . . . . . . . . . . . . . . . . . . . . . . . . . . 132
Transition Effects. . . . . . . . . . . . . . . . . . . . . . . . . . . . . . . . . . . . . . . 132
Segment Effects. . . . . . . . . . . . . . . . . . . . . . . . . . . . . . . . . . . . . . . . 133
Applying Effects to a Sequence. . . . . . . . . . . . . . . . . . . . . . . . . . . . . . 133
Working in Effect Mode . . . . . . . . . . . . . . . . . . . . . . . . . . . . . . . . . . . . 134
Adding Transition Effects. . . . . . . . . . . . . . . . . . . . . . . . . . . . . . . . . . . 135
Adding Fade In . . . . . . . . . . . . . . . . . . . . . . . . . . . . . . . . . . . . . . . . 135
Dissolving Between Shots. . . . . . . . . . . . . . . . . . . . . . . . . . . . . . . 136
Insufficient Footage for a Dissolve . . . . . . . . . . . . . . . . . . . 137
Creating Audio Dissolves . . . . . . . . . . . . . . . . . . . . . . . . . . . 138
Adding a Fade Within the Sequence. . . . . . . . . . . . . . . . . . . . . . 138
Creating a Quick Transition. . . . . . . . . . . . . . . . . . . . . . . . . . . . . . . . . 139
Adding Keyframes. . . . . . . . . . . . . . . . . . . . . . . . . . . . . . . . . . . . . . . . . 140
7
Page 8

Adding a Picture-in-Picture Effect . . . . . . . . . . . . . . . . . . . . . . . . . . . 140
Repositioning the Image . . . . . . . . . . . . . . . . . . . . . . . . . . . . . . . . 143
Adjusting a Parameter . . . . . . . . . . . . . . . . . . . . . . . . . . . . . . . . . . 144
Dissolving the Picture-in-Picture On and Off. . . . . . . . . . . . . . 145
Rendering an Effect . . . . . . . . . . . . . . . . . . . . . . . . . . . . . . . . . . . . . . . . 147
Chapter 9 Creating Titles
Working with Titles. . . . . . . . . . . . . . . . . . . . . . . . . . . . . . . . . . . . . . . . 149
Understanding the Title Tool Window . . . . . . . . . . . . . . . . . . . . . . . 150
Adding Text . . . . . . . . . . . . . . . . . . . . . . . . . . . . . . . . . . . . . . . . . . . . . . . 151
Formatting Text in the Title Tool. . . . . . . . . . . . . . . . . . . . . . . . . . . . . 152
Selecting Objects in the Title Tool . . . . . . . . . . . . . . . . . . . . . . . . . . . 153
Choosing Colors and Setting Transparency . . . . . . . . . . . . . . . . . . . 154
Selecting a Color. . . . . . . . . . . . . . . . . . . . . . . . . . . . . . . . . . . . . . . . . . . 155
Creating a New Title . . . . . . . . . . . . . . . . . . . . . . . . . . . . . . . . . . . . . . . 156
Working with Title Templates. . . . . . . . . . . . . . . . . . . . . . . . . . . . . . . 157
Creating a Title Template. . . . . . . . . . . . . . . . . . . . . . . . . . . . . . . . 157
Using a Title Template . . . . . . . . . . . . . . . . . . . . . . . . . . . . . . . . . . 158
Editing a Title Template . . . . . . . . . . . . . . . . . . . . . . . . . . . . . . . . . 158
Removing a Title Template . . . . . . . . . . . . . . . . . . . . . . . . . . . . . . 159
Repositioning Text and Objects . . . . . . . . . . . . . . . . . . . . . . . . . . . . . 159
Applying a Color . . . . . . . . . . . . . . . . . . . . . . . . . . . . . . . . . . . . . . . . . . 160
Applying a Shadow . . . . . . . . . . . . . . . . . . . . . . . . . . . . . . . . . . . . . . . . 160
Saving a Title. . . . . . . . . . . . . . . . . . . . . . . . . . . . . . . . . . . . . . . . . . . . . . 161
Editing the Title into the Sequence . . . . . . . . . . . . . . . . . . . . . . . . . . 162
Editing an Existing Title . . . . . . . . . . . . . . . . . . . . . . . . . . . . . . . . . . . . 163
Chapter 10 Output
Preparing for Output. . . . . . . . . . . . . . . . . . . . . . . . . . . . . . . . . . . . . . . 164
Preparing Tapes for Frame-Accurate Recording. . . . . . . . . . . . . . . . 165
Previewing a Digital Cut . . . . . . . . . . . . . . . . . . . . . . . . . . . . . . . . . . . 166
Recording a Digital Cut to Tape . . . . . . . . . . . . . . . . . . . . . . . . . . . . . 168
Enabling VTR Play Emulation . . . . . . . . . . . . . . . . . . . . . . . . . . . . . . 171
8
Page 9

Chapter 11 Using the NRCS Tool
Opening the NRCS Tool . . . . . . . . . . . . . . . . . . . . . . . . . . . . . . . . . . . . 174
Understanding the NRCS Tool Window . . . . . . . . . . . . . . . . . . . . . . 177
Opening a Story . . . . . . . . . . . . . . . . . . . . . . . . . . . . . . . . . . . . . . . . . . . 180
Editing a Story . . . . . . . . . . . . . . . . . . . . . . . . . . . . . . . . . . . . . . . . . 181
Formatting Text. . . . . . . . . . . . . . . . . . . . . . . . . . . . . . . . . . . . . 182
Removing the Text Format . . . . . . . . . . . . . . . . . . . . . . . . . . . 182
Adding a Production Cue. . . . . . . . . . . . . . . . . . . . . . . . . . . . 183
Calculating the Read Time of a Story . . . . . . . . . . . . . . . . . . . . . 184
Adding the Story to a Sequence . . . . . . . . . . . . . . . . . . . . . . . . . . . . . 185
Saving Changes to a Story . . . . . . . . . . . . . . . . . . . . . . . . . . . . . . . . . . 186
Disconnecting from the Server . . . . . . . . . . . . . . . . . . . . . . . . . . . . . . 187
Index
9
Page 10

Figures
Figure 1-1 NewsCutter Hardware Components . . . . . . . . . . . . . . 15
Figure 2-1 Project Window . . . . . . . . . . . . . . . . . . . . . . . . . . . . . . . . 32
Figure 2-2 Bin Window . . . . . . . . . . . . . . . . . . . . . . . . . . . . . . . . . . . 32
Figure 3-1 Project Window — Bin View . . . . . . . . . . . . . . . . . . . . . 39
Figure 3-2 Project Window — Settings View . . . . . . . . . . . . . . . . . 40
Figure 3-3 Project Window — Info View. . . . . . . . . . . . . . . . . . . . . 41
Figure 3-4 Bin Window — Text View . . . . . . . . . . . . . . . . . . . . . . . 44
Figure 3-5 Bin Window — Frame View. . . . . . . . . . . . . . . . . . . . . . 45
Figure 3-6 Bin Window — Script View . . . . . . . . . . . . . . . . . . . . . . 46
Figure 4-1 Record Tool. . . . . . . . . . . . . . . . . . . . . . . . . . . . . . . . . . . . 53
Figure 4-2 Audio Tool . . . . . . . . . . . . . . . . . . . . . . . . . . . . . . . . . . . . 56
Figure 4-3 Video Input Tool . . . . . . . . . . . . . . . . . . . . . . . . . . . . . . . 59
Figure 5-1 Command Palette — Move Tab. . . . . . . . . . . . . . . . . . . 70
Figure 5-2 Command Palette — Play Tab. . . . . . . . . . . . . . . . . . . . 71
Figure 5-3 Command Palette — Edit Tab . . . . . . . . . . . . . . . . . . . . 71
Figure 5-4 Command Palette — Trim Tab . . . . . . . . . . . . . . . . . . . 71
Figure 5-5 Command Palette — FX Tab . . . . . . . . . . . . . . . . . . . . . 72
Figure 5-6 Command Palette — Other Tab. . . . . . . . . . . . . . . . . . . 72
Figure 5-7 Command Palette — More Tab . . . . . . . . . . . . . . . . . . . 72
Figure 5-8 Default Tool Palette . . . . . . . . . . . . . . . . . . . . . . . . . . . . . 73
Figure 5-9 NewsCutter Default Keyboard Settings . . . . . . . . . . . . 76
Figure 5-10 Record Monitor Position Bar . . . . . . . . . . . . . . . . . . . . . 80
Figure 5-11 Source Monitor Position Bar. . . . . . . . . . . . . . . . . . . . . . 81
Figure 5-12 Position Indicator in Timeline . . . . . . . . . . . . . . . . . . . . 81
Figure 6-1 Source Monitor. . . . . . . . . . . . . . . . . . . . . . . . . . . . . . . . . 91
10
Page 11

Figure 6-2 Record Monitor. . . . . . . . . . . . . . . . . . . . . . . . . . . . . . . . . 92
Figure 6-3 Pop-up Monitor . . . . . . . . . . . . . . . . . . . . . . . . . . . . . . . . 93
Figure 6-4 Timeline Window. . . . . . . . . . . . . . . . . . . . . . . . . . . . . . . 94
Figure 6-5 Timeline Track Selector Panel . . . . . . . . . . . . . . . . . . . . 97
Figure 7-1 Trim Mode Window . . . . . . . . . . . . . . . . . . . . . . . . . . . 119
Figure 8-1 Effect Palette . . . . . . . . . . . . . . . . . . . . . . . . . . . . . . . . . . 132
Figure 8-2 Effect Editor . . . . . . . . . . . . . . . . . . . . . . . . . . . . . . . . . . 134
Figure 8-3 Picture-in-Picture Effect . . . . . . . . . . . . . . . . . . . . . . . . 142
Figure 8-4 Picture-in-Picture Effect with Softness . . . . . . . . . . . . 145
Figure 9-1 Title Tool Window. . . . . . . . . . . . . . . . . . . . . . . . . . . . . 151
Figure 9-2 Title Tool Color Picker. . . . . . . . . . . . . . . . . . . . . . . . . . 155
Figure 11-1 NRCS Settings Dialog Box — NRCS Tab . . . . . . . . . . 174
Figure 11-2 NRCS Settings Dialog Box — iNEWS Tab . . . . . . . . . 175
Figure 11-3 NRCS Tool — Login Dialog Box . . . . . . . . . . . . . . . . . 176
Figure 11-4 NRCS Tool Window . . . . . . . . . . . . . . . . . . . . . . . . . . . 178
Figure 11-5 NRCS Tool — Directory Panel. . . . . . . . . . . . . . . . . . . 180
Figure 11-6 NRCS Tool — Production Cue. . . . . . . . . . . . . . . . . . . 183
Figure 11-7 NRCS Tool — Read Time . . . . . . . . . . . . . . . . . . . . . . . 185
11
Page 12

Tables
Table 2-1 Common Project Icons . . . . . . . . . . . . . . . . . . . . . . . . . . 30
Table 11-1 NRCS Tool Components . . . . . . . . . . . . . . . . . . . . . . . 178
Table 11-2 Formatting Toolbar Buttons . . . . . . . . . . . . . . . . . . . . . 181
12
Page 13

CHAPTER 1
Introduction
This chapter provides an overview of the NewsCutter system and the
editing process. Understanding how the system organizes tapes, clips,
sequences, and other media objects helps you to edit projects more
effectively. This chapter contains the following sections:
• About NewsCutter
• NewsCutter Hardware
• Starting Your System
• Starting NewsCutter
• Using Help
• Using Online Documentation
13
Page 14

About NewsCutter
NewsCutter is a nonlinear editing workstation specifically designed for
editing news stories. It offers flexibility and speed to create
compelling, up-to-the-minute news stories. You can edit a story
several different ways and choose the best one, or you can quickly
create different versions of a lead story for three different broadcasts.
NewsCutter allows you to quickly add transition effects, motion
effects, and 2D digital video effects (DVEs) for added impact, with just
a few keystrokes — even after a story is laid out.
With a linear system, you must lay down the first shot, make sure it
ends at the right point, cue the second shot, make sure it starts at the
right point, and then make the edit. Y ou build the sequence by making
sure each transition is correct before moving to the next edit.
NewsCutter lets you assemble a sequence in any order — you do not
need to edit the first shot first and the last shot last. The system’s
strength is that it lets you make changes without reassembling all the
edits after the change. You can update breaking stories quickly and
easily, save them, and then try different versions.
The system maintains frame-accurate links between each alteration of
the objects you work with and the original media files. This allows you
to experiment with every edit you make through multiple generations.
When you play back your work, the system immediately accesses and
plays the appropriate portions of the recorded video and audio.
You can start by editing a rough version of the entire sequence. You
can see how long it runs and where it drags, adjust individual edits
and transitions, replace or remove shots, and tighten or extend scenes.
Because the audio and video are stored on disk, they can be
manipulated and used over and over again without duplication or
degradation.
14
Page 15
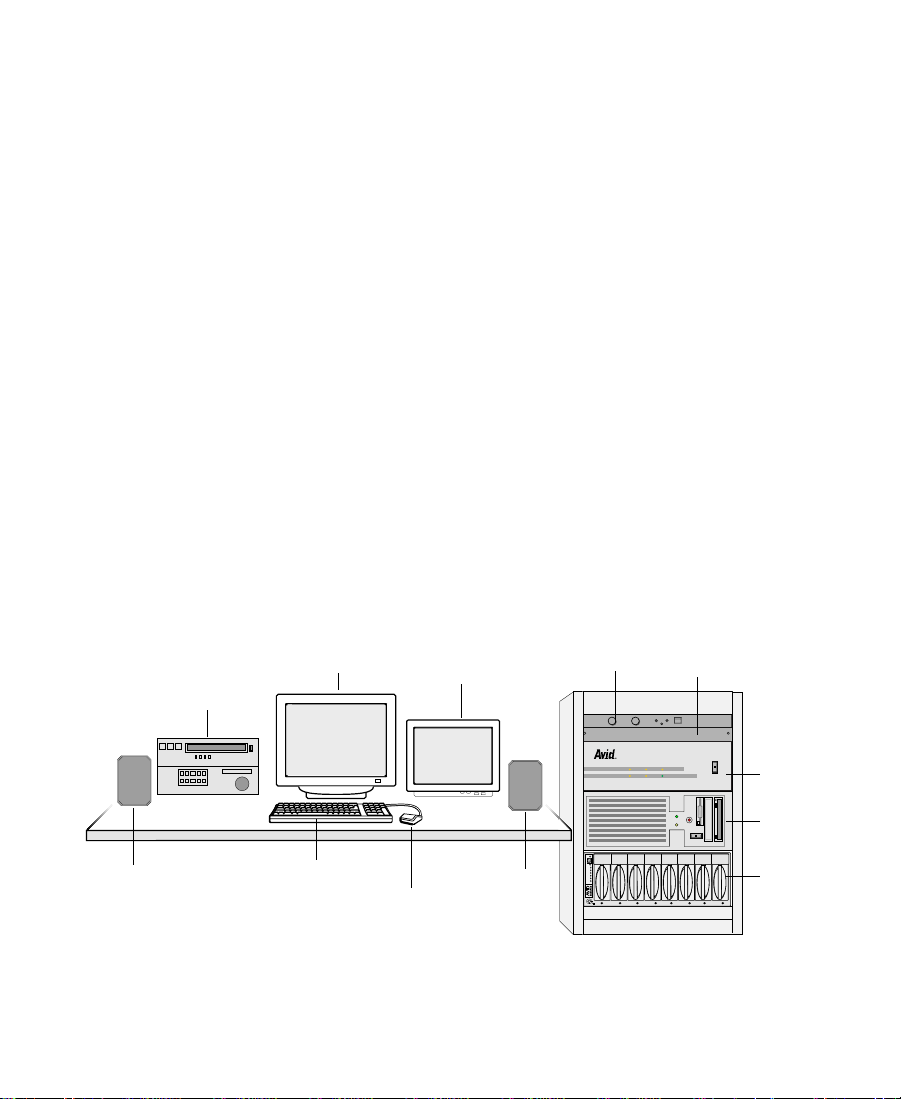
NewsCutter Hardware
The following hardware components make up NewsCutter, as shown
in Figure 1-1.
n
Video deck
Your components might differ slightly, depending on the options you
purchased.
®
• A PC running the Windows NT
™
•Meridien
audio and video interface
operating system
• The User Interface (UI) and Playback monitors; recommended
resolution 1024 x 768 with True Color or greater
• Keyboard and mouse
•Speakers
• Audio amplifier if you do not have powered speakers
• Decks or video source to input and output your work
™
• MediaDock
and MediaDrive enclosures for storing your
recorded audio and video
UI monitor
Playback monitor
Amplifier
VLX
V-LAN® VLXi®
PULL DOWN
44.1 kHz
AUDIO SYNC
kHz
POWER
48
VIDEO SYNC
O
Meridien
l
I/O box
Speaker
SCSI IDSCSI ID
Slots
Act
Keyboard
Speaker
Wide
Dualbus
Fans
Pwr 2Pwr 2
Pwr 1Pwr 1
Mouse
Figure 1-1 NewsCutter Hardware Components
15
O
l
NewsCutter
PC
MediaDock
Page 16

Starting Your System
Begin your edit session by turning on the components of your
NewsCutter system. If any part of your system fails to turn on, make
sure its electrical cord is plugged snugly into an appropriate electrical
outlet or power strip. For information on setting up your system, see
the Avid NewsCutter Setup Guide.
c
c
If you fail to follow the proper sequence for starting up your system,
you could damage your computer and storage drives and
NewsCutter might not work properly.
Always turn on the devices as follows:
1. MediaDrives: Turn on storage drives before starting the
computer. Allow 10 to 15 seconds for the drives to spin
up-to-speed before starting your computer.
2. Other peripheral hardware: Turn on all other peripheral units
except the computer. This includes:
• Monitors and speakers
• Tape decks or video source
• Meridien I/O box
3. The computer: Turn on your computer according to your
manufacturer’s instructions.
The desktop appears.
To avoid damage, do not disconnect drives while your computer is
on.
4. Loading the application: Locate the Avid NewsCutter Release Notes.
Read all the information in the release notes thoroughly then
follow the software installation instructions.
16
Page 17

Starting NewsCutter
To start the NewsCutter application:
t Click the Start button, point to Programs, point to Avid, and click
NewsCutter.
Electronic Licensing
To accept your NewsCutter product license:
1. Read the License Agreement, and then click Accept or Decline at
the bottom of the screen.
n
If you click Decline, the application will not start.
The agreement appears the first several times you start the
application. After you have started NewsCutter several times, a
new button appears at the bottom of the screen.
2. If you do not want to see the license agreement again, click Accept
and Don’t Show Again.
A dialog box appears.
3. Enter the name of your organization in the dialog box, and click
OK.
The Open Project dialog box appears; from here, you create a new
user and a new project, as described in “Creating a User” on
page 36.
17
Page 18

How to Proceed
The following are a few tips for taking full advantage of the
NewsCutter documentation and other resources:
• Begin learning about basic procedures by using the default
settings. As your confidence increases, begin to explore additional
procedures and settings.
• Instead of using the standard menus to find the command you
need in a window, try using shortcut menus. Using the right
mouse button, click in a window to access a shortcut menu that
shows the most frequently used commands for that window.
• Keep the Av id NewsCutter Quick Reference available during editing
sessions.
• Make a habit of reading Avid’s newsletters, mailings, and other
trade publications.
• Make use of additional training resources provided by Avid
whenever possible, such as classes and instructional videotapes.
• Check the Avid Web site education area for a list of available
courses.
Using Help
You can get help and background information for tasks, windows,
dialog boxes, and screen objects through your Avid Help system. Your
Help system is HTML-based and operates in a Web browser. You need
Version 4.5 or later of Microsoft
sections describe the Help system:
• Opening and Closing the Help System
• Understanding the Topic Window
• Getting Help for Windows and Dialog Boxes
• Getting Help for Screen Objects
18
®
Internet Explorer. The following
Page 19

• Keeping Help Available
• Finding Information Within the Help
• Creating a Favorites List
• Using the Browse Buttons
• Printing Help Topics
Opening and Closing the Help System
To open the Help system:
1. Choose Avid NewsCutter Help from the Help menu.
The Help system appears in the default browser for your system.
2. Click the Using Help, Contents, Index, Search, Favorites, and
Glossary buttons to access the information you need.
To close the Help system, do one of the following:
t Click the Close button in the browser.
t Choose Exit from the browser File menu.
t Navigate to another Web site.
The Help system closes.
Understanding the Topic Window
Help topics open in the right browser frame. A topic is a single page of
the Help system.
The heading at the top of the topic window indicates the chapter in
which the topic appears. For example, this topic, “Understanding the
Topic Window,” is in the Using Help chapter. The browse buttons are
also at the top of the topic. For more information, see “Using the
Browse Buttons” on page 26.
19
Page 20

Some topics include a link to additional information about a
procedure. The procedure Saving Bins Automatically, for example,
includes a link to About Saving Bins Automatically. About links are
always at the top of the topic.
Some topics include graphics of buttons used in the procedure
explained in the topic. These are for illustration only; they do not
function if you click them.
At the bottom of each topic are links to related topics, which are listed
under the heading See Also.
You might also see icons and information for Notes, Cautions, and
Warnings that provide important details about the topic.
Getting Help for Windows and Dialog Boxes
The Help system provides you with context-sensitive Help for
windows and dialog boxes, such as tools and settings.
To get Help for windows and dialog boxes:
n
1. Make sure the Avid application is active.
2. Position the mouse pointer anywhere in the window or dialog box
for which you want help.
3. Press the F1 key on the keyboard.
If there is no information about a window or dialog box, a Navigation
Canceled message appears in the browser. Use the Search and Index buttons
in the Help to look for similar functions.
20
Page 21

Getting Help for Screen Objects
You can use What’s This? Help to find out about buttons and other
screen objects.
To get help for screen objects:
1. Using the right mouse button, click the screen object (for example,
a button).
A pop-up menu appears.
2. Choose What’s This? from the pop-up menu.
A browser window opens that explains how to use the item. Many
windows include a link (marked by underlined text) to more
information.
Keeping Help Available
When you access a Help topic and then return to the Avid application,
the Help browser disappears behind the Avid system.
To keep Help available, you can use one of the methods in the
following topics:
• Restoring Help from the Taskbar
• Using Alt+Tab to Restore Help
21
Page 22

Restoring Help from the Taskbar
You can restore the Help from the taskbar at the bottom of the screen.
All active applications are represented by buttons on the taskbar.
To restore Help:
t Click the browser button on the taskbar.
The Help reappears.
Using Alt+Tab to Restore Help
To use Alt+Tab to restore Help:
1. Press and hold the Alt key.
2. Press and release the Tab key, but keep holding the Alt key.
A window appears containing icons and names for all the
applications currently open on your system. A box surrounds the
active application.
3. Continue to hold down the Alt key and press and release the Tab
key until the box surrounds the Help Browser icon, then release
both keys.
Finding Information Within the Help
Your browser application opens and displays Help from the Help
menu. The left frame of the Help browser includes a Contents list and
buttons for several other methods of finding information.
See the following topics:
• Using the Contents List
• Using the Index
• Using the Search Feature
• Using the Glossary
22
Page 23

Using the Contents List
The Contents button provides a list of topics covering the entire Help
system.
To view the Contents list, do one of the following:
t From the Help menu, choose Avid NewsCutter Help, and then
t From a Help topic, click the Contents button.
To display a topic:
t Click the topic title in the Contents list.
click the Contents button.
n
Using the Index
The Contents displays only the top-level topics. Many entries link to
subtopics with related information or procedures.
The Index button provides an alphabetized list of entries, like the
index of a printed book.
To find topics by using the Index button:
1. Choose Avid NewsCutter Help from the Help menu and click the
Index button, or click the Index button from within a Help topic.
2. From the alphabet at the top, select the letter that begins the topic
you want to find (for example, click A to jump to index entries
listed under audio).
3. Scroll through the topics beginning with that letter until you find
the topic you want.
4. Click the number to the right of the index entry. The number
indicates how many topics that index entry has associated with it.
The topic opens in the right frame of the browser.
23
Page 24

Using the Search Feature
The Search button lets you search the entire Help system for words or
phrases and then lists topics that include those words or phrases.
To search for topics by using the Search button:
1. From the Help menu, choose Avid NewsCutter Help and click the
Search button, or click the Search button from within a topic.
2. In the text box, type the word or phrase that you want to find. You
can type up to three words, not including invalid words like “the”
or misspellings.
3. Press Enter or click the Search button.
A list shows topics that contain the word or words for which you
searched.
n
n
Using the Glossary
Do not type quotation marks or asterisks in the text box.
4. Click a topic in the list.
The topic opens in the right frame of the browser.
Remember that Help includes a comprehensive index. If Search does not
produce useful results for a particular search, you can often find the specific
information you need quickly by using the index.
The glossary defines and explains many industry terms. Some entries
might not apply to your particular system.
To use the glossary:
1. Click the Glossary button.
2. In the left frame of the browser, click the letter that begins the term
or concept for which you are searching.
3. Scroll through the section to find your term.
4. Click links to see related information.
24
Page 25

To search through the glossary (Netsca p e Navigator only):
1. Follow steps 1 and 2 in the previous procedure.
2. Click in the Glossary to make it active.
3. Choose Find in Frame from the Edit menu.
4. Type the word you want to find in the text box and click the Find
Next button.
Creating a Favorites List
The Favorites button allows you to keep a list of topics you want to go
to frequently.
To add a favorite topic to your list:
1. Click the Favorites button.
2. Click the Add Current button.
The topic name appears in the list with a check box next to it.
To access a favorite topic:
1. Click the Favorites button.
2. Click the topic you want to visit.
The topic opens in the right browser frame.
To delete a favorite topic from your list:
1. Select the topic in the list by selecting the check box.
2. Click the Delete button.
The topic is removed from the list.
25
Page 26

Using the Browse Buttons
Each Help topic contains browse buttons to help you navigate forward
and backward through related topics. Your browser also includes a
Back button and a Forward button.
To move forward or backward through related topics:
t Click one of the Browse buttons.
To retrace your steps backward or forward through topics you
visited:
t Use the browser Back or Forward buttons.
Printing Help Topics
You can print a Help topic if you need to refer to it during a
complicated procedure or for reference later.
To print a Help topic:
1. Open or click the topic to make it active.
n
2. Choose Print from the browser File menu, or click the Print button
in the browser toolbar.
3. Select the print options.
4. Click OK.
You can print a topic by clicking the right mouse button and choosing Print
from the pop-up menu.
26
Page 27

Using Online Documentation
n
The online version of the books are PDF files. You can view them with
the Adobe
CD-ROM. The Avid NewsCutter Online Publications CD-ROM includes:
• Avid New sCutter Setup Guide
• Avid NewsCutter Getting Started Guide (this book)
• Avid NewsCutter User’s Guide
• Avid NewsCutter Effects Guide
• Avid NewsCutter Help
• Avid Products Collaboration Guide
Avid gives you permission to print up to three complete copies of each book.
®
Acrobat® Reader, which you can install from the
27
Page 28

CHAPTER 2
About NewsCutter
This chapter explains the basic concepts and terminology with which
you need to be familiar to edit video with NewsCutter. This chapter
contains the following sections:
• Basic Editing Steps
• Understanding the Pieces
• Organizing Your Work with Projects and Bins
• How Media Is Stored
• The Attic Folder
Basic Editing Steps
Creating a sequence can be as simple as stringing several shots
together without sound for a voice-over, or it can be as complex as
editing a series of shots together with sound bites, narration, music
with dissolves, audio crossfades, and motion effects.
28
Page 29

You create a sequence from raw footage in three simple stages:
1. Record the source video from tape or external feed onto an
external drive. You can also record your raw footage while editing
the story. This process is called Record to Timeline, as described in
“Recording to the Timeline” on page 61.
2. Edit the sequence and fine-tune it by using various NewsCutter
features and effects.
Use basic editing procedures to create a series of straight cuts.
NewsCutter offers both film-style splice and video insert edits.
Then trim the transitions between shots to create overlap cuts or to
move transitions forward or backward in the sequence.
Add effects, such as dissolves, wipes, or digital video effects
(DVEs). Edit multiple tracks of audio. Create or import graphic
images and key them over video. Add titles and credits. Use other
advanced features to create a complex sequence.
3. Output or play back your material.
NewsCutter allows you to view your sequence, broadcast directly
to air, and, if necessary, record a finished copy to tape without
returning to your source video.
29
Page 30
Understanding the Pieces
Use Table 2-1 to identify the icons that you will be working with and
to help you work more effectively.
Table 2-1 Common Project Icons
Icon Name Description
Project The job that results in one or more sequences; the Project window
Avid Project
Sequence An edited composition that includes audio and video clips and
Bin The window in which you organize the material to be edited; bins
Source clip The smallest media object that references your source footage.
Master clip An object that references the compr essed media.
Media file Stored, compressed digital data representing the original video
organizes all the clips, sequences, effects, bins, and media file
pointers for a program or series of programs.
rendered effects.
reside in a project, and you can have multiple bins in a project.
and audio.
Source/
Record mode
Timeline The graphical representation of every edit made to a sequence,
Segment mode Editing controls for moving, deleting, marking, and editing
Trim mode Controls for fine-tuning edits and transitions with various trim
Effect mode Controls in the Timeline and the Ef fect Editor to apply, render , and
Two modes you switch between: the Source monitor displays
source clips; the Record monitor displays the assembled sequence.
including effects and titles.
segments in the Timeline.
procedures.
edit effects into the sequence.
30
Page 31

Table 2-1 Common Project Icons (Continued)
Icon Name Description
IN and OUT
points
Subclip Part of a master clip; a subclip references the master clip.
Motion effect A file in the bin that references effect media files generated when
Group clip A file in the bin that combines two or more clips based on marks
Title A clip that references a title that you created.
Digital cut A copy struck directly from disk to tape.
Starting and ending points of an edit.
you create motion effects.
or tracking information synchronization points.
Organizing Your Work with Projects and Bins
All work on NewsCutter is stored in a project in NTSC or PAL video
format.
A project contains all the work for a single job. You can organize
projects to suit your needs. A project could contain a specific show,
one reporter’s work, or an ongoing series.
For example, you begin working on a sequence about a house fire and
you might create a project called Firefighters. The name of the project
appears in the Project window (see Figure 2-1).
31
Page 32

Project name
Figure 2-1 Project Window
Then, within the Firefighters project, you can create multiple bins; for
example, you could keep all your raw footage in one bin, a short
sequence in another bin, and a more in-depth sequence in another bin.
Use bins to store and organize master clips, subclips, sequences, and
other media objects in a way that works best for your workflow. The
bin contains information about each clip, such as name, start timecode,
and end timecode (see Figure 2-2).
Bin name
Figure 2-2 Bin Window
32
Page 33

Y ou can customize Bin views to suit your needs, such as sho wing more
or less information about each media file. Y ou can also sort clips by the
information in any field, choosing to view only clips that meet specific
criteria, such as a certain interview subject. You can view bins in Frame
view, Text view, or Script view. For more information about bin views,
see “About Bin Vi ews” on page43.
How Media Is Stored
When you record media, NewsCutter creates two types of files: media
files and master clips. Media files contain the recorded media. Master
clips contain information about the source material and the location of
the media files on disk.
NewsCutter creates a media file for each track of video and audio. If
you record a section of video with two tracks of audio, NewsCutter
creates three separate media files.
The system creates one master clip for each shot captured, regardless
of the number of tracks in the shot. Wh en y o u edit the recorded
material, you access the media files through the master clip. You do
not edit the media files directly.
When you create dissolves or motion effects, or when you import
graphic or animation files, NewsCutter creates additional media files.
Media files require substantial storage space on your media drives.
Master clips are stored on your internal drive and require very little
storage space.
MediaDrives hold approximately 4 to 5 minutes of video per gigabyte.
Therefore, an 18-GB MediaDrive holds approximately 90 minutes of
video.
33
Page 34

The Attic Folder
NewsCutter saves copies of your current project and its bins at r egular
intervals and whenever you save or close a project or bin. These
auto-save files are stored in the Attic folder in the NewsCutter
application folder. If at any time you lose work due to a power outage
or system error, open the Attic folder and look for a project or bin of
the same name with the file name extension .bak.xx, where xx is the
version number. For example, the first backup file for the bin Rough
Cut would be named Rough Cut.bak.1.avb. Later versions would be
named Rough Cut.bak.2.avb, Rough Cut.bak.3.avb, and so on.
34
Page 35

CHAPTER 3
Starting Your Project
This chapter gets you started with NewsCutter and presents the
concept of projects and how you use them to organize your work. It
contains the following sections:
• Starting NewsCutter
• Creating a User
• Creating a Project
• Opening an Existing Project
• Understanding the Project Window
• Working with Bins
• Creating a Quick Transition Bin
• About Trash
• Customizing Your Work Environment
35
Page 36

Starting NewsCutter
To start the NewsCutter application:
t Click the Start button, point to Programs, point to Avid, and click
NewsCutter.
n
To start the application from your desktop, create a shortcut and place it in a
convenient location. For more information on creating a shortcut, see your
Windows NT documentation.
Creating a User
Before you can start working in NewsCutter , you need to create a user.
Once you have started NewsCutter, the Open Project dialog box
appears and you can create new users.
To create a new user:
1. Click New User in the Open Project dialog box.
The New User dialog box appears.
2. Type the name of the user you want to create and click OK.
The user name appears in the Avid Users list in the Open Project
dialog box. You can create as many users as you need.
36
Page 37

When you create a new user, NewsCutter creates a folder for the user
and two files within the folder: a user profile file and a user settings
file. The folder is stored in the Avid Users folder on your internal
drive. If you want to delete a user, you must delete that person’s
folder. The default location for the Avid User folder is:
C:\Programs\Avid\NewsCutter\Avid Users
Creating a Project
When you start NewsCutter, the Open Project dialog box appears and
from there you can open and create projects. It does not matter
whether you create your project or your users first; they can be done in
either order.
The first time you start a project you will be asked to select the Video
Format (NTSC or PAL). After you have created a project, the New
Project window will use the Video Format selection that was
previously selected as your default project format.
To create a new project:
n
1. Click New Project in the Open Project dialog box.
The New Project dialog box appears.
If you need to change the video format and the Format pop-up menu does not
appear in the New Project dialog box, click the New Pr oject button while you
press and hold the Alt key. Then the Format pop-up menu appears.
37
Page 38

2. Type the name of the project you want to create.
3. Select NTSC or PAL from the Format pop-up menu.
4. Click OK.
The Project name appears in the Avid Projects list.
5. Click OK to open the Project window.
When you create a new project, NewsCutter creates a folder for the
project and two files within the folder: a project file and a project
settings file. The folder is stored in the Avid Projects folder on your
internal drive. If you want to delete a project, you must delete its
folder. The default location for the Avid Projects folder is:
C:\Programs\Avid\NewsCutter\Avid Projects
Opening an Existing Project
Every time you start NewsCutter, the Open Project dialog box
appears; from there you open your existing project.
To open your existing project:
1. Click the name of the project you want to open in the Avid Projects
list.
2. Click a user name in the Avid Users list.
3. Click OK.
The Project window opens.
38
Page 39

Understanding the Project Window
All your clips, sequences, bins, and subclips in NewsCutter are
organized into projects. Once you create your project and open it, you
will see the Project window.
Within the Project window, there are three buttons for displaying
information. They include:
• Bins — Displays all the bins associated with this project; this is the
default view as shown in Figure 3-1. The Bins display option is
described more fully in “Working with Bins” on page 41.
n
When you first create a project, there will not be any bins in it. You have to
create the bins you need.
Figure 3-1 Project Window — Bin View
39
Page 40

• Settings — Displays all the settings available for NewsCutter; the
Settings scroll list and the Fast menu let you change the settings
view to see specific types of settings, for example, Title Styles. To
view the Settings scroll list, click the Settings button. For more
information, see “Settings” in the Help index or the
Avid NewsCutter User’s Guide.
Settings scroll list
Settings Fast Menu button
Figure 3-2 Project Window — Settings View
• Info — Provides access to system information; use the Fast menu
at the bottom of the Project window to display the Profile,
Memory, or Hardware Info. To view the Info list, click the Info
button.
- Profile — Displays the video format of the project, either
NTSC or PAL
- Memory — Displays the computer ’ s memory usage
40
Page 41

- Hardware — Displays the operating system version and disk
usage
For more information on the Info display, see “Information
Display Menu” in the Help index or the Avid NewsCutter User’s
Guide.
Settings Fast menu
Figure 3-3 Project Window — Info View
Working with Bins
Within a project, a bin is a way of organizing clips, subclips, and
sequences. The concept of a bin comes from the world of film. Editors
would store reels of film in bins. Logically, bins are still where you
store material for a project.
The names of the bins belonging to a project are displayed in the
Project window, as shown in Figure 3-1. The contents of a bin are
displayed in the Bin window. Only one Bin window is displayed; to
bring a different Bin window to the front, double-click the Bin icon in
the Project window.
41
Page 42

n
Creating a Bin
Open Bin icon
If you want to keep the current Bin window and Project window attached,
select Enable ‘Sticky’ Bins in the Bin Settings dialog box. When you select
this option, NewsCutter remembers the position of the bins in the workspace.
Once you have created your project, you can create as many bins as
you need to organize your work.
To create a bin:
1. With the Project window open, click the New Bin button.
A new bin with the project name is created in the Project window.
2. Type the name you want for the bin in the text field.
New Bin button
Closed Bin icon
Bin Name text field
3. Double-click the Bin icon, next to the bin name, to open the bin or
to bring it to the front of the Bin window.
42
Page 43

About Bin Views
There are three views for working with clips in a bin: Text view, Frame
view, and Script view. You will probably use each of these views as
you work with NewsCutter.
Text View
n
In the examples shown in the next three sections, footage has already been
recorded and that is why it appears in the bins. When you first start
NewsCutter , you will not see anything in your bins until you begin r ecording
footage. For more information, see Chapter 4.
In Text view, clips are displayed in a text format using columns and
rows, with icons representing the various objects. You can customize
the view by adding, hiding, or rearranging column headings.
To save the view:
t Choose Save As from the Bin View pop-up menu.
To choose column headings:
t Choose Headings from the Bin Fast menu (or from the Bin menu
on the main NewsCutter menu bar).
43
Page 44
Bin name
Column
headings
Object icons
Bin Fast Menu button
Frame View button
Script View button
Frame View
To enter Text view:
t Click the Text View button (labeled T) in the lower left corner of
the Bin window. (See Figure 3-4.)
Bin View pop-up menuText View button
Figure 3-4 Bin Window — Text View
In Frame view, each clip is represented by a single picture frame, with
the name of the clip. You can step through the footage forward and
backward in each frame, enlarge or reduce the frame, and rearrange
frames in any order within the bin.
44
Page 45

Bin name
Frame of
media object
Object icons
Script View
To enter Frame view:
t Click the Frame View button (labeled F) in the lower left corner of
the Bin window. (See Figure 3-5.)
Frame View button
Figure 3-5 Bin Window — Frame View
In Script view, the system combines the features of Text view with
Frame view and adds space for typing notes or script. The frames are
displayed vertically on the left side of your screen with a text box to
the right of each clip. Clip data is displayed above the text box.
To enter Script view:
t Click the Script View button (labeled S) in the lower left corner of
the Bin window. (See Figure 3-6.)
45
Page 46

Bin name
Frame of
media object
Text box
Object icons
To add text:
t Click in the text box and begin typing.
Script View button
Figure 3-6 Bin Window — Script View
Creating a Quick Transition Bin
NewsCutter contains a feature called Quick Transition, which allows
you to save the parameters of an effect so that you can add the same
effect many times in a sequence.
Y ou save the parameters in a bin named Quick Transition. NewsCutter
then provides access to the effects stored in the Quick Transition bin
through the Quick Transition dialog box.
n
If you want to use a Quick Transition in multiple projects, you must copy the
bin to each project.
46
Page 47

To create the Quick Transition bin and enable this feature:
1. With the Project window open, click the New Bin button.
A new bin with the project name is created in the Project window.
2. Type Quick Transition in the text field.
n
About Trash
c
You must name the bin Quick Transition. Otherwise, NewsCutter will not
recognize it as a Quick Transition bin.
For more information on how to create Quick Transition, see
“Creating a Quick Transition” on page 139.
NewsCutter stores deleted bins in the Trash. The Trash icon is located
in the Project window and appears only when you delete a bin. You
can use the Trash to retrieve bins you deleted in error, or you can
empty the Trash to create more storage space on your internal drive.
Clips, subclips, and effects that are in a bin appear in the T rash after
you delete the bin. However, if you select a clip, subclip, or effect
directly and press the Delete key, the item does not appear in the
Trash.
47
Page 48

Fast Menu button
To empty the contents of the Trash:
Trash icon
c
Once you empty the contents of the Trash, bins will not appear in
the Trash or on the drive.
1. Click the Trash icon to display its contents.
2. Click the Fast Menu button in the Bin window.
3. Choose Empty Trash.
Customizing Your Work Environment
NewsCutter lets you customize your work environment so you can
work more quickly and more efficiently. You can map buttons to the
Tool palette and the keyboard, and you can save an arrangement of
windows in your NewsCutter workspace.
48
Page 49

Mapping Keys and Buttons
NewsCutter lets you map buttons from the Command palette and
menu commands from the NewsCutter main menu to the Tool palette
and keys on your keyboard. You can also remap buttons to other
buttons. When you start NewsCutter, there are several assigned
buttons in the Tool palette; the other blank spaces are available for
mapping the buttons you use most frequently. Y ou can also map menu
commands that you use frequently to the Tool palette.
If you are more comfortable working with the keyboard, you might
want to map buttons to the keyboard where they are most accessible
for you to reach. For instructions on mapping buttons from the
Command palette, see “Mapping Buttons to the Tool Palette” on
page 74. For instructions on mapping buttons from the Command
palette to the keyboard, see “Mapping Buttons to the Keyboard” on
page 76.
The ability to map buttons, keys, and menu commands lets you tailor
NewsCutter tools to your working style, making you more ef ficient. In
addition, you can move these User settings between projects and
systems, ensuring that you can set up your work environment quickly
and easily. For information on moving User settings between projects
and systems, see the Help or the Avid NewsCutter User’s Guide.
Setting Up Workspaces
A workspace is the arrangement and size of tool windows displayed
on your NewsCutter system. For example, during recording, you
might want to have the Record tool and Video Input tool display in
specific locations. During effects editing, you might want to have the
Effect Palette and Effect Editor appear in a particular location and size.
NewsCutter comes with four workspaces set up for the basic
functions: recording, editing, effects editing, and audio editing. You
can use these workspaces as is, or you can modify them.
49
Page 50

Customizing your workspace lets you be prepared when you want to
start working on a particular NewsCutter functional area, such as
recording or effects editing.
For instructions on using and modifying the default workspaces, see
“Using Workspaces” on page 78.
50
Page 51

CHAPTER 4
Recording
This chapter describes recording, the process of converting your
analog video and audio to a digital format. This chapter includes the
following sections:
• Selecting Settings for Recording
• The Record Tool
• The Audio Tool
• The Video Input Tool
• Recording Preparations Check List
• Recording to the Timeline
• Recording and Logging at the Same Time
• Batch Recording
• Rerecording a Sequence
51
Page 52

Selecting Settings for Recording
A number of settings have a direct bearing on the recording process.
Before recording, review the following options for General Settings,
Deck Settings, and Record Settings.
• Drive Filtering Based on Resolution causes the system to dim all
drives for which speed capabilities are unknown or untested. This
setting is selected by default in the General Settings dialog box.
c
NewsCutter does not prevent you from using non-Avid drives, but
their reliability cannot be ensured.
• Deck Preferences contains various options, including
drop-frame/non-drop-frame prefer ence for NTSC decks, assemble
edit for digital cut, stop key pauses deck, shuttle holds speed, and
deck control.
• Deck Configuration Settings allow you to establish deck control
parameters for a single deck or for multiple decks. You can
manually configure the deck or use the Auto-configure option.
You can also add channels.
• Record Settings include options for recording and batch
recording, and editing. These options select the general
parameters for capturing the source material, tape naming, and
special conditions such as recording across timecode breaks.
For more information on Record settings, see the Help or the Avid
NewsCutter User’s Guide.
52
Page 53

The Record Tool
y
The Record tool provides controls for recording your footage.
To open the Record tool:
t Choose Record Tool from the Tools menu.
Record button
Enable Timecode button
Channel Selection buttons
Video Input
pop-up menu
Message bar
Name text box
Comment text box
Bin pop-up
menu
Single/Dual
Drives button
Target Drive
pop-up menu
Deck controls
Deck Selection
pop-up menu
Preroll
selection
Record
indicator
Trash
button
Tape name
Record/
Log
Mode
button
Toggle
Source
button
Video
Input
Tool
Audio
Tool
buttonbutton
Splice-in
button
Overwrite
button
Audio Input
pop-up menu
Resolution
pop-up menu
Drive Time
Available displa
Logging controls
Figure 4-1 Record Tool
53
Page 54

The Record tool has the following components:
• Audio Input pop-up menu displays the menu of audio source
options.
• Audio Tool button opens the Audio tool. See “The Audio T ool”
on page 56.
• Bin pop-up menu lets you choose a target bin as the destination
for the master clips created when you record on-the-fly. You can
also choose a target bin containing the logged clips you will use to
batch record your media.
• Channel S election butt ons let you choose which audio tracks you
want to record from the source tape, whether you want to record
video, and whether you want to record timecode. If you click and
hold a Video Track button or Audio Track button, a pop-up menu
appears where you can select another track to which to patch.
• Comment (Cmnt) text box lets you add comments about the clip.
• Custom Preroll option and pop-up menu allow you to select how
many seconds the tape rolls before the recording starts. This
option overrides the global preroll setting in the Deck Settings
dialog box.
• Deck controls operate the deck.
• Deck Selection pop-up menu lets you choose the deck you want
to play from or you can choose a satellite feed. It also lets you
check and reset the serial port connection to decks.
• Drive Time Available display appears after you select a drive or
drives for the recorded media.
• Enable Timecode button lets you record the TC (timecode) track
from the source tape when selected. If you deselect the TC button,
the system will record with time-of-day timecode.
• Logging controls allow you to mark IN and OUT points in your
footage before you begin recording.
• Message bar displays information on the current status of the tool.
• Name text box lets you add a name for the clip you are recording.
54
Page 55

• Overwrite button lets you record footage directly from tape into a
sequence loaded in the Timeline in one step. When you use
Overwrite, it replaces what was on the track to which you are
recording with the material you just recorded.
• Record button begins the recording process.
• Record indicator flashes on and off while you are recording.
• Record/Log Mode button lets you switch between Record mode
and Log mode.
• Resolution pop-up menu contains a list of the available
resolutions.
• Single/Dual Drives button lets you choose a single or striped
media drive volume for recording the audio and video.
• Splice-in button lets you record footage directly from tape into a
sequence loaded in the Timeline in one step. When you use
Splice-in, everything else in the sequence is pushed forward to
make room for the new clip.
• Tape name shows the name of the source tape. If no tape is
selected, NewsCutter automatically assigns the tape a name or
prompts you for a name if you selected that option in the Record
Settings dialog box.
• Target Drive pop-up menu lets you choose the target drive
volumes.
• Toggle Source button lets you switch between sources. You
choose Satellite Feed mode with this button.
• Trash button stops the recording proc ess and deletes the r ecor ded
media.
• Video Input pop-up menu allows you to choose Composite,
Component, S-Video, or Serial Digital.
• Video Input Tool button opens the V ideo Input tool. See “The
Video Input Tool” on page 58.
55
Page 56

The Audio Tool
The Audio tool controls parameters for incoming audio.
To open the Audio tool:
t Choose Audio Tool from the Tools menu.
t Click the Audio Tool button in the Record tool.
To display the full screen of the Audio tool (as shown in Figure 4-2):
t Click the Output, Input, and Setup buttons.
Input button
In/Out Toggle button
Reset Peak button
Track indicator
Output
Setup
buttonbutton
Peak
Hold
pop-up
menu
Setup
display
Digital VU scale
Meters
Analog
VU scale
Input
display
Figure 4-2 Audio Tool
56
Channel
Selector
pop-up
menus
Output
display
Page 57

The Audio tool has the following components:
• Analog VU scale to the right of the meters displays a fixed range
of values that you can conform to the headroom parameters of
your source audio.
• Channel Selector pop-up menus let you map tracks in the
sequence to output channels.
• Digital VU scal e to the left of the meters displays a fixed range of
values from 0 to –90 decibels (dB), according to common digital
peak meter standards.
• In/Out Toggle button switches the meter displays for each
channel between input levels from a source device and output
levels to the speakers and record devices. The letter I indicates
Input, and O indicates Output.
• Input button opens the Input display.
• Input display shows a panel that contains a single slider control
for raising or lowering global audio input.
• Meters dynamically track audio levels for each channel as follows:
- Meters show green below the target reference level (the
default reference level is –20 dB on the digital scale).
- Meters show yellow for the normal headroom range, above
the reference level to approximately –3 dB.
- Meters show red for peaks approaching overload, between
–3 dB and 0 (zero) dB.
- Thin green lines at the bottom indicate signals below the
display range.
57
Page 58

• Output button opens the Output display.
• Output display shows a panel that contains contr ols for raising or
lowering global audio output.
• Peak Hold pop-up menu allows you to choose options for
customizing the meter displays and for setting and playing back
the internal calibration tone.
• Reset Peak button resets the current maximum peak
measurements. It also stops the playback of the internal
calibration tone.
• Setup button opens the Setup display.
• Setup display shows a panel that contains information and
controls for adjusting various audio hardware parameters.
• Track indicator displays the audio track number.
The Video Input Tool
The Video Input tool controls parameters for incoming video.
To open the Video Input tool:
t Choose Video Input Tool from the Tools menu.
t Click the Video Input Tool button in the Record tool.
58
Page 59

Input
pop-up
menu
Slider
Consumer
Source
button
Internal Waveform
Monitor button
Vectorscope
Monitor
button
Internal
Waveform
monitor
Vectorscope
monitor
Settings
pop-up
menu
100% Bars
button
Preset
buttons
Figure 4-3 Video Input Tool
To expand the Video Input Tool window to include the internal
Waveform monitor:
t Click the Internal Waveform Monitor button.
To expand the Video Input Tool window to include the internal
Vectorscope monitor:
t Click the Vectorscope Monitor button.
The Video Input tool has the following components:
• 100% Bars button switches the 100% bars for calibration on and
off.
• Consumer Src button sets the system to use a consumer grade
video deck (such as a home VCR).
• Input pop-up menu lets you choose Composite, Component, or
S-Video or Serial Digital video input source.
59
Page 60

• Internal Waveform monitor lets you adjust luminance values.
• Internal Waveform Monitor button opens the internal Waveform
monitor.
• Preset buttons are highlighted when the factory preset levels are
displayed. When you click a lit Preset button, it turns gray and the
slider returns to the most recent manual level setting.
• Settings pop-up menu lets you save the Site settings for an
individual tape each time you calibrate bars.
• Sliders let you change the value for each setting.
• Vectorscope monitor lets you adjust hue and saturation.
• Vectorscope Monitor button opens the Vectorscope monitor.
Recording Preparations Check List
1. Check your hardware configurations: power switches, cable
connections, and remote switch on the source deck for deck
control (for hardware configurations, see the Avid NewsCutter
Setup Guide).
2. In the Settings scroll list, make sure you have the optio ns you want
selected in the General, Deck Preferences, Deck Configuration,
and Record Settings dialog boxes.
Check the settings for Handle Length in the Record Settings dialog
box. A handle is extra media on either side of your IN and OUT
points that ensures you have enough extra footage to perform
trims. The default setting is 2 seconds on each side. Keep the
default, or increase the handle length if you think you will need
extra footage.
Select “Ask for name when a new tape is seen” in the Record
Settings dialog box if you want NewsCutter to prompt you for a
tape name. Otherwise, NewsCutter automatically names the tape
in sequential order.
60
Page 61

3. Label each of your external disk drives with a meaningful name.
For information on naming drives, see “Naming Drives” in the
Help index or the Avid NewsCutter User’s Guide.
4. Insert a tape into the deck and set up the Record tool for track
selection, target bin, target drives, source tape, and source deck.
5. Use the Audio Input tool to set the audio input levels.
6. Use the Video Input tool to set the video input levels; save your
video settings for future use.
Recording to the Timeline
You can record footage directly from tape into a sequence loaded in
the Timeline in one step, without organizing and reviewing clips,
marking edit points, or performing edits.
Before you begin recording, see the “Recording Preparations Check
List” on page 60.
n
Make sure Audio Input in the Record tool is set to Microphone or Microphone
with Power, depending on the type of microphone you are using.
To record to the Timeline:
1. Load a sequence into the Record monitor by selecting New
Sequence from the Clip menu or by double-clicking an existing
sequence icon in a bin.
2. Mark an IN point in the sequence or move the position indicator to
the location where you want the edit to take place.
3. Mark the source material that you want to record by using the
Record tool logging controls.
61
Page 62

4. (Option) You can mark an OUT point based on the following:
Splice-in
Overwrite
• If you are recording to the middle of a sequence in the
Timeline, mark both IN and OUT points for frame accuracy.
• If you are recording at the end of a sequence, you can mark
just an IN point and then mark the OUT point later on-the-fly.
5. Click the Splice-in button or the Overwrite button in the Record
tool to choose the type of edit.
Splice-in will move everything in the sequence down to make
room for the new clip. Overwrite replaces what is there, keeping
the same length of the sequence.
6. Click the Record button to begin recording.
7. If you did not mark the OUT point in advance, click the Record
button again when the footage reaches the frame where you want
to stop recording.
n
If you already marked an OUT point, recording will stop automatically.
When recording ends, the clip appears in place in the sequence,
and a master clip appears in the bin.
Recording and Logging at the Same Time
When you record without entering log information in a bin ahead of
time, the system creates clips and associated media files while you
record. Recording in this manner involves manually cueing source
footage with an Avid-controlled deck, using the deck controls in the
Record tool.
Ways to record and log at the same time include:
• Recording On-the-F ly
• Recording from an IN Point to an OUT Point
62
Page 63

Recording On-the-Fly
Recording on-the-fly is easier than setting marks, but it is more
imprecise. It involves using the deck controls in the lower left corner of
the Record tool to cue, play, and stop the source footage manually
while recording.
Use the recording on-the-fly method in any of the following
circumstances:
• If you are eager to begin editing immediately and no adequate
logs exist for importing into the system or setting marks
• If you are recording from a sour ce deck that cannot be controlled
by the Record tool or a V-LAN VLXi unit (through NewsCutter)
• If your source tape does not have timecode
• If you ar e recording fr om a digital source such as a compact disc or
DAT player
• If you ar e recor ding fr om a live sour ce, such as a studio feed, or an
in-house router
In some circumstances, the recorded material might exceed the logical
file size allowed by NewsCutter. For example, the maximum size of a
media file cannot exceed 2 gigabytes (GB). T o make sur e that recor ding
does not stop if a file exceeds the limit, select “Record video to
multiple files” in the Record Settings dialog box. Then if a file does
exceed the limit, it will be split across multiple files and recording will
continue.
n
Before you begin recording, see the “Recording Preparations Check
List” on page 60.
There is a slight delay of several frames after you manually select a spot both
to start and to stop recording. Therefore, use this method when you do not
need precise beginning and end points in your clip.
63
Page 64

To record on-the-fly:
1. Select the video and audio tracks to which you want to record in
the Record tool.
2. Make sure the Record/Log Mode button in the Record tool is set
to REC.
3. Use the deck controls in the bottom left corner of the Record tool
to locate the position on the tape where you want to start
recording.
4. Play the deck and when it gets up-to-speed, click the Record
button.
n
Make sure you have cleared any previous marks so that the deck does not
begin cueing to the previous location.
5. While the system is recording, you can type a clip name in the
Name text box.
Press the Tab key after typing a clip name to enter comments
about the clip in the Comments text box.
6. Click the Pause button at any time to pause play. You can also
abort the record procedur e by clicking the Trash button in the
Record tool. The clip will be discarded.
7. To stop recording, click the Record button, or press the Esc key on
the keyboard.
The system creates a new clip in the bin.
64
Page 65

Recording from an IN Point to an OUT Point
Recording from an IN point to an OUT point lets you specify the exac t
timecode location to begin and end recording. You can also specify
only an IN point or an OUT point, and enter the other mark on-the-fly.
Use this method in the following circumstances:
• If logs exist in written or printout form but not in the proper
format for quick import into the system
• If the IN and OUT points are rough and need to be
double-checked for accuracy
• If you ar e familiar enough with the sour ce material to estimate the
timecode for the IN point, the OUT point, or both, quickly and
accurately
Before you begin recording, see the “Recording Preparations Check
List” on page 60.
To record by specifying an IN point and an OUT point:
1. Cue the tape to the start of the clip you want to record and mark
an IN point.
2. Cue the tape and mark the OUT point now, or set the OUT point
on-the-fly while you are recording.
3. Click the Record button in the Record tool.
The Record tool automatically rewinds the tape to the preroll
point before the IN point of the clip, and the tape begins to play.
The Record button changes to bright red, the indicator next to the
Record button flashes, and the Message bar displays the message
that recording has begun.
4. While the system is recording, you can type a clip name or enter
comments about the clip.
65
Page 66

Recording stops, and the system creates a new clip in the bin when
the tape reaches the clip’s OUT point or when you click the Recor d
button again.
Batch Recording
Once you have imported a log or have manually logged a group of
clips to a bin, you can automate the record process by using the
batch-recording capabilities of NewsCutter.
If your media was analog (not digital) when it was recorded, you will
need to reset the color bars in the Video Input tool before you batch
record. For more information and procedures, see “Adjusting color
bars” in the Help index or the Avid NewsCutter User’s Guide.
You can also use the batch record process to rerecord existing clips.
n
Before you batch record, make sure the source tapes have timecode.
Before you begin recording, see the “Recording Preparations Check
List” on page 60.
To batch record clips:
1. Open the bin that stores the logged clips.
2. Select the clips to batch record.
3. Choose Batch Record from the Bin menu.
4. Select options in the Batch Record dialog box:
• If the bin contains some clips that are already recorded and
you do not want to rerecord those clips, select the option
“Record only those items for which media is currently
unavailable.”
• If your selections include a sequence for batch recording, the
dialog box prompts you for handle length information.
66
Page 67

5. Click OK.
If you have not loaded a tape, the system prompts you to insert
the first tape.
6. Insert the tape into the tape deck, and click Mounted.
A message box appears.
7. Click OK to confirm the tape and deck entries and to begin the
recording process.
The system records each clip from the tape, in start timecode
order.
Rerecording a Sequence
Rerecording is the process of capturing previously recorded source
footage based on existing clips and sequences. Rerecording uses the
batch record process and does not require extra logging time because
the clip information for such things as source tracks and timecodes
already exists in the bin.
There are several situations in which you might want to rerecord:
c
• You can quickly rerecord selected clips if you make an error while
recording the first time.
• You can rerecord clips if you accidentally delete media files.
• You can rerecord a sequence after you transfer it to another
system.
Rerecording requires your original source footage. Do not delete the
media files if the source footage is no longer available, unless you
will not need the material again.
Before you begin recording, see the “Recording Preparations Check
List” on page 60.
67
Page 68

n
To streamline the rerecording process, select “Ask for name when a new tape
is seen” in the Record Settings dialog box during the original recording.
To rerecord a sequence or clips:
1. Choose Record Tool from the T ools menu.
2. Open or activate the bin that contains the sequence or clips.
3. Select the sequences or clips you want to rerecord.
4. Choose Batch Record from the Bin menu.
The Batch Record dialog box appears.
5. To preserve clips that already have existing media, select “Record
only those items for which media is currently unavailable.”
6. Click the Handle Length text box (sequences only), and type the
number of additional frames you want to record at the heads and
tails of the new master clips.
7. Click OK.
The system prompts you to insert the first tape.
8. Insert the tape into the tape deck if you have not already done so.
9. Click Mounted to indicate to the system that the correct tape is
loaded and ready for recording.
A message box appears.
10. Click OK to confirm the tape and deck entries.
The system records each clip from the tape, in start timecode
order. If another source tape is needed, the system prompts you
for the tape.
You can stop the batch record process at any time by clicking the
Trash button in the Record tool.
68
Page 69

CHAPTER 5
Getting Ready to Edit
This chapter describes the tools available to you for editing. It also
describes methods for navigating within your clips or sequences and
ways of marking your footage for inclusion in a sequence. It includes
the following topics:
• Using the Command Palette
• Using the Tool Palette
• Using the Keyboard Palette
• Using Workspaces
• Modifying Workspaces
• Controlling Playback
• Marking IN and OUT Points
• Creating Subclips
Using the Command Palette
The Command palette, accessible from the Tools menu, provides a
central location for all editing, playback, and navigational buttons.
These buttons allow you to perform a wide range of commands with a
single click. The Button to Button Reassignment option allows you to
69
Page 70

map buttons to the Tool palette or to reconfigure the keyboard by
using the Keyboard palette. The Menu to Button Reassignment option
allows you to map menu commands to various buttons and keys.
You can use the buttons directly from the Command palette without
mapping them by selecting the Active Palette option at the bottom of
the Command palette.
The Command palette groups buttons by function. Tabs are displayed
for each function, and the buttons that perform those functions are
displayed within each tab. The functions are Move, Play, Edit, Trim,
FX, Other, and More.
You should familiarize yourself with the buttons in the Command
palette. The more familiar you are, the faster you can edit. Once you
know which buttons or menu commands you use most often, you can
map them to the Tool palette.
All available buttons are displayed in the Command palette. If you
cannot find a particular button, open the Command palette from the
Tools menu and search for it there. For procedures on mapping
buttons to the T ool palette, se e “Mapping Buttons to the Tool Palette”
on page 74. For procedures on mapping buttons to the keyboard, see
“Mapping Buttons to the Keyboard” on page76.
Figure 5-1 Command Palette — Move Tab
70
Page 71

Figure 5-2 Command Palette — Play Tab
Figure 5-3 Command Palette — Edit Tab
Figure 5-4 Command Palette — Trim Tab
71
Page 72

Figure 5-5 Command Palette — FX Tab
Figure 5-6 Command Palette — Other Tab
Figure 5-7 Command Palette — More Tab
72
Page 73

Using the Tool Palette
The Tool palette is located in the Timeline. You can also view the Tool
palette by clicking the Fast Menu button under the Source monitor.
The default Tool palette, shown in the Figure 5-8, provides buttons for
editing and navigating. It has blank buttons where you can map the
buttons or menu commands you use most frequently. The default T oo l
palette displays the buttons without names.
Figure 5-8 Default Tool Palette
To turn on the display of button names:
1. Click the Settings button in the Project window.
The Settings scroll list appears.
2. Double-click Interface.
n
The Interface-Current Settings dialog box appears.
3. Select Show Labels in Tool Palette.
You can enable ToolTips here as well to help you become familiar with the
NewsCutter interface. ToolTips shows the name of each tool on the interface a s
you move the mouse pointer over it.
4. Click OK.
5. (Option) Resize the Tool palette.
73
Page 74

Mapping Buttons to the Tool Palette
You can map frequently used functions to the Tool palette for easy
access.
To map a button from the Command palette to the Tool palette:
1. Make sure the Source monitor is active; if it isn’t, click the
Source/Record Toggle button to activate it.
When the Source monitor is active, it displays “NewsCutter
Source” in the title bar.
2. Open the Timeline by choosing Timeline from the Tools menu.
3. Choose Command Palette from the Tools menu.
4. Click Button to Button Reassignment at the bottom of the
Command palette if it’s not already selected.
5. Find the button you want to remap, click the button, and drag it to
the Tool palette, placing it where you want it.
You can place the button over an existing button, in which case
you can’t access the original button, or you can place it over one of
the blank buttons.
To remove the button you mapped:
t Drag another button over it.
t Drag the blank button over it.
The blank button can be found in the Other tab of the Command
palette.
74
Page 75

Mapping Menu Commands to the Tool Palette
You can map frequently used functions to the Tool palette for easy
access.
To map a menu command to the Tool palette:
1. Open the Timeline by choosing Timeline from the Tools menu.
2. Choose Command Palette from the Tools menu.
3. Click Menu to Button Reassignment at the bottom of the
Command palette if it’s not already selected.
4. Click the button on the Tool palette where you want the menu
command to appear.
5. Find the menu command you want to map and click it.
The menu command appears in the Tool palette.
You can place the menu command over an existing button, in
which case you can’t access the original button, or you can place it
over one of the blank buttons.
To remove the menu command you mapped:
t Drag another menu command or button over it.
t Drag the blank button over it.
The blank button can be found in the Other tab of the Command
palette.
75
Page 76

Using the Keyboard Palette
The keyboard has many editing and navigational buttons. For faster
editing, you can use the keyboard rather than the mouse. Figure5-9
shows the default keyboard configuration.
Step buttons
Play button
Stop button
Figure 5-9 NewsCutter Default Keyboard Settings
Play/Step/Shuttle buttons
Mapping Buttons to the Keyboard
You can map buttons to the keyboard from the Command palette to
help you work more quickly. You can map only to the light-colored
keys shown in Figure 5-9; the dark-colored keys are reserved for
system functions such as Shift, Ctrl, and Alt.
To map a button from the Command palette to the keyboard:
1. Choose Command Palette from the Tools menu.
2. Click Button to Button Reassignment at the bottom of the
Command palette if it’s not already selected.
3. Activate the Project window, and click the Settings button.
The Settings scroll list appears.
76
Page 77

4. Double-click Keyboard.
The Keyboard palette appears.
5. Find the button you want to remap, click the button, and drag it to
the keyboard, placing it on any of the light-colored keys.
You can place the button over an existing key, in which case you
can’t access the original key, or you can place it over one of the
blank keys.
To remove the button you mapped:
t Drag another button over it.
t Drag the blank button over it.
The blank button can be found in the Other tab of the Command
palette.
Mapping Menu Commands to the Keyboard
You can map menu commands that you use frequently to the
keyboard from the Command palette. You can map only to the
light-colored keys shown in Figure 5-9; the dark-colored keys are
reserved for system functions such as Shift, Ctrl, and Alt.
To map a menu command from the Command palette to the
keyboard:
1. Choose Command Palette from the Tools menu.
2. Click Menu to Button Reassignment at the bottom of the
Command palette if it’s not already selected.
3. Activate the Project window, and click the Settings button.
The Settings scroll list appears.
4. Double-click Keyboard.
The Keyboard palette appears.
5. Click the key where you want the menu command to appear.
77
Page 78

6. Find the menu command you want to remap and click it.
The menu command appears on the keyboard diagram.
You can place the menu command over an existing key, in which
case you can’t access the original key, or you can place it over one
of the blank keys.
To remove the menu command you mapped:
t Drag another menu command or button over it.
t Drag the blank button over it.
The blank button can be found in the Other tab of the Command
palette.
Using Workspaces
Workspaces let you have the tools you need to perform a specific
function, such as recording, available to you with the press of a key.
NewsCutter comes with four workspaces set up for the basic functions
of recording, editing, adding effects, and adding audio. These default
workspaces are already mapped to the keyboard as follows:
Workspace Function Key
1 record F9
2 edit F10
3 effx (effects) F11
4 audio F12
You can use these workspaces as is, or you can modify them.
78
Page 79

To use a workspace:
t Press the function key on the keyboard for the workspace you
want.
Modifying Workspaces
You can modify the default workspaces to adapt them to your style of
working.
n
n
To take advantage of the workspace shortcut buttons, you must remember that
NewsCutter sorts the workspaces alphabetically. Therefore, the workspace
button assignments might change if you add workspaces. To keep a designated
order, name the workspaces with a number preceding the first letter (for
example, 5 digital cut).
To modify an existing workspace:
1. Press the function key on the keyboard for the workspace you
want to modify, for example, F9 for recording.
2. Make any changes — resize or reposition any windows.
3. Click the Settings button in the Project window.
The Settings scroll list appears.
4. Double-click the workspace you want to modify.
The Save Workspace dialog box appears.
5. Click OK.
The Workspace setting is modified.
When you change workspaces, you see the arrangement you set when you left
the workspace. If you close a window before you leave a workspace, the next
time you open the workspace, the window will be closed. For bins, you must
select Enable ‘Sticky’ Bins in the Bin Settings dialog box to save the position
of the bins in your workspace. To access the Bin Settings dialog box,
double-click Bin in the Project window’s Settings scroll list.
79
Page 80

You can also create four additional workspaces. For information on
creating workspaces, see “Workspace” in the Help index or the Avid
NewsCutter User’s Guide.
Controlling Playback
There are several ways to play, view, and cue clips:
• Instantly access frames or move through footage by using the
position indicator within the position bar under the Source or the
Record monitor.
• Play, step (jog), or shuttle through footage by using buttons.
• Play, step, or shuttle by using keyboard equivalents.
• Step or shuttle by using the mouse.
Using Position Bars and Position Indicators
You can quickly access frames within a clip loaded into a monitor or
move through the footage by using the position indicators that appear
in the position bars under the Source or the Record monitor, and in the
Timeline when you are viewing a sequence.
Record monitor
position bar
Position indicator
• You can move the position indicator within the position bar under
the Source or the Record monitor by clicking anywhere in the
position bar or by dragging the position indicator to the left or
right. The speed with which you drag the position indicator
determines the speed at which you move through the footage.
Figure 5-10 Record Monitor Position Bar
80
Page 81

Source monitor
position bar
Position indicator
Figure 5-11 Source Monitor Position Bar
• In the Timeline, the position indicator shows your position within
the sequence. It is always in the same position as the position
indicator in the Record monitor’s position bar and works in the
same way: you can click anywhere in the Timeline to relocate the
position indicator, or you can drag the position indicator through
footage at varying speeds.
Position indicator in Timeline
Using Buttons
Figure 5-12 Position Indicator in Timeline
• You can go directly to the beginning or end of a clip or sequence
by clicking at the far left or far right of the clip or sequence.
You can use the buttons that appear under the Source and Record
monitors to play and step through your footage. You can also use the
keyboard to manipulate footage.
Buttons can be remapped from the Command palette to the Tool
palette. See “Mapping Buttons to the Tool Palette” on page 74.
81
Page 82

The Play Button
The Play button is a toggle button. With a clip loaded in a monitor, the
Play button plays your footage at a normal speed. When a clip is
playing, the arrow on the button is lit. Clicking the Play button while
your clip is playing stops play. The space bar also stops play.
In the Record monitor, you can play only video and audio tracks that
are currently monitored in the Track Selector panel.
Track Selector panel
Video Track Monitor button
with Monitor icon
Audio Track Monitor button
with Speaker icon
To play a clip:
1. Load a clip into the Source monitor or a sequence into the Record
monitor by double-clicking a clip or sequence icon in a bin.
2. For sequences in the Record monitor, click the Video Track
Monitor or the Audio Track Monitor button in the Track Selector
panel.
3. Go to the start of the clip or sequence:
t Click at the start of the position bar under the monitor.
t Press the Home key.
4. Click the Play button under the chosen monitor.
To stop playback:
t Press the space bar.
t Click the Play button again.
82
Page 83

Step Buttons
Using Keys
You can also use the Step Forward and Step Backward buttons under
the monitors to play the clip backward or forward in one-frame
increments.
You can advance 10 frames forward or 10 frames backward by using
the 10-step keys on the keyboard.
To step through footage:
1. Load a clip into the Source monitor or a sequence into the Record
monitor.
2. Press the appropriate key to step 1 or 10 frames forward or
backward.
You can use the keys on the keyboard to quickly move through the
media in the Source and Record monitors. Commands can be
remapped from the Command palette to the keyboard. See “Map ping
Buttons to the Keyboard” on page 76.
J-K-L Keys (Three-Button Play)
The J-K-L keys on the keyboard allow you to play, step, and shuttle
through footage at varying speeds. This feature, also referred to as
three-button or variable-speed play, allows you to use three fingers to
manipulate the speed of playback for greater control.
83
Page 84

To shuttle through the footage by using the J-K-L keys on the
keyboard:
1. Do one of the following:
t Load a clip into the Source monitor or a sequence into the
Record monitor.
t Select a clip in a bin in Frame view to play through the clip in
the bin.
2. Use the following keys to shuttle at varying speeds:
Press To
L Move forward through the footage at normal speed. Press once
to increase the forward speed two times, twice to increase it
three times, three times to increase it five times, and four times
to increase it eight times the normal speed.
J Move backward at the same shuttle speed increments.
J+K Move forward slowly.
K+J Move backward slowly.
To pause the shuttling:
t Press the K key.
To stop shuttling:
t Press the space bar.
84
Page 85

Home, End, and Arrow Keys
Mouse Jog
button
To move through footage when a clip is loaded in a monitor:
Press To
Home key Move to the beginning of a clip or sequence.
End key Move to the end of a clip or sequence.
Left Arrow
key
Right Arrow
key
Using the Mouse
You can also use the mouse for one-handed control of playback. You
can either step or shuttle by using the mouse.
Stepping with the Mouse
To step by using the mouse:
1. Load a clip into the Source monitor or a sequence into the Record
2. Activate the buttons in the Command palette:
Move the footage one frame backward.
Move the footage one frame forward.
monitor.
a. Select Active Palette at the bottom of the Command palette.
b. Click the Mouse Jog button in the Play tab of the Command
palette.
n
You can map the Mouse Jog button to a button in the Tool palette (see “Using
the Tool Palette” on page 73).
85
Page 86

3. Move the mouse to the right to step forward or to the left to step
Mouse Shuttle
button
backward.
To quit stepping with the mouse:
t Press the space bar.
t Double-click the mouse button.
Shuttling with the Mouse
To shuttle by using the mouse:
1. Load a clip into the Source monitor or a sequence into the Record
monitor.
2. Activate the buttons in the Command palette:
a. Select Active Palette at the bottom of the palette.
b. Click the Mouse Shuttle button in the Play tab of the
Command palette.
n
You can map the Mouse Shuttle bu tt on t o a button in the Tool palette (see
“Using the Tool Palette” on page 73).
3. Move the mouse to the right to increase the shuttle speed or to the
left to decrease the shuttle speed.
To stop shuttling with the mouse:
t Press the space bar.
t Double-click the mouse button.
You can also use the keyboard in conjunction with the mouse to
control shuttling. For example, if you’re shuttling with the mouse and
you press the L key, the playback speeds up to the next normal play
rate (60, 90, 150, 240 fps for NTSC; and 50, 75, 125, 200 fps for PAL).
You can continue to change the shuttle speed and direction with the
mouse.
86
Page 87

Marking IN and OUT Points
You can mark IN and OUT points for your clips in advance, which
provides several advantages:
• You can quickly build a sequence by splicing the marked clips into
place one after another.
• You can use the process of rough-cut or storyboard editing, which
allows you to instantly splice several prepared clips into a
sequence.
• You can play back and mark clips in the bin before loading a single
clip, saving several steps.
Even if your marks are not accurate now, you can trim the edit points
and fine-tune the sequence later without reediting the material.
Creating Subclips
When you mark footage with IN and OUT points, you can save the
entire clip along with the new marks, or you can create subclips to
break up longer master clips into smaller segments of selected footage.
Subclips do not directly reference the original media. Subclips remain
linked to the master clips from which they are created, and the master
clips in turn reference the recor ded media files located on your storage
drives. As a result, none of the original footage is lost.
You can create subclips directly from the marked section of material in
the monitors by using one of the following methods:
• Alt key: Pr ess and hold the Alt key, and then drag the picture from
the monitor to the bin in which you want to store the subclip.
87
Page 88

• Make Subclip button: Click the Make Subclip button located in
the Edit tab of the Command palette to create the subclip and
place it in the active bin by default. If you press the Alt key while
you click the Make Subclip button, a dialog box allows you to
choose the destination bin for the subclip.
n
A new subclip
shown in Text
view
You can also create subclips while recording as described in “Subclips,
creating on-the-fly” in the Help index or the Avid NewsCutter User’s
Guide.
The new subclip will be listed in the bin, preceded by a subclip icon
and identified with a numbered .Sub extension, as shown in the
following illustration.
For more information on trimming, see “Trim Edits” in the Help index
or Avid NewsCutter User’s Guide.
88
Page 89

CHAPTER 6
Creating a First Cut
This chapter describes how you begin to put your story together. It
includes the following topics:
• Viewing Your Clips
• Navigating in the Timeline
• Using the Track Selector Panel
• Making the First Edit
• Splicing or Overwriting Video into a Sequence
• Marking Clips for Storyboarding
• Using the Go to IN and Go to OUT Buttons
• Moving to the Head or Tail of a Shot
• Undoing an Edit
• Redoing an Edit
• Splicing a Shot into the Middle of a Sequence
89
Page 90

Viewing Your Clips
You can work with clips and sequences in several different ways,
depending upon your needs and preferences. Each method has its
own uses and advantages, as follows.
• Viewing in bins: Frame view shows you pictorial images of the
clips in your bins; Text view shows you the clips listed by name;
Script view shows you pictorial images and provides a space for
you to add text. For more information on displaying clips in bins,
see “Working with Bins” on page 41.
• Viewing in the Timeline: Use the Timeline to view individual
tracks for either a sequence or a source clip. You can drag a clip or
group of clips into the Timeline to create a sequence.
• Viewing in full-screen: You can use a second, full-screen monitor
to view your footage in a larger screen format.
90
Page 91

• Viewing in the Source monitor: You can load clips and sequences
into the Source monitor (see Figure 6-1) to view and mark shots
for use in a sequence that you build in the Record monitor. Load a
clip into the Source monitor by double-clicking its icon in the bin.
Click on the Monitor pop-up menu to view the history clips and
sequences you have loaded. Clear the menu or monitor contents
by choosing the appropriate command from this menu.
Monitor pop-up menu
Clip icon
Source/Record Toggle button
Figure 6-1 Source Monitor
91
Page 92

• Viewing in the Record monitor: You can load a sequence into the
Record monitor (see Figure 6-2) to view, mark, or modify an
existing sequence. You cannot load a clip into the Record monitor.
You load a sequence into the Record monitor by double-clicking
its icon in the bin. Click on the Monitor pop-up menu to view the
history clips and sequences you have loaded. Clear the menu or
monitor contents by choosing the appropriate command from this
menu.
Monitor pop-up menu
Sequence
icon
Source/Record Toggle button
Figure 6-2 Record Monitor
92
Page 93

• Viewing in pop-up monitors: You can load clips into pop-up
monitors (see Figure 6-3) to view and mark one or several clips
simultaneously in smaller, movable windows. (Enable a pop-up
monitor by pressing the Alt key whi le double-clicking the cl ip you
want to open.) You can have multiple pop-up monitors open at
one time.
Figure 6-3 Pop-up Monitor
93
Page 94

Navigating in the Timeline
The Timeline window (see Figure 6-4) provides various controls for
quickly moving through a sequence and adjusting your view of details
displayed in the tracks while editing. You can make changes in the
Timeline format by using the Timeline Fast menu or by
double-clicking Timeline in the Settings scroll list in the Project
window.
Position indicator
Track Selector
panel
Timeline
Fast Menu button
Extract/Splice-in button
(Segment mode)
Lift/Overwrite button
(Segment mode)
Scale bar
Timeline track
Scroll bar
Figure 6-4 Timeline Window
Using the Position Indicator
The position indicator, the vertical blue line in the Timeline, marks
your place in the sequence. It also determines how some of your
commands are interpreted. For example, when you perform an edit,
the system takes the location of the position indicator as the IN point if
you haven’t marked an IN point. The position indicator can also be
used as an OUT point if you haven’t marked an OUT point.
94
Page 95

When you move the position indicator in the Timeline, the smaller
position indicator within the Record monitor’s position bar also
moves.
Using the A and S keys
The Go to Previous Edit and Go to Next Edit buttons in the Command
palette allow you to quickly move forward and backward thr ough the
Timeline. When you click the Go to Pr evious Edit button (A key on the
default keyboard), the position indicator moves to the previous
transition point in the sequence, ignoring tracks that are not active.
When you click the Go to Next Edit button (S key on the default
keyboard), the position indicator moves to the next transition point in
the sequence and is also based on the track selection.
Displaying More or Less Detail
The scale bar stretches and contracts the Timeline area centered
around the position indicator, allowing you to either zoom in to focus
on a specific area of your sequence or zoom out to see your whole
sequence. This is especially useful when you have a lengthy sequence
with many edits.
Scale bar
Scale box
The Timeline always expands or contracts proportionally on both
sides of the position indicator.
To see more detail:
t Click the scale box and drag it to the right.
95
Page 96

As the Timeline expands, a second “shadow” position indicator
As the Timeline
expands, a shadow
position indicator
appears.
appears next to the position indicator, showing the end of a single
frame, and the two continue to move apart as you expand the
Timeline.
The position indicator and its shadow mark the beginning and
end of each frame. The solid line is the mark or edit point. Y ou can
click either the line or the shadow to move exactly one frame
forward or backward.
In addition, if the Timeline is maximized for full-screen viewing,
the Timeline will split in half (or thirds) as it wraps through the
sequence for you to see all the clips.
To contract an expanded Timeline to see less detail but more of the
sequence:
t Click the scale box and drag it to the left.
Using the Scroll Bar
The scroll bar functions like any standard scroll bar. Click the arrows
or drag the scroll box to scroll left or right.
Scroll bar
Scroll box
Using the Track Selector Panel
The Track Selector panel (see Figure 6-5) provides numerous controls
for working effectively with multiple tracks. With this one resource,
you can select, delete, monitor, enlarge, reduce, lock, patch, and move
any video or audio track.
96
Page 97

The Track Selector panel also provides a quick display of track
information. You can see which tracks (on the source or the record
side) are available, active, patched, monitored, or locked. The
configuration shown in Figure 6-5 is just one example. The Track
Selector panel might look very different, depending on the nature of
the source material or the work under way in the sequence.
Source Track Monitor buttons
Source Track buttons
Sync Lock and Lock buttons
Record Track buttons
Record Track Monitor buttons
Timecode button
Figure 6-5 Timeline Track Selector Panel
The source side (left side) of the panel displays only those tracks
available for the clip currently loaded and displayed in the Source
monitor. For instance, a clip that has audio digitized for track A1 only
does not display an A2 track in the Track Selector panel.
The record side of the panel displays only those tracks curr ently in use
for the sequence. However, if you edit source material with a track
selected that does not yet exist on the record side (A3 or V2, in the
previous example), by default the track appears on the record side
after the edit takes place.
A clip (or sequence) needs to be loaded in the Source and Record
monitors to display both track panels.
97
Page 98

Selecting Tracks
You can select tracks on either the record side or the source side as
follows:
• You can edit selected tracks on the source side directly into the
sequence, assuming you have selected parallel tracks on the
record side.
• You cannot edit deselected tracks on the source side into the
sequence, regardless of record track selections.
• You cannot edit deselected tracks on the record side, regardless of
source track selections.
There are four methods for selecting tracks:
• Click any deactivated Track Selector button to select it. Click any
activated Track Selector button to deselect it.
• Lasso the Track Selector buttons by dragging the pointer to the
right and down, making sure to select multiple Track Selector
buttons at once. Make sure the lasso box appears with the pointer.
• With the Timeline window active, choose Select All Tracks from
the Edit menu or press Ctrl+A to select all tracks on the record
side.
• With the Timeline window active, use the keys on the keyboard
corresponding to each track to select and deselect tracks. To see
the default Keyboard settings, double-click Keyboard in the
Settings scroll list of the Project window.
98
Page 99
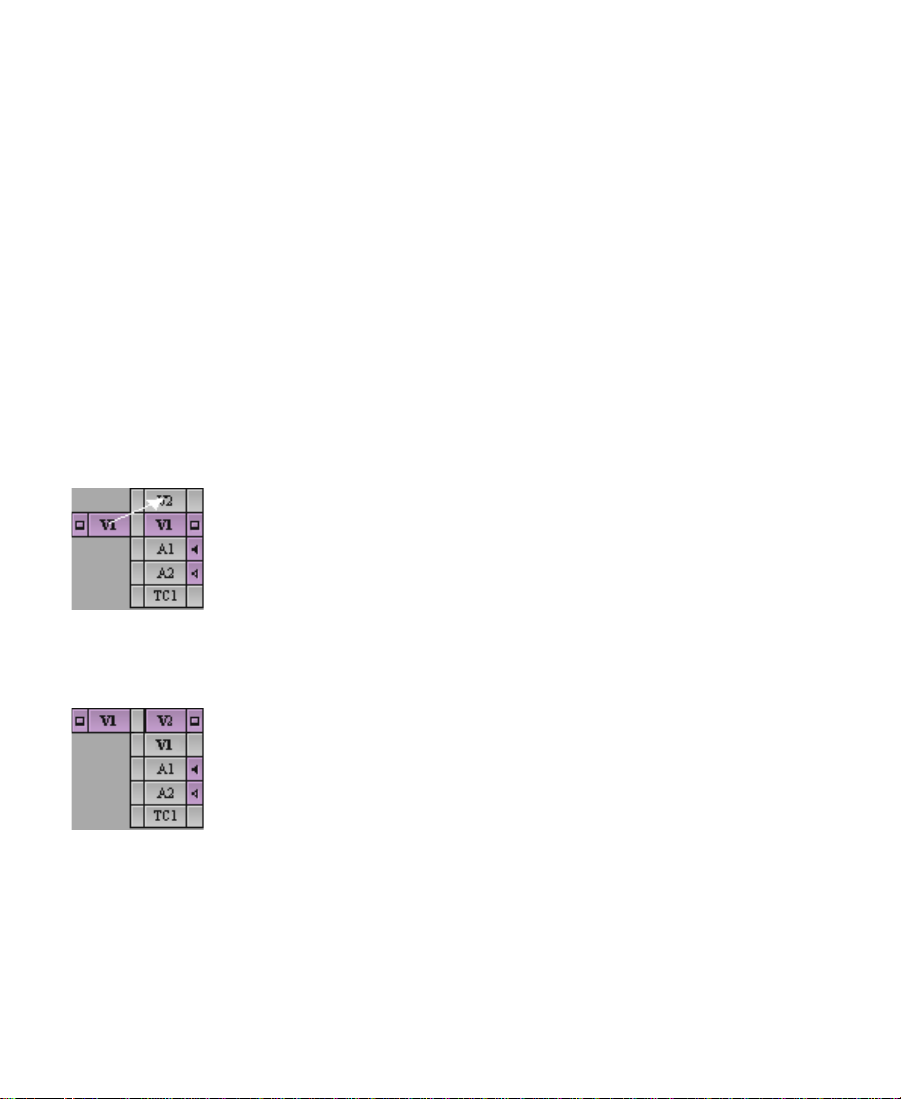
For example, you might select the source and record tracks for V1, A1,
and A2 to edit video and audio from the source clip into the sequence.
Select only V1 source and record tracks to edit video without sound.
Or, select only A1 and A2 to edit the sound without the video.
n
Patching Tracks
Selected tracks change color, becoming lighter.
When working with multiple tracks, you occasionally encounter a
circumstance where you must edit source audio or video onto a track
other than the parallel track displayed in the Track Selector panel. To
edit the source material onto another record track above or below it,
you must patch the source track to the targeted record track.
You can perform only one patch per edit, but there is no limit to the
number of times you can patch from the same source track. Audio can
patch only to audio, and video only to video.
To perform a patch:
t Drag from a source track (audio or video) to the targeted record
track (a white arrow appears during the patch).
The selected source track moves beside the record track to which it is
patched as soon as you release the mouse. The patched track remains
highlighted in preparation for your edit. You can proceed to select any
other tracks required for the edit.
To undo a patch:
1. Click directly in the Record monitor.
2. Manually repatch to the previous track.
99
Page 100

n
When you are patching from one video track to another, the Monitor icon
moves to the track to which you patch. Be sure to return the icon to the
topmost track when necessary to play back and output all video tracks.
Monitoring Tracks
You determine the monitoring of tracks by clicking the monitor
column of either the source-side or record-side tracks to activate or
deactivate the Monitor icons.
Video Track Monitor button
with Monitor icon
Audio Track Monitor
button with black
Speaker icon
The track monitor determines what you see and hear during playback.
You can turn track monitors off at any time to monitor only audio or
only video during editing. When there are multiple tracks, all tracks
under the monitored track are active during playback.
Audio Track Monitor button
with hollow Speaker icon
n
When you edit with multiple tracks, you can activate the monitor on a
lower track to monitor only that track. This is especially useful when
you have multiple layers of video effects and need to see one track
without the additional layers.
If you reposition the Monitor icon, be sure to return it to the topmost track to
view, render, or record all the tracks together. Unmonitored tracks are not
included in playback.
100
 Loading...