

Page 1

™
Avid® MediaStream
Version 3.2x Software Installation Guide
MediaStream Network Storage Systems
MediaStream Storage Independent Systems
make manage move | media
™
Avid
®
Page 2

Copyright and Disclaimer
Product specifications are subject to change without notice and do not represent a commitment on the part of
Avid Technology, Inc.
The software described in this document is furnished under a license agreement. You can obtain a copy of that license by
visiting Avid's Web site at www.avid.com. The terms of that license are also available in the product in the same directory as
the software. The software may not be reverse assembled and may be used or copied only in accordance with the terms of the
license agreement. It is against the law to copy the software on any medium except as specifically allowed in the license
agreement.
This document is protected under copyright law. An authorized licensee of Avid MediaSteam may reproduce this publication
for the licensee’s own use in learning how to use the software. This document may not be reproduced or distributed, in whole
or in part, for commercial purposes, such as selling copies of this document or providing support or educational services to
others. This document is supplied as a guide for Avid MediaSteam. Reasonable care has been taken in preparing the
information it contains. However, this document may contain omissions, technical inaccuracies, or typographical errors. Avid
Technology, Inc. does not accept responsibility of any kind for customers’ losses due to the use of this document. Product
specifications are subject to change without notice.
Copyright © 2006 Avid Technology, Inc. and its licensors. All rights reserved.
The following disclaimer is required by Sam Leffler and Silicon Graphics, Inc. for the use of their TIFF library:
Copyright © 1988–1997 Sam Leffler
Copyright © 1991–1997 Silicon Graphics, Inc.
Permission to use, copy, modify, distribute, and sell this software [i.e., the TIFF library] and its documentation for any purpose
is hereby granted without fee, provided that (i) the above copyright notices and this permission notice appear in all copies of
the software and related documentation, and (ii) the names of Sam Leffler and Silicon Graphics may not be used in any
advertising or publicity relating to the software without the specific, prior written permission of Sam Leffler and Silicon
Graphics.
THE SOFTWARE IS PROVIDED “AS-IS” AND WITHOUT WARRANTY OF ANY KIND, EXPRESS, IMPLIED OR
OTHERWISE, INCLUDING WITHOUT LIMITATION, ANY WARRANTY OF MERCHANTABILITY OR FITNESS FOR A
PARTICULAR PURPOSE.
IN NO EVENT SHALL SAM LEFFLER OR SILICON GRAPHICS BE LIABLE FOR ANY SPECIAL, INCIDENTAL, INDIRECT
OR CONSEQUENTIAL DAMAGES OF ANY KIND, OR ANY DAMAGES WHATSOEVER RESULTING FROM LOSS OF USE,
DATA OR PROFITS, WHETHER OR NOT ADVISED OF THE POSSIBILITY OF DAMAGE, AND ON ANY THEORY OF
LIABILITY, ARISING OUT OF OR IN CONNECTION WITH THE USE OR PERFORMANCE OF THIS SOFTWARE.
The following disclaimer is required by the Independent JPEG Group:
Portions of this software are based on the work of the Independent JPEG Group.
This Software may contain components licensed under the following conditions:
Copyright © 1989 The Regents of the University of California. All rights reserved.
Redistribution and use in source and binary forms are permitted provided that the above copyright notice and this paragraph
are duplicated in all such forms and that any documentation, advertising materials, and other materials related to such
distribution and use acknowledge that the software was developed by the University of California, Berkeley. The name of the
University may not be used to endorse or promote products derived from this software without specific prior written
permission. THIS SOFTWARE IS PROVIDED ``AS IS'' AND WITHOUT ANY EXPRESS OR IMPLIED WARRANTIES,
INCLUDING, WITHOUT LIMITATION, THE IMPLIED WARRANTIES OF MERCHANTABILITY AND FITNESS FOR A
PARTICULAR PURPOSE.
Copyright © 1989, 1991 by Jef Poskanzer.
Permission to use, copy, modify, and distribute this software and its documentation for any purpose and without fee is hereby
granted, provided that the above copyright notice appear in all copies and that both that copyright notice and this permission
notice appear in supporting documentation. This software is provided “as is” without express or implied warranty.
Copyright 1995, Trinity College Computing Center. Written by David Chappell.
Permission to use, copy, modify, and distribute this software and its documentation for any purpose and without fee is hereby
granted, provided that the above copyright notice appear in all copies and that both that copyright notice and this permission
notice appear in supporting documentation. This software is provided “as is” without express or implied warranty.
2
Page 3

Copyright 1996 Daniel Dardailler.
Permission to use, copy, modify, distribute, and sell this software for any purpose is hereby granted without fee, provided that
the above copyright notice appear in all copies and that both that copyright notice and this permission notice appear in
supporting documentation, and that the name of Daniel Dardailler not be used in advertising or publicity pertaining to
distribution of the software without specific, written prior permission. Daniel Dardailler makes no representations about the
suitability of this software for any purpose. It is provided “as is” without express or implied warranty.
Modifications Copyright 1999 Matt Koss, under the same license as above.
Copyright © 1991 by AT&T.
Permission to use, copy, modify, and distribute this software for any purpose without fee is hereby granted, provided that this
entire notice is included in all copies of any software which is or includes a copy or modification of this software and in all
copies of the supporting documentation for such software.
THIS SOFTWARE IS BEING PROVIDED “AS IS”, WITHOUT ANY EXPRESS OR IMPLIED WARRANTY. IN PARTICULAR,
NEITHER THE AUTHOR NOR AT&T MAKES ANY REPRESENTATION OR WARRANTY OF ANY KIND CONCERNING THE
MERCHANTABILITY OF THIS SOFTWARE OR ITS FITNESS FOR ANY PARTICULAR PURPOSE.
This product includes software developed by the University of California, Berkeley and its contributors.
The following disclaimer is required by Nexidia Inc.:
© 2006 Nexidia. All rights reserved.
Manufactured under license from the Georgia Tech Research Corporation, U.S.A. Patent Pending.
The following disclaimer is required by Paradigm Matrix:
Portions of this software licensed from Paradigm Matrix.
The following disclaimer is required by Ray Sauers Associates, Inc.:
“Install-It” is licensed from Ray Sauers Associates, Inc. End-User is prohibited from taking any action to derive a source code
equivalent of “Install-It,” including by reverse assembly or reverse compilation, Ray Sauers Associates, Inc. shall in no event
be liable for any damages resulting from reseller’s failure to perform reseller’s obligation; or any damages arising from use or
operation of reseller’s products or the software; or any other damages, including but not limited to, incidental, direct, indirect,
special or consequential Damages including lost profits, or damages resulting from loss of use or inability to use reseller’s
products or the software for any reason including copyright or patent infringement, or lost data, even if Ray Sauers Associates
has been advised, knew or should have known of the possibility of such damages.
The following disclaimer is required by Videomedia, Inc.:
“Videomedia, Inc. makes no warranties whatsoever, either express or implied, regarding this product, including warranties
with respect to its merchantability or its fitness for any particular purpose.”
“This software contains V-LAN ver. 3.0 Command Protocols which communicate with V-LAN ver. 3.0 products developed by
Videomedia, Inc. and V-LAN ver. 3.0 compatible products developed by third parties under license from Videomedia, Inc. Use
of this software will allow “frame accurate” editing control of applicable videotape recorder decks, videodisc recorders/players
and the like.”
The following disclaimer is required by Altura Software, Inc. for the use of its Mac2Win software and Sample
Source Code:
©1993–1998 Altura Software, Inc.
The following disclaimer is required by 3Prong.com Inc.:
Certain waveform and vector monitoring capabilities are provided under a license from 3Prong.com Inc.
The following disclaimer is required by Interplay Entertainment Corp.:
The “Interplay” name is used with the permission of Interplay Entertainment Corp., which bears no responsibility for Avid
products.
This product includes portions of the Alloy Look & Feel software from Incors GmbH.
This product includes software developed by the Apache Software Foundation (http://www.apache.org/
© DevelopMentor
).
3
Page 4

This product may include the JCifs library, for which the following notice applies:
JCifs © Copyright 2004, The JCIFS Project, is licensed under LGPL (http://jcifs.samba.org/). See the LGPL.txt file in the Third
Party Software directory on the installation CD.
Avid Interplay contains components licensed from LavanTech. These components may only be used as part of and in
connection with Avid Interplay.
Attn. Government User(s). Restricted Rights Legend
U.S. GOVERNMENT RESTRICTED RIGHTS. This Software and its documentation are “commercial computer software” or
“commercial computer software documentation.” In the event that such Software or documentation is acquired by or on behalf
of a unit or agency of the U.S. Government, all rights with respect to this Software and documentation are subject to the terms
of the License Agreement, pursuant to FAR §12.212(a) and/or DFARS §227.7202-1(a), as applicable.
Trademarks
888 I/O, Adrenaline, AirPlay, AirSPACE, AirSPACE HD, AirSpeed, AniMatte, AudioSuite, AudioVision, AutoSync, Avid,
Avid DNA, Avid DNxcel, Avid DNxHD, AVIDdrive, AVIDdrive Towers, Avid DS Assist Station, Avid ISIS,
Avid Learning Excellerator, Avid Liquid, Avid Mojo, AvidNet, AvidNetwork, Avid Remote Response, AVIDstripe, Avid Unity,
Avid Unity ISIS, Avid Xpress, AVoption, AVX, CamCutter, ChromaCurve, ChromaWheel, DAE, Dazzle, Deko, DekoCast, D-Fi,
D-fx, DigiDelivery, Digidesign, Digidesign Audio Engine, Digidesign Intelligent Noise Reduction, DigiDrive,
Digital Nonlinear Accelerator, DigiTranslator, DINR, DNxchange, do more, D-Verb, Equinox, ExpertRender, Face Robot,
FieldPak, Film Composer, FilmScribe, FluidMotion, HIIP, HyperSPACE, HyperSPACE HDCAM, IllusionFX,
Image Independence, iNEWS, iNEWS ControlAir, Instinct, Interplay, Intraframe, iS9, iS18, iS23, iS36, LaunchPad, Lightning,
Lo-Fi, Magic Mask, make manage move | media, Marquee, Matador, Maxim, MCXpress, Media Browse, Media Composer,
MediaDock, MediaDock Shuttle, Media Fusion, Media Illusion, MediaLog, Media Reader, Media Recorder, MEDIArray,
MediaShare, MediaStream, Meridien, MetaSync, MissionControl, NaturalMatch, Nearchive, NetReview, NewsCutter, Nitris,
OMF, OMF Interchange, OMM, Open Media Framework, Open Media Management, PCTV, Pinnacle MediaSuite,
Pinnacle Studio, Pinnacle Systems, ProEncode, Pro Tools, QuietDrive, Recti-Fi, RetroLoop, rS9, rS18, Sci-Fi, ScriptSync,
SecureProductionEnvironment, Show Center, Softimage, Sound Designer II, SPACE, SPACEShift, SpectraGraph,
SpectraMatte, SteadyGlide, Symphony, TARGA, Thunder, Trilligent, UnityRAID, Vari-Fi, Video RAID, Video Slave Driver,
VideoSPACE, and Xdeck are either registered trademarks or trademarks of Avid Technology, Inc. in the United States and/or
other countries.
Windows is either a registered trademark or trademark of Microsoft Corporation in the United States and/or other countries. All
other trademarks contained herein are the property of their respective owners.
Avid MediaStream Version 3.2x Software Installation Guide • 0130-07713-01 Rev. A • October 2006
4
Page 5

Contents
Official Notices and Warranties . . . . . . . . . . . . . . . . . . . . . . . . . . . . . . . . . 7
Software License Agreement . . . . . . . . . . . . . . . . . . . . . . . . . . . . . . . . . . . . . . . . . . . 7
Limitation of Liability . . . . . . . . . . . . . . . . . . . . . . . . . . . . . . . . . . . . . . . . . . . . . . . . . . 8
Chapter 1 Introduction . . . . . . . . . . . . . . . . . . . . . . . . . . . . . . . . . . . . . . . . . . . . . . . . . 9
Before You Begin . . . . . . . . . . . . . . . . . . . . . . . . . . . . . . . . . . . . . . . . . . . . . . . . . . . 10
Software Version Numbers . . . . . . . . . . . . . . . . . . . . . . . . . . . . . . . . . . . . . . . . . . . . 10
System Version Number . . . . . . . . . . . . . . . . . . . . . . . . . . . . . . . . . . . . . . . . . . 10
MSi Version Number . . . . . . . . . . . . . . . . . . . . . . . . . . . . . . . . . . . . . . . . . . . . . 10
FSC Version Number . . . . . . . . . . . . . . . . . . . . . . . . . . . . . . . . . . . . . . . . . . . . . 11
MSS Version Number. . . . . . . . . . . . . . . . . . . . . . . . . . . . . . . . . . . . . . . . . . . . . 11
Long File Names . . . . . . . . . . . . . . . . . . . . . . . . . . . . . . . . . . . . . . . . . . . . . . . . 11
Chapter 2 MSi Software Upgrade . . . . . . . . . . . . . . . . . . . . . . . . . . . . . . . . . . . . . . . . 13
Adjust the MSi Computer’s Monitor Resolution (15-inch Monitors) . . . . . . . . . . 16
Chapter 3 FSC and MSS Upgrade . . . . . . . . . . . . . . . . . . . . . . . . . . . . . . . . . . . . . . . 17
Prepare for FSC Upgrade . . . . . . . . . . . . . . . . . . . . . . . . . . . . . . . . . . . . . . . . . . . . . 17
Upgrade FSCs on 8000 Network Storage . . . . . . . . . . . . . . . . . . . . . . . . . . . . . 19
Upgrade FSC on 8000 Storage Independent. . . . . . . . . . . . . . . . . . . . . . . . . . . 24
FSC Configuration (8000si only) . . . . . . . . . . . . . . . . . . . . . . . . . . . . . . . . . . . . 29
Upgrade the MediaStream Servers. . . . . . . . . . . . . . . . . . . . . . . . . . . . . . . . . . . . . . 34
Initial Checks . . . . . . . . . . . . . . . . . . . . . . . . . . . . . . . . . . . . . . . . . . . . . . . . . . . 34
Back Up Site Files . . . . . . . . . . . . . . . . . . . . . . . . . . . . . . . . . . . . . . . . . . . . . . . 35
Select the Required Software. . . . . . . . . . . . . . . . . . . . . . . . . . . . . . . . . . . . . . . 36
Start the Upgrade . . . . . . . . . . . . . . . . . . . . . . . . . . . . . . . . . . . . . . . . . . . . . . . . . . . 37
PMON Upgrade. . . . . . . . . . . . . . . . . . . . . . . . . . . . . . . . . . . . . . . . . . . . . . . . . . . . . 39
Page 6

Upgrade ConnectPlus Gateways . . . . . . . . . . . . . . . . . . . . . . . . . . . . . . . . . . . . . . . 41
Upgrade the Gateway on an 8000NS System. . . . . . . . . . . . . . . . . . . . . . . . . . 41
Upgrade Gateway on an 8000Si (Internal and/or External). . . . . . . . . . . . . . . . 42
Gateway Configuration (8000si) . . . . . . . . . . . . . . . . . . . . . . . . . . . . . . . . . . . . 45
Chapter 4 Palladium Store 1000 Firmware Upgrade. . . . . . . . . . . . . . . . . . . . . . . . . 47
Run RAID Patrol Utility. . . . . . . . . . . . . . . . . . . . . . . . . . . . . . . . . . . . . . . . . . . . . . . 51
6
Page 7

Official Notices and Warranties
Software License Agreement
IMPORTANT-READ CAREFULLY: This Software License Agreement is a legal
agreement between You and Pinnacle (or its suppliers). This System contains certain
Pinnacle computer software (“Software”), associated media, printed materials, and
electronic documentation. By using the Software, You agree to be bound by the terms of this
Software License Agreement. If You do not agree to the terms of this Software License
Agreement, Pinnacle is unwilling to license the Software to You. In such case, You may not
use or copy the Software. This system also contains certain third party software, which is
provided to You upon the condition that You agree to the terms outlined in the third party
software licenses included with the materials shipped with the System.
License: Pinnacle grants to You a nonexclusive, personal, perpetual, nontransferable,
limited license to use the installed Software exclusively on hardware on which Pinnacle has
loaded the Software, or other hardware on which Pinnacle has authorized it to be loaded, but
solely in connection with the operation of Your internal business, and not for the benefit of
any third party. If the contract, purchase order or invoice specifies the number of licenses
granted or seats or channels authorized, You may only use the specified number of copies of
the Software or specified number of channels or seats and must obtain additional licenses
from Pinnacle for use of any additional copies, seats or channels. Such Software may only
be enabled by Pinnacle or its authorized agent. Pinnacle and its licensors retain all right, title
and interest in and to all Software, but title to the media on which the Software is delivered
is transferred to You.
Restrictions: The Software is copyrighted and may contain material that is protected by
patent, trade secret or other laws pertaining to proprietary rights. You may not copy the
Software, except that it may make a single copy for archival purposes. You may not modify
the Software or permit or assist any third party in doing so. You may not decompile, reverse
engineer, disassemble, or otherwise reduce the Software to source code or other human-
Page 8

Official Notices and Warranties
readable form, or attempt or permit any third party to do so. Any violation of this Software
license shall be a material breach and shall immediately entitle Pinnacle to exercise any
remedy that may exist at law or in equity.
Copyright: All title and copyrights in the Software (and any copies thereof) and the
accompanying printed materials are owned by Pinnacle. All rights not specifically granted
under this Software License Agreement are reserved by Pinnacle.
Limited Warranty: Pinnacle warrants that (a) the Software will perform substantially in
accordance with the published specifications for a period of one year
receipt and (b) any Pinnacle hardware will be free from defects in materials and
workmanship under normal use and service for a period of one year
This warranty will not apply to repair or replacement necessitated by accident, disaster,
improper or inadequate maintenance, customer or customer-supplied interfacing or
machines, unauthorized modifications or repairs, improper electrical current, misuse, abuse
or improper installation. This warranty is personal to You and may not be assigned or
transferred. Pinnacle does not warrant that the Software will operate error-free.
THE LIMITED WARRANTY SET FORTH HEREIN IS THE ONLY WARRANTY,
EXPRESS, IMPLIED OR STATUTORY THAT PINNACLE MAKES WITH RESPECT
TO THE PRODUCTS. ALL IMPLIED WARRANTIES, INCLUDING, BUT NOT
LIMITED TO, THE IMPLIED WARRANTIES OF MERCHANTABILITY, FITNESS
FOR A PARTICULAR PURPOSE AND NONINFRINGEMENT, ARE DISCLAIMED.
from the date of
from the date of receipt.
Limitation of Liability
PINNACLE SHALL NOT BE LIABLE FOR INDIRECT, SPECIAL, INCIDENTAL, OR
CONSEQUENTIAL DAMAGES; FOR DAMAGES THAT DIRECTLY OR
INDIRECTLY ARISE FROM YOUR USE OF, OR INABILITY TO USE, THE SYSTEM;
FOR COMMERCIAL LOSS OF ANY KIND; FOR THE PROCUREMENT OF
SUBSTITUTE GOODS--WHETHER ARISING IN TORT, CONTRACT OR ANY
OTHER LEGAL THEORY, EVEN IF PINNACLE HAS BEEN ADVISED OF THE
POSSIBILITY OF SUCH DAMAGES. IN ANY EVENT, PINNACLE'S LIABILITY
SHALL BE LIMITED TO THE AMOUNT ACTUALLY PAID BY YOU FOR THE
SYSTEM GIVING RISE TO ANY SUCH DAMAGE. THIS LIMITATION IS INTENDED
TO LIMIT PINNACLE'S LIABILITY AND SHALL APPLY NOTWITHSTANDING
ANY FAILURE OF ESSENTIAL PURPOSE OF ANY LIMITED REMEDY.
8
Page 9

Chapter 1
Introduction
This guide provides instructions for upgrading the MediaStream Network Storage (NS)
System and the MediaStream Storage Independent (Si) System to software version
SAN 3.2x or the current software release. Software releases update all or any combination of
the following components:
• The MediaStream Interface (MSi) computer
• The File System Controllers (FSC)
• The MediaStream Server (MSS)
• The Palladium Store (PS) 1000 Firmware
• The ConnectPlus/gateway
Read the release notes to identify current release revision numbers and to note any special
instructions with the release. The MediaStream Server Software disc contains release
for the main release and all patches in the :\doc directory.
There are two Network Storage System upgrade CDs. One contains the MSS and MSi
software upgrades. The FSC Program CD contains the FSC software upgrade.
notes
c
As part of the system upgrade, you need to upgrade any gateways (FTP servers) when
you upgrade the MediaStream Servers. If you have a ConnectPlus product, be sure
that you have an upgrade CD for the gateway before you start the system upgrade.
Page 10

Chapter 1 Introduction
Before You Begin
See the Release Notes on the upgrade CDs for the latest information on the
changes, features, and issues regarding this software release.
c
n
All of the upgrades for your system must be performed at the same time. Otherwise,
your system’s integrity could be compromised.
Upgrade to SAN 3.2x requires your system to be running at least SAN version 3.01. If you
running an earlier revision, you must upgrade to version 3.01 first and perform its
are
associated File Migration procedure before continuing. See the MediaStream Network
Storage System 3.01 Installation Guide.
The upgrade must be completed in the following order.
1. Upgrade the MSi
2. Upgrade FSCs
3. Upgrade MSS and gateways (ConnectPlus products)
4. Upgrade Palladium Store 1000 firmware
Software Version Numbers
The numbering convention for MediaStream system software is as follows:
System Version Number
0X.YZ
For system releases X is the current major release number, Y is the minor release number
and Z indicates a patch number. A complete upgrade on the system is necessary for any
change in the revision number.
MSi Version Number
A.X.YZ
A indicates MSi software; X is the current major release number; Y is the minor release
number; and Z indicates the patch number. A complete upgrade on the device is necessary
for any change in the revision number.
10
Page 11

FSC Version Number
G.0X.0Y.ZZ
G indicates FSC software; X is the current major release number; Y is the minor release
number; and Z indicates the patch number. A complete upgrade on the device is necessary
for any change in the revision number.
MSS Version Number
C.XX.YZ
The initial C indicates that this software is for use with the MediaStream Server System.
XX is the major revision of software. If you are installing software that has a different major
number than the software you are currently running, you must check with your automation
vendor before installing this software.
Y is the minor revision number. A change in the minor number indicates minor feature
changes and bug fixes. A change of minor release does not include any changes that will
affect control of the servers via automation.
Software Version Numbers
Z is a patch level; the Z number indicates the number of patches installed on top of the
minor release. Installing additional patches does not require a complete re-install of the
software.
Long File Names
Versions later than C.15.00 provide for the use of longer (32-character) file names.
c
Do not enable the longer file names feature without approval from your automation
vendor. Their software might not support its use or may need configuration changes to
accommodate it. If desired, the MSi application can be then enabled to allow it to
create and reference these longer file names. You can do so by selecting
Setup/Configuration from the application’s title bar and selecting the Long File Names
option in the dialog box.
11
Page 12

Chapter 1 Introduction
12
Page 13
Chapter 2
MSi Software Upgrade
MSi software updates take about three minutes to perform.
To update the MSi software:
1. Close all applications and exit from the MSi application.
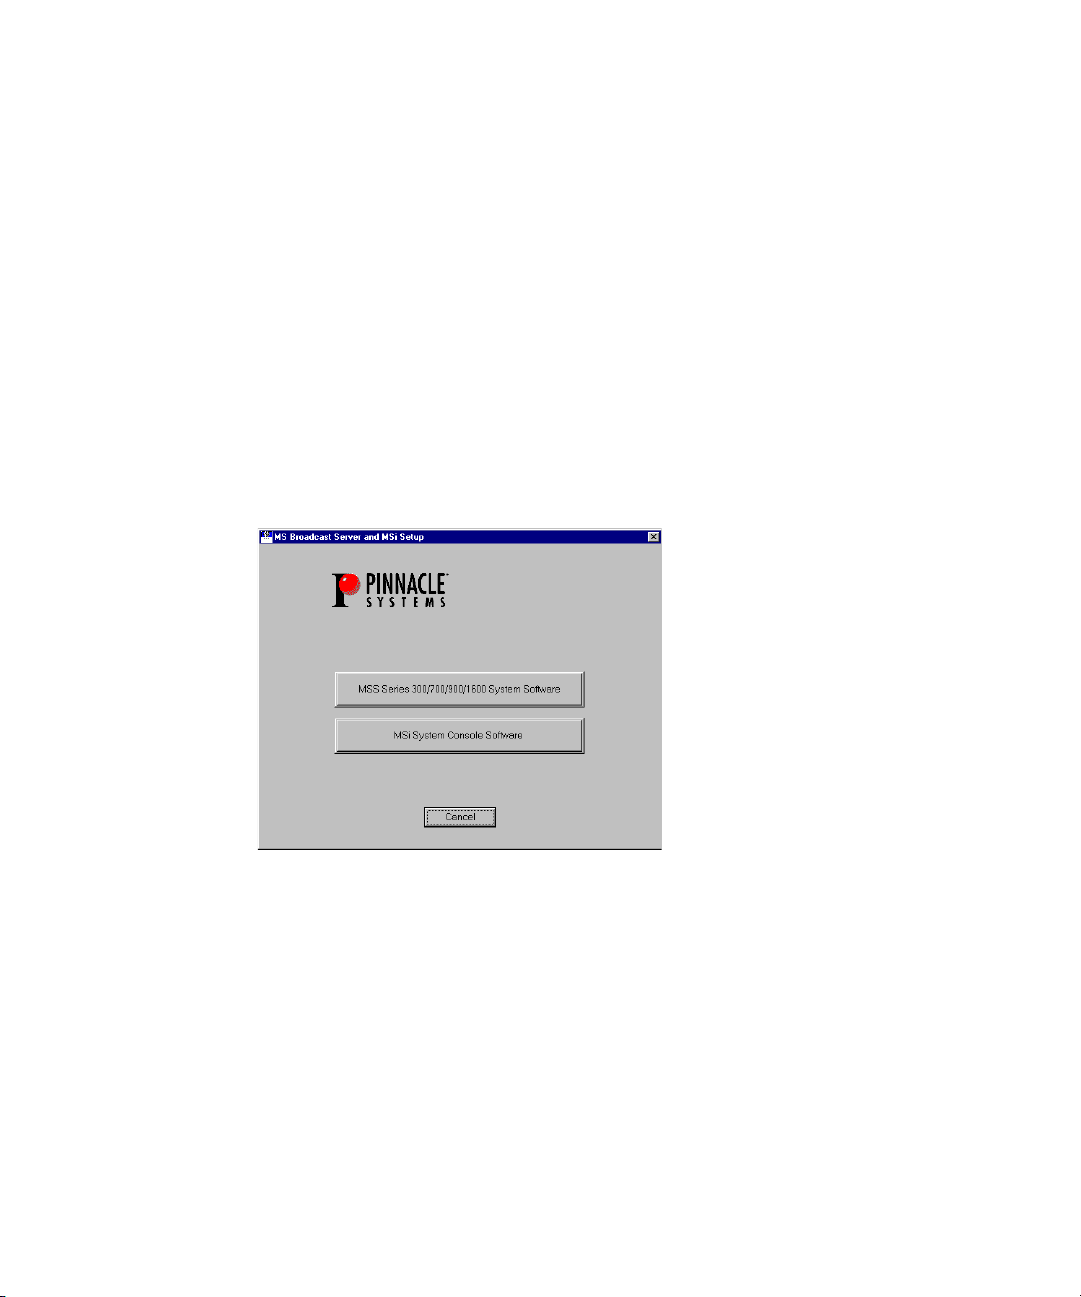
2. Insert the MSi upgrade CD into the drive. The setup program starts automatically.
3. Click the MSi System Console Software button. The MSi Setup program runs.
4. A message might appear saying that a previous install is detected. Follow the
instructions to back up your old configuration files before proceeding.
Page 14
Chapter 2 MSi Software Upgrade
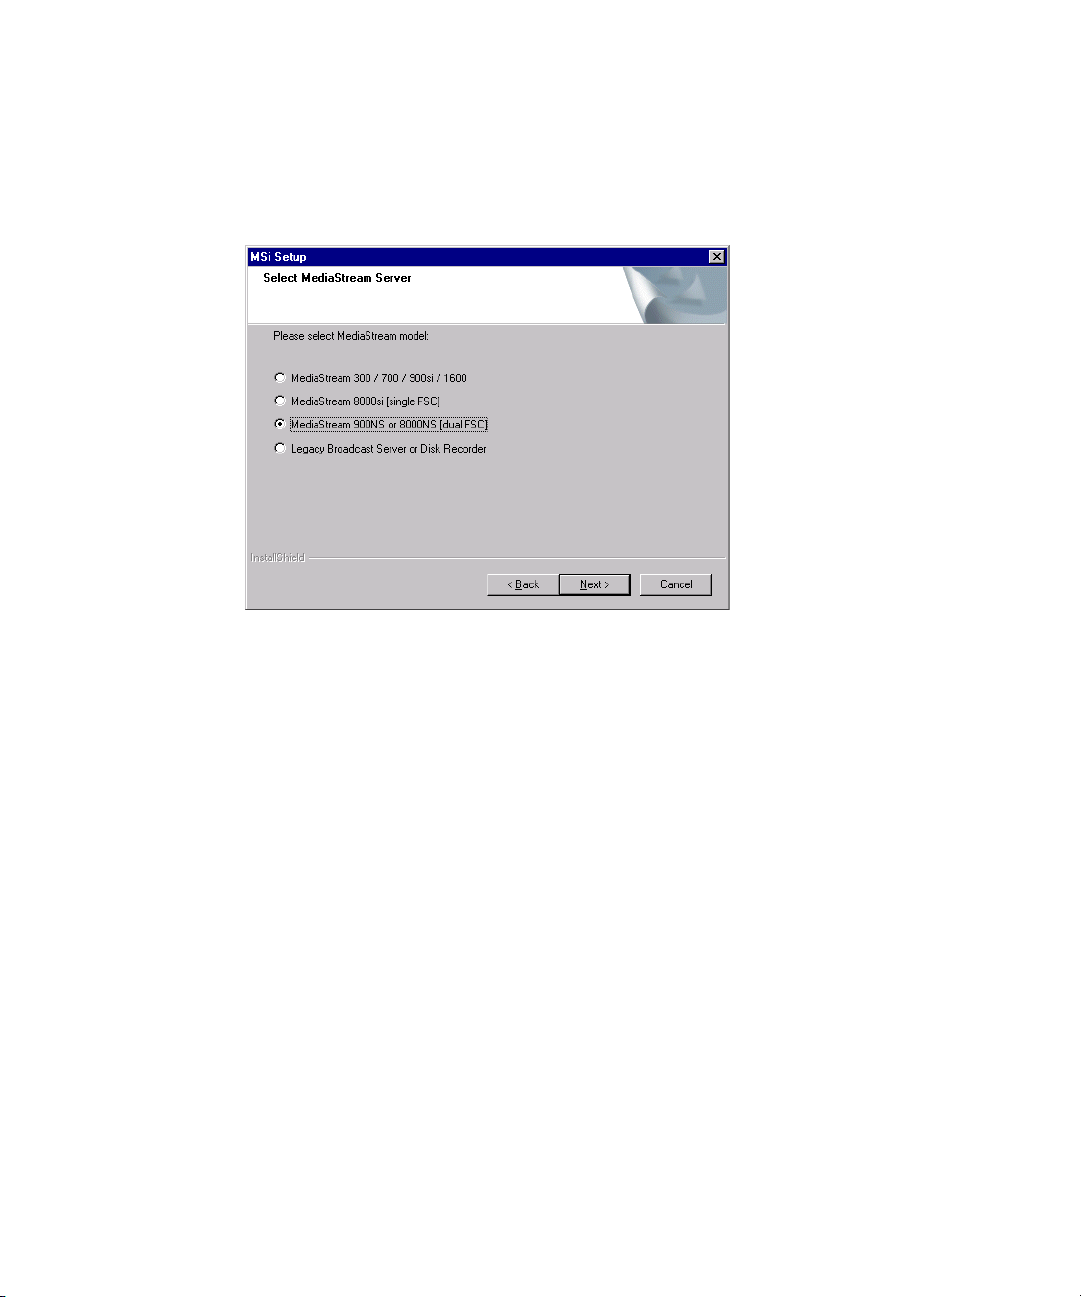
5. Choose the appropriate MS model from the list (8000si or 8000NS) and click Next.
- MediaStream 8000si — choose MediaStream 8000si [single FSC]
- MediaStream 8000NS — choose MediaStream 900NS or 8000NS [dual FSC]
6. Click Yes to display the Release Notes, otherwise click No.
14
7. Click Next to start the installation, which takes less than a minute to complete.
8. Click OK at the MSi Setup Complete pop-up window.
9. Click Yes, I want to restart my computer now.
10. After the MSi PC successfully restarts, double-click the MSi icon in the desktop
window or select MSi from the Start Menu.
Page 15

11. The first time that you start the MSi application, you might be prompted to set up the
configuration. When asked if you want to Enter MSi configuration, click OK. From the
main menu, select Setup > Configuration.
n
For instructions on configuring MSi, see Chapter 6 of the MediaStream Server 8000 Site
Preparation, Installation and Reference Guide or Chapter 3 of the MediaStream Server
8000Si Site Preparation, Installation and Reference Guide.
12. If you have any 15-in monitors running MSi, adjust them as described in the following
section.
15
Page 16

Chapter 2 MSi Software Upgrade
Adjust the MSi Computer’s Monitor Resolution (15-inch Monitors)
If you are using a 15-inch monitor, adjust the screen resolution to 1024 by 768.
To adjust the screen resolution:
1. Place your mouse on an area of the Windows desktop that has only the background
color and right-click. Select Properties from the menu.
2. Select the Settings tab in the Display Properties dialog box.
16
3. Move the resolution slider to 1024 by 768.
4. Click the Test button and click OK.
5. Click OK in the Testing Mode dialog box. Your desktop is temporarily set to the new
resolution.
6. After the test, click Yes to retain the new display resolution.
Page 17

Chapter 3
FSC and MSS Upgrade
This chapter describes upgrades for several components on your MediaStream System
including the FSC, MSS, and Gateway.
Prepare for FSC Upgrade
Later in the procedure you will need to upgrade any gateways (FTP servers) you have for
this cluster. If you have a ConnectPlus product, before continuing the upgrade be sure that
you have an upgrade CD for the gateway. Also, ensure that you have the MSi and MSS
upgrade CDs ready for use.
n
t From a command window for each FSC run
revision.
- If your revision matches the current release proceed to “Upgrade the MediaStream
Servers” on page 34.
- If your revision does not match the revision required for this release, proceed with
the following procedure.
For 8000si systems there is only one FSC.
fsc_revisions
to verify current software
Page 18

Chapter 3 FSC and MSS Upgrade
To open a command window on a computer,
n
1. Click Start > Run, enter
2. From a command window on either of the FSC computers, enter
These commands are case sensitive.
DATABASE
TCP Port 1315 1325
Role PRIMARY SECONDARY
Connection CONNECTED CONNECTED
Remote DB tcp 10.64.22.2 1325 tcp 10.64.22.1 1315
Operations 133852 138163
Date 3/02/2005 3/02/2005
Time 09:37a 09:37a
Size 39,354,368 39,354,368
SANSERVICE
Status Ready Ready
WATCHDOG
Status ok ok
command
in the text box and click OK.
fsc_status.
n
n
18
- 8000si systems — only one column will display showing a Primary FSC.
- 8000NS systems — determine which FSC is the primary (usually FSC 1) and
which is the secondary (usually FSC 2). The following instructions require that you
know which FSC is the primary FSC and which FSC is secondary. FSC 1 in these
instructions refers to the primary, and FSC 2 refers to the secondary FSC
For 8000NS systems, make sure both FSCs are running in a Ready state before beginning
the upgrade procedure. In the
status of “
“
ok
proceeding.
3. From a command window on FSC 1, stop the FSC by entering
For FSC 8000Si, running
upgrades are not supported for 8000si systems.
Connected
.” If any of these is not displayed, contact Avid MediaStream Support before
FSC 2 is now the only FSC running. It should be running as Primary Alone - Broken.
Use the
fsc_status
,” SANSERVICE Status of “
fsc_status
command to verify this.
fsc_stop
will bring the server off the air. This is normal. On-air
display, they should both have a Connection
Ready
,” and WATCHDOG status of
fsc_stop.
Page 19

Upgrade FSCs on 8000 Network Storage
The FSC software upgrade is an InstallShield program.
Prepare for FSC Upgrade
n
c
If you are upgrading your FSC on an 8000si system see “Upgrade FSC on 8000 Storage
Independent” on page 24.
Do NOT reboot the FSC, even if prompted, until the end of the upgrade procedure.
Follow the instructions for rebooting as given in the following steps.
To install or upgrade the FSC software on an 8000NS:
1. Insert the FSC upgrade CD into the CD-ROM drive of the FSC computer to be
upgraded.
2. Click Yes to confirm the upgrade.
3. Click the Next button to advance through the screens. For the FSC manufacturer’s type,
look at the label on the computer. Select the appropriate manufacturer, or other if the
computer is not an IBM x335 or SuperMicro.
19
Page 20

Chapter 3 FSC and MSS Upgrade
4. Select Install Palladium FSC with VLAN (MSS Network Storage) and click Next.
5. If the Welcome screen for installing the ODBC drivers is displayed, click Next.
c
20
Do NOT reboot the FSC, even if prompted, until the end of the upgrade procedure.
Follow the instructions for rebooting as given in the following steps.
Page 21

Prepare for FSC Upgrade
6. The components to be installed are shown on the display, click Next.
7. When the ODBC Setup Complete screen is displayed, click Finish.
n
8. The Configuration utility starts, click Yes to run Config tool or No to skip Config.
Performing a complete configuration is recommended after a software upgrade, but it will
overwrite your previous fsc.ini file (after creating a time-stamped backup copy in the
C:\fsc\cfg_files directory
reapply them.
). If you had any custom settings in this file, you need to
21
Page 22

Chapter 3 FSC and MSS Upgrade
9. If running config (entered yes in previous step), enter C to select the complete
configuration.
10. When asked if this is a standalone system (8000si) enter
N
for 8000NS system.
11. For NS Systems, enter the cluster number.
Please enter the Cluster number [1..16]: 1
12. For NS Systems, Enter the FSC number: 1 for FSC 1 or 2 for FSC 2.
Please enter the FSC number [1 or 2]: 1
13. Enter the number of MSS server nodes configured for the system.
14. Enter maximum disk system bandwidth. The value is in kilobytes per second, and
depends on your system. The following table gives recommended values for a given
number of RAID arrays.
Recommended Values for the Number of RAID Arrays
Number of RAIDs Kilobytes per Second (KB/s)
1 60,000
2 100,000
3 130,000
4 180,000
5 200,000
6 240,000
22
7 280,000
8 320,000
Contact Avid MediaStream Support if you have any questions on the proper value for
your system.
Page 23

Prepare for FSC Upgrade
When the script finishes running, the following output is displayed:
15. When the script has completed, make sure that the total of all errors is 0.
- If there are any errors, after the FSC upgrade (InstallShield) program is complete,
call Avid MediaStream Support.
- If there are no errors, continue with the upgrade.
16. Close the Config tool window.
17. Select “Yes” and click Finish to reboot the FSC.
18. Remove the FSC upgrade CD from the computer.
f
19. After reboot, open a command window on the FSC and enter
sc_revisions
that the software has been upgraded. Check the current Revision number (listed in the
software release notes on the Installation CD).
20. Enter
fsc_status
to verify that the upgraded FSC is running properly, then repeat the
upgrade procedure on the other FSC.
to verify
23
Page 24

Chapter 3 FSC and MSS Upgrade
21. Wait at least 5 minutes before upgrading the second FSC to allow the databases to
update.
22. Run
fsc_stop
step 1 of “Upgrade FSCs on 8000 Network Storage” on page 19.
on the second FSC. On this second FSC repeat the entire process from
Upgrade FSC on 8000 Storage Independent
If you are upgrading your FSC on an 8000 Network Storage system see “Upgrade FSCs on
8000 Network Storage” on page 19.
To install or upgrade the FSC software on an 8000Si:
c
n
Do NOT reboot the FSC, even if prompted, until the end of the upgrade procedure.
Follow the instructions for rebooting as given in the following steps.
1. Back up the FSC sitefiles using the
This procedure is outlined in Chapter 5 “File System Controller (FSC)” of Media Stream
Server 8000si Site Preparation, Installation and Reference Guide.
2. Run
3. Enter Yes when asked if you want to stop the FSC.
4. Enter Yes when you are warned you are about to take the server off air.
5. Insert the upgrade CD, the installer on the CD auto launches.
6. Click the Next button to advance through the screens.
fsc_stop
to stop the FSC during upgrade
fsc_backup
command.
24
For the FSC manufacturer’s type on an MSS 8000si system, select “Others.”
Page 25

Prepare for FSC Upgrade
7. For FSC type, select “StandAlone (8000si)” and click Next to load the upgrade files.
n
c
The next three steps will only appear if you are performing a clean install on a new or
recovered FSC.
8. When the Welcome screen for installing the ODBC drivers is displayed, click Next.
Do NOT reboot the FSC, even if prompted, until the end of the upgrade procedure.
Follow the instructions for rebooting as given in the following steps.
25
Page 26

Chapter 3 FSC and MSS Upgrade
9. The components to be installed are shown on the display. Click Next.
10. After the ODBC Setup Complete screen is displayed, click Finish.
n
If prompted to close any open windows after this point, close them.
26
Page 27

11. Select Yes to Run the Config tool or No to skip it.
Prepare for FSC Upgrade
n
If this is a clean install choose yes. If this is an upgrade choose no unless directed by support
or release note instructions to choose yes. Choosing yes requires you to reset your network
settings and other configuration settings for your FSC.
12. If you chose Yes, the Configuration utility runs.
A
13. Press
14. When asked if this is a Vortex System?
15. Enter the system number for the FSC. For example, enter
fsc0002
16. Enter maximum disk system bandwidth. The value is in kilobytes per second, and
depends on your system. The recommended value for an MSS 8000si system is 50,000.
to select the complete configuration.
Y/N
.
, enter N.
1
for
fsc0001
or 2 for
27
Page 28

Chapter 3 FSC and MSS Upgrade
When the script finishes running, the following output is displayed:
------------------------------------------------------------------------ Updating the FSC_SA-Name
The current FSC-Name is: FSC0001
------------------------------------------------------------------------ Total of all changes: 17
Total of all errors: 0
FSC_Name-Update is done.
------------------------------------------------------------------------ Updating the Solid TCP Setting
The Solid TCP Entry is: tcp 1315
The Solid Driver DLL is: c:\winnt\system32\sacw3231fe.dll
The Solid Setup DLL is: c:\winnt\system32\sosw3231fe.dll
------------------------------------------------------------------------ Total of all changes: 27
Total of all errors: 0
Solid-Update is done.
------------------------------------------------------------------------ Removing all old Logfiles (\fsc\logs\fsc.log.*)
Total erased files: 0
Total not erasable files: 0
Total of all changes: 27
Total of all errors: 0
Logfile removing done.
------------------------------------------------------------------------ Creating FSC.ini file and saving the old one.
Total of all changes: 28
Total of all errors: 0
Creating the fsc.ini is done.
------------------------------------------------------------------------ Creating solid.ini file and saving the old one.
Total of all changes: 29
Total of all errors: 0
Creating the fsc.ini is done.
------------------------------------------------------------------------ Updating the NTP Settings
NTP Settings created for: FSC0001
------------------------------------------------------------------------ Total of all changes: 35
Total of all errors: 0
NTP-Update is done.
------------------------------------------------------------------------ Creating hosts and lmhosts and saving the old ones.
Total of all changes: 37
Total of all errors: 0
Creating the hosts and lmhosts is done.
------------------------------------------------------------------------ Updating the registry done.
NOTE:
1) If run manually, please reboot.
2) If run with Installshield, please close this window.
-------------------------------------------------------------------------
28
Page 29

Prepare for FSC Upgrade
17. When the script has completed, make sure that the total of all errors is 0, and type
to quit.
If there are any errors, after the FSC upgrade (InstallShield) program is complete,
manually run it a second time. If errors still appear, call Avid MediaStream Support.
18. If you ran the Config tool, choose NO when asked if you want to restart the computer
now, and Finish to complete the upgrade. DO NOT reboot the FSC yet.
If you did not run the config tool, choose yes to reboot the computer.
exit
FSC Configuration (8000si only)
If you ran the configuration tool, you must manually configure the .ini settings and network
settings for the FSC. These instructions describe the configuration using the recommended
network configuration values.
n
If your system is to be configured in other than a default configuration, consult your system
administrator for the appropriate values to enter in the following section.
FSC Networking Values
System No. Host Name IP Address
System 1 fsc0001 10.1.5.130
System 2 fsc0002 10.1.5.131
System 3 fsc0003 10.1.5.132
29
Page 30

Chapter 3 FSC and MSS Upgrade
FSC Networking Values (Continued)
System No. Host Name IP Address
System 4 fsc0004 10.1.5.133
System 5 fsc0005 10.1.5.134
System 6 fsc0006 10.1.5.135
System 7 fsc0007 10.1.5.136
System 8 fsc0008 10.1.5.137
System 9 fsc0009 10.1.5.138
System 10 fsc00010 10.1.5.139
n
1. Modify the following parameters in the file
- LocalHostname: the default “
fsc0001
- DiskProxy0: the name of the MSS. Enter
C:\fsc\cfg_files\fsc.ini
” for System 1
mss0001
for System 1. Sequence as
:
appropriate for additional systems.
- FtpBackupMachine: typically the name of the MSi PC;
msi0001
for System 1
If you have only one MSS8000Si Server, use System 1. For a multiple server environment,
sequence your servers from 1 to the last server in your system (up to 10). If you have more
than 10 servers in your facility, consult with your system administrator or Avid
MediaStream Support.
2. Select Network and Dial-up Connections under Settings on the Start menu.
30
Page 31

Prepare for FSC Upgrade
3. Right-click on “Sec (lan2)” and choose Properties from the menu.
31
Page 32

Chapter 3 FSC and MSS Upgrade
4. Select “Internet Protocol (TCP/IP) from the list, and click Properties.
32
5. Enter the IP Address for the FSC (see “FSC Networking Values” on page 29) and click
OK. You must enter some address here; it is not done automatically.
6. Close the network configuration dialog boxes, right-click on the FSC’s icon in
Windows Explorer, and select Properties from the menu.
Page 33

7. Under the Network Identification tab, click Properties.
Prepare for FSC Upgrade
n
8. Change the value for Computer name: to the hostname of your machine (see “FSC
Networking Values” on page 29), and click OK.
9. When asked whether you want to restart the PC now, click No.
If you are using non-default host names on your system, you must update the hostfile update
the hosts file in C:\winnt\system32\drivers\etc to reflect your changes to network
configuration. This must also be done on the MSi PC and any external gateways you are
using. Consult you system administrator for details.
10. Remove the upgrade CD and reboot the FSC.
11. Open a command window on the FSC, and enter
software has been upgraded. To find the current revision, consult the Release Notes on
the Software Installation CD.
12. Verify the IP address and hostname with the
13. If you had other custom
installer also places a dated copy of the original
directory.
14. When settings are complete, reboot the computer.
fsc.ini
settings, verify that you still have them. The FSC
fsc_revisions
ipconfig
command.
fsc.ini
in the
to verify that the
C:\fsc\cfg_files
33
Page 34

Chapter 3 FSC and MSS Upgrade
Upgrade the MediaStream Servers
Server Node software updates can take an hour or more to complete depending on how
many patches are included with a particular software upgrade. Once completed, the Server
Node can be brought back on-air and the upgrade process procedure can begin on the next
Node in the System.
n
All Server Nodes in the System must be upgraded to the same operating software version to
ensure optimum reliability and performance.
The upgrade process involves two primary steps:
- FTP Transfer Upgrade files from MSi PC to Server Node — Insert a CD ROM disk
- Run the Upgrade process on the Server Node.
This procedure assumes that the MSi application has already been upgraded. If this has not
been done, please do so before installing the server software.
Initial Checks
Open a Console port Telnet Session on the MSi PC and login as root.
To start a Console Telnet session:
1. From the MSi Control application, right-click on the icon of the Server Node you are
upgrading and select Console.
2. A Console session opens. If there is no prompt, press Enter. If you get a login prompt,
login as
of the current directory on the Server Node this will most likely be
After you are logged in, determine the current software revision:
into the MSi PC and follow the instructions on the screen.
root
, with a password of “
.root
”. Otherwise, you should see a return prompt
[root@xxyy /bvs]
34
3. Enter:
4. Note the software version here for future reference: _______________________.
5. Determine the Server Node’s hostname.
revisions -a
-Enter
- Note the displayed hostname here: _______________________.
Before starting this upgrade, arrange for the Server Node to be off-line for about an
hour.
hostname
Page 35

Back Up Site Files
Site files specify a server’s configuration. These files include the bvsrc, hosts, rhosts,
passwd, group and a number of audio and video configuration files. Backing up the site files
ensures that in the event of a problem such as a Boot Disk (the server’s hard disk) failure,
you can quickly restore a server to its configured operating mode.
To back up a server’s site files:
Upgrade the MediaStream Servers
1. Enter the command
root@01 /bvs] sitefiles2file
Operator Name:
No operator name has been specified in the last 24 hours.
Please enter your name at the prompt below. Your name is used to
keep track of who is doing system administration on your
Broadcast Video Server. It will appear in the /bvs/syslog log file.
Please enter your name: ekl
This sitefiles save operation would overwrite the file /tmp/sfiles.cpio.
Is it ok to overwrite this file with the latest sitefiles? (y/n)(def=y): y
sitefiles2file
.
2. If requested to enter your name, enter your name or initials.
3. When prompted if it is OK to overwrite the file /tmp/sfiles.cpio, press Enter.
Wait for the process to complete, it could take a couple of minutes. When it is complete,
the prompt displays:
--->> sitefiles copied to '/tmp/sfiles.cpio':
followed by the root prompt.
4. From the MSi main menu, select Setup > Site Files > Save Sitefiles from Server to
Console PC.
5. In the Save As dialog box that appears, save the file to the following path:
C:\Program Files\Pinnacle\Msi\data\servername.cpio
where servername is your server’s name.
6. Click OK if you are asked to confirm saving sitefiles to PC.
7. A message asking “Is ‘sitefiles2file’ done?” is displayed. Click Yes.
8. After the site files are saved successfully to the PC, a message is displayed. Click OK.
35
Page 36

Chapter 3 FSC and MSS Upgrade
n
9. Drag and drop the
Files\Pinnacle\MSi\data
10. Remove the disk and label it Site Files <Server Hostname>. Date it and store it in a safe
place.
If you have the most recent version of the MSi, you might use the USB port on the rear of the
unit to save your files. Insert a USB drive or other USB compliant storage device in this port
to save sitefiles off the MSi PC.
To copy the upgrade files to the server:
1. Insert the Upgrade CD into the CD-ROM drive. The setup program starts automatically.
2. Select MSS Series System Software.
3. When the Please Enter the MSS Name dialog box is displayed, enter the Server’s
hostname (recorded during initial checks) and click OK.
4. When the Update Source From dialog box is displayed, click OK, which displays the
Update Software Selection dialog box shown in step 1 of “Select the Required
Software” on page 36.
*.cpio
Select the Required Software
The Update Software Selection dialog displays a list of the upgrade software on the CD.
1. In the top pane of the dialog box, select the current Main release in the MediaStream
Server (MSS) Video Server Software check box.
files in the directory
onto the CD-recordable disk.
C:\Program
36
Page 37

Start the Upgrade
2. Options for the software appear in the lower pane. If you click Select All, all of the
software update options listed in the lower pane of the dialog box are selected. Each
program is installed/updated separately.
n
n
If you are upgrading from the previous patch release, it is only necessary to select the
upgrade components you are adding. If you are unsure, click Select All.
3. Click Update. The File Transfer window displays a list of the files being transferred.
The file transfer takes about 10 minutes. The transfer is complete when the window
changes to a display of follow-up text.
4. Select File Transfer Details to check if any errors have occurred. If there are errors,
contact Avid MediaStream Support.
5. Click Next in the Update Software dialog box if another program is to be installed.
Repeat the procedure described above.
6. Click OK to return to the Update Software Selection dialog box.
7. When all of the software has been transferred, click Exit from the Update Software
Selection dialog box and remove the CD from the drive.
Use the Console Port Telnet session on the MSS Node for the upgrade.
8. Reboot the MSS. When the console prompt reappears, enter the
9. When the message “
displayed, press
ESC
Start the Upgrade
stopams
Waiting to start the MSS storage controller?
so that the server software will not start.
command.
” is
c
c
Do not interrupt the upgrade process, which takes about 30 minutes. Periods of
inactivity on the screen are normal. The upgrade process reboots the server twice.
To install the upgrade software:
1. Open a Console port Telnet session on the MSS.
For the v3.20 release only, perform the following commands in Step 2 to set the
checksum for the firmware upgrade.
2. For the v3.20 upgrade only, run the following commands before you run
a. At the
directories.
b. At the
directories.
[root@0801 /]
[root@0801 /releases/C.20.20/bvs
> prompt, enter
cd /releases/C.20.20/bvs
> prompt, enter ls. to list the
upgrademss
. to change
.
37
Page 38

Chapter 3 FSC and MSS Upgrade
c. Enter the command
d. Enter the command
cksum ams.cpio.Z
grep ams.cpio.Z checksum.file
.
.
Your results should look like the following. If the checksums match as shown, run
upgrademss
[root@0801 /] cd /releases/C.20.20/bvs
[root@0801 /releases/C.20.20/bvs] ls
README pmon_var upgrd_2_todo/
ams.cpio.Z release_notes upgrd_3_pending
signature upgrd_4_done/
checksum.file upgrademss vg4install.bin
exe_list.txt upgrd_1_new/ vg4install.kdi
[root@0801 /releases/C.20.20/bvs] cksum ams.cpio.Z
1741002024 163696672 ams.cpio.Z
[root@0801 /releases/C.20.20/bvs] grep ams.cpio.Z checksum.file
1741002024 163696672 ams.cpio.Z
. Contact Avid MediaStream Support if the checksums do not match.
[root@0801 /releases/C.20.20/bvs]
3. Enter the command
upgrademss
4. If you are prompted for an operator name, enter your initials.
5. If asked if you want to overwrite any files, press
6. The upgrade process automatically detects which upgrades are needed. When asked if
you want to install upgrades to your server, press
7. When prompted with the following, enter
Is it ok to reboot the OS off the new disk kernel? (y/n; def=y):
The system completes a reboot off the disk drive.
8. Allow the upgrade to complete. After the final reboot (dependent on number of patches
in the upgrade) the AMS operating system is loaded.
9. After verifying that the server is working properly, back up the server’s site files, See
“Back Up Site Files” on page 35.
38
.
Y
.
Y
and then press
y
:
Enter
.
Page 39

PMON Upgrade
n
If several servers need to be upgraded, upgrade all of them and upgrade RAID Firmware
before saving SiteFiles. The Palladium Store 1000 might not display properly in System
Status window until array firmware is upgraded.
The additional MSS computers can now be upgraded to the current software. Once you have
upgraded MSS 01, the order that you upgrade the other servers does not matter, although
upgrading in order is recommended.
PMON Upgrade
The PMON bootrom monitor of the system controller board may require field upgrade. If
this procedure is required for a particular release, use the MSi TFTP server to accomplish it.
To perform PMON upgrade:
1. On the MSI, start the Pinnacle TFTP application by double clicking the Pinnacle TFTP
Server icon (on the MSi desktop).
2. Enter the IP address or the hostname of the server node.
n
Skip this step for the 8000si.
3. Click the Options button. Under the Server tab, change settings to the following values
if necessary:
- Select Give all files and Take all files
- Set TFTP filesystem root (download path) to D:\kdi
(Make sure the upgrade CD is in the D: drive of the MSi.)
- Click OK to accept changes
4. Leave the TFTP application open on the desktop so that it can accept your TFTP
download process.
ESC
5. Power on the server node, and press
Autoboot command: "diskboot -x -d /dev/sd0 -o100 -l5000 -a100000 -a;g -e 1000"
Press <Enter> to execute or any other key to abort.Restore the
server’s site files as described below.
6. Verify that the four bootrom monitor variables are set as shown below:
a. Enter
set bootaddr
when the following prompt appears:
39
Page 40

Chapter 3 FSC and MSS Upgrade
The boot address is the IP address for the TFTP server. This server runs on the MSi
PC. On an 8000NS system, the correct address is the VLAN address for connection
between the Server Node and the MSi PC. This command should return the
following:
PMON> bootaddr = 10.xx.yy.z
This value is determined by your LAN configuration. The default value for an
8000NS is 10.64.1.5. The default value for an 8000si is 10.1.5.120.
If the value is incorrect, enter the correct value. For example
10.1.5.120
b. Enter set ipaddr
The IP address is the LAN address for the server node. This command returns the
following:
PMON> ipaddr = 10.xx.yy.z
This value is determined by your LAN configuration. The default value for an
8000NS is 10.64.1.3. The default value for an 8000si is 10.1.5.100.
c. Enter
set gateway
The Gateway is the IP address for the external router connection. This command
returns the following:
PMON> gateway = 10.xx.yy.z
This value is determined by your LAN configuration. If the value is incorrect, enter
the correct value.
d. Enter
set netmask
The netmask for MSS Network storage systems should always be set as follows:
PMON> netmask = 255.255.255.0
7. If any of the return variables are incorrect, enter the appropriate
the correct value.
set bootaddr
set
command followed
8. If variables have been changed, enter
reboot
, and press
ESC
when the following prompt
appears:
Autoboot command: "diskboot -x -d /dev/sd0 -o100 -l5000 -a100000 -- a;g -e
1000"
Press <Enter> to execute or any other key to abort.
9. At the
10. Enter
40
PMON>
prompt, enter
netboot -f fff00000 -o 10000 pmon122vg4.elf
set sbsexpert 1
.
.
Page 41

This will begin the TFTP transfer and flash of the PMON.
Upgrade ConnectPlus Gateways
11. At the prompt, enter
12. Enter
reboot
, which puts the changes into operation.
unset sbsexpert
.
13. Start up the server and allow it to start normally.
PMON>
14. If the system does not autoboot, at the
diskboot -x -d/dev/sd0 -o100 -l5000 -a100000 --a;g -e 100020
15. When the system has completed reboot, press
Waiting 00:40 to start the MSS storage controller:
- Press <return> to start the MSS Server immediately.
- Press ESCAPE to end the timeout and bypass the MSS server startup.
{ 0:40} Waiting to start MSS Server. (<Enter>=StartNow or <ESC>=DoNotStart
16. At the prompt enter
installbvs -c
.
prompt, enter:
ESC
at the following prompt:
17. When the prompt returns, the process is complete. Restart the server by entering
stopams
.
Upgrade ConnectPlus Gateways
The procedure for ConnectPlus Gateway upgrade is different for 8000NS systems and
8000si systems. Verify which system you have before proceeding and see the appropriate
section.
Upgrade the Gateway on an 8000NS System
To upgrade a Gateway on an 8000si system see “Upgrade Gateway on an 8000Si (Internal
and/or External)” on page 42.
To upgrade any ConnectPlus Gateways on your 8000NS system:
1. Insert the upgrade CD into the drive. The installer program should run automatically.
2. Click Next when the Welcome screen appears.
3. Click Yes to accept the License Agreement.
The installation files are then copied to your system. A command window opens, and
the installation script runs.
4. When the Set Type dialog appears, choose the correct PC model for your Gateway.
41
Page 42

Chapter 3 FSC and MSS Upgrade
5. Choose the correct system type, either 8000/900ns or 8000si. Click Next.
6. Choose the Fibre Channel Switch type for your system (choose no switch for 8000si
systems). Click Next.
7. If the Digital Signature Not Found dialog appears, choose yes and click Next.
8. When prompted whether you want to run the configuration tool, click No.
n
It is not necessary to run the configuration tool on an upgrade. If this is a clean install, you
might wish to click yes.If so, choose C when the dialog appears and enter the correct values
when prompted. Call MediaStream Support if you have any questions.
9. The installation finishes, and you are asked to restart the system. Select Yes and click
Finish to complete the upgrade.
Upgrade Gateway on an 8000Si (Internal and/or External)
To upgrade a gateway on an 8000NS system see “Upgrade the Gateway on an 8000NS
System” on page 41.
n
This procedure describes installation of the gateway. Your system might have an internal
gateway and/or an external gateway. The procedure for installation is essentially the same.
To upgrade any ConnectPlus Gateways on your 8000Si system:
1. Insert the upgrade CD into the drive. The installer program should run automatically.
2. Click Next when the Welcome screen appears.
3. When the License Agreement appears, read the agreement carefully. If you agree to
accept it, click Yes.
4. When the Setup Type dialog appears asking you to “Choose the model of gateway PC
you are installing:,” select MSi for an internal Gateway; select Intel Xenon 2.8GHz
(Gateway 100) for an external gateway. Click Next.
n
42
If you have an older IBM style PC gateway, select IBM 335 or IBM 330. If you are unsure,
call Avid MediaStream Support.
5. When the Setup Type dialog appears asking you to “Choose the system type:”, select
8000si, then click Next.
6. Select No Switch at the Setup Type Dialog.
7. If the Digital Signature Not Found dialog appears, choose yes and click Next.
8. The installation begins. When the Welcome to the Microsoft XML Parser Setup wizard
screen appears, click Next.
Page 43

Upgrade ConnectPlus Gateways
9. Read the License Agreement that appears for Microsoft XML Parser. If you agree to the
terms, click Yes.
10. Enter your username and organization name. Click Next.
11. Click Install to install the XML Parser.
12. Click Finish to finish installation of Microsoft XML Parser.
13. If this is your first installation of the gateway, click Yes to accept the start of the
configuration tool. If you are updating software and do not want to change your
configuration settings, click No to decline the start of the tool.
14. If the Set System Number dialog appears on the System text entry line, enter the system
number (between 1 and 10). Click Next.
This dialog only appears on a fresh install.
n
This is the number of the 8000si system in your facility. This number must match the system
number you chose when you configured your FSC (see “FSC Networking Values” on
page 29). The System number will determine host names for the gateway(s) connected to the
8000si server. If you are unsure of the value to enter here, consult with Avid MediaStream
Support.
43
Page 44

Chapter 3 FSC and MSS Upgrade
15. The Configuration Tool begins (if you clicked Yes in the preceding step). When
prompted enter
16. At the next prompt for system number, enter the number you previously entered in
step 14.
C
for complete configuration.
n
c
44
For internal gateways the prompt will ask for the MIA number; for external gateways the
prompt will ask for the GWS number. In both cases, this number refers to the system number
entered in
17. The configuration tool completes its changes. Verify that the total of all errors is 0 at the
The configuration tool assumes you are setting your system up in a default
configuration. If this is not the case, consult with your system administrator or Avid
MediaStream Support for assistance.
18. Reboot the PC to complete installation.
step 14.
end of the script.
Page 45

Gateway Configuration (8000si)
To upgrade a Gateway on an 8000si system see “Upgrade Gateway on an 8000Si (Internal
and/or External)” on page 42.
To set or verify configuration parameters for the gateway on an 8000Si system:
t Double-click on the ConnectConfig shortcut on the desktop.
Upgrade ConnectPlus Gateways
On an MSS 8000si system, the dialog will only have an entry for one FSC (fsc0001).
The Configure Utility automatically configures all machine specific settings for networking,
communication and application initialization. This application is especially important to run
since each gateway requires specific network settings.
The Configure application automatically performs the settings required to make each
gateway unique within the overall system architecture. It is a good idea to run this
application after any system upgrades.
45
Page 46

Chapter 3 FSC and MSS Upgrade
46
Page 47

Chapter 4
Palladium Store 1000 Firmware Upgrade
The Palladium Store 1000 storage system is the last component to upgrade in the
MediaStream Systems. The SAN software must have already been upgraded to release the
current release. Check your release notes or “Introduction” on page 9. Use the
command to verify the revision number.
–a
To upgrade the Palladium Store 1000 storage system:
1. Verify that the MSi application is off. (Performing the upgrade with the MSi running
will cause a system crash.) Also, shut down all Connect Plus 1000s attached to the
cluster.
2. Enter the following command:
sand_state -s
revisions
Verify that the entry for Fibre Channel Driver State returns;
[FCSA_READY]
arrays on all nodes, there is a command entry for each controller.
The output should be similar to the following:
. This indicates that the Fibre Channel paths are up and logged into the
0x0000000F
Page 48

Chapter 4 Palladium Store 1000 Firmware Upgrade
[root@1001 /bvs] sand_state -s
items 0x1e fcsa_rmgr.numBlocks 0xa fcsa_rmgr.blockSize 0x180000
-------------------------------------------------------------------Driver Build Information:
--------------------------------------------------------------------Driver Revision: 1.7
Build Date: Fri Oct 19 14:35:25 PDT 2001
Built By: dlow@vidux066
Build Directory: /users/steam/SANrelease
-------------------------------------------------------------------Driver State Information:
--------------------------------------------------------------------Fibre Channel Driver State: 0x0000000F [FCSA_READY]
Tachyon Configuration Register: 0x40000A00
Tachyon Status Register: 0x00001016
Tachyon ee_cr_0_tmr: 0x00000000
Tachyon bb_cr_0_tmr: 0x000001E7
Frame Manager Config Register: 0x72000200
Frame Manager Status Register: 0x98000000
Frame Manager TOV Register: 0x00000000
Frame Manager Link Err Stat 1: 0x00000000
Frame Manager Link Err Stat 2: 0x00000000
Frame Manager WWNHI: 0x00010800
Frame Manager WWNLO: 0x09D40E40
items 0x1e fcsa_rmgr.numBlocks 0xa fcsa_rmgr.blockSize 0x180000
------------------------------------------------------------------Driver Build Information:
--------------------------------------------------------------------Driver Revision: 1.7
Build Date: Fri Oct 19 14:35:25 PDT 2001
Built By: dlow@vidux066
Build Directory: /users/steam/SANrelease
------------------------------------------------------------------Driver State Information:
--------------------------------------------------------------------Fibre Channel Driver State: 0x0000000F [FCSA_READY]
Tachyon Configuration Register: 0x40000A00
Tachyon Status Register: 0x00001016
Tachyon ee_cr_0_tmr: 0x00000000
Tachyon bb_cr_0_tmr: 0x0000003E
Frame Manager Config Register: 0x71000200
Frame Manager Status Register: 0x98000000
Frame Manager TOV Register: 0x00000000
Frame Manager Link Err Stat 1: 0x00000000
Frame Manager Link Err Stat 2: 0x00000000
Frame Manager WWNHI: 0x00010800
Frame Manager WWNLO: 0x09D40E41
48
Page 49

3. Enter the following command:
ps1000fwdownload array0x /bvs/firmware/SR12.MOT
where array0x is the ID for the array, such as array02. Examine the output for errors; if
any are found, contact Avid MediaStream Support before proceeding.
n
n
n
Arrays always begin numbering with
4. If the PS 1000 beeps during the download, press the middle button on its front panel to
silence the beep. The lower LCD window might display IDs. As the procedure
continues, Controller 2 download will begin following success on Controller 1. Press
the middle button on the front panel to silence the beep when it occurs again.
5. When download is finished (approximately 15 minutes), remove the PS 1000 front
panel to verify that no LEDs are red.
If any LEDs are red, contact Avid MediaStream Support.
For information on the PS 1000 front panel and other hardware features, consult the
MediaStream Server 8000 Site Preparation, Installation and Reference Guide or
MediaStream Server 8000Si Site Preparation, Installation and Reference Guide.
6. Enter the
array0x is the ID for the array, such as
The –s command flag is not used for 8000si upgrade.
If the upgrade has been successful, output similar to the following is displayed:
Checking mode pages on device /dev/fcdss0102: Medea Medea.
****************************
# Controller 1 PASSED !!! #
****************************
check_mode_pages array0x –s
array02
array02
on an 8000NS or 8000Si system.
command to verify the upgrade, where
.
n
****************************
# Controller 2 PASSED !!! #
****************************
If you have an 8000si with a single controller, only one controller will be identified.
49
Page 50

Chapter 4 Palladium Store 1000 Firmware Upgrade
If you do not receive similar output for both controllers in response to the
check_mode_pages
command, enter the following command for the controller(s) that
had errors:
scsi_set_mode array0x -I y -d
where array0x is the ID for the array, such as
array02
, and y is the number of the
controller. Check the output for errors; if any are found, contact Avid MediaStream
Support.
7. Repeat steps 2 to step 6 for each additional array.
8. Verify that the drive log pages are cleared on the first controller by entering the
following commands:
array_services -I1 -l11 array0x
array_services -I1 -l12 array0x
where array0x is the ID for the array, such as
specifying controller
1
, begins with a capital letter I, while the second option begins
array02
. Note that the first option,
with a lower-case letter L.
9. If either command displays contents showing dropouts and timeouts not equal to 0, on
the log page, clear the page with the following command:
array_services -I1 -cyy array0x
where array0x is the ID for the array, and yy is the number of the page you want to
clear.
10. Repeat the above commands for the second controller as follows:
array_services -I2 -l11 array0x
array_services -I2 -l12 array0x
n
50
where array0x is the ID for the array, such as
array02
.
Do not run this command for firmware upgrade on an 8000si.
11. If either command displays contents showing dropouts and timeouts not equal to zero on
a log page, clear the page with the following command:
array_services -I2 -cyy array0x
where array0x is the ID for the array, and yy is the number of the page you want to
clear.
12. Repeat step 8 to step 11 for each additional array.
The upgrade procedure is now complete.
Page 51

Run RAID Patrol Utility
Run the RAID Patrol utility to check your array for problems after a firmware upgrade.
RAID Patrol requires that the system be off-air, and can take several hours to complete.
To RAID Patrol utility:
1. Set the reconstruct DMA timeout to 1000 on each controller with these commands:
scsi_set_mode array0x -I1 -j1000
scsi_set_mode array0x -I2 -j1000
Run RAID Patrol Utility
where array0x is the name of the array, such as “
array02
.”
2. Enter this command to start RAID Patrol:
array_services -K array0x
where array0x is the name of the array, such as “
array02
.”
The RAID Patrol should run for up to three hours on a set of 120GB drives, or five
hours for 250GB drives. To check the status, enter
array_services array0x
and
check for lines like the following:
Rebuild Bank A: Active (0% done) Drive: 1
Rebuild Bank B: Not Active
3. When the RAID Patrol finishes, enter these commands to set the DMA timeout back to
the default on each controller:
scsi_set_mode array0x -I1 -j550
scsi_set_mode array0x -I2 -j550
If you have more than one array, repeat the procedure on each one, substituting the
correct array number for “
array 0x
” in the commands.
51
Page 52

Chapter 4 Palladium Store 1000 Firmware Upgrade
52
 Loading...