

Page 1

Avid® Media Composer
Editing Guide
®
Page 2

Legal Notices
Product specifications are subject to change without notice and do not represent a commitment on the part of Avid Technology,
Inc.
This product is subject to the terms and conditions of a software license agreement provided with the software. The product
may only be used in accordance with the license agreement.
Avid products or portions thereof are protected by one or more of the following United States Patents: 5,077,604; 5,267,351;
5,309,528; 5,355,450; 5,396,594; 5,440,348; 5,467,288; 5,513,375; 5,528,310; 5,557,423; 5,568,275; 5,577,190; 5,584,006;
5,634,020; 5,640,601; 5,644,364; 5,654,737; 5,724,605; 5,726,717; 5,745,637; 5,752,029; 5,754,180; 5,754,851; 5,799,150;
5,812,216; 5,828,678; 5,842,014; 5,852,435; 5,905,841; 5,929,836; 5,930,445; 5,946,445; 5,986,584; 5,987,501; 6,016,152;
6,018,337; 6,023,531; 6,058,236; 6,061,758; 6,091,778; 6,105,083; 6,118,444; 6,130,676; 6,134,607; 6,141,691; 6,198,477;
6,201,531; 6,223,211; 6,249,280; 6,269,195; 6,330,369; 6,353,862; 6,404,435; 6,407,775; 6,426,778; 6,477,271; 6,489,969;
6,512,522; 6,532,043; 6,546,190; 6,552,731; 6,553,142; 6,570,624; 6,571,255; 6,583,824; 6,618,547; 6,636,869; 6,665,450;
6,678,461; 6,687,407; 6,704,445; 6,747,705; 6,763,134; 6,766,063; 6,791,556; 6,810,157; 6,813,622; 6,847,373; 6,871,003;
6,871,161; 6,901,211; 6,907,191; 6,928,187; 7,043,058; 7,081,900; 7,103,231; 7,266,241; 7,280,117; RE40,107; 7,403,561;
7,433,519; 7,512,885; 7,545,957; 7,671,871; 7,684,096; D352,278; D392,267; D392,268; D392,269; D395,291; D396,853;
D398,912. Other patents are pending.
Avid products or portions thereof are protected by one or more of the following European Patents: 0506870; 0635188;
0674414; 0752174; 0857293; 0976108; 0988756; 1068734; 1111910; 1173850; 1629675. Other patents are pending.
This document is protected under copyright law. An authorized licensee of Avid Media Composer may reproduce this
publication for the licensee’s own use in learning how to use the software. This document may not be reproduced or
distributed, in whole or in part, for commercial purposes, such as selling copies of this document or providing support or
educational services to others. This document is supplied as a guide for Avid Media Composer. Reasonable care has been
taken in preparing the information it contains. However, this document may contain omissions, technical inaccuracies, or
typographical errors. Avid Technology, Inc. does not accept responsibility of any kind for customers’ losses due to the use of
this document. Product specifications are subject to change without notice.
Copyright © 2010 Avid Technology, Inc. and its licensors. All rights reserved.
The following disclaimer is required by Apple Computer, Inc.:
APPLE COMPUTER, INC. MAKES NO WARRANTIES WHATSOEVER, EITHER EXPRESS OR IMPLIED, REGARDING
THIS PRODUCT, INCLUDING WARRANTIES WITH RESPECT TO ITS MERCHANTABILITY OR ITS FITNESS FOR ANY
PARTICULAR PURPOSE. THE EXCLUSION OF IMPLIED WARRANTIES IS NOT PERMITTED BY SOME STATES. THE
ABOVE EXCLUSION MAY NOT APPLY TO YOU. THIS WARRANTY PROVIDES YOU WITH SPECIFIC LEGAL RIGHTS.
THERE MAY BE OTHER RIGHTS THAT YOU MAY HAVE WHICH VARY FROM STATE TO STATE.
The following disclaimer is required by Sam Leffler and Silicon Graphics, Inc. for the use of their TIFF library:
Copyright © 1988–1997 Sam Leffler
Copyright © 1991–1997 Silicon Graphics, Inc.
Permission to use, copy, modify, distribute, and sell this software [i.e., the TIFF library] and its documentation for any purpose
is hereby granted without fee, provided that (i) the above copyright notices and this permission notice appear in all copies of
the software and related documentation, and (ii) the names of Sam Leffler and Silicon Graphics may not be used in any
advertising or publicity relating to the software without the specific, prior written permission of Sam Leffler and Silicon
Graphics.
THE SOFTWARE IS PROVIDED “AS-IS” AND WITHOUT WARRANTY OF ANY KIND, EXPRESS, IMPLIED OR
OTHERWISE, INCLUDING WITHOUT LIMITATION, ANY WARRANTY OF MERCHANTABILITY OR FITNESS FOR A
PARTICULAR PURPOSE.
IN NO EVENT SHALL SAM LEFFLER OR SILICON GRAPHICS BE LIABLE FOR ANY SPECIAL, INCIDENTAL, INDIRECT
OR CONSEQUENTIAL DAMAGES OF ANY KIND, OR ANY DAMAGES WHATSOEVER RESULTING FROM LOSS OF USE,
DATA OR PROFITS, WHETHER OR NOT ADVISED OF THE POSSIBILITY OF DAMAGE, AND ON ANY THEORY OF
LIABILITY, ARISING OUT OF OR IN CONNECTION WITH THE USE OR PERFORMANCE OF THIS SOFTWARE.
The following disclaimer is required by the Independent JPEG Group:
This software is based in part on the work of the Independent JPEG Group.
This Software may contain components licensed under the following conditions:
Copyright (c) 1989 The Regents of the University of California. All rights reserved.
2
Page 3

Redistribution and use in source and binary forms are permitted provided that the above copyright notice and this paragraph
are duplicated in all such forms and that any documentation, advertising materials, and other materials related to such
distribution and use acknowledge that the software was developed by the University of California, Berkeley. The name of the
University may not be used to endorse or promote products derived from this software without specific prior written
permission. THIS SOFTWARE IS PROVIDED ``AS IS'' AND WITHOUT ANY EXPRESS OR IMPLIED WARRANTIES,
INCLUDING, WITHOUT LIMITATION, THE IMPLIED WARRANTIES OF MERCHANTABILITY AND FITNESS FOR A
PARTICULAR PURPOSE.
Copyright (C) 1989, 1991 by Jef Poskanzer.
Permission to use, copy, modify, and distribute this software and its documentation for any purpose and without fee is hereby
granted, provided that the above copyright notice appear in all copies and that both that copyright notice and this permission
notice appear in supporting documentation. This software is provided "as is" without express or implied warranty.
Copyright 1995, Trinity College Computing Center. Written by David Chappell.
Permission to use, copy, modify, and distribute this software and its documentation for any purpose and without fee is hereby
granted, provided that the above copyright notice appear in all copies and that both that copyright notice and this permission
notice appear in supporting documentation. This software is provided "as is" without express or implied warranty.
Copyright 1996 Daniel Dardailler.
Permission to use, copy, modify, distribute, and sell this software for any purpose is hereby granted without fee, provided that
the above copyright notice appear in all copies and that both that copyright notice and this permission notice appear in
supporting documentation, and that the name of Daniel Dardailler not be used in advertising or publicity pertaining to
distribution of the software without specific, written prior permission. Daniel Dardailler makes no representations about the
suitability of this software for any purpose. It is provided "as is" without express or implied warranty.
Modifications Copyright 1999 Matt Koss, under the same license as above.
Copyright (c) 1991 by AT&T.
Permission to use, copy, modify, and distribute this software for any purpose without fee is hereby granted, provided that this
entire notice is included in all copies of any software which is or includes a copy or modification of this software and in all
copies of the supporting documentation for such software.
THIS SOFTWARE IS BEING PROVIDED "AS IS", WITHOUT ANY EXPRESS OR IMPLIED WARRANTY. IN PARTICULAR,
NEITHER THE AUTHOR NOR AT&T MAKES ANY REPRESENTATION OR WARRANTY OF ANY KIND CONCERNING THE
MERCHANTABILITY OF THIS SOFTWARE OR ITS FITNESS FOR ANY PARTICULAR PURPOSE.
This product includes software developed by the University of California, Berkeley and its contributors.
The following disclaimer is required by Nexidia Inc.:
© 2006 Nexidia. All rights reserved.
Manufactured under license from the Georgia Tech Research Corporation, U.S.A. Patent Pending.
The following disclaimer is required by Paradigm Matrix:
Portions of this software licensed from Paradigm Matrix.
The following disclaimer is required by Ray Sauers Associates, Inc.:
“Install-It” is licensed from Ray Sauers Associates, Inc. End-User is prohibited from taking any action to derive a source code
equivalent of “Install-It,” including by reverse assembly or reverse compilation, Ray Sauers Associates, Inc. shall in no event be
liable for any damages resulting from reseller’s failure to perform reseller’s obligation; or any damages arising from use or
operation of reseller’s products or the software; or any other damages, including but not limited to, incidental, direct, indirect,
special or consequential Damages including lost profits, or damages resulting from loss of use or inability to use reseller’s
products or the software for any reason including copyright or patent infringement, or lost data, even if Ray Sauers Associates
has been advised, knew or should have known of the possibility of such damages.
The following disclaimer is required by Videomedia, Inc.:
“Videomedia, Inc. makes no warranties whatsoever, either express or implied, regarding this product, including warranties with
respect to its merchantability or its fitness for any particular purpose.”
“This software contains V-LAN ver. 3.0 Command Protocols which communicate with V-LAN ver. 3.0 products developed by
Videomedia, Inc. and V-LAN ver. 3.0 compatible products developed by third parties under license from Videomedia, Inc. Use
of this software will allow “frame accurate” editing control of applicable videotape recorder decks, videodisc recorders/players
and the like.”
3
Page 4

The following disclaimer is required by Altura Software, Inc. for the use of its Mac2Win software and Sample
Source Code:
©1993–1998 Altura Software, Inc.
The following disclaimer is required by Ultimatte Corporation:
Certain real-time compositing capabilities are provided under a license of such technology from Ultimatte Corporation and are
subject to copyright protection.
The following disclaimer is required by 3Prong.com Inc.:
Certain waveform and vector monitoring capabilities are provided under a license from 3Prong.com Inc.
The following disclaimer is required by Interplay Entertainment Corp.:
The “Interplay” name is used with the permission of Interplay Entertainment Corp., which bears no responsibility for Avid
products.
This product includes portions of the Alloy Look & Feel software from Incors GmbH.
This product includes software developed by the Apache Software Foundation (http://www.apache.org/).
© DevelopMentor
This product may include the JCifs library, for which the following notice applies:
JCifs © Copyright 2004, The JCIFS Project, is licensed under LGPL (http://jcifs.samba.org/). See the LGPL.txt file in the Third
Party Software directory on the installation CD.
Avid Interplay contains components licensed from LavanTech. These components may only be used as part of and in
connection with Avid Interplay.
Attn. Government User(s). Restricted Rights Legend
U.S. GOVERNMENT RESTRICTED RIGHTS. This Software and its documentation are “commercial computer software” or
“commercial computer software documentation.” In the event that such Software or documentation is acquired by or on behalf
of a unit or agency of the U.S. Government, all rights with respect to this Software and documentation are subject to the terms
of the License Agreement, pursuant to FAR §12.212(a) and/or DFARS §227.7202-1(a), as applicable.
Trademarks
003, 192 Digital I/O, 192 I/O, 96 I/O, 96i I/O, Adrenaline, AirSpeed, ALEX, Alienbrain, AME, AniMatte, Archive, Archive II,
Assistant Station, AudioPages, AudioStation, AutoLoop, AutoSync, Avid, Avid Active, Avid Advanced Response, Avid DNA,
Avid DNxcel, Avid DNxHD, Avid DS Assist Station, Avid Liquid, Avid Media Engine, Avid Media Processor, Avid MEDIArray,
Avid Mojo, Avid Remote Response, Avid Unity, Avid Unity ISIS, Avid VideoRAID, AvidRAID, AvidShare, AVIDstripe, AVX,
Axiom, Beat Detective, Beauty Without The Bandwidth, Beyond Reality, BF Essentials, Bomb Factory, Boom, Bruno, C|24,
CaptureManager, ChromaCurve, ChromaWheel, Cineractive Engine, Cineractive Player, Cineractive Viewer, Color Conductor,
Command|24, Command|8, Conectiv, Control|24, Cosmonaut Voice, CountDown, d2, d3, DAE, Dazzle,
Dazzle Digital Video Creator, D-Command, D-Control, Deko, DekoCast, D-Fi, D-fx, Digi 003, DigiBase, DigiDelivery,
Digidesign, Digidesign Audio Engine, Digidesign Development Partners, Digidesign Intelligent Noise Reduction,
Digidesign TDM Bus, DigiLink, DigiMeter, DigiPanner, DigiProNet, DigiRack, DigiSerial, DigiSnake, DigiSystem,
Digital Choreography, Digital Nonlinear Accelerator, DigiTest, DigiTranslator, DigiWear, DINR, DNxchange, DPP-1, D-Show,
DSP Manager, DS-StorageCalc, DV Toolkit, DVD Complete, D-Verb, Eleven, EM, EveryPhase, Expander, ExpertRender,
Fader Pack, Fairchild, Fastbreak, Fast Track, Film Cutter, FilmScribe, Flexevent, FluidMotion, Frame Chase, FXDeko,
HD Core, HD Process, HDPack, Home-to-Hollywood, HYBRID, HyperControl, HyperSPACE, HyperSPACE HDCAM,
iKnowledge, Image Independence, Impact, Improv, iNEWS, iNEWS Assign, iNEWS ControlAir, Instantwrite, Instinct,
Intelligent Content Management, Intelligent Digital Actor Technology, IntelliRender, Intelli-Sat,
Intelli-sat Broadcasting Recording Manager, InterFX, Interplay, inTONE, Intraframe, iS Expander, ISIS, IsoSync, iS9, iS18,
iS23, iS36, ISIS, IsoSync, KeyRig, KeyStudio, LaunchPad, LeaderPlus, LFX, Lightning, Link & Sync, ListSync, LKT-200, Lo-Fi,
Luna, MachineControl, Magic Mask, Make Anything Hollywood, make manage move | media, Marquee, MassivePack,
Massive Pack Pro, M-Audio, M-Audio Micro, Maxim, Mbox, Media Composer, MediaDock, MediaDock Shuttle, MediaFlow,
MediaLog, MediaMatch, MediaMix, Media Reader, Media Recorder, MEDIArray, MediaServer, MediaShare, MetaFuze,
MetaSync, MicroTrack, MIDI I/O, Midiman, Mix Rack, MixLab, Moviebox, Moviestar, MultiShell, NaturalMatch, NewsCutter,
NewsView, Nitris, NL3D, NLP, Nova, NRV-10 interFX, NSDOS, NSWIN, Octane, OMF, OMF Interchange, OMM, OnDVD,
Open Media Framework, Open Media Management, Ozone, Ozonic, Painterly Effects, Palladium, Personal Q, PET, Pinnacle,
Pinnacle DistanTV, Pinnacle GenieBox, Pinnacle HomeMusic, Pinnacle MediaSuite, Pinnacle Mobile Media,
Pinnacle Scorefitter, Pinnacle Studio, Pinnacle Studio MovieBoard, Pinnacle Systems, Pinnacle VideoSpin, Podcast Factory,
PowerSwap, PRE, ProControl, ProEncode, Profiler, Pro Tools|HD, Pro Tools LE, Pro Tools M-Powered, Pro Transfer, Pro Tools,
QuickPunch, QuietDrive, Realtime Motion Synthesis, Recti-Fi, Reel Tape Delay, Reel Tape Flanger, Reel Tape Saturation,
Reprise, Res Rocket Surfer, Reso, RetroLoop, Reverb One, ReVibe, Revolution, rS9, rS18, RTAS, Salesview, Sci-Fi, Scorch,
Scorefitter, ScriptSync, SecureProductionEnvironment, Serv|LT, Serv|GT, Session, Shape-to-Shape, ShuttleCase, Sibelius,
4
Page 5

SIDON, SimulPlay, SimulRecord, Slightly Rude Compressor, Smack!, Soft SampleCell, Soft-Clip Limiter, Solaris,
SoundReplacer, SPACE, SPACEShift, SpectraGraph, SpectraMatte, SteadyGlide, Streamfactory, Streamgenie, StreamRAID,
Strike, Structure, Studiophile, SubCap, Sundance Digital, Sundance, SurroundScope, Symphony, SYNC HD, Synchronic,
SynchroScope, SYNC I/O, Syntax, TDM FlexCable, TechFlix, Tel-Ray, Thunder, Titansync, Titan, TL Aggro, TL AutoPan,
TL Drum Rehab, TL Everyphase, TL Fauxlder, TL In Tune, TL MasterMeter, TL Metro, TL Space, TL Utilities,
tools for storytellers, Torq, Torq Xponent, Transfuser, Transit, TransJammer, Trigger Finger, Trillium Lane Labs, TruTouch,
UnityRAID, Vari-Fi, Velvet, Video the Web Way, VideoRAID, VideoSPACE, VideoSpin, VTEM, Work-N-Play, Xdeck, X-Form,
Xmon, XPAND!, Xponent, X-Session, and X-Session Pro are either registered trademarks or trademarks of Avid Technology,
Inc. in the United States and/or other countries.
Adobe and Photoshop are either registered trademarks or trademarks of Adobe Systems Incorporated in the United States
and/or other countries. Apple and Macintosh are trademarks of Apple Computer, Inc., registered in the U.S. and other
countries. Windows is either a registered trademark or trademark of Microsoft Corporation in the United States and/or other
countries. All other trademarks contained herein are the property of their respective owners.
Footage
Arri — Courtesy of Arri/Fauer — John Fauer, Inc.
Bell South “Anticipation” — Courtesy of Two Headed Monster — Tucker/Wayne Atlanta/GMS.
Canyonlands — Courtesy of the National Park Service/Department of the Interior.
Eco Challenge British Columbia — Courtesy of Eco Challenge Lifestyles, Inc., All Rights Reserved.
Eco Challenge Morocco — Courtesy of Discovery Communications, Inc.
It’s Shuttletime — Courtesy of BCP & Canadian Airlines.
Nestlé Coffee Crisp — Courtesy of MacLaren McCann Canada.
Saturn “Calvin Egg” — Courtesy of Cossette Communications.
“Tigers: Tracking a Legend” — Courtesy of www.wildlifeworlds.com, Carol Amore, Executive Producer.
"The Big Swell" — Courtesy of Swell Pictures, Inc.
Windhorse — Courtesy of Paul Wagner Productions.
Arizona Images — KNTV Production — Courtesy of Granite Broadcasting, Inc.,
Editor/Producer Bryan Foote.
Canyonlands — Courtesy of the National Park Service/Department of the Interior.
Ice Island — Courtesy of Kurtis Productions, Ltd.
Tornados + Belle Isle footage — Courtesy of KWTV News 9.
WCAU Fire Story — Courtesy of NBC-10, Philadelphia, PA.
Women in Sports – Paragliding — Courtesy of Legendary Entertainment, Inc.
Avid Media Composer Editing Guide • 0130-30390-01 • June 2010
5
Page 6

6
Page 7

Contents
Using This Guide . . . . . . . . . . . . . . . . . . . . . . . . . . . . . . . . . . . . . . . . . . . . 23
Symbols and Conventions . . . . . . . . . . . . . . . . . . . . . . . . . . . . . . . . . . . . . . . . . . . . 23
If You Need Help. . . . . . . . . . . . . . . . . . . . . . . . . . . . . . . . . . . . . . . . . . . . . . . . . . . . 24
Accessing the Goodies Folder . . . . . . . . . . . . . . . . . . . . . . . . . . . . . . . . . . . . . . . . . 25
Avid Training Services . . . . . . . . . . . . . . . . . . . . . . . . . . . . . . . . . . . . . . . . . . . . . . . 25
Chapter 1 Editing Overview . . . . . . . . . . . . . . . . . . . . . . . . . . . . . . . . . . . . . . . . . . . . 27
Editing Workflow . . . . . . . . . . . . . . . . . . . . . . . . . . . . . . . . . . . . . . . . . . . . . . . . . . . . 27
Starting a Project. . . . . . . . . . . . . . . . . . . . . . . . . . . . . . . . . . . . . . . . . . . . . . . . . . . . 28
Preparing to Edit . . . . . . . . . . . . . . . . . . . . . . . . . . . . . . . . . . . . . . . . . . . . . . . . . . . . 29
Editing a Sequence . . . . . . . . . . . . . . . . . . . . . . . . . . . . . . . . . . . . . . . . . . . . . . . . . . 30
Outputting a Sequence . . . . . . . . . . . . . . . . . . . . . . . . . . . . . . . . . . . . . . . . . . . . . . . 32
Chapter 2 Starting a Project . . . . . . . . . . . . . . . . . . . . . . . . . . . . . . . . . . . . . . . . . . . . 35
Turning on Your Equipment . . . . . . . . . . . . . . . . . . . . . . . . . . . . . . . . . . . . . . . . . . . 35
Working with the Desktop . . . . . . . . . . . . . . . . . . . . . . . . . . . . . . . . . . . . . . . . . . . . . 36
Starting Your Avid Editing Application (Windows). . . . . . . . . . . . . . . . . . . . . . . . . . . 44
Starting Your Avid Editing Application (Macintosh). . . . . . . . . . . . . . . . . . . . . . . . . . 45
Working with Projects . . . . . . . . . . . . . . . . . . . . . . . . . . . . . . . . . . . . . . . . . . . . . . . . 46
Quitting and Turning Off Equipment . . . . . . . . . . . . . . . . . . . . . . . . . . . . . . . . . . . . . 57
Avid Projects and Avid Users Folders. . . . . . . . . . . . . . . . . . . . . . . . . . . . . . . . . . . . 58
Changing Project and User Names. . . . . . . . . . . . . . . . . . . . . . . . . . . . . . . . . . . . . . 60
Backing Up Your Project Information . . . . . . . . . . . . . . . . . . . . . . . . . . . . . . . . . . . . 61
Avid Attic Folder . . . . . . . . . . . . . . . . . . . . . . . . . . . . . . . . . . . . . . . . . . . . . . . . . . . . 62
Using Toolsets . . . . . . . . . . . . . . . . . . . . . . . . . . . . . . . . . . . . . . . . . . . . . . . . . . . . . 66
Chapter 3 Working with the Project Window . . . . . . . . . . . . . . . . . . . . . . . . . . . . . . 69
Overview of the Project Window . . . . . . . . . . . . . . . . . . . . . . . . . . . . . . . . . . . . . . . . 70
Controlling Project Window Display . . . . . . . . . . . . . . . . . . . . . . . . . . . . . . . . . . . . . 71
Using the Bins Tab . . . . . . . . . . . . . . . . . . . . . . . . . . . . . . . . . . . . . . . . . . . . . . . . . . 71
Page 8

Using the Settings Tab. . . . . . . . . . . . . . . . . . . . . . . . . . . . . . . . . . . . . . . . . . . . . . . 79
Using the Format Tab. . . . . . . . . . . . . . . . . . . . . . . . . . . . . . . . . . . . . . . . . . . . . . . . 80
Working with Color Spaces in HD Projects . . . . . . . . . . . . . . . . . . . . . . . . . . . . . . . 81
Changing the Project Color Space for an HD Project . . . . . . . . . . . . . . . . . . . . . . . 83
Using the Usage Tab . . . . . . . . . . . . . . . . . . . . . . . . . . . . . . . . . . . . . . . . . . . . . . . . 84
Using the Info Tab . . . . . . . . . . . . . . . . . . . . . . . . . . . . . . . . . . . . . . . . . . . . . . . . . . 88
Managing Bins and Memory. . . . . . . . . . . . . . . . . . . . . . . . . . . . . . . . . . . . . . . . . . . 90
Understanding User Profiles . . . . . . . . . . . . . . . . . . . . . . . . . . . . . . . . . . . . . . . . . . 90
Managing User Profiles . . . . . . . . . . . . . . . . . . . . . . . . . . . . . . . . . . . . . . . . . . . . . . 92
Customizing the Avid User Interface . . . . . . . . . . . . . . . . . . . . . . . . . . . . . . . . . . . . 94
User-Customized Workspaces. . . . . . . . . . . . . . . . . . . . . . . . . . . . . . . . . . . . . . . . . 97
Working with Bins and Projects in an Avid Unity Environment. . . . . . . . . . . . . . . . 102
Chapter 4 Using Tools. . . . . . . . . . . . . . . . . . . . . . . . . . . . . . . . . . . . . . . . . . . . . . . . 111
Using the Tools Menu . . . . . . . . . . . . . . . . . . . . . . . . . . . . . . . . . . . . . . . . . . . . . . 111
Using a Deck Controller . . . . . . . . . . . . . . . . . . . . . . . . . . . . . . . . . . . . . . . . . . . . . 111
Deck Controller Window Reference . . . . . . . . . . . . . . . . . . . . . . . . . . . . . . . . . . . . 112
The Command Palette . . . . . . . . . . . . . . . . . . . . . . . . . . . . . . . . . . . . . . . . . . . . . . 113
Using the Avid Calculator. . . . . . . . . . . . . . . . . . . . . . . . . . . . . . . . . . . . . . . . . . . . 117
Using The Console Window. . . . . . . . . . . . . . . . . . . . . . . . . . . . . . . . . . . . . . . . . . 118
Using the Hardware Tool . . . . . . . . . . . . . . . . . . . . . . . . . . . . . . . . . . . . . . . . . . . . 120
External Controllers as Editing Control Surfaces . . . . . . . . . . . . . . . . . . . . . . . . . . 120
Chapter 5 Logging . . . . . . . . . . . . . . . . . . . . . . . . . . . . . . . . . . . . . . . . . . . . . . . . . . . 121
Using Avid Log Exchange to Prepare Log Files for Import . . . . . . . . . . . . . . . . . . 121
Avid Log Specifications . . . . . . . . . . . . . . . . . . . . . . . . . . . . . . . . . . . . . . . . . . . . . 130
Creating an Avid Log . . . . . . . . . . . . . . . . . . . . . . . . . . . . . . . . . . . . . . . . . . . . . . . 138
Double-Checking Log Files . . . . . . . . . . . . . . . . . . . . . . . . . . . . . . . . . . . . . . . . . . 139
Transferring Bins from MediaLog. . . . . . . . . . . . . . . . . . . . . . . . . . . . . . . . . . . . . . 139
Logging Directly into a Bin . . . . . . . . . . . . . . . . . . . . . . . . . . . . . . . . . . . . . . . . . . . 141
Understanding the Pulldown Phase . . . . . . . . . . . . . . . . . . . . . . . . . . . . . . . . . . . . 150
Setting the Pulldown Phase . . . . . . . . . . . . . . . . . . . . . . . . . . . . . . . . . . . . . . . . . . 152
Film-Related Log Information. . . . . . . . . . . . . . . . . . . . . . . . . . . . . . . . . . . . . . . . . 152
8
Page 9

Chapter 6 Preparing for Capture . . . . . . . . . . . . . . . . . . . . . . . . . . . . . . . . . . . . . . . 163
Logging and Shot Logs . . . . . . . . . . . . . . . . . . . . . . . . . . . . . . . . . . . . . . . . . . . . . . 163
Importing Shot Log Files . . . . . . . . . . . . . . . . . . . . . . . . . . . . . . . . . . . . . . . . . . . . . 164
Preparing the Hardware for Capture . . . . . . . . . . . . . . . . . . . . . . . . . . . . . . . . . . . . 166
Selecting Settings for Capture . . . . . . . . . . . . . . . . . . . . . . . . . . . . . . . . . . . . . . . . 169
Configuring Decks. . . . . . . . . . . . . . . . . . . . . . . . . . . . . . . . . . . . . . . . . . . . . . . . . . 181
Understanding Timecode . . . . . . . . . . . . . . . . . . . . . . . . . . . . . . . . . . . . . . . . . . . . 186
Connecting a DV Device . . . . . . . . . . . . . . . . . . . . . . . . . . . . . . . . . . . . . . . . . . . . . 187
Setting Up the Capture Tool . . . . . . . . . . . . . . . . . . . . . . . . . . . . . . . . . . . . . . . . . . 188
Preparing to Capture Audio. . . . . . . . . . . . . . . . . . . . . . . . . . . . . . . . . . . . . . . . . . . 202
Preparing to Capture Video. . . . . . . . . . . . . . . . . . . . . . . . . . . . . . . . . . . . . . . . . . . 220
Capture Preparations Check List . . . . . . . . . . . . . . . . . . . . . . . . . . . . . . . . . . . . . . 229
Chapter 7 Capturing Media . . . . . . . . . . . . . . . . . . . . . . . . . . . . . . . . . . . . . . . . . . . . 231
Capturing and Logging at the Same Time . . . . . . . . . . . . . . . . . . . . . . . . . . . . . . . 232
Capturing Directly from a DV Device . . . . . . . . . . . . . . . . . . . . . . . . . . . . . . . . . . . 242
Frame Chase Capture. . . . . . . . . . . . . . . . . . . . . . . . . . . . . . . . . . . . . . . . . . . . . . . 247
Batch Capturing from Logged Clips . . . . . . . . . . . . . . . . . . . . . . . . . . . . . . . . . . . . 250
Recapturing and Decomposing. . . . . . . . . . . . . . . . . . . . . . . . . . . . . . . . . . . . . . . . 254
Alternate Source Capture . . . . . . . . . . . . . . . . . . . . . . . . . . . . . . . . . . . . . . . . . . . . 264
Using Capture Function Keys . . . . . . . . . . . . . . . . . . . . . . . . . . . . . . . . . . . . . . . . . 267
Handling Errors During the Capture Process . . . . . . . . . . . . . . . . . . . . . . . . . . . . . 268
Creating Subclips While Capturing . . . . . . . . . . . . . . . . . . . . . . . . . . . . . . . . . . . . . 269
Adding Locators On-the-Fly While Capturing . . . . . . . . . . . . . . . . . . . . . . . . . . . . . 271
Naming a New Tape from the Keyboard While Capturing . . . . . . . . . . . . . . . . . . . 272
Controlling Decks from the Keyboard . . . . . . . . . . . . . . . . . . . . . . . . . . . . . . . . . . . 273
Ejecting Tapes with a Button or Key . . . . . . . . . . . . . . . . . . . . . . . . . . . . . . . . . . . . 273
Using Dolby E Media. . . . . . . . . . . . . . . . . . . . . . . . . . . . . . . . . . . . . . . . . . . . . . . . 274
Delaying Audio During Capture. . . . . . . . . . . . . . . . . . . . . . . . . . . . . . . . . . . . . . . . 277
Live Capturing with External Timecode. . . . . . . . . . . . . . . . . . . . . . . . . . . . . . . . . . 277
Capturing to the Timeline . . . . . . . . . . . . . . . . . . . . . . . . . . . . . . . . . . . . . . . . . . . . 279
Capturing Video Without Pulldown into a 24p NTSC Project . . . . . . . . . . . . . . . . . 281
Remote Play, Capture, and Punch-In . . . . . . . . . . . . . . . . . . . . . . . . . . . . . . . . . . . 281
Relinking Clips by Key Number. . . . . . . . . . . . . . . . . . . . . . . . . . . . . . . . . . . . . . . . 288
9
Page 10

Modifying the Pulldown Phase After Capturing . . . . . . . . . . . . . . . . . . . . . . . . . . . 290
DV and HDV Scene Extraction. . . . . . . . . . . . . . . . . . . . . . . . . . . . . . . . . . . . . . . . 292
Using the Panasonic VariCam . . . . . . . . . . . . . . . . . . . . . . . . . . . . . . . . . . . . . . . . 295
Chapter 8 Importing Files . . . . . . . . . . . . . . . . . . . . . . . . . . . . . . . . . . . . . . . . . . . . . 297
Preparing to Import Files . . . . . . . . . . . . . . . . . . . . . . . . . . . . . . . . . . . . . . . . . . . . 298
Creating and Modifying Import Settings . . . . . . . . . . . . . . . . . . . . . . . . . . . . . . . . . 298
Importing Media Files. . . . . . . . . . . . . . . . . . . . . . . . . . . . . . . . . . . . . . . . . . . . . . . 301
Importing Audio Files from a Music CD . . . . . . . . . . . . . . . . . . . . . . . . . . . . . . . . . 305
Adjusting Gain Before Importing Audio Files . . . . . . . . . . . . . . . . . . . . . . . . . . . . . 306
Sample Rate Conversion and Audio Import. . . . . . . . . . . . . . . . . . . . . . . . . . . . . . 307
Setting Sample Rate Conversion Options Before Importing Audio Files . . . . . . . . 308
Photoshop Graphics Import . . . . . . . . . . . . . . . . . . . . . . . . . . . . . . . . . . . . . . . . . . 309
Digital Bars and Tone. . . . . . . . . . . . . . . . . . . . . . . . . . . . . . . . . . . . . . . . . . . . . . . 314
Importing Color Bars and Other Test Patterns. . . . . . . . . . . . . . . . . . . . . . . . . . . . 315
Importing Editcam Files . . . . . . . . . . . . . . . . . . . . . . . . . . . . . . . . . . . . . . . . . . . . . 317
Setting XDCAM Import Options . . . . . . . . . . . . . . . . . . . . . . . . . . . . . . . . . . . . . . . 318
Importing XDCAM Media . . . . . . . . . . . . . . . . . . . . . . . . . . . . . . . . . . . . . . . . . . . . 319
Importing XDCAM EX Media . . . . . . . . . . . . . . . . . . . . . . . . . . . . . . . . . . . . . . . . . 320
Automatically Importing Proxy Media from an XDCAM Device . . . . . . . . . . . . . . . 322
Importing Proxy Media from an XDCAM Disk . . . . . . . . . . . . . . . . . . . . . . . . . . . . 323
Copying XDCAM Proxy Media to a Local Drive or a Server . . . . . . . . . . . . . . . . . 324
Manually Importing XDCAM Media from the XDCAM Disk . . . . . . . . . . . . . . . . . . 325
Importing Essence Marks as Locators in XDCAM Media. . . . . . . . . . . . . . . . . . . . 325
Editing XDCAM Proxy Media . . . . . . . . . . . . . . . . . . . . . . . . . . . . . . . . . . . . . . . . . 326
Batch Importing High-Resolution XDCAM Media from the XDCAM Disk. . . . . . . . 327
Editing and Finishing High-Resolution XDCAM Media. . . . . . . . . . . . . . . . . . . . . . 330
Importing P2 Clips and Media . . . . . . . . . . . . . . . . . . . . . . . . . . . . . . . . . . . . . . . . 330
Importing Sequences from Pro Tools through Interplay. . . . . . . . . . . . . . . . . . . . . 331
Using the Drag-and-Drop Method to Import Files . . . . . . . . . . . . . . . . . . . . . . . . . 331
Reimporting Files . . . . . . . . . . . . . . . . . . . . . . . . . . . . . . . . . . . . . . . . . . . . . . . . . . 332
Batch Import Dialog Box. . . . . . . . . . . . . . . . . . . . . . . . . . . . . . . . . . . . . . . . . . . . . 335
10
Page 11

Chapter 9 Working with Bins . . . . . . . . . . . . . . . . . . . . . . . . . . . . . . . . . . . . . . . . . . 339
Object Icons in Bins . . . . . . . . . . . . . . . . . . . . . . . . . . . . . . . . . . . . . . . . . . . . . . . . 339
Bin Views . . . . . . . . . . . . . . . . . . . . . . . . . . . . . . . . . . . . . . . . . . . . . . . . . . . . . . . . 341
Bin Procedures . . . . . . . . . . . . . . . . . . . . . . . . . . . . . . . . . . . . . . . . . . . . . . . . . . . . 350
Working with Bin Columns . . . . . . . . . . . . . . . . . . . . . . . . . . . . . . . . . . . . . . . . . . . 362
Modifying Clip Information. . . . . . . . . . . . . . . . . . . . . . . . . . . . . . . . . . . . . . . . . . . . 368
Working with Film Information in Bins . . . . . . . . . . . . . . . . . . . . . . . . . . . . . . . . . . . 379
Working with the SuperBin . . . . . . . . . . . . . . . . . . . . . . . . . . . . . . . . . . . . . . . . . . . 382
Creating a Storyboard . . . . . . . . . . . . . . . . . . . . . . . . . . . . . . . . . . . . . . . . . . . . . . . 385
Setting the Bin Display . . . . . . . . . . . . . . . . . . . . . . . . . . . . . . . . . . . . . . . . . . . . . . 385
Sifting Clips and Sequences . . . . . . . . . . . . . . . . . . . . . . . . . . . . . . . . . . . . . . . . . . 386
Working with Restricted Material. . . . . . . . . . . . . . . . . . . . . . . . . . . . . . . . . . . . . . . 390
Printing Bins . . . . . . . . . . . . . . . . . . . . . . . . . . . . . . . . . . . . . . . . . . . . . . . . . . . . . . 392
Chapter 10 File Based Media - AMA. . . . . . . . . . . . . . . . . . . . . . . . . . . . . . . . . . . . . . 393
XDCAM and XDCAM EX Media . . . . . . . . . . . . . . . . . . . . . . . . . . . . . . . . . . . . . . . 394
P2 Media . . . . . . . . . . . . . . . . . . . . . . . . . . . . . . . . . . . . . . . . . . . . . . . . . . . . . . . . . 399
Canon XF Media . . . . . . . . . . . . . . . . . . . . . . . . . . . . . . . . . . . . . . . . . . . . . . . . . . . 406
GFCAM Media . . . . . . . . . . . . . . . . . . . . . . . . . . . . . . . . . . . . . . . . . . . . . . . . . . . . 408
RED Media . . . . . . . . . . . . . . . . . . . . . . . . . . . . . . . . . . . . . . . . . . . . . . . . . . . . . . . 411
QuickTime Media . . . . . . . . . . . . . . . . . . . . . . . . . . . . . . . . . . . . . . . . . . . . . . . . . . 423
MXF Media . . . . . . . . . . . . . . . . . . . . . . . . . . . . . . . . . . . . . . . . . . . . . . . . . . . . . . . 424
The Avid Media Access (AMA) Workflow . . . . . . . . . . . . . . . . . . . . . . . . . . . . . . . . 427
Workflows for Editing with AMA . . . . . . . . . . . . . . . . . . . . . . . . . . . . . . . . . . . . . . . 440
Chapter 11 Managing Media Files . . . . . . . . . . . . . . . . . . . . . . . . . . . . . . . . . . . . . . . 449
Working with Media Files in an Avid Interplay Environment . . . . . . . . . . . . . . . . . . 450
Using Avid Editing Systems in an Avid Unity LANshare Workgroup. . . . . . . . . . . . 451
Viewing Media with a 100Base-T Connection to Avid Unity ISIS . . . . . . . . . . . . . . 452
Understanding Drive Mounting . . . . . . . . . . . . . . . . . . . . . . . . . . . . . . . . . . . . . . . . 452
Mounting and Unmounting Drives. . . . . . . . . . . . . . . . . . . . . . . . . . . . . . . . . . . . . . 453
Using the Media Tool . . . . . . . . . . . . . . . . . . . . . . . . . . . . . . . . . . . . . . . . . . . . . . . 454
Consolidating Media . . . . . . . . . . . . . . . . . . . . . . . . . . . . . . . . . . . . . . . . . . . . . . . . 459
Using the Consolidate Command . . . . . . . . . . . . . . . . . . . . . . . . . . . . . . . . . . . . . . 461
Using the Transcode Command . . . . . . . . . . . . . . . . . . . . . . . . . . . . . . . . . . . . . . . 465
11
Page 12

Loading the Media Database . . . . . . . . . . . . . . . . . . . . . . . . . . . . . . . . . . . . . . . . . 469
Refreshing Media Directories . . . . . . . . . . . . . . . . . . . . . . . . . . . . . . . . . . . . . . . . . 470
Deleting Unreferenced Clips and Media. . . . . . . . . . . . . . . . . . . . . . . . . . . . . . . . . 470
Backing Up Media Files . . . . . . . . . . . . . . . . . . . . . . . . . . . . . . . . . . . . . . . . . . . . . 471
Finding a Related Media File . . . . . . . . . . . . . . . . . . . . . . . . . . . . . . . . . . . . . . . . . 472
Relinking Media Files . . . . . . . . . . . . . . . . . . . . . . . . . . . . . . . . . . . . . . . . . . . . . . . 473
Unlinking Media Files . . . . . . . . . . . . . . . . . . . . . . . . . . . . . . . . . . . . . . . . . . . . . . . 479
Archiving and Restoring Media Files to Videotape. . . . . . . . . . . . . . . . . . . . . . . . . 480
Sequence and Clip Information Summary . . . . . . . . . . . . . . . . . . . . . . . . . . . . . . . 485
Chapter 12 Viewing and Marking Footage. . . . . . . . . . . . . . . . . . . . . . . . . . . . . . . . . 491
Viewing Methods . . . . . . . . . . . . . . . . . . . . . . . . . . . . . . . . . . . . . . . . . . . . . . . . . . 491
Customizing the Composer Window and Monitors . . . . . . . . . . . . . . . . . . . . . . . . 493
Using the Info Window . . . . . . . . . . . . . . . . . . . . . . . . . . . . . . . . . . . . . . . . . . . . . . 500
Using the Timecode Window . . . . . . . . . . . . . . . . . . . . . . . . . . . . . . . . . . . . . . . . . 501
Playing Video to the Client Monitor . . . . . . . . . . . . . . . . . . . . . . . . . . . . . . . . . . . . 502
Activating and Deactivating the Client Monitor Display . . . . . . . . . . . . . . . . . . . . . 503
Selecting the Video Display Settings . . . . . . . . . . . . . . . . . . . . . . . . . . . . . . . . . . . 504
Playing Video to a Full-Screen Monitor . . . . . . . . . . . . . . . . . . . . . . . . . . . . . . . . . 506
Adjusting the Play Delay Offset . . . . . . . . . . . . . . . . . . . . . . . . . . . . . . . . . . . . . . . 506
Using the Tool Palette . . . . . . . . . . . . . . . . . . . . . . . . . . . . . . . . . . . . . . . . . . . . . . 507
Playing Selected Clips in a Loop . . . . . . . . . . . . . . . . . . . . . . . . . . . . . . . . . . . . . . 508
Loading and Clearing Footage. . . . . . . . . . . . . . . . . . . . . . . . . . . . . . . . . . . . . . . . 509
Controlling Playback. . . . . . . . . . . . . . . . . . . . . . . . . . . . . . . . . . . . . . . . . . . . . . . . 511
Playing Back to a DV Device . . . . . . . . . . . . . . . . . . . . . . . . . . . . . . . . . . . . . . . . . 519
Video Quality Options for Playback . . . . . . . . . . . . . . . . . . . . . . . . . . . . . . . . . . . . 521
Setting the Video Quality for Playback. . . . . . . . . . . . . . . . . . . . . . . . . . . . . . . . . . 524
Marking and Subcataloging Footage . . . . . . . . . . . . . . . . . . . . . . . . . . . . . . . . . . . 524
Using Locators . . . . . . . . . . . . . . . . . . . . . . . . . . . . . . . . . . . . . . . . . . . . . . . . . . . . 530
Finding Frames, Clips, and Bins . . . . . . . . . . . . . . . . . . . . . . . . . . . . . . . . . . . . . . 544
Sequence and Clip Information Summary . . . . . . . . . . . . . . . . . . . . . . . . . . . . . . . 553
12
Page 13

Chapter 13 Creating and Editing Sequences . . . . . . . . . . . . . . . . . . . . . . . . . . . . . . 559
Entering Source/Record Mode . . . . . . . . . . . . . . . . . . . . . . . . . . . . . . . . . . . . . . . . 560
Creating a New Sequence . . . . . . . . . . . . . . . . . . . . . . . . . . . . . . . . . . . . . . . . . . . 560
Making a First Edit . . . . . . . . . . . . . . . . . . . . . . . . . . . . . . . . . . . . . . . . . . . . . . . . . 565
Creating an Instant Rough Cut . . . . . . . . . . . . . . . . . . . . . . . . . . . . . . . . . . . . . . . . 567
Undoing or Redoing Edits . . . . . . . . . . . . . . . . . . . . . . . . . . . . . . . . . . . . . . . . . . . . 568
Editing Additional Clips into the Sequence . . . . . . . . . . . . . . . . . . . . . . . . . . . . . . . 569
Mixing Frame Rates and Field Motion Types . . . . . . . . . . . . . . . . . . . . . . . . . . . . . 572
Mixing Frame Sizes and Aspect Ratios . . . . . . . . . . . . . . . . . . . . . . . . . . . . . . . . . 581
Refreshing Sequences to Use Current Clip Attributes . . . . . . . . . . . . . . . . . . . . . . 586
Lifting, Extracting, and Copying Material. . . . . . . . . . . . . . . . . . . . . . . . . . . . . . . . . 587
Adding Comments to Sequence Clips . . . . . . . . . . . . . . . . . . . . . . . . . . . . . . . . . . 591
Playing Back a Sequence . . . . . . . . . . . . . . . . . . . . . . . . . . . . . . . . . . . . . . . . . . . . 591
Understanding Sync Breaks . . . . . . . . . . . . . . . . . . . . . . . . . . . . . . . . . . . . . . . . . . 594
Fixing Sync Breaks . . . . . . . . . . . . . . . . . . . . . . . . . . . . . . . . . . . . . . . . . . . . . . . . . 596
Understanding Sync Lock . . . . . . . . . . . . . . . . . . . . . . . . . . . . . . . . . . . . . . . . . . . . 597
Ganging Footage in Monitors . . . . . . . . . . . . . . . . . . . . . . . . . . . . . . . . . . . . . . . . . 601
Sync Point Editing . . . . . . . . . . . . . . . . . . . . . . . . . . . . . . . . . . . . . . . . . . . . . . . . . . 602
Autosyncing Clips . . . . . . . . . . . . . . . . . . . . . . . . . . . . . . . . . . . . . . . . . . . . . . . . . . 603
Understanding AutoSequence . . . . . . . . . . . . . . . . . . . . . . . . . . . . . . . . . . . . . . . . 605
Adding Audio or Video to Original Videotape Using AutoSequence . . . . . . . . . . . . 606
Resyncing Subframe Audio. . . . . . . . . . . . . . . . . . . . . . . . . . . . . . . . . . . . . . . . . . . 607
Resyncing Audio for a Selected Subclip . . . . . . . . . . . . . . . . . . . . . . . . . . . . . . . . . 608
Working with Phantom Marks . . . . . . . . . . . . . . . . . . . . . . . . . . . . . . . . . . . . . . . . . 608
Creating Video and Audio Leaders . . . . . . . . . . . . . . . . . . . . . . . . . . . . . . . . . . . . . 609
Using MetaSync to Synchronize Metadata . . . . . . . . . . . . . . . . . . . . . . . . . . . . . . . 611
Chapter 14 Script-Based Editing . . . . . . . . . . . . . . . . . . . . . . . . . . . . . . . . . . . . . . . . 613
Understanding Lined Scripts . . . . . . . . . . . . . . . . . . . . . . . . . . . . . . . . . . . . . . . . . . 613
Script Integration — Lining in the Digital Realm . . . . . . . . . . . . . . . . . . . . . . . . . . . 616
Understanding the Script Window. . . . . . . . . . . . . . . . . . . . . . . . . . . . . . . . . . . . . . 618
Working with the Script Window . . . . . . . . . . . . . . . . . . . . . . . . . . . . . . . . . . . . . . . 619
Working with Script Text . . . . . . . . . . . . . . . . . . . . . . . . . . . . . . . . . . . . . . . . . . . . . 622
Working with Page or Scene Numbers and Searching in a Script . . . . . . . . . . . . . 625
13
Page 14

Linking Clips to a Script . . . . . . . . . . . . . . . . . . . . . . . . . . . . . . . . . . . . . . . . . . . . . 628
Interpolating Position for Script Integration . . . . . . . . . . . . . . . . . . . . . . . . . . . . . . 629
Working with Slates in the Script Window . . . . . . . . . . . . . . . . . . . . . . . . . . . . . . . 630
Working with Takes in the Script Window . . . . . . . . . . . . . . . . . . . . . . . . . . . . . . . 633
Indicating Off-Screen Dialog in a Script . . . . . . . . . . . . . . . . . . . . . . . . . . . . . . . . . 636
Using Color Indicators in the Script Window . . . . . . . . . . . . . . . . . . . . . . . . . . . . . 636
Script Marks . . . . . . . . . . . . . . . . . . . . . . . . . . . . . . . . . . . . . . . . . . . . . . . . . . . . . . 637
Finding Clips and Script . . . . . . . . . . . . . . . . . . . . . . . . . . . . . . . . . . . . . . . . . . . . . 645
Editing From the Script Window. . . . . . . . . . . . . . . . . . . . . . . . . . . . . . . . . . . . . . . 646
Chapter 15 Using the Timeline . . . . . . . . . . . . . . . . . . . . . . . . . . . . . . . . . . . . . . . . . . 649
Customizing Timeline Views . . . . . . . . . . . . . . . . . . . . . . . . . . . . . . . . . . . . . . . . . 650
Navigating in the Timeline . . . . . . . . . . . . . . . . . . . . . . . . . . . . . . . . . . . . . . . . . . . 671
Working with Segments . . . . . . . . . . . . . . . . . . . . . . . . . . . . . . . . . . . . . . . . . . . . . 676
Working with Multiple Tracks . . . . . . . . . . . . . . . . . . . . . . . . . . . . . . . . . . . . . . . . . 689
In to Out Highlighting in the Timeline . . . . . . . . . . . . . . . . . . . . . . . . . . . . . . . . . . . 703
Editing in Heads or Heads Tails View . . . . . . . . . . . . . . . . . . . . . . . . . . . . . . . . . . 703
Performing a Quick Edit Using the Top and Tail Commands. . . . . . . . . . . . . . . . . 704
Working with Add Edits (Match Frames) . . . . . . . . . . . . . . . . . . . . . . . . . . . . . . . . 705
Dupe Detection. . . . . . . . . . . . . . . . . . . . . . . . . . . . . . . . . . . . . . . . . . . . . . . . . . . . 707
Editing with the Film Track . . . . . . . . . . . . . . . . . . . . . . . . . . . . . . . . . . . . . . . . . . . 709
Tracking Color Frame Shifts. . . . . . . . . . . . . . . . . . . . . . . . . . . . . . . . . . . . . . . . . . 710
Finding Black Holes and Flash Frames . . . . . . . . . . . . . . . . . . . . . . . . . . . . . . . . . 712
Printing the Timeline. . . . . . . . . . . . . . . . . . . . . . . . . . . . . . . . . . . . . . . . . . . . . . . . 713
Chapter 16 Working with Trim Edits . . . . . . . . . . . . . . . . . . . . . . . . . . . . . . . . . . . . . 715
Trimming with the Timeline Palette . . . . . . . . . . . . . . . . . . . . . . . . . . . . . . . . . . . . 716
Understanding Trim Displays . . . . . . . . . . . . . . . . . . . . . . . . . . . . . . . . . . . . . . . . . 717
Setting Small Trim Display . . . . . . . . . . . . . . . . . . . . . . . . . . . . . . . . . . . . . . . . . . . 719
Trim Settings Overview . . . . . . . . . . . . . . . . . . . . . . . . . . . . . . . . . . . . . . . . . . . . . 720
Timeline Trim States . . . . . . . . . . . . . . . . . . . . . . . . . . . . . . . . . . . . . . . . . . . . . . . 720
Selecting Trim Sides . . . . . . . . . . . . . . . . . . . . . . . . . . . . . . . . . . . . . . . . . . . . . . . 721
Overwrite Trimming . . . . . . . . . . . . . . . . . . . . . . . . . . . . . . . . . . . . . . . . . . . . . . . . 725
Ripple Trimming . . . . . . . . . . . . . . . . . . . . . . . . . . . . . . . . . . . . . . . . . . . . . . . . . . . 726
Dual-Roller Trimming . . . . . . . . . . . . . . . . . . . . . . . . . . . . . . . . . . . . . . . . . . . . . . . 728
14
Page 15

Refining Trims . . . . . . . . . . . . . . . . . . . . . . . . . . . . . . . . . . . . . . . . . . . . . . . . . . . . . 729
Reviewing Trim Edits . . . . . . . . . . . . . . . . . . . . . . . . . . . . . . . . . . . . . . . . . . . . . . . 730
Trimming On-the-Fly . . . . . . . . . . . . . . . . . . . . . . . . . . . . . . . . . . . . . . . . . . . . . . . . 731
Using Dual-Image Playback During Trims . . . . . . . . . . . . . . . . . . . . . . . . . . . . . . . 732
Trimming During a Playback Loop . . . . . . . . . . . . . . . . . . . . . . . . . . . . . . . . . . . . . 733
Creating Overlap Edits . . . . . . . . . . . . . . . . . . . . . . . . . . . . . . . . . . . . . . . . . . . . . . 734
Extending an Edit . . . . . . . . . . . . . . . . . . . . . . . . . . . . . . . . . . . . . . . . . . . . . . . . . . 735
Maintaining Sync While Trimming. . . . . . . . . . . . . . . . . . . . . . . . . . . . . . . . . . . . . . 736
Slipping or Sliding Segments . . . . . . . . . . . . . . . . . . . . . . . . . . . . . . . . . . . . . . . . . 737
Trimming in Two Directions. . . . . . . . . . . . . . . . . . . . . . . . . . . . . . . . . . . . . . . . . . . 741
Using the Transition Corner Display . . . . . . . . . . . . . . . . . . . . . . . . . . . . . . . . . . . . 742
Chapter 17 Working with Audio . . . . . . . . . . . . . . . . . . . . . . . . . . . . . . . . . . . . . . . . . 745
Overview of Audio Tools . . . . . . . . . . . . . . . . . . . . . . . . . . . . . . . . . . . . . . . . . . . . . 746
Working with Multichannel Audio Tracks . . . . . . . . . . . . . . . . . . . . . . . . . . . . . . . . 748
Displaying Track Formats in Bins . . . . . . . . . . . . . . . . . . . . . . . . . . . . . . . . . . . . . . 750
The Track Control Panel . . . . . . . . . . . . . . . . . . . . . . . . . . . . . . . . . . . . . . . . . . . . . 751
Using Audio Scrub . . . . . . . . . . . . . . . . . . . . . . . . . . . . . . . . . . . . . . . . . . . . . . . . . 754
Audio Displays in the Timeline . . . . . . . . . . . . . . . . . . . . . . . . . . . . . . . . . . . . . . . . 758
Displaying Audio Formats in Bins . . . . . . . . . . . . . . . . . . . . . . . . . . . . . . . . . . . . . . 765
Working with Surround Sound or 5.1 Audio
(Avid Nitris DX and Avid Mojo DX Only) . . . . . . . . . . . . . . . . . . . . . . . . . . . . . . . 765
Adjusting the Play Buffer Size for Audio (Software-only Models) . . . . . . . . . . . . . . 769
Using the Audio Mixer Tool . . . . . . . . . . . . . . . . . . . . . . . . . . . . . . . . . . . . . . . . . . . 770
Rendering and Unrendering Order for Audio Effects . . . . . . . . . . . . . . . . . . . . . . . 776
Audio Gain Staging and an Audio Editing Workflow . . . . . . . . . . . . . . . . . . . . . . . . 777
Using Clip Gain and Pan Mode. . . . . . . . . . . . . . . . . . . . . . . . . . . . . . . . . . . . . . . . 778
Using Automation Gain and Pan. . . . . . . . . . . . . . . . . . . . . . . . . . . . . . . . . . . . . . . 787
Using Live Mix Mode. . . . . . . . . . . . . . . . . . . . . . . . . . . . . . . . . . . . . . . . . . . . . . . . 794
Fading and Dipping Audio. . . . . . . . . . . . . . . . . . . . . . . . . . . . . . . . . . . . . . . . . . . . 802
Audio Sample Rate Conversion . . . . . . . . . . . . . . . . . . . . . . . . . . . . . . . . . . . . . . . 805
Changing the Audio Sample Rate for Sequences and Audio Clips . . . . . . . . . . . . 805
Mixing Down Audio Tracks . . . . . . . . . . . . . . . . . . . . . . . . . . . . . . . . . . . . . . . . . . . 806
Splitting Stereo Tracks to Mono Tracks . . . . . . . . . . . . . . . . . . . . . . . . . . . . . . . . . 808
15
Page 16

Using the Audio EQ Tool . . . . . . . . . . . . . . . . . . . . . . . . . . . . . . . . . . . . . . . . . . . . 809
Recording Voice-Over Narration . . . . . . . . . . . . . . . . . . . . . . . . . . . . . . . . . . . . . . 823
Chapter 18 Using External Audio Devices . . . . . . . . . . . . . . . . . . . . . . . . . . . . . . . . 831
Using an External Fader Controller or Mixer to Record
Automation Gain . . . . . . . . . . . . . . . . . . . . . . . . . . . . . . . . . . . . . . . . . . . . . . . . . 833
Adjusting the Volume or Pan of Individual Keyframes . . . . . . . . . . . . . . . . . . . . . . 835
Using the 002 and the Command|8 . . . . . . . . . . . . . . . . . . . . . . . . . . . . . . . . . . . . 835
Configuring USB-to-MIDI Software for External Controllers. . . . . . . . . . . . . . . . . . 845
Using the FaderMaster Pro and MCS-3000X. . . . . . . . . . . . . . . . . . . . . . . . . . . . . 848
Using the Yamaha 01V/96 or the Yamaha 01V . . . . . . . . . . . . . . . . . . . . . . . . . . . 851
Using a GPI Device with the Audio Punch-In Tool . . . . . . . . . . . . . . . . . . . . . . . . . 856
Chapter 19 Using Audio Plug-Ins . . . . . . . . . . . . . . . . . . . . . . . . . . . . . . . . . . . . . . . . 863
Real-Time AudioSuite Plug-Ins . . . . . . . . . . . . . . . . . . . . . . . . . . . . . . . . . . . . . . . 863
Avid AudioSuite Plug-Ins . . . . . . . . . . . . . . . . . . . . . . . . . . . . . . . . . . . . . . . . . . . . 870
Core Avid Audio Plug-Ins . . . . . . . . . . . . . . . . . . . . . . . . . . . . . . . . . . . . . . . . . . . . 882
Chapter 20 Exporting Frames, Clips, or Sequences . . . . . . . . . . . . . . . . . . . . . . . . 925
Understanding Export. . . . . . . . . . . . . . . . . . . . . . . . . . . . . . . . . . . . . . . . . . . . . . . 926
Preparing to Export a Sequence . . . . . . . . . . . . . . . . . . . . . . . . . . . . . . . . . . . . . . 927
Exporting With the Send To Templates . . . . . . . . . . . . . . . . . . . . . . . . . . . . . . . . . 928
Send To Templates Reference . . . . . . . . . . . . . . . . . . . . . . . . . . . . . . . . . . . . . . . 932
Creating a Custom Send To Template for Exporting to
Third-Party Applications . . . . . . . . . . . . . . . . . . . . . . . . . . . . . . . . . . . . . . . . . . . 933
Exporting With the Export Command or the Drag-and-Drop Method. . . . . . . . . . . 935
Customizing Export Settings . . . . . . . . . . . . . . . . . . . . . . . . . . . . . . . . . . . . . . . . . 939
Guidelines for Exporting OMFI and AAF Files . . . . . . . . . . . . . . . . . . . . . . . . . . . . 940
Exporting Projects and Bins Using AFE Files (Windows Only) . . . . . . . . . . . . . . . 943
Exporting QuickTime Movies . . . . . . . . . . . . . . . . . . . . . . . . . . . . . . . . . . . . . . . . . 945
Installing or Copying the Avid Codecs for QuickTime on Other Systems . . . . . . . 947
Exporting from a Third-Party QuickTime or AVI Application . . . . . . . . . . . . . . . . . 949
Exporting as Windows Media (Windows Only). . . . . . . . . . . . . . . . . . . . . . . . . . . . 949
Creating a Custom Profile for Windows Media Export (Windows Only). . . . . . . . . 950
Exporting Media to XDCAM Devices . . . . . . . . . . . . . . . . . . . . . . . . . . . . . . . . . . . 951
Exporting to XDCAM . . . . . . . . . . . . . . . . . . . . . . . . . . . . . . . . . . . . . . . . . . . . . . . 952
16
Page 17

Exporting Your Clip or Sequence to a P2 Card. . . . . . . . . . . . . . . . . . . . . . . . . . . . 953
Exporting as Windows Media Using a VC1 Resolution. . . . . . . . . . . . . . . . . . . . . . 954
Using Avid Interplay Media Services. . . . . . . . . . . . . . . . . . . . . . . . . . . . . . . . . . . . 955
Chapter 21 Generating Output . . . . . . . . . . . . . . . . . . . . . . . . . . . . . . . . . . . . . . . . . . 957
Preparing for Output: Overview. . . . . . . . . . . . . . . . . . . . . . . . . . . . . . . . . . . . . . . . 957
Selecting the Device for Output . . . . . . . . . . . . . . . . . . . . . . . . . . . . . . . . . . . . . . . 958
Selecting the Sync Source for Output . . . . . . . . . . . . . . . . . . . . . . . . . . . . . . . . . . . 959
Selecting a Video Output Signal . . . . . . . . . . . . . . . . . . . . . . . . . . . . . . . . . . . . . . . 962
Calibrating for Video Output . . . . . . . . . . . . . . . . . . . . . . . . . . . . . . . . . . . . . . . . . . 962
Preparing for Converting HD Formats. . . . . . . . . . . . . . . . . . . . . . . . . . . . . . . . . . . 969
Preparing for Audio Output . . . . . . . . . . . . . . . . . . . . . . . . . . . . . . . . . . . . . . . . . . . 972
Preparing Record Tapes . . . . . . . . . . . . . . . . . . . . . . . . . . . . . . . . . . . . . . . . . . . . . 978
Enabling Assemble-Edit Recording. . . . . . . . . . . . . . . . . . . . . . . . . . . . . . . . . . . . . 980
Using ExpertRender to Prepare Effects for a Digital Cut . . . . . . . . . . . . . . . . . . . . 981
Using the Digital Cut Tool . . . . . . . . . . . . . . . . . . . . . . . . . . . . . . . . . . . . . . . . . . . . 982
Output Mode Resolution Options . . . . . . . . . . . . . . . . . . . . . . . . . . . . . . . . . . . . . . 991
Outputting DV 50 and DVCPRO HD Media Directly to a DV Device . . . . . . . . . . . 993
Selecting Output and Timecode Formats for 23.976p, 24p,
and 25p Projects . . . . . . . . . . . . . . . . . . . . . . . . . . . . . . . . . . . . . . . . . . . . . . . . . 994
Selecting Output Formats for 23.976p, 24p, and 25p Projects . . . . . . . . . . . . . . . . 995
Output Format Reference for 23.976p, 24p, and 25p Projects . . . . . . . . . . . . . . . . 996
Selecting the Timecode Format for Output . . . . . . . . . . . . . . . . . . . . . . . . . . . . . . . 998
Outputting Drop-Frame and Non-Drop-Frame Timecode
Simultaneously for Downstream Encoding . . . . . . . . . . . . . . . . . . . . . . . . . . . . . 999
Indicating the Destination Timecode Rate . . . . . . . . . . . . . . . . . . . . . . . . . . . . . . 1000
Selecting the Video Pulldown Cadence . . . . . . . . . . . . . . . . . . . . . . . . . . . . . . . . 1000
Performing an Insert Edit with Pulldown . . . . . . . . . . . . . . . . . . . . . . . . . . . . . . . . 1001
Digital Cuts and Audio. . . . . . . . . . . . . . . . . . . . . . . . . . . . . . . . . . . . . . . . . . . . . . 1002
Changing the Default Pulldown Phase for Sequences . . . . . . . . . . . . . . . . . . . . . 1003
Understanding DV Digital Cut Delay . . . . . . . . . . . . . . . . . . . . . . . . . . . . . . . . . . 1004
Delaying the Sequence for a Digital Cut . . . . . . . . . . . . . . . . . . . . . . . . . . . . . . . . 1005
Using EDL Manager . . . . . . . . . . . . . . . . . . . . . . . . . . . . . . . . . . . . . . . . . . . . . . . 1005
Using FilmScribe . . . . . . . . . . . . . . . . . . . . . . . . . . . . . . . . . . . . . . . . . . . . . . . . . . 1006
Understanding Matchback . . . . . . . . . . . . . . . . . . . . . . . . . . . . . . . . . . . . . . . . . . 1006
17
Page 18

Vertical Blanking Information . . . . . . . . . . . . . . . . . . . . . . . . . . . . . . . . . . . . . . . . 1008
Preserving HD Closed Captioning and Ancillary Data . . . . . . . . . . . . . . . . . . . . . 1014
Chapter 22 Conforming and Transferring Projects . . . . . . . . . . . . . . . . . . . . . . . . 1027
Understanding Conforming . . . . . . . . . . . . . . . . . . . . . . . . . . . . . . . . . . . . . . . . . 1027
Preparations for Conforming . . . . . . . . . . . . . . . . . . . . . . . . . . . . . . . . . . . . . . . . 1028
Conforming Workflow. . . . . . . . . . . . . . . . . . . . . . . . . . . . . . . . . . . . . . . . . . . . . . 1032
Transferring Project and Media Files Between Avid Editing Systems . . . . . . . . . 1041
Chapter 23 Working with Avid Interplay from an Avid Editing System . . . . . . . . 1053
Working with Interplay and Remote Assets . . . . . . . . . . . . . . . . . . . . . . . . . . . . . 1053
Administrator Settings for Avid Editing Clients. . . . . . . . . . . . . . . . . . . . . . . . . . . 1055
Using the Interplay Window . . . . . . . . . . . . . . . . . . . . . . . . . . . . . . . . . . . . . . . . . 1056
Connecting to the Avid Interplay Database . . . . . . . . . . . . . . . . . . . . . . . . . . . . . 1058
Editing with Remote Assets . . . . . . . . . . . . . . . . . . . . . . . . . . . . . . . . . . . . . . . . . 1063
Managing Remote Assets with the Interplay Window . . . . . . . . . . . . . . . . . . . . . 1076
Finding Remote Assets . . . . . . . . . . . . . . . . . . . . . . . . . . . . . . . . . . . . . . . . . . . . 1096
Capturing Media to Interplay Folders . . . . . . . . . . . . . . . . . . . . . . . . . . . . . . . . . . 1099
Connecting to Avid Unity and Mounting Workspaces . . . . . . . . . . . . . . . . . . . . . 1100
Dos and Don’ts for Editors Working with Avid Interplay . . . . . . . . . . . . . . . . . . . . 1109
Chapter 24 Using MultiRez and Dynamic Relink . . . . . . . . . . . . . . . . . . . . . . . . . . 1113
Understanding MultiRez and Proxy Editing . . . . . . . . . . . . . . . . . . . . . . . . . . . . . 1113
Acquiring Media at Multiple Resolutions . . . . . . . . . . . . . . . . . . . . . . . . . . . . . . . 1115
Understanding How Clips are Associated with Multiple Resolutions . . . . . . . . . . 1119
Options for Clip and Media Association . . . . . . . . . . . . . . . . . . . . . . . . . . . . . . . . 1120
Understanding Dynamic Relink . . . . . . . . . . . . . . . . . . . . . . . . . . . . . . . . . . . . . . 1124
Workflow: Editing a Film or HD Project using MultiRez . . . . . . . . . . . . . . . . . . . . 1126
Considerations When Working with Dynamic Relink . . . . . . . . . . . . . . . . . . . . . . 1132
Using the Dynamic Relink Settings Dialog Box . . . . . . . . . . . . . . . . . . . . . . . . . . 1132
Relinking in Frame Chase Editing . . . . . . . . . . . . . . . . . . . . . . . . . . . . . . . . . . . . 1140
Using the Relink Dialog Box in an Avid Interplay Environment . . . . . . . . . . . . . . 1140
Displaying Whether Media Is Available for Dynamic Relinking . . . . . . . . . . . . . . 1141
MultiRez Button Menu . . . . . . . . . . . . . . . . . . . . . . . . . . . . . . . . . . . . . . . . . . . . . 1147
MultiRez Bin Headings. . . . . . . . . . . . . . . . . . . . . . . . . . . . . . . . . . . . . . . . . . . . . 1149
Understanding Options for Deleting MultiRez Clips and Media . . . . . . . . . . . . . . 1151
18
Page 19

Deleting MultiRez Clips and Media from a Bin . . . . . . . . . . . . . . . . . . . . . . . . . . . 1153
Working with Partially Online Files . . . . . . . . . . . . . . . . . . . . . . . . . . . . . . . . . . . . 1154
Quality Matching . . . . . . . . . . . . . . . . . . . . . . . . . . . . . . . . . . . . . . . . . . . . . . . . . . 1157
Chapter 25 MultiCamera Editing . . . . . . . . . . . . . . . . . . . . . . . . . . . . . . . . . . . . . . . 1163
Understanding Grouping and Multigrouping Clips . . . . . . . . . . . . . . . . . . . . . . . . 1163
Creating Group Clips. . . . . . . . . . . . . . . . . . . . . . . . . . . . . . . . . . . . . . . . . . . . . . . 1164
Creating Multigroup Clips . . . . . . . . . . . . . . . . . . . . . . . . . . . . . . . . . . . . . . . . . . . 1165
MultiCamera Displays . . . . . . . . . . . . . . . . . . . . . . . . . . . . . . . . . . . . . . . . . . . . . . 1167
MultiCamera Editing Techniques . . . . . . . . . . . . . . . . . . . . . . . . . . . . . . . . . . . . . 1173
Selective Camera Cutting . . . . . . . . . . . . . . . . . . . . . . . . . . . . . . . . . . . . . . . . . . . 1178
Chapter 26 Settings . . . . . . . . . . . . . . . . . . . . . . . . . . . . . . . . . . . . . . . . . . . . . . . . . . 1181
Understanding Settings. . . . . . . . . . . . . . . . . . . . . . . . . . . . . . . . . . . . . . . . . . . . . 1182
Working with Settings . . . . . . . . . . . . . . . . . . . . . . . . . . . . . . . . . . . . . . . . . . . . . . 1185
Options for Moving User Settings Files. . . . . . . . . . . . . . . . . . . . . . . . . . . . . . . . . 1192
Summary of Settings. . . . . . . . . . . . . . . . . . . . . . . . . . . . . . . . . . . . . . . . . . . . . . . 1193
AMA Settings . . . . . . . . . . . . . . . . . . . . . . . . . . . . . . . . . . . . . . . . . . . . . . . . . . . . 1196
Audio Settings . . . . . . . . . . . . . . . . . . . . . . . . . . . . . . . . . . . . . . . . . . . . . . . . . . . . 1197
Audio Project Settings. . . . . . . . . . . . . . . . . . . . . . . . . . . . . . . . . . . . . . . . . . . . . . 1198
Bin Settings . . . . . . . . . . . . . . . . . . . . . . . . . . . . . . . . . . . . . . . . . . . . . . . . . . . . . . 1204
Capture Settings . . . . . . . . . . . . . . . . . . . . . . . . . . . . . . . . . . . . . . . . . . . . . . . . . . 1205
Communication (Serial) Ports Tool Settings . . . . . . . . . . . . . . . . . . . . . . . . . . . . . 1210
Composer Settings . . . . . . . . . . . . . . . . . . . . . . . . . . . . . . . . . . . . . . . . . . . . . . . . 1211
Controller Settings. . . . . . . . . . . . . . . . . . . . . . . . . . . . . . . . . . . . . . . . . . . . . . . . . 1214
Correction Settings . . . . . . . . . . . . . . . . . . . . . . . . . . . . . . . . . . . . . . . . . . . . . . . . 1215
Deck Configuration Settings . . . . . . . . . . . . . . . . . . . . . . . . . . . . . . . . . . . . . . . . . 1217
Deck Settings . . . . . . . . . . . . . . . . . . . . . . . . . . . . . . . . . . . . . . . . . . . . . . . . . . . . 1217
Deck Preferences Settings . . . . . . . . . . . . . . . . . . . . . . . . . . . . . . . . . . . . . . . . . . 1219
Dynamic Relink Settings . . . . . . . . . . . . . . . . . . . . . . . . . . . . . . . . . . . . . . . . . . . . 1220
Effect Editor Settings. . . . . . . . . . . . . . . . . . . . . . . . . . . . . . . . . . . . . . . . . . . . . . . 1224
Email Settings . . . . . . . . . . . . . . . . . . . . . . . . . . . . . . . . . . . . . . . . . . . . . . . . . . . . 1226
Export Settings . . . . . . . . . . . . . . . . . . . . . . . . . . . . . . . . . . . . . . . . . . . . . . . . . . . 1227
Film and 24P Settings . . . . . . . . . . . . . . . . . . . . . . . . . . . . . . . . . . . . . . . . . . . . . . 1252
Full Screen Playback Settings . . . . . . . . . . . . . . . . . . . . . . . . . . . . . . . . . . . . . . . 1253
19
Page 20

General Settings. . . . . . . . . . . . . . . . . . . . . . . . . . . . . . . . . . . . . . . . . . . . . . . . . . 1255
Grid Settings. . . . . . . . . . . . . . . . . . . . . . . . . . . . . . . . . . . . . . . . . . . . . . . . . . . . . 1256
Import Settings . . . . . . . . . . . . . . . . . . . . . . . . . . . . . . . . . . . . . . . . . . . . . . . . . . . 1258
Interface Settings . . . . . . . . . . . . . . . . . . . . . . . . . . . . . . . . . . . . . . . . . . . . . . . . . 1264
Interplay Folder, Interplay Server, and Interplay User Settings . . . . . . . . . . . . . . 1265
Keyboard Settings . . . . . . . . . . . . . . . . . . . . . . . . . . . . . . . . . . . . . . . . . . . . . . . . 1266
Marquee Title Settings . . . . . . . . . . . . . . . . . . . . . . . . . . . . . . . . . . . . . . . . . . . . . 1267
Media Creation Settings. . . . . . . . . . . . . . . . . . . . . . . . . . . . . . . . . . . . . . . . . . . . 1268
Media Services Settings (Windows Only) . . . . . . . . . . . . . . . . . . . . . . . . . . . . . . 1271
Mouse Settings. . . . . . . . . . . . . . . . . . . . . . . . . . . . . . . . . . . . . . . . . . . . . . . . . . . 1272
PortServer Settings . . . . . . . . . . . . . . . . . . . . . . . . . . . . . . . . . . . . . . . . . . . . . . . 1272
Remote Play and Capture Settings . . . . . . . . . . . . . . . . . . . . . . . . . . . . . . . . . . . 1273
Render Settings . . . . . . . . . . . . . . . . . . . . . . . . . . . . . . . . . . . . . . . . . . . . . . . . . . 1274
Safe Colors Settings. . . . . . . . . . . . . . . . . . . . . . . . . . . . . . . . . . . . . . . . . . . . . . . 1276
Script Settings . . . . . . . . . . . . . . . . . . . . . . . . . . . . . . . . . . . . . . . . . . . . . . . . . . . 1277
Sound Card Configuration Settings
(Windows Only). . . . . . . . . . . . . . . . . . . . . . . . . . . . . . . . . . . . . . . . . . . . . . . . . 1278
Timeline Settings . . . . . . . . . . . . . . . . . . . . . . . . . . . . . . . . . . . . . . . . . . . . . . . . . 1278
Trim Settings . . . . . . . . . . . . . . . . . . . . . . . . . . . . . . . . . . . . . . . . . . . . . . . . . . . . 1281
Video Display Settings . . . . . . . . . . . . . . . . . . . . . . . . . . . . . . . . . . . . . . . . . . . . . 1282
Video Input Tool Settings . . . . . . . . . . . . . . . . . . . . . . . . . . . . . . . . . . . . . . . . . . . 1283
Video Output Tool Settings . . . . . . . . . . . . . . . . . . . . . . . . . . . . . . . . . . . . . . . . . 1284
Video Satellite Settings . . . . . . . . . . . . . . . . . . . . . . . . . . . . . . . . . . . . . . . . . . . . 1288
Workspace Settings . . . . . . . . . . . . . . . . . . . . . . . . . . . . . . . . . . . . . . . . . . . . . . . 1289
Chapter 27 File Format Specifications. . . . . . . . . . . . . . . . . . . . . . . . . . . . . . . . . . . 1291
Specifications for Graphics (Image) Files. . . . . . . . . . . . . . . . . . . . . . . . . . . . . . . 1291
Specifications for Animation Files . . . . . . . . . . . . . . . . . . . . . . . . . . . . . . . . . . . . 1297
Specifications for Importing OMFI Files . . . . . . . . . . . . . . . . . . . . . . . . . . . . . . . . 1298
Working with BWF Files . . . . . . . . . . . . . . . . . . . . . . . . . . . . . . . . . . . . . . . . . . . . 1299
Field Ordering in Graphic Imports and Exports . . . . . . . . . . . . . . . . . . . . . . . . . . 1304
Chapter 28 Resolutions and Storage Requirements . . . . . . . . . . . . . . . . . . . . . . . 1307
Compression and Avid Editing Applications. . . . . . . . . . . . . . . . . . . . . . . . . . . . . 1307
Monitor Display Resolutions. . . . . . . . . . . . . . . . . . . . . . . . . . . . . . . . . . . . . . . . . 1308
20
Page 21

Resolution Specifications . . . . . . . . . . . . . . . . . . . . . . . . . . . . . . . . . . . . . . . . . . . 1309
Support for Uncompressed HD Media . . . . . . . . . . . . . . . . . . . . . . . . . . . . . . . . . 1318
Mixing Resolutions . . . . . . . . . . . . . . . . . . . . . . . . . . . . . . . . . . . . . . . . . . . . . . . . 1319
Resolution Groups and Image Quality . . . . . . . . . . . . . . . . . . . . . . . . . . . . . . . . . 1320
Estimating Drive Space Requirements . . . . . . . . . . . . . . . . . . . . . . . . . . . . . . . . . 1320
Storage Requirements . . . . . . . . . . . . . . . . . . . . . . . . . . . . . . . . . . . . . . . . . . . . . 1321
Considerations for Managing Storage. . . . . . . . . . . . . . . . . . . . . . . . . . . . . . . . . . 1330
Chapter 29 Working with Stereoscopic Material . . . . . . . . . . . . . . . . . . . . . . . . . . 1333
Understanding the Stereoscopic Workflow . . . . . . . . . . . . . . . . . . . . . . . . . . . . . . 1333
Acquiring Stereoscopic Files. . . . . . . . . . . . . . . . . . . . . . . . . . . . . . . . . . . . . . . . . 1334
Setting Up Your System For Viewing Stereoscopic Material in
Three Dimensions . . . . . . . . . . . . . . . . . . . . . . . . . . . . . . . . . . . . . . . . . . . . . . . 1334
Displaying Stereoscopic Material . . . . . . . . . . . . . . . . . . . . . . . . . . . . . . . . . . . . . 1336
Considerations When Working with Stereoscopic Material. . . . . . . . . . . . . . . . . . 1338
Chapter 30 Working in High-Resolution Projects. . . . . . . . . . . . . . . . . . . . . . . . . . 1341
Delivery Methods for Film & Video . . . . . . . . . . . . . . . . . . . . . . . . . . . . . . . . . . . . 1342
Film Workflows: Editing Footage from Film Reel . . . . . . . . . . . . . . . . . . . . . . . . . 1343
Checklist: Editing Film Reel Footage in Media Composer . . . . . . . . . . . . . . . . . . 1345
Transferring Film to Tape . . . . . . . . . . . . . . . . . . . . . . . . . . . . . . . . . . . . . . . . . . . 1347
Film Workflows: Editing Footage from Digital Files. . . . . . . . . . . . . . . . . . . . . . . . 1357
Checklist: Editing Digital Film Footage in Media Composer . . . . . . . . . . . . . . . . . 1359
HD Workflow: Video-Based Television . . . . . . . . . . . . . . . . . . . . . . . . . . . . . . . . . 1362
Producing Graphics for Broadcast . . . . . . . . . . . . . . . . . . . . . . . . . . . . . . . . . . . . 1364
Creating a Film-Based Project . . . . . . . . . . . . . . . . . . . . . . . . . . . . . . . . . . . . . . . 1364
Editing with High-Resolution Media . . . . . . . . . . . . . . . . . . . . . . . . . . . . . . . . . . . 1368
Linking to RED Files . . . . . . . . . . . . . . . . . . . . . . . . . . . . . . . . . . . . . . . . . . . . . . . 1373
Working with HDV . . . . . . . . . . . . . . . . . . . . . . . . . . . . . . . . . . . . . . . . . . . . . . . . . 1376
Understanding HDV . . . . . . . . . . . . . . . . . . . . . . . . . . . . . . . . . . . . . . . . . . . . . . . 1377
HDV Workflow. . . . . . . . . . . . . . . . . . . . . . . . . . . . . . . . . . . . . . . . . . . . . . . . . . . . 1378
Capturing and Importing HDV . . . . . . . . . . . . . . . . . . . . . . . . . . . . . . . . . . . . . . . . 1379
Playing Back HDV Media . . . . . . . . . . . . . . . . . . . . . . . . . . . . . . . . . . . . . . . . . . . 1380
Outputting HDV . . . . . . . . . . . . . . . . . . . . . . . . . . . . . . . . . . . . . . . . . . . . . . . . . . . 1381
21
Page 22

Raster Dimensions. . . . . . . . . . . . . . . . . . . . . . . . . . . . . . . . . . . . . . . . . . . . . . . . 1386
Raster Sizes. . . . . . . . . . . . . . . . . . . . . . . . . . . . . . . . . . . . . . . . . . . . . . . . . . . . . 1388
Chapter 31 Dual Link HD RGB Support . . . . . . . . . . . . . . . . . . . . . . . . . . . . . . . . . . 1389
HD RGB Capture . . . . . . . . . . . . . . . . . . . . . . . . . . . . . . . . . . . . . . . . . . . . . . . . . 1390
HD RGB Playback to High Resolution Monitor . . . . . . . . . . . . . . . . . . . . . . . . . . 1390
HD RGB Digital Cut . . . . . . . . . . . . . . . . . . . . . . . . . . . . . . . . . . . . . . . . . . . . . . . 1390
Chapter 32 International Character Support (ICS) in
Avid Editing Applications 1391
Choosing a Locale on an English Language Operating System . . . . . . . . . . . . . 1391
Using a Local Language Operating System
(Windows Only). . . . . . . . . . . . . . . . . . . . . . . . . . . . . . . . . . . . . . . . . . . . . . . . . 1392
Non-English Character Support (Macintosh) . . . . . . . . . . . . . . . . . . . . . . . . . . . . 1392
Non-English Character Support (Windows) . . . . . . . . . . . . . . . . . . . . . . . . . . . . . 1395
Using Foreign Keyboard Mapping (Windows) . . . . . . . . . . . . . . . . . . . . . . . . . . . 1399
Considerations for International Character Support. . . . . . . . . . . . . . . . . . . . . . . 1400
Chapter 33 Using the MCS3 Controller . . . . . . . . . . . . . . . . . . . . . . . . . . . . . . . . . . 1405
Configuring MCS3 Settings . . . . . . . . . . . . . . . . . . . . . . . . . . . . . . . . . . . . . . . . . 1405
Default MCS3 Button Mappings. . . . . . . . . . . . . . . . . . . . . . . . . . . . . . . . . . . . . . 1409
Moving Through Footage with the MCS3 Controller . . . . . . . . . . . . . . . . . . . . . . 1410
Using the MCS3 for Editing Footage . . . . . . . . . . . . . . . . . . . . . . . . . . . . . . . . . . 1411
Troubleshooting the MCS3 Controller . . . . . . . . . . . . . . . . . . . . . . . . . . . . . . . . . 1412
Chapter 34 Setting Up the Matrox MX02 Mini . . . . . . . . . . . . . . . . . . . . . . . . . . . . . 1413
Index . . . . . . . . . . . . . . . . . . . . . . . . . . . . . . . . . . . . . . . . . . . . . . . . . . . . 1419
22
Page 23

Using This Guide
This guide contains the task-oriented instructions and conceptual information you need to
use the basic features of your Avid editing application. The Advanced Guide for your Avid
editing application, available as a PDF document in the Online Library, is a companion to
this guide. The Advanced Guide contains instructions and conceptual information for
advanced features of your Avid editing application, as well as reference information. The
contents of both guides are available in the Help.
This guide is intended for all users, from beginning to advanced.
Unless noted otherwise, the material in this document applies to the Windows
Mac OS
on a Windows system, but the information applies to both Windows and Mac OS X systems.
Where differences exist, both Windows and Mac OS X screen shots are shown.
The documentation describes the features and hardware of all models. Therefore, your
n
system might not contain certain features and hardware that are covered in the
documentation.
Symbols and Conventions
®
X operating systems.The majority of screen shots in this document were captured
®
and
Avid documentation uses the following symbols and conventions:
Symbol or Convention Meaning or Action
n
c
w
> This symbol indicates menu commands (and subcommands) in the
A note provides important related information, reminders,
recommendations, and strong suggestions.
A caution means that a specific action you take could cause harm to
your computer or cause you to lose data.
A warning describes an action that could cause you physical harm.
Follow the guidelines in this document or on the unit itself when
handling electrical equipment.
order you select them. For example, File > Import means to open the
File menu and then select the Import command.
Page 24

Symbol or Convention Meaning or Action
This symbol indicates a single-step procedure. Multiple arrows in a list
indicate that you perform one of the actions listed.
(Windows), (Windows
only), (Macintosh), or
(Macintosh only)
Bold font Bold font is primarily used in task instructions to identify user interface
Italic font Italic font is used to emphasize certain words and to indicate variables.
Courier Bold font
Ctrl+key or mouse action Press and hold the first key while you press the last key or perform the
If You Need Help
If you are having trouble using your Avid product:
1. Retry the action, carefully following the instructions given for that task in this guide. It
is especially important to check each step of your workflow.
2. Check the latest information that might have become available after the documentation
was published:
- If the latest information for your Avid product is provided as printed release notes,
they are shipped with your application and are also available online.
This text indicates that the information applies only to the specified
operating system, either Windows or Macintosh OS X.
items and keyboard sequences.
Courier Bold font identifies text that you type.
mouse action. For example, Command+Option+C or Ctrl+drag.
24
- If the latest information for your Avid product is provided as a ReadMe file, it is
supplied on your Avid installation CD or DVD as a PDF document
(README_product.pdf) and is also available online.
You should always check online for the most up-to-date release notes or ReadMe
because the online version is updated whenever new information becomes
available. To view these online versions, select ReadMe from the Help menu, or visit
the Knowledge Base at www.avid.com/readme.
3. Check the documentation that came with your Avid application or your hardware for
maintenance or hardware-related issues.
4. Visit the online Knowledge Base at www.avid.com/onlinesupport. Online services are
available 24 hours per day, 7 days per week. Search this online Knowledge Base to find
answers, to view error messages, to access troubleshooting tips, to download updates,
and to read or join online message-board discussions.
Page 25

Accessing the Goodies Folder
Avid supplies a Goodies folder located on the editing application DVD. Access the Goodies
folder by browsing the DVD. This folder contains programs and files you might find useful
when trying to perform functions beyond the scope of your Avid editing application.
The information in the Goodies folder is provided solely for your reference and as
suggestions for you to decide if any of these products fit into your process. Avid is not
responsible for the manufacture, support, or sales of these products. Avid is also not
responsible for any loss of data or time, or any other adverse results related to the use of
these products. All risks of using such products or accessing such Web sites are entirely your
own. The Web sites listed in the Goodies folder are not under the control of Avid, and Avid
is not responsible for their content, any changes or updates to them, or the collection of any
personal data or information by the operators of such Web sites. All information and product
availability is subject to change without notice.
Avid Training Services
Avid makes lifelong learning, career advancement, and personal development easy and
convenient. Avid understands that the knowledge you need to differentiate yourself is always
changing, and Avid continually updates course content and offers new training delivery
methods that accommodate your pressured and competitive work environment.
Accessing the Goodies Folder
For information on courses/schedules, training centers, certifications, courseware, and
books, please visit www.avid.com/support and follow the Training links, or call Avid Sales
at 800-949-AVID (800-949-2843).
25
Page 26

26
Page 27

1 Editing Overview
The topics in this chapter provide an overview of the editing workflow:
• Editing Workflow
• Starting a Project
• Preparing to Edit
• Editing a Sequence
• Outputting a Sequence
Editing Workflow
Your editing workflow depends on a variety of factors. For example, you might work on a
standard-definition video project, a film project, or an HD project.
The following procedure lists the basic steps for editing a sequence and refers you to
sections of the documentation for more information.
1. Create or open a project.
For more information, see “Starting a Project” on page 35.
2. Set the appropriate Project settings and create a bin structure.
For more information, see “Working with the Project Window” on page 69.
3. Capture or import the media.
For more information, see “Preparing for Capture” on page 163, “Capturing Media” on
page 231, and “Importing Files” on page 297.
4. Organize your bins to suit your project’s needs.
For more information, see “Working with Bins” on page 339.
5. View your clips in advance and mark IN and OUT points, or create subclips based on
selected portions of your master clips.
For more information, see “Viewing and Marking Footage” on page 491.
6. Build your sequence in the Timeline.
Page 28

1 Editing Overview
For more information, see “Creating and Editing Sequences” on page 559 and “Using
the Timeline” on page 649.
7. Use Trim mode, Effect mode, and Color Correction mode to fine-tune your edits and
effects.
For more information, see “Working with Trim Edits” on page 715 and the Effects and
Color Correction Guide for your Avid editing application.
8. Add any titles you need.
For more information, see the “Creating Titles” and “Editing with Titles” chapters in the
Effects and Color Correction Guide for your Avid editing application.
9. Use audio tools to adjust and mix multiple audio tracks and prepare for final output.
For more information, see “Working with Audio” on page 745.
10. Export the sequence or output a digital cut.
For more information, see “Exporting Frames, Clips, or Sequences” on page 925 or
“Generating Output” on page 957.
If you are working in an offline to online project, see “Conforming and Transferring
Projects” on page 1027.
Starting a Project
Whenever you start to work on a new project, follow these basic steps:
1. Turn on your equipment in a prescribed order and start your Avid editing application.
For more information, see “Turning on Your Equipment” on page 35.
2. Select or create a new project
For more information, see “Starting a Project” on page 35.
3. Select the Project settings from the Settings list.
For more information, see “Working with the Project Window” on page 69.
4. Create and organize bins.
For more information, see “Working with Bins” on page 339.
5. Back up your project on a regular basis.
For more information, see “Starting a Project” on page 35.
28
Page 29
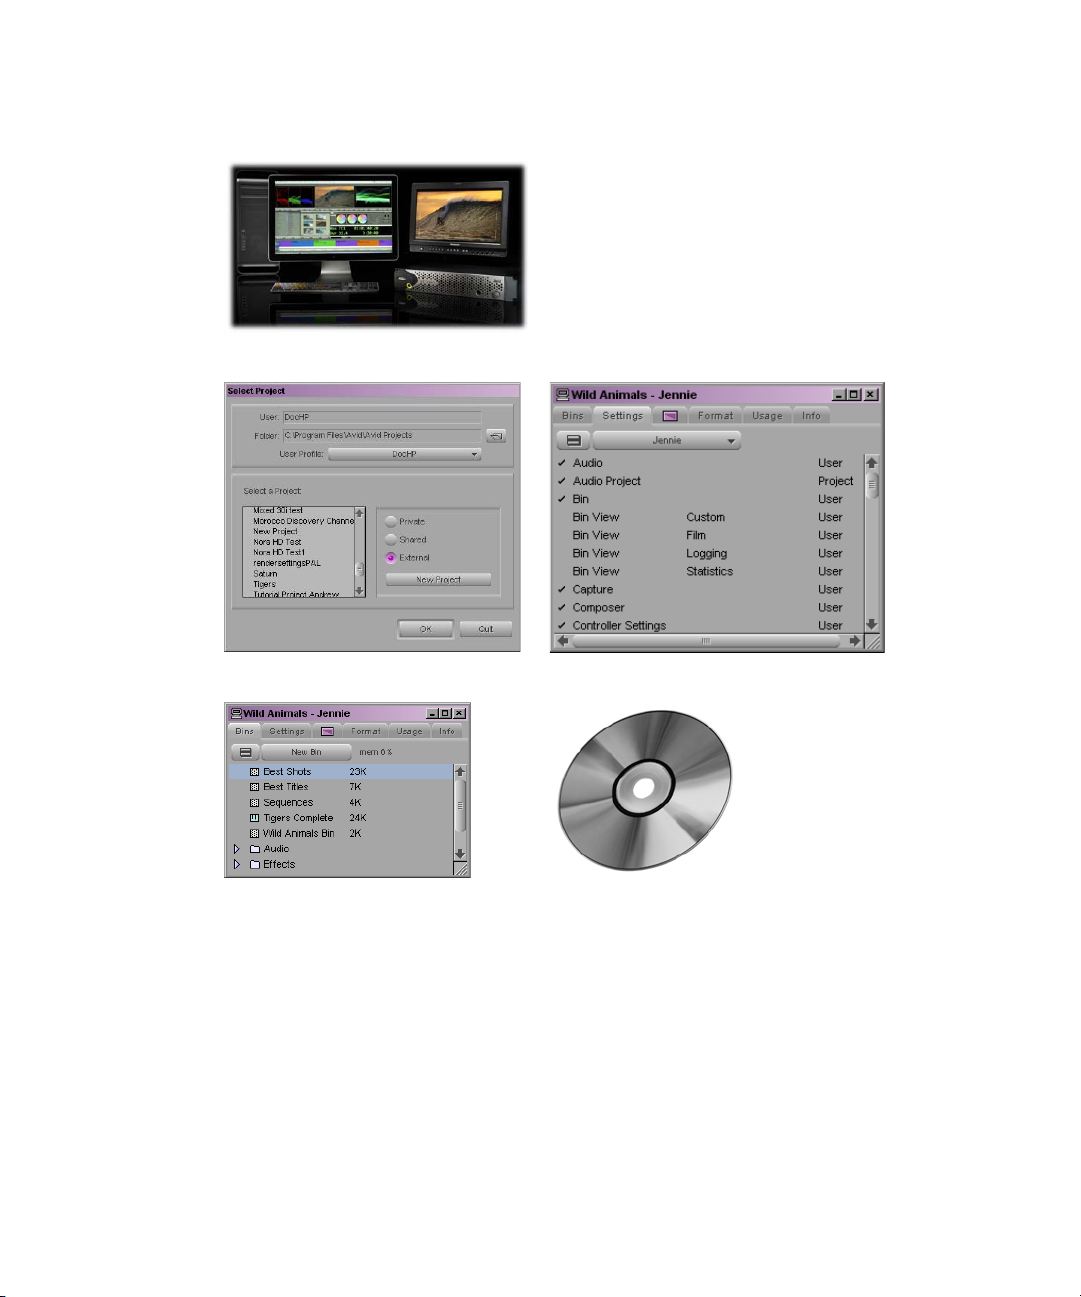
1 Turn on your system and start your Avid editing application
Preparing to Edit
2 Select or create a project
4 Create and organize bins
Preparing to Edit
When you capture and organize footage before you edit, follow these basic steps:
1. Batch capture, log and capture, or capture on-the-fly your source material into your
Avid editing application.
For more information, see “Preparing for Capture” on page 163 and “Capturing Media”
on page 231.
2. Use bins to organize your project items.
3 Select the Project settings
5 Back up the project
29
Page 30

1 Editing Overview
For more information, see “Working with Bins” on page 339.
3. Use the Media tool to manage media files.
For more information, see “Managing Media Files” on page 449.
4. Use the bins to create storyboards.
For more information, see “Creating a Storyboard” on page 385.
1 Capture footage, creating master clips and media files
2 Sort and organize clips in bins
4 Previsualize with storyboards
Editing a Sequence
When you edit your video and audio, follow these basic steps:
1. View your clips and mark IN and OUT points, or create subclips based on selected
portions of your master clips.
For more information, see “Viewing and Marking Footage” on page 491.
30
3 Manage media files for storage efficiency and backup security
Page 31

Editing a Sequence
2. Build your sequence in Source/Record mode in the Timeline. See “Creating and Editing
Sequences” on page 559.
3. Use Segment, Trim, and Effect modes to fine-tune your edits and effects.
For more information, see “Using the Timeline” on page 649, “Working with Trim
Edits” on page 715, and the Effects and Color Correction Guide for your Avid editing
application.
4. Use the Audio tool to adjust and mix multiple audio tracks and prepare for final
playback or output.
For more information, see “Working with Audio” on page 745.
5. Continue to edit if further adjustments are required.
1 Screen, mark, and subcatalog footage
2 Edit in Source/Record mode and the Timeline
3 Fine-tune edits and effects
31
Page 32

1 Editing Overview
4 Fine-tune audio pan, volume, and EQ
5 Screen and continue editing, repeating any or all of steps 1 through 4 as necessary
Outputting a Sequence
When your sequence is finished, you can output it in any of the following ways:
• Export as a file or a series of files.
For more information, see “Exporting Frames, Clips, or Sequences” on page 925.
• Output a digital cut in one or more formats.
For more information, see “Generating Output” on page 957.
™
• Generate a cut list through Avid FilmScribe
.
• Generate an EDL through Avid EDL Manager.
For more information on FilmScribe or EDL Manager, see the Avid Media Composer,
NewsCutter, and Symphony Supporting Applications Guide, or the FilmScribe or EDL
Manager Help.
32
Page 33

Finished sequence. Output options include:
Outputting a Sequence
Export a file
Generate a cut list
Output to tape
Generate an EDL
33
Page 34

1 Editing Overview
34
Page 35

2 Starting a Project
Your work begins when you turn on your system, start your Avid editing application, and
open an existing project or create a new project. The following topics describe procedures
for starting your work, as well as several techniques to safeguard and restore your work if
necessary:
• Turning on Your Equipment
• Working with the Desktop
• Starting Your Avid Editing Application (Windows)
• Starting Your Avid Editing Application (Macintosh)
• Working with Projects
• Quitting and Turning Off Equipment
• Avid Projects and Avid Users Folders
• Changing Project and User Names
• Backing Up Your Project Information
• Avid Attic Folder
• Using Toolsets
Turning on Your Equipment
Avid recommends that you turn on your equipment in the following order:
1. Storage devices.
2. Peripheral devices (such as monitors and speakers).
3. Computer system.
4. Avid input/output hardware device.
Do not disconnect devices while you run your Avid editing application. Before you start your
n
Avid editing application, make sure you connect all your devices first.
Page 36

2 Starting a Project
Working with the Desktop
You can use some of the desktop navigation features of your operating system to speed your
work or customize for your convenience while you edit. You can:
• Control how the Windows taskbar appears on the screen (Windows only).
• Use the Macintosh Dock as a quick way to launch your Avid editing application
(Macintosh only).
• Use shortcut menus (also sometimes known as context menus) to quickly access editing
commands.
• Use standard keyboard shortcuts to navigate and select options in dialog boxes and
menus.
• Use the mouse scroll wheel for navigation and customize mouse button functions.
You also use the desktop for backups and transferring projects, as described in “Backing Up
Your Project Information” on page 61 and “Avid Projects and Avid Users Folders” on
page 58.
For information on the Windows desktop and icons, see your Microsoft® documentation. For
n
information on the System Folder and the desktop and icons, see your Macintosh
documentation.
Using the Windows Taskbar (Windows Only)
By default, the Windows taskbar always appears on the bottom of your screen, on top of
your Avid editing application. You have two other choices:
• Keep the taskbar hidden behind your Avid editing application
• Set the taskbar to appear only when you drag the mouse pointer to it
If you keep the taskbar hidden while you run your Avid editing application and you
minimize an application such as Help, you do not see the minimized icon in the taskbar.
For more information about the taskbar, see the Windows Help.
You can also drag the taskbar to the top, bottom, or either side of the monitor.
n
When you work in your Avid editing application, you can minimize windows (such as the
Project window and bins). The icons appear in your Avid editing application window, not in
the taskbar.
36
Page 37

To see the taskbar and minimized icons:
t Minimize your Avid editing application.
To change the taskbar settings:
1. Right-click an unused part of the taskbar, and select Properties.
The Taskbar and Start Menu Properties dialog box opens.
2. Select the options you want:
t To keep the taskbar hidden, deselect “Keep the task bar on top of other windows”
and “Auto hide the task bar.”
t To set the taskbar to appear when you want, select “Keep the task bar on top of
other windows” and “Auto hide the task bar.”
3. Click OK.
Using the Macintosh Dock (Macintosh Only)
You can place an application icon alias on the Dock for easy access to your Avid editing
application. The Dock is hidden when your Avid editing application is active. For full
information on using the Dock, see the Macintosh documentation.
Working with the Desktop
To display the Dock:
t Move the mouse pointer to the edge of the screen where the Dock is hidden.
Using Shortcut Menus
In addition to standard menus to find a command you need, you can use shortcut menus.
Shortcut menus show the most frequently used commands for a window or a screen object.
Most shortcut menus contain a What’s This? command to access Help for the window or the
object.
To use a shortcut menu:
t Right-click a window or a screen object.
37
Page 38

2 Starting a Project
Using the Keyboard for Navigating in Dialog Boxes and Menus
To navigate in dialog boxes and menus and to select and deselect options:
Option Command
To move from tabbed page to tabbed page
within a dialog box.
To move from check box to check box or from
option to option in a dialog box.
To select or deselect a check box or an option
in a dialog box.
To move up or down in a menu, or increment a
numeric value.
Press Page Up or Page Down.
Press Tab.
Press Right Arrow, Left Arrow, or the space bar.
Press Up Arrow or Down Arrow.
Using the Mouse Scroll Wheel for Navigating
You can use the mouse scroll wheel to navigate in your Avid editing application, as
described in the following table. You can also set the speed to scroll with the mouse wheel,
and assign functions to three additional mouse buttons, as described in “Customizing Mouse
Functions” on page 39.
Option Command
To scroll through items in a window or function area
with a vertical scroll bar (such as a bin).
To move the position bar one frame at a time in the
Timeline.
Press Ctrl (Windows) or Control
(Macintosh) + scroll wheel.
Press Ctrl (Windows) or Control
(Macintosh) + scroll wheel.
38
To move the position bar 10 frames at a time in the
Timeline.
To move the slider one unit at a time in a tool or
window containing a slider (such as the Effect Editor).
To move the slider 10 units at a time in a tool or
window containing a slider (such as the Effect Editor).
Press Ctrl (Windows) or Control
(Macintosh) + Alt (Windows) or Option
(Macintosh) + scroll wheel.
Press Ctrl (Windows) or Control
(Macintosh) + scroll wheel.
Press Ctrl (Windows) or Control
(Macintosh) + Alt (Windows) or Option
(Macintosh) + scroll wheel.
Page 39

Customizing Mouse Functions
Your Avid editing application lets you set the speed of scrolling with the mouse wheel, and
lets you assign functions to three additional mouse buttons.
When you map mouse buttons, make sure that the modifier key that you assign to the button
n
and command does not already have an alternate function.
You cannot assign functions to the standard left and right mouse buttons.
To set the mouse scroll speed:
1. In the Project window, click the Settings tab, and then double-click Mouse.
The Mouse Settings dialog box opens.
Working with the Desktop
2. Select a speed from the Vertical Scroll Speed menu.
Normal is the default setting. Normal scrolls one item at a time. Moderate scrolls two
items at a time, and Fast scrolls four items at a time.
To assign functions to additional mouse buttons:
1. In the Project window, click the Settings tab, and then double-click Mouse.
The Mouse Settings dialog box opens.
2. Select Tools > Command Palette.
The Command palette opens.
3. Select Button to Button Reassignment at the bottom of the Command palette.
4. Click the tab from which you want to select a user-selectable button.
5. Click the mouse, and drag the button from the Command palette to a button location on
the Mouse Settings dialog box.
39
Page 40

2 Starting a Project
Optimum Performance (Windows XP)
Background tasks can interrupt time-critical operations, such as capturing, playing, or
rendering. Make sure that background tasks are not running while you work on your Avid
editing system.
The following list contains suggestions for ensuring optimum performance when working
with your Avid editing application on a Windows XP system:
• It is required to turn off File Sharing. If you do not do this, you might receive Access
Denied errors after you move files.
In My Computer > Select Tools > Folder Options > View, deselect Use simple file
sharing (Recommended).
• Disable CPU throttling.
In Control Panel > Power Options > Power schemes, select Always On.
• Do not enable the Windows Display setting “Show window contents while dragging.”
This setting hinders redraw performance on the Avid editing system.
In Control Panel > Display > Appearance tab > Effects, deselect Show window contents
while dragging.
• Enable setting to adjust for best performance.
In Control Panel > System > Advanced > Performance Settings, select Adjust for best
performance.
• Disable Hibernation in the Power options.
In Control Panel > Power Options > Hibernate, deselect Enable hibernation.
• Set automatic updates to Notify you but don’t automatically download.
In System > Automatic Updates, select “Notify me but don’t automatically download
them or install them.”
• Turn off the firewall for Avid Interplay.
In Control Panel > Windows Firewall > General, select Off.
• Do not leave the Console window open when you edit. The Avid editing system
performance slows considerably when the Console window is open.
• Do not leave a Windows Explorer window open. Windows Explorer attempts to update
file information.
• Do not leave an e-mail application open if it is set to do periodic checks for mail.
• Do not run any application that periodically “wakes up” and performs an action.
• Disable screen savers.
40
Page 41

Working with the Desktop
• Do not keep media on the same partition where you install your Avid editing
application. Avid recommends external media drives.
• Always use small fonts with the display driver to avoid missing characters in the dialog
boxes in your Avid editing application.
• After you move a drive from one system to another, restart your system. Windows does
not recognize the drive until you restart.
• Ensure you do not accidentally delete locked items from your desktop.
Right-click the Recycle Bin icon on your desktop and then, in Properties > Global tab,
select Display delete confirmation dialog.
• When you advance by single frames through the Timeline, deselect Render On-the Fly
to enable faster response time.
In your Avid editing application, deselect Clip > Render On-the-Fly.
• Do not name files with special characters (/ \ : ? ” < > | *). Windows does not recognize
special characters in file names. Bin names are limited to 27 characters (not including
the four characters reserved for the file name extension).
• Do not schedule automatic backups at times when your Avid editing system might be in
use.
• Do not run any application that includes prescheduled or automatically scheduled
activities, such as a calendar program.
• Do not leave other applications running. Some applications, such as Microsoft Office,
run background processes.
• Do not allow the Find Fast background process (find.exe) to run. The process tries to
update its cache of file and folder locations. Check your Startup folder, and delete the
file if it is there. To locate the find.exe, select Start > Search > find.exe.
Optimum Performance (Windows Vista and Windows 7)
The following list contains suggestions for ensuring optimum performance when working
with your Avid editing application on a Windows Vista or Windows 7 system:
• It is required to turn off File Sharing. If you do not do this, you might receive Access
Denied errors after you move files.
In Control Panel > Network and Sharing Center > File Sharing, select Turn off File
Sharing.
• Disable CPU throttling.
In Control Panel > Hardware and Sound > Power Options, select High Performance.
• Do not enable the Windows Display setting “Show window contents while dragging.”
This setting hinders redraw performance on your Avid editing system.
41
Page 42

2 Starting a Project
In Control Panel > Appearance and Personalization > Personalization > Window Color
and Appearance > Effects, deselect Show window contents while dragging.
• Enable setting to adjust for best performance.
In Control Panel > System and Maintenance > System > Advanced System Settings >
Performance Settings, select Adjust for best performance.
• Disable Desktop compositing.
In Control Panel > System and Maintenance > System > System Protection > Advanced
tab > Performance Setting, deselect Enable desktop composition.
• Disable Windows Defender.
In Control Panel > Security > Windows Defender > Tools > Options > Administrator
Options, deselect Use Windows Defender > Save.
• Disable Sidebar.
Right-click the Sidebar or Sidebar icon on your desktop > Properties > Deselect Start
Sidebar when Windows starts > Right click icon and select Exit.
• Disable Hibernation in the Power options.
In Control Panel > System and Maintenance > Power Options > Change when the
computer sleeps > Put the computer to sleep, select Never.
42
• Set automatic updates to Notify you but don’t automatically download.
In Control Panel > System and Maintenance > Windows Updates > Change settings,
select “Notify me but don’t automatically download them or install them.”
• Turn off the firewall for Avid Interplay.
In Control Panel > Security > Windows Firewall, select Turn Windows Firewall on or
off.
• Do not leave the Console window open when you edit. The performance of your Avid
editing system slows considerably when the Console window is open.
• Do not leave a Windows Explorer window open. Windows Explorer attempts to update
file information.
• Do not leave an e-mail application open if it is set to do periodic checks for mail.
• Do not run any application that periodically “wakes up” and performs an action.
• Disable screen savers.
• Do not keep media on the same partition where you install your Avid editing
application. Avid recommends external media drives.
• Always use small fonts with the display driver to avoid missing characters in the dialog
boxes in your Avid editing application.
Page 43

Working with the Desktop
• After you move a drive from one system to another, restart your system. Windows does
not recognize the drive until you restart.
• Ensure you do not accidentally delete locked items from your desktop.
Right-click the Recycle Bin icon on your desktop > Properties > General tab > Display
delete confirmation dialog.
• When you advance by single frames through the Timeline, deselect Render On-the Fly
to enable faster response time.
In your Avid editing application, deselect Clip > Render On-the-Fly
• Do not name files with special characters (/ \ : ? ” < > | *). Windows does not recognize
special characters in file names. Bin names are limited to 27 characters (not including
the four characters reserved for the file name extension).
• Do not schedule automatic backups at times when your Avid editing system might be in
use.
• Do not run any application that includes prescheduled or automatically scheduled
activities, such as a calendar program.
• Do not leave other applications running. Some applications, such as Microsoft Office,
run background processes.
• Do not allow the Find Fast background process (find.exe) to run. The process tries to
update its cache of file and folder locations. Check your Startup folder, and delete the
file if it is there. To locate the find.exe, select Start > Search > find.exe.
Optimum Performance (Macintosh)
The following list contains suggestions for ensuring optimum performance when working
with your Avid editing application on a Macintosh system:
• Do not select the option that puts the hard disk to sleep when possible.
In System Preferences > Hardware Energy Saver, deselect Put the hard disk(s) to sleep
when possible.
• Set sleep options to Never in Energy Saver preference.
In System Preferences > Hardware Energy Saver, select Never.
• Disable screensavers.
In System Preferences > Personal Desktop & Screen Saver > Screen Saver, select Never.
43
Page 44

2 Starting a Project
Antivirus Applications
Antivirus programs that contain autoscanning features can interfere with the operation of
your Avid editing application. Since virus scanning is a processor-and disk-intensive
activity, it can interfere with capturing and playing real-time effects in your Avid editing
application.
Avid recommends you do not scan files or schedule any background tasks such as virus
scanning when you use your Avid editing application.
File deletion protection utilities also consume system resources and could interfere with the
proper operation of your Avid editing application. These utilities automatically back up any
files that you delete, even temporary files that you create and delete with your Avid editing
application. This consumes a large amount of disk space.
Starting Your Avid Editing Application (Windows)
By default, your Avid editing application is located in the following folder:
drive:\Program Files\Avid\Avid editing application
44
c
n
The installation process adds a desktop icon and a pointer to your Avid editing application in
the Start menu.
Your Avid editing application does not start properly if you move the application file
from the Avid editing application folder.
If you install your Avid editing application on a laptop computer, a dialog box might open
with a message about incompatible power management schemes. Avid recommends you use
the “Always On” power scheme for Windows XP and the “High Performance” power option
for Windows Vista or Windows 7 when you work with Avid editing applications. Other power
schemes might affect performance of editing functions (for example, capture and digital
cuts).
To start your Avid editing application, do one of the following:
t Click Start > All Programs > Avid > Avid editing application.
t Double-click the Avid editing application desktop icon.
After your Avid editing application starts, the Select Project dialog box opens. For more
information on the Select Project dialog box, see “Working with Projects” on page 46.
Page 45

Starting Your Avid Editing Application (Macintosh)
Starting Your Avid Editing Application (Macintosh)
Your Avid editing application is in the following location:
Macintosh HD/Applications/Avid editing application
For most users, the desktop or Dock is a more convenient location to start your Avid editing
application. The installation process places a shortcut alias icon for your Avid editing
application on the desktop.
For more information to make an alias and use the Dock, see your Macintosh
n
documentation.
c
n
Your Avid editing application does not start properly if you move the application file
from the Avid editing application folder. You can drag it onto the Dock, and an alias
appears on the Dock.
When you start your Avid editing application, you might see a message box which indicates
there is no input or output signal. Check to ensure that your Avid input/output hardware is
connected to the system with the cables secured and that it is turned on.
To start your Avid editing application, do one of the following:
t Double-click the alias icon for your Avid editing application on the desktop.
t Double-click the alias icon for your Avid editing application on the Dock.
t Select Go > Applications, and then double-click the Avid editing application folder.
Then double-click the Avid editing application file.
You might see a license agreement. After your Avid editing application starts, the Select
Project dialog box opens. For more information on the Select Project dialog box, see
“Working with Projects” on page 46.
45
Page 46

2 Starting a Project
1
2
5
3
4
6
7
Working with Projects
This topic describes basic methods for working with projects. You can:
• Create a new project and save it to a folder located on your system.
Some of the available folders use your operating system’s security features to limit
access to the project.
• Use the Select Project dialog box to find, open, or delete a project.
• Automatically open your last project when you start your Avid editing application.
• Open the startup project (if you have installed the startup project and media).
• Close an open project and return to the Select Project dialog box.
You should also back up your project information regularly to a separate storage device, as
described in “Backing Up Your Project Information” on page 61.
For information on the files and folders that your Avid editing application creates as part of a
project, see “Avid Projects and Avid Users Folders” on page 58.
Select Project Dialog Box
The Select Project dialog box lets you find and open a project, create a new project, or
establish user profiles.
46
Page 47

Working with Projects
Element Description
1 User Displays the login name of the user currently logged into the system. To change to a
different user, log out and log in as that user.
2 Folder Displays the path of the current folder. This path determines which projects appear in
the project list and where a new project is created.
You cannot type into the User or Folder text boxes.
n
3 User Profile Displays the name associated with the current settings. By default your Avid editing
application uses the login name. The list button changes profiles or creates a new one.
For more information, see “Understanding User Profiles” on page 90.
4 Project list Displays a list of the Avid projects in the currently selected folder. Double-click a
project to open it.
5 Browse button Lets you navigate to a different folder. The projects in this folder appear in the project
list. See “Opening and Closing Projects” on page 52.
6 Folder buttons Select a button to set the path for the project folder:
• Private displays any projects in the folder for the user logged into the system.
Private projects use the security provided by your system’s user login. By default,
this path is
(Windows)
name\Documents\Avid Projects
(Macintosh)
Projects
• Shared displays projects in the folder for all users logged into the system. By
default, this path is:
(Windows)
Projects
(Macintosh)
application/Shared Avid Projects
• External displays the projects in a folder other than the Private or Shared folder. The
Browse button sets the path for the External folder.
drive:\Documents and Settings\Windows login
Macintosh HD/Users/Mac login name/Documents/Avid
drive:\Documents and Settings\All Users\Shared Avid
Macintosh HD/Users/Shared/Avid editing
7 New Project button Opens the New Project dialog box to create a new project.
47
Page 48

2 Starting a Project
Creating a New Project
You can open a project in any format. The settings you choose for your project will dictate
the format and settings for all sequences within this project.
To create a new project:
1. Start your Avid editing application.
The Select Project dialog box opens.
2. In the Select Project dialog box, select the folder in which you want to create the
project: Private, Shared, or External.
For more information, see “Select Project Dialog Box” on page 46.
3. Click New Project.
The New Project dialog box opens.
4. Type the name of your new project in the text box.
5. Click the Format menu and select a project type.
Your options might change depending on the project type you choose.
48
Example of the New Project dialog box
Page 49

6. Set the following additional option(s), where applicable:
Option SD HD
Working with Projects
Aspect Ratio Select either
4:3 or 16:9
The project uses the aspect ratio setting to determine the display setting in the
monitors, and as a factor in determining whether material requires resizing or
repositioning in sequences. For more information, see “Mixing Frame Sizes and
Aspect Ratios” on page 581
Raster
Dimension
Color Space N/A Specifies the color space for some HD project types, either RGB 709
Film Gauge Available for 23.976p, 24p, 25p, 720p, and 1080p film projects.
Audio
Transfer Rate
Matchback Available for 25i PAL, 30i NTSC, 720p, and 1080i Matchback projects only. Select
N/A The Raster Dimension menu appears only for HD projects on a
Matchback, then click the Film button and select a format for film gauge tracking
from the Default Film Type menu. The Matchback item appears only if your Avid
editing application includes the Matchback option
Always uses the 16:9 aspect ratio.
supported system. For more information,
or YCbCr 709. For more information, see “Project Types” on
page 51 and “Working with Color Spaces in HD Projects” on
page 81.
Click the Film button and select a format for film gauge tracking
from the Default Film Type menu.
Available for 24p PAL projects. For more information, see “Audio
Transfer Options for 24p PAL Projects” on page 1355.
7. Click OK.
Your Avid editing application creates the new project files and folder, and then returns to
the Select Project dialog box. The project name is highlighted in the Projects list.
8. Double-click the project name in the Projects list to open the project or click OK with
the project name highlighted.
The Project window, the Composer window, and the Timeline open with the User
settings loaded. The title bar of the Project window contains the project name and the
user profile selected in the Select Project dialog box.
49
Page 50

2 Starting a Project
Project name and user name in the title bar (left) and Close button (right) in the Project window
9. (Option) If your project uses a film project type, set film preferences immediately after
you create the project.
Naming a Project
The system limits bins and project names to 27 characters, not including the period and
3-character extension that the system automatically adds to a file name. If you plan to move
bins and projects from one platform to another, do not use the characters / \ : * ? “ < > | or
leading spaces, trailing spaces, or trailing periods, when you name a project, bin, and user.
(Macintosh only) If you use your Avid editing application as a standalone editor (and don’t
plan to move your bins or projects to another platform), you can extend bin and project
names to 31 characters. You can also choose to accept or not accept the Windows compatible
file naming convention of special characters and spacing.
To use Windows compatible file names
1. Click the Settings tab in the Project window.
The Settings list appears.
2. Double-click General Settings.
3. Select Use Windows compatible file names.
This prevents your Avid editing application from accepting the restricted characters in a
bin, project, or user name.
50
Page 51

Working with Projects
To extend project and bin names to 31 characters (Macintosh only)
1. Click the Settings tab in the Project window.
The Settings list appears.
2. Double-click General Settings.
3. Select Allow files names to extend 27 characters.
This extends the names of projects and bins to 31 characters.
Project Types
The following table lists the format options available. Depending on the model of your Avid
editing application, your format options might not include all items listed here.
Project Type Source Footage Transfer Color Space
23.976p NTSC For film-originated or video-originated footage that has been shot at
23.976 fps or film-originated footage transferred on digital videotape
(such as Digital Betacam
24p NTSC For film-originated or other 24-fps footage transferred to NTSC videotape YCbCr
24p PAL For film-originated or other 24-fps footage transferred to PAL videotape
at 25 fps
25i PAL For PAL video-originated footage (25 fps) YCbCr
25p PAL For 25-fps film footage transferred to PAL videotape YCbCr
30i NTSC For NTSC video-originated or other 30-fps footage transferred to NTSC
videotape
720p/23.976 For film-originated material transferred to videotape. YCbCr
720p/25 For video-originated material that can be captured, edited and output for
HD broadcast. It can also be captured in DVCProHD format.
720p/29.97 For video-originated material. Can be directly captured, edited, and output
for HD broadcast.
720p/50 For HDV broadcast (European broadcast). YCbCr
720p/59.94 For video-originated material. Can be directly captured, edited, and output
for HD broadcast.
™
)
YCbCr
YCbCr
YCbCr
YCbCr
YCbCr
YCbCr
1080p/23.976 For film footage transferred to videotape, or high-resolution files from
digital film cameras.
YCbCr
RGB
51
Page 52

2 Starting a Project
Project Type Source Footage Transfer (Continued) Color Space
1080p/24 For film footage transferred to videotape, or high-resolution files from
digital film cameras. True 24-fps editing.
1080p/25 For film footage transferred to videotape, or high-resolution files from
digital film cameras.
1080i/50 For video-originated material, or high-resolution files from digital film
cameras. Can be directly captured, edited, and output for HD broadcast.
1080i/59.94 For video-originated material, or high-resolution files from digital film
cameras. Can be directly captured, edited, and output for HD broadcast.
Some older versions of Avid editing applications provided HD project types based on HDV
n
requirements. In current versions of Avid editing applications, these are replaced by
standard HD projects that let you specify the raster dimensions for editing and playback.
Set film preferences in the Film and 24P Settings dialog box immediately after you create a
n
project to provide your Avid editing application with important information about the type of
film and audio transfer you used for your project.
Opening and Closing Projects
You can open a project from the Select Project dialog box, and navigate from the Select
Project dialog box to find any project on your system.
YCbCr
RGB
YCbCr
RGB
YCbCr
RGB
YCbCr
RGB
52
If you have already created a project, when you enter your Avid editing application you can
bypass the Select Project dialog box and have your last project open automatically.
If you choose to install the sample startup project and media when you install your Avid
editing application, you can open this project from the Select Project dialog box. The startup
project, called Avid Boston Project DV25, contains a complete sequence with rendered
effects and titles, as well as all the video and audio clips used in the sequence.
Use the startup project to learn how to edit with your Avid editing application, before you
capture any media of your own. You can explore the sequence in the Timeline to learn how it
is assembled, and use the clips to practice viewing and editing techniques described in this
guide.
If a sequence that was created in an older version of an Avid editing application contains
n
effects or color corrections, you might need to update the sequence. If a sequence requires
updating, the Update Sequence dialog box might open when you load the sequence. For
more information, see “Updating and Reverting Existing Effects in Sequences” in the Help.
Page 53

Working with Projects
To open an existing project:
1. In the Select Project dialog box, select the folder in which the project is located: Private,
Shared, or External.
For more information, see “Select Project Dialog Box” on page 46.
2. Do one of the following:
t Select a project in the Select Project dialog box, and then click OK.
t Double-click a project name in the Projects list.
The Project window, the Composer window, and the Timeline open with the User
settings loaded. The title bar of the Project window contains the project name and the
user profile selected in the Select Project dialog box.
To browse for a project in a location other than the default Shared and Private folders:
1. Start your Avid editing application.
The Select Project dialog box opens.
Browse button in the Select Project dialog box
53
Page 54

2 Starting a Project
2. Click the Browse button.
The Browse for Folder (Windows) or Project Directory (Macintosh) dialog box opens.
54
Page 55

Working with Projects
3. Navigate to the folder that contains the project you want.
4. Click OK (Windows) or Choose (Macintosh).
5. Select a project in the Projects list.
6. Click OK.
The Project window, the Composer window, and the Timeline open with the User
settings loaded. The title bar of the Project window contains the project name and the
user profile selected in the Select Project dialog box.
The next time you open the Select Project dialog box, the path you selected will be
displayed when you click the External button.
To open a project automatically:
1. Click the Settings tab in the Project window.
The Settings list appears.
2. Double-click any Interface setting.
The Interface Settings dialog box opens.
3. Click the General tab, select “Automatically Launch Last Project at Startup,” and then
click OK.
The next time you start your Avid editing application, it opens your last project.
To turn off the automatic opening of projects so that you can select another project
when you start your Avid editing application:
1. Deselect “Automatically Launch Last Project at Startup,” and then click OK.
2. Quit your Avid editing application and restart it.
The Select Project dialog box opens.
3. Select a project and click OK.
The Project window, the Composer window, and the Timeline open with the User
settings loaded.
To open the startup project:
1. In the Select Project dialog box, click the Shared folder button.
2. Double-click Avid Boston Project DV25 in the Project list.
The Avid Boston Project DV25 project opens.
The footage in the Avid Boston Project DV25 project is shot in 16:9 aspect ratio. To view the
n
footage correctly in monitors, click the Format tab in the Project Window and set aspect
ratio to 16:9.
55
Page 56

2 Starting a Project
3. In the Format tab of the Project window, ensure that Aspect Ratio is set to 16:9.
The footage in the Avid Boston Project DV25 project is shot in 16:9 aspect ratio.
4. Use the Bins tab in the Project window to open one or both of the bins in the project:
- Boston Seq DV25 contains a complete sequence
- Boston Project source contains all the video and audio clips in the project
For more information on opening bins, see “Opening and Closing Bins” on page 73.
To close the current project, do one of the following:
t With the Project window active, select File > Close Project.
t Click the Close button in the Project window.
Deleting a Project
To delete a project:
1. Start your Avid editing application.
The Select Project dialog box opens.
2. Click the project you want to delete.
c
n
3. Press the Delete key.
4. If you see a message asking if you want to delete the selected project and associated
bins, click OK
The deleted project no longer appears in the Select Project dialog box.
Deleting a project also deletes any bins that are in that project.
Media related to a deleted project is not deleted with the project folder. For more
information on deleting media files, see “Deleting Items from a Bin” on page 353 and
“Deleting Media Files with the Media Tool” on page 457.
56
Page 57

Quitting and Turning Off Equipment
Quitting and Turning Off Equipment
If you work in an Avid Unity™ environment, your Avid editing application writes a media
database file (.mdb) to the workspace where you work. Before you quit your Avid editing
application, make sure that the workspace has approximately 50 MB of storage space
available. Ask your Avid Unity administrator to increase the space if you need more storage.
To quit your Avid editing application and leave it immediately:
t (Macintosh) Select Avid editing application > Quit Avid editing application.
t (Windows) Select File > Exit.
The project closes and your Avid editing application quits.
To quit your Avid editing application and view the Select Project dialog box:
1. Click the Close button at the far right (Windows) or at the far left (Macintosh) of the
Project window’s title bar.
The Select Project dialog box opens.
2. Click Quit.
A message box opens.
c
3. Do one of the following:
t Click Leave to quit your Avid editing application.
t Click Cancel to return to the Select Project dialog box and select another project.
To view remaining storage on your media drives:
1. Click the Info tab in the Project window, and then click Hardware.
The Hardware tool opens.
2. Click the appropriate drive tab.
Quit your Avid editing application before you turn off your equipment.
To turn off your equipment:
1. Turn off the system by doing the following:
For a Windows system:
a. Click the Start button, and select Shut Down.
The Shut Down Windows dialog box opens.
b. Click the menu, and select Shut down.
c. Click OK.
57
Page 58

2 Starting a Project
For a Macintosh system:
t Select Apple menu > Shut Down.
2. If you have an Avid input/output device attached to your system, turn it off.
3. Turn off peripheral devices (such as monitors and speakers).
4. Turn off external storage devices.
c
Never remove media drives from your Avid system when it is turned on. Shut down the
computer, and then remove the drives.
5. Turn off all other hardware.
Avid Projects and Avid Users Folders
When you create a new project or user profile, your Avid editing application creates files and
folders in the Avid Projects and the Avid Users folders. You manage Avid projects, user
profiles, and settings by:
• Moving, copying, or deleting these files and folders.
• Changing project or user names, as described in “Changing Project and User Names” on
page 60.
Locations of Avid Projects and Avid Users Folders
The system installs two Avid Projects folders by default:
• Private Projects (Windows) —
name\Documents\Avid Projects
• Shared Projects (Windows) —
Users\Shared Documents\Shared Avid Projects
drive:\Documents and Settings\Windows login
drive:\Documents and Settings\All
58
• Private Projects (Macintosh) —
name/Documents/Avid Projects
• Shared Projects (Macintosh) —
application/Shared Avid Projects
For an explanation of the difference between private projects and shared projects, see “Select
Project Dialog Box” on page 46.
Macintosh HD/Users/Mac login
Macintosh HD/Users/Shared/Avid editing
Page 59

The Avid Users folder is located in the application folder:
Avid Projects and Avid Users Folders
•(Windows XP)
Documents\Avid editing application\Avid Users
• (Windows Vista or Windows 7)
editing application\Avid Users
• (Macintosh)
Users
(Windows only) The location of the Avid Users folder depends on the installation path for
n
your Avid editing application.
Files and Folders Created For Projects
When you create a new project, your Avid editing application creates a folder for the project
and three files that are stored within the project folder:
• A project file (.avp)
• A project settings file (.avs)
• A bin file (.avb)
The project folder and the three files all use the project name you provide. The project folder
is stored in the Avid Projects folder.
Your settings are initially set to the default values. As you create additional bins for the
project (see “Creating a New Bin” on page 72), additional bin (.avb) files are added to the
project folder.
drive:\Documents and Settings\All Users\Shared
drive:\Users\Public\Public Documents\Avid
Macintosh HD/Users/Shared/Avid editing application/Avid
Files and Folders Created For User Profiles
When you create a new user profile, your Avid editing application creates a folder for the
user and two files that are stored within the user folder:
• A user profile file (.ave)
• A user settings file (.avs)
The user folder and the two files all use the user profile name you provide. The new folder is
stored in the Avid Users folder.
59
Page 60

2 Starting a Project
Changing Project and User Names
You cannot change project or user names from within your Avid editing application. You
must change the names from your desktop before you start your Avid editing application.
For information about the location of the Avid Projects and Avid Users folders, see “Avid
Projects and Avid Users Folders” on page 58.
c
n
When you change a user name or a project name, make sure you change the name of
the folder and all the files in the folder that have the old name. Your Avid editing
application does not automatically change the names of corresponding files in the
folder.
To change a project name or user name:
1. Navigate to the Avid Projects or Avid Users folder, and then double-click the folder to
open it.
2. Click the name of the folder you want to change.
The name highlights.
3. Type the new name of the folder.
4. Double-click the folder with the new name to open it.
The folder contains profile, settings, and project files with the old name.
5. Change the old name of each file to the new name.
Do not change the name of the file MCState.avs in the Avid Users folder.
6. Close the windows, and restart your Avid editing application.
The new project name or user name appears in the Select Project dialog box.
60
Page 61

Backing Up Your Project Information
Backing Up Your Project Information
Although your Avid editing application automatically saves your bins, projects, and settings,
you should back up these items frequently. Because the storage requirements are minimal,
you can back up these files to a variety of storage devices, such as:
•USB (thumb) drive
• CD-ROM or DVD-ROM
• Network storage device (such as a file server)
• Mass-storage device
To back up the larger media files created when you capture footage, use a high-capacity
n
storage device. For information on backing up media files, see “Backing Up Media Files”
on page 471.
To save your work on a drive or on removable media:
1. Mount the drive or insert the storage media (USB drive, CD-ROM, or DVD-ROM).
2. (Windows only) From the Windows desktop, double-click the My Computer icon.
3. Double-click the icon for the destination storage drive or storage media to open it.
Double-click any additional folders to target the appropriate storage location.
4. Navigate to the folder that contains the project folder or the user folder you want to save.
5. Drag a project folder or a user folder to the targeted storage location.
6. When the system finishes copying the files, unmount the drive or eject the media and
store it.
To restore a project or user information from a backup storage device:
1. Mount the drive or insert the removable media that contains the backup copies you want
to restore.
2. From the desktop, double-click the icons for the drive or storage media and for the
internal hard drive (Windows) or for the Macintosh HD (Macintosh).
3. Drag the copies from the storage device to the appropriate folder on the internal hard
drive (Windows) or
When you start your Avid editing application, the restored project and user profile
appear in the Select Project dialog box.
If you restore a single bin or bins, you must relink them to the project from within the Project
n
window. For more information, see “Opening and Closing Bins” on page 73.
Macintosh HD/Users/Shared
(Macintosh).
61
Page 62

2 Starting a Project
Avid Attic Folder
The Avid Attic folder contains backup files of each bin in a project. You retrieve files from
the Avid Attic folder in the following circumstances:
• When you want to replace current changes to a sequence or clip with a previous version
• When the current bin file becomes corrupted
For information on retrieving files from the Avid Attic folder, see “Retrieving Files from the
Avid Attic Folder (Windows)” on page 62 and “Retrieving Files from the Avid Attic Folder
(Macintosh)” on page 65.
(Macintosh only) If you deselected the “Allow filenames to exceed 27 characters” option in
n
the General Settings dialog box, you cannot retrieve a backup file with a file name larger
than the 27-character limit. You must rename the file before you retrieve it.
The Avid Attic folder contains a folder for each project. Each project folder contains a Bins
folder. When a bin is saved, a folder with the bin’s name is created in the Bins folder and a
copy of the bin file is stored in the folder with the bin name. The system adds the file name
extension .bak plus a version number to the bin’s file name. The bin file with the highest
version number represents the latest copy of the bin file.
When you view a bin folder in Details view (Windows) or List view (Macintosh), you can
also identify the most recent backup file based on the timestamp of creation displayed in the
Modified column (Windows) or Date Modified column (Macintosh).
The oldest backup file is overwritten only if the second-oldest backup file is more than
n
2 hours old.
Retrieving Files from the Avid Attic Folder (Windows)
To retrieve a file from the Avid Attic folder:
1. Minimize your Avid editing application.
2. From the desktop, double-click the Avid Attic folder, located in:
(Windows XP)
Documents\Avid editing application
(Windows Vista or Windows 7)
editing application
The Avid Attic folder opens and displays a folder for each project.
3. Double-click a project folder, and then double-click the Bins folder.
The Bins folder opens and displays a folder for each bin in the project.
62
drive:\Documents and Settings\All Users\Shared
.
drive:/Users/Public/Public Documents/Avid
.
Page 63

Avid Attic Folder
4. Double-click the folder for the bin you want to retrieve.
5. If the bin folder is not already in the Details view, select View > Details.
The bin folder displays the backup bin files and their creation dates. A backup bin file
has the same name as the bin, with a number appended. For example, a bin named
Source Clips might have backup bin files named Source Clips.1 and Source Clips.2.
6. Select the backup bin file or files you want to retrieve.
7. Ctrl+drag the selected backup bin files to the desktop.
This makes a copy of the files, leaving the original files in the Avid Attic folder.
To copy backup files to a new bin:
1. Click the taskbar item for your Avid editing application to restore it.
If the taskbar is hidden, see “Using the Windows Taskbar (Windows Only)” on page 36.
n
2. Click the Project window to activate it, and click the Bins tab to display the Bins list.
3. Select File > Open Bin.
4. From the Files of Type list, select All Files (*.*).
63
Page 64

2 Starting a Project
5. Navigate to the desktop, select one of the backup bin files you copied, and click Open.
The backup bin opens. When you open a backup bin, a link to the backup bin on the
desktop is created in the Other Bins folder.
Your Avid editing application does not allow a bin and a copy of a bin to be open at the same
n
time. You must keep all other bins closed and open the backup bins one at a time.
6. Create a new bin.
For example, if you are retrieving clips from a backup bin called Source Clips.2, you
can call the new bin Source Clips New.
64
7. Select the material you want to keep from the backup bin, and drag the files to the new
bin.
8. Repeat steps 3 through 7 for any other backup bin files you copied to the desktop.
9. Select and delete the backup bins in the Other Bins folder.
10. Drag the backup bin files on the desktop to the Recycle Bin.
Page 65

Retrieving Files from the Avid Attic Folder (Macintosh)
To retrieve a file from the Avid Attic folder:
1. Minimize your Avid editing application.
Avid Attic Folder
2. From the desktop, double-click the
application/Avid Attic
The Avid Attic folder opens and displays a folder for each project.
3. Double-click a project folder, and then double-click the Bins folder.
The Bins folder opens and displays a folder for each bin in the project.
4. Double-click the folder for the bin you want to retrieve.
5. Select View > as List, if the bin folder is not already in the List view.
The bin folder displays the backup bin files and their creation dates. A backup bin file
has the same name as the bin, with a number appended. For example, a bin named
Source Clips might have backup bin files named Source Clips.1 and Source Clips.2.
6. Command+click the files you want to retrieve.
7. Option+drag the selected backup bin files to the desktop.
This makes a copy of the files, leaving the original files in the Avid Attic folder.
To copy backup files to a new bin:
1. Click the icon for your Avid editing application on the Dock to activate your Avid
editing application.
2. Click the Project window to activate it, and click Bins to display the Bins list.
3. Select File > Open Bin.
folder.
Macintosh HD/Users/Shared/Avid editing
4. Navigate to the desktop, select one of the backup bin files you copied, and click Open.
The backup bin opens. When you open a backup bin, a link to the backup bin on the
desktop is created in the Other Bins folder.
Your Avid editing application does not allow a bin and copy of a bin to be open at the same
n
time. You must keep all other bins closed and open the backup bins one at a time.
5. Create a new bin.
For example, if you are retrieving clips from a backup bin called Source Clips.2, you
can call the new bin Source Clips New.
6. Open the new bin and open the backup bin in the Other Bins folder.
7. Select the material you want to keep from the backup bin, and drag the files to the new
bin.
65
Page 66

2 Starting a Project
8. Repeat steps 3 through 7 for any other backup bin files you copied to the desktop.
9. Select and delete the backup bins in the Other Bins folder.
10. Drag the backup bin files on the desktop to the Trash.
Using Toolsets
You can use predesigned work environments (toolsets) that are suited to your most common
tasks:
• Color Correction
• Source/Record Editing
• Effects Editing
• Audio Editing
•Capture
You can change the toolset workspace, restore it to the default arrangement, or link it to
other settings. For example, you might want each toolset to appear with a different color
scheme.
66
You can link the current toolset to custom User settings, or link several toolsets to named
settings but leave the other toolsets linked to a default, unnamed setting.
To open a toolset:
t Select Toolset > toolset.
To customize the toolset workspace:
1. For the toolset you want to customize, select Toolset > toolset.
2. Open other tools with which you want to work, and position them where you want them.
3. Select Toolset > Save Current.
The next time you select the customized toolset, it appears with your changes.
To remove your customizations:
t Select Toolset > Restore Current to Default.
Page 67

To link a toolset to another setting:
1. For the toolset you want to link, select Toolset > toolset.
2. Select Toolset > Link Current to.
The Link Toolset dialog box opens.
3. Click the Links to Current Toolset menu, and select Link to Named Settings.
4. Type the name of the other setting to which you want to link the toolset.
You can link toolsets only to User settings.
n
5. Click OK.
The active toolset is linked to the custom setting you specified.
To link a toolset to an unnamed setting:
1. For the toolset you want to link, select Toolset > toolset.
2. Select Toolset > Link Current to.
The Link Toolset dialog box opens.
3. Click the Links to Current Toolset menu, and select Link to Unnamed Settings.
Using Toolsets
4. Click OK.
The active toolset is linked to all the unnamed settings in the Settings list.
67
Page 68

2 Starting a Project
68
Page 69

3 Working with the Project Window
The Project window provides controls for structuring and viewing important information
about your current project. You can also modify User, Project, and Site settings from the
Project window and display a list of effects.
The following topics describe features of the Project window:
• Overview of the Project Window
• Controlling Project Window Display
• Using the Bins Tab
• Using the Settings Tab
• Using the Format Tab
• Using the Usage Tab
• Using the Info Tab
• Managing Bins and Memory
• Understanding User Profiles
• Managing User Profiles
• Customizing the Avid User Interface
• User-Customized Workspaces
• Working with Bins and Projects in an Avid Unity Environment
Page 70

3 Working with the Project Window
Overview of the Project Window
The Project window is a central location for important information and tools that you need
as you work on your project.
Project window information is organized in tabs.
Tab Function
Bins Lets you create and open bins. See “Using the Bins Tab” on page 71.
Settings Lets you view and modify settings. See “Using the Settings Tab” on page 79.
Effects Lets you access a library of effects. See “Applying Effects” in the Help.
Format Lets you view information about the format of the project. See “Using the Format
Tab” on page 80.
Usage Lets you view information about the work session usage.
Info Lets you view information about system memory usage and system hardware
configuration.
70
Page 71

Controlling Project Window Display
Controlling Project Window Display
The Project window opens automatically when you select a project. You can use the Project
window’s tab to change the display of information in the window.
The Project window is always open when you are working in a project. However, it might
become hidden behind open bins or tools.
To change the information display in the Project window:
t Click one of the tabs.
To locate and redisplay the Project window, do one of the following:
t Select Tools > Project.
t Click in an area of the Project window to bring it forward.
To close the Project window, do one of the following:
t With the Project window active, select File > Close Project.
t Click the Close button in the Project window.
The Select Project dialog box opens.
Using the Bins Tab
When you create a project, your Avid editing application automatically creates a bin with the
name of the new project, which displays in the Bins tab. You can rename this bin and create
additional bins as you work in your project.
The word bin is a movie industry term that refers to a container that holds pieces of film. In
your Avid editing application, bins contain master clips that are created when you capture
source material. Bins also contain the sequences, subclips, group clips, and effect clips that
you create during a project. From the Project window, you can view a list of bins associated
with the project, and open, close, and create bins. You can also open bins that you create for
other projects.
71
Page 72

3 Working with the Project Window
Viewing a List of Bins
You can view a list of bins in the Project window. The Bins list displays the number, names,
sizes, and location of the bins. Bins from other projects appear in the Project window in
italic.
To view a list of bins associated with the project:
t Click the Bins tab in the Project window.
Fast menu button (top) and Bins list with bin icons (bottom) in the Bins tab of the Project window.
Creating a New Bin
To create a new bin from the Project window:
1. Do one of the following:
t Select File > New Bin.
t Click the New Bin button in the Project window.
A new (empty) bin opens and is given the name of the project as displayed in the title
bar of the Project window. The new bin appears in the Bins list in the Project window
with a default name highlighted and a number appended to it.
2. Type the name of the new bin, and press Enter (Windows) or Return (Macintosh).
A corresponding bin file is placed in the Avid Projects folder, and a backup copy is
placed in the Avid Attic folder. For more information, see “Avid Projects and Avid Users
Folders” on page 58 and “Avid Attic Folder” on page 62.
To place a bin in a folder:
t Drag the bin to the folder icon.
72
Page 73

Renaming a Bin
Each new bin that you create takes the name of the project that appears in the title bar of the
Project window and is numbered incrementally.
If you plan to move bins and projects from one platform to another, do not use the characters
n
/ \ : * ? “ < > | or leading spaces, trailing spaces, or trailing periods, when you name a
project, bin, and user. Bin and project names are limited to 27 characters, not including the
period and 3-character extension that the system automatically adds to a file name.
(Macintosh only) You can set the Use Windows compatible File Names option in your Avid
n
editing application’s General Settings dialog box to prevent your Avid editing application
from accepting these restricted characters in a bin, project, or user name. If you use your
Avid editing application as a standalone editing application (and don’t plan to move your
bins or projects to another platform), you have the option to extend bin and project names to
31 characters.
To change the name of a bin:
1. Click the bin name in the Bins list.
2. Type a new name.
Using the Bins Tab
Project name in title bar (top) and default bin name based on Project name (bottom) in the Bins tab of the
Project window.
Opening and Closing Bins
You can open a single bin or open multiple bins at once. You can also open a bin from
another project.
If you have the SuperBin enabled, see “Working with the SuperBin” on page 382.
n
c
Never open a bin that is stored on a removable disk or equivalent device; otherwise,
your Avid editing application cannot save your work. Always copy the bin to a project
folder on the system drive before you open it.
73
Page 74

3 Working with the Project Window
To open a bin directly:
1. Click the Bins tab.
2. Double-click the Bin icon next to the bin name.
The bin opens in a separate window. The Bin icon appears dimmed in the Bins list,
indicating the bin is open.
To open several bins at once from the Project window:
1. Click a Bin icon in the Bins list.
2. Ctrl+click (Windows) or Shift+click (Macintosh) each additional bin you want to open.
3. Select File > Open Selected Bins.
To open a bin from another project:
1. Select File > Open Bin.
The Open a Bin dialog box opens.
2. Find and select the bin you want.
Bins have the file name extension .avb.
3. Click Open.
The bin appears in the Bins list in a folder called Other Bins. The name Other Bins
appears in italic. You can rename this folder. This option is useful when you want to
open a bin not currently displayed in the Project window.
The Other Bins folder disappears from the Bins list when you delete all the bins in the Other
n
Bins folder. Deleting bins from the Other Bins folder does not remove the bins from your
system; only the pointers to the bins are removed.
To close a bin, do one of the following:
t Click the Close button.
t Select File > Close Bin.
74
Page 75

Displaying Folders of Bins in the Bins List
You can add folders to the Bins list to help organize your project. You can drag bins into
folders or drag folders into folders.
Fast Menu button (top), folders and folder arrows (center), and the Trash icon (bottom) in the Bins tab of the
Project window.
Using the Bins Tab
To create a folder in a project:
1. Click the Fast menu button, and select New Folder.
A new untitled folder appears.
2. Click the untitled folder name in the Bins list and rename it.
To show or hide the folder’s contents in the Bins list in the Project window:
t Click the arrow next to a folder icon.
To view a list of only the folder contents and not the folders:
t Click the Fast Menu button, and select Flat View.
The Trash icon and its contents disappear until Flat View is deselected.
75
Page 76

3 Working with the Project Window
Creating a Folder
To create a folder in a project:
1. Click the Bins tab in the Project window.
2. Click the Fast Menu button, and select New Folder.
A new untitled folder appears.
3. Click the untitled folder name in the Bins list and rename it.
Deleting a Bin or Folder
You can delete bins and folders along with their contents from the Bins list. Deleted bins and
folders are moved to a Trash folder in the Bins list until you empty the Trash. If you need a
deleted bin or folder, you can retrieve it from the Trash. For more information, see “Viewing
and Emptying the Trash” on page 76.
c
Only bins and folders appear in the Trash. If you select a clip, subclip, or effect directly
in a bin and press the Delete key, the item is permanently deleted and does not appear
in the Trash.
To delete a bin or folder from the Project window:
t Select the bin or the folder you want to delete in the Bins list, and do one of the
following:
- If the SuperBin is not enabled, press the Delete key.
- If the SuperBin is enabled, right-click the bin name and select Delete Selected Bins.
For more information on using the Superbin feature, see “Working with the
SuperBin” on page 382.
A Trash icon appears in the Bins list in the Project window. The Trash contains the
deleted item.
The Trash is not visible in the Project window until you delete your first item.
n
Viewing and Emptying the Trash
If you need to view the contents in the Trash or decide you do not want to delete those items,
you must first move the bins and folders from the Trash.
c
Emptying the trash permanently removes the bins or folders from the drive.
If you change the name of the Trash icon, you cannot empty the Trash.
n
76
Page 77

To view items in the Trash:
1. Click the arrow next to the Trash icon in the Bins list.
2. Click the bins or folders you want to keep (or view), and drag them from the Trash to the
Bins list in the Project window.
3. Double-click the bin or folder to view it.
To empty the Trash in the Bins list:
1. Click the Fast Menu button, and select Empty Trash.
A message box opens.
2. Click Empty Trash to delete the bins or folders from the Trash and from your hard drive.
Saving Bins
Your Avid editing application automatically saves changes to your work on a regular basis.
You can modify the frequency of the automatic backups.
You can also manually save a specific bin, selected bins, or all bins. You might want to do
this immediately after performing an important edit.
Using the Bins Tab
When you work with bins, an asterisk (Windows) or a diamond (Macintosh) appears before
the bin name in the bin’s title bar. The asterisk or diamond indicates that the changes to the
bin have not been saved. After you save the bin, your Avid editing application removes the
asterisk or diamond.
When an autosave occurs, any open bins update with changes made since the last autosave,
and copies of these bins are placed in the project’s backup bin folder:
Windows XP drive:\Documents and Settings\All Users\Shared Documents\Avid editing
application\Avid Attic folder
Windows Vista and
Windows 7
Macintosh /Users/Shared/Avid editing application/Avid Attic folder
drive:\Users\Public\Public Documents\Avid editing application\Avid Attic
folder
Your Avid editing application automatically saves copies of all bins into the Avid Attic
folder at regular intervals for backup. When your work is lost, or when you want to recover
an earlier version of a bin or sequence, you can retrieve files from the Avid Attic folder.
77
Page 78

3 Working with the Project Window
To adjust the frequency of automatic saves:
1. In the Project window, click the Settings tab, and then double-click Bin.
The Bin Settings dialog box opens.
2. Type a number in the Auto-Save interval text box.
3. Click OK.
Setting to zero the maximum number of files stored in the Avid Attic folder as well as the
n
maximum number of versions of a bin deletes existing files in the project folder in the Avid
Attic folder and prevents any backup bins from being saved. For more information about
backup options, see “Bin Settings” on page 1204.
Saving Bins Manually
To save a specific bin:
1. Click the bin to activate it.
2. Select File > Save Bin.
To save selected bins:
1. In the Bins tab, click a Bin icon to select it, and then Ctrl+click any additional bins.
78
2. Select File > Save All.
The system saves all the selected bins.
The Save Bin command appears dimmed if there were no changes since the last time the
n
active bin was saved.
To save all the bins:
1. Click the Bins tab in the Project window.
2. Select File > Save All.
The system saves all the bins for the project.
Page 79

Using the Settings Tab
From the Settings tab in the Project window, you can view, select, open, and alter various
User, Project, and Site settings. Each setting either displays information about that specific
tool or window or lets you select options or preferences associated with that tool or window.
For more information, see “Viewing and Modifying Settings” on page 1185.
To view the Settings list:
t Click the Settings tab in the Project window.
Using the Settings Tab
To open a setting:
t Double-click the setting in the Settings list.
To view Help for a setting:
t Open a setting and press the F1 key (Windows) or the Help key (Macintosh).
79
Page 80

3 Working with the Project Window
Using the Format Tab
The Format tab in the Project window lets you view basic project information, such as the
video format (NTSC, for example). The information lists the options you selected in the
New Project dialog box when you created the project.
For some project formats, the Project Type list lets you change the format of the project to
another format that shares the same frame rate. For example, if you are working in a
1080i/59.94 HD project, you can change the project format to 30i NTSC.
80
If you switch from one project type, aspect ratio, color space, or raster dimension to another
n
during the course of your workflow, you might create precomputed clips that have not
rendered with the quality that you need for your final output. You might need to manually
purge the precomputed clips and re-render effects. For more information, see “Ensuring the
Quality Level of Precomputed Clips” in the Help.
For 24p PAL projects, the Format tab shows the audio transfer rate you selected when you
n
created the project. The actual audio transfer rate might be different from the display if you
used the Film and 24P Settings dialog box to change the audio transfer rate.
To open the Format tab:
t Click the Format tab.
Page 81

Working with Color Spaces in HD Projects
Working with Color Spaces in HD Projects
In full HD projects, some Avid editing applications and Avid input/output hardware devices
let you work in either the YCbCr or the RGB color space. Your Avid editing application uses
a project’s color space setting to control how it displays video, processes most effects, and
outputs sequences.
RGB and YCbCr both separate colors into three channels, but they store color information
differently. When you choose which color space to work in, you need to take several factors
into consideration, including the color space of your media, your output needs, and your
performance expectations for your Avid editing application while editing.
The RGB color space is not available for 720p or NTSC/PAL SD projects.
Understanding the YCbCr Color Space
YCbCr performs better, but is of lesser quality.
YCbCr stores brightness (Y) separately from colors (Cb and Cr). Since humans are more
susceptible to changes in light than in color, YCbCr discards half the chrominance data
(one-third of the overall data) with little discernible difference to image quality. Media that
uses YCbCr takes up less disk space than media that uses RGB, and less bandwidth is
required to play it.
YCbCr is the only color space available for SD media, because SD requires lower
bandwidths and might need to maintain backwards compatibility with black-and-white
displays. When you only need SD output, you only need to work in the YCbCr color space.
Newer HD technologies can display detailed images with sharp changes in color. Because
some color data is missing, YCbCr media does not take full advantage of HD display
hardware. The limited color information available in YCbCr also means that the results of
effects processing are not as good as they could be with RGB media.
Understanding the RGB Color Space
RGB produces higher quality images and effects, but takes up more space.
RGB separates images into their constituting colors: red (R), green (G), and blue (B) and
does not discard any of the chrominance data. As a result, video images look sharper,
particularly those with fast motion or abrupt changes in color. Newer HD formats support
RGB only.
81
Page 82

3 Working with the Project Window
Because no color data is lost, your Avid editing application can make more precise
calculations when processing effects using RGB media. The quality improvement over
YCbCr processing is most noticeable in effects that perform color analysis, such as chroma
keyers. Even if the original video data is in YCbCr, your should consider converting to RGB
to process effects as precisely as possible.
The disadvantage of RGB is file size. Media that uses RGB takes up more disk space than
media that uses YCbCr, and more bandwidth is required to play it. Some systems might not
be able to handle playback of RGB material smoothly, particularly when you use the J-K-L
keys to play at greater than normal speed or to play in reverse.
RGB media requires high bandwidth. For effective playback of multiple streams of video at
n
higher resolutions, you should distribute the video tracks as evenly as possible among
available drives, and target separate drives for audio and video.
Choosing a Color Space for Your Project
Your choice of a color space depends on both your input/output hardware and your desired
output. For information on how to define the color space for a project, see “Changing the
Project Color Space for an HD Project” on page 83.
If your hardware supports both RGB and YCbCr, choose the color space that corresponds to
your output needs.
82
If your hardware supports only YCbCr, you can choose RGB for your project color space to
maintain maximum quality throughout your workflow. Your Avid editing application
converts your material to YCbCr right before sending it to the hardware for monitoring or
output. However, choosing RGB in your project is only useful if your input media is in RGB.
Otherwise, you should set your project color space to YCbCr.
The project color space specifies how your Avid editing application processes effects in real
time. Your Avid editing application supports native processing of effects in either the RGB
or YCbCr color spaces. For example, this means that RGB media does not need to be
converted to YCbCr for processing, maintaining maximum video quality until the final
output.
Mixing Media of Different Color Spaces
You can work with media of different color spaces in the same sequence. For example, you
can mix SD YCbCr and HD RGB. When you mix media in this way, your video editing
application converts media to the project’s color space when necessary. This conversion
takes place internally during the processing of real-time effects and prior to output.
Page 83

Changing the Project Color Space for an HD Project
The color space of your media depends on its format. Tape-based SD and HD media uses the
YCbCr color space. Newer HD digital formats, such as R3D, use RGB. See “Resolution
Specifications” on page 1309 for information about supported formats.
You can check the color space of the media for any clip in your project by viewing the Color
Space bin heading in the bin that contains the clip. For more information, see “Moving,
Aligning, and Deleting Bin Columns” on page 362.
Changing the Project Color Space for an HD
Project
You typically set the color space for a project when you create the project (see “Creating a
New Project” on page 48). However, you can change the color space at any time.
The RGB color space is only available in full HD projects. 720p and NTSC/PAL projects
can only use the YCbCr color space.
Changing the project color space does not affect the rendering of titles and effects or change
the color space of imported media. Your Avid editing application controls these according to
their Media Creation Settings. For more information, see “Media Creation Settings” on
page 1268.
To change the project color space:
1. Click the Format tab in the Project window.
2. Click the Color Space menu, and select either RGB 709 or YCbCr 709, depending on
the color space you want to use.
Color Space menu in the Format tab of the Project window
Your Avid editing application now displays video and processes real-time effects in the
new color space. The final output is also in the new space.
83
Page 84

3 Working with the Project Window
Using the Usage Tab
The Statistics feature gathers and reports information on system usage. You can use this
information to support business functions such as resource management.
All statistics are gathered and reported by project. The file that contains this information is
formatted so you can use it as input to software programs such as analysis applications,
spreadsheets, or report generators.
c
Do not rely on the Statistics feature for billing or other financial purposes.
To view and update statistics for an open project:
t Click the Usage tab in the Project window.
To print the Statistics file:
t Select File > Print Usage.
Statistics File Structure and Layout
A new Statistics file is created each time you open the project. The files are stored in a
Statistics folder inside each project folder.
The file name has the following format:
Statistics.yymmdd.HHMMSS
where:
Variable Description
yy Indicates the last two digits of the year
mm Indicates the month
84
dd Indicates the day
HH Indicates the hour
MM Indicates the minutes
SS Indicates the seconds
Page 85

Using the Usage Tab
The statistics file is formatted as comma-separated ASCII text, so it can be accepted by a
variety of software programs. Each line in the file is tagged with indicators for identifying
content and data type to assist in programming custom applications. The following
illustration shows a sample Statistics file.
85
Page 86

3 Working with the Project Window
The values in the first column indicate the content of the line:
01
02
03
100
101
102
104
105
106
110
111
113
114
115
116
117
title1
title2
Title Only
project info
Time Project open
Capture tool open
Capture tool active
Captured Media bytes used
Rendered Effects bytes used
Effects rendering time
Title tool open
Title tool active
Title tool rendering
Capture tool capturing
Capture tool logging
user comments
The values in the second column indicate the type of data in the line:
01
02
03
04
project info
time used
bytes used
text string
Importing the Statistics File into a Spreadsheet
You can import the Statistics file into a spreadsheet or other program as an ASCII file and
use your Avid editing application to set up the proper format.
To import a Statistics file into Microsoft Excel:
1. Start Microsoft Excel.
2. Select File > Open, and navigate to the Statistics file you want to import.
(Windows only) Make sure All Files (*.*) is selected in the Files of Type list.
86
Page 87

Using the Usage Tab
3. Click Open.
The Text Import wizard starts.
4. Select Delimited for the Original Data Type, and click Next.
5. Select Comma for Delimiters, and click Next.
6. Select General for Column Data Format.
7. Click Finish.
The statistics file appears in spreadsheet format.
The following illustration is the sample file from the previous section as it appears when
you import it into a spreadsheet.
87
Page 88

3 Working with the Project Window
Displaying Disk Space Statistics
You must use a Console command to calculate and display statistics for disk space in the
Usage window.
To display disk space statistics in the Usage window:
1. Select Tools > Console.
2. In the command entry text box, type:
toggleStatSpace
3. Press Enter (Windows) or Return (Macintosh).
4. Select File > Load Media Database.
After the media database is loaded, the Usage window displays the number of files and
disk space used for captured media and rendered effects.
To update the display:
t Click the Usage tab in the Project window.
To prevent recalculation:
t Reenter the
toggleStatSpace
Using the Info Tab
The Info display in the Project window lets you view system memory information and
access the Hardware tool. The items listed in this display are for information only and
cannot be changed. The Hardware tool gives a visual representation of usage for each drive
and provides operating system information.
To open the Info display:
t Click the Info tab in the Project window.
command.
88
Page 89

Using the Info Tab
To display system memory information:
t Click the Info tab, and then click the Memory button.
The Memory window opens with the following information:
Item Description
Objects The total number of memory handles currently used by your Avid
editing application. Objects include memory requirements of your Avid
editing application, such as windows, clips, sequences, and other items
associated with a project.
You can improve the performance of large projects when you reduce the number of objects. To do this,
n
close unused bins, unmount unused media drives, consolidate finished elements, eliminate old material
from the project, or divide the project into separate projects. Then quit and restart your Avid editing
application. If performance is still slow, restart your system.
Total physical memory (Windows) or
Total Mem (Macintosh)
Available physical memory (Windows)
or Free Mem (Macintosh)
Total page file The total number of bytes stored in the paging file. The paging file is
Available page file The total number of bytes available in the paging files.
Working set (minimum and maximum) The set of memory pages currently available to your Avid editing
To open the Hardware tool, do one of the following:
The total number of bytes of RAM (random-access memory).
The amount of RAM available for allocation by the Windows or
Macintosh system.
used as virtual memory by the Windows system.
application in RAM.
t Click the Info tab in the Project window, and then click the Hardware button.
t Select Tools > Hardware.
The Hardware tool opens.
For more information about the Hardware tool, see “Using the Hardware Tool” on
n
page 120.
89
Page 90

3 Working with the Project Window
Managing Bins and Memory
System memory usage increases depending on how many bins you have open, the number of
sequences in a bin, the number of tools that are open, and the size of a sequence. Using more
memory can slow system performance.
In the Bin tab of the Project window, a memory usage indicator increases and updates as you
open and close bins. Avid recommends that you keep memory usage below 80-85%. If you
exceed the recommended usage, a dialog box opens informing you that your memory usage
is high and recommends that you close some bins and save your project.
If your system is running low on memory and you need to free up memory, you can either
close your bins or use the Clear Memory button. If you close your bins, some of your
memory remains unavailable until you exit your Avid editing application because the online
master clips remain in memory. The Clear Memory button, however, closes and saves all of
your open bins and clears out any cached data of the online master clips.
Bins containing sequences use more memory than bins containing master clips. For bins that
contain a large number of sequences, you can free up memory and still keep your old
sequences. Create an archive bin and move older sequences that you do not use anymore to
the archive bin. Keep the archive bin closed.
To free up memory:
1. Click the Info tab of the Project window.
2. Click the Clear Memory button.
A dialog box opens asking if you want to close and save all opened bins.
3. Click OK.
This operation deletes cached data for the online master clips only. Memory might also
be used by other parts of your Avid editing application and will not be reduced by using
the Clear Memory button.
Understanding User Profiles
User profiles let you switch between settings without having to log out of your system and
log back in under a different user name.
User profiles let you establish separate settings for different editing functions. User “Jane,”
for example, can have separate profiles for “Audio editor,” “Film editor,” or for “Assistant 1,”
“Assistant 2,” and so on.
90
Page 91

Understanding User Profiles
User profile folders are kept in the following folder:
Windows XP drive:\Documents and Settings\All Users\Shared Documents\Avid editing
application\Avid Users\UserName
Windows Vista and
Windows 7
Macintosh /Users/Shared/Avid editing application/Avid Users/UserName
You can do the following with user profiles:
• Create new user profiles
• Switch between user profiles
• Return to the original user profile
• Import settings from another user or user profile
• Create a user profile on one system, export it to a server, and then import the same user
profile from another system to the new system.
When you export a user profile, you can select either a Personal or Group profile.
- When you select Personal, the user profile performs an auto-load and an auto-save
every time you open a project. Every time the user profile is updated, it saves the
new profile information. For example, you can create the user profile Jennie on one
system, export it to another location (a server), and then import it to a different
system. Any time you change the Jennie user profile, it updates to the server and
when you open the Jennie user profile on either system, it uses the most updated
Jennie user profile.
- When you select Group, the user profile auto-loads but it does not auto-save.
Changes made to the user profile only affect the system where you made the
change. The changes do not update to the server.
drive:\Users\Public\Public Documents\Avid editing application\Avid
Users\UserName
When you export User Profiles in an Avid Unity™ environment, make sure the workspace
n
containing the user profile has the same drive letter on all systems.
You can not share user profiles across platforms (Macintosh to Windows or Windows to
n
Macintosh).
• Update a user profile to add user settings to an existing Settings list.
For example, if you upgrade to a version of your Avid editing application that contains
the Send To option from a version that did not have that option, you can choose the
Update User Profile option to make sure the Send To settings templates appear in your
Settings list.
For step-by-step procedures, see “Managing User Profiles” on page 92.
91
Page 92
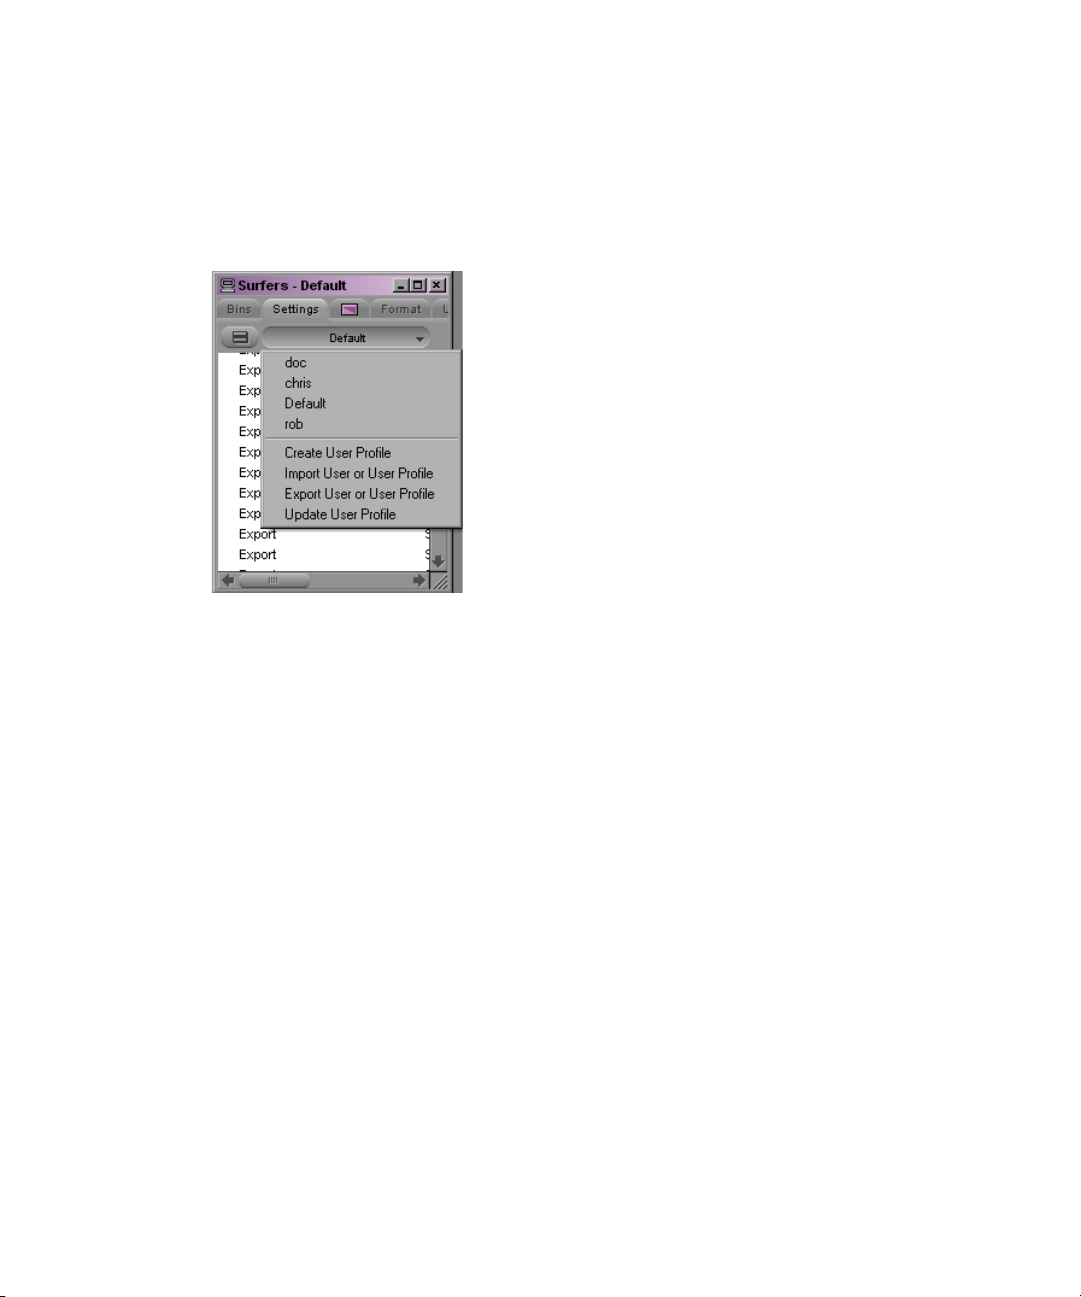
3 Working with the Project Window
Managing User Profiles
To create a user profile:
1. Click the Settings tab in the Project window.
The User Profile Selection menu in the Settings tab of the Project window
2. Click the User Profile Selection menu, and select Create User Profile.
92
The Create User Profile dialog box opens.
3. Type a name in the Profile Name text box, and then click OK.
The new user profile appears selected in the menu, and the user profile name appears in
the Project window title bar.
To import user settings from another user or user profile:
1. Click the Settings tab.
2. Click the User Profile Selection menu, and select another user profile.
3. The new user profile name appears in the Project window title bar.
To return to the original user profile:
1. Click the Settings tab.
2. Click the User Profile Selection menu, and select the default user profile.
If you use a user profile other than the default and you change to another project, the default
n
user settings load, even though the Project window displays your non-default user profile
name. You must reselect the user profile.
Page 93

Managing User Profiles
To import user settings from another user or user profile:
1. Click the Settings tab.
2. Click the User Profile Selection menu, and select Import User or User Profile.
3. Navigate to the user or user profile you want to import.
To export user settings to another user or user profile:
1. Click the Settings tab.
2. Click the User Profile Selection menu, and select Export User or User Profile.
3. Select Personal or Group.
4. Navigate to the location where you want to place the user or user profile.
5. Click OK.
To update user profiles:
1. Click the Settings tab.
2. Click the User Profile Selection menu, and select Update User Profiles.
Any new settings added to the upgraded version of your Avid editing application appear
in the Settings list.
To delete a user profile from your desktop:
1. Navigate to the Avid Users folder, and then select the user folder you want to delete.
For information about the location of the Avid folders, see “Avid Projects and Avid
Users Folders” on page 58.
2. Do one of the following:
t (Windows) Press the Delete key, then click OK in the dialog box.
t (Macintosh) Drag the folder to the Trash.
3. Empty the Recycle Bin (Windows) or the Trash (Macintosh) to remove the files from the
system.
4. Close the windows, and restart your Avid editing application.
The deleted user no longer appears in the Select Project dialog box.
93
Page 94

3 Working with the Project Window
Customizing the Avid User Interface
The Interface Settings dialog box provides you with controls for customizing the brightness
and the colors of the Avid user interface. For complete reference information on the
Interface Settings dialog box, see “Interface Settings” on page 1264.
The Interface Settings dialog box allows you to set the highlight color for buttons. You can
also control the brightness of the user interface, which includes the following components:
• Application, tool, toolbar, and dialog box backgrounds
• Buttons and button contents
• Project background
The Avid editing application lets you modify the colors of some interface components using
controls not included in the Interface Settings dialog box:
• Bin media object color — see “Assigning Colors to Objects in a Bin” on page 357.
• Timeline clip color — see “Displaying Clip Colors in the Timeline” on page 655.
• Timeline background and track colors — see “Changing the Timeline Background or
Track Color” on page 659.
• Bin background color — see “Changing the Bin Background Color” on page 356.
Changing Interface Component Colors
You can use a brightness selection slider and selection buttons to change the appearance of
some interface components.
c
When you use the selection slider to modify interface settings, it overwrites any
previous user settings. Avid recommends you save a copy of your user settings before
you use the selection slider.
To set the brightness and color of interface components:
1. In the Project window, click the Settings tab, and then double-click Interface.
The Interface dialog box opens.
94
Page 95

Customizing the Avid User Interface
2. Click a highlight color to change button highlight colors.
3. Click the Interface Brightness slider to adjust the brightness of the user interface. The
Avid editing application provides several presets on the slider.
4. (Option) If you want to set the color of the video, audio, or timecode tracks to the
default, select the appropriate option.
5. (Option) If you want to be able to set custom background colors for bins, select Allow
Custom Bin Backgrounds.
For more information, see “Changing the Bin Background Color” on page 356.
6. Do one of the following:
t Click Apply to apply the changes you selected.
If you click Cancel after you click Apply, interface components retain the colors
you applied.
t Click OK to close the dialog box and put the new setting into effect.
t Click Cancel to close the dialog box.
The changes you select do not take effect.
95
Page 96

3 Working with the Project Window
Changing Font and Point Size
You can change the default font and point sizes of the Project, Bin, Composer monitor,
Script, and Timeline windows. You can vary the fonts and point sizes across these windows.
For example, you can set the Project window to Helvetica, 13 pt.; set one Bin window to
Times Roman, 11 pt.; and set another Bin window to Arial, 12 pt.
The table describes the windows you can change, and where these changes are saved.
Window Location of Changes
Project Changes the font and point size of the text in the Project window; saves as a Project
setting.
Bin Changes the font and point size of the text in the Bin window; saves as a Bin setting
(not a Bin View setting).
Composer
monitor
Script Changes the font and point size of the text in the Script window; saves as a Script
Timeline Changes the font and point size of clip text; saves as a Timeline View setting.
To change the font in the Project, Bin, Composer monitor, Script, or Timeline window:
Changes the font and point size of the sequence or source clip name text; saves as a
Composer setting.
setting.
1. Click the Project, Bin, Composer monitor, Script, or Timeline window to make it active.
2. Select Edit > Set Font.
The Set Font dialog box opens.
3. Click the Font menu, and select a font.
Any font installed on the Avid system appears in the list. For information on adding fonts to
n
your system, see the documentation for your operating system.
4. Type another point size for the font in the Size text box.
5. Click OK.
The new font and point size appear in the active window.
When you close the window, the last font and point size applied are saved with the
window.
96
Page 97

User-Customized Workspaces
A workspace is the arrangement and size of tool windows displayed in your Avid editing
application. If you are accustomed to working with a particular group of windows arranged
and sized in a particular setup, you can assign them to a workspace setting that you can then
recall with a workspace button.
For example, during capture you might want to display the Capture tool and Video Input tool
in specific locations. During effects editing, you might want to display the Effect Palette and
Effect Editor in particular locations and sizes.
While in a workspace, you can move tool windows or open and close tool windows. The
next time you select that workspace, the tool windows appear with either:
• The arrangement from the last time you left the workspace
• The arrangement you set for the workspace, regardless of any changes you made
You can assign up to eight buttons that let you switch between user-customized workspaces.
This is useful if there is more than one user accessing the same Avid system. Each user can
assign up to eight workspaces. Workspace buttons are assigned to the workspaces in the
Settings list in the order that they appear. For example, the W1 button is assigned to the first
workspace that appears in the Settings list; W2 is assigned to the second workspace that
appears in the Settings list.
User-Customized Workspaces
You cannot assign certain tool windows to a workspace, such as the Hardware tool, the
n
Communication (Serial) Ports tool, and the Media tool.
Creating a New Workspace Setting
To create a new workspace setting:
1. Click the Settings tab in the Project window.
The Settings list appears.
2. Scroll to the bottom of the Settings list, and select Workspace.
3. Select Edit > Duplicate.
A new workspace setting appears in the Settings list.
If you duplicate a previously named workspace setting, a .1 appears at the end of the new
n
name.
4. Click to the left of the new workspace you want to set.
A check mark appears next to the workspace.
97
Page 98

3 Working with the Project Window
5. Assign a custom name to the new workspace:
a. In the column between Workspace and User, click until you see a text cursor and
box. Make sure you click the Custom name column and not the Setting name.
Custom name column in the Settings list
b. Type a name for the new custom workspace; (for example, Logging).
c. Press Enter (Windows) or Return (Macintosh).
d. Open the windows and tools with which you want to associate the workspace.
Resize and move the windows to the location you want them to appear on
the monitors.
6. Double-click the custom workspace setting.
The Workspace Settings dialog box opens.
7. Select or deselect the following options, depending on your preference for the behavior
of the workspace:
Option Description
Activate Settings
Linked by Name
Continually Update
This Workspace
Manually Update This
Workspace
Lets you link other settings to the workspace. For more information,
see “Linking User Settings and Workspaces” on page 99.
Automatically preserves the workspace in its most recent arrangement.
Future changes to the arrangement of the tool windows are saved.
Saves the workspace in its current arrangement when you click Save
Workspace Now. Future changes to the arrangement of the tool
windows are disregarded.
8. Click OK.
98
Page 99

Linking User Settings and Workspaces
You can link User settings to a workspace. You can create a customized workspace, set up
specific options in any Settings dialog box, and link them together by name.
For example, you can create an Audio workspace that opens the Audio Mixer tool and Audio
tool. This workspace can also open a customized Timeline (with enlarged audio tracks and
rubberbanding displays).
To link user settings and a workspace:
1. Create a new workspace.
For more information, see “Creating a New Workspace Setting” on page 97.
2. Give the workspace a custom name.
3. Click a setting in the Settings list that you want to link to the new workspace. For
example, click Timeline View. Adjust the Timeline to how you want it displayed
(enlarged tracks, audio waveform, and so forth).
4. Give this Timeline View setting the same name you gave the workspace in step 2.
5. Double-click another setting, (for example, Audio). Select the new options, (for
example, Default Pan), and close the dialog box.
User-Customized Workspaces
6. Give this setting the same name you gave the workspace in step 2.
Examples of linked settings (top and center) and a linked workspace (bottom)
7. Double-click the workspace you just created.
The Workspace Settings dialog box opens.
99
Page 100

3 Working with the Project Window
8. Click Activate Settings Linked By Name.
9. Click OK.
All the settings and the new workspace you created are activate.
Switching Between Workspaces
To switch from one workspace to another:
1. Click the Settings tab in the Project window.
The Settings list appears.
2. Click to the left of the workspace setting you want to use.
A check mark appears next to the workspace.
To switch between workspaces use the workspace buttons. To assign workspace buttons,
see “Assigning a Workspace Button” on page 101.
Deleting a Workspace
To delete a workspace:
1. Select the workspace you want to delete from the Settings list.
100
The workspace highlights.
Make sure a check mark does not appear next to the workspace you want to delete. You
cannot delete an active workspace.
2. Press the Delete key.
The system removes the selected workspace from the Settings list.
 Loading...