

Page 1

Pinnacle MediaCenter
Page 2

Pinnacle MediaCenter
User’s Guide
GB/US September 2004
© Pinnacle Systems GmbH 2004
All rights reserved.
No part of this manual may be reproduced or transferred to other media without
explicit written permission from Pinnacle Systems GmbH, Braunschweig,
Germany.
All brand or product names are trademarks or registered trademarks of their
respective holders.
This manual is printed on chlorine-free, bleached paper using solvent-free ink.
Pinnacle Systems GmbH has written this manual to the best of its knowledge,
but does not guarantee that the programs/systems will fulfill the users’ intended
applications.
No warranty is made as to the specifications of features.
Pinnacle Systems GmbH retains the right to make alterations to the content of
the manual without obligation to inform third parties.
All quotes, sales, supply and manufacturing contracts from Pinnacle Systems
GmbH, including consulting, installation and other contractual services are
subject exclusively to the General Sales and Delivery Terms of Pinnacle
Systems GmbH.
Page 3

Table Of Contents
Introduction ........................................................................................................... 1
Welcome ............................................................................................................1
Pinnacle MediaManager................................................................................. 1
Pinnacle MediaCenter ....................................................................................2
Pinnacle hardware .......................................................................................... 2
PCTV MediaCenter remote control ...............................................................2
Delivery Contents .............................................................................................. 3
Hardware ........................................................................................................ 3
Software..........................................................................................................3
Documentation ............................................................................................... 4
Online Help........................................................................................................ 5
Online Manual ................................................................................................... 5
How to Manage the Pinnacle MediaCenter ....................................................... 6
On-screen menu buttons................................................................................. 6
Remote control and PC function keys............................................................6
Menu bars .......................................................................................................8
Installing Pinnacle MediaCenter ...........................................................................9
Hardware Installation.........................................................................................9
Software Installation ..........................................................................................9
Pinnacle MediaManager......................................................................................11
Overview.......................................................................................................... 11
What the Pinnacle MediaManager Does...................................................... 11
Main Window of the Pinnacle MediaManager ............................................ 12
The Media Library ...........................................................................................14
Introduction to the Media Library ................................................................ 14
The Sort View in the Media Library ............................................................ 16
Searching in the Media Library.................................................................... 17
Deleting Files in the Media Library ............................................................. 18
The Media Player..............................................................................................19
Using the Media Player and Its Controls ..................................................... 19
Importing Media Files..................................................................................21
Introduction to the Import Tab .....................................................................21
Import - Folder ............................................................................................. 22
iii
Page 4

Pinnacle MediaCenter
Import - Files ................................................................................................23
Import - Drives ............................................................................................. 24
Import - Audio CD ....................................................................................... 25
Import - Digital Camera ............................................................................... 28
Import - Watch Folder.................................................................................. 30
Organizing Media Files....................................................................................32
Organizing File Tags ....................................................................................32
Customized File Tags (Keywords)...............................................................33
Introduction to the Organize Tab .................................................................34
Using Playlists.................................................................................................36
Introduction to the Playlists Tab ..................................................................36
Creating and Editing Playlists ......................................................................37
Exporting Media Files..................................................................................39
Introduction to the Export Tab .....................................................................39
Exporting to a Folder....................................................................................40
Exporting to a Winamp Playlist ................................................................... 42
Exporting to a Burner ................................................................................... 43
The Menus........................................................................................................45
The File Menu ..............................................................................................45
The Edit Menu.............................................................................................. 47
File Formats.....................................................................................................49
Supported File Formats ................................................................................ 49
Pinnacle MediaCenter ......................................................................................... 51
Overview.......................................................................................................... 51
Pinnacle MediaCenter Functions.................................................................. 51
The Main Screen of the Pinnacle MediaCenter ........................................... 52
TV Menu .......................................................................................................... 53
Overview of the TV Menu ...........................................................................53
Watching Live Television ............................................................................ 54
Selecting Channels .......................................................................................56
Recording Live Television ........................................................................... 57
Playing or Deleting a Recording .................................................................. 60
Videotext ......................................................................................................61
Timeshift....................................................................................................... 63
Movies Menu ................................................................................................... 65
Overview of the Movies Menu..................................................................... 65
iv
Page 5

Table Of Contents
Playlists......................................................................................................... 67
Genre ............................................................................................................ 68
All Movies .................................................................................................... 69
CD/DVD....................................................................................................... 70
Browse Hard Disk ........................................................................................ 71
Music Menu ..................................................................................................... 72
Overview of Music Menu............................................................................. 72
Playlists......................................................................................................... 74
Genre ............................................................................................................ 75
Artist .............................................................................................................77
Album ........................................................................................................... 78
Song.............................................................................................................. 79
Browse Hard Disk or CD .............................................................................80
Photos Menu ....................................................................................................82
Overview of the Photos Menu......................................................................82
Slide Shows .................................................................................................. 84
Date............................................................................................................... 85
Photo Album................................................................................................. 87
Browse Hard Disk ........................................................................................ 88
Settings Menu ..................................................................................................89
Overview of the Settings Menu....................................................................89
General Settings............................................................................................ 91
TV Settings................................................................................................... 93
DVD Settings................................................................................................ 95
Video Settings .............................................................................................. 97
Music Settings .............................................................................................. 99
Photo Settings............................................................................................. 101
Advanced Settings............................................................................................. 103
Overview of the Advanced Settings Dialog ..................................................103
Channel Advanced Settings - Creating a Channel List .................................104
Channel Advance Settings - Editing a Channel List .....................................106
Viewing channel lists .................................................................................106
Importing and exporting channel lists........................................................ 106
Changing the channel position ...................................................................106
Deleting an analog channel ........................................................................106
v
Page 6

Pinnacle MediaCenter
Advanced Settings - Display.......................................................................... 107
Colors.......................................................................................................... 107
Reset ...........................................................................................................107
Display type................................................................................................107
Aspect ratio.................................................................................................107
Video start size ........................................................................................... 107
Cropping ..................................................................................................... 108
Noise filter .................................................................................................. 108
Advanced Settings - Video ............................................................................ 109
Video input .................................................................................................109
Video standard............................................................................................109
Video interlace............................................................................................ 109
Advanced Settings - Audio ............................................................................ 110
Device......................................................................................................... 110
Save separate settings for each input.......................................................... 110
TV playback input ......................................................................................110
Sound recording input ................................................................................ 110
Levels.......................................................................................................... 110
Advanced Settings - Recording ..................................................................... 111
Output format .............................................................................................111
Capture file path ......................................................................................... 111
Advanced Settings - Timeshift ...................................................................... 112
Enable timeshifting..................................................................................... 112
Maximum file size (MB)/ Maximum duration (minutes) .......................... 112
Timeshift file path ......................................................................................112
Offsets......................................................................................................... 113
Show record indicator................................................................................. 113
Advanced Settings - Playback .......................................................................114
Music playback........................................................................................... 114
Movie playback .......................................................................................... 114
Showing photo files.................................................................................... 115
General Advanced Settings............................................................................ 116
Language ....................................................................................................116
Theme .........................................................................................................116
Screen saver................................................................................................ 116
Duration of OSD......................................................................................... 116
vi
Page 7

Table Of Contents
Transparency of OSD................................................................................. 116
Parental control........................................................................................... 116
Process priority........................................................................................... 117
PCTV hardware .......................................................................................... 117
Save all settings ..........................................................................................117
Load all settings.......................................................................................... 117
tvtv-Manager ..................................................................................................... 119
The tvtv-Manager........................................................................................... 119
Opening a user account ..............................................................................119
Assigning TV stations ................................................................................ 119
Programmed recording list .........................................................................120
Technical Support.............................................................................................. 121
Getting Technical Support ............................................................................. 121
1. Frequently asked questions. ...................................................................121
2. Ask a question and receive an answer....................................................121
3. E-mail support. ....................................................................................... 122
4. Discussion forum....................................................................................122
License Information ..........................................................................................123
Pinnacle End User License Agreement .........................................................123
Glossary............................................................................................................. 127
Index .................................................................................................................. 135
vii
Page 8

Pinnacle MediaCenter
viii
Page 9

Introduction
Welcome
Your new Pinnacle product offers you a completely new experience in
multimedia entertainment. From now on, you can access and process all sorts of
media such as television, movies, music and photos, either from your computer
or from the comfort of your armchair.
You can watch both analog and digital television on either your computer
monitor or your television screen.
The fun gets even better with the following features. Watching TV just got
easier and you don't have to miss a second of your favorite shows, thanks to the
latest timeshift recording technology. This makes spontaneous or scheduled
recording to your hard disk a breeze. With you new Pinnacle product, you have
immediate access to the latest news using videotext and an Electronic Program
Guide (EPG) gives you an overview of a complete range of television programs.
Furthermore, programming your recordings is quick and easy.
You can play video, music and display photo files from your hard disk or from a
CD and/or DVD. You can also burn CDs or DVDs that you have created
yourself.
In addition, you can arrange your media files in an intelligent multimedia
database so that they can be found quickly. This is done according to various
playback criteria based on specific categories (e.g., all the movies in a certain
genre or all of the photos from a particular vacation). Pinnacle MediaCenter
gives you simple and targeted access to all of your media files.
Now you can access all of these different media quickly and easily with just one
device: your PC. The Pinnacle MediaCenter interface is especially designed so
that all of the menus can be easily recognized and operated via remote control,
even from several yards away.
The following components of your new Pinnacle product put all the following
functions at your fingertips:
Pinnacle MediaManager
The Pinnacle MediaManager is installed on your PC and is used to import music
files, movies and digital photos into the MediaManager database. You also
manage these files in the MediaManager and keep them in order. You can create
your own playlists for collecting your favorite music, movies and photos. The
media files on your PC could come from the Internet, your own audio CDs or
your digital camera.
1
Page 10

Pinnacle MediaCenter
Pinnacle MediaCenter
The Pinnacle MediaCenter is also installed on your PC and is used for media
playback.
You can watch and record TV with the Pinnacle MediaCenter, play back
recordings and display videotext. Music, movies and photos from CDs, DVDs or
your hard disk are shown in the Pinnacle MediaCenter. You can access the
categories created in the Pinnacle MediaManager to display media sorted
according to your criteria. This helps you select the medium best suited to your
particular mood or for any occasion.
Pinnacle hardware
Included in your new Pinnacle product as an option is a TV card which lets you
watch TV, as well as do timeshifts or view videotext.
PCTV MediaCenter remote control
With the remote control, you can navigate the on-screen menu from anywhere in
your room – without having to bother going back and forth to your computer.
Now go have fun with your new Pinnacle product!
2
Page 11
Introduction
Delivery Contents
Before you begin with the installation, check the contents of the package to
make sure that they are complete. If any part is missing or damaged, contact
your retailer. Keep the packing material in case you have to transport the
original parts again in the future.
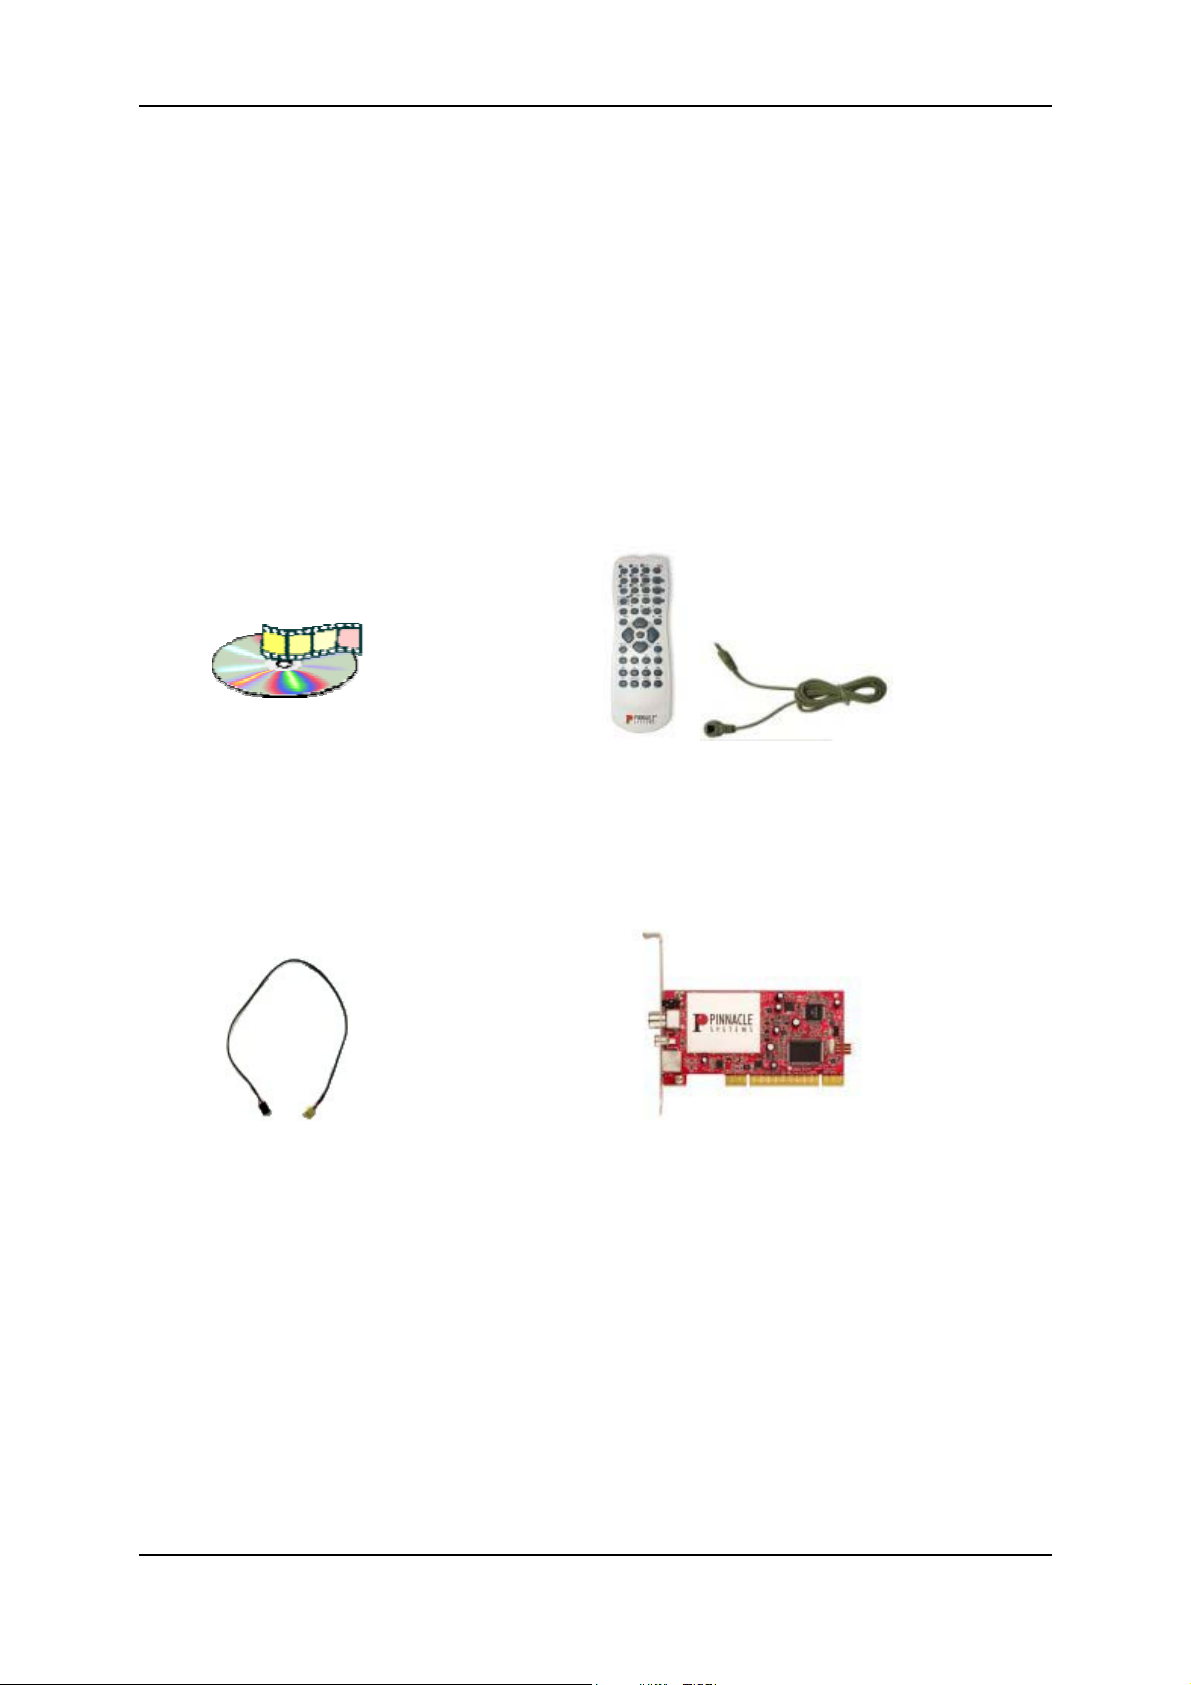
Hardware
CD-ROM with
applications, sample
files and drivers
Internal audio cable
(optional) (illustration is
a sample)
Remote control with receiving cable
(illustrations are samples)
TV card (optional)
(illustration is a sample)
Software
Software designed for Windows XP is found on the CD-ROM included in the
delivery.
3
Page 12
Pinnacle MediaCenter
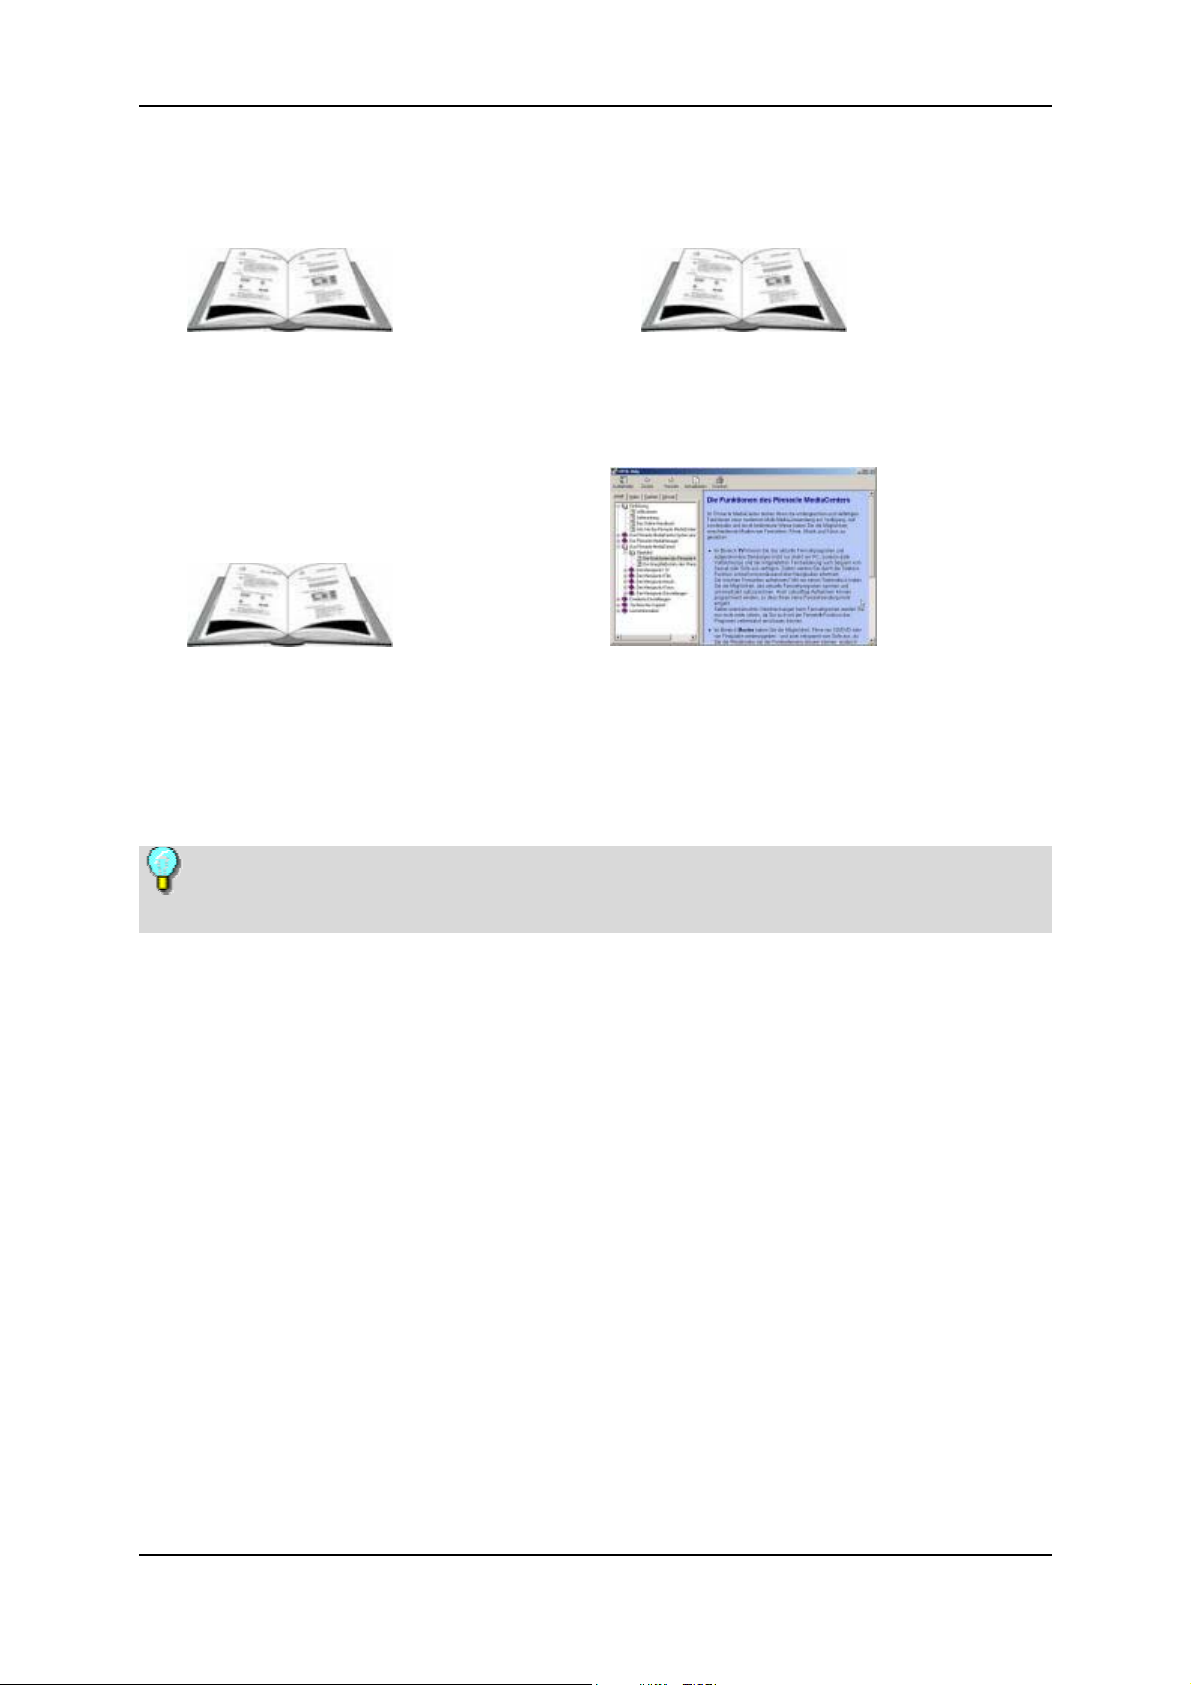
Documentation
User Manual on CD Hardware operating instructions on CD
Remote control
Online Help
operating instructions
on CD
Please note that the contents of the actual delivery package may differ from
the items shown above depending on the delivery variant!
4
Page 13

Introduction
Online Help
Online Help is available for your Pinnacle product at any time.
To search for a specific topic, select the Help Topics function in the Help menu
or simply press the F1 key.
Online Manual
If you have questions about the function and operation of your Pinnacle product,
you can also consult the online manual in addition to the printed manual. The
online manual is installed automatically and can be read directly on-screen.
To open the online manual, you need the free program Adobe Acrobat Reader.
To start the online manual, do the following:
Use the mouse to click and open the Windows Start menu.
Use the mouse to go to Programs. The Program menu then opens.
Use the mouse to go to Pinnacle MediaCenter. The menu then opens.
Click the entry Pinnacle MediaCenter.
Any new modifications or supplements, which didn't make it into the
documentation, are described in the ReadMe file on the CD-ROM included in
the delivery package.
5
Page 14

Pinnacle MediaCenter
How to Manage the Pinnacle MediaCenter
There are several ways to operate the Pinnacle MediaCenter:
By using your remote control
By using your mouse and the cursor
By using your keyboard
To simplify this manual, the instructions on how to operate your Pinnacle
MediaCenter will be based mainly on the use of your remote control. However,
the same functions found on your remote control can also be used via your PC
function keys and menu bars or by using your mouse.
On-screen menu buttons
Many of the functions in your Pinnacle MediaCenter can be performed using the
on-screen menu buttons displayed on your screen (e.g., the individual menu
items on the main screen).
If you want to display an on-screen menu item, select that item using the
cursor keys on your PC keyboard or the cursor buttons of your remote
control. Press the Enter key on your keyboard and/or the Confirm/OK key
on your remote control. The menu item you want is then activated.
Remote control and PC function keys
In addition, you can manage several of the various functions directly using the
remote control that came with the product or your PC keyboard and/or mouse without having to activate an on-screen menu button (this includes the fast
forward function when playing back a television recording).
The remote control buttons required for the various functions are described in
detail in the individual chapters of this documentation.
You can also consult the documentation for your remote control to get an
overview of the functions assigned to the various buttons.
You can also execute various commands by using certain function keys on
your PC keyboard. In this case, the individual function keys correspond to
specific keys on your remote control.
Read the following overview to find out which PC keys are used to perform
which functions:
The Pinnacle MediaCenter "Advanced Settings" can only be accessed using
the keyboard or your mouse.
6
Page 15

Function PC function keys
Stop PMC ALT+F4
Introduction
Switch between full screen and
preview window
Zoom ALT+Z
Multi-channel preview ALT+P
Channel list Enter (while watching TV)
Channel info ALT+I
Sound Off/On M
Toggle between two channels ALT+L
Volume +/- +/-
Channel +/- Page Up/Page Down
Confirm Enter
Menu ALT+M
Jump to live position during timeshift
playback
Start recording C
ALT+F or ALT+Enter
F5
Pause
in TV mode:Start timeshift recording
in videotext mode: automatic page
update
Jump back/Jump forward
in videotext mode: Display
Page 100/Page 899
Playback
in videotext mode: Display hidden
text
Stop
in videotext mode: Hide hidden text
Rewind/Fast forward
in videotext mode: Display
previous/next subpage
TV F5
Videotext (Teletext) F6
Space bar
Pos1/End
P
S
R/F
7
Page 16

Pinnacle MediaCenter
Function PC function keys
Radio F7
EPG F8
Enter numbers 1/2/3/4/5/6/7/8/9
0/AV (change video input) 0
Selection of on-screen menu buttons Cursor
In videotext mode: Display
previous/next page
Cursor up/down
Menu bars
To quickly and easily operate your Pinnacle MediaCenter, there are two menu
bars from which you can directly access important functions using your mouse.
To display the menu bars, move your mouse.
In the upper menu bar, you can do the following with a simple mouse click:
Go to the Pinnacle MediaCenter menu.
Return to the previous page or menu option.
Keep the window permanently on top.
Minimize or maximize the size of the window.
Close the Pinnacle MediaCenter program.
In the lower menu bar, you can also do the following with a simple mouse click:
Turn the sound on and off.
Adjust the volume.
Switch from one TV station to another.
Jump between tracks, music titles or videotext pages.
Play back, pause or cancel movies, slideshows or music titles.
Record shows.
Start a timeshift recording using the Pause option.
8
Page 17

Installing Pinnacle MediaCenter
Hardware Installation
Hardware installation depends on the variant supplied, e.g., an internal or
external device. You will find a detailed description in the corresponding
hardware manual on the CD.
Software Installation
This section describes how to install Pinnacle Software on your PC. In the
course of the installation, a program group with subgroups will be created in
which all of the required software components will be copied.
During the installation process, you will be asked to provide the program
serial number. The serial number is located on the cover of the CD.
Please insert the supplied installation CD into the corresponding drive of
your computer.
The setup program will now start either automatically or you can click on
autorun.exe in the setup directory of your CD-ROM.
Follow the installation instructions shown on your screen.
After installation has been completed you will be prompted to restart your
computer. For a successful installation it is absolutely necessary that you
restart your computer.
9
Page 18

Pinnacle MediaCenter
10
Page 19

Pinnacle MediaManager
Overview
What the Pinnacle MediaManager Does
The Pinnacle MediaManager is installed on your PC so that you can import
Music files,
Movies and other video files, and
Digital photos
to the constantly updated MediaManager Database and then manage and
organize them.
You can also create personal playlists – compilations of your favorite songs,
movies or photos that are organized according to your own special criteria.
These playlists can also be exported so that, among other things, you can burn
an audio CD.
11
Page 20

Pinnacle MediaCenter
Main Window of the Pinnacle MediaManager
You can launch the Pinnacle MediaManager from the Pinnacle program group
in the Start Menu or by double-clicking the Desktop shortcut. The following
window will open:
The window contains the following sections:
Section 1:
The Tools section with the Import, Organize, Playlists and Export tabs,
located in the upper left-hand corner.
Section 2:
The Media Player in the upper right-hand corner.
Section 3:
The Media Library with the Music, Movies and Photos tabs, located in the
bottom half of the window.
Menu Bar:
At the very top of the window is the menu bar, which contains the File, Edit and
Help menus.
12
Page 21

Pinnacle MediaManager
The window layout varies depending on what tools and lists you have selected;
the three sections work together closely and interactively. How the sections
work individually is explained in detail in the following chapters.
We will first focus on the Media Library and the Media Player to give you the
basic tools you need to use the application.
In later chapters, we will look at the more advanced functions – Import,
Organize, Playlists and Export – as well as the menus.
13
Page 22
Pinnacle MediaCenter
The Media Library
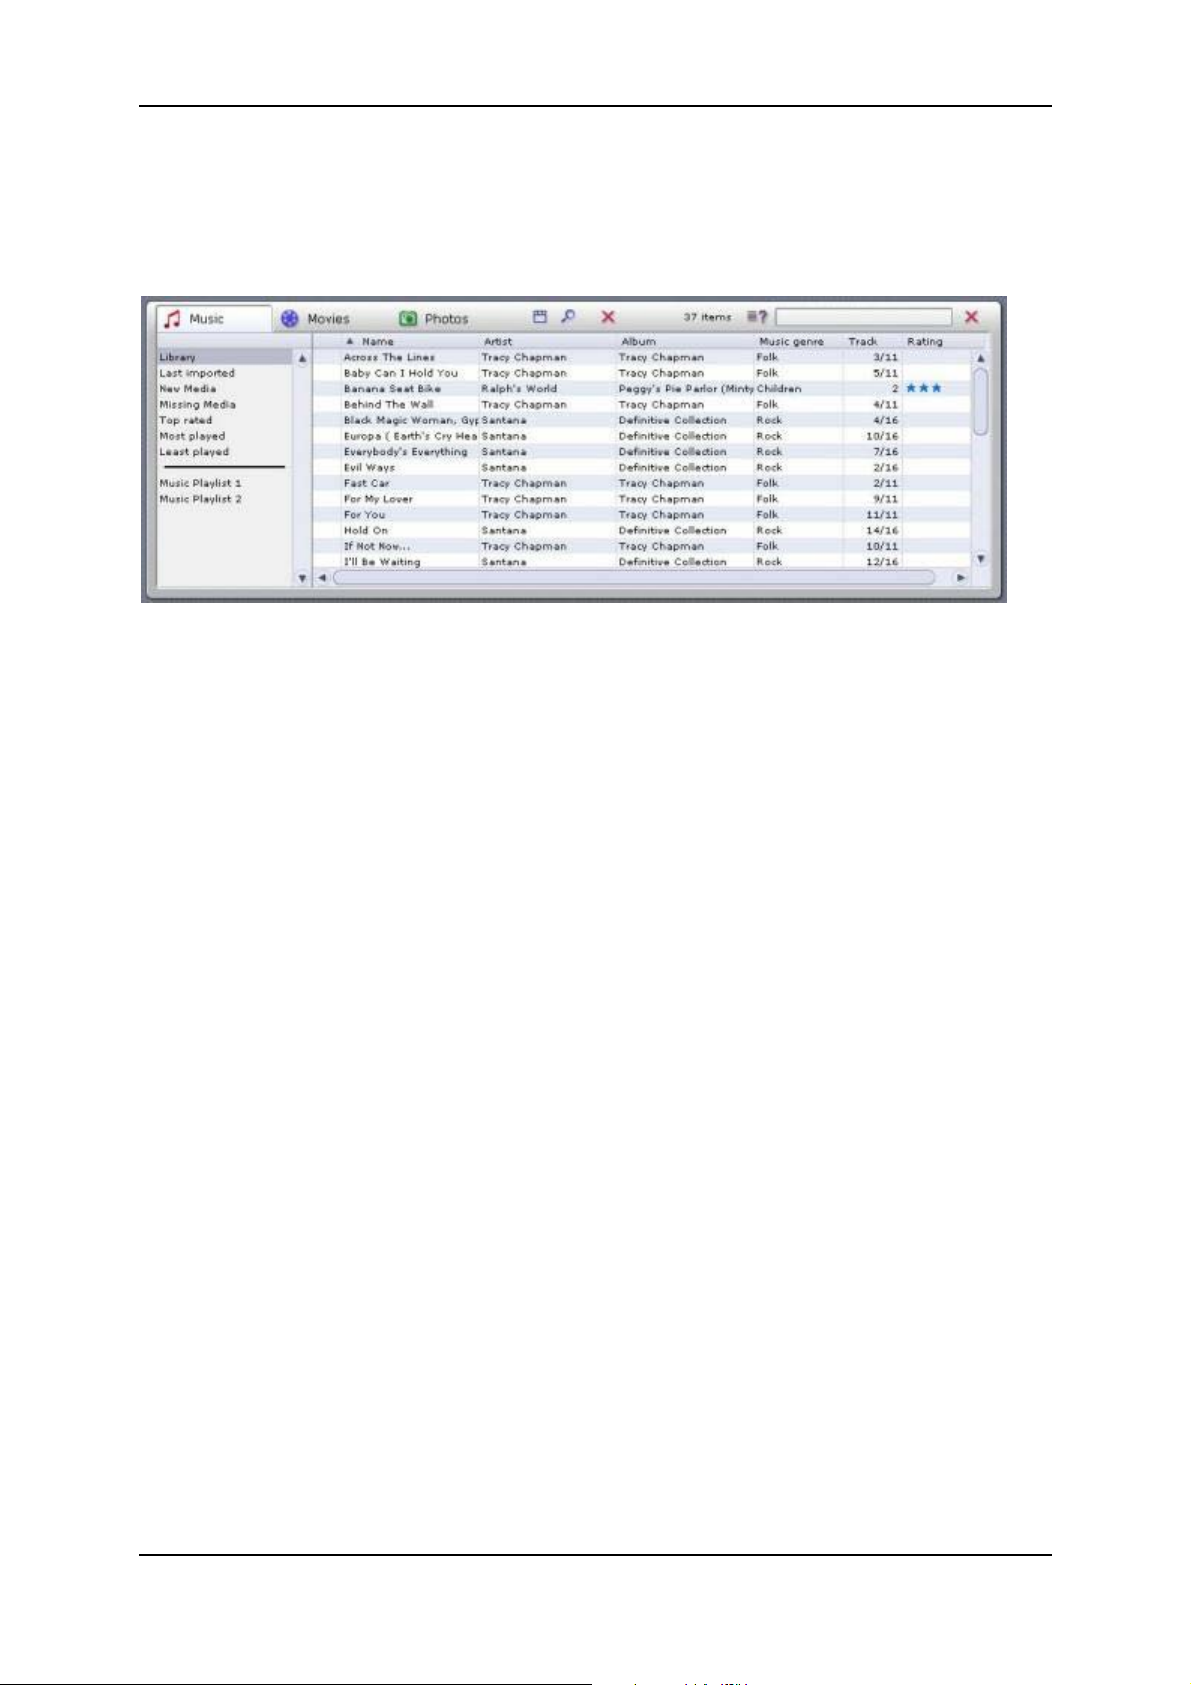
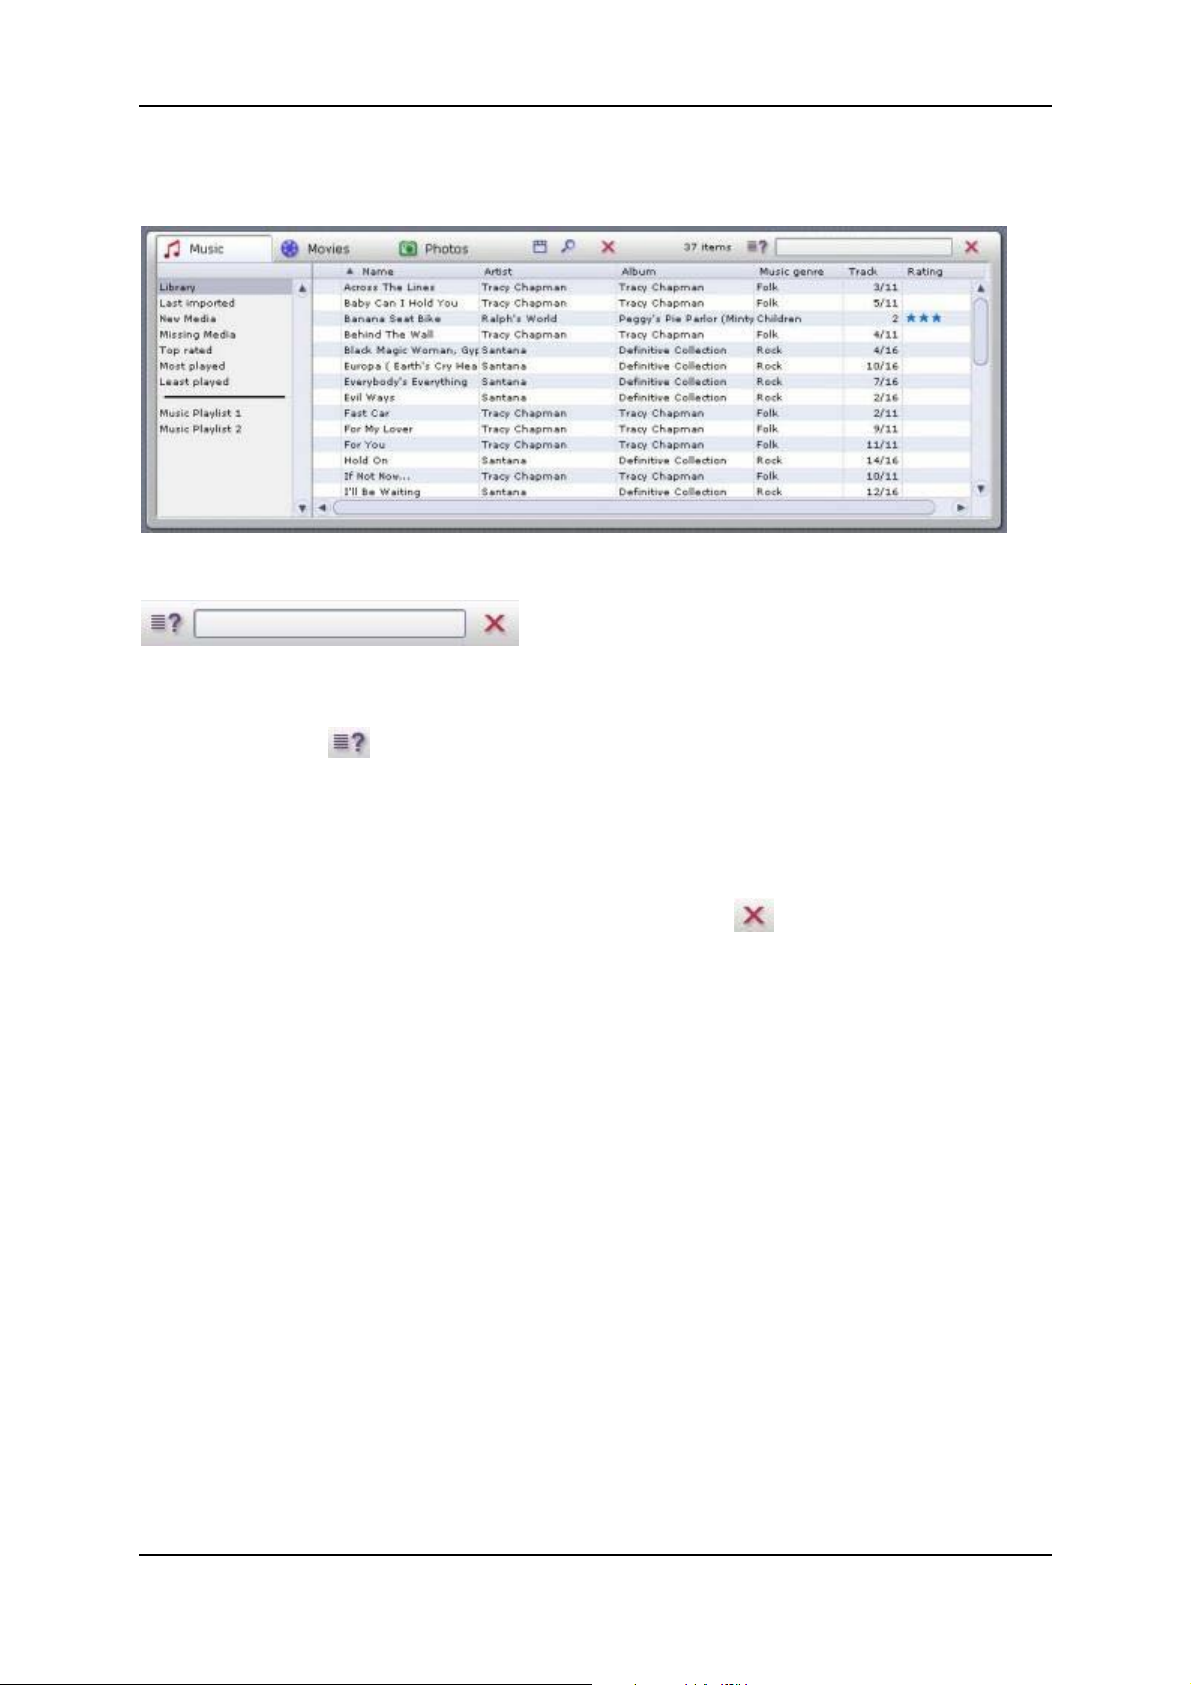
Introduction to the Media Library
Media Types
The Media Library displays the contents of the database sorted by media type. It
consists of the
Music tab
Movies tab and the
Photos tab.
Categories
For each media type, you can toggle between the categories listed on the lefthand side.
Library:
Displays all the files in the database.
Last imported:
Displays the most recently imported files. For example, if you import 3 CDs
in a row, you will only see the tracks from the third CD.
New Media:
All the files imported over the past twenty-four hours.
Missing Media:
The media items displayed here are still existing as entries in the database but
the belonging files are no longer available at their original storage location as
they have been deleted or moved by mistake. These entries are indicated by a
corresponding symbol in the left column of the Media Library. With a right
click on the list you can open the context menu, search for the missing media
files and "repair" the broken links.
14
Page 23

Pinnacle MediaManager
Top rated:
Displays the files that have been rated four or five stars by the user. The
rating is done via the context menu of the right column in the list and is
indicated by stars.
Most played:
Displays the media files that have been played the most by the user.
Least played:
Displays the media files that have been played least by the user.
Playlists:
Displays all the files in the selected playlist.
The MediaManager's installer copies sample files to your hard drive and
automatically imports them to the database. You can already see these files in
their assigned categories the first time you launch the MediaManager.
Details
The right-hand list displays details on individual files; these details will vary
depending on whether you have selected the Music, Movies or Photos tab/media
type. These sorting criteria are also called tags.
Depending on which media type is selected, you may see the following
information: file status, track/movie/photo name, date created, etc.
If the database does not contain any data on individual tags, the associated
columns will remain empty.
As in Windows Explorer, you can left-click a column header to resort the files in
the list.
You can change the order of the columns by left-clicking the column headers
and dragging them to a new location.
Right-clicking a column header will bring up a pop-up menu where you can
choose which columns to display and which not.
The following chapters explain how the Media Library can help you organize
and manage your media files.
15
Page 24
Pinnacle MediaCenter
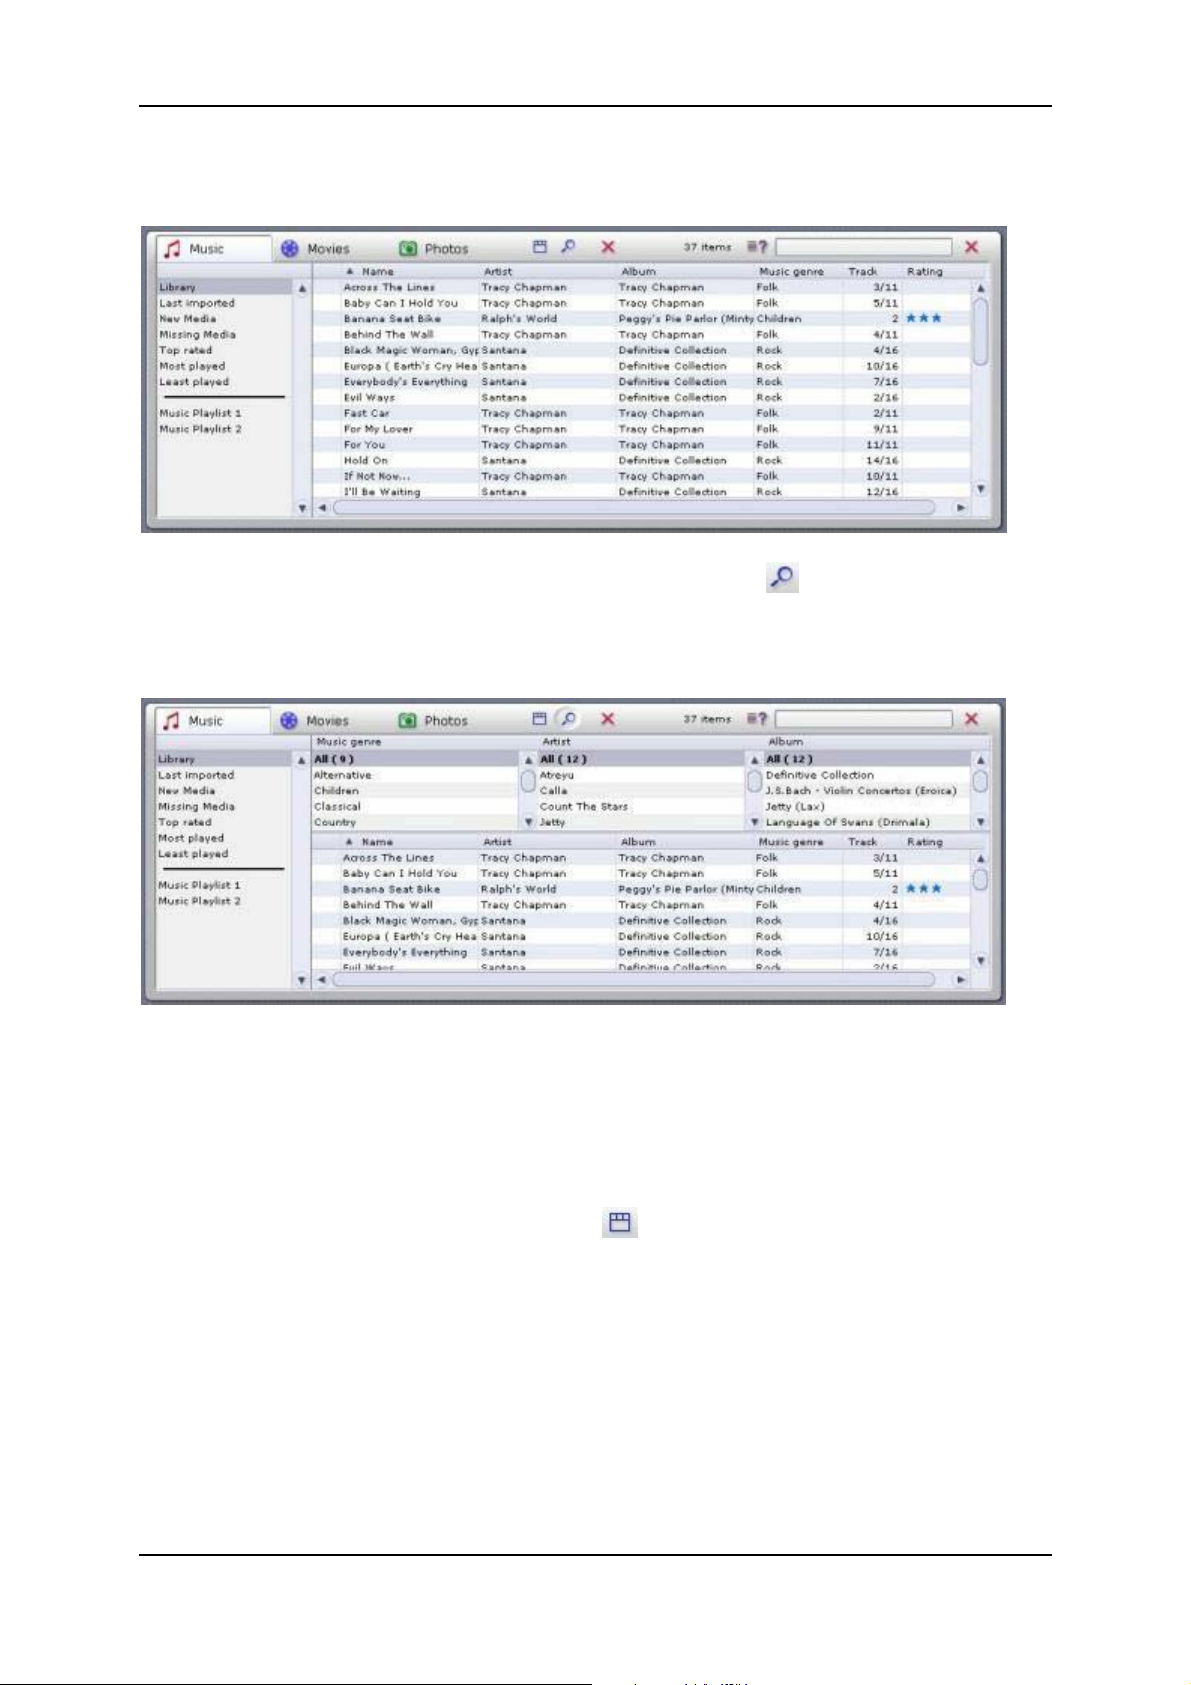
The Sort View in the Media Library
You can toggle the sort view on and off by clicking the
the tabs.
Clicking this button will split the list horizontally into two new sections.
The upper half of the list can be used to sort or filter the media files displayed in
the lower half. In other words, in the upper half you set a filter that selects which
files can be displayed in the lower half.
Example: You have activated the Music tab and now want to display all the
tracks in your database in the Soul genre.
button to the right of
You can open the context menu with the
columns should be displayed in the sort view. We recommend listing photos, for
example, according to date.
button and determine which
16
Page 25
Pinnacle MediaManager
Searching in the Media Library
On the far right-hand side of the Media Library is the search field:
To quickly find a particular media file in the database, just enter any search term
in the search field.
You can use the
database should be searched, e.g. according to "Name", "Artist" or "Album", or
whether the entire database should be searched.
Any files that have names containing the search term will be displayed in the
list. To enter a new search term, simply click in the search field and overwrite
the old search term, or clear the field by clicking the
button to determine whether only certain ranges in the
button.
17
Page 26
Pinnacle MediaCenter
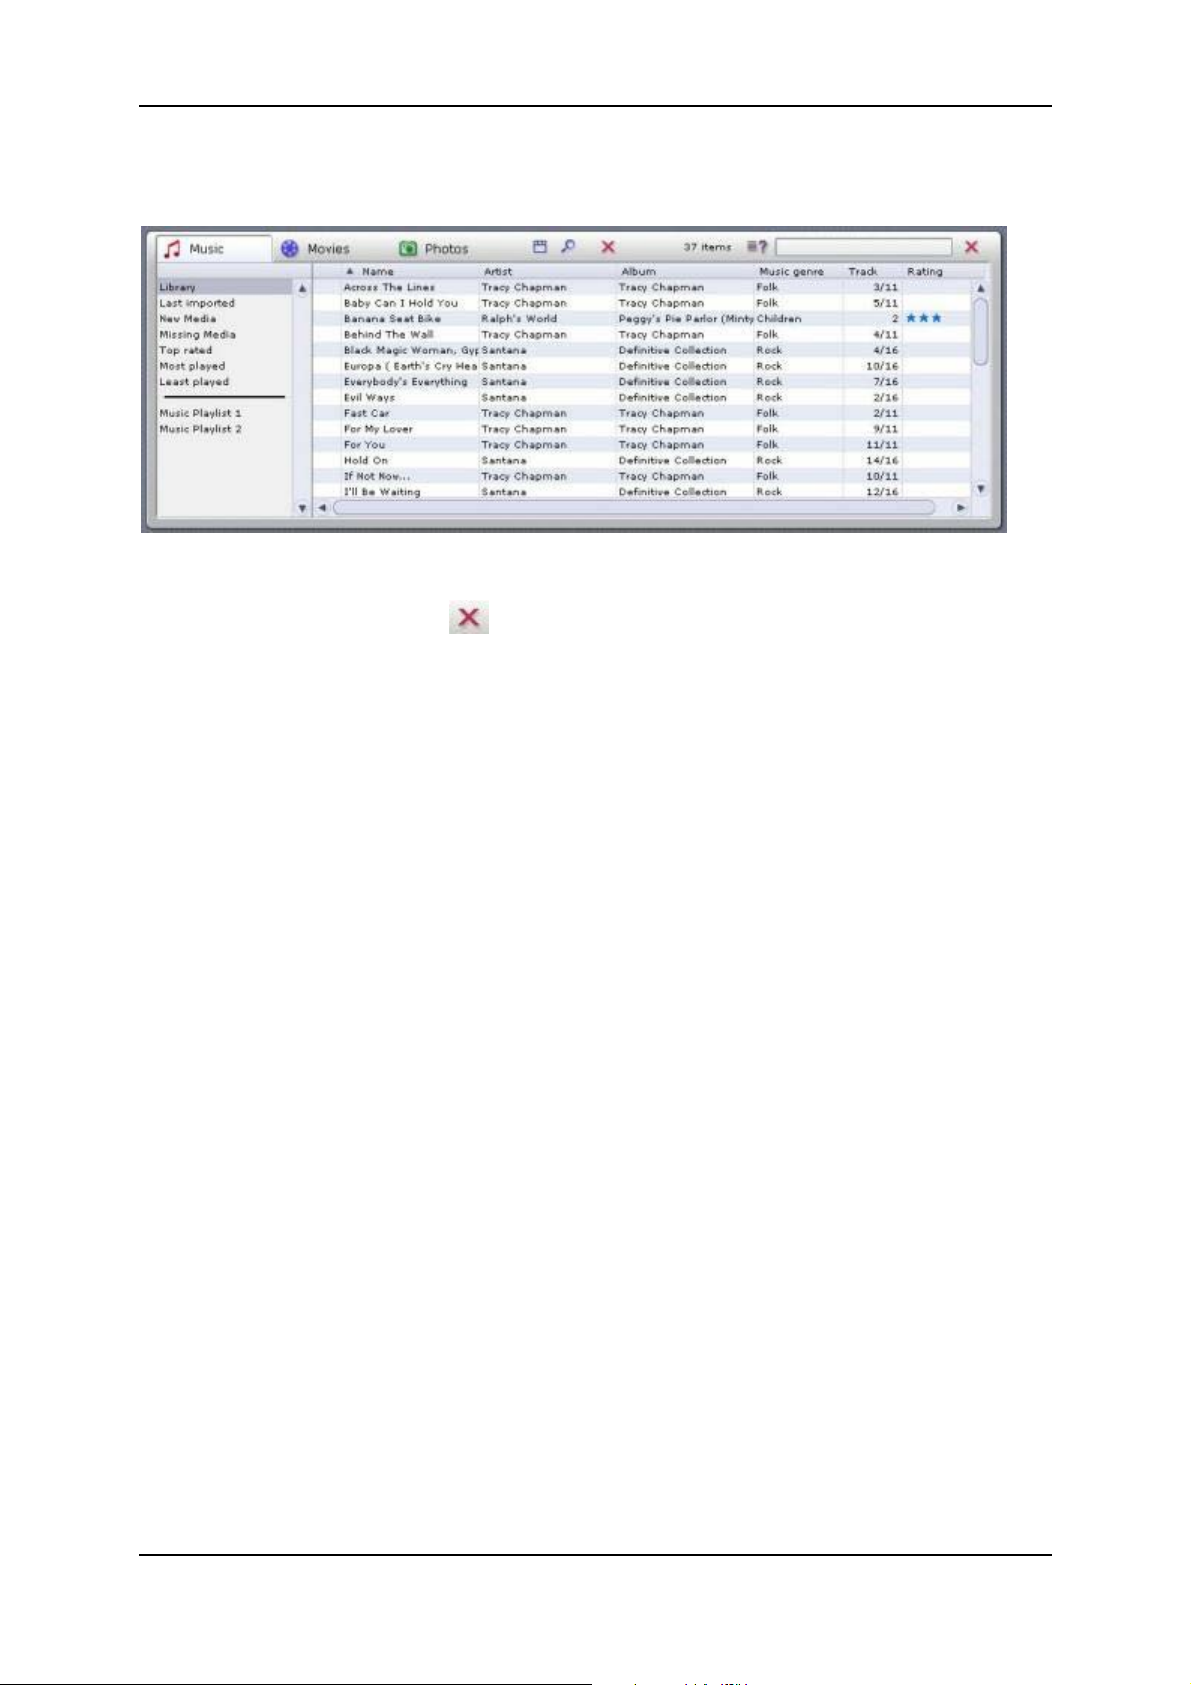
Deleting Files in the Media Library
Deleting Files
To the right of the tabs is a
Select one or more files in the list and then click this button.
The entries are deleted from the database. The belonging media files can
additionally be deleted from the hard disk if you select the corresponding option
in the displayed dialog box.
To make the files appear again in the database, you will have to reimport them.
button.
18
Page 27
The Media Player
Using the Media Player and Its Controls
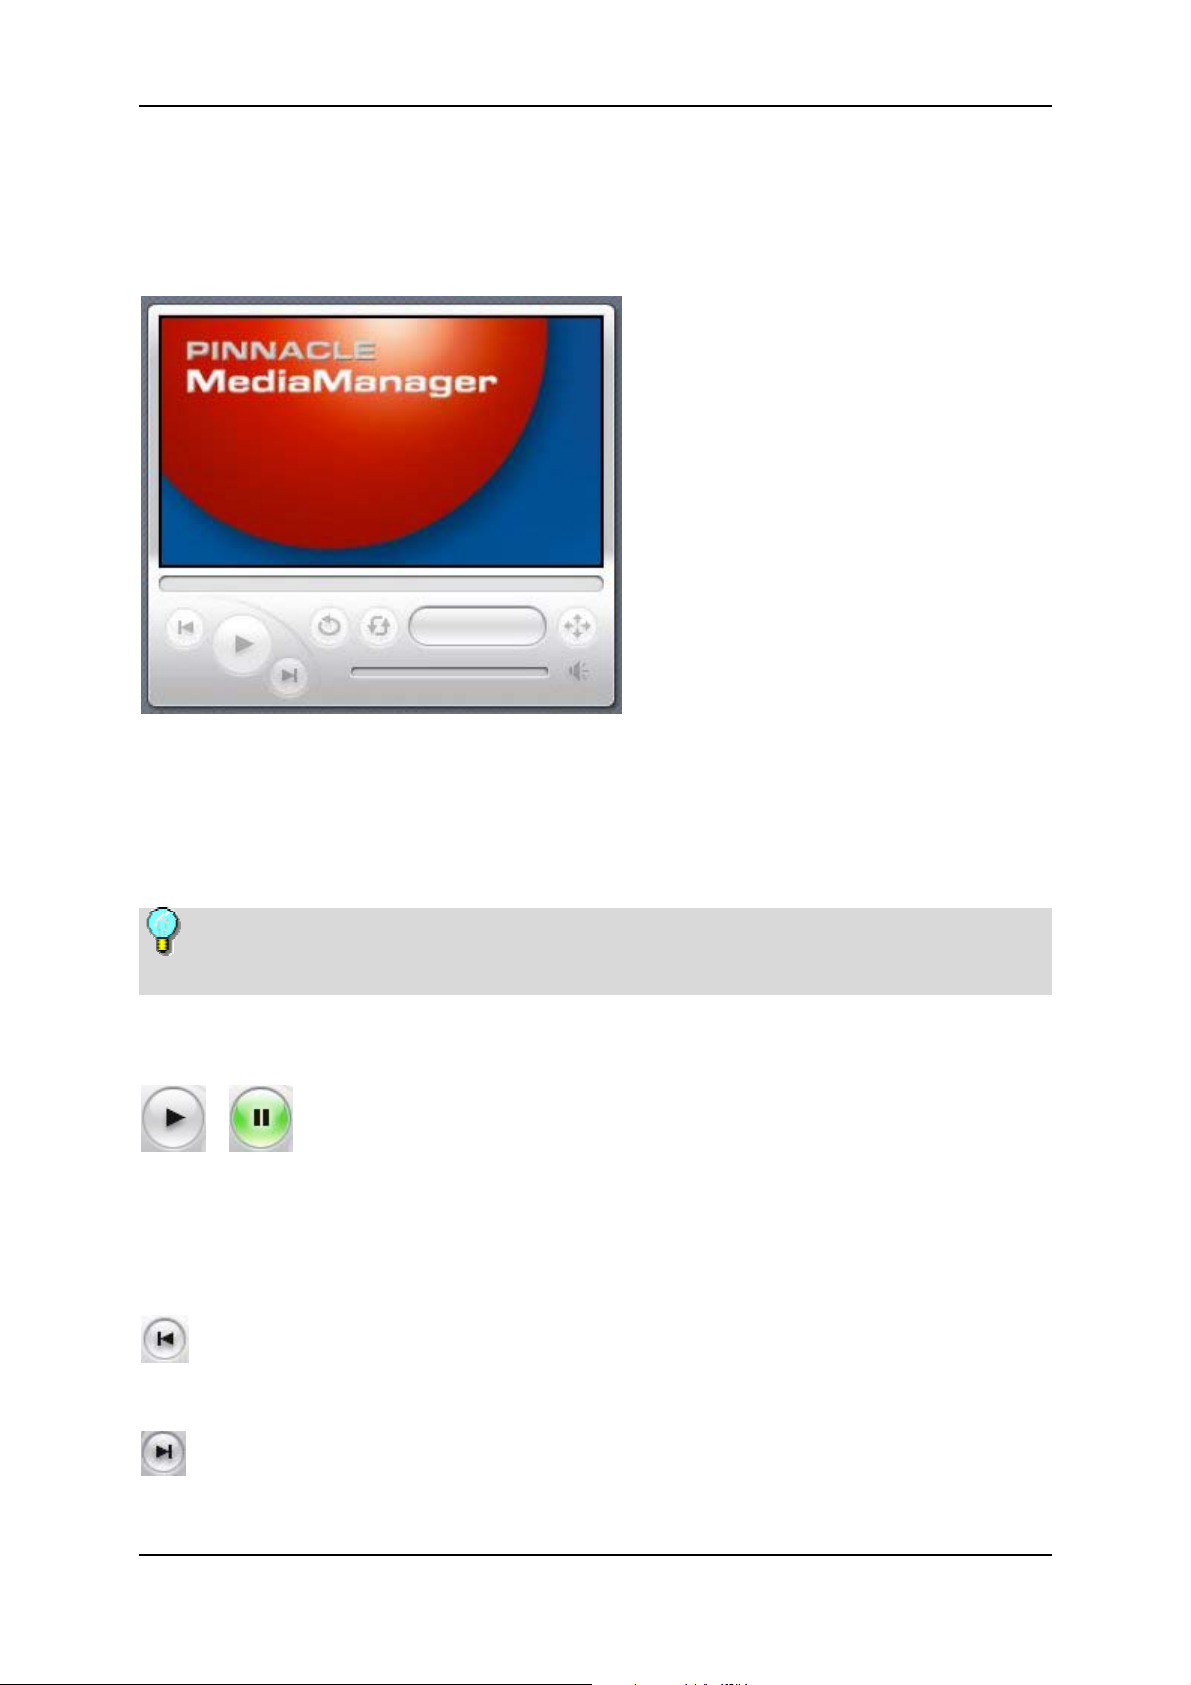
Pinnacle MediaManager
The Media Player plays the media files in the database on your PC. Video files
and photos are played/displayed on its 16:9 screen.
Audio files are played back using your sound card and computer speakers.
Audio files also require you to use the Media Player controls.
To make them easier to use, all controls have a tooltip field that appears
when your mouse pointer is placed over the buttons.
Individual Explanations of Controls:
Start/Pause Playback
Click on a file in the Media Library and then click this button. Or, you can
double-click the file in the list. The movie or the photo will appear in the Media
Player's screen, and the button will change its appearance. Click the button again
to stop playback.
Previous
Click this button to play back the previous file in the playlist.
Next
Click this button to play back the next file in the playlist.
19
Page 28

Pinnacle MediaCenter
Shuffle
The music, video or photo files will be played/displayed in a random order.
Repeat
If you click this button while a playlist is being played, the list will be played
back over and over until you deactivate the feature by clicking the button again.
Video Format
While playing a movie, you can click this button to select the video format
(standard 4:3, letterbox or widescreen 16:9). Please note that a tooltip field will
appear when you place the mouse pointer over this button. The video format you
select for a movie will be saved in the database – you won't have to reset it the
next time you watch the movie.
To toggle full-screen playback on your PC monitor, double-click the Media
Player screen. Double-click the screen again to revert to the main Pinnacle
MediaManager view.
Progress Bar
This slider indicates by its position how much of the current audio or movie file
you have heard or seen. You can also move back and forth to anywhere in the
file by dragging the slider with your mouse.
Time Display
This shows you how long the audio or video file has been playing.
Volume Control
Located on the right-hand side of the screen section, this slider can be dragged
up and down with the mouse to set the volume.
Mute
Click this button to turn the sound on and off.
20
Page 29
Pinnacle MediaManager
Importing Media Files
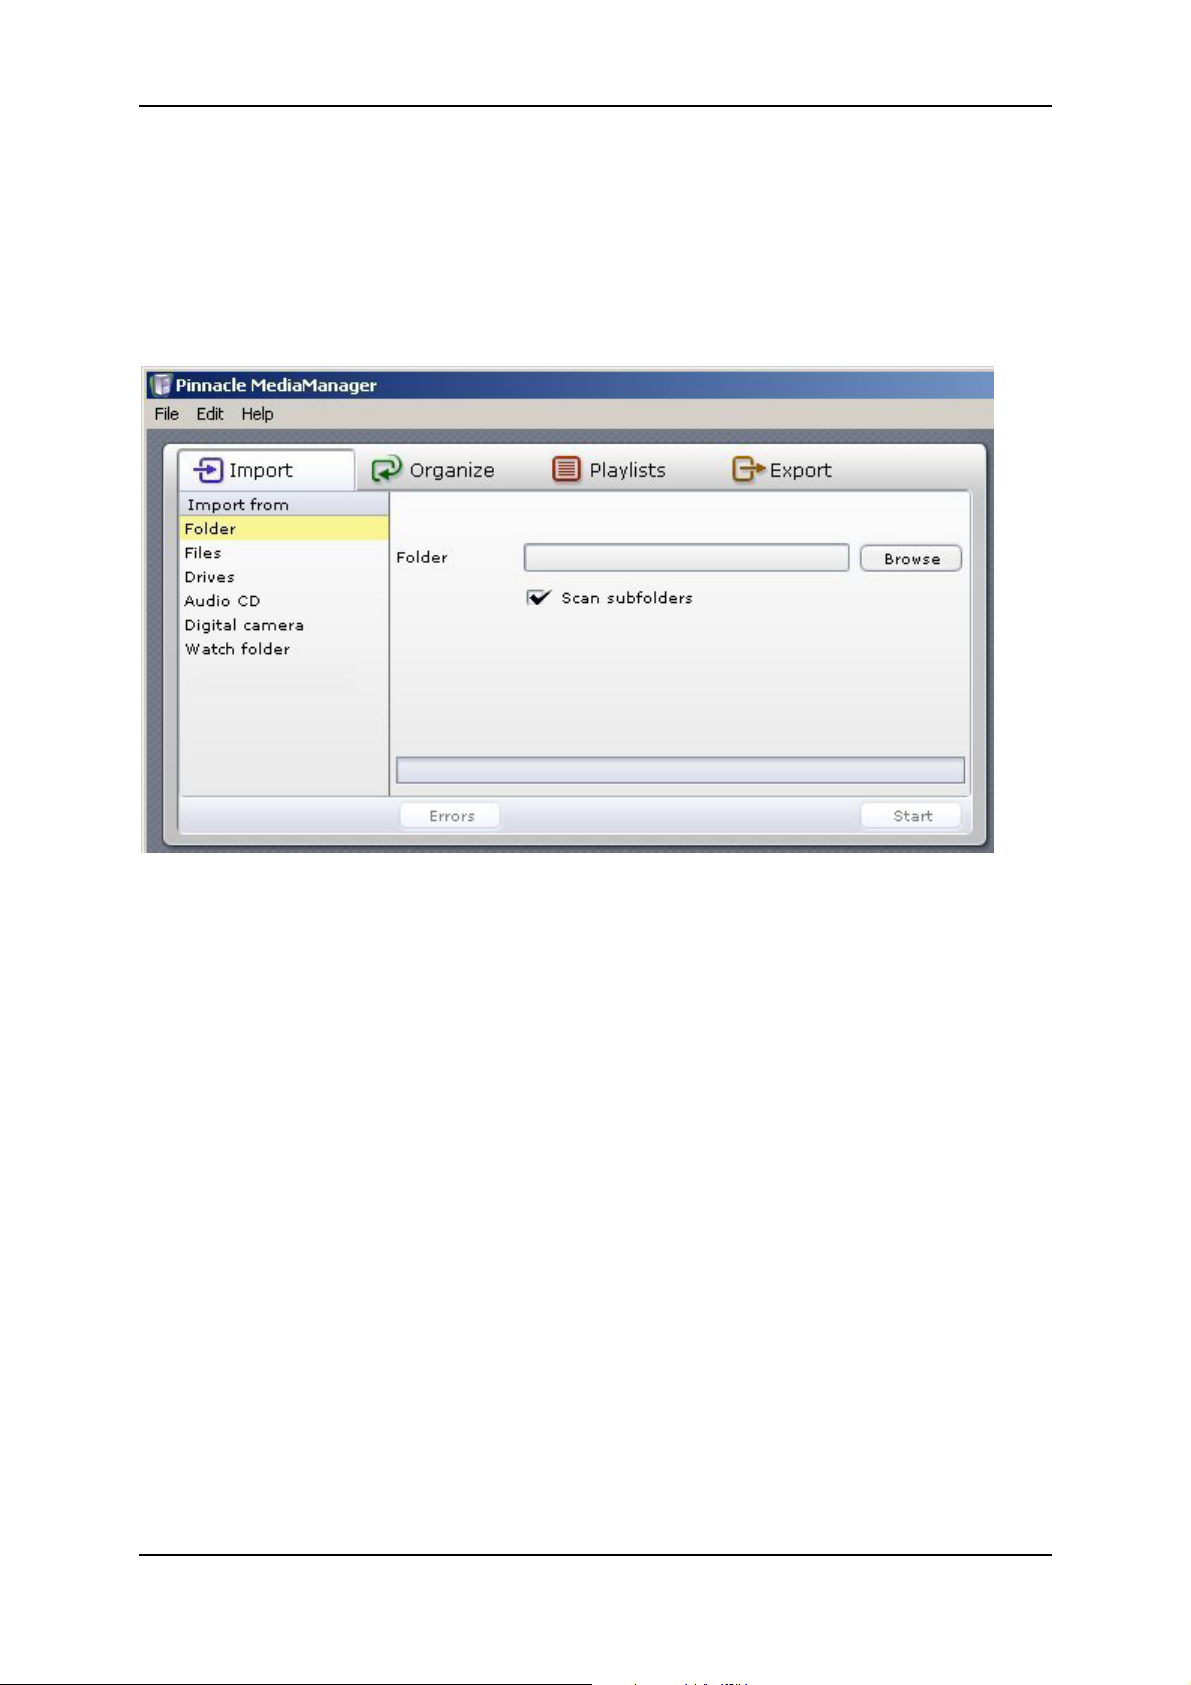
Introduction to the Import Tab
You will see the following window if you select the Import tab in the Tools
section:
You can import media files to the MediaManager Database from the following
sources:
Folder: From a folder on your PC.
Files: One or more files from a selected folder.
Drives: From any drive on your PC.
Audio CD: From the audio CDs that you wish to archive in the
MediaManager Database.
Digital camera: Photos taken with your digital camera.
Watch folder: From a watch folder on your PC.
In the tab for a particular media type in the Media Library, you can see the
imported files in the Last imported category and in other categories.
Right-click the list and select the Display in Explorer option from the pop-up
menu in order to open the folder on your PC hard drive where the files are
stored.
The following sections explain the features for the individual categories in more
detail.
21
Page 30
Pinnacle MediaCenter
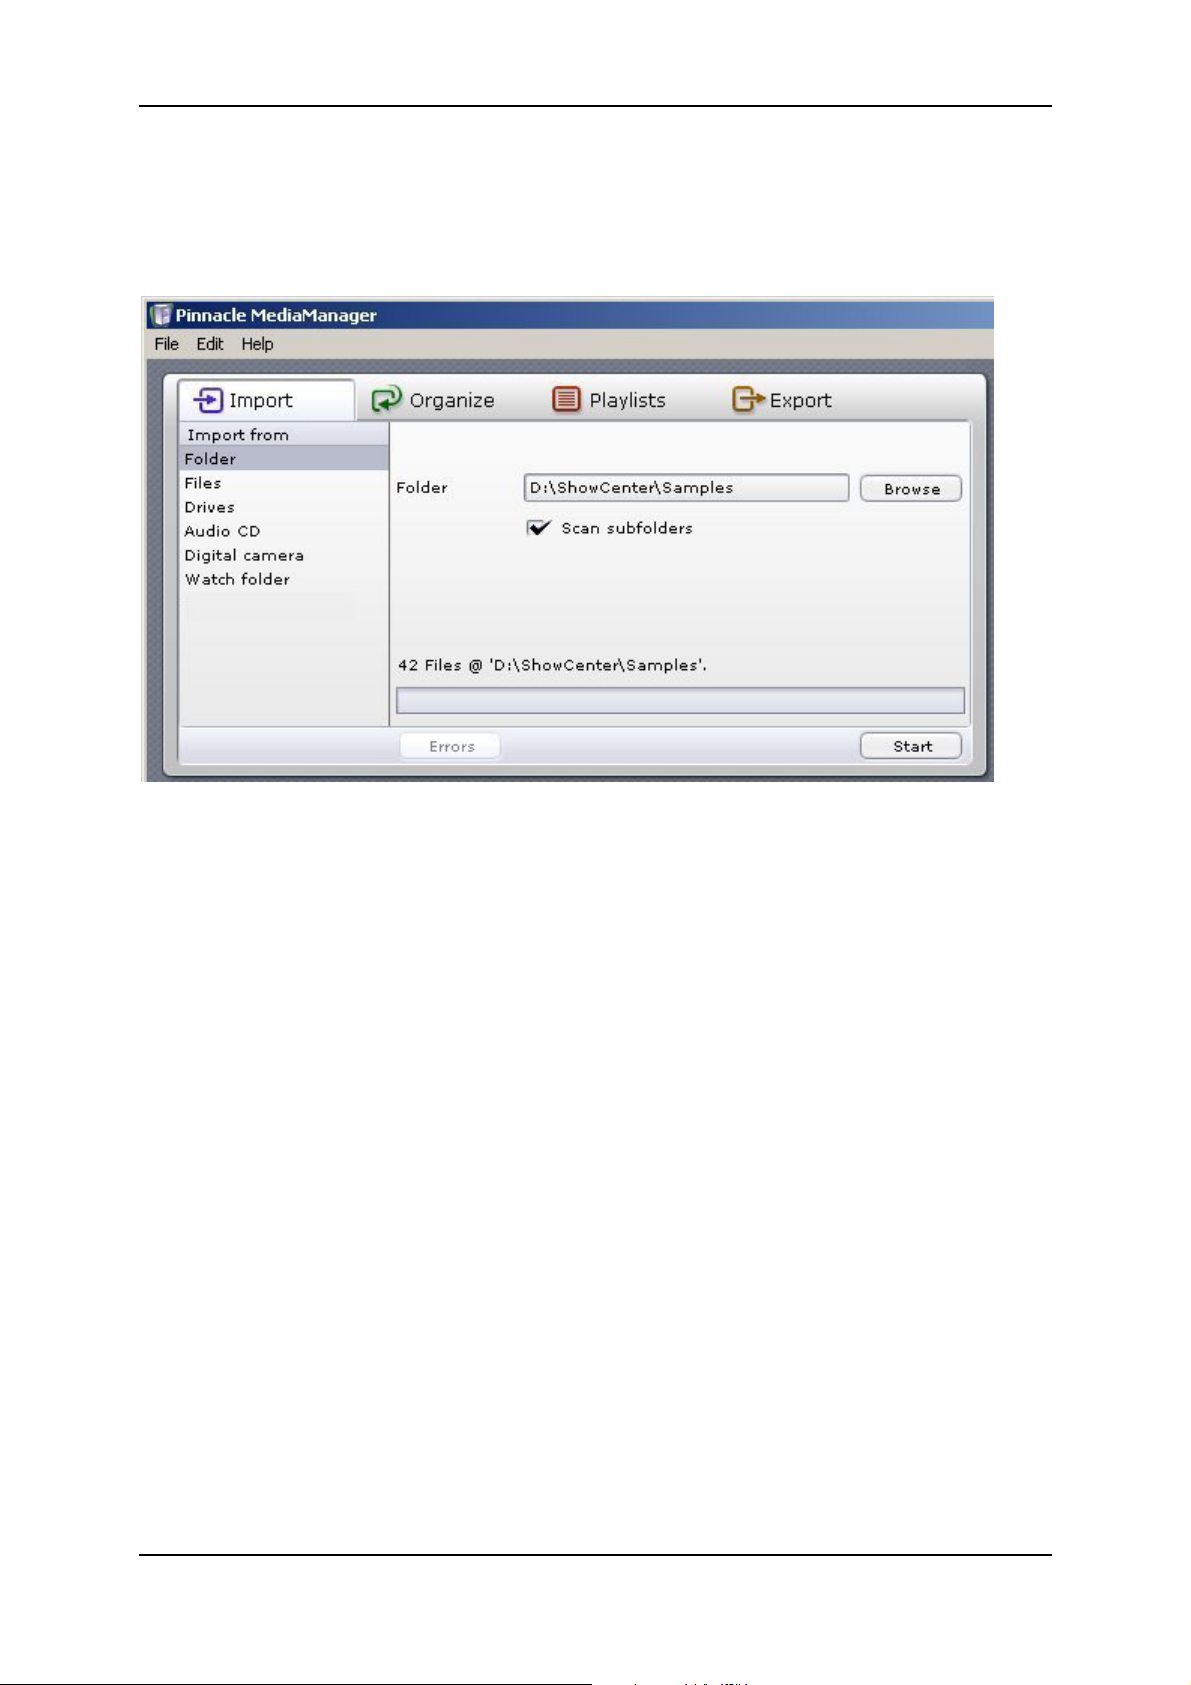
Import - Folder
You will see the following window if you select the Folder category in the
Import tab in the Tools section:
Folder
Click the Browse button to select which folder on your computer you want to
import media files from. Once you have found the folder, click the Open button.
The folder and the number of files selected will be displayed above the progress
bar.
Scan Subfolders
If you activate this checkbox, the application will import any files it finds in the
subfolders.
If you are importing photos, the names of the subfolders will also be imported as
photo-album names.
Movie titles act as names for collections. If a movie consists of several files,
these files will be grouped together in a collection.
Start
When you are finished with your settings, click the Start button. The progress
bar will display 100% when the import is complete. You will also be told how
many files were imported and how many, if any, were rejected because their
format wasn't supported or they were already listed in the database. All imported
files will be displayed in the Media Library in the bottom half of the window,
listed by media type and category.
22
Page 31

Pinnacle MediaManager
Import - Files
You will see the following window if you select the Files category under the
Import tab in the Tools section:
Files
Click the Browse button to select which file(s) you want to import to the
database from a folder on your hard drive. Once you have selected the files,
click the Open button. The folder and the number of files selected will be
displayed above the progress bar.
Start
When you have made your selection, click the Start button.
The progress bar will display 100% when the import is complete. You will also
be told how many files were imported and how many, if any, were rejected
because their format was not supported or they were already listed in the
database.
All imported files will be displayed in the Media Library in the bottom half of
the window, listed by media type and category.
Playlists from other programs can also be imported by using this function
(M3U format).
23
Page 32

Pinnacle MediaCenter
Import - Drives
You will see the following window if you select the Files category under the
Import tab in the Tools section:
Hard Disk
In the drop-down list, select the hard drive on your computer that you wish to
import media files from.
Ignore 'Windows' and Ignore 'Program Files'
If you have activated these checkboxes, the application will not scan the
Windows and/or Program Files folders. This is generally a good idea because
these folders generally do not contain any noteworthy media files.
If you are importing photos, the names of the subfolders will also be imported as
photo-album names.
Movie titles act as names for collections. If a movie consists of several files,
these files will be grouped together in a collection.
Start
When you are finished with your settings, click the Start button.
You will be told how many files were imported and how many, if any, were
rejected because their format wasn't supported or they were already listed in the
database.
All imported files will be displayed in the Media Library in the bottom half of
the window, listed by media type and category.
24
Page 33

Pinnacle MediaManager
Import - Audio CD
Due to licensing issues, this function is not available in all versions of the
Pinnacle MediaManager.
You will see the following window when you select the Audio CD category
under the Import tab in the Tools section:
This feature allows you to import your audio CDs to the MediaManager
Database. The tracks on each CD are read in and separated into individual MP3
files.
You may have problems importing copy-protected audio CDs.
Insert the CD and Select the Drive
Insert the audio CD in your computer's CD drive. If your computer has several
CD or DVD drives, you will have to select the drive from the Drive drop-down
list.
The application will read in the CD tracks and display them by number in the
Track column.
25
Page 34

Pinnacle MediaCenter
Get Titles
You will need an active internet connection to use this feature.
The names and titles of all known audio CDs are stored in an internet database.
The Get Titles feature allows you to import this information to the
MediaManager Database along with the tracks from the CD. If you click this
button, the application will search for the data online and will generally display
it immediately as shown below.
If you cannot connect to the internet or if your CD is not listed in the internet
database, you can enter the titles as well as artist and album names manually.
Just left-click the corresponding fields to enter this information.
You can also play back individual CD tracks by double-clicking the title. The
Media Player will display a special image indicating that you are playing back
from the CD.
26
Page 35

Pinnacle MediaManager
If you look in the Start column, you will see a checkbox for each track.
Activating these checkboxes allows you to select which tracks you want to
import.
Here's a helpful tip: if you want to select all the tracks at once, right-click the
Start column and choose Select all from the pop-up menu.
Start
When you are finished with your settings, click the Start button. During the
import, each track is assigned its own progress bar.
The progress bar at the bottom will display 100% once all selected titles have
been imported.
In the Music tab in the Media Library, you can see the files imported from
your audio CD in the Last imported category and in other categories.
Unless you have already defined a folder in the QuickStart Assistant or in the
Preferences item in the File menu, imported audio files will be saved by default
to the ...\My Documents\My Music folder on your PC's hard drive.
Ejecting the CD
Click this button to eject the CD from the drive.
Closing the CD Drive
You can close the CD drive by clicking this button.
27
Page 36

Pinnacle MediaCenter
Import - Digital Camera
At present, only cameras with WIA drivers are supported. Since Windows
2000 does not support WIA, this feature is only available in Windows XP.
You will see the following window when you select the Digital camera
category under the Import tab in the Tools section:
Camera
To import photos to the MediaManager Database directly from a digital camera,
select the camera from the Camera drop-down list.
If you connected a new camera to your PC while the MediaManager was active,
just click the Refresh button. It will then appear in the drop-down list.
Album
Enter a name for your album.
Remove after Import
Activate this checkbox to have the photo files removed from your camera's
memory after being imported.
Start
When you are finished with your settings, click the Start button. The progress
bar will display 100% when all files have been imported.
28
Page 37

Pinnacle MediaManager
In the Photos tab in the Media Library, you can see the imported files in the
Last imported category and in other categories.
Unless you have already defined a folder in the QuickStart Assistant or in the
Preferences item in the File menu, imported photo files will be saved by
default to the ...\My Documents\My Pictures folder on your PC's hard drive.
29
Page 38

Pinnacle MediaCenter
Import - Watch Folder
You will see the following window when you select the Watch folder category
under the Import tab in the Tools section:
Here you can specify/add any number of directories as watched directories on
your PC. The Media Server constantly checks these directories for new or
deleted files and records this information to the database – even if the
MediaManager is not active. You can designate the watched directories yourself
and see them all in the list in the right half of the window.
Define/Create New Watch Folder
Click this button to define/create a new watch folder.
New watch folders start out active by default. To deactivate a watch folder, click
the button in the first column of the list.
Options for Watch Folders
If you click the last column in the list of watch folders, a menu will appear
where you can select additional options for each watch folder:
Subfolder
If this option is activated, the server will watch all subfolders as well.
If you are watching folders with photos, the names of the subfolders will be
imported as photo-album names.
Movie titles act as names for collections. If a movie consists of several files,
these files will be grouped together in a collection.
30
Page 39

Pinnacle MediaManager
Delete Watch Folder
Click this button to delete a watch folder from the database.
Only the reference to the folder will be deleted from the database; the folder
itself will still be stored on your PC's hard drive. To make the folder appear
again in the database, you will have to redefine it as a watch folder.
Scan Watched Directories Again
Click on this button to scan all of the watched directories again. This is useful if,
for example, the Media Server has been switched off temporarily.
31
Page 40

Pinnacle MediaCenter
Organizing Media Files
Organizing File Tags
Various organizing tags can be used to manage the three media types (music,
movies, photos) in the Pinnacle MediaManager. These organizational criteria
serve to rank all files of a specific media type.
Organizing tags are exclusive tags. That means that if a music file has been
assigned to the Pop genre, it can't also be assigned to the Classical genre.
Sample Tags for Digital Photos
Photo Album Photo
My Wedding At the rehearsal dinner
My Wedding At the church
My Wedding At the reception
32
Page 41

Pinnacle MediaManager
Customized File Tags (Keywords)
In addition to the organizing tags, you can also assign customized tags
(keywords).
These non-exclusive tags will help you to organize your media files.
Assigning a Keyword - An Example
You can create the keyword "My Wedding" and assign all wedding-related
media files to it. This will make it a snap at some later date to filter out all the
files in "My Wedding" from the rest of the files in the Media Library.
Assigning Several Keywords - An Example
You can assign several keywords to one file. For example, some of the files to
which the "My Wedding" keyword has already been assigned can be assigned
one or more additional keywords, such as "At the rehearsal dinner", "At the
church" or "At the reception".
Display Keywords
This button
display in the Medium Library sort view.
lets you open the context menu and switch on the keywords
33
Page 42

Pinnacle MediaCenter
Introduction to the Organize Tab
You will see the following window when you select the Organize tab in the
Tools section:
The Organize tab helps you to change or add tags for your media files so as to
better organize your files.
Defining a New Keyword
On the left-hand side, you can assign keywords to the media files in the
MediaManager Database. You can then use the keywords as search terms in
order to find certain files quickly. You can assign several keywords to a single
file.
Select one or more files in the Media Library list and click the
create a new keyword for the selected files.
Deleting a Keyword
Select the keyword you want to delete from the database and then click the
button.
Field and Value - Changing Organizing Tags
Whenever you select an entry in the Media Library list, you will also see the
value assigned to each field. By double-clicking, you can access and modify the
individual values.
button to
For some organizing tags such as Genre, the application will suggest common
terms (Pop, Rock, Classical) even if you haven't imported any files in this
category. Just click the entry once to see the suggestions.
34
Page 43

Pinnacle MediaManager
Once you are finished modifying the values for an entry in the list, click the
button to have the values written to the database. The changes will be shown
accordingly in the Media Library.
Note: changing tags that are associated with metadata (such as MP3
metadata) will cause these changes to be made in the associated file as well.
Undo Button
Click this button to undo previous changes. However, you can only undo
changes if you have yet accepted them by clicking the
Rotate Clockwise/Counterclockwise (For Photos)
Selecting a photo from the Media Library will bring it up in the Media Player.
You can rotate the photo by clicking on these two buttons.
Next, click the
new position will be used whenever the photo is displayed on the television.
Restricted Access
You have the option of setting the Restricted access value for each media file
with the click of a mouse.
According to the setting value, for a particular file this may mean that the
correct access code will have to be entered from the menu of the output device
before the file can be played on the output device.
button to have the new position saved to the database. The
button.
Note: the access code only applies to media playback from the menu of the
output device. All files can still be accessed from the MediaManager on your
PC.
35
Page 44

Pinnacle MediaCenter
Using Playlists
Introduction to the Playlists Tab
You will see the following window when you select the Playlists tab in the
Tools section:
This section is where you create personal playlists in which you list your
favorite music, movies and photos, organized according to your own special
criteria.
Since each playlist can only contain one type of media, you will be creating
playlists for music, movies or photos. You cannot mix these different types of
media in one playlist.
Catalog of Playlists
All the playlists are displayed in the section to the left.
Contents of Individual Playlists
The section to the right displays the contents of the individual playlists.
Selecting a playlist in the left-hand section will bring up detailed information in
the right-hand section about the media files in the playlist.
36
Page 45

Creating and Editing Playlists
Pinnacle MediaManager
Creating a New Playlist
Click the
An input field, which is by default called Playlist, will appear in the left-hand
side of the list. Double-click the field to access it and enter your own name for
the new playlist.
Now it's time to put together the media files you want in this playlist. Select one
or more files from the Media Library in the database and drag them up to the
right-hand section.
If you do not want to drag with the mouse, you can use the
Organizing Items in a Playlist
Select the file you want to move within the playlist and drag it to its new
position. Or, if you prefer, you can use the two
Deleting Playlists or Items
If you want to delete a playlist or remove a file from the playlist, just select it
button to create a new playlist.
button instead.
and buttons instead.
and then click the
button.
37
Page 46

Pinnacle MediaCenter
Slideshows
There are two extra things to do when creating photo playlists ("slideshows"):
1. Click the last column for a given entry in order to specify the display time
for a photo. If you select manual, the slideshow will not automatically
continue after that particular photo. To change the display time for all photos
at once, first right-click and choose Select all from the menu. Then, leftclick on the display time for any entry in order to set the time for all photos.
2. If you want to play background music during a slideshow then select an
appropriate music playlist from the drop-down list. This list will be played to
your photos on the output device.
Playback in the Media Player
Double-click an entry in the playlist to play it back with the Media Player. Once
that particular item is finished, the application will automatically move on the
next entry in the playlist. You can also use the Next, Previous, Shuffle, and
Repeat functions in the Media Player. When playing back a slideshow, the
Media Player will only display the photos; it will not play any selected music
playlist.
38
Page 47

Pinnacle MediaManager
Exporting Media Files
Introduction to the Export Tab
You will see the following window when you select the Export tab in the Tools
section:
In this section, you can export copies of media files from your MediaManager
playlists to a:
New folder on your hard drive
Winamp playlist
CD burner or DVD burner.
The following sections explain the features for the individual categories in more
detail.
39
Page 48

Pinnacle MediaCenter
Exporting to a Folder
You will see the following window when you select the Folder category under
the Export tab in the Tools section:
In this section, you can export the items in a playlist to a new folder on your
hard drive. The export will create copies of the media files.
Playlist
Select a playlist from the drop-down menu.
Folder
Use the Browse button to the right to select the folder you want the playlist to be
exported to.
Create subfolders
Activate this checkbox to have subfolders created based on the sort criteria of
the original files (e.g., artist, album, photo album).
If a particular file does not have all the tags, this option will create a subfolder
called Unknown.
Note: this option is not active when you export video playlists.
40
Page 49

Pinnacle MediaManager
Create Winamp playlist
If this checkbox is activated, you will both export the selected playlist to a folder
and create a Winamp-compatible playlist.
Start
When you are finished with your settings, click the Start button. The progress
bar will display 100% once all the files have been exported. You will also be
told how many files were exported.
41
Page 50

Pinnacle MediaCenter
Exporting to a Winamp Playlist
You will see the following window when you select the Playlist category under
the Export tab in the Tools section:
In this section, you can export a MediaManager playlist to a Winamp playlist.
The playlist will contain references to the actual location where your media files
are stored.
Playlist
Select the playlist you want to export from the drop-down menu.
File
Use the Browse button to the right to select the file you want exported to the
selected playlist. Then enter the name you want to give to the file.
Start
When you are finished with your settings, click the Start button.
42
Page 51

Pinnacle MediaManager
Exporting to a Burner
You will see the following window when you select the Burner category under
the Export tab in the Tools section:
In this section, you can export a playlist to burn to CD or DVD.
Playlist
Select the playlist you want to export from the drop-down menu.
Disc type
The choice of output formats will depend on what kind of media files are in the
playlist. Select a format from the drop-down list.
Music
Audio CD: You want to burn an audio CD that you can play on your stereo
system or in your car's CD player. Any MP3 files will be automatically decoded.
MP3 Data CD/DVD: You want to burn MP3 files to a CD or a DVD. All tracks
in the playlist will have to be converted to the MP3 format.
Data CD/DVD: You want to burn original music files (MP3, WMA or WAV)
to a CD. Any converted versions will not be used.
Movies
Depending on what format the media files are in and whether converted copies
are available, you will be given the option of burning a VCD (VideoCD), SVCD
(SuperVideoCD) or DVD. You can always select a data CD/DVD, which will
burn the media files in their original format.
43
Page 52

Pinnacle MediaCenter
You cannot start the burning process if the file(s) is (are) too long for a CD or
DVD.
Photos
Photos are always burned as original media files to a data CD/DVD.
Recorder
Select the burner you wish to use and click Start. The progress bar will display
100% when the burning process is complete.
The CD/DVD burner in the Pinnacle MediaManager is optimized for fast,
easy burning. It cannot create DVD menus nor can it spread long files/playlists
over several discs. If you need more sophisticated burning features, we
recommend using Pinnacle INSTANT CD/DVD.
44
Page 53

Pinnacle MediaManager
The Menus
The File Menu
The File Menu Contains the Following Options:
New Playlist From Selection
If you have selected one or more files in the Media Library and then choose this
option, the selected files will be used to create a new playlist.
On the left-hand side of the Media Library, you will see an input field with a
default name where you can enter your own name for the new playlist.
For more information, consult the Creating and Editing Playlists
Play Selection
Select one or more files from the Media Library and choose this option. The
selection will now be played back / displayed in the Media Player.
Preferences
Choosing this menu item will bring up a dialog box where you can make all
your settings for the Pinnacle MediaManager:
Audio CD Import
Format (quality and bitrate)
Speed
General
Language
Data conversion settings
Skin settings
section.
Specify the access code (PIN) for restricted file access
Define folders for audio, video and image files and for temporary files
Playback
Playback settings: device and memory buffer
45
Page 54

Pinnacle MediaCenter
Key Commands
Choosing this menu item will bring up a dialog box where you can create, edit
and delete customized key commands and macros.
Quit
Choose this option to exit the Pinnacle MediaManager.
46
Page 55

Pinnacle MediaManager
The Edit Menu
The Edit Menu Contains the Following Options:
Cut
Select the text you want to move and click Cut in the menu. Then, click the
location where you want to paste the text and click Paste in the menu.
The text will be removed from its original location and inserted at the new
location.
Copy
Select the text you want to copy and click Copy in the menu. Then, click the
location where you want to paste the text and click Paste in the menu.
The text will remain at its current location and will also be inserted at the new
location.
Paste
This command allows you to paste text at one location that you have cut or
copied from another location using the Cut or Copy commands.
Delete
Select the files and then choose this option from the menu in order to
permanently remove the files.
Select All
This option allows you to simultaneously select all the files in an active area
(e.g., the Media Library list).
Select None
This option allows you to undo the selection for files in an active area (e.g., the
Media Library list).
47
Page 56

Pinnacle MediaCenter
Select Invert
This option allows you to simultaneously select all the files in an active area
(e.g., the Media Library list), or to undo an existing selection.
Browse
This option brings you to the Media Library sort view. There is a separate, more
detailed section in the manual for this feature.
48
Page 57

File Formats
Supported File Formats
Supported Audio File Formats
MP3
WAV
WMA
Supported Video File Formats
MPEG 1
MPEG 2 (including VOB files)
MPEG 4 AVI (Versions 3, 4, 5) [simple profile]
Pinnacle MediaManager
XviD AVI [simple profile]
DV AVI
WMV
Supported Photo Formats
JPG
PNG
GIF
49
Page 58

Pinnacle MediaCenter
50
Page 59

Pinnacle MediaCenter
Overview
Pinnacle MediaCenter Functions
In the Pinnacle MediaCenter, you have the extensive and diverse functions of a
modern multimedia application at your disposal. It lets you enjoy a wide range
of media such as television, movies, music and photos both conveniently and
easily:
In the TV section, not only can you take advantage of the current television
schedule and watch recorded broadcasts directly on your PC, but also from
the comfort of your armchair or sofa thanks to full screen mode and the
remote control that comes in the package. In addition, the videotext function
provides you with quick comprehensive news.
Want to record a TV show? With just the press of a button, you can easily
and spontaneously record any TV show from the current listings. Future
recordings can also be scheduled so that you won't miss a single TV show
ever again.
Even annoying interruptions while watching TV won't bother you anymore
because you can delay viewing a particular program by using the timeshift
function
In the Movies section, you can run movies from a CD/DVD or from your
hard disk - in fact, from the comfort of your own sofa because you control
the playback with the remote control, eliminating the need to go back and
forth to your PC. If you have already assigned films to specific categories in
the Pinnacle MediaManager, you can access the categories you want and
select films according to the criteria you choose.
In the Music section, you can access CDs or the categories created in the
Pinnacle MediaManager. This means you can sort and play back music
according to a wide range of criteria (e.g., the type of music or artist) and
select the music that best suits your particular mood or the occasion.
In the Photos section, you can view photos that have been saved to your hard
disk. Photos saved in Pinnacle MediaManager can also be displayed
according to the categories you set (e.g., photos taken on vacation, at a
celebration on a certain date) so that you can quickly and easily view the
photos you really want to see. You can also make an impression by
presenting your photos in a slide show.
51
Page 60

Pinnacle MediaCenter
The Main Screen of the Pinnacle MediaCenter
You can start the Pinnacle MediaCenter via the Start menu and the Pinnacle
program group by double-clicking the desktop link or by pressing the TV button
(remote control type A) or the Pinnacle button (remote control type B) on your
remote control.
The main screen of the Pinnacle MediaCenter then appears:
The main screen provides you with an overview of five menu items:
All of the available functions for each type of media can be accessed via the
menu items TV, Movies, Music and Photos.
Under Settings, you can modify the most important settings for the Pinnacle
MediaCenter.
You can modify more advanced settings in the "Advanced Settings Dialog".
For more information, read the chapter on "Advanced Settings".
The following sections in this documentation provide you with detailed
information about the numerous possibilities available under the individual
menu items.
For information on operating the Pinnacle MediaCenter, read the chapter on
"How to Manage the Pinnacle MediaCenter".
52
Page 61

Pinnacle MediaCenter
TV Menu
Overview of the TV Menu
When you select the TV menu item in the main screen of the Pinnacle
MediaCenter, the following window appears:
The following functions are available under the individual menu items:
Live TV: Select this menu item in order to watch television.
Channels: Under this menu item, you can select channels from the station
list and display their current listings.
Record: This menu item lets you record TV shows.
Recorded TV: This menu item lets you play back or delete any previously
recorded shows.
Teletext: Select this menu item if you want to display videotext.
In addition, you can make timeshift recordings while watching television.
In the following sections, the individual TV menu functions are explained in
detail.
53
Page 62

Pinnacle MediaCenter
Watching Live Television
When you select the Live TV menu item in the TV menu or press the TV button
on your remote control, the following window appears:
A preview window appears in the right-hand section of the screen with the
listings for the currently selected television station whose name is displayed
below the window.
Switching between preview and full screen mode
If you want to view a television program in full screen mode, press the Fullscreen button on your remote control. Or select the preview window using the
cursor buttons on the remote control and activate it.
If you press the remote control Full Screen button again, the television image is
minimized to the size of the preview window.
Zoom (depending on the model of the remote control)
If you want to have a closer look at the current television image, you can zoom
into the image by pressing the Zoom button on your remote control and greatly
enlarge a particular image area. The original image area is restored by pressing
the button again.
Station information (depending on the model of the remote control)
In addition, the Pinnacle MediaCenter makes it possible for you to obtain
information about the current listings. To do this, simply press the Info button
on your remote control. This displays station information, such as the program
slot for the current channel, the time or the type of reception,above the television
image. Pressing this button again will hide the station information.
54
Page 63

Pinnacle MediaCenter
Video input
By pressing the AV button, you can enable any of the given video inputs on
your television card (e.g, from antenna to S-Video) in succession. This means
you also have the option of switching between analog and digital television
(depending on your hardware and on the reception available).
Volume control
Use the remote control buttons Volume +/- to control the sound volume when
watching television.
By pressing the Sound off/on button, you can turn the sound on and off.
55
Page 64

Pinnacle MediaCenter
Selecting Channels
When you select the Channels menu item in the TV menu or when you press
the Station List button (depending on the model of the remote control) on your
remote control, the following window appears:
Station list
In this window, you can display the listings for a particular channel and/or
change the current television channel by activating a new station from the
station list. To do this, select the station you want and confirm your selection.
The listings for the newly selected channel then appear in the preview window.
If the television screen is still active, you can also use the Channel+/Channel-
buttons to change the current station in the order on the station list.
Or you can press the remote control Confirm/OK button, which then displays
the list of stations. Press the cursor buttons on your remote control to select a
station and then confirm it.
Direct station input
While watching live TV, you can also directly select a station using the remote
control or the keyboard of your computer:
Simply enter the number of the channel you want with the input keys on your
remote control or the numeric keys on your keyboard, confirm your entry and
the listing for the selected station then appears.
Switching between the last two stations
In addition, you can switch back and forth between the last two selected
television stations (e.g., to avoid annoying advertising breaks) by pressing the
remote control Switch Between Last Two Stations button.
56
Page 65

Pinnacle MediaCenter
Recording Live Television
When you select the Record menu item in the TV menu, the following window
appears:
Here you can either start recording immediately, program a recording for some
later time or modify already existing programming for future recordings.
If you display this menu item while you are recording a television program, you
can either cancel the recording at this point or modify the settings.
Start recording
If you want to record the current television program at this point, select the
Record now menu item and confirm your selection. Or you can press the Start
Recording button on your remote control to record the current television
program. To stop recording, press the Stop button on your remote control.
Program recording
If you want to schedule a recording for some time in the future, select the
Schedule a recording menu item and confirm your selection. The following
window appears:
57
Page 66

Pinnacle MediaCenter
Here you can enter the names of the recording, the station number, the weekday,
as well as the start and stop times of the recording and/or its duration, the
frequency (the intervals at which the recording should be repeated, e.g., daily or
weekly) and the format you want the recording to be in (e.g., DVD or VCD).
Your settings are saved by selecting and confirming the Done menu item and
the recording takes place at the set time.
Make sure that your PC is on at the time of the recording and that your
Pinnacle hardware is not being used by any other application.
Modify, delete or suspend scheduled recording
If you want to modify already scheduled recordings or delete them altogether,
select the View scheduled recordings menu item and confirm your selection.
The following window appears:
All scheduled recordings are displayed here. If you want to modify a recording,
select the corresponding entry and confirm your selection. In the window that
appears, you can either change modify, delete or suspend the scheduled
recordings.
Modify scheduled recording
If you want to modify the scheduled recording (e.g., change the recording time
or date), select Edit and confirm the selection. The stored settings for the
recording are now displayed for editing.
58
Page 67

Pinnacle MediaCenter
Delete scheduled recording
If you would prefer to delete the scheduled recording, select Delete and confirm
this selection. The settings for the recording are deleted and recording does not
take place.
Suspend scheduled recording
If you want to delete the scheduled recording but would like to keep the settings
(e.g., suspend a recording that takes place on a weekly basis for one week, and
then record the broadcast again the next week), select and confirm the Suspend
option. In order to reactivate the programming later, select and confirm Suspend
again.
Cancel or modify current recording
If you select the Record menu item while recording a television broadcast, the
following window appears:
Cancel current recording
By selecting and confirming the Stop recording option, you can cancel the
recording currently in progress. Or you can end a current recording by pressing
the Stop button or the Start recording button on your remote control.
Modify current recording
You can modify the duration of the recording in progress by selecting and
confirming the Duration or Maximum options.
59
Page 68

Pinnacle MediaCenter
Playing or Deleting a Recording
When you select the Recorded TV menu item in the TV menu, the following
window appears:
All of the currently available recordings, including information about the
channel, the recording date and time are displayed on the right.
Now you can either play back or delete a recording. To do this, choose a
recorded program and confirm your selection.
Play recording
Play
In the window that now appears, you can play the recording you want by
selecting and confirming Play or by pressing the Play button on your remote
control.
Rewind and fast forward
With the remote control Rewind and Fast forward buttons you can rewind or
fast forward to a specific point in the playback.
Pause and stop
By pressing the Pause button on your remote control, you interrupt playback of
the recording. By pressing the Stop button, you end playback.
Delete recordings
You can delete a selected recording by selecting and confirming Delete.
60
Page 69

Pinnacle MediaCenter
Videotext
When you select the Teletext menu item in the TV menu or press the Teletext
button on your remote control, the following window appears:
In the right-hand section of the window, you can see the videotext for the
current television station. This is text information that is sent as part of the
television signal.
Switching between videotext pages
By selecting and confirming Next page or Previous page, you can display
either the next or the previous videotext page. To do this, use the Up and/or
Down cursor buttons on your remote control. You can also enter a page number
directly via the remote control or the PC keyboard and the corresponding page
will be appear.
Please note that only page numbers between 100 and 899 are valid.
By using the remote control Jump Back and/or Jump Forward buttons, you
can jump to the first (page 100) and/or the last (page 899) videotext page.
Switching between videotext subpages
A videotext page may include several subpages. They can be displayed by
selecting and confirming Next subpage or Previous subpage. These options are
not available if the currently active videotext page does not have any subpages.
Or you can access the previous and/or next videotext page with the remote
control Rewind and/or Fast Forward buttons.
61
Page 70

Pinnacle MediaCenter
Automatic page update
In videotext mode, you can activate the automatic page update by using the
remote control Pause button. New videotext pages will then be displayed
automatically. The automatic page update function can be deactivated by
pressing this button again.
Hidden text
In videotext mode, you can display hidden text by pressing the Play button on
your remote control. Use the Stop button to hide the text.
TOP - The Intelligent Table of Contents
TOP ("Table of Pages") is an optional radio station service, which is, however,
not supported by all stations.
TOP is a table of contents, in which all the information available in a particular
subject area is linked. It lets you quickly navigate though the videotext listings
in a user-friendly environment - without having to know the page numbers.
In the Pinnacle MediaCenter, the subject list offered by the current station is
displayed on the edge of the videotext window of the TOP Navigator.
You can quickly and easily get to the information you want by selecting and
confirming a subject.
FLOF - Page navigation (depending on the model of the remote
control)
FLOF is another method you can use to quickly and easily access interesting
videotext subject areas.
With FLOF, you can bring up the highlighted information pages (red, green,
yellow, blue) displayed on the lower edge of the videotext window using your
remote control directly - without having to enter individual page numbers.
In order to display a specific videotext area, press the Various Other
Functions remote control button with the corresponding color. The
corresponding videotext page is now brought up.
62
Page 71

Pinnacle MediaCenter
Timeshift
The timeshift function in the Pinnacle MediaCenter gives you the convenience
of viewing the current television program later.
Annoying disturbances when watching television are now a thing of the past.
With the press of a simple button, you can now interrupt the current television
program and continue watching it later at any time. In the meantime, the rest of
the television program is automatically recorded to a temporary area on your
hard disk. In this case, the size of the temporary area determines the quantity of
the film material that can be recorded (see the chapter on Advanced Settings
further information on the size of the temporary area).
A press of a button is all that is required to continue viewing the program from
the time of the interruption. At the same time, the current program will continue
to be recorded in the background so that you will not miss a single minute.
You can run the time-shifted recording back and forth in quick motion even
while recording. You can skip certain passages (e.g., advertising blocks), repeat
them (e.g., deciding goals in a soccer game) or switch back to live TV.
for
Activate timeshift recording
To start the timeshift recording, press the Pause button on your remote control
while you are watching television. The current television program is then
recorded to a temporary area on your hard disk.
View timeshift recording
Playing a timeshift recording
To view the timeshift recording, use the remote control Rewind or Jump back
buttons to the point you want in the recording. The recording is then played
from that point onward. The live TV broadcast continues to be recorded in
parallel.
During timeshift playback, you can repeat or skip passages with help of the
Rewind/Fast forward buttons or Jump back-/Jump forward buttons. You can
go back or forward at a uniform speed within a recording using the Rewind-
/Fast forward buttons. With the Jump back -/Jump forward buttons, you
jump back or forward according to a previously defined time interval in the
timeshift recording (see the chapter Advanced Settings for setting this time
interval).
Interrupting timeshift playback
You can interrupt the timeshift playback by pressing the Pause button on your
remote control. To continue playback, press the Pause button again or press the
Play button.
63
Page 72

Pinnacle MediaCenter
Return to live position
If you want to return to the live position of the current program, press the LiveTV button (remote control type A) or TV (remote control type B) on your
remote control. The timeshift recording continues and can be played back at any
time.
Ending the timeshift recording
To end the timeshift recording, press the Stop button on your remote control.
64
Page 73

Pinnacle MediaCenter
Movies Menu
Overview of the Movies Menu
When you select the Movies menu item in the main screen of the Pinnacle
MediaCenter, the following window appears:
The following functions are available in each menu item:
Playlists and Genre: These menu items allow you to play movies that have
been assigned to a particular playlist or a particular genre in the Pinnacle
MediaManager.
All Movies: Select this menu item if you want to display all of the films
stored in the database and/or if you want to play one or more of them.
CD/DVD: Here you can play movies from a CD or DVD.
Browse: Here you can search your hard disk for video files and play them.
The individual functions of the Movie menu are explained in detail in the
following sections.
Controlling film playback
Play
To play one or more films in a particular category, select the film or the category
and press the Play button on your remote control.
Rewind and Fast Forward
During playback, you can use the remote control Rewind and Fast forward
buttons to go to any position you want, even within a specific track.
65
Page 74

Pinnacle MediaCenter
Jump back and Jump forward
By using the Jump back /Jump forward buttons, you can jump to the
beginning of the current and/or the next track.
Pause
Pressing the Pause button on your remote control interrupts the movie. You can
continue the movie by pressing the Pause button again or the Play button.
Stop
You can stop the movie at any time by pressing the Stop button.
Zoom (depending on the model of the remote control)
If you want to have a closer look at the current television image, you can zoom
into the image by pressing the Zoom button on your remote control and thereby
greatly enlarge a particular image area. The original image area is restored by
pressing the button once again.
Volume
To control the volume, please use the remote control Volume +/- buttons. By
pressing the Sound off/on button, you can turn off the sound and on again.
Activating random mode
The Shuffle function is available in each menu item:
You can activate random mode by selecting and confirming the Shuffle menu
item (recognizable by the control light on the menu button). All of the films you
have selected from a particular category (e.g., from a playlist or genre) are now
shown in random order. The function can be de-activated by selecting and
confirming again, and the films are shown again in their defined order.
Repeat
If you select and confirm the menu item Repeat all the movies in a chosen
category will be repeated in order.
66
Page 75

Pinnacle MediaCenter
Playlists
When you select the Playlists menu item in the Movies menu, the following
window appears:
All of the movie playlists that have been previously created in the Pinnacle
MediaManager are displayed in the right section of the window.
Play entire playlists
If you want to play all of the movies on a particular playlist, select the playlist
you want and press the Play button on your remote control.
Playing individual movies from the playlist
If you want to view the individual movies on a particular playlist, select the
playlist and confirm the selection. All of the movies on the playlist are then
displayed on the right side of the window.
In order to play a single movie, select the movie you want and confirm your
selection.
If you select a single film and then press the Play button on your remote control,
the entire playlist will be played.
67
Page 76

Pinnacle MediaCenter
Genre
When you select the Genre menu item in the Movie menu, the following
window appears:
In the right-hand section of the window, all of the movie genres created in the
Pinnacle MediaManager are displayed in alphabetical order (e.g., action films,
documentaries and comedies).
Play all of the movies of a genre
If you want to play all of the movies assigned to a particular genre, select the
genre and press the Play button on your remote control.
Play individual movies of a genre
If you want to display all of the movies assigned to a particular genre in the
database, select the genre and confirm the selection. The corresponding movie
titles are now listed on the right side of the window.
To play a particular movie, make a selection and confirm your selection.
If you select a movie and press the Play button on your remote control, all of the
movies in the selected genre are played.
68
Page 77

Pinnacle MediaCenter
All Movies
When you select the All Movies menu item in the Movie menu, the following
window appears:
All of the movies contained in the database are displayed in alphabetical order in
the right-hand section of the window.
Playing individual movies
You can play a movie from the database by making and confirming a selection.
If you select a movie and press the Play button on your remote control, all of the
movies in the database are played.
69
Page 78

Pinnacle MediaCenter
CD/DVD
When you select the CD/DVD menu item in the Movies menu, the following
window appears:
Here you can play movies from a CD or DVD.
If a CD/DVD is in your CD-ROM / DVD drive, the titles of the available
movies are displayed in the right section of the window. You can play the movie
you want by selecting and confirming the selection or by pressing Play on the
remote control.
If no CD or DVD is in the corresponding drive, the Pinnacle MediaCenter will
prompt you to insert a CD or DVD.
70
Page 79

Pinnacle MediaCenter
Browse Hard Disk
When you select the Browse menu item in the Movies menu, the following
window appears:
In the right-hand section of the window, you can browse your hard disk for
video files and play them. To do this, select a folder or a video file and confirm
your selection. The corresponding folder is opened and/or the movie is played.
71
Page 80

Pinnacle MediaCenter
Music Menu
Overview of Music Menu
When you select the Music menu item in the main screen of the Pinnacle
MediaCenter, the following window appears:
The following functions are available in each menu item:
Playlists, Genre, Artist, Album and Song: These menu items let you play
music from categories created in the Pinnacle MediaManager.
Browse/Browse CD: Select this menu item if you want to play music from a
CD or from your hard disk.
The individual functions in the Music menu are explained in detail in the
following sections.
Controlling music playback
Play
To play one or more tracks in a particular category, select the title or the
category and press the Play button on your remote control.
Rewind and Fast Forward
During playback, you can use the remote control Rewind and Fast forward
buttons to go to any position you want, even within a specific track.
Jump back and Jump forward
By using the Jump back /Jump forward buttons, you can jump to the
beginning of the current and/or the next track.
72
Page 81

Pinnacle MediaCenter
Pause
Pressing the Pause button on your remote control interrupts the music playback.
You can resume playback by pressing the Pause button again or the Play button.
Stop
You can stop playback at any time by pressing the Stop button.
Volume
In order to control the volume when listening to music, use the remote control
Volume +/- buttons. By pressing the Sound off/on button, you can turn the
sound off and back on.
Activating random mode
The Shuffle function is available in each menu item:
You can activate random mode by selecting and confirming the Shuffle menu
item (recognizable by the control lamp on the menu button). All the titles you
selected from a particular category (e.g., playlists or genre) are now shown in
random order. The function can be deactivated by selecting and confirming it
again, and the titles are again shown in their defined order.
Repeat
If you select and confirm the menu item Repeat all the music titles in a chosen
category will be repeated in order.
73
Page 82

Pinnacle MediaCenter
Playlists
When you select the Playlists menu item in the Music menu, the following
window appears:
All of the individual music playlists created in the Pinnacle MediaManager are
displayed in alphabetical order in the right-hand section of the window.
Play all playlists
If you want to play all of the tracks on a playlist, select the playlist you want and
press the Play button on your remote control.
Playing individual playlist titles
To display the individual tracks on a playlist, select and confirm the playlist you
want. All of the titles on that particular playlist are then listed on the right-hand
side of the window.
To play a single music track, select the track and confirm your selection.
If you select a single song title and press Play on your remote control, the entire
playlist is played.
74
Page 83

Pinnacle MediaCenter
Genre
When you select the Genre menu item in the Music menu, the following
window appears:
All of the genres you have created in the Pinnacle MediaManager are displayed
in alphabetical order in the right-hand section of the window (e.g., country,
classic and pop).
Play all of the titles of a genre
If you want to play all of the titles assigned to a particular genre, select the genre
and press the Play button on your remote control.
Playing the titles by an artist from a particular genre
To display all of the artists in the database assigned to a particular genre, select
and confirm that genre. The corresponding artists are then listed on the righthand side of the window. To play all of the tracks by a particular artist, make a
selection and press the Play button.
Playing an album by an artist in a particular genre
To display the albums by an artist in the selected genre, select and confirm that
artist. All of the albums by that particular artist in the database are then shown
on the right-hand side of the window. To play all of the tracks on a particular
album, select the album and press the Play button on your remote control.
75
Page 84

Pinnacle MediaCenter
Playing individual tracks by an artist in a particular genre
To display all of the tracks of one of the albums listed, select and confirm that
album. All of the music tracks on the selected album are then displayed on the
right-hand side of the window.
To play a single music track, select the track and confirm your selection.
If you select a single song title and press Play on your remote control, the entire
album is played.
76
Page 85

Pinnacle MediaCenter
Artist
When you select the Artist menu item in the Music menu, the following
window appears:
All of the artists in the Pinnacle MediaManager are displayed in alphabetical
order in the right-hand section of the window.
Playing all the tracks by an artist
If you want to play all of the tracks by a particular artist, select that artist and
press the Play button on your remote control.
Playing an album by a particular artist
If you want to display the albums by a particular artist, select and confirm that
artist. All of the albums by the artist contained in the database are then shown on
the right-hand side of the window. To play all of the tracks on a particular
album, select the album and press the Play button on your remote control.
Playing individual songs from the album of an artist
To display the individual tracks on one of the previously listed albums, select
and confirm that album. All of the music tracks on the selected album are then
displayed on the right-hand side of the window.
To play a single music track, select the track and confirm your selection.
If you select a single song title and press Play on your remote control, the entire
album is played.
77
Page 86

Pinnacle MediaCenter
Album
When you select the Album menu item in the Music menu, the following
window appears:
All of the music albums in the database are displayed in alphabetical order in the
right-hand section of the window.
Playing an album
If you want to play all of the tracks on a particular album, select that album and
press the Play button on your remote control.
Playing individual tracks on an album
If you want to display a single title on one of the previously listed albums, select
that album and confirm you selection. Now all the titles on the album are
displayed on the right side of the window.
To play a single track, select the track you want and confirm your selection.
If you select a particular track and press the Play button on your remote control,
the entire album is played.
78
Page 87

Pinnacle MediaCenter
Song
When you select the Song menu item in the Music menu, the following window
appears:
All of the music tracks in the database are displayed in alphabetical order in the
right-hand section of the window.
Playing individual song titles
To play a single track, select the track you want and confirm your selection.
If you select a particular song title and press the Play button on your remote
control, all of the tracks in the database are played.
79
Page 88

Pinnacle MediaCenter
Browse Hard Disk or CD
With the Browse and/or Browse CD menu item, you can search your hard disk
for audio files or play music from a CD.
Playing music from the hard disk
When you select the Browse menu item in the Music menu, the following
window appears:
In the right-hand section of the window, you can search your hard disk for audio
files and play them. To do this, select a folder or a track and confirm your
selection. The folder is opened or the track you want is played.
Playing music from a CD
If a CD is in your CD-ROM drive, the Browse menu item in the Music menu
changes to Browse CD.
After selecting and confirming this menu item, the following window appears:
80
Page 89

Pinnacle MediaCenter
The path of your CD-ROM drive is displayed in the right-hand section of the
window.
Play entire CD
To play the entire CD, select the corresponding CD-ROM drive and press the
Play button on your remote control.
Playing individual tracks on the CD
To display the individual tracks on the CD, select the corresponding CD-ROM
drive and confirm your selection. All of the tracks on the CD are then listed on
the right.
To play a single track, select the track you want and confirm your selection.
If you select a particular song and press the Play button on your remote control,
the entire CD is played.
81
Page 90

Pinnacle MediaCenter
Photos Menu
Overview of the Photos Menu
When you select the Photos menu item in the main screen of the Pinnacle
MediaCenter, the following window appears:
The following functions are available in each menu item:
Slide Shows: Select this menu item to play a slide show set up in Pinnacle
MediaManager or to display individual photos from a slide show.
This means that instead of having to show your friends and relatives a whole
photo album (e.g., of a particular holiday), you can present the highlights in a
separate slide show.
By Date: This option allows you to search for photos by chronological
criteria (year, month, day) and to display them in a slide show or
individually.
Photo Albums: In this menu item, you can display photo albums set up in
Pinnacle MediaManager as slide shows or display individual photos from the
albums.
Browse: Here you can search your hard disk for photos and display them as
single photos or as a slide show.
82
Page 91

Pinnacle MediaCenter
Controlling the slide show
Play
To play a slide show, press the remote control Start button.
Rewind, Forward, Jump back and Jump forwards
Using the Rewind, Forward, Jump left and Jump right buttons, you can get
to any position you want within the slide show.
Pause
Pressing the Pause button on your remote control interrupts the slide show. You
can continue the show by pressing the Pause button again or the Play button.
Stop
You can stop the slide show at any time by pressing the Stop button.
Controlling the display of single photos
If you want to display photos one at a time in the preview window or in full
screen mode, you can use the arrow keys on your remote control to display the
previous or the next photo in that category. This gives you the option of looking
at all the photos in a slide show, on a particular date or in a particular album as
individual images.
Activating random mode
The Shuffle function is available in each menu item:
You can activate random mode by selecting and confirming the Shuffle menu
item (recognizable by the control lamp on the menu button). All the photos you
selected from a particular category (e.g., the playlist or the album) are now
shown in random order. The function can be deactivated by selecting and
confirming it again, and the photos are again shown in their defined order.
Repeat
If you select and confirm the menu option Repeat all the photos in a chosen
category will be repeated in order.
83
Page 92

Pinnacle MediaCenter
Slide Shows
When you select the Slide Shows menu item in the Photo menu, the following
window appears:
All the slide shows previously set up in Pinnacle MediaManager are shown in
alphabetical order in the right-hand section of the window.
Playing the whole slide show
If you want to play an entire slide show, select that slide show and press the
Play button on your remote control.
You can use the "Settings" menu item to create your own individual slide
show.
Displaying individual photos from a slide show
In order to display the individual photos from a slide show, select a slide show
and confirm your selection. All the photos in the slide show are now displayed
in miniature on the right-hand side of the window.
If you select a photo and press the Play button on your remote control, the entire
slide show is played.
If you want to view an individual photo in the preview window, select it and
confirm your selection. You can view that photo in full screen mode by selecting
and confirming it again or by pressing the Full Screen Mode remote control
button.
84
Page 93

Pinnacle MediaCenter
Date
When you select the By Date menu item in the Photo menu, the following
window appears:
A list of years for which there are photos in the database is shown in the righthand section of the window.
Displaying the photos from a particular year
If you want to view all the photos in the database from a particular year, select
that year and press the Play button on your remote control. All the photos from
that year are now displayed in a slide show.
Displaying photos from a particular month
If you want to view all the photos in the database from a particular month, select
a year and confirm this selection. All of the months containing photos in the
database are displayed on the right-hand side.
Now select a month and press the Play button on your remote control. All the
photos from that month are now displayed in a slide show.
Displaying the photos from a particular day
If you want to view all the photos in the database from a particular day, select a
year and confirm your selection. All of the months containing photos in the
database are displayed on the right-hand side. Now select a month and confirm
your selection. All of the days in that month are now shown on the right-hand
side of the window.
85
Page 94

Pinnacle MediaCenter
Now select a day and press the Play button on your remote control. All the
photos from that day are now displayed in a slide show.
If you want to view an individual photo from a particular day as a thumbnail,
select that day and confirm your selection. You can view the photo you want in
full screen mode by selecting and confirming it again.
If you select a photo and press the Play button on your remote control, all of the
photos from the selected day are now displayed in a slide show.
86
Page 95

Pinnacle MediaCenter
Photo Album
When you select the Photo Albums menu item in the photo menu, the following
window appears:
All of the photo albums in the database are shown in the right-hand section of
the window. Each album is symbolized by a miniature of the first photo it
contains.
Playing the entire album
To play the entire album, select it and press the Play button on your remote
control. The photos in the album are shown in a slide show.
Displaying individual photos from an album
To display individual photos from an album, select an album and confirm this
selection. All of the photos in the album are now shown in miniature on the
right-hand side of the window.
If you select a photo and press the Play button on your remote control, the
whole album is played as a slide show.
If you want to view a single photo in the preview window, select it and confirm
your selection. You can view that photo in full screen mode by selecting and
confirming it again or by pressing the Full Screen Mode button on your remote
control.
87
Page 96

Pinnacle MediaCenter
Browse Hard Disk
When you select the Browse menu item in the Photo menu, the following
window appears:
You can search your hard disk for photos in the right-hand area of the window
and display them as individual images or in a slide show. To do this, select a
folder or a photo and confirm this selection. The folder is opened or the photo is
displayed.
88
Page 97

Pinnacle MediaCenter
Settings Menu
Overview of the Settings Menu
When you select the Settings menu item in the main screen of the Pinnacle
MediaCenter, the following window appears:
You can define the most important settings in the individual menu items for the
following areas:
General
TV
DVD
Video
Music
Photos
The individual areas of the Settings menu are explained in detail in the
following sections.
You can define more extensive settings in the "Advanced Settings Dialog
Box". To do this, read the section entitled "Advanced Settings".
89
Page 98

Pinnacle MediaCenter
Activating settings
After you have made changes to the settings, the following window appears
when you exit the Settings menu:
If you want to keep the changes you have made, select and confirm by clicking
Yes. The changed settings are now activated.
If you do not want to activate the changes you have made, select and confirm
No. The changed settings are discarded.
90
Page 99

Pinnacle MediaCenter
General Settings
When you select the General menu item in the Settings menu, the following
window appears:
You can change various general settings in the right-hand section of the
window.
Parental control
Here you can deactivate the limited access to media as defined in the Pinnacle
MediaManager, thereby releasing all films for viewing.
To use this function, select the access code field and enter the relevant four-digit
PIN number via the entry buttons on your remote control or your PC keyboard.
The access restrictions are removed after your entry has been confirmed.
Language
Here you can modify the language settings in the Pinnacle MediaCenter.
To do this, select the language field and confirm your selection. A list appears
with all the available languages. Select the language you want and confirm your
selection again.
Theme (skin)
Here you can change the skin of the Pinnacle MediaCenter.
Select the relevant field and confirm your selection. A list of all available skins
is displayed. After you have selected and confirmed a skin, the Pinnacle
MediaCenter is displayed with the outward appearance you have chosen.
91
Page 100

Pinnacle MediaCenter
Screen saver
This menu item lets you set how long the computer should wait after you last
used it to launch the screen saver.
To do this, select the relevant field, use the entry buttons on your remote control
or your PC keyboard to enter a length of time and confirm your entry.
OSD transparency
Here you can set the degree of transparency at which the on-screen displays
appear in the Pinnacle MediaCenter.
Select the corresponding field, enter a degree of transparency as a percentage
and confirm your entry.
OSD duration
In this area you can decide how long an on-screen display is to be shown in the
Pinnacle MediaCenter.
To do this, enter the length of time you want in the corresponding field and
confirm your entry.
92
 Loading...