

Page 1

Avid LeaderPlus
Installation and User’s Guide
Version 5.0
Page 2

Copyright and Disclaimer
Product specifications are subject to change without notice and do not represent a commitment on the part of Avid Technology, Inc.
The software described in this document is furnished under a license agreement. You can obtain a copy of that license by visiting Avid's
Web site at www.avid.com. The terms of that license are also available in the product in the same directory as the software. The software
may not be reverse assembled and may be used or copied only in accordance with the terms of the license agreement. It is against the law
to copy the software on any medium except as specifically allowed in the license agreement.
No part of this document may be reproduced or transmitted in any form or by any means, electronic or mechanical, including photocopying
and recording, for any purpose without the express written permission of Avid Technology, Inc.
Copyright © 2008 Avid Technology, Inc. and its licensors. All rights reserved.
Attn. Government User(s). Restricted Rights Legend
U.S. GOVERNMENT RESTRICTED RIGHTS. This Software and its documentation are “commercial computer software” or “commercial
computer software documentation.” In the event that such Software or documentation is acquired by or on behalf of a unit or agency of the
U.S. Government, all rights with respect to this Software and documentation are subject to the terms of the License Agreement, pursuant to
FAR §12.212(a) and/or DFARS §227.7202-1(a), as applicable.
Trademarks
888 I/O, Adrenaline, AirPlay, AirSPACE, AirSPACE HD, AirSpeed, AniMatte, AudioSuite, AudioVision, AutoSync, Avid, Avid DNA,
Avid DNxcel, Avid DNxHD, AVIDdrive, AVIDdrive Towers, Avid Mojo, AvidNet, AvidNetwork, AVIDstripe, Avid Unity, Avid Unity ISIS, Avid
ISIS, Avid Xpress, AVoption, AVX, CamCutter, ChromaCurve, ChromaWheel, Command, DAE, D-Fi, D-fx, Digidesign, Digidesign Audio
Engine, Digidesign Intelligent Noise Reduction, DigiDrive, Digital Nonlinear Accelerator, DigiTranslator, DINR, DNxchange, D-Verb,
Equinox, ExpertRender, FieldPak, Film Composer, FilmScribe, FluidMotion, HIIP, HyperSPACE, HyperSPACE HDCAM, IllusionFX,
Image Independence, Intraframe, iS9, iS18, iS23, iS36, LaunchPad, Lo-Fi, Magic Mask, make manage move | media, Marquee, Matador,
Maxim, MCXpress, Media Compos er, Medi aD o ck, Me diaDock Shuttle, Media Fusion, Media Illusion, MediaLog, Media Reader,
Media Recorder, MEDIArray, MediaShare, Meridien, MetaSync, MissionControl, NaturalMatch, Nearchive, NetReview, NewsCutter, Nitris,
OMF, OMF Interchan ge, OMM, Open Media Framew o rk, Ope n Media Management, ProEncode, Pro Tools, QuietDrive, Recti-Fi,
RetroLoop, rS9, rS18, Sci-Fi, Softimage, Sound Designer II, SPACE, SPACEShift, SpectraGraph, SpectraMatte, Symphony, Trilligent,
UnityRAID, Vari-Fi, Video Slave Driver, VideoSPACE, and Xdeck are either registered trademarks or trademarks of Avid Technology, Inc.
in the United States and/or other countries.
iNEWS, iNEWS ControlAir, and Media Browse are either registered trademarks or trademarks of iNews, LLC.
All other trademarks contained herein are the property of their respective owners.
Avid LeaderPlus v5.0 Installation and User’s Guide
Part #0130-04996-02 Rev B
October 10, 2008
Printed in the United States of America
Page 3

Chapter 1
Introduction to LeaderPlus
Summary 1-2
Features of LeaderPlus 1-2
Page 4

________________________________________________________________
1-2
Summary
The LeaderPlus Election Management System is a comprehensive and
user-friendly database capable of meeting election night needs ranging
from vote collection and analysis to the automatic updating of races by
wire and the instant airing of customized character generator displays.
LeaderPlus is a network-based program that operates on a Windows NT
4.0, Windows 2000, Windows XP platform and can be incorporated into
an existing network. It connects to a network hub to communicate to
multiple workstations and can run from the same desktop as your current
iNEWS program.
Features
Some of the features of the LeaderPlus Election Management System
include:
• Easy input of wire races into the database prior to an election.
LeaderPlus will automatically pull the appropriate wire codes
directly out of a wire capture containing sample wire data. Wire
codes are NOT to be entered manually.
• Aid to the election coordinator in organizing data as both individual
races and as lists of races. Using a race list, LeaderPlus will
automatically call up selected races in a predefined order for easy
monitoring, updating, and displaying on air.
• Race reports for printing race summaries to easily verify data and
provide hard copy rewards.
• Multiple wire updating, manual updating of races, and updating or
accessing the database via modem.
• Instant updates of race results entered at any LeaderPlus
workstation (secured with individual user access).
• A window for producers that clearly displays race status
information and results through customized lists of races.
• The use of multiple character generators connected to individual
workstations on the network for simultaneous airing of races. This
is a real advantage when producing election coverage out of
different studios simultaneously.
Page 5

________________________________________________________________
1-3
• A window for on air anchors that displays race results and
information (or background notes) about the candidates or issues
being discussed. This window is driven directly by the races sent
to the CG. It is a valuable tool for the talent to use on air.
• Increased security with users entered into the system individually,
so each user has his or her, own password and privileges on the
system.
• The ability to air results to the Internet
• A secure password protected method for inputting updates to
races via the Internet.
• Automatic updating of election results from a web page or FTP
site.
Page 6

________________________________________________________________
1-4
Page 7

Chapter 2
Installation & Configuration
This chapter reviews the equipment requirements for
LeaderPlus and explains the installation process for the
server and workstations. This chapter should be read by
engineers and IS managers.
This chapter contains:
Hardware Requirements 2-2
Items Provided by Avid for LeaderPlus 2-3
Optional Services 2-3
LeaderPlus Election System Diagram 2-4
Installing LeaderPlus Software 2-4
Part 1- Installing MSDE 2-4
Part 2- Installing Server Application 2-10
Part 3- Creating the Database 2-14
Part 4- Installing the Client 2-17
Repairing/Upgrading the LeaderPlus 2-20
Application
Starting the Server Application 2-22
Configuration for Web Interaction 2-25
Page 8

________________________________________________________________
2-2
Hardware Requirements
The following are considered the minimum requirements for running
LeaderPlus. Maximum speed and efficiency are dependent upon the
hardware.
LeaderPlus Server
• Requires a server running Microsoft Windows NT4.0 SP6 or Windows
2000 Server SP2.
• Pentium processor running at a minimum of 500 MHz with 512 MB of
RAM
• 3.5” disk drive
• 8X or faster CD-ROM drive
• 20 GB Hard Disk
• Color VGA monitor that supports 800X600, 1024X768 or 1280X1024
• Internet Explorer 4.0 or higher
• Network Card
• NOTE: LeaderPlus Server must be on the same domain as the
LeaderPlus clients.
LeaderPlus Clients
• Pentium PC with minimum 250 MHz processor
• 64 MB RAM
• Windows 2000 Professional, NT Workstation or Windows XP
Professional software
• Internet Explorer 4.0 or higher
• Network Card
• Color VGA monitor that supports 1024x768 or 1280x1024
• Workstations connecting to a character generator need an RS-232
serial port.
• NOTE: LeaderPlus 5.0 will run on workstations running Windows 95
or 98 with lower hardware capabilities than listed above, but
performance will be reduced.
Network and Peripheral Devices
• Local area network (LAN) card. (Contact LeaderPlus Customer
Service for current recommendation.)
• NetBEUI or TCP/IP network protocol acceptable
• Network Hubs
• At least one available parallel port 9if a local printer is desired)
• Character Generator
• Other peripheral devices and accessories such as printers, modems,
mice, keyboards, and cabling.
Page 9

________________________________________________________________
2-3
Items Provided by Avid for LeaderPlus
• SQL Server Software: the MSDE version of 2000 is available with the
LeaderPlus 5.0 installation. This offers some basic database
maintenance capabilities.
• LeaderPlus Election System server application on a CD-ROM
• LeaderPlus Election-System client software
• LeaderPlus Reference Guide
Optional Services
• LeaderPlus training courses are offered regularly in Madison,
Wisconsin. Contact the Avid Worldwide Training Manager at 608-2748686 for more information
• An annual service contract is available for continuous support of your
LeaderPlus system. Contact you Avid sale representative at 608-274-
8686.
• Election night telephone support is available with 30 days written
notice. This is available at no charge if you have an active LeaderPlus
service contract.
Page 10
__________________________________________________________
2-4
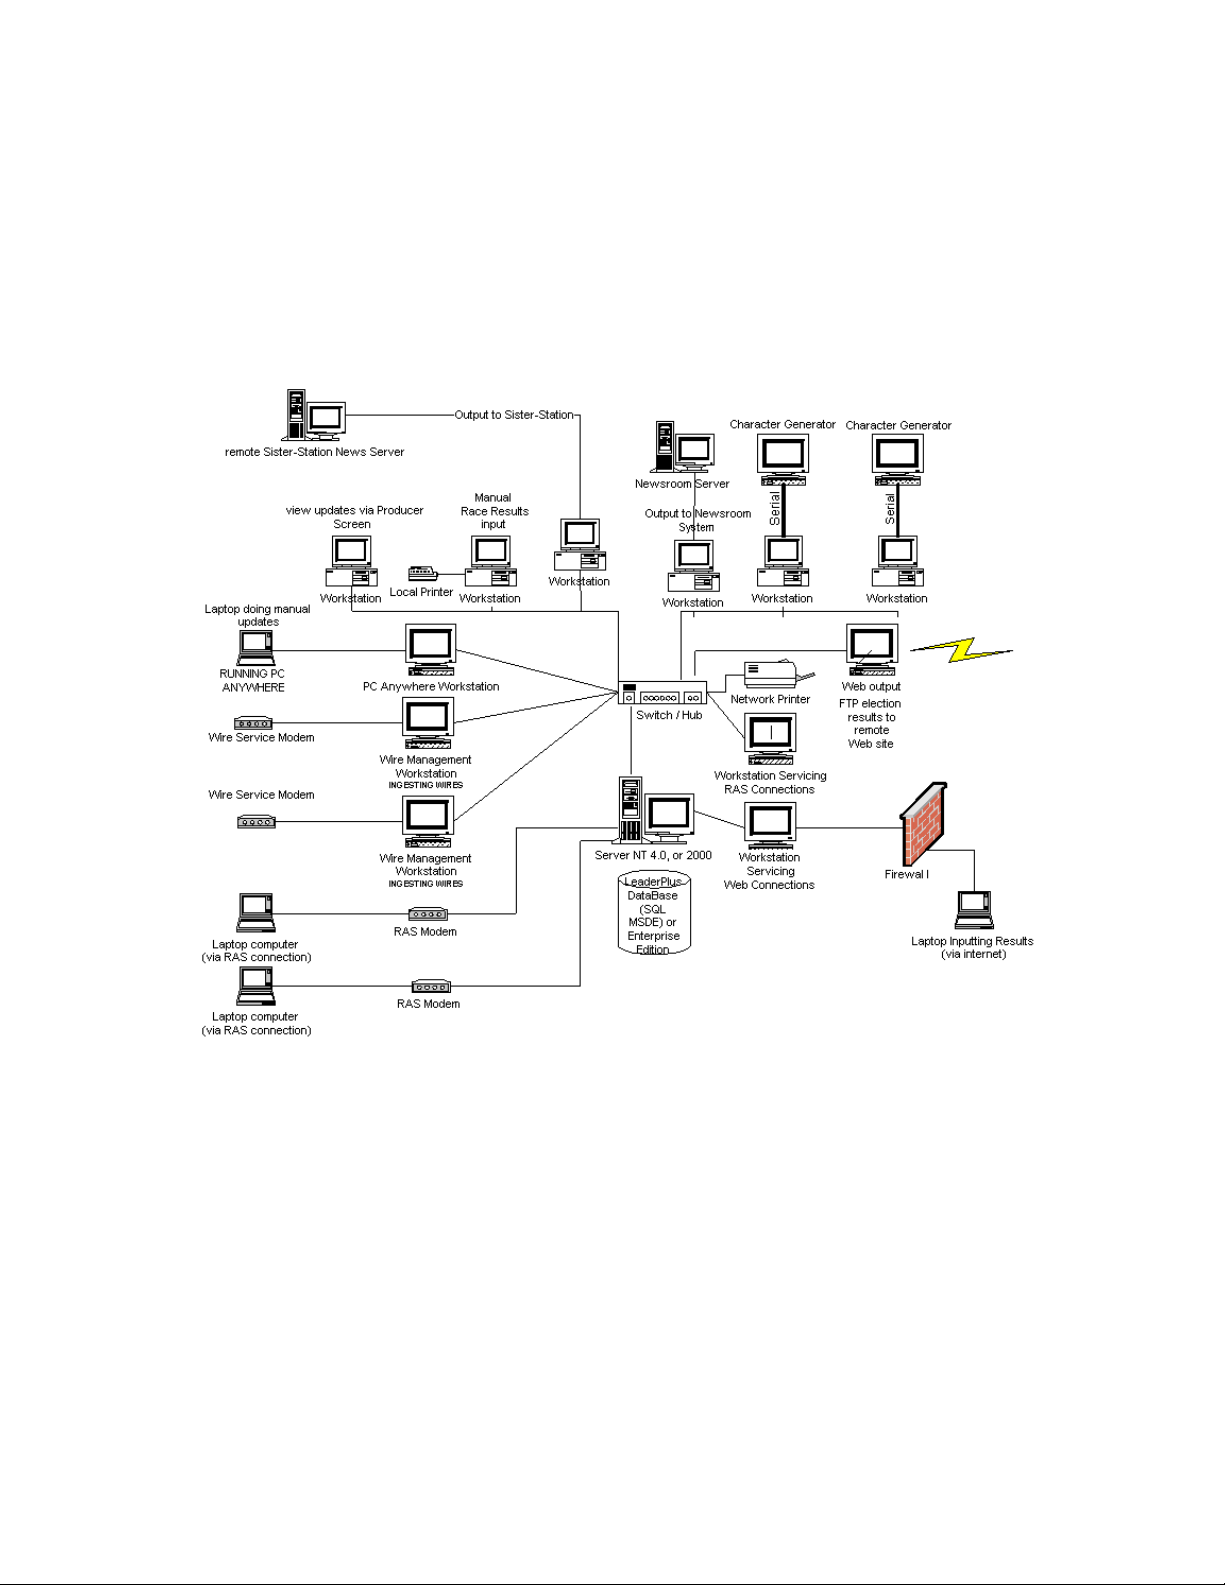
LeaderPlus Election System Diagram
Page 11
________________________________________________________________
2-5
Installing LeaderPlus
Installation – Part 1 Installing MSDE
The LeaderPlus program will be supplied on CD.
There are four parts to the installation. Part one will install the MSDE
version of 2000 SQL. Part two will install the server application. Part three
creates the database. Part four will install the client software
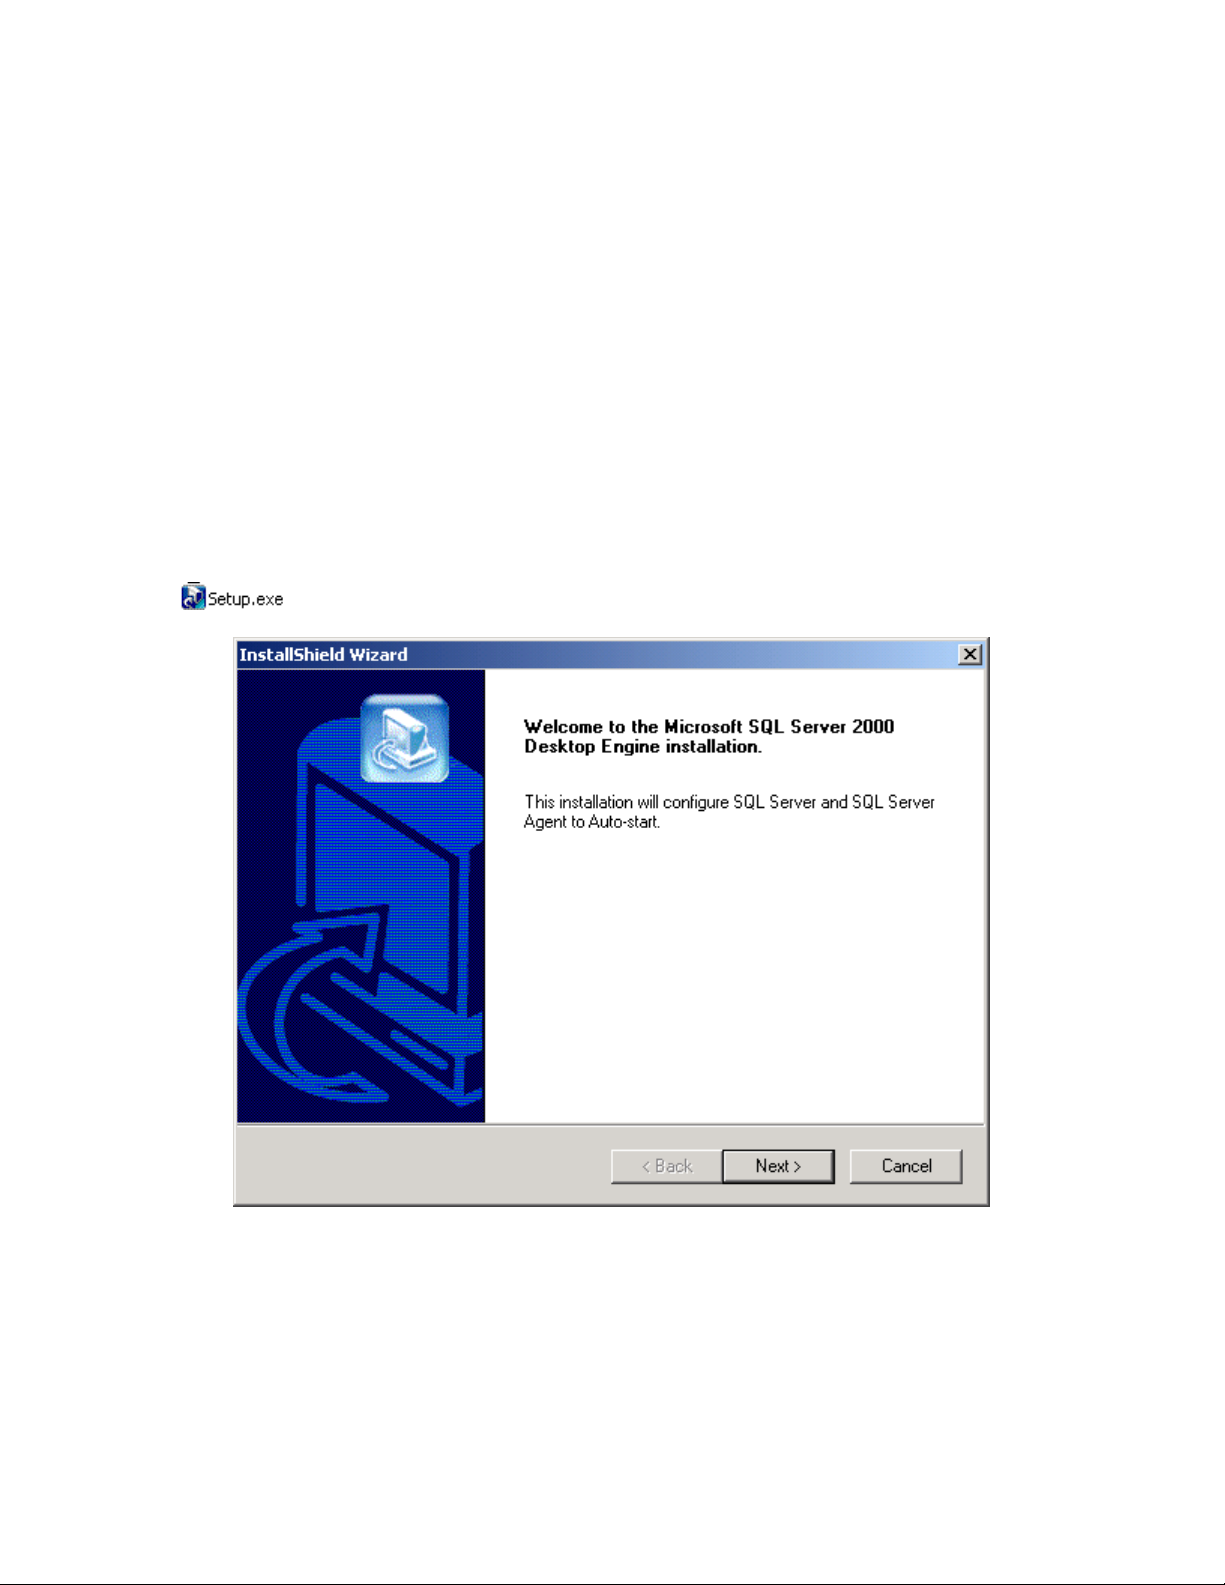
1. To install SQL MSDE, click on setup.exe.
2. Click next to begin installing the database SQL server and Agent.
LeaderPlus installation will eventually create the LeaderPlus database,
but the server and agent have to be in place.
Page 12
________________________________________________________________
2-6
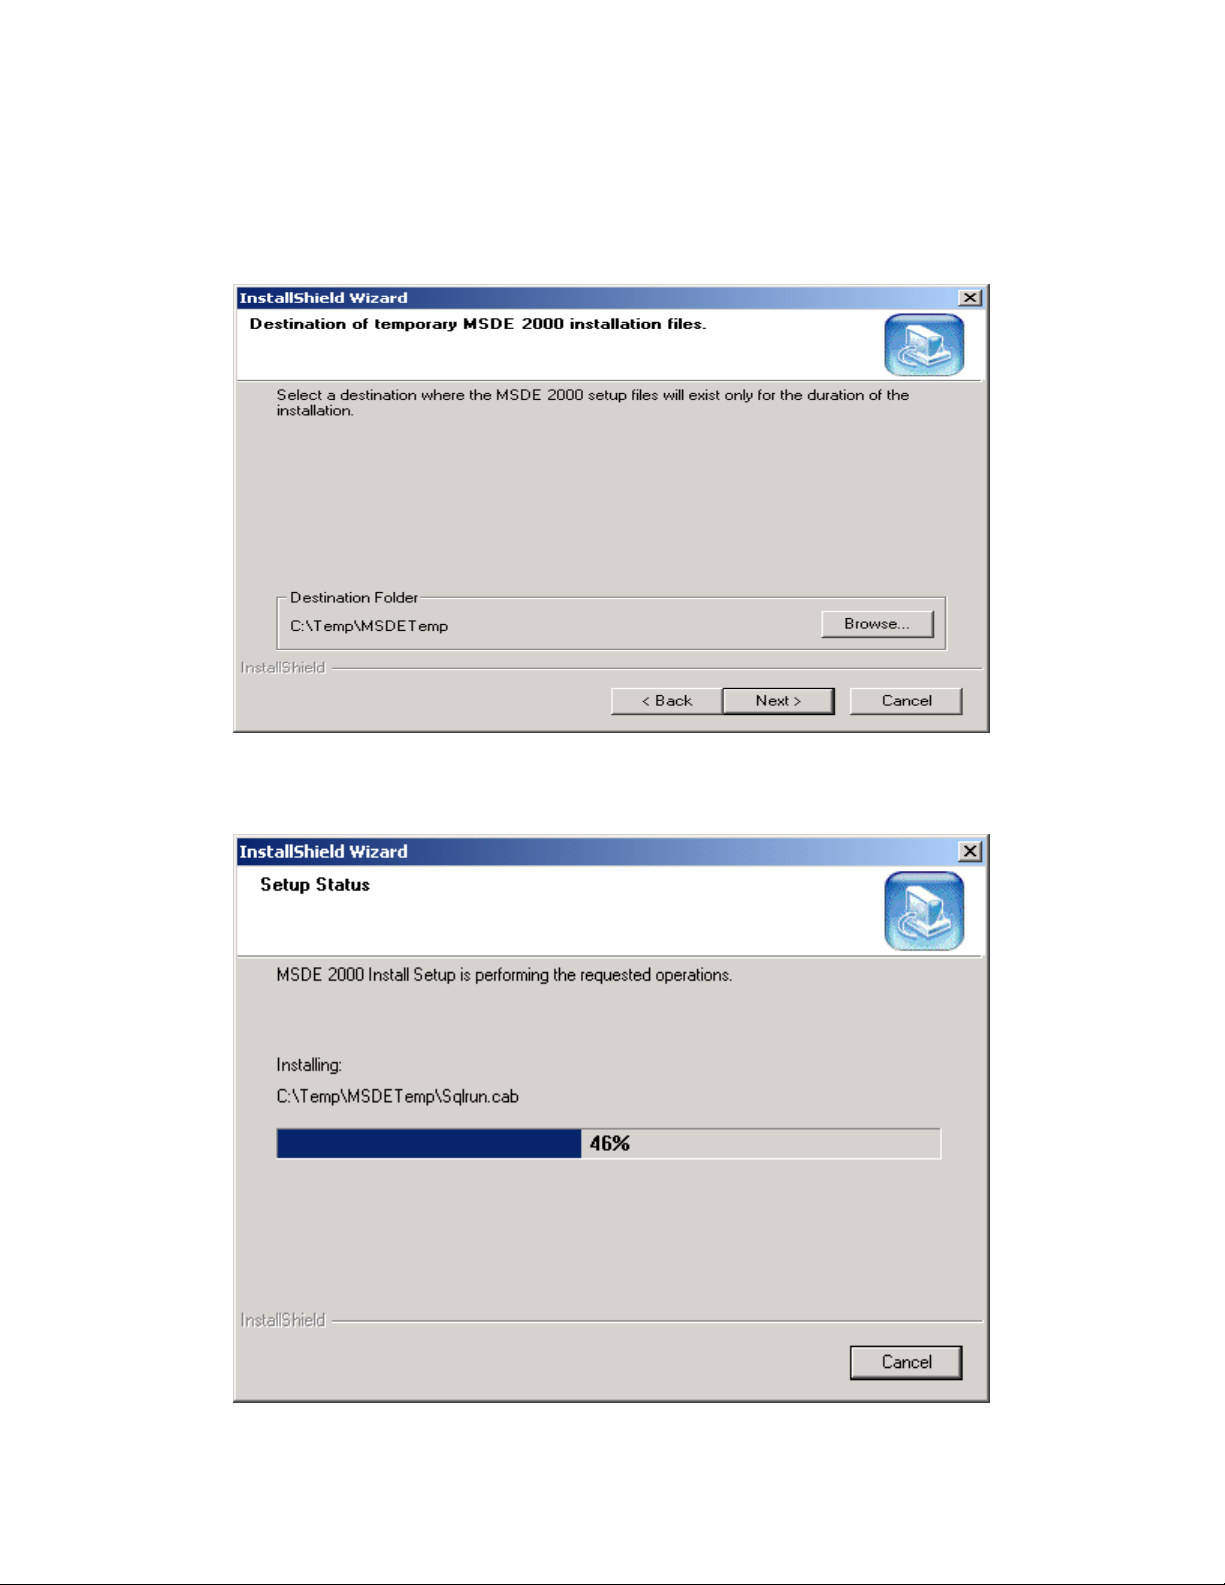
3. This step (above) asks for a place to temporarily store files for the
duration of the installation of SQL MSDE. Click on Next >
Page 13
4. Setup (above) will begin loading files:
________________________________________________________________
2-7
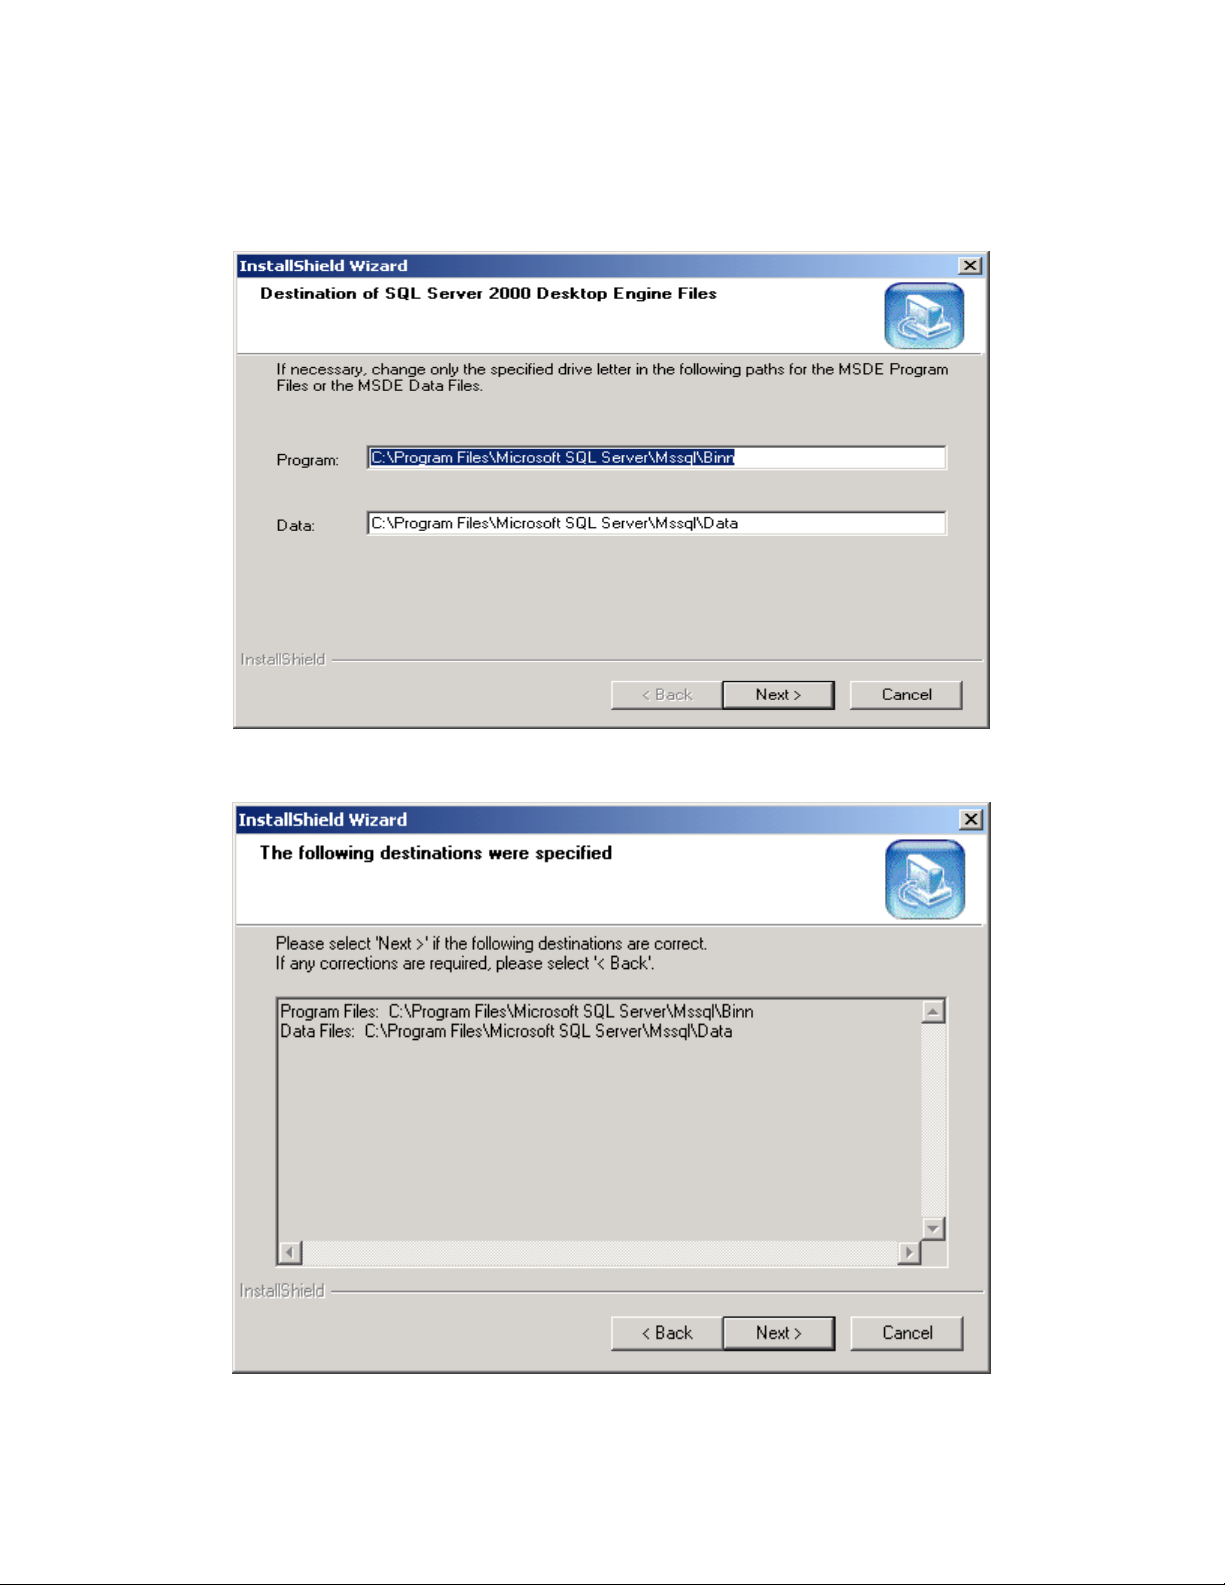
5.
.
Confirm the location of SQL MSDE files and data and click Next.
Page 14
6. The Program files are what SQL uses to run the application, and the
data files are where the LeaderPlus database will be stored
_______________________________________________________________
2-8
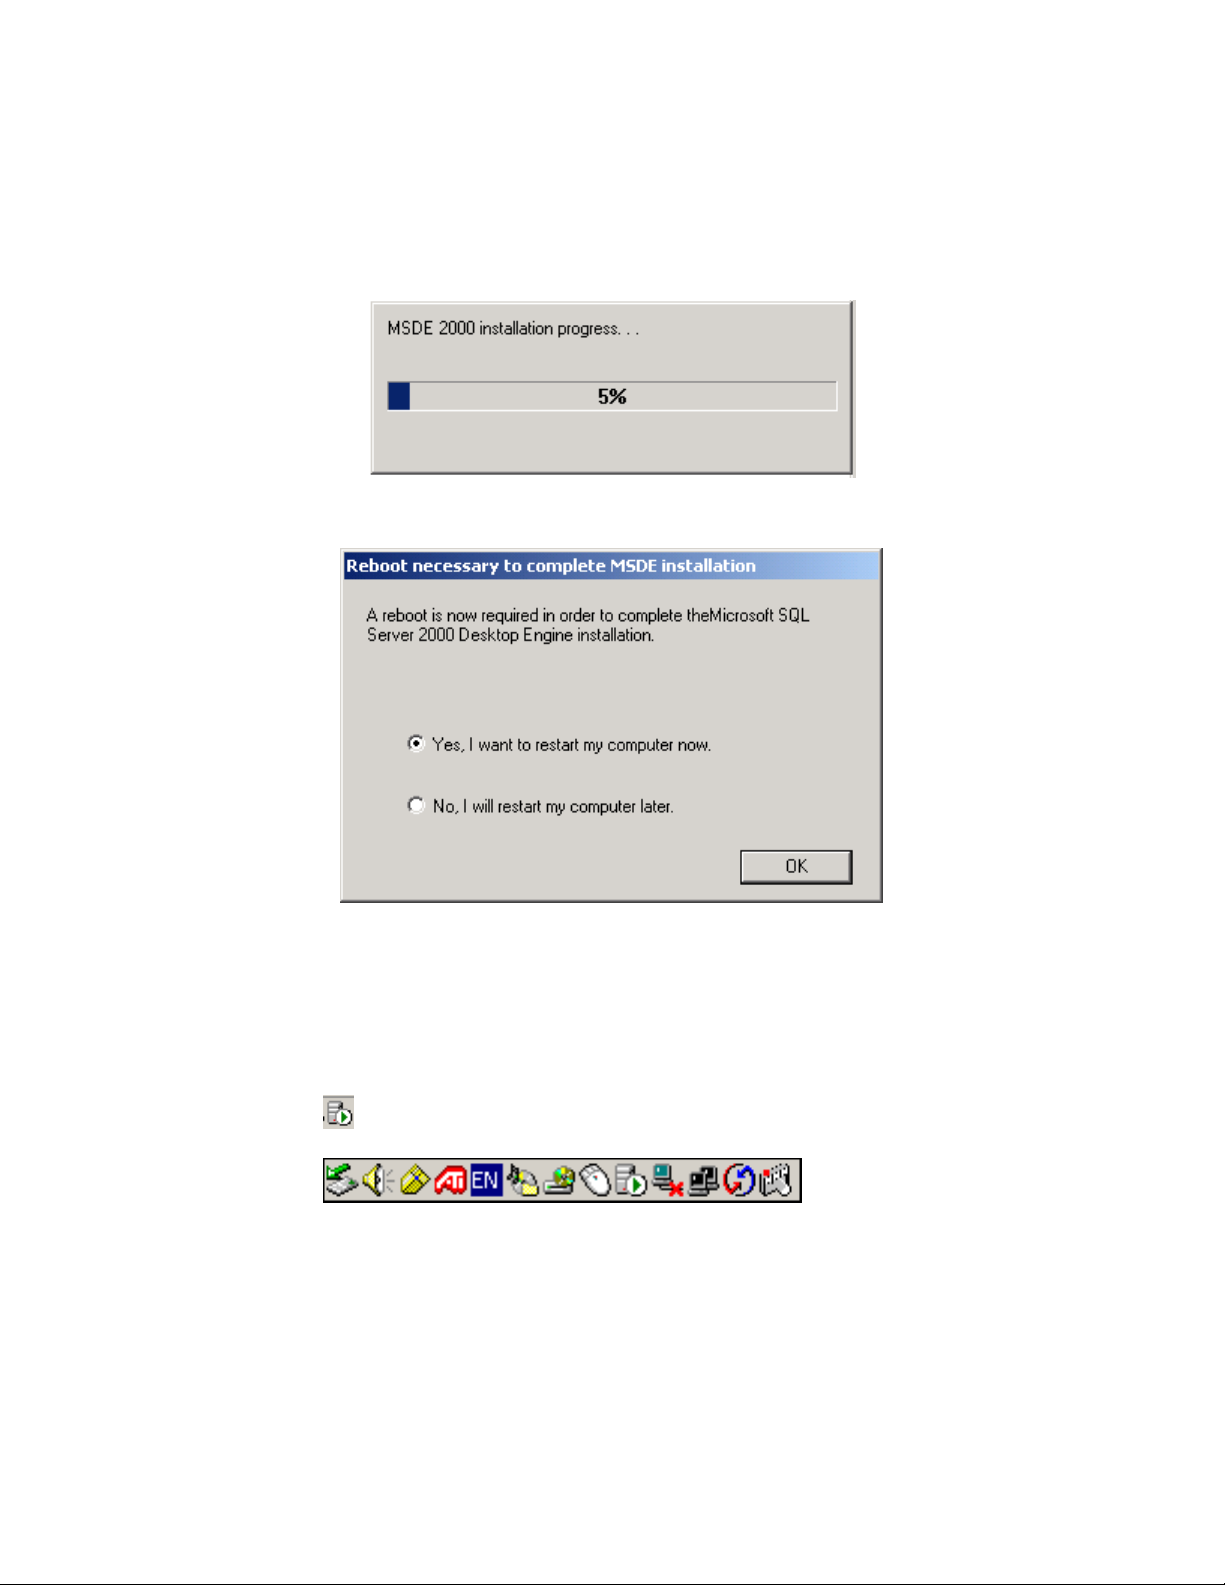
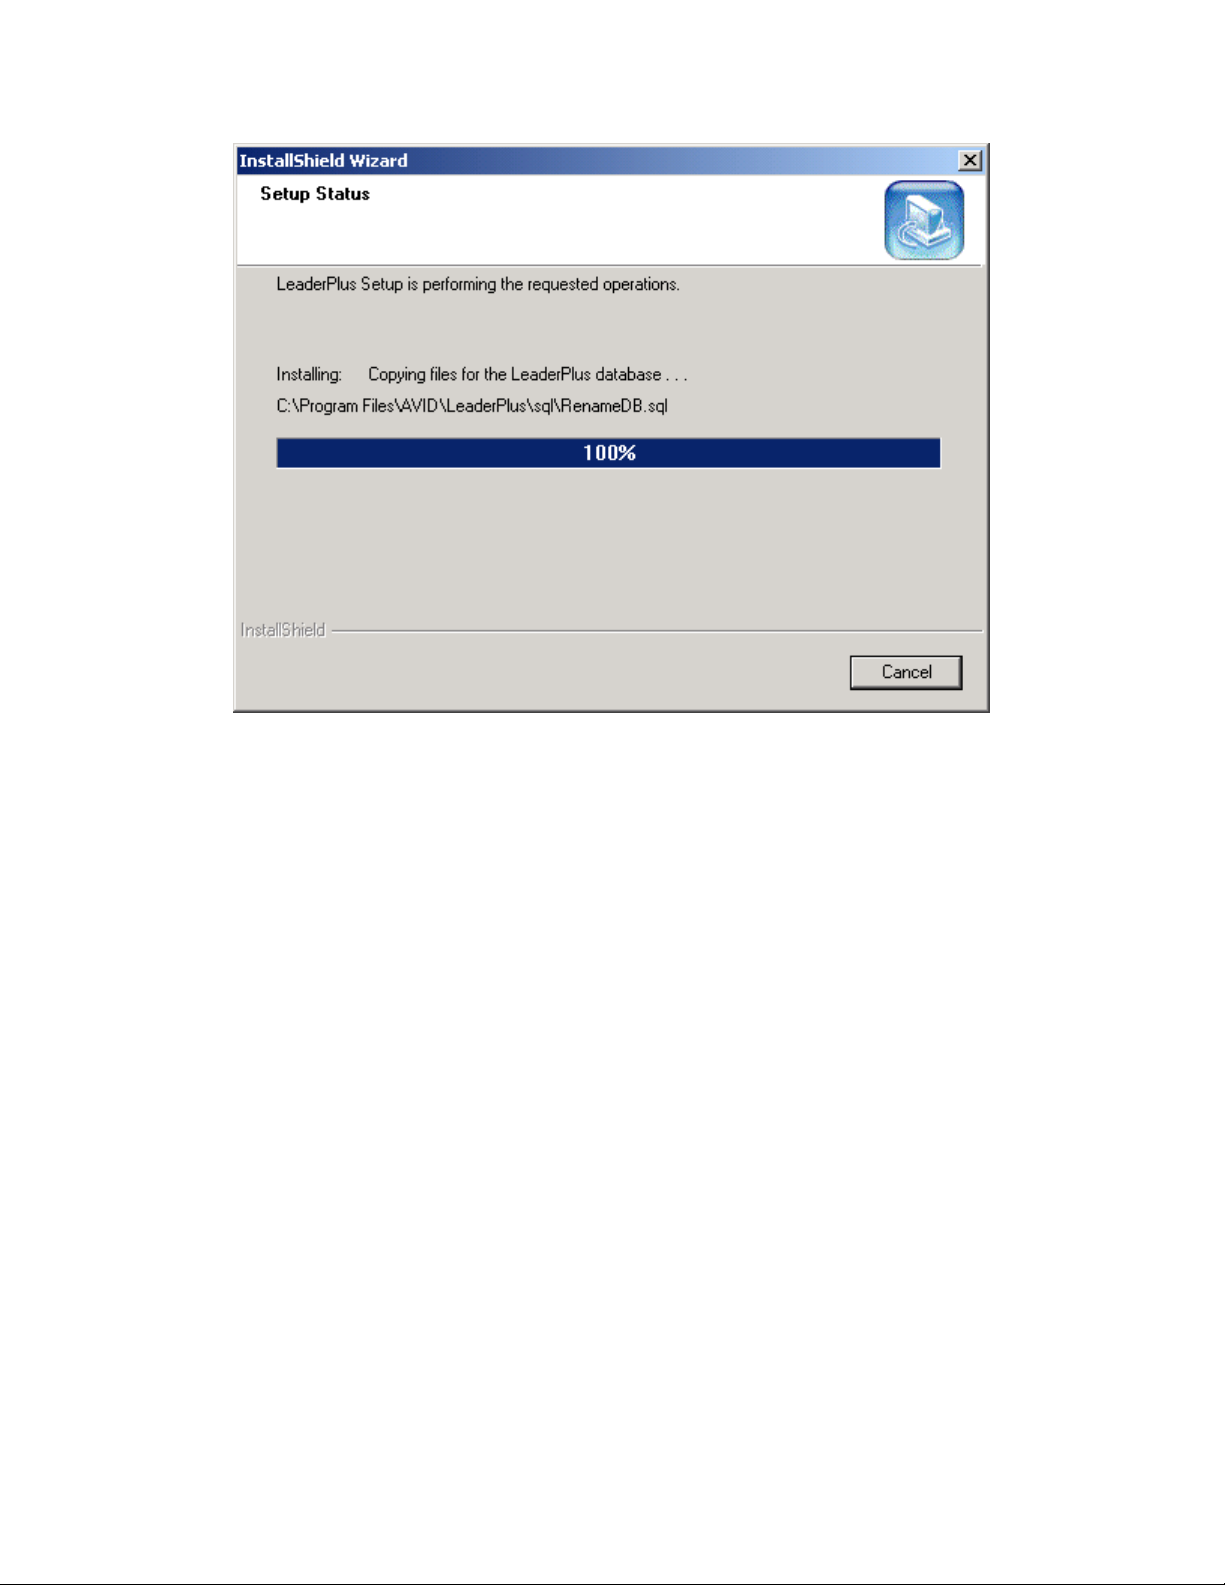
7. The installation will commence (above), showing you the progress.
8. When SQL MSDE is installed, you will be prompted to reboot. You
should reboot before installing LeaderPlus server application.
When you restart the server, you ought to see the Microsoft SQL server
application running in the task bar.
Page 15
_______________________________________________________________
2-9
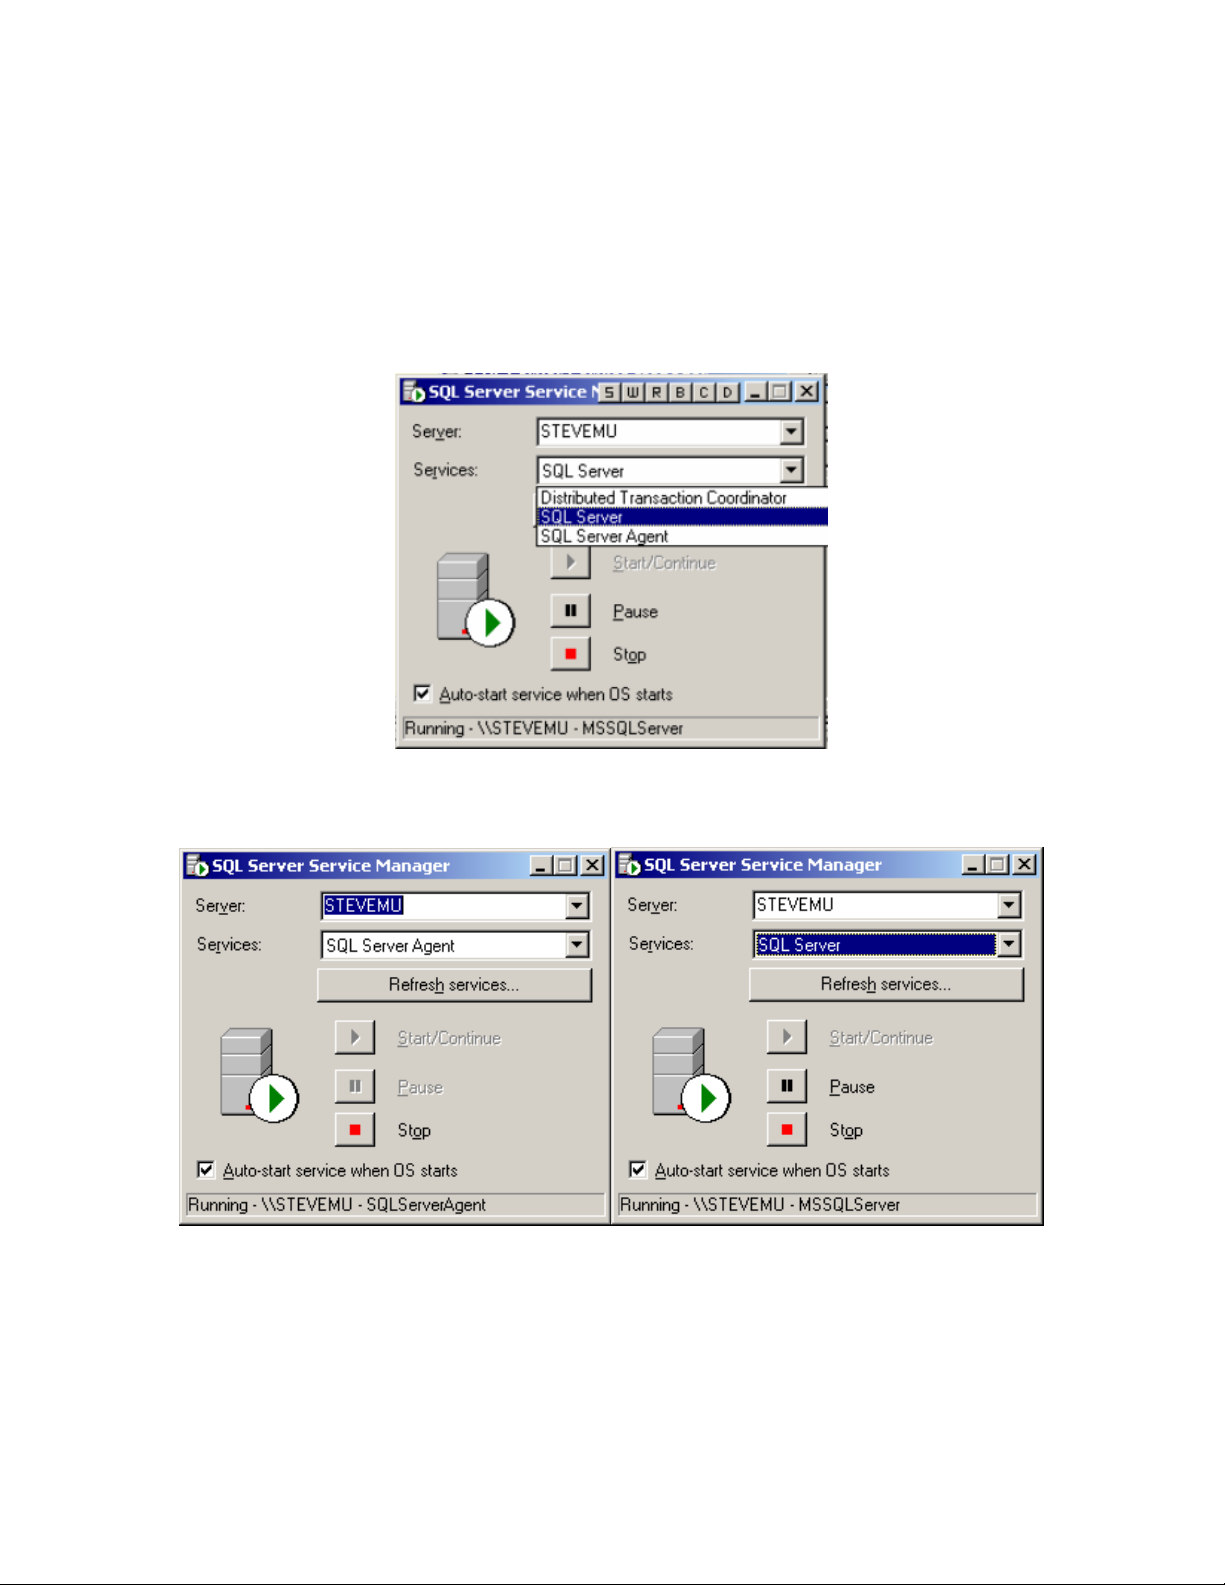
To see which operations it is watching, double-click on the applet.
SQL server and SQL server agent should be running and set to start
when the OS starts.
SQL server agent and server shown running and set to auto start with OS
Page 16

_______________________________________________________________
2-10
Installation – Part 2 Installing the LeaderPlus Server Application
1. Open the LeaderPlus 5 folder and then the server folder. Double-click
on the setup.exe setup to launch the LeaderPlus server installation
Install shield will launch to load the components needed for the
installation.
2. LeaderPlus Server Installation: click next to begin the process.
Page 17
________________________________________________________________
2-11
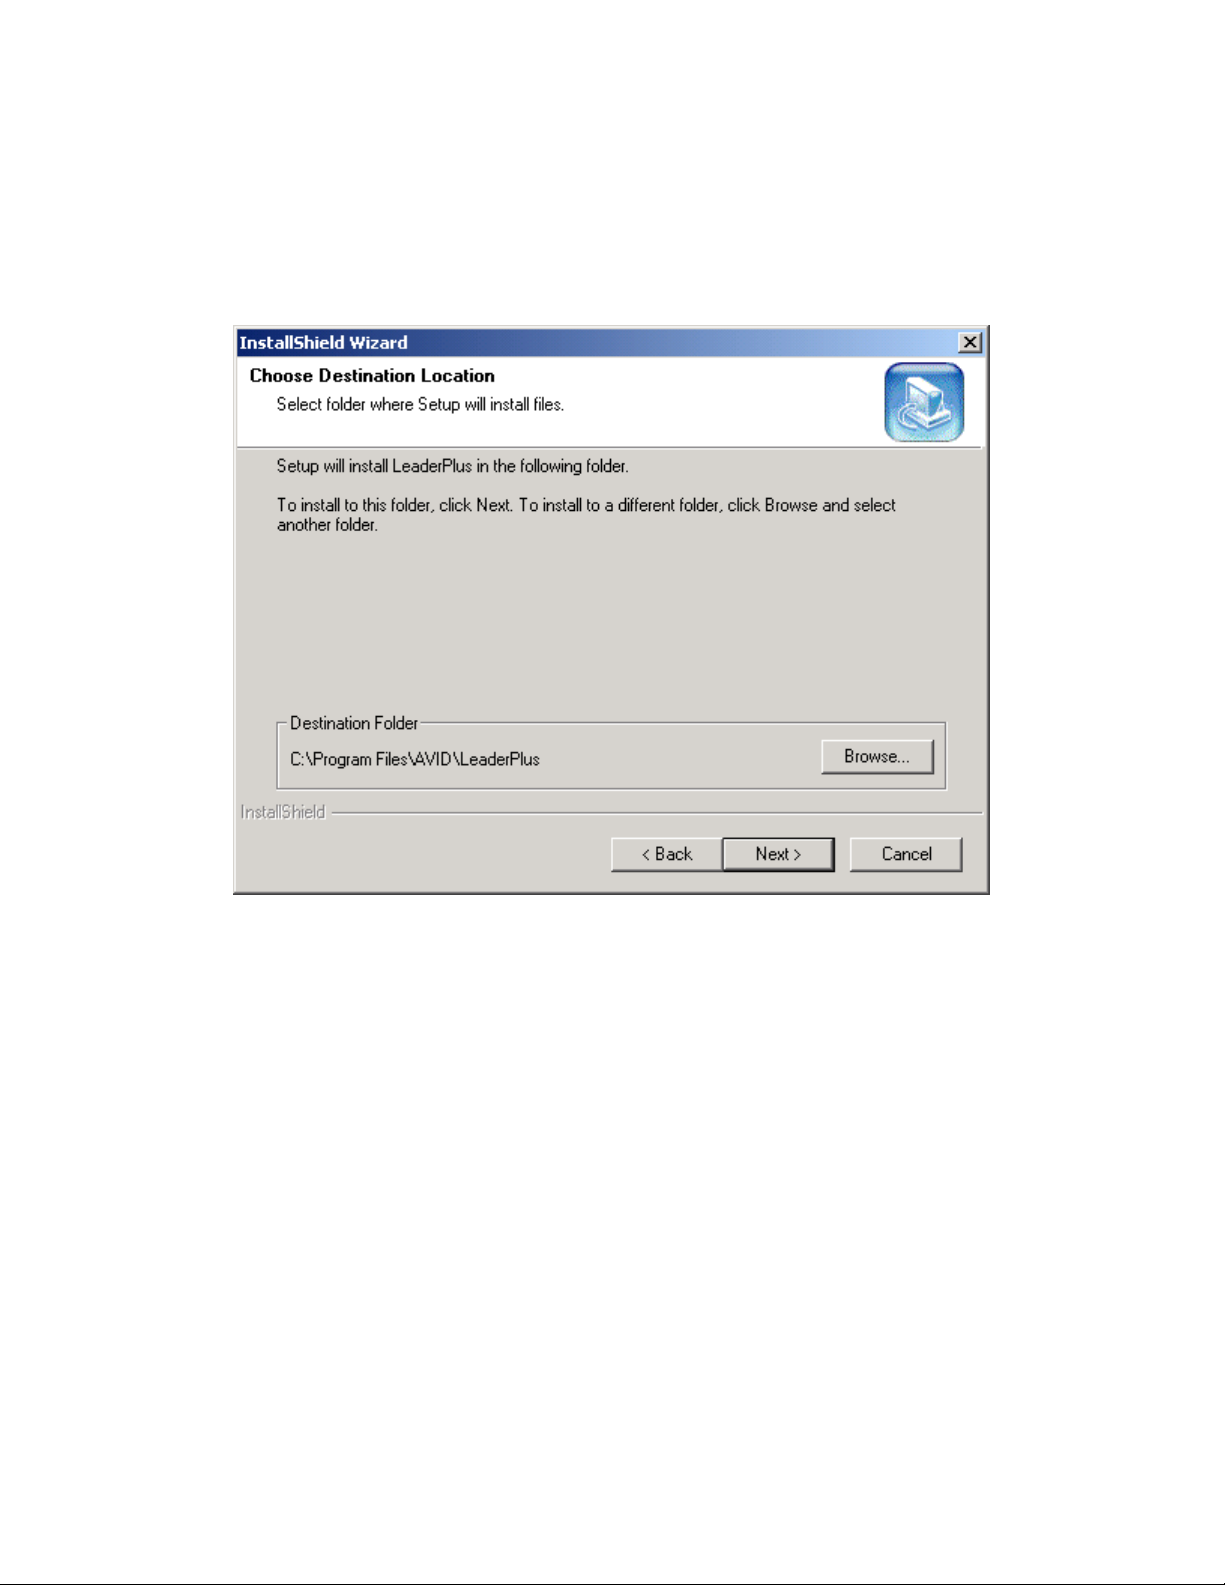
3. LeaderPlus Server Installation: confirm the destination of the
installation, and click Next.
Page 18
_______________________________________________________________
2-12
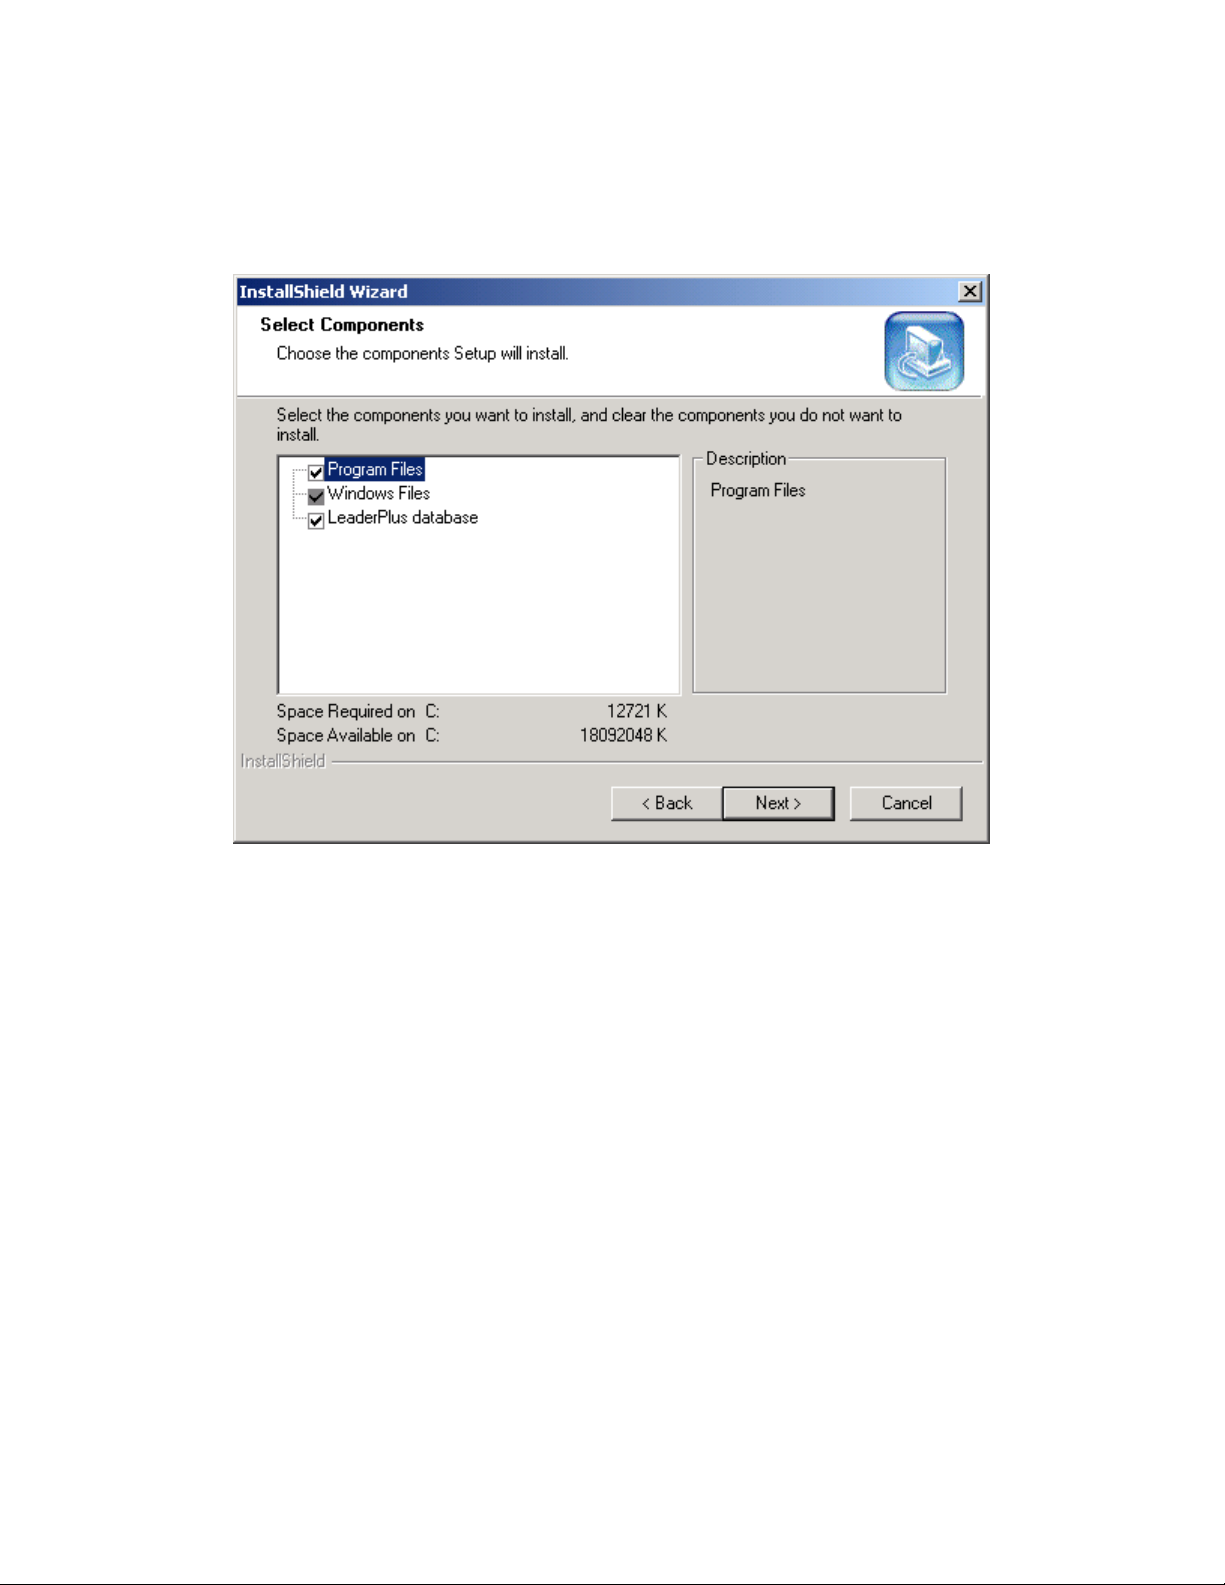
4. Select Components. By default both program files and LeaderPlus
database are checked. Click Next.
Page 19
_______________________________________________________________
2-13
Page 20
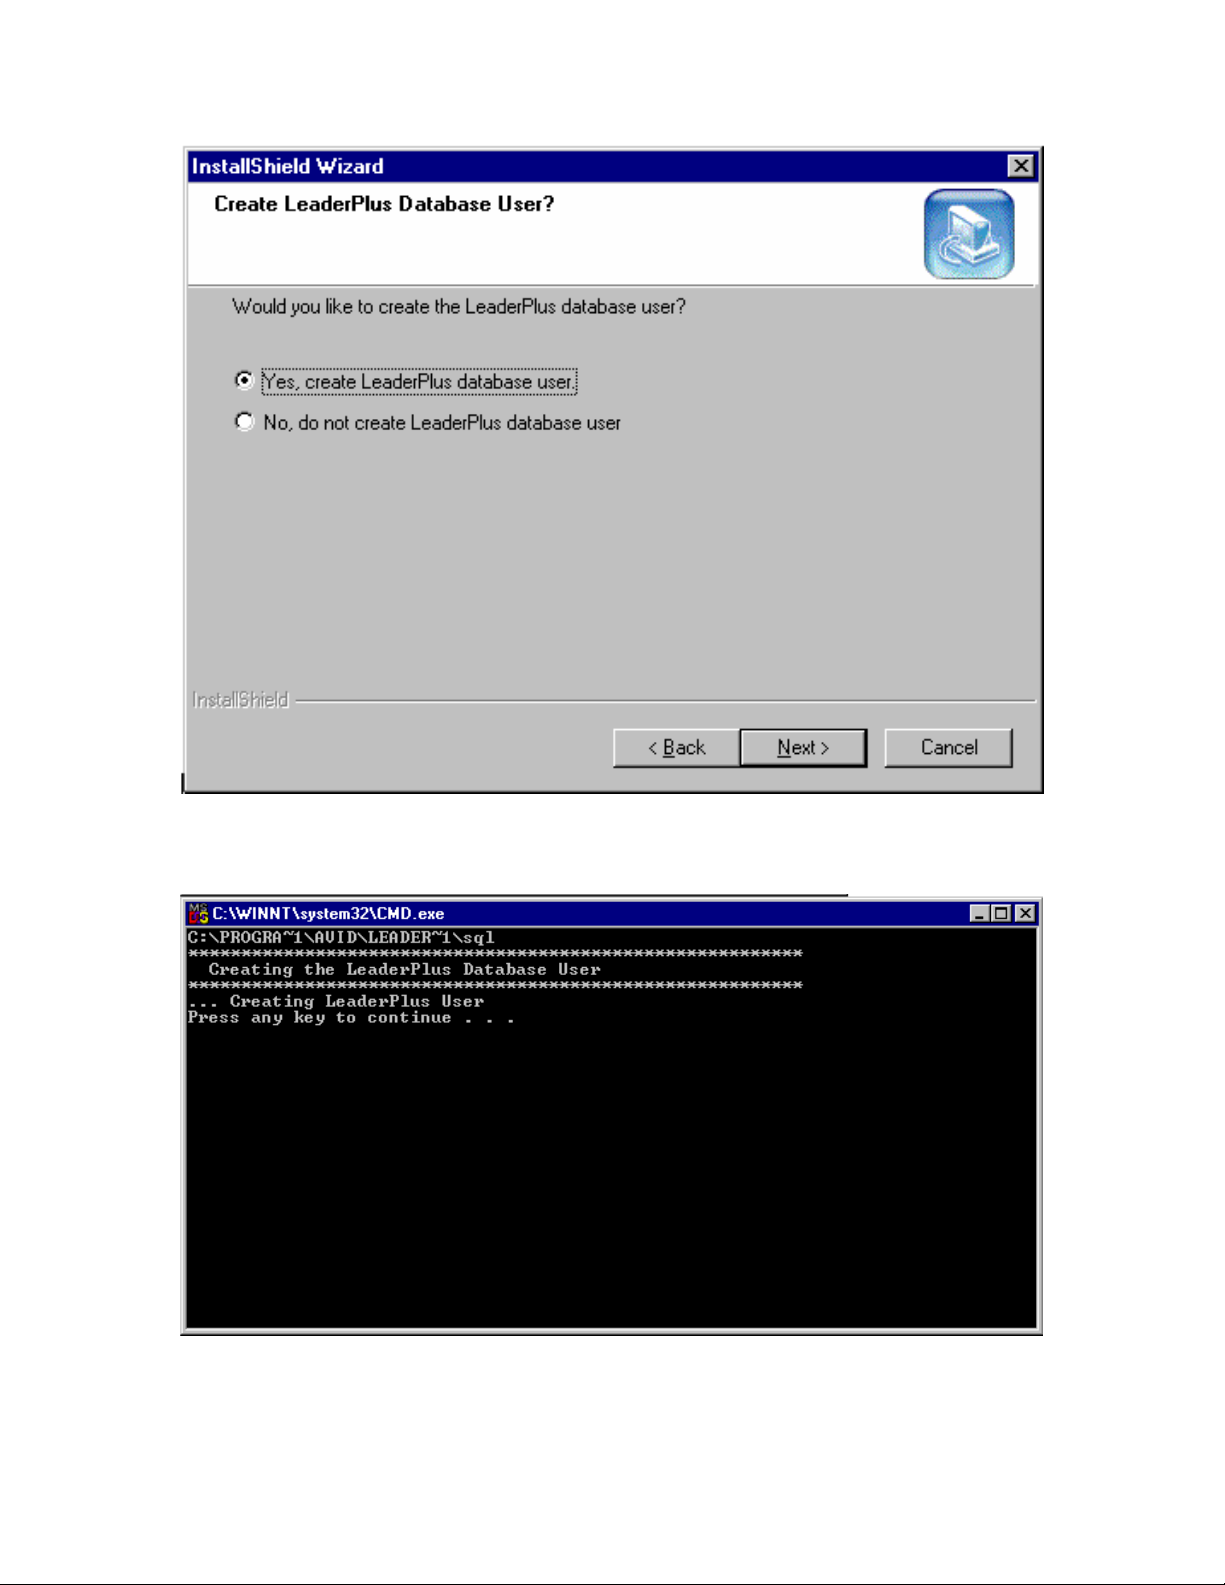
5. LeaderPlus Server Installation: by default, the radio button to create
the LeaderPlus user is checked. Confirm the choice and click Next.
_______________________________________________________________
2-14
Page 21
6. Click Finish and you can commence to install the client, if you are
going to perform wire ingest on this machine.
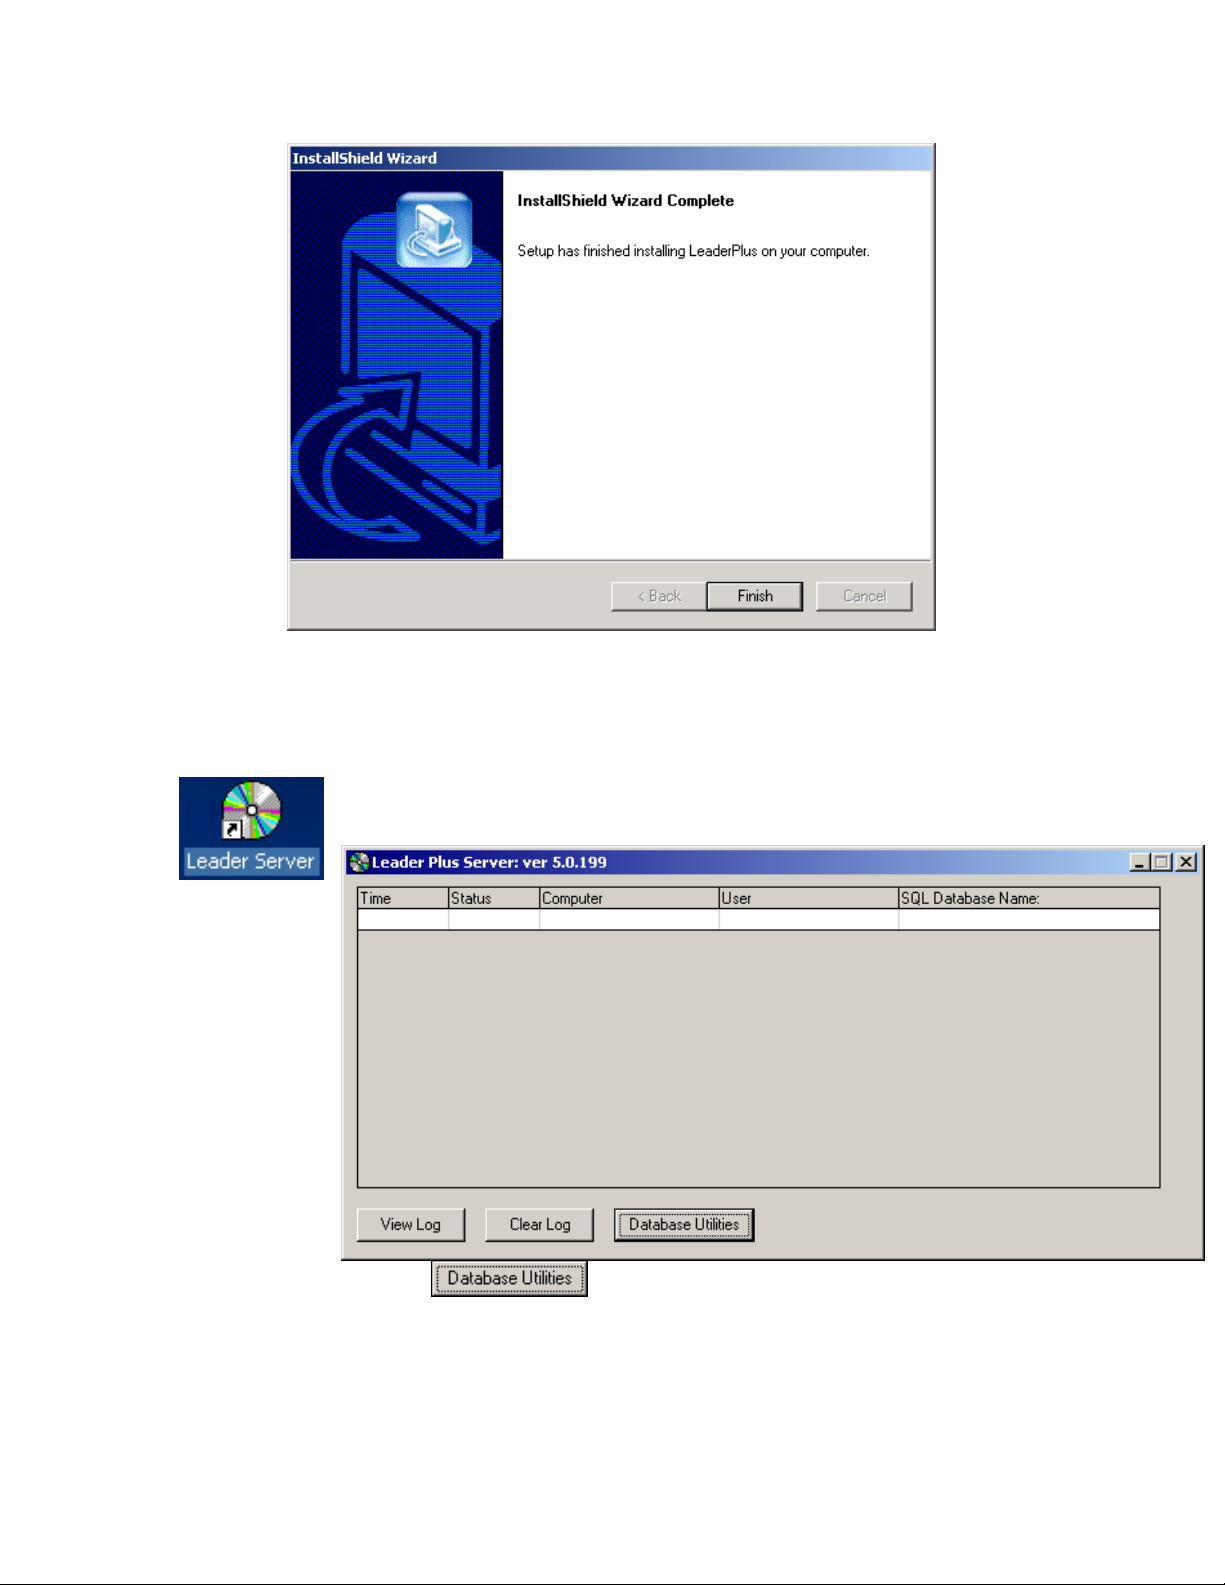
Installation – Part 3 Creating the LeaderPlus Database
LeaderPlus creates the database from the server application. After you
have installed the server, start it by double-clicking on the server icon.
1. Click on
________________________________________________________________
2-15
Page 22
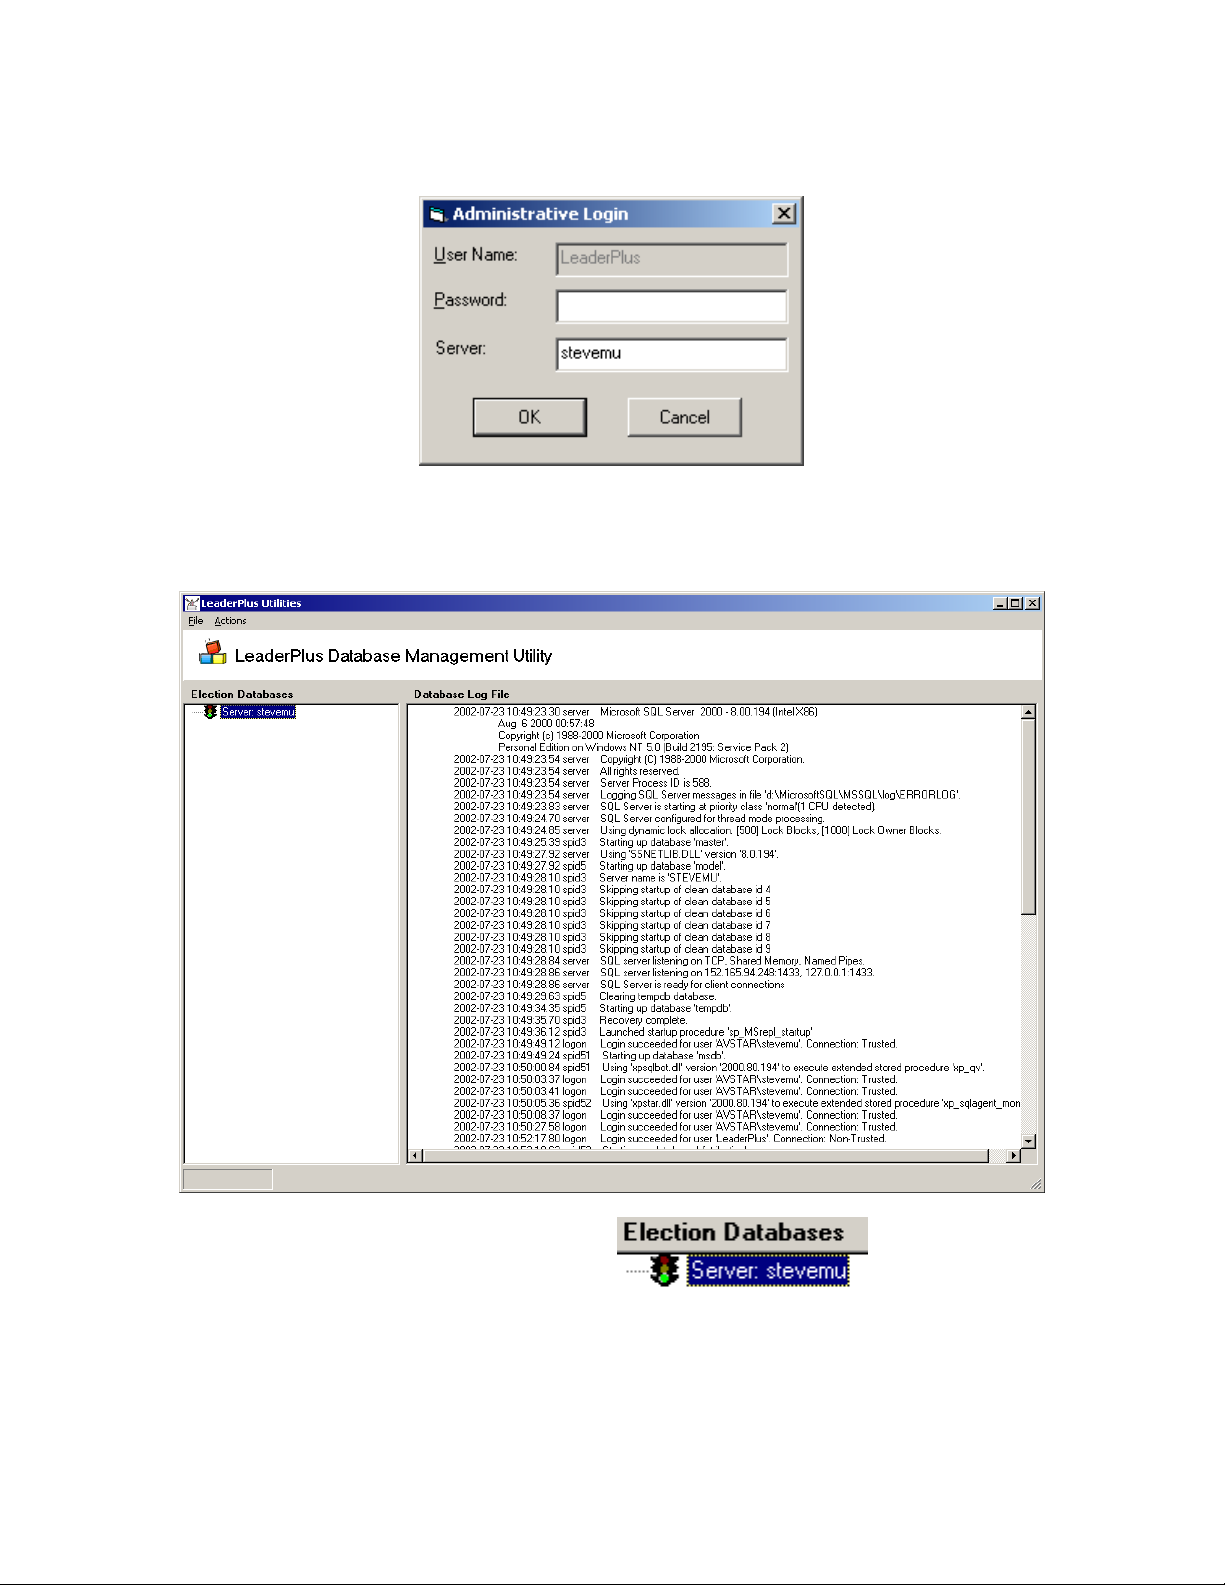
Installation – Part 3 Creating the LeaderPlus Database
2. The database user is LeaderPlus, and that field will be grayed out.
Type in the name of the server, but leave the password blank.
The LeaderPlus user has no password.
3. Perform a right-click on the
database server tree.
top of the
________________________________________________________________
2-16
Page 23

Installation – Part 3 Creating the LeaderPlus Database
s
4. Choose New Dat abase
5. Type in the name of the new database,
*NOTE: make sure there are NO spaces in the name of the database.
and click Create.
________________________________________________________________
2-17
Page 24
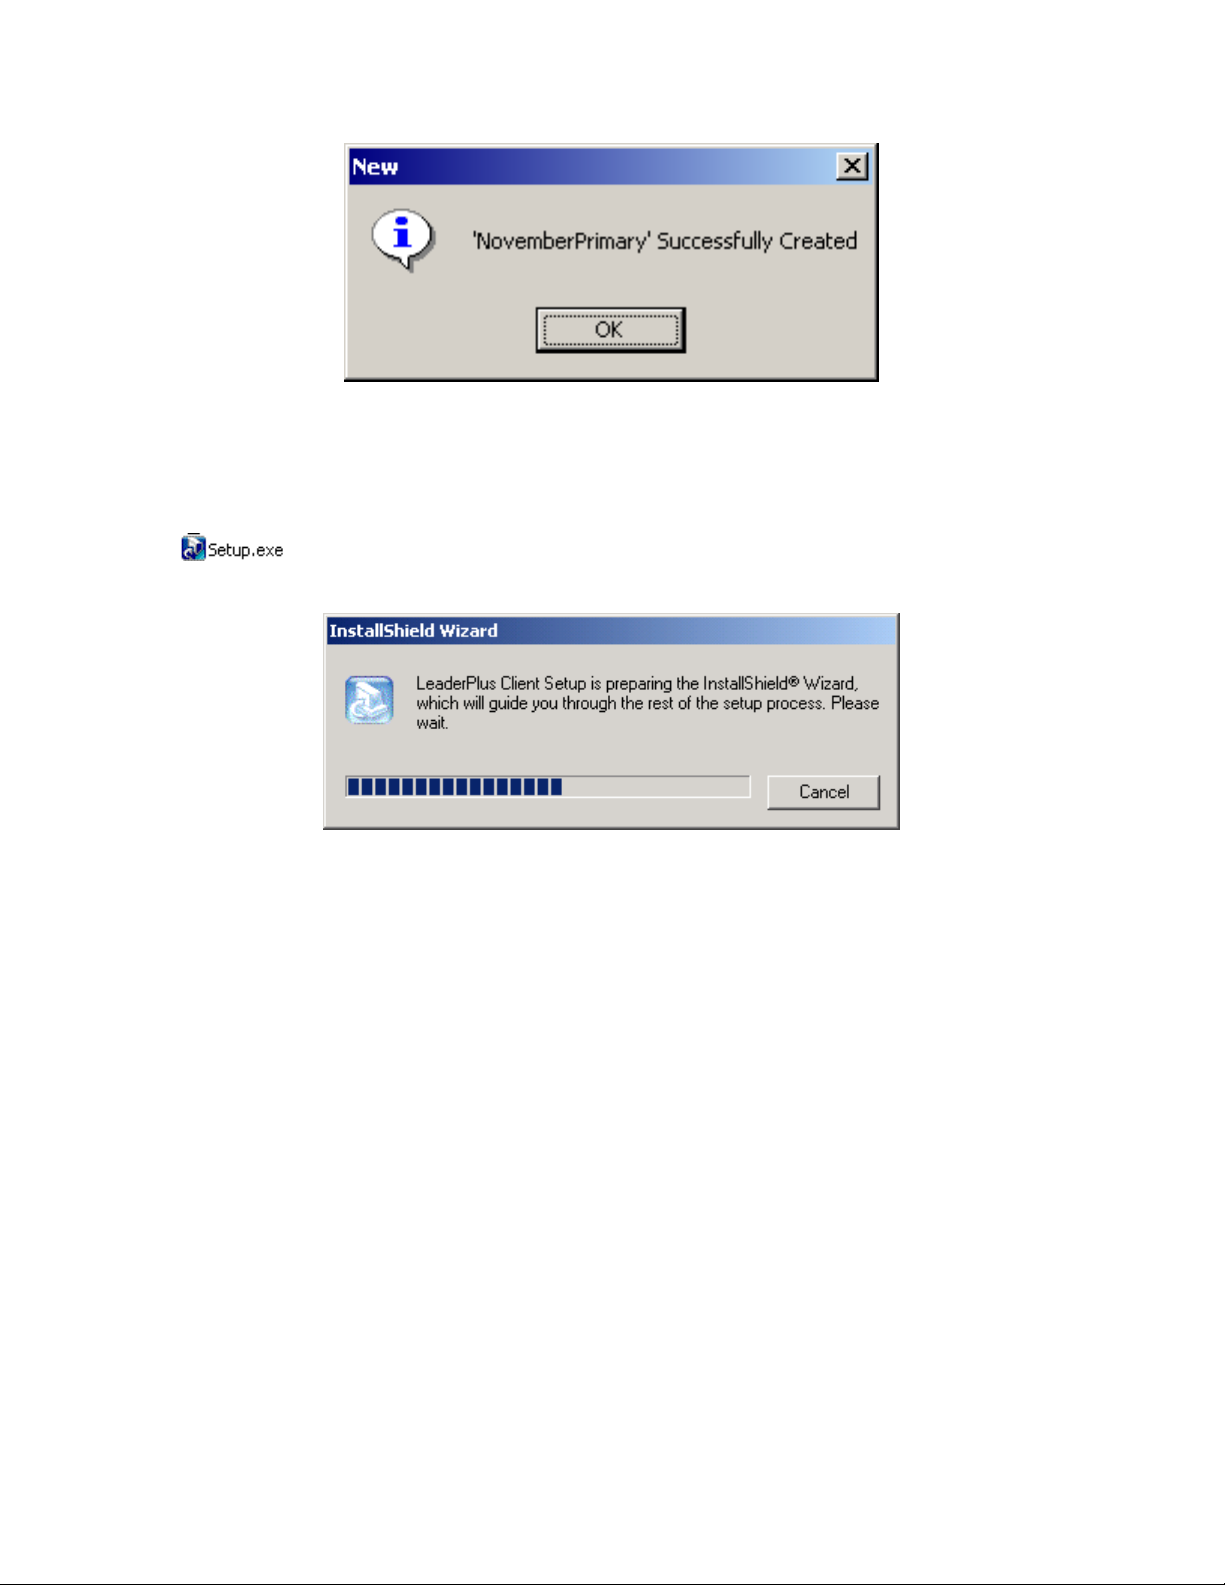
6. The database now exists. You must install the client on the server if
you are going to ingest wires into a COM port on the server.
Installation – Part 4 Installing the LeaderPlus Client Application
1. Open the LeaderPlus 5 folder and then the client folder. Double-click
on the setup.exe setup to launch the LeaderPlus client installation
________________________________________________________________
2-18
Page 25
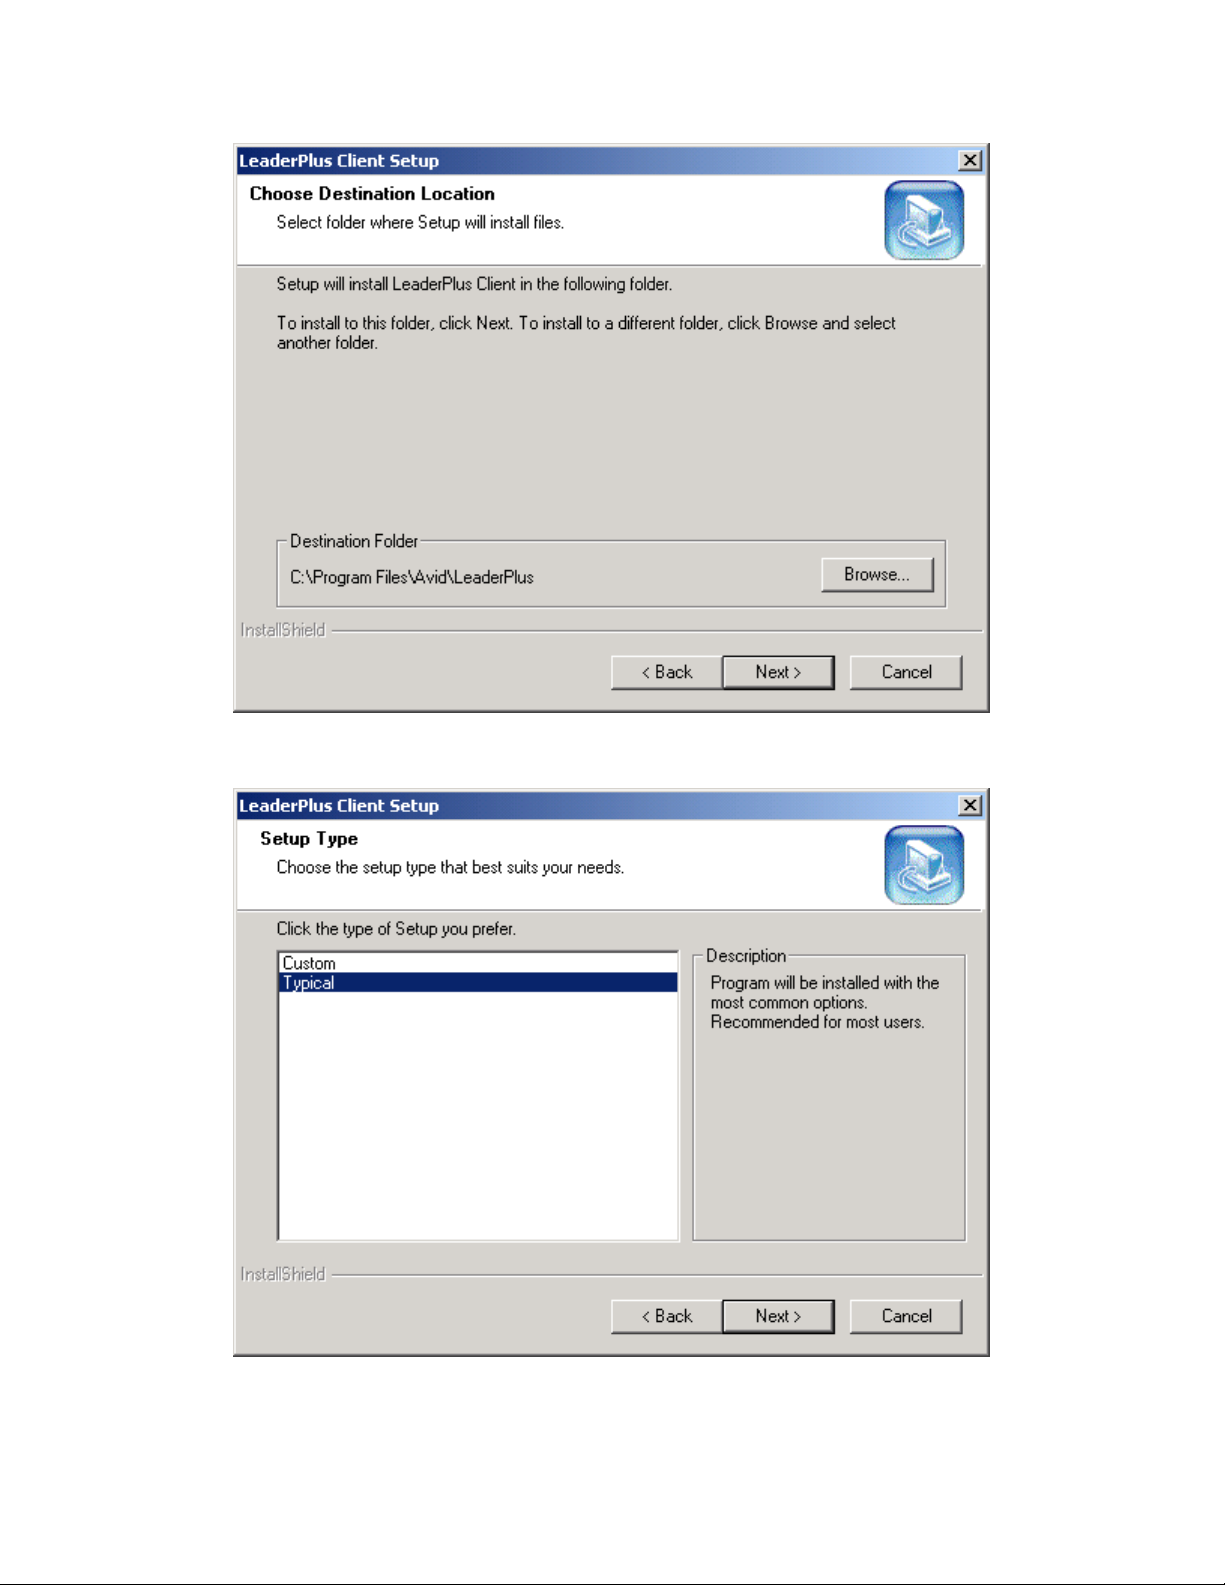
2. Confirm the destination (above) for the LeaderPlus client application to
run from and click Next:
3. Setup Type (above), choose typical, and click Next:
________________________________________________________________
2-19
Page 26
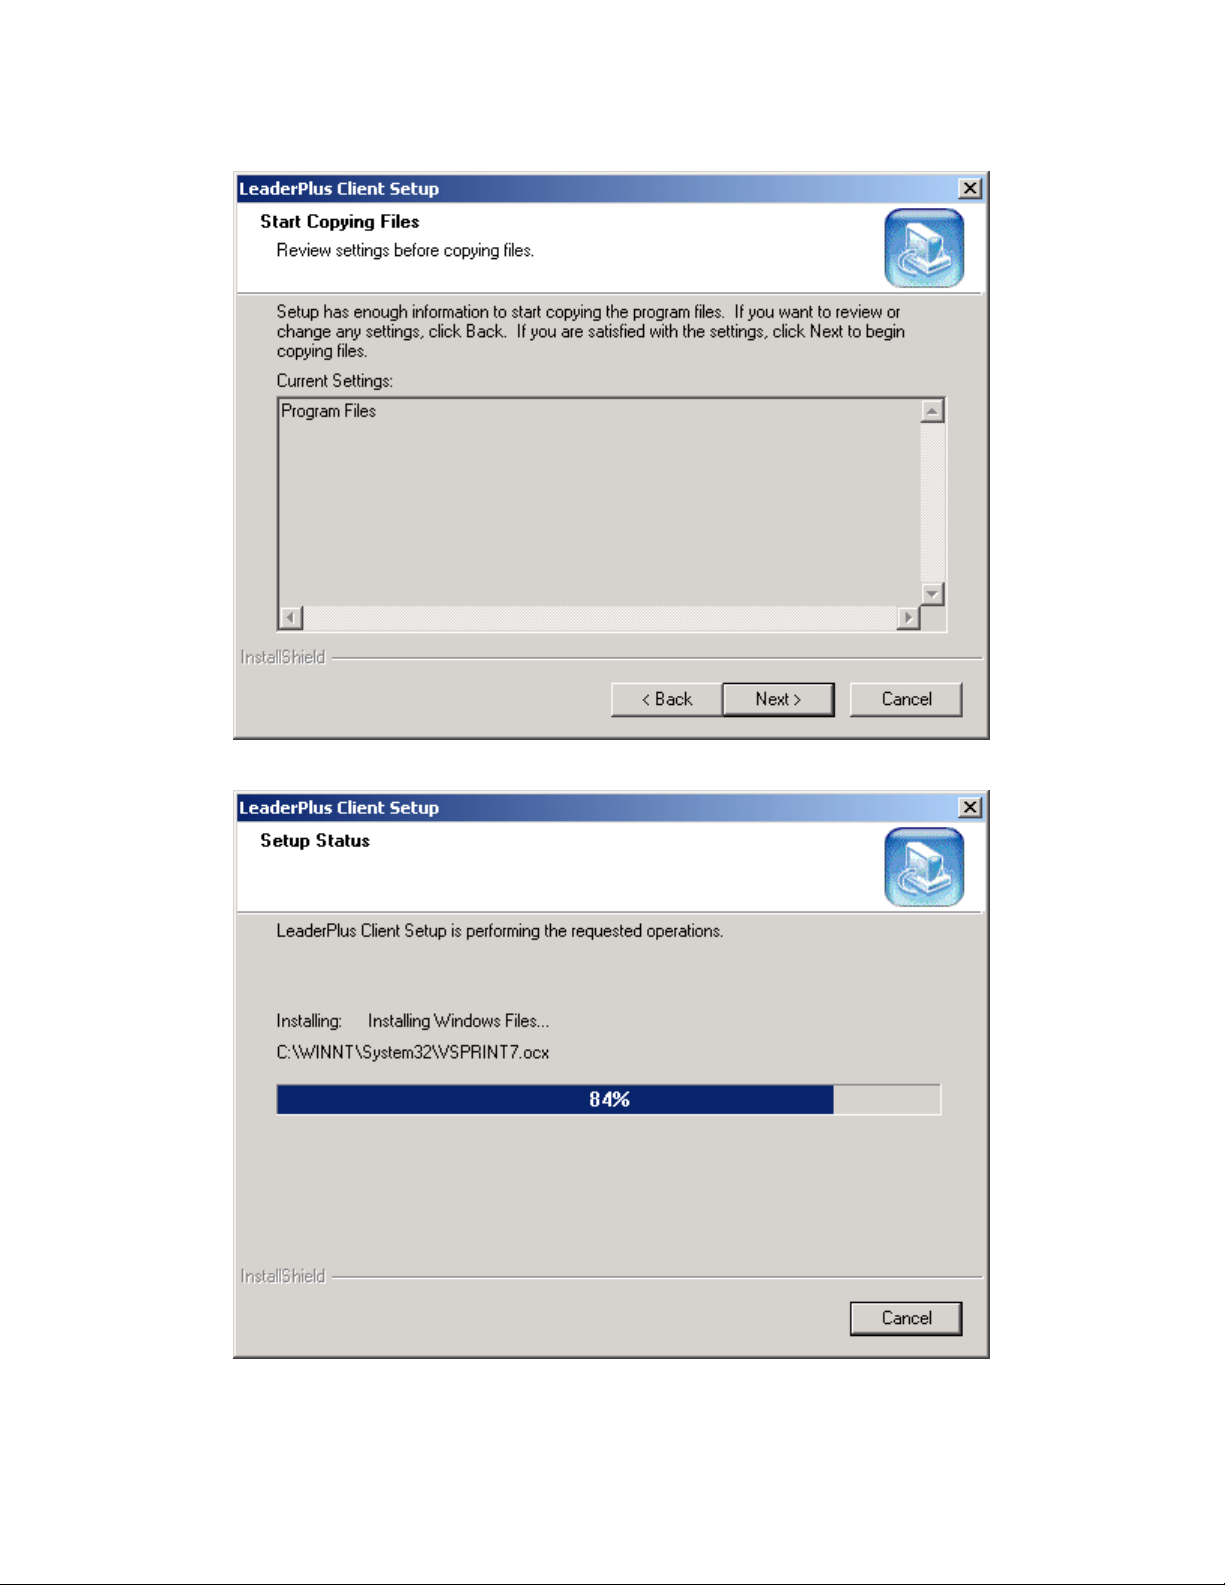
4. Setup will pause on this screen (above) to have you confirm where
LeaderPlus will be installed. If you are satisfied, click Next:
5. Client installation will commence (above), showing you the status
________________________________________________________________
2-20
Page 27
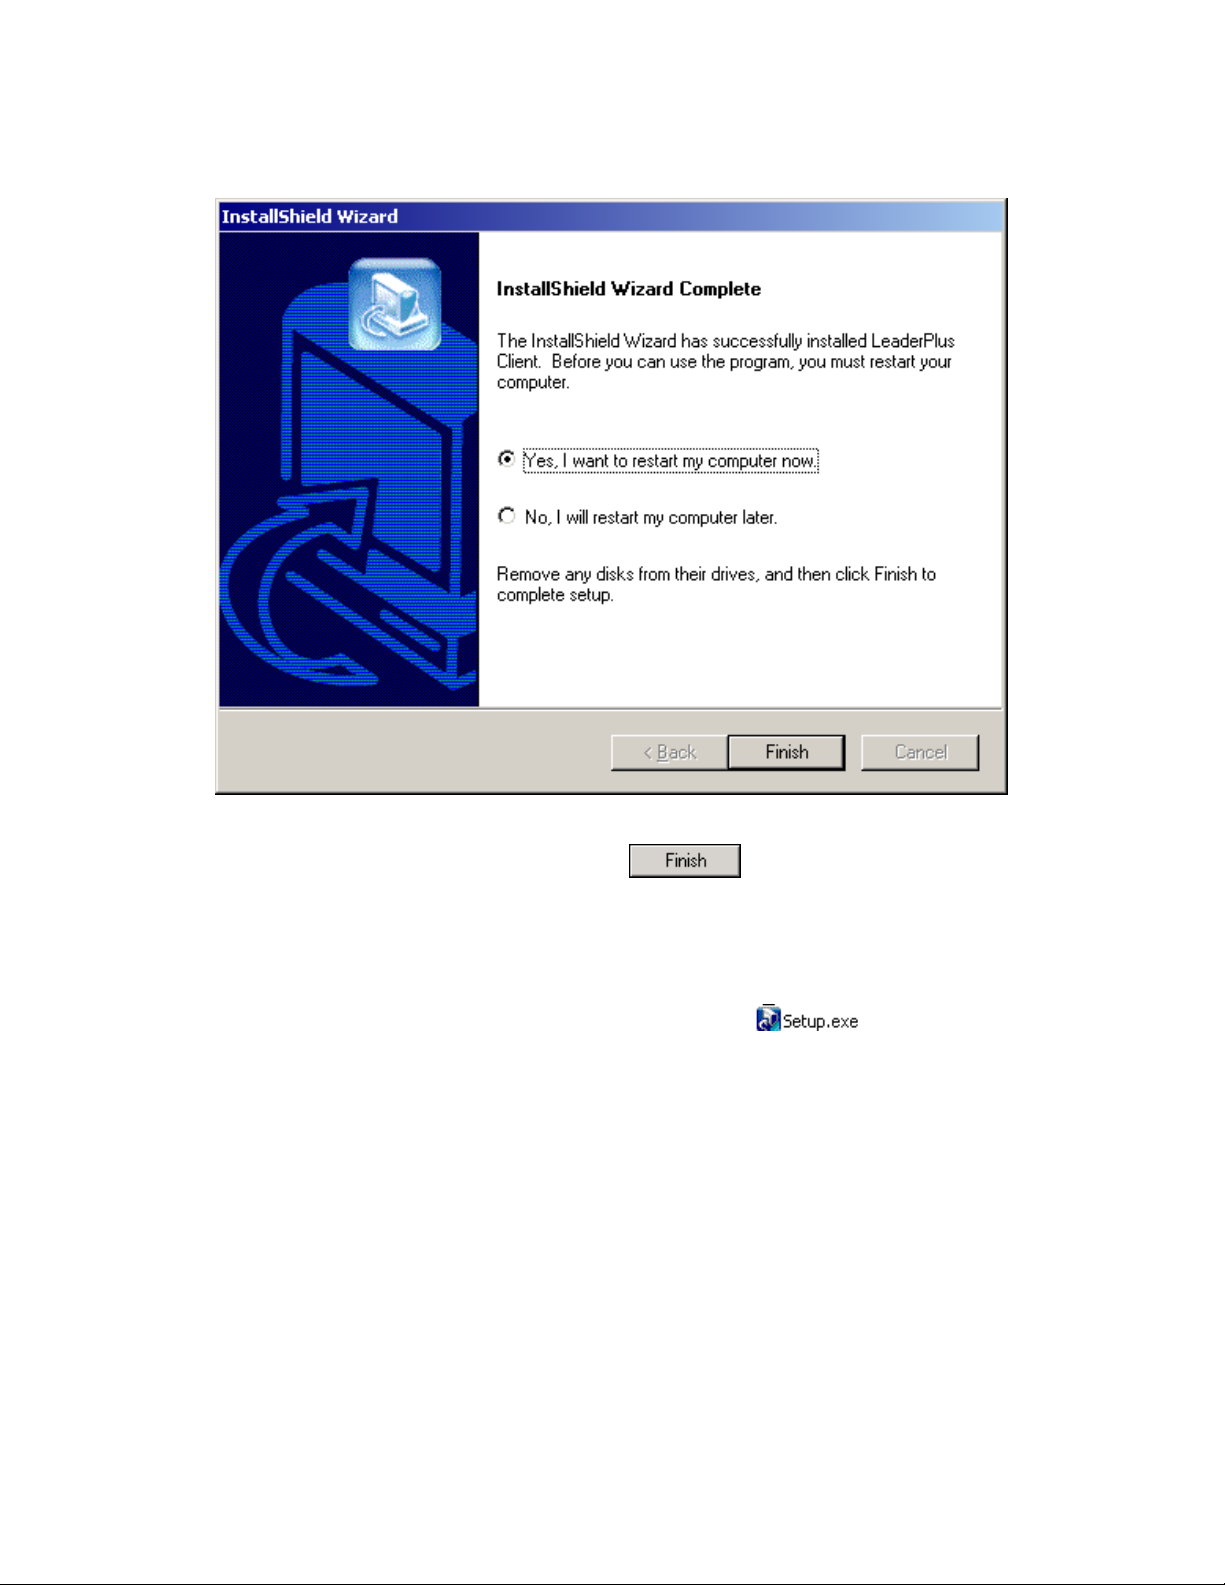
6. When setup is done, the following screen (above) will come up to
announce the fact. Click Finish
Repairing/Upgra ding the Le ade rPlus Application
To upgrade or re-install LeaderPlus click on from the client or
server folder. The process is the same for both server and client, so there
is only one set of instructions written here.
________________________________________________________________
to restart the computer.
2-21
Page 28
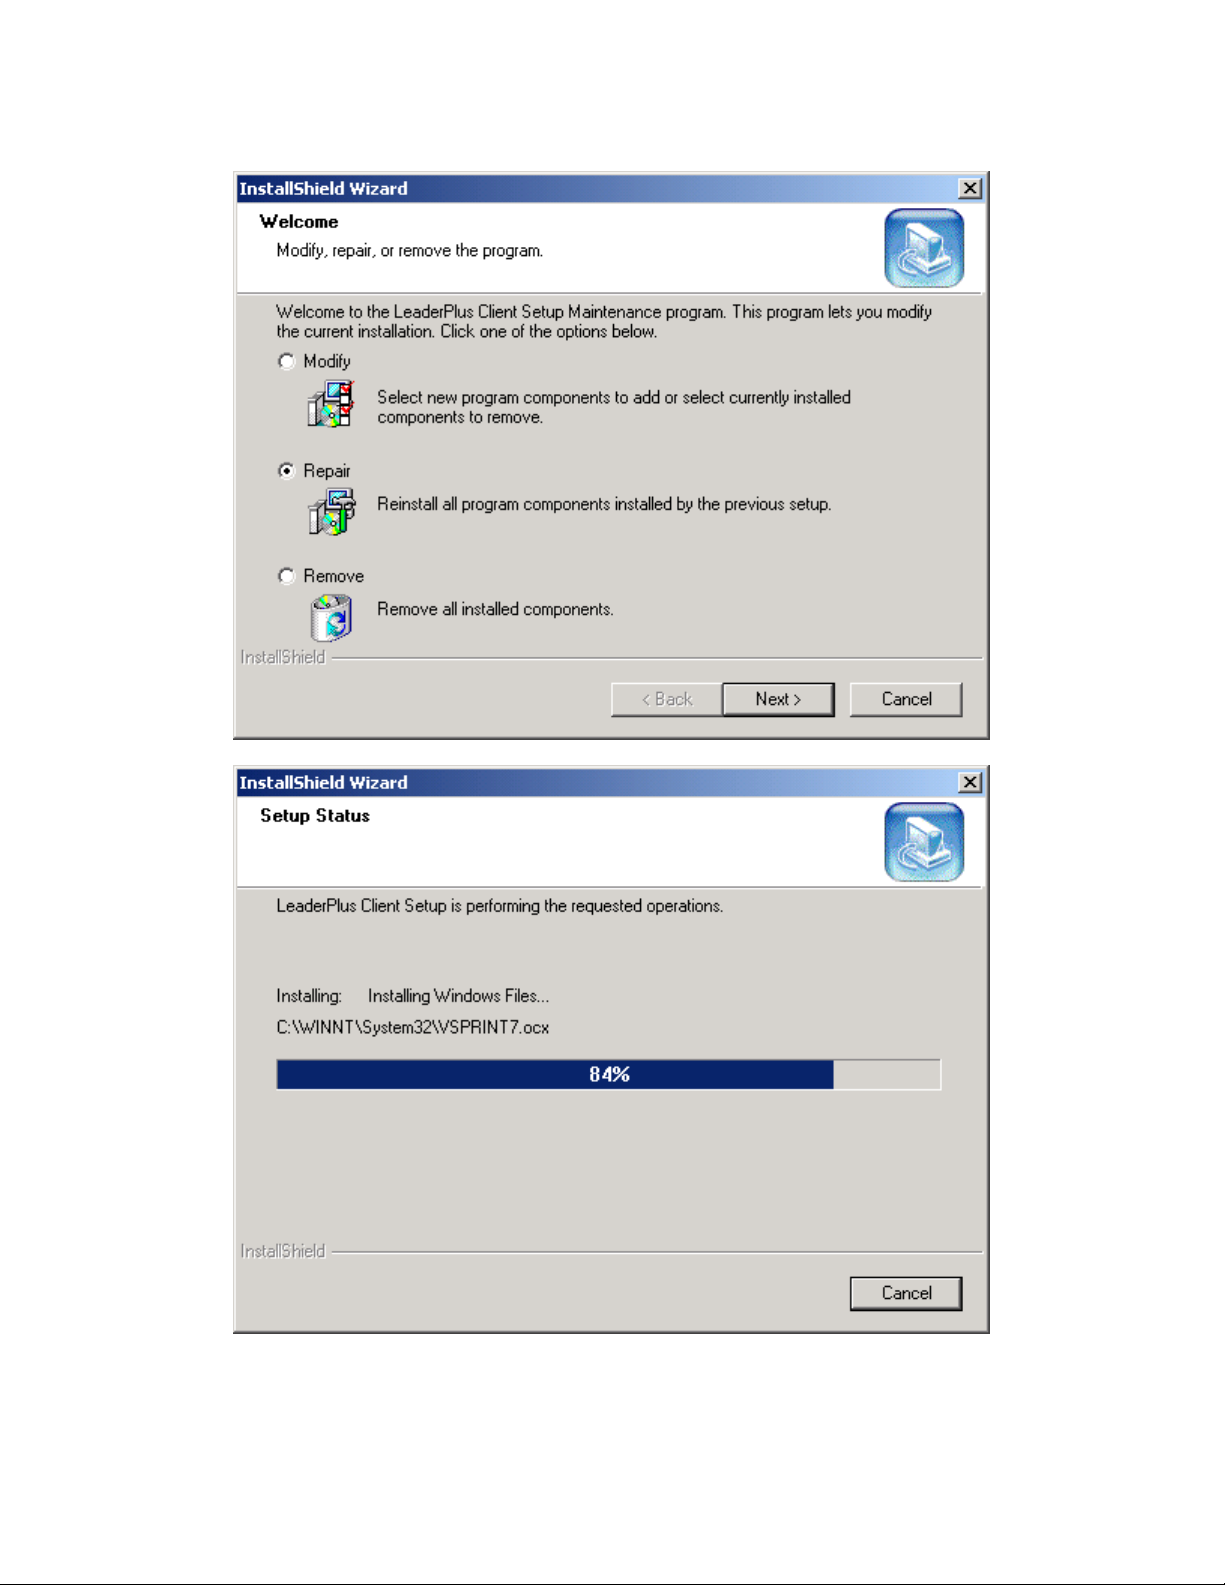
Choose Repair when the InstallShield Wizard starts and click Next.
Setup displays the progress of its repair. Click Finish when prompted.
________________________________________________________________
2-22
Page 29

Starting the LeaderPlus Server Application
On the Server, this icon will start up the server application. Double-click
on the server icon to start the server application
________________________________________________________________
2-23
Page 30
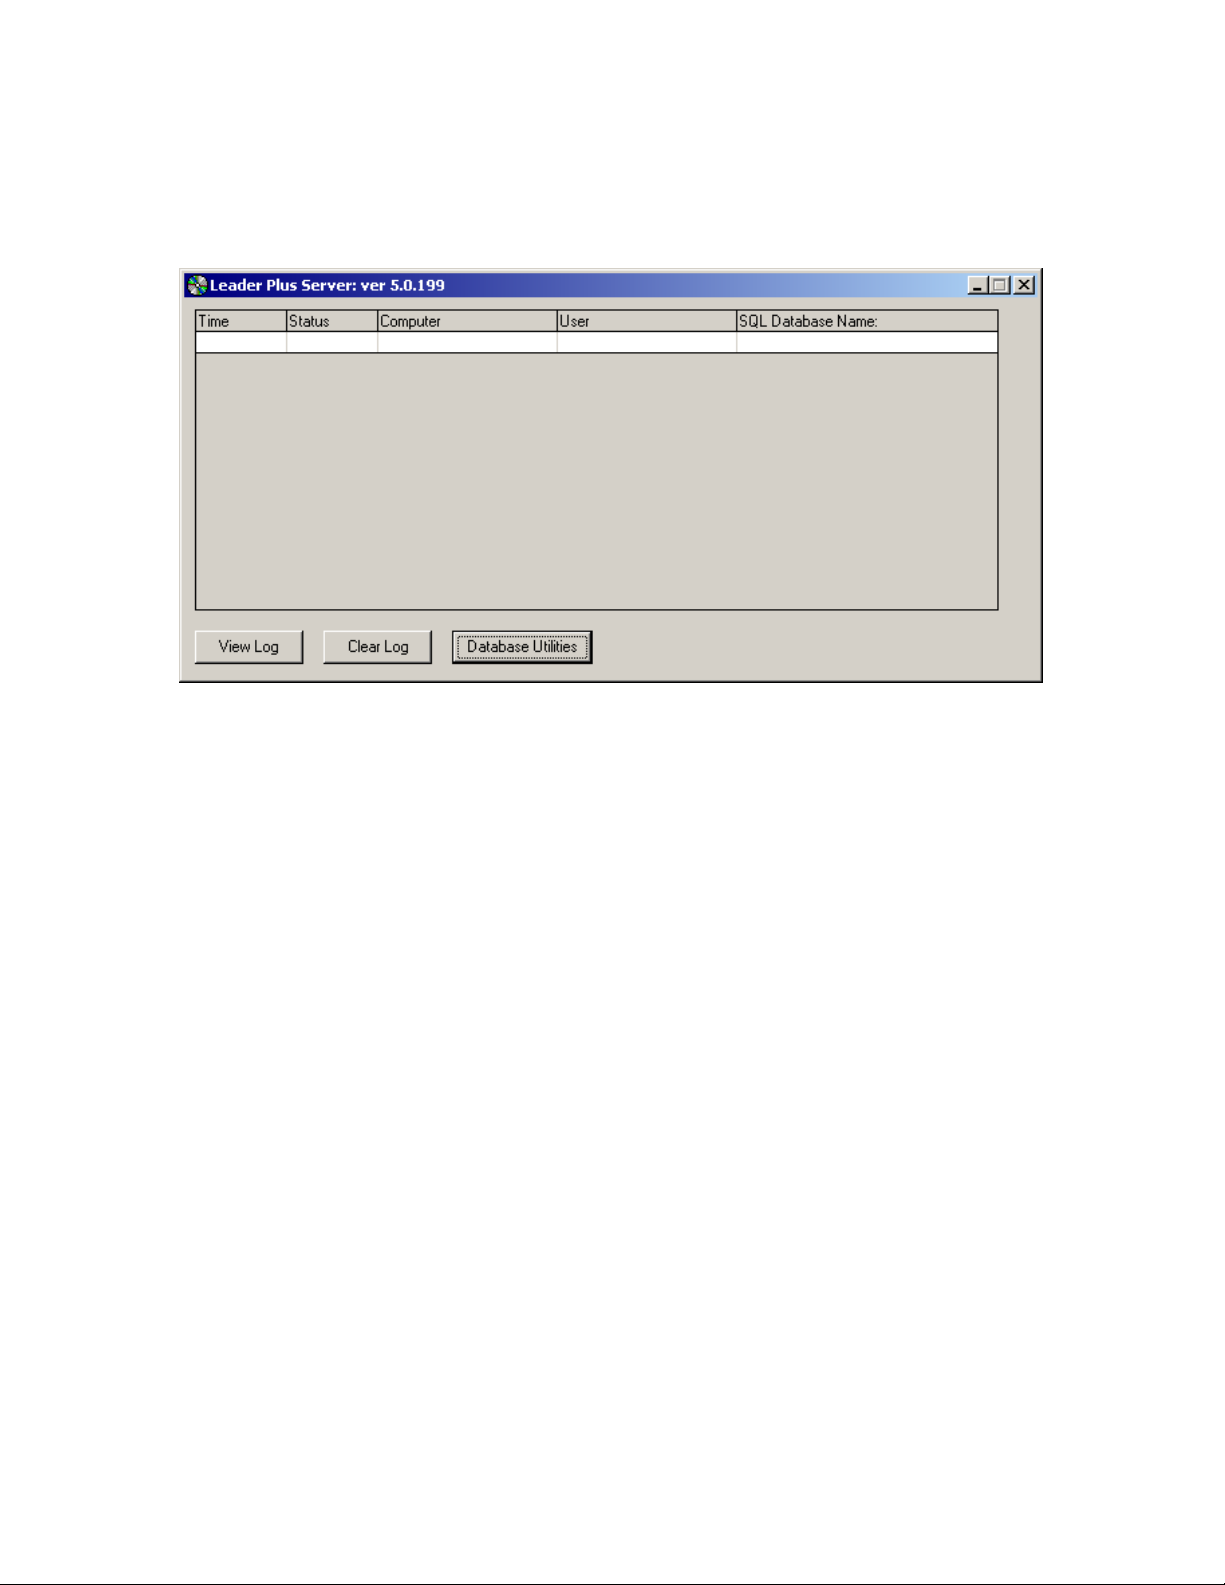
Starting the LeaderPlus Server Application
The server application MUST BE RUNNING FOR THE CLIENTS TO GET
UPDATES. Once the server application is running, you will be able to sign
on with the client.
As users sign on to LeaderPlus, the Server Process window will show the
following:
• The time a workstation connected to the LeaderPlus network
• The status of the workstation’s connection to LeaderPlus. An R in
this column indicates a RAS connection. The letter W in the status
column indicates an Internet or Web connection. No letter
indicates a direct network (LAN) connection.
• The name of each workstation connected to the LeaderPlus
Election System.
• The name of the user who is signed on at the workstation
• The database the user is logged in to an using
________________________________________________________________
2-24
Page 31

View Log
Selecting this button allows you to view a log of activity on the LeaderPlus
system, including workstations
Clear Log
Select the Clear Log button to delete the information in the View Log file
________________________________________________________________
2-25
Page 32

Configuration for Web Inte ra c t ion
LeaderPlus’ Web Interaction feature includes both the airing of race
results to the Internet and the password-protect input of updates to races
in the LeaderPlus database from remote locations via the Internet. When
setting up the system to allow for inputting of updates, it is necessary to
add a registry setting on the Windows NT 4.0 Server or Win2K server
running the LeaderPlus Server Program.
As a precaution, it is always recommended that a copy be made as a
backup prior to any editing of the registry.
Registry Editor
To make the required change to the registry, you need to complete the
following procedures:
1. Open the Registry Editor on the LeaderPlus server. To do this, select
Run from the Start menu and type REGEDIT, and then click OK.
2. Open the HKEY_LOCAL_MACHINE folder and continue opening
folders until you navigate to the following directory:
HKEY_LOCAL_MACHINE\SYSTEM\Current
ControlSet\Services\LanmanServer\Parameters
3. On the right side of the screen, you will see the Value name and the
data.
4. Double-click on the one called NullSessionPipes.
________________________________________________________________
2-26
Page 33

5. The Edit Binary Value dialog box will open as shown below.
6. Edit this binary data, adding the pipe “LEADPLUS” using Hex ASCII
characters. To do this:
a. Start on the last line at the second to last 00, where the
cursor.
b. Enter the following information: (You will not need to type the
spaces between each set of two digits.)
4C 45 41 44 50 4C 55 53
00 00
The pair of zeros (00,00) should slide to the right as you
type, so you will not need to type them. Either way, make sure
it ends with 00,00 on the next line. As you type the word
“LEADPLUS” will appear at the far right.
________________________________________________________________
2-27
Page 34

When you have completed entering the information, the registry
setting should appear as the dialog box shown below.
c. Click OK
7. You can now close the Registry Editor window. The changes
necessary for LeaderPlus to communicate with your Windows-based
Web serv er are com plete.
Page 35

Chapter 3
Sign On/Off
This chapter explains the sign-on process, including
changing passwords and selecting the database to be
used. It should be read by all LeaderPlus users.
This chapter contains:
Sign On 3-2
Sign On Parameters 3-3
Selecting a Database 3-4
Selecting a Server 3-4
Changing Your Password 3-5
Sign Off 3-5
____________________________________________________________
3-2
Page 36

Sign On
The Sign On menu is used to log into the LeaderPlus system, change
your password, select the appropriate database, and define the server.
Af ter selecting the LeaderPlus program from the Desktop, the LeaderPlus
main menu will appear. Select the Sign On/Off button to begin the sign on
process.
Figure 3-1 LeaderPlus Main Menu
______________________________________________________________
3-3
Page 37

Select the Sign On/Off button.
By Default, the previous user’s name will appear in the User Name field
Sign On Parameters
Before completing the sign on process, you must select a database and
define the server. The procedures for both are as follows.
Settings>>
Select the Settings>> button on the Sign On dialog box (See Figure 4-2)
to access the Signon Parameters dialog box.
Figure 4-2 Sign On Parameter
Database User
The MSDE user is the sa (System Administrator), called LeaderPlus.
Do not change this database user.
Database Pwd
The password for the LeaderPlus user remains blank.
______________________________________________________________
3-4
Page 38

SQL Server Name
Type in the name of the server machine where MSDE is running.
Database Name
Enter the database name created in the Database Utilities.
Leader Server Name
Enter the name of the machine where the LeaderPlus server application
is running.
Accessing Leader Database with a RAS (modem) connection
Select this checkbox only when the workstation used to sign on is
connected to the LeaderPlus server through a Remote Access Service
(RAS) modem.
Debugging Enabled
Do not check Debugging Enabled unless instructed to do so by Avid
Customer Service
Click on OK
Enter the user name and password in the appropriate fields. If a System
Administrator did not assign you a password, you will need to enter the
user name in the password field as well.
______________________________________________________________
Figure 3-2 Sign On dialog box
3-5
Page 39

Changing your Password
1. Enter your user name and current password
2. Then type a new password in the New Password field. You must use
the mouse to access this field.
3. Select the Sign on button
4. The New Password dialog box will appear
5. Retype your new password and select OK
Sign Off
From the Main menu, select Sign On/Off button. LeaderPlus will ask for
confirmation. Select OK to confirm sign off.
______________________________________________________________
Page 40

3-6
Page 41

Chapter 4
Wire Management
This chapter explains setting up serial ports for wire
services, monitoring wires, creating and running Wire
Captures, and starting wire processes on election night. It
should be read by engineers, IS managers, and people
involved in pre-election setup. (For the Poll Websites
button functionality and usage, see Chapter 13-Web
Polling)
This chapter contains:
Wire Management 4-2
Serial Port Setup 4-3
Wire Captures 4-7
Creating a Wire Capture 4-8
Loading an existing Capture File 4-9
Editing a Wire Capture 4-10
Running a Wire Capture 4-11
Starting the Wire 4-13
______________________________________________________________
4-2
Page 42

Wire Management
You must have Wire Management privileges in you User Profile (See
Chapter 5) to access the Wire Management section of LeaderPlus.
The Wire Management section is used to set up wires and create wire
tests prior to the election. It is also where the wire processes are started,
a necessary step before the election results begin coming in.
For optimal use, the wires should be connected to the same PC where
the LeaderPlus database is located.
Wire Management is only done on those PCs that have wire services
directly connected to them. From the LeaderPlus main menu select the
Wire Management button. The Wire window will appear as pictured
below.
Running more than two wire processes on any workstation is not
supported.
The Poll Websites Icon will be discussed in Chapter 13-Web Polling, later
in this manual.
______________________________________________________________
4-3
Page 43

Serial Port Setup
Select the Port / Setup>> button to set up COM ports—for wire service
information.
Serial Port Setup can also be accessed from the Air Races / CG
Setup window, to set up the port for the character generator or Web
interaction
______________________________________________________________
4-4
Page 44

Serial Port Setup (Options)
Port
Select the port desired from the drop-down menu. If it is a new port,
select an unused port. It will become defined after entering a description
of the port.
Method
From the drop-down menu, select the specific COM port (1-10) to be
used for the wire service. Do not choose FILE or FTP in this case (they
are reserved for outputting data to the Internet.
Do NOT type in the COM port name…it must be select from the dropdown menu or it will not work.
Description
Enter the description – the name you want this port to be called in the
Port drop-down list, such as AP wire or VNS wire—of the device to which
the port will be connected.
Baud Rate
Enter the baud rate or select one from the drop-down menu. The baud
rate must match the baud rate the wire modem has been set to
Dat a Bits
Enter the data bits required or select from the drop-down menu. The most
common setting for a wire service is 8.
Options include:
8 7 5 4
Parity
Enter the parity or select from the drop-down menu. The most common
parity a wire service uses is NONE.
Options include:
NONE EVEN ODD MARK SPACE
______________________________________________________________
4-5
Page 45

Stop Bits
Enter in the stop bits required or select from the drop-down menu. The
most common setting for a wire service is 1.
Options include:
1 1.5 2
Init Stri ng
If connecting to a dial up wire service, enter the command string of text
required to make the connection. This string will automatically be sent out
when Start Wire is selected.
Commas may be used to specify a 1-2 second pause to the modem
within the telephone number. To specify a pause within the Init String,
enter a tilde (~) for every two-second pause needed. To specify a
carriage return and a line feed, you will need to type \r\n. In the
following example, the init string wraps as a result of the margins in this
manual. In the actual program, the string should not appear on two lines
Example: Texas Secretary of State connection:
Atdt 9,,
15124632975\r\n~~~~~~~~~~~~~~~secretary\r\n~~~~~~~wire\r\n~~~~~
~tek\r\n~~~~~texas1\r\n
The length of the pause needed may vary for specific wire services. T o
determine the length of the pause, you may try the Send Now command
line to send the command separately. See the “Send Now” section in this
chapter.
To set up the modem to receive and send data, make sure that the DTR
and RTS controls are enabled. These are located on the bottom right of
the screen.
Monitor On
The Monitor mode allows you to view wire data as it comes in the port
from the wire service. Select the Monitor ON button to begin the process.
The wire data will appear in the lower window. You must monitor the
wires at the PC the wires are connected to.
This button works as a toggle. Once you have turned on the monitor, the
mode, the button will read Monitor OFF. Select Monitor OFF when you
have finished monitoring the port. The button will read Monitor ON again.
______________________________________________________________
4-6
Page 46

Send Now
This field only appears when the Monitor ON button is selected. Use this
field to enter the various commands needed for another device such as a
character generator or wire service.
This field will allow you to send only certain commands at a time, such as
the phone number, then a password. It is useful when indefinite pauses
are required between commands. Mark the CR and LF if carriage return
and line feed specifications are needed at the end of each string. Press
ENTER to send the command.
Make sure that the DTR and RTS controls are enabled. These are
located on the bottom right of the screen.
Example: Texas Secretary of State connection
atdt 9,,15124632975 (press ENTER)
secretary (press ENTER)
write (press ENTER)
tek (press ENTER)
texas1 (pr ess ENTER)
You can make this an automatic Init String once you have determined the
amount of pause time needed between commands. See the “Init String”
section in this chapter for more information.
When using commands requiring a back slash, each one to be sent will
need to be specified as a pair of \\. If you need to send two back slashes,
you will need to enter four in this field.
Additional Port Specifications
Additional details on Port Setup window are available for specific devices.
However, most of these additional specifications are not needed for
common wire services.
______________________________________________________________
4-7
Page 47

Additional Port Specifications
The available options include: Monitor CTS, Monitor DSR, Monitor
Xon/Xoff, and Send Xon/Xoff. These options may be selected by clicking
on the corresponding check box, or, by pressing the space bar to mark
the box. Additional specifications for DTR and DSR Control options may
be selected from the drop-down menu. Xon/Xoff Character specifications
may be entered by selecting the appropriate number.
For dial up modems/wire services, you may need to set DTR & RTS to
ENABLED.
Save
Select the Save-F9 button to save changes to any option in Wire
Management. This closes the Port Setup window.
Wire Captures
Prior to an election, the wire service will send test results. You will want to
capture these tests into a file so you can use them to create races and
test them. You want to ensure that each race accurately updates by the
wire using these tests. These files are called Capture files.
______________________________________________________________
4-8
Page 48

Creating a Wire Capture
A Capture must be created on the PC the wires are connected to
Several minutes before a test begins (when the wire service is sending
test results for your region), you will need to select the wire port you wish
to capture data from, and give the Capture file a name.
To create a wire capture:
1. Select Wire Management
2. Port/Setup>>
Select from the drop-down menu the COM port that has been
configured for the wire that you want to capture.
3. Capture File>> (creating the .cap file)
a. In the Capture File>> field, type the location and file name for the
capture.
- OR -
b. Select the Capture File>> button and select the location from
Windows dialog box.
Capture File>>
When you are creating a Capture for the first time, type both the
path and name for the new Capture file. You may also select the
Capture File>> button to access a window where you may select
the location for the file. Once you have selected the location, enter
the name of the file in the File Name field and select the Open
button to insert that Capture file into the Capture File>> field.
You may select any name for your capture file. The file will
automatically be given the extension of .cap designating it as a
Capture file.
4. Wire Type
From the Wire Type drop-down menu, select the Wire type. Options
include both ANPA and California Secretary of State (for more on this
wire, see Chapter 15- System Administration)
5. Create Capture
Initializes the port and starts taking in wire data. This data is recorded
in to the capture file. During the test, DO NOT EXIT LeaderPlus on
the PC connected to the wire service
______________________________________________________________
4-9
Page 49

6. View Live Wire
Use View Live Wire to monitor and verify data coming in to the port
7. After the test ends, manually select STOP to stop capturing. If not, the
capture will end automatically when reaching the Max Capture Size
specification.
Stop
Select the Stop button to stop the Capture
Max Capture Size
This field allows you to specify the maximum number of kilobytes
allowed in a capture file. Once a capture file reaches the capacity,
it will automatically turn itself off, to prevent the file from getting
too large (the default is 1000KB)
The file needs a maximum size. DO NOT set this to 0, or it will
create no capture file at all.
Loading an Existing Capture File
Enter the path and name for the file or select on the
Capture File>> button. This reveals a window, allowing access to existing
drives, folders, and files. Highlight the desired file and select the Open
button to insert the Capture name in the field.
______________________________________________________________
4-10
Page 50

Editing a Wire Capture
Once the capture is complete, you may find it necessary to view or edit
the capture file. You can do both from the Wire Management window.
To view a Capture:
• Select the Edit Capture button to open the file into a WordPad
window. This will allow you to view the text and codes within the
Capture.
• In WordPad, the various ASCII codes appear as boxes. To view the
actual ASCII codes you will need to view the file in a DOS editor.
If you wish to actually edit the file, it is recommended that you save a
copy of the file as a text file under a new name first. This will keep the
original Capture intact for future reference just in case someone
accidentally edits or deletes some of the necessary codes in the file
______________________________________________________________
4-11
Page 51

To copy a Capture to a new name:
1. Select Capture File>> button
2. Select the Capture file to copy. Highlight that file.
3. Right-click on that file.
4. Select the Copy option.
5. Select the background of the windows (not a specific file.)
6. Right-click and select the Paste function.
7. Select and highlight the new file.
8. Right-click and select the Rename option.
9. Enter a new name for the file
You are now ready to open and edit the Capture.
To edit a capture
1. Select the Edit Capture button to load the Capture file into a WordPad
window. If the Capture file contains a race with zero results, you may
want to enter your own vote totals so races will update with results
when you run the Capture.
As you enter various vote totals, it is recommended that you make the
results for each race different. Also, LeaderPlus only uses the actual precinct
number and vote count to calculate its own percentages. The percentages
sent by the wire service are ignored, so you do not need to alter those
numbers.
2. When you have completed all editing of the Capture, select the File
drop-down menu, and select the Save Option
Running a Wire Capture
Running a wire capture is a way to run the fictitious wire totals in the .cap
file against your created races in a wire list, to ensure they are updating
accurately. This is not necessary until races are created from the .cap file
in Election Setup-Race Setup (see Chapter 5 Election Setup).
Wire Captures are used only prior to election night for testing purposes.
DO NOT run a capture on election night.
______________________________________________________________
4-12
Page 52

To run a Capture:
1. Capture File>>
Select the Capture File>> button and select the Capture you want
to run.
2. Wire List
From the drop-down menu, select the Wire List (created in
Election Setup-List S etup---more on this in Chapter 5-Election
Setup)
3. Wire Type
From the drop-down menu, select the wire type used in the
Capture.
4. Update Only if Higher
Select the Update Only if Higher option if there are valid precinct
and vote totals in the capture.
If the wire service sent zero precinct and vote totals, when you do
NOT select this option, corresponding Wire Races WILL show an
update, even though the results are zeros. This provides you a
quick and easy way to use Captures that contain zero results, and
still verify that your races receive an update. It is still
recommended that the races be further tested with actual
numbers as results
5. Run Capture
Select the Run Capture button to begin running the Capture
through the races listed in the corresponding Wire list. When it has
entirely read the file it will stop automatically.
Loop Capture
This feature will run the capture continuously, to aid in
seeing updates, until the Stop button is hit
Delay Between Capture Updates
This field is used to specify the number of seconds desired between each
update while the capture is running. By slowing down the Capture, it is
easier to monitor the races as they are updated. As each race updates, it
will appear in the update window in the lower portion of the Wire
Management window.
______________________________________________________________
4-13
Page 53

Starting the Wire
Either on election night, or for live testing, the wire must be started on the
Wire Management screen, on the machine the wire is physically
connected to. Without enabling this, you will receive no vote totals from
this wire service on election night.
To Start the Wire: (Night of the Election)
1. Port/Setup>>
Select from the drop-down menu the COM port that has been
configured for the wire that you want to capture.
2. Capture File>> (if applicable)
Select the Capture File>> button and select the Capture you want
to run. This is only necessary if you want to use the Log Wire and
View Live Wire features (See below)
3. Wire List
From the drop-down menu, select the Wire List (created in
Election Setup-List Setup---more on this in Chapter 5-Election
Setup)
There should ONLY be ONE WIRE LIST per INCOMING WIRE
4. Wir e Type
From the drop-down menu, select the wire type used.
5. Update Only if Higher
This is an important decision prior to the night of the election. If
checked, results will update, only if they have increased since the
last update. This means, that if the wire service has decreased
their percentages, the race in the database will not be updated.
If unchecked, the races will be updated in the database, whether
they are higher totals or not.
6. Log Wire (If Applicable)
To log the contents of incoming data in to a capture file, select this
option prior to starting the wire (this is useful in live testing as it will
create a new capture file, to save this incoming data as well as to
test it live against a database). The capture file will record the
incoming data until the specified Max Capture Size is reached.
Make sure that an acceptable .cap file is specified as it will be
overwritten when Start Wire is hit
Enabling this feature is also necessary to use the View Live Wire
Function (See Step 7)
______________________________________________________________
4-14
Page 54

7. Start Wire
This will initialize the COM port, updating the races within the
specified Wire List, each time the data comes in, logging the data
information in to the specified .cap file (if Log Wire was checked)
View Live Wire
If you want a real time view of the data coming in to the
selected COM port, click the View Live Wire button. This
feature launches Wintail.exe, which scans the capture file.
(This is similar to Monitor On, but can be used in
conjunction with Start Wire. Monitor On cannot be)
Update Window
The lower portion of the Wire Management window displays several fields
showing update information while a capture is running and during election
night. This is how you can monitor the incoming data.
Last Input
This field displays the last data record from the wire service.
The At: field displays at what time it updated
The Ago field displays how long it has been since the last input
Race Last Seen
This field displays the race number that was last seen. This is
typically the last race that has updated; however, if the race is
repeated on the wire service with the same or lower votes, it does
not necessarily update that race in the database. That depends
upon the Update Only if Higher setting in the Wire Management
window.
The At: field displays at what time the last race was seen.
The Ago field displays how long it has been since another race
has been seen.
Title Fields
The titles of the Race Last Seen appear in these fields.
Page 55

Chapter 5
Election Setup
This chapter covers various aspects of election preparation
including Race Setup, List Setup, User Setup, and
Database Management. It should be read by election
coordinators and producers. This chapter contains five
sections (For the Web Polling Setup icon functionalities,
see Chapter 13-Web Polling):
Section A – Race Setup 5-2
Creating a New Race 5-4
Entering Race Setup data 5-5
Wire Races 5-20
Section B – List Setup 5-31
Creating a New List 5-32
Copying a List 5-36
Deleting a List 5-37
Section C – User Profile Setup 5-38
Creating a New User 5-38
Copying a User 5-42
Deleting a User 5-43
Section D – Race Setup Options 5-44
Section E – Delete from Database 5-45
______________________________________________________________
Page 56

5-2
Election Setup is used to organize elements for an upcoming election.
Selecting the Election Setup button will open a window, which contains
six different set-up areas used to define race, access privileges for users,
web polling setup (covered in Chapter 13), etc.
Section A – Race Setup
Race Setup is required for every election. It is used to enter specific
information pertaining to individual races. It is highly recommended that
the election coordinator (or other designated person) set up the races well
in advance of the election.
Race Setup includes:
• Race number
• Race titles
• Number of precincts reporting to the race
• Candidate names and information
• Wire code information for automatic updating by a wire service
• Specific parameters for the race (EX: number of winners, maximum
votes possible)
• Variable CG options
• Talent notes about the race and/or specific candidates
______________________________________________________________
Page 57

5-3
To begin entering information for a race, select the Race Setup
button. A window will appear with the cursor positioned in the
Race Number field.
Before entering Race information, it is best to know the on-air
graphic look for both CG and web output pages. It is the information
entered in Race Setup that is pulled from the database and pushed
to these devices.
______________________________________________________________
Page 58

5-4
Creating a New Race
LeaderPlus is capable of storing an unlimited number of races in its
database. Race numbers do not, however, exist until a race is created
and assigned a number by the election coordinator.
To create a new race at a specific number:
1. Select the New button. A Create New Race dialog box will appear.
2. In the Race # field, enter race number desired. Press ENTER twice or
click Race # button to create the race.
3. Once a race number has been selected, you will return to the race
Setup window. The race number will appear in the Race Number field.
To create a new race at the next available number from a specific
location:
1. Select the New button. A sub menu will appear.
2. In the Empty Race # Above field, enter the number from which
LeaderPlus should locate the next empty race. Press ENTER or click
Empty Race # Above button.
3. LeaderPlus will locate the next available race number at or above the
number specified.
4. Press ESC or select Cancel to exit the sub menu without selecting a
new race number. Once a race number has been selected, you will
return to the Race Setup window. The race number will appear in the
Race Number field.
______________________________________________________________
Page 59

Recalling an Existing Race
To recall a race that has already been created, enter the race number in
the Race Number field, and press ENTER. Or, you may use the pi c k race
5-5
button next to the Race Number field
from the drop down menu. The race will appear in the Race Setup
window.
Copying and Deleting a Race will be covered following the explanation of
the other elements from the Race Setup window in this chapter.
, and select the race desired
Entering Data into the Race Setup Window
Virtually all windows in the LeaderPlus system are made up of fields or
check boxes. The TAB key may be used to move the cursor from field to
field. OR the mouse may be used to select a specific field,
Keystrokes Available:
ESC or ALT/F4 will close the Set up Window and return you to the
Election Setup window
ENTER of F2 allow you to edit the contents of a cell in the
Candidate table
Once the race number has been selected, the remaining elements of the
Race Setup window need to be completed.
Information on the Race Setup Window
When entering new information in the Race Setup window, the
information is saved automatically, by navigating to a different Race
Number (either by typing it in the Race Number field and hitting ENTER
or by using the pick race button, or using the F4 Previous or F5 Next
Race buttons or keystrokes) or by exiting the Race Setup window.
Race Title 1-3
Titles 1-3 are used to identify the specific race throughout the program on
Producer windows, Talent windows, Character Generator displays, etc.
Enter titles that will adequately describe a race. You may use one or more
of these fields are needed.
Since these fields are usually sent to the character generator when airing
the race, enter the text into these fields as you wish them to appear on
the CG, using UPPER or lower case as necessary. Each CG display may
be programmed to use one or more of these fields.
______________________________________________________________
Page 60

5-6
Race is Airable
This feature is used as a flag, to designate which races should go to air
(web, cg) and which races should not go to air. If checked, you can air
this race into a list without warning (such as the top race in a tree). If
unchecked (lower races in a tree), you will receive warning in List Setup.
Precincts
Enter the total number of precincts that will report to this race. The
number of precincts allowed per race is unlimited.
If this is a wire race (a race that will be updated by a wire service) the
number of precincts will be filled in automatically when using the Match
with Capture feature. See “Wire Race ” section of this chapter for detail
Wire ID
This is the specific code used by a wire service to identify the race. This is
filled in automatically when matching a race to a wire capture. This field
will be discussed in further detail in the Wire Race section of this chapter.
Wire Sub ID
This is another specific code used by a wire service to further identify a
race when it is included with several other races using the same Wire ID
(such as race summaries). This is filled in automatically when matching a
race to a wire capture. This field will be discussed in further detail in the
“Wire Race” section of this chapter.
Although you may type in these fields, it is highly recommended that the
MATCH WITH CAPTURE function be used to complete the wire Ids. This
function will automatically pull out the correct Ids from sample wire data
on the system.
Candidate Information
The Candidate grid allows you to enter specific information for each
candidate in the race. You may enter up to 350 candidates in a race.
______________________________________________________________
Page 61

Candidate Information (cont.)
To create the first candidate, using the mouse, click on the <click for
new> statement in the Last Name field. Within the Candidate grid, you
may press TAB to move from field to field or cursor up or down within a
column to remain within a specific field.
You may resize any of the columns in the Candidate grid by using the
mouse within the header. This may be helpful while you are entering
information. Select the column desired, Position the mouse on the divider
line between the column and the one next to it. Press and hold the left
mouse button, dragging the column size to the width desired. Releasing
the mouse button will resize the column. These changes are NOT saved.
Column widths will rest to the defaults when you re-enter Race Setup.
Entering Candidate Data
There are several fields, also known as columns that may be used to fill in
candidate data. The mouse may be used to position a cursor in a field or,
the tab or arrow keys can be used from one field to another.
5-7
Logo
This field is used to specify the character on the CG where the
candidate’s logo is stored. The logo is typically a picture of the
candidate. This character may be a letter, number, or punctuation
mark, and it is case sensitive. Contact your CG operator to
determine the CG character used for each candidate.
If it is stored as a keycap in conjunction with the ALT key, that is
entered in the CG script (all candidates in the race would need to
be stored at ALT and a keystroke in order for it to work)
______________________________________________________________
Page 62

5-8
First Name
Enter the first name of the candidate. This field may be used on a
CG display. Use upper/lower case as needed.
Last Name
Enter the last name of the candidate (use upper/lower case as
needed). This is a mandatory field. If yes or no, or for or against,
are entered in to this field, the system automatically flags the race
as a proposition type race.
Initial
Enter the middle initial of the candidate, if desired. This field may
be used in a CG display. Use upper/lower case as needed.
If a race has been copied, and candidate names already appear in the
grid, DO NOT type over existing names in these fields
name and its corresponding elements as they exist in the database (you
will receive a warning). The candidate should be deleted, and then new
information may be entered.
Party
Enter the necessary characters to designate the candidate’s party
affiliation in this field. These characters will be used as a party
reference when setting up the CG display. This is explained in
further detail in Chapter 11 – Air Races / CG Setup. It may also be
used to sort the candidates by party if the Sort by Party option is
selected.
Incumbent
Use this field to flag the incumbent candidate. To select
(or un-select), you may press the SPACE BAR or use the mouse
to place a check mark in the Incumbent box. This information is
displayed on various windows in LeaderPlus. It may also be
displayed on the CG, if desired.
Wire Name
This field is required only if the race will be updated by a wire
service. The candidate’s wire name must match the name sent by
the wire service. This can be filled in automatically when matching
a race to a wire capture. See Match with Capture later in this
chapter for more information
This field should never be altered manually if the race is to be
updated by a wire.
. This will alter the
______________________________________________________________
Page 63

Talent Notes
These notes are specific details about the candidate. The notes
appear on the Talent Screen, and are used by anchors for
reference during the election coverage. The amount of text seen is
limited by the size of the talent window. Because of this, it may be
easier to enter one or all of the talent notes directly on the Talent
Screen, to ensure the necessary text will fit on the window. See
Chapter 8 – Talent Screen for further details.
>> (Candidate Pick List)
This option drops open a pick list of candidates already in the
database. Using the mouse, select the candidate desired and
single click to insert into the race (this happens only when clicking
on a different field in race setup). Do not type any information on
the candidate line prior to choosing the candidate with the pick list.
The information in the database contains all the information that
corresponds with that candidate.
5-9
If the candidate has already been entered into another race, and
therefore, already exists in the LeaderPlus database, it is important to use
this pick list. If you type in that candidate’s name again manually, you will
have duplicate candidate names in the database. This is allowed when
there are two different candidates with the same name; however, you do
not want duplicate entries for the dame candidate, if possible.
Cother 1 – 3
These options allow additional information pertaining to the
candidate to be sent to the character generator. These fields can
be used for additional candidate logos, backgrounds, etc. Each
field can contain a single character or several characters as
needed. Contact your CG operator to determine the character
placements needed.
Re-ordering Candidates in a Race
To re-order a candidate in the candidate table:
1. Click on any field on the candidate in the candidate table
2. Hold down the <CTRL> key on the keyboard and drag-drop
with the mouse to the desired destination of the candidate
3. As you drag, a gray bar appears. When you let go of the
cursor, the candidate will appear directly above the gray bar.
______________________________________________________________
Page 64

5-10
Deleting a Candidate from a Race
Should you need to delete a candidate from a race, DO NOT click on the
Delete button at the top of the Race Setup window, because, that button
is used to delete the entire race
Instead, you need to first, use the mouse to click on any field in the
candidate table of the candidate to be deleted. Then, press the
<DELETE> key on the keyboard to remove the candidate (You will be
prompted for a confirmation). The candidate is now removed from this
race only This does NOT remove the candidate from the database.
General Race Information
The section below the candidate grid contains several general race
questions. You will not be able to TAB directly from the candidate grid to
the General Race Information section. You must click on the Number of
Winners field to begin this section.
Number of Winners
Enter the number of possible winners for this race. Most races will have
only one winner; however some races may have several winners, such as
a School Board race.
The Number of Winners field also has an effect on the Air Races window.
It determines the number of Leader pages a race may have. If the Only
Air Leader Pages option is selected on the Air Races window, LeaderPlus
will display enough pages of the race to include the number of possible
winners. Example: Four winners are possible in a race, and a 3 candidate
display is being used to air a race on the CG. If the Only Air Leader
Pages option is selected in the Air Races window, this race will show the
first 2 pages (or the top 6 candidates) on the CG. This feature discussed
in Chapter 12 – Air Races / CG Setup.
Win Fl ag – Prec % +Lead%
Win Flag is an automatic winner flag option, which allows you to set up a
race so LeaderPlus will select the winners automatically. The criteria
LeaderPlus users to determine this is based on the percentage of
precincts reporting and the percent of votes a candidate is leading by at
that time.
This feature is NOT recommended on races that have more than one
possible winner. Please test the scenario to ensure it is generating the
desired result.
_______________________________________________________________
Page 65

5-11
If you do not fill in these fields, the winners must be selected manually
from the Race Results window (see Chapter 6), or by using the Wire
Winner Flag feature (discussed later in this chapter).
• In the Prec.% field, enter the minimum number of precincts that
must be reporting before a winner may be determined.
• In the +Lead% field, enter the sum of minimum number of
precincts required plus the minimum lead percentage a candidate
must have at that time, before being flagged as a winner.
For example, perhaps you do not want a winner to be automatically
selected until 100% of the precincts are reporting and the leading
candidate has at least a 1% lead over the next closest candidate. The
win Flag fields would be set up as follows.
Win Flag – Prec% 100 +Lead% 101
Using various combinations in these two fields allows for greater flexibility
to automatically select a winner. Once the minimum number of precincts
reporting is reached, and any combination of precinct and lead
percentages that are equal to or greater than the +Lead% figure is
achieved, that candidate would be declared a winner.
For example, if you would like a winner automatically flagged after at
least 95% of the precincts are reporting, when the leading candidate
has a 10% variable lead over the next closest candidate from that
point on, the Win Flag field would be set up as follows:
Win Flag – Prec% 95 +Lead% 105
LeaderPlus may call the winner when any combination of the +Lead%
SUM is achieved. As depicted in the above example, any of the following
possibilities would cause LeaderPlus to declare a winner.
95% Precincts reporting with candidate lead at least 10% = 105
96% Precincts reporting with candidate lead at least 9% = 105
97% Precincts reporting with candidate lead at least 8% = 105
98% Precincts reporting with candidate lead at least 7% = 105
99% Precincts reporting with candidate lead at least 6% = 105
100% Precincts reporting with candidate lead at least 5% = 105
_______________________________________________________________
Page 66

5-12
Wire Winner Flag
If the race will be updated by a wire service, this option allows you to use
winners selected by that wire service, as winners in LeaderPlus.
To select (or un-select), you may press the SPACE BAR or use the
mouse to place a check mark in the Wire Winner Flag box.
Maximum Vote
Enter the maximum number of votes allowed in the race. Commas are not
necessary.
The number entered in this field is the maximum number of votes allowed
in the race. If the total number of votes for all candidates (or any one
candidate) exceeds this number when votes are entered in the Race
Results window, an error message (Maximum Vote Exceeded) will
appear and the results will not be saved. The votes must be re-entered
correctly.
Sum Results
This option determines if new race-results entered for this race should be
added to the previous figures, each time they are entered. If selected,
each time results are entered into this race either from the Race Results
window, a wire service, or reporting races, precincts and vote numbers
would be added to the current data.
To select (or un-select), you may press the SPACE BAR or use the
mouse to place a check mark in the Sum Results box.
This option is not often needed, but can be used on specific races when
the results, which will be manually entered, need to be summed together
because the results are coming in as separate totals from individual
precincts.
This also would be used if there were several races reporting to a
designated principle race, and the results of those races need to be
summed together.
_______________________________________________________________
Page 67

5-13
Reporting Races
The Report To 1-3 fields allows you to transfer the results of the selected
race to up to three other races
- T he results of races that “feed” another race are known as
“Reporting Races.”
- A race that is “fed” by other races is known as the “Principle
Race”
There are two ways Reporting Races can be used:
- For Com parison Updating – the Principle Race would compare
the results of several reporting races, and only accept data
from the race with the higher vote totals.
- For Summing Updates – the Principle Race would add
together the results of several reporting races. This may be
used when adding the votes from many areas (districts,
counties, etc.) into a grand total
These two ways can be combined to form multiple layers of reporting
races. Here are some more details about the ways to use Reporting
Races:
• Comparison Updating
Several races may be set up to report their results to a Principal
race. On the Reporting Races, enter the race number of the
Principle race that the selected race should report to in the
Report to 1, 2, or 3 fields.
When setting up the Principle Race, you would NOT select the
Sum Results option. By NOT selecting Sum Results on the
Principle Race, the race will compare all results reporting to it, and
accept only the data from the race with the higher votes.
When races are compared, it is important that each race have the
same number of precincts reporting to it, and the same number of
candidates in each race.
The order of the candidates does not need to match; however, for
easier entry; it is suggested that the COPY function be used when
creating these races.
_______________________________________________________________
Page 68

5-14
A comparison race might be set up when you want to
compare a race that will be manually updated with that same
race that the wire service is updating.
Creating a Reporting Race structure like this allows the
election producer to monitor the single Principle Race where
only the highest votes will be reflected.
In LeaderPlus, the choice to compare results is made on the
PRINCIPLE RACE ONLY with the Sum Results option.
The example below displays a sample Reporting Race
structure for comparing races. The race numbers are
arbitrary,
Race 2 Compares Races 150 & 250
Prec. Rep = 2000
Sum Results=Off Principle Race
Report to 1= 0
Race 2
Reporting
Races
Manually Entered Votes Updated by Wire Service
Prec. Rep = 2000 Prec. Rep = 2000
Report to 1 = 2 Report to 1 = 2
• Summing Updates
A Principle Race may also be set up to receive and sum (add
together) results from other races.
On the Reporting Races enter the race number of the Principle
Race to which the selected race should report in the Report to 1,
2, or 3 fields.
When setting up the Principle Race, you WOULD select the Sum
Results option. This would make the Principle Race automatically
add all results reporting to it.
Race 250 Race 150
_______________________________________________________________
Page 69

5-15
As mentioned in Comparison Updating, in LeaderPlus, the choice
to compare results is made on the PRINCIPLE RACE ONLY with
the Sum Results option.
When using the Sum Results option, the Principle Race must
have the total number of precincts set to the sum of the races
reporting to it.
The example below displays a sample Reporting Race structure
for summing races. The race numbers used are arbitrary.
Race 101 Compares Races 201-203
Prec. Rep = 2000
Sum Results=Off Principle Race
Report to 1= 0
Race 101
Race 201
Manually Entered Votes Manually Entered Votes Manually Entered Votes
Prec. Rep = 1 Prec. Rep = 1 Prec. Rep = 1
Report to 1 = 101 Report to 1 = 101 Report to 1 = 101
• Multiple Levels of Reporting Races
It is possible for a Principle Race to also be a Reporting Race for
yet another Principle Race.
For example, you have 3 races that must sum together in a
Principle Race. That Principle Race may be compared to another
race that is being updated by a wire service. These two races
would be set to report to yet another Principal Race.
The example below displays a sample of multiple level Reporting
Race structure containing both summing and comparison races.
The race numbers are arbitrary.
_______________________________________________________________
Reporting Reporting
Races Races
Race 202
Race 203
Page 70

5-16
Race 1 Compares Races 101 & 401
Prec. Rep = 3
Sum Results=O ff
Report to 1= 0
Race 1
Summed votes from Updated by Wire
Races 201-203
Prec. Rep-3 Pr ec. Rep=3
Sum Results-ON SumResults-OFF
Report to 1 = 1 Report to 1= 1
Race 201
Manually Entered Votes Manually Entered Votes Manually Entered Votes
Prec. Rep = 1 Prec. Rep = 1 Prec. Rep = 1
Report to 1 = 101 Report to 1 = 101 Report to 1 = 101
Miscellaneous CG Options
The options referred to as [other1] through [other4] and [yesno1]
through [yesno4] are user-definable options. They can be defined with
specific names in Race Setup Options to allow greater flexibility when
setting up displays for the CG.
[Other1] - [Other2] - [Other3] – [Other4]
In the Race Setup Options window, you can define several race logos or
backgrounds for the character generator to use.
Example: The Other 1-4 options might be renamed Race Setup Options
for the following uses:
[Other1] Race Logo1
[Other2] Race Logo2
Race 101
Race 202
[Other3] Bkg Char.
[Other4] Title 4
_______________________________________________________________
Race 401
Race 203
Page 71

5-17
In the appropriate [other] field, enter the desired character or text.
Special backgrounds are usually stored at the CG under a letter, number
or character on the CG keyboard. These fields are then used within a CG
display for special instructions.
[YesNo1] - [YesNo2] - [YesNo3] – [YesNo4]
These options offer yes/no variables that can be used when setting up
specific CG displays.
If set to ON, then unique instructions can be specified in the CG display
for those races. In the Race Setup Options window, you could set these
options up with specific names. See Race Setup Options described later
in this chapter.
To select (or un-select), you may press the SPACE BAR or use the
mouse to place a check mark in the appropriate [YesNo] box.
Sort by Party
This option allows you to sort candidates by their party affiliation on the
CG. If selected, the candidates will appear on the CG grouped together
by party, and within each party. LeaderPlus will list them based on their
vote totals.
The party affiliation is determined in the Party column for each candidate
in the Candidate grid. If letters are used to specify parties, the candidates
will be grouped together by alphabetical order of the parties. (Democrats,
Others, Republicans). If numbers are used to specify parties, the
candidates will be grouped together in the numerical order of the parties.
The Sort by Party feature only applies to the Party column of the
candidate grid.
Talent Notes
These notes are general information about the race that on the Talent
Screen, and are used by anchors for reference during the election
coverage. Enter information as needed into each talent note field.
The amount of text seen is limited by the size of the Talent Screen
window. Because of this, it may be easier to enter one or all of the talent
notes directly on the Talent Screen window to ensure the necessary text
will fit on the screen. See Chapter 9 – Talent Screen for further details.
_______________________________________________________________
Page 72

5-18
Previous and Next Buttons
Selecting the Previous Button (or F4) will recall the previous
existing race by number.
Selecting the Next Button (or F5) will recall the next existing race
by number.
Print All and Print Race Buttons
Selecting the Print All button will bring the list of all races into a
WordPad window. To change the size of the page you are
viewing, use the mouse and double click on the page. Press the
printer icon
Selecting the Print Race button will bring the currently selected
race into a WordPad window. To change the size of the page you
are viewing, use the mouse and double click on the page. Press
CTRL-P to print the race. Press ESC to exit.
Record Locator Buttons
These buttons are located in the lower left corner of the Race Setup
Window.
to print the list of all races. Press ESC to exit.
Copying a Race
You may copy an existing race to a new number, either by specifying the
new number or by accepting the next available unassigned race number
in the system.
You cannot copy a race to an existing number. You must first delete that
race before you will be allowed to copy another race to it.
locates the first race number in the database
locates the last numbered race in the database
changes to the previous race in the database from the
current location.
changes to the next race in the database from the current
location
_______________________________________________________________
Page 73

5-19
To copy a race, you must first click on the Copy button in the Race Setup
window. Then complete the following procedures for copying an existing
race.
To copy a race to a specific number:
1. In the Race # field, enter the number of the race you wish to copy.
2. Press the ENTER key. That race appears on the Race Setup window.
3. Select the Copy button. The Copy Race # To: dialog box will appear.
4. In the Race # field, enter the race number to co py to. Press ENTER or
click Race # button to copy the race.
Press ESC or select Cancel to exit the sub menu without copying the
race.
To copy a new race to the next available number from a specific
location:
1. In the Race # field, enter the number of the race you wish to copy.
Press the ENTER key to recall the race on the Race Setup window.
2. Select the Copy button. A Copy Race # To: dialog box will appear.
3. In the Empty race # above field, enter the number from which
LeaderPlus should locate the next empty race. Press ENTER twice or
click the Empty race # Above button. LeaderPlus will copy the race to
the next available race number at or above the number specified.
Press ESC or select Cancel to exit the sub-menu without copying the
race.
_______________________________________________________________
Page 74

5-20
If a race has been copied, and candidate names already appear in the
grid, DO NOT type over existing names in these fields. This will alter the
name and its corresponding elements as they exist in the database. The
candidate should be deleted, and then new information may be entered.
Once a race has been copied LeaderPlus will return you to the Race
Setup window. The race will appear with the new race number in the
Race # field.
Deleting a Race
To delete a race, you must first recall it into the Race Setup window.
Enter the number of the race you wish to delete in the Race Number field.
Press ENTER or TAB to move the cursor to the next field. This will recall
the race specified. Then, select the Delete button. LeaderPlus will prompt
you with an Election Setup dialog box to confirm your command to
Delete.
After answering the Delete prompt, the race will disappear from the race
Setup window.
Wire Races
Some races entered into LeaderPlus may be updated by a wire service.
Three requirements must be met in LeaderPlus to complete the set-up
process for wire races.
1. Create a Wire list.
2. Create a Wire Capture
3. Create a Wire Race (setting up a race to be updated by a wire).
A Wire list is needed to designate all races that will be updated by the
wire service connected to a specific port. There can be only ONE WIRE
LIST PER INCOMING WIRE.
_______________________________________________________________
Page 75

5-21
A Wire Capture is a file containing sample data from a wire service while
they are conducting tests prior to the election. This file can be used to
create the wire races automatically with the correct wire codes. It can also
be viewed, edited, and used to test wire races long after the wire service
has completed a test. A Wire Capture is critical to the success of entering
Wire Races into LeaderPlus. The sooner a capture is created, the sooner
Wire Races may be entered and tested.
Wire Races can be quickly created directly from a Wire Capture, with the
specific wire codes and precincts reporting for each race automatically
entered in to the race.
_______________________________________________________________
Page 76

5-22
Creating a Wire List
Creating a list of races will be covered in detail in the Section B “List
Setup” of this chapter.
The process of creating a Wire list, from the Main menu, is, as
follows:
1. Select Election Setup
2. Select List Setup
3. Select the New button to create a new list.
4. Create the Wire List at a high number (Example: 900), separating it
from other lists and list types, due to its importance. This will reduce
the chance for operator error, from potentially disabling this list type.
5. Enter a name for this list in the List Name field.
Example: AP Wire List
6. Select WIRE as the list type, and then exit the List Setup window.
The Wire Races will automatically be added to the Wire list when they are
created from the Capture.
Wire Captures
Before creating a Wire Capture, you must first connect the wire to a COM
port of any LeaderPlus PC. On that PC, select the Wire Management
option to configure the port for the wire. See Chapter 4- Wire
Management for details on setting up a wire port.
When a wire service informs you that they will be providing a test of
sample results for races they will be covering, you will want to capture
that test for future use. See Chapter 4 – Wire Management for more
details and procedures for “Creating a Wire Capture”.
Creating Wire Races
Once you have a good Capture file, you can create Wire Races quickly in
Race Setup, using the Match with Capture or Auto-Create Batch
functions.
_______________________________________________________________
Page 77

To make a race update from a wire:
1. Create a new race using the New button, or recall an existing race (to
add wire codes) by entering the race number in the Race Number
field and pressing ENTER
2. Select the Match with Capture button
Match with Capture
This feature locates the corresponding wire data from a wire
capture to be used to update a race and can be used at any time
during the Race Setup procedure.
5-23
3. In the Capture Name>> field.
a. Enter the location and Capture file name
-ORb. Select the Capture Name>> button and select the Capture
from the Window’s dialog box and select Open.
_______________________________________________________________
Page 78

5-24
You CANNOT continue this process without first creating a wire list.
4. From the Add to Wire List drop-down menu, select the Wire list to be
filled in with the races as they are selected. If a Wire list is not
selected, a warning dialog appears:
5. Select the Load Capture button to load all races from the Capture into
the lower white display panel of the Match with Capture dialog box. If
you are only interested in certain race and would like to search the
Capture for a particular title or candidate name, enter the title, or the
last name of the desired candidate, in the Search For field. Select the
Load Capture button to load the Capture file into the display panel.
Only those races containing that title or name will be recalled.
6. Using the mouse, highlight the desired race and double-click to select
that race. LeaderPlus will then begin the copying process.
7. Once you have selected the race from the capture, the Match Capture
Options dialog box will appear. This menu allows you to automatically
select a title from the Capture as one or more of the race titles for the
race.
_______________________________________________________________
Page 79

5-25
a. Choose A if you would like the Wire Sub ID to be used as Title
1 of the race.
b. Choose B if you would like the Wire ID to be used as Title 1 of
the race.
c. Choose C if you would like the Wire ID to be used as Title 1
and the Wire Sub ID to be used as Title 2 of the race.
8. If you choose to not copy titles, you have two options:
a. Select the Do Not Copy button if you do not wish to use any
title directly from the Wire Capture. Use this option if you are
running the Match with Capture process on an existing race
that you have already created and/or partially filled out. You
can always alter the titles on the Race Setup window once you
complete the Match with Capture.
-ORb. Select Quit to exit the match process at this point.
_______________________________________________________________
Page 80

5-26
After responding to the Title question, the race will automatically be
created using the proper candidate wire names. Those names will be
added to the database
9. If the candidate names in the race already exist in the database – for
example: there is a race already setup with the candidates’ names –
then a second prompt will appear as part of the Match with Capture
process. This Match Capture Options dialog box will give you the
option to use existing name in the database or add the name from the
capture file
a. Choose A if you wish to use the candidate from the database
(selected in the display panel) as the candidate name. If
several appear, you may use the mouse to select the desired
candidate, and then select option A.
b. Choose B if you wish to add the name to the existing
database.
10. As with the Match Capture Options dialog box in steps 7 and 8, you
are given two options if you chose to not select a candidate.
a. Select the Do Not Copy button if you do not wish to copy any
candidate name from the Capture into the race. This is
necessary with different candidates with the same name
_______________________________________________________________
Page 81

5-27
b. Select Quit to exit the match process at this point.
Upon returning to the Race Setup window, the Wire Ids and Candidate
name fields should automatically be filled in from the Match with Capture
process. You will need to complete the rest of the Race Setup window
manually.
After creating an initial race using the Match with Capture process,
Close the window, go to the next available race number and start the
process over again for the next race or you can use the Auto Create
Batch feature to expedite this process.
Auto-Create Batch
This feature allows you to create one race after another, while remaining
in the Match with Capture window. Follow Steps 1-10 (without closing the
Match Capture window) in the preceding example. Then hit the Auto
Create Batch button, and it will create the next race in the Match Capture
Window at the next available race number. This might be useful if
creating a number of district races that appear sequentially in a Capture.
General Wire Information
• Multiple Wire Sources: A race in LeaderPlus can only be
updated by a single wire source. If there are other sources
supplying results for the same race, you will need to copy the race
to a new number, and use that number in a separate Wire list. You
will also need to update the Wire ID and Sub ID for the other wire
service.
You cannot have multiple races with the same Wire ID. The wire service
will only update one race.
If there are several races that different wire services are updating,
you can set up a Principle Race that will compare results from
each race reporting to it. The principle race will only accept results
from the race with the highest votes.
LeaderPlus will calculate its own percentage if precincts and votes
based on the number of candidates and the number of precincts.
The percentages sent by a wire service are ignored. Therefore, it
is important to use the same number of precincts reporting to the
race as the wire service is using.
_______________________________________________________________
Page 82

5-28
• Presidential Races: The race for President crosses the wire
with percentage o f preci nct s repor ti ng , not a sp ecific number
of precincts as in all other races. LeaderPlus reads this
percentage number as the actual number of precincts
reporting and tries to calculate a percentage. In order to
keep the precincts accurate for this race, you should enter
100 as the total number of precincts reporting to the
presidential race. That way, when LeaderPlus receives the
precinct percentage and reads it as the actual number of
precincts reporting, it will calculate 100 precincts into that
number, which will translate to the same percentage that
crossed the wire. For example, 50% reporting: LeaderPlus
reads the data as 50 out of 100 precincts reporting, which
calculates into 50%
• Wire IDs and Sub IDs Explained: Although LeaderPlus will
automatically insert the proper codes into a Wire Race with
the Match with Capture, it is helpful to understand where
these codes are located within a capture.
When viewing a Wire Capture fil e fro m the Wire
Management window, you will see all text as well as ASCII
codes sent by the wire service. In WordPad, the ASCII
characters will appear as boxes. To view the actual
characters, edit the file in a DOS window.
Prior to editing a file, it is recommended that you copy the file to a
new name to keep the master file protected from inadvertent
editing.
The Wire ID that LeaderPlus uses to identify the race is the
first line of code sent by the wire. This code follows two
lower case letters.
The Wire Sub ID will be the title of each race as sent by the
wire service. Wire Sub Ids will only be used when multiple
races are sent within one Wire ID.
_______________________________________________________________
Page 83

5-29
In the following two examples, the Wire IDs, and Wire Sub IDs,
are pointed out for you. Some translations for the IDs are also
provided.
Example #1
____v0318_0sc-p Wire ID
r p__ BC-SC-Gov-Sum 11-04 0036
_^BC-SC-Gov-Sum,0039<
^(AP) 11-04-02 14:02,,<
The following are TEST returns.
715 of 2,004 precincts - 36 percent
Jim Hodges, Dem (i) 349,483 - 60 percent
Mark Sanford, GOP 230,636 - 40 percent
In this wire example, the Wire ID would be the code:
BC-SC-Gov-Sum
The ID translates to:
BC = National Election Wire
SC = South Carolina
Gov = Governor
Sum = Summary
Since only one race is sent under this Wire ID, a Wire Sub
ID is not needed.
_______________________________________________________________
Page 84

5-30
percent
Example #2
Wire ID
____v0210_0nc-p
r p__ BC-NC-Courts-Glance-Sum 11-04 0231
_^BC-NC-Courts-Glance-Sum,0243<
^(AP) 11-04-02 14:00,,<
The following are TEST returns.< Wire
^SupCrt.Assoc.Justice Orr Seat Sub ID
1,239 of 2,739 precincts - 45 percent
Robert F. 'Bob' Orr, GOP (i) 961,983 - 55 percent
Bob Hunter, Dem 783,914 - 45 percent
BC-NC-Courts-Glance-Sum
1,213 of 2,739 precincts - 44 percent
G.K. Butterfield, Dem (i) 936,011 - 55 percent
Edward T. Brady, GOP 766,304 - 45
<
^SupCrt.Assoc.Justice Butterfield Seat Sub ID
In this wire example, the Wire ID would be the code:
In this wire example, since there are several races sent
under the same Wire ID, each race would have a wire Sub
ID to identify it.
Wire
_______________________________________________________________
Page 85

Section B – List Setup
Lists are made up of various race numbers, and can be used for a variety
of purposes. There are four types of lists.
• Producer – enable a producer type list to easily access various lists
of races to view results.
• Wire – these list types determine which races will be updated by wire
services.
• Precinct – are available to separate results of races by precincts.
• Other – are used to allow for easier vote entry for multiple races, lists
of races in a specific order for CG display sequences, or lists
containing races that will output to the internet.
In general, a single race can appear in a variety of lists. However, if a
race is to be updated by a wire, it may only appear in one Wire type list.
To begin setting up lists in LeaderPlus, select the List Setup button from
the Election Setup window. The List Setup window will appear.
5-31
_______________________________________________________________
Page 86

5-32
Creating a New List
LeaderPlus is capable of storing an unlimited number of race lists in its
database. List numbers do not, however, exist until a list is created and
assigned a number by the election coordinator. A list can be created
without races initially. Actually race numbers can be added to the list at a
later time.
To create a new list at a specific number:
1. Select the New button
2. The Create New List dialog box will appear.
3. In the List # field, enter the desired race list number.
4. Press ENTER or select the List # button to create the list.
Once a list number has been selected, LeaderPlus will return to the List
Setup window. The list number appears in the List Number field.
To create a new list at the next available number from a specific
location:
1. Select the New button. The Create New List dialog box will appear.
2. In the Empty List # Above field, enter the number from which
LeaderPlus should locate the next empty list.
3. Press ENTER or click on the Empty List # Above button.
4. LeaderPlus will locate the next available list number at or above the
number specified.
_______________________________________________________________
Page 87

5-33
Press ESC or select Cancel to exit the sub-menu without selecting a new
list number.
Once a list number has been selected, LeaderPlus will return to the List
Setup window. The list number will appear in the Pick List button
Recalling an Existing List
To recall a list that has already been created, enter the list number in the
List Number field, and press ENTER. Or, you may use the pick list button
and select the list fr om the menu and hit OK. The list will appear in
the List Setup window.
Saving Information on the List Setup Window
There is NO Save button in List Setup. The new settings are saved when
List Setup is closed.
List Name
From the List Setup window, in the List Name field, enter a name for the
list you are creating. If it is a Wire list, it is suggested that the name of the
list include the type of wire. For example, you might have an AP wire list
and a VNS Wire list.
List Type
Select one of the four types of lists from the List Type Selection box.
Here’s a more detailed description of each type.
Producer Lists
Producer lists are created for easy access to race lists on the
Producer Screen. A button on the bottom of the Producer window
will represent each Producer list. These buttons can be labeled
with the List Name designated in List Setup.
W ire Lists
Wire lists contain all the races being updated by a wire service. If
there are multiple wires, each wire will need a list containing those
races that will be updated by that wire. This list will later be
assigned to a specific wire port in the Wire Management window.
When init ia lly cr e ating Wire lists, you do not need to enter any
races manually into the lists. When you create the Wire Races in
Race Setup using the Match with Capture feature, the Wire List is
updated automatically with the Wire Races you create. See
Section A-Race Setup “Wire Races” in this Chapter for more info.
.
_______________________________________________________________
Page 88

5-34
Precinct Lists
A Precinct list may be created for races in which you want to view
results from specific precincts.
For example, you might have a Governor race, Mayor Race, and a
Congressional race in the database with various numbers of
reporting precincts. If you would like to view the results from one
or more precincts in those races separately, you could create a
Precinct List for each precinct.
For each Precinct list, create a list name that describes the
precinct it covers, such as Precinct 1. Enter all the races in the list
for which you want to view results from that precinct.
When entering race results for that precinct, the Precinct race list
would be recalled. The number of precincts reporting will not be
available, as it would only be one more than the current total. Only
those votes from that precinct would be entered in race results.
Upon recalling the race itself, those numbers will be added to the
totals already in the race. If the race is viewed using the Precinct
list, only those votes from that precinct list will be shown.
Other Lists
This is a general category for lists that might be used for a variety
of other reasons. This might include race lists for vote entry,
viewing, CG display sequences, or outputting to the Internet.
Entering Races Into a List
To enter races into a list:
1. Type the race number in the Race # column.
2. Cursor down to continue in this column.
3. Enter each race number in the order needed. You are not allowed
to type in the Title fields. These fields will automatically will in the
Race Titles from the Titles entered in Race Setup, once the race
number has been entered and the field exited.
_______________________________________________________________
Page 89

5-35
You are not allowed to enter non-existent race numbers in a race list. If
you have inadvertently entered an invalid race number, you will need to
change the number to an existing race number (the invalid number will be
discarded upon leaving the window) or you cannot enter a new race.
If the race “Race is Airable” is unchecked in Race Setup, you will be
prompted when attempting to add that race in to a list.
Another way to enter races into a list is to use the
Pick Race column with the mouse. A small
downward arrow appears upon a single click in to
the field. Clicking on the arrow reveals a list of existing
races in the database. Select the desired race. Click on
any other field on the List Setup screen and it will add the
race, creating the <new> line once more. Then, repeat
the steps for each race.
Add All Races button
This option allows quick access to make a list of all the races that are in
the database.
You must create a new list or recall an existing one into the List Setup
window. Select the Add All Races button. All races are entered iin
numerical order.
If you have an existing list on the screen that already contains a number
of races, and you select the Add All races option, LeaderPlus will prompt
you to verify your request prior to adding them all to the bottom of the
current list as shown in the Election Setup dialog box below.
Re-ordering Race in a List
To re-order a list in the list setup table:
1. Click on any field on the race in the list table
2. Hold down the <CTRL> key on the keyboard and drag-drop
with the mouse to the desired destination of the race
3. As you drag, a gray bar appears. When you let go of the
cursor, the race will appear directly above the gray bar.
_______________________________________________________________
Page 90

5-36
Deleting Races from a List
To delete a race from a list:
1. Use the mouse to click on any field of the race to be deleted in the
list table.
2. Then press the DELETE key on the keyboard to remove the race
from the list. ONLY ONE RACE can be deleted at a time from the
list table.
DO NOT use the Delete button at the top of the List Setup window to
delete a race from a list. That button is used to delete a list of races from
the database. See “Deleting a List” later in this chapter for more info.
Copying a List
Lists already created can be copied to a new list number.
To copy a list to a specific number:
1. In the List # field, enter the number of the race you wish to copy.
2. Press the ENTER key to recall the race on the List Setup window.
3. Select the Copy button. A Copy List # To: dialog box will appear.
4. In the List # field, enter the new list number to copy to
5. Press ENTER or click the List # button to copy the list
_______________________________________________________________
Page 91

5-37
Press ESC or select Cancel to exit the dialog box without copying
the list
To copy a new list to the next available number from a specific location:
1. In the List # field, enter the number of the race you wish to copy.
2. Press the ENTER key to recall the race on the List Setup window.
3. Select the Copy button. A Copy List # To: dialog box will appear.
4. In the Empty List # Above field, enter the number from which
LeaderPlus should locate the next empty list
5. Press ENTER twice or click the Empty List # Above button.
LeaderPlus will copy the list to the next available list number at or
above the number specified.
Press ESC or select Cancel to exit the dialog box without copying the list.
You cannot copy a list to an existing number. You must first delete that
list before you will be allowed to copy another list to it.
Once a list has been copied, you will return to the List Setup window. The
list will appear with the new list number in the List Number field.
Deleting a List
To delete an entire list:
1. T ype the list in the List Number field or choose the list from the
List Number field-pick list drop down menu
2. Select the Delete button
3. LeaderPlus will request confirmation
.
4. Select OK to confirm the prompt and complete the process.
5. Select Cancel to exit the dialog box without deleting the list.
_______________________________________________________________
Page 92

5-38
Section C – User Profile Setup
The User Profile Setup options allow you to enter new users and
designate or change their privileges.
From the LeaderPlus Main menu, select Election Setup. Select the User
Profile Setup option. The User Profile Setup window will appear.
Creating a New User
1. Select the New User button
Saving Information on the List Setup Window
_______________________________________________________________
To create a profile for a new user:
2. Enter the name of the new user in the Name field.
3. Enter a password for a new user (optional).
4. The User ID will fill in automatically with a unique number. This
number will be the next available number in the system. Even if a
user is deleted, their User ID will no longer be available for
reassignment.
There is NO Save button in User Profile Setup. The new settings are
saved when User Profile Setup is closed.
Password
When entering a new user, you can assign the user a desired password
or leave this field blank. If the field is left empty, the password becomes
the user Name. The user can sign in by typing in their Name for the User
Name and Password, and then change the password.
Page 93

5-39
User Privil eges
The bottom section of the User Profile window offers a variety of
privileges for the specified user.
Update Race Results
This privilege allows the user to enter results (precincts, votes,
into the Race Results window. If a user does not have this
privilege, they will still be able to access the Race Results window
for viewing race results, but will not be allowed to enter any data
on that screen. That includes entering race results via the Internet.
View Talent Screen
This privilege allows the user to view the Talent Screen. This
contains race information, results, and talent notes about that
race, while following the on-air character generator
Update Talent Notes
This privilege allows the user to enter information into the Talent
Notes fields of the Talent Screen. Talent notes includes general
information about the race as well as notes about the candidates,
which provides assistance to the anchor on election night.
If a user does not have this privilege, and is granted access to
Election Setup, he or she may still enter Talent Notes via the Race
Setup window. If the user should not have any access for entering
Talent Notes, he or she must not be given access to either Update
Talent Notes or Allow Election Setup.
The on-air anchor should have this ability removed before election night.
The Talent Screen follows the on-air character generator, which is
constantly changing on Election Night. Updating Talent Notes, while the
screen is changing, may cause a Run Time Error to occur.
View Producer Screen
This privilege allows the user to access the Producer window. This
is where users can view updates and results of races in the
database.
_______________________________________________________________
Page 94

5-40
Air Races on CG
This privilege allows the user to send races to the character
generator for on-air display. The function also allows the user to
Output Updates to the Internet, to a newsroom system, or to
another LeaderPlus system.
Allow Election Setup
This privilege allows the user to access to Race Setup, List Setup,
User Profile Setup, Race Setup Options, and Delete from
Database. This checkmark is effectively making the user a super
user within the system. This privilege should be given only to
engineers and election producers/coordinators.
Allow Clear All Results
This privilege allows users to Clear Results from some or all
races. This will allow them to zero results and remove winner flags
from races. This privilege should be given only to engineers and
election producers/coordinators.
Allow Wire Management
This privilege allows the user to access Wire Management to set
up ports for wire services, start wire processes, create and edit
captures, and monitor wire ports. This privilege should be given
only to engineers and election producers/coordinators.
Server Required for User
This setting determines if the server application must be running in
order for the user to sign on to LeaderPlus. It is recommended for
most users in pre-election, for all users the night of the election.
Disabling this option (unchecked) allows a user to make changes
to the database without the server application running (offline).
REMEMBER: Users MUST be logged in to the server application
to see instant updates from one LeaderPlus client to another.
System Administrator
This privilege allows the user access to the System Administrator
window. This window includes determining automatic winner
flagging for multiple races, flagging uncontested races, service
connections, and setting up the California SOS wire. This also
allows a user to run the Pre-Election Analysis under Print Reports.
This privilege should be given only to engineers and election
producers coordinators.
Allow Winner Select
This privilege allows users to manually declare winners within the
Race Results window. This privilege should be given only to
election producers/coordinators.
_______________________________________________________________
Page 95

Recalling an Existing User
To recall a user already entered into the system, you must use the
Record Locator buttons. These buttons are located in the lower left corner
of the User Profile Setup window.
Record Locator Buttons
locates the first user in the database.
locates the last user in the database
locates the previous user in the database from the current location
locates the next user in the database from the current location
Print User
Selecting this button will bring the User Profile privileges for the current
user into a WordPad window. You can zoom in or out on the WordPad
window by using the mouse to double click anywhere on the screen.
5-41
To print the “User: document, click on the printer icon
.
_______________________________________________________________
Page 96

5-42
Print List
Selecting this button will create a list of users in a WordPad window. It will
also indicate the User ID. System Administrator privilege, and Server
Required specification for each user. You can zoom in on the WordPad
window by using the mouse to double click anywhere on the window.
To print the “User List: document, click on the printer icon
Print All
Selecting this button will bring the User Profile privileges for all users into
a WordPad window. You can zoom in on the WordPad window by using
the mouse to click anywhere on the screen.
To print the report, click on the printer icon
.
.
Copying a User
To copy a user:
1. Recall the existing user by using the Record Locator buttons.
2. Select t he Copy User button. All of the user’s privileges will be
copied to a new user.
3. You may then enter the name and password for the new user
_______________________________________________________________
Page 97

5-43
Deleting a User
1. Recall the existing user by using the Record Locator buttons.
To delete a user:
2. Select the Delete User button. LeaderPlus will request
confirmation.
3. Answer the prompt to remove the user from the database.
Even though a user has been removed, their User ID # will no longer be
available for a new user. This will not pose any problem, as you may
enter as many users into the database as needed.
_______________________________________________________________
Page 98

5-44
Section D – Race Setup Options
This window is used to translate the miscellaneous CG options on the
Race Setup window. These options are generally used to designate
variables for character generator displays. They might be used for
multiple race logos, different backgrounds, or additional race titles that
may be needed.
The default options are:
[Other1] [Other2] [Other3] [Other4]
[YesNo1] [YesNo2] [YesNo3] [YesNo4]
To change the text in the [Other] fields or [YesNo] fields, type the
new name on the right side of the window. (Example: Race Logo 1, Bkg
Char.,Title 4, etc.)
To save changes, click on the X in the upper right-hand corner of the
window. The changes save automatically when the window closes. When
the Race Setup window is re-entered, the options will be defined with the
new name(s).
Note: if you change the [Other1-4] or [YesNo1-4] options for Race Setup,
in the CG script portion of the LeaderPlus system (see Chapter 12- Air
Races/CG Setup) you must reference them by their original field headers,
NOT the customized headers.
_______________________________________________________________
Page 99

Section E – Delete from Database
The Delete from Database window allows you to delete various elements
from the LeaderPlus database. These elements include all candidates, all
races, or all lists. Deleting the material would only be done to set up a
new and empty database at the start of preparations for an upcoming
election.
Prior to deleting a database, you might want to keep a copy of the current
database for future reference, or for archive reasons. Therefore, it is
recommended that you make a backup copy of the database (for
instructions on backing up the database see Chapter 14-Database
Maintenance).
Delete From Database Options
After creating the backup, you will need to delete all the data using all of
the Delete from Database options in the Database Maintenance dialog
box. This gives you an empty database from which to begin your election
preparations.
5-45
To Delete All Data from Database
To completely empty a database, all the races, candidates, and race lists
must be deleted.
To delete all data from the database: select each of the three buttons in
the Database Maintenance dialog box and follow the procedures for each
step as documented below.
To cancel, use ESC or select the Close button
Page 100

_______________________________________________________________
5-46
Delete All Candidates
To delete all candidate information from the database:
1. Select the Delete All Candidates button to delete all of the
candidate information from the LeaderPlus database or a specific
race.
2. LeaderPlus will request confirmation.
3. Select t he OK button to complete the delete process. This will
remove all candidates from the races, but will not delete the races
or the race lists.
Delete All Races
To delete all race information from the database:
1. Select the Delete All Races button.
2. LeaderPlus will request confirmation.
3. Select the OK button to complete the delete process. This will
remove all races from the database, but will not delete the
candidates or the race lists.
_______________________________________________________________
 Loading...