

Page 1
Avid ISIS® 7000 Client Quick Start Card
Installing the Software
You can do any of the following to install the Avid ISIS 7000
client software:
• You can take the installation DVD to each client separately
and load the software from the DVD.
• You can store the client software somewhere on the
corporate network and allow everyone who needs the
software to access it and load it.
• If the latest client installers were installed on the Avid ISIS
system, you can use the Administrator tool to install the
software from the System Director.
n You must be an administrator to install the software.
To use the Administrator tool to install the client software:
1. Open your Web browser.
2. In the address bar of your browser, do one of the following:
t Type
t Type
The Login dialog box for the Administrator tool opens.
3. Type your administrator password.
4. Click the Login button.
The Avid ISIS Home page opens.
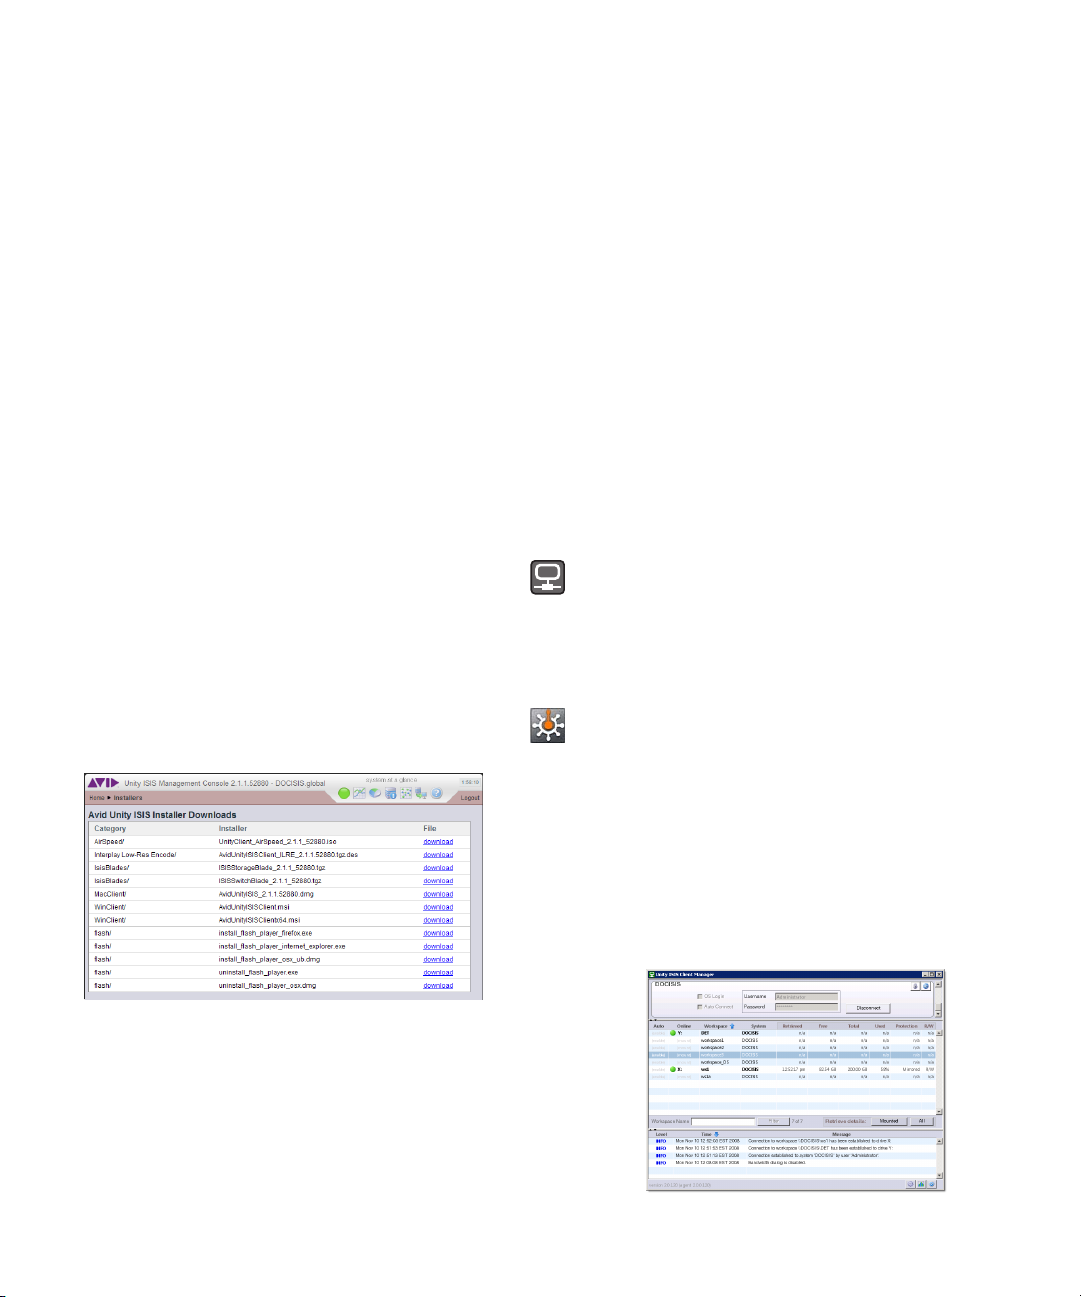
5. Click the Installers icon from the Advanced section.
https://[Virtual System Director
IP address]:5015
https://[Virtual System Director
network pathname]:5015
®
t (Macintosh
AvidUnityISISClient_version.dmg
The installer is downloaded to your system.
7. (Option) In the ThirdParty area, click the appropriate
installer for Adobe
n To use the Client Manager, you need to have Adobe Flash
Player installed on your system.
8. Start the installer and follow the installation instructions.
) In the MacClient area, click
®
Flash® Player.
Mounting and Unmounting Workspaces
If you have a user account on your Avid ISIS system, you can
use the Client Manager to mount and unmount workspaces.
n If you do not have a user account, see your Avid ISIS
administrator.
To mount workspaces:
1. Make sure your Avid editing application is not running.
2. Do one of the following:
t (Windows) If the Client Manager icon is not available
in the Windows taskbar, select Start > All Programs >
AvidUnityISIS > ClientManager.
t (Windows) Right-click the Client Manager icon and
select ISIS Client Manager, or click the Client Manager icon in the Windows taskbar.
t (Macintosh) If the Client Manager alias icon is not
available, select Go > Applications, and then
double-click the AvidUnityISIS folder. In this folder,
double-click the UnityClientManager file.
t (Macintosh) Double-click the Client Manager alias
icon on the desktop, or double-click the
Client Manager alias icon in the dock.
3. Click the Connections tab.
The Connections list displays all available System
Directors.
6. Do one of the following:
®
t (Windows
appropriate installer:
- AvidUnityISISClient.msi
- AvidUnityISISClientx64.msi
) In the Win32Client area, click the
Page 2

4. Select the System Director you want to connect to from the
Workspaces
list
Connections list.
5. Do one of the following:
t (Windows) If your ISIS system is configured to use the
Windows user name and password for your local system, select OS Login.
t (Windows) If your ISIS system is configured to use a
separate Avid ISIS client account user name and password, select User Login, and then type your account
name in the Username text box, and type your password in the Password text box.
t (Macintosh) Type your Avid ISIS account name in the
Username text box, and type your password in the
Password text box.
6. Click the Connect button.
7. (Option — Windows only) If you use the same user name
and password for your client system and your Avid ISIS
account, and you want to connect to the network
automatically every time you start your system, click the
OS Login button, and then select the Auto-Reconnect box.
8. Click the Workspaces tab.
The Workspaces list displays all workspaces to which you
have access. The Online field displays a green circle for
workspaces already mounted.
4. In the Workspaces list, select the workspace you want to
unmount, and do one of the following:
t Click the Unmount button.
t Right-click and select Unmount from the menu.
The Client Manager unmounts the workspace from your
client, and the Online field appears blank.
For Zone 3 Clients
If your system connects to the Avid ISIS media network as a
Zone 3 client, you need to add the name of your System
Director in order for the Client Manager to connect to it. You
cannot use the virtual System Director name or IP address.
n You need to add the name or IP addresses of all primary
and failover System Directors in your network, and you
need to add both subnet addresses.
To add a remote host:
1. Open the Client Manager.
2. Click the Preferences button.
The Preferences dialog box opens.
3. In the Navigation panel, select Remote Hosts.
The Remote Hosts panel opens.
9. In the Workspaces list, select the workspace you want to
mount.
10. Click the Mount button.
The Client Manager mounts the selected workspace on
your client and the Online field displays a green circle.
You can now start your Avid editing application and access the
mounted workspaces.
To unmount workspaces:
1. Make sure your Avid editing application is not running.
2. Open the Client Manager.
3. Click the Workspaces tab.
The Workspaces list displays all workspaces to which you
have access. The Online field displays a green circle for
workspaces that currently are mounted.
4. Click the Add button.
5. In the Input text box, type the IP address of the System
Director to which you want to connect, and then click OK.
6. Click Apply, and then click Close.
7. If you have a second System Director for failover, repeat
steps 4 through 6 using the IP address of the second
System Director.
8. Click the Connections tab.
9. Select the System Director you want to connect to from the
Connection list.
10. Click the Connect button.
Page 3

Testing Your Avid ISIS Connection
Before you begin using the Avid ISIS media network, you
should test the connection to your workspace to make sure
communication between your client system and the media
network is sufficient for the functionality needed by your
system. You can use the Avid PathDiag tool, which installs with
your client software, to test the read/write throughput, or the
rate that read and write operations are conducted between your
client system and a mounted workspace.
To test your workspace connection:
1. Select Start > Programs > AvidUnityISIS > PathDiag.
The Avid PathDiag tool opens.
2. Click the Setup button.
3. Click Custom Test.
4. Adjust the custom test parameters as follows:
- Path to Test — select a drive with a mapped Avid ISIS
workspace
- Duration (Minutes) — 2
- Loop — (optional)
- File Access Method — Automatically select
- Reads vs Writes — Writes, then Reads (Sequential)
- Transfer Size (KB) — 4096 for an Avid editing applica-
tion; 1024 for other Avid applications
- Transfer Rate (KB/S) — unlimited
- Max File Size (MB) — 100
- Use named common file for Reads — (optional)
• Peak Read: less than 5 MS/100
• Peak Write: less than 5 MS/100
In addition, results should plot along a smooth, stable line in the
Test Results graph, and they should not have peaks or spikes
that indicate variable performance within the media network.
The following illustration shows a healthy read/write test:
In this illustration, the test loops so that the Read results and
Write results fall to zero as the test alternates between Reads
and Writes. However, Reads and Writes plot consistently in the
Test Results graph and appear level over the course of the test.
If your results fall below optimal performance, you can check to
see if your User and Device bandwidth reservations are limited
(see the Avid ISIS Help). If your bandwidth requirements are
greater than the reservations set in the Avid ISIS Management
Console, your Avid ISIS administrator can adjust the limits.
These results represent guidelines for Avid-qualified systems;
performance on your system might vary. If your Read/Write
results differ from those listed here by more than 5 - 10 MB/s,
see your Avid ISIS administrator.
5. Click OK.
6. Click Start in the PathDiag tool main window.
The following list indicates the results that reflect an optimal
connection for an Avid editing client on the media network:
• Average Read: 60 - 70 MB/s
• Average Write: 70 - 80 MB/s
Additional Functions
If you have the necessary privileges, you can also use the
Client Manager to resize workspaces and to specify client
bandwidth reservations, if any. See your administrator to
determine your account privileges and which settings are
correct for your site.
For more information on using the Client Manager, see the
Client Manager Help or the Avid ISIS 7000 Client User’s Guide
on the online library DVD-ROM.
Copyright © 2009 Avid Technology, Inc. and its licensors. All rights reserved. Avid,
Avid Unity, and ISIS are either registered trademarks or trademarks of Avid
Technology, Inc. in the United States and/or other countries. Macintosh is a trademark
of Apple Computer, Inc., registered in the U.S. and other countries. Windows is a
registered trademark or trademark of Microsoft Corporation in the United States and/or
other countries. All other trademarks contained herein are the property of their
respective owners.
Avid ISIS 7000 Client Quick Start Card • 0130-07967-01 Rev B• December 2009
 Loading...