

Page 1

Avid® iNEWS
User’s Guide
®
Page 2

Legal Notices
Product specifications are subject to change without notice and do not represent a commitment on the part of Avid Technology, Inc.
The software described in this document is furnished under a license agreement. You can obtain a copy of that license by visiting Avid's
Web site at www.avid.com
may not be reverse assembled and may be used or copied only in accordance with the terms of the license agreement. It is against the law
to copy the software on any medium except as specifically allowed in the license agreement.
Avid products or portions thereof are protected by one or more of the following United States Patents: 4,970,663; 5,267,351; 5,309,528;
5,355,450; 5,396,594; 5,440,348; 5,467,288; 5,513,375; 5,528,310; 5,557,423; 5,577,190; 5,584,006; 5,640,601; 5,644,364; 5,654,737;
5,715,018; 5,719,570; 5,724,605; 5,726,717; 5,729,673; 5,745,637; 5,752,029; 5,754,851; 5,799,150; 5,812,216; 5,828,678; 5,842,014;
5,852,435; 5,999,406; 6,038,573; 6,061,758; 6,141,007; 6,211,869; 6,532,043; 6,546,190; 6,596,031; 6,636,869; 6,747,705; 6,763,523;
6,766,357; 6,813,622; 6,847,373; 7,081,900; RE40,107; 7,403,561; 7,433,519; D352,278; D372,478; D373,778; D392,267; D392,268;
D392,269; D395,291; D396,853; D398,912. Other patents are pending.
This document is protected under copyright law. An authorized licensee of Avid iNEWS may reproduce this publication for the licensee’s
own use in learning how to use the software. This document may not be reproduced or distributed, in whole or in part, for commercial
purposes, such as selling copies of this document or providing support or educational services to others. This document is supplied as a
guide for Avid iNEWS. Reasonable care has been taken in preparing the information it contains. However, this document may contain
omissions, technical inaccuracies, or typographical errors. Avid Technology, Inc. does not accept responsibility of any kind for customers’
losses due to the use of this document. Product specifications are subject to change without notice.
Copyright © 2017 Avid Technology, Inc. and its licensors. All rights reserved.
The following disclaimer is required by Apple Computer, Inc.:
APPLE COMPUTER, INC. MAKES NO WARRANTIES WHATSOEVER, EITHER EXPRESS OR IMPLIED, REGARDING THIS
PRODUCT, INCLUDING WARRANTIES WITH RESPECT TO ITS MERCHANTABILITY OR ITS FITNESS FOR ANY
PARTICULAR PURPOSE. THE EXCLUSION OF IMPLIED WARRANTIES IS NOT PERMITTED BY SOME STATES. THE ABOVE
EXCLUSION MAY NOT APPLY TO YOU. THIS WARRANTY PROVIDES YOU WITH SPECIFIC LEGAL RIGHTS. THERE MAY
BE OTHER RIGHTS THAT YOU MAY HAVE WHICH VARY FROM STATE TO STATE.
The following disclaimer is required by Sam Leffler and Silicon Graphics, Inc. for the use of their TIFF library:
Copyright © 1988–1997 Sam Leffler
Copyright © 1991–1997 Silicon Graphics, Inc.
Permission to use, copy, modify, distribute, and sell this software [i.e., the TIFF library] and its documentation for any purpose is hereby
granted without fee, provided that (i) the above copyright notices and this permission notice appear in all copies of the software and related
documentation, and (ii) the names of Sam Leffler and Silicon Graphics may not be used in any advertising or publicity relating to the
software without the specific, prior written permission of Sam Leffler and Silicon Graphics.
THE SOFTWARE IS PROVIDED “AS-IS” AND WITHOUT WARRANTY OF ANY KIND, EXPRESS, IMPLIED OR OTHERWISE,
INCLUDING WITHOUT LIMITATION, ANY WARRANTY OF MERCHANTABILITY OR FITNESS FOR A PARTICULAR
PURPOSE.
IN NO EVENT SHALL SAM LEFFLER OR SILICON GRAPHICS BE LIABLE FOR ANY SPECIAL, INCIDENTAL, INDIRECT OR
CONSEQUENTIAL DAMAGES OF ANY KIND, OR ANY DAMAGES WHATSOEVER RESULTING FROM LOSS OF USE, DATA
OR PROFITS, WHETHER OR NOT ADVISED OF THE POSSIBILITY OF DAMAGE, AND ON ANY THEORY OF LIABILITY,
ARISING OUT OF OR IN CONNECTION WITH THE USE OR PERFORMANCE OF THIS SOFTWARE.
The following disclaimer is required by the Independent JPEG Group:
This software is based in part on the work of the Independent JPEG Group.
This Software may contain components licensed under the following conditions:
Copyright (c) 1989 The Regents of the University of California. All rights reserved.
Redistribution and use in source and binary forms are permitted provided that the above copyright notice and this paragraph are duplicated
in all such forms and that any documentation, advertising materials, and other materials related to such distribution and use acknowledge
that the software was developed by the University of California, Berkeley. The name of the University may not be used to endorse or
promote products derived from this software without specific prior written permission. THIS SOFTWARE IS PROVIDED ``AS IS'' AND
WITHOUT ANY EXPRESS OR IMPLIED WARRANTIES, INCLUDING, WITHOUT LIMITATION, THE IMPLIED WARRANTIES
OF MERCHANTABILITY AND FITNESS FOR A PARTICULAR PURPOSE.
Copyright (C) 1989, 1991 by Jef Poskanzer.
. The terms of that license are also available in the product in the same directory as the software. The software
2
Page 3

Permission to use, copy, modify, and distribute this software and its documentation for any purpose and without fee is hereby granted,
provided that the above copyright notice appear in all copies and that both that copyright notice and this permission notice appear in
supporting documentation. This software is provided "as is" without express or implied warranty.
Copyright 1995, Trinity College Computing Center. Written by David Chappell.
Permission to use, copy, modify, and distribute this software and its documentation for any purpose and without fee is hereby granted,
provided that the above copyright notice appear in all copies and that both that copyright notice and this permission notice appear in
supporting documentation. This software is provided "as is" without express or implied warranty.
Copyright 1996 Daniel Dardailler.
Permission to use, copy, modify, distribute, and sell this software for any purpose is hereby granted without fee, provided that the above
copyright notice appear in all copies and that both that copyright notice and this permission notice appear in supporting documentation, and
that the name of Daniel Dardailler not be used in advertising or publicity pertaining to distribution of the software without specific, written
prior permission. Daniel Dardailler makes no representations about the suitability of this software for any purpose. It is provided "as is"
without express or implied warranty.
Modifications Copyright 1999 Matt Koss, under the same license as above.
Copyright (c) 1991 by AT&T.
Permission to use, copy, modify, and distribute this software for any purpose without fee is hereby granted, provided that this entire notice
is included in all copies of any software which is or includes a copy or modification of this software and in all copies of the supporting
documentation for such software.
THIS SOFTWARE IS BEING PROVIDED "AS IS", WITHOUT ANY EXPRESS OR IMPLIED WARRANTY. IN PARTICULAR,
NEITHER THE AUTHOR NOR AT&T MAKES ANY REPRESENTATION OR WARRANTY OF ANY KIND CONCERNING THE
MERCHANTABILITY OF THIS SOFTWARE OR ITS FITNESS FOR ANY PARTICULAR PURPOSE.
This product includes software developed by the University of California, Berkeley and its contributors.
The following disclaimer is required by Nexidia Inc.:
© 2006 Nexidia. All rights reserved.
Manufactured under license from the Georgia Tech Research Corporation, U.S.A. Patent Pending.
The following disclaimer is required by Paradigm Matrix:
Portions of this software licensed from Paradigm Matrix.
The following disclaimer is required by Ray Sauers Associates, Inc.:
“Install-It” is licensed from Ray Sauers Associates, Inc. End-User is prohibited from taking any action to derive a source code equivalent
of “Install-It,” including by reverse assembly or reverse compilation, Ray Sauers Associates, Inc. shall in no event be liable for any
damages resulting from reseller’s failure to perform reseller’s obligation; or any damages arising from use or operation of reseller’s
products or the software; or any other damages, including but not limited to, incidental, direct, indirect, special or consequential Damages
including lost profits, or damages resulting from loss of use or inability to use reseller’s products or the software for any reason including
copyright or patent infringement, or lost data, even if Ray Sauers Associates has been advised, knew or should have known of the
possibility of such damages.
The following disclaimer is required by Videomedia, Inc.:
“Videomedia, Inc. makes no warranties whatsoever, either express or implied, regarding this product, including warranties with respect to
its merchantability or its fitness for any particular purpose.”
“This software contains V-LAN ver. 3.0 Command Protocols which communicate with V-LAN ver. 3.0 products developed by
Videomedia, Inc. and V-LAN ver. 3.0 compatible products developed by third parties under license from Videomedia, Inc. Use of this
software will allow “frame accurate” editing control of applicable videotape recorder decks, videodisc recorders/players and the like.”
The following disclaimer is required by Altura Software, Inc. for the use of its Mac2Win software and Sample Source
Code:
©1993–1998 Altura Software, Inc.
The following disclaimer is required by Ultimatte Corporation:
Certain real-time compositing capabilities are provided under a license of such technology from Ultimatte Corporation and are subject to
copyright protection.
3
Page 4

The following disclaimer is required by 3Prong.com Inc.:
Certain waveform and vector monitoring capabilities are provided under a license from 3Prong.com Inc.
The following disclaimer is required by Interplay Entertainment Corp.:
The “Interplay” name is used with the permission of Interplay Entertainment Corp., which bears no responsibility for Avid products.
This product includes portions of the Alloy Look & Feel software from Incors GmbH.
This product includes software developed by the Apache Software Foundation (http://www.apache.org/
© DevelopMentor
This product may include the JCifs library, for which the following notice applies:
JCifs © Copyright 2004, The JCIFS Project, is licensed under LGPL (http://jcifs.samba.org/). See the LGPL.txt file in the Third Party
Software directory on the installation CD.
Avid Interplay contains components licensed from LavanTech. These components may only be used as part of and in connection with Avi d
Interplay.
Attn. Government User(s). Restricted Rights Legend
U.S. GOVERNMENT RESTRICTED RIGHTS. This Software and its documentation are “commercial computer software” or
“commercial computer software documentation.” In the event that such Software or documentation is acquired by or on behalf of a unit or
agency of the U.S. Government, all rights with respect to this Software and documentation are subject to the terms of the License
Agreement, pursuant to FAR §12.212(a) and/or DFARS §227.7202-1(a), as applicable.
Trademarks
003, 192 Digital I/O, 192XD I/O, 888 I/O, Adrenaline, AirPlay, AirSPACE, AirSPACE HD, AirSpeed, ALEX, Alienbrain, AniMatte,
AudioMarket, AudioPages, AudioSuite, AudioVision, AutoSync, Avid, Avid Advanced Response, Avid DNA, Avid DNxcel,
Avid DNxHD, AVIDdrive, Avid DS Assist Station, Avid EditStar, Avid Learning Excellerator, Avid Liquid, Avid Liquid Chrome Xe,
Avi d M ED IAr ray, Avid M oj o, Av idN et , Avi dNe two rk, Avi d N ewS tar , Avi d R emo te R esp ons e, AVI Dst rip e, Avid U nit y, Av id Un ity I SI S,
Avid VideoRAID, Avid Xpress, AVoption, AVX, Beauty Without The Bandwidth, Blacktooth, Boom, C|24, CamCutter, CaptureManager,
ChromaCurve, ChromaWheel, Command|24, Conectiv, CountDown, DAE, Dazzle, Dazzle Digital Video Creator, Deko, DekoCast, D-Fi,
D-fx, DigiDelivery, Digidesign, Digidesign Audio Engine, Digidesign Intelligent Noise Reduction, DigiDrive, DigiLink, DigiMeter,
DigiSerial, Digital Nonlinear Accelerator, DigiTranslator, DINR, DNxchange, do more, DVD Complete, D-Verb, Eleven, Equinox,
EveryPhase, ExpertRender, Fastbreak, Fast Track, FieldPak, Film Composer, FilmScribe, Flexevent, FluidMotion, FXDeko, G7, G-Rack,
HD Core, HD Process, HDPack, Hollywood DV-Bridge, Hybrid, HyperControl, HyperSPACE, HyperSPACE HDCAM, IllusionFX,
Image Independence, iNEWS, iNEWS Assign, iNEWS ControlAir, Instantwrite, Instinct, Intelli-sat Broadcasting Recording Manager,
Intelli-Sat, InterFX, Interplay, inTONE, Intraframe, iS9, iS18, iS23, iS36, ISIS, IsoSync, KeyRig, KeyStudio, LaunchPad, LeaderPlus,
Lightning, ListSync, Lo-Fi, Magic Mask, Make Anything Hollywood, make manage move | media, Marquee, M-Audio, M-Audio Micro,
Maxim, Mbox, MCXpress, Media Browse, Media Composer, MediaDock, MediaDock Shuttle, Media Fusion, Media Illusion, MediaLog,
Media Reader, Media Recorder, MEDIArray, MediaShare, MediaStream, Media Suite, Meridien, MetaFuze, MetaSync, MicroTrack,
Midiman, MissionControl, Mix Rack, MixLab, Moviebox, Moviestar, NaturalMatch, Nearchive, NetReview, NewsCutter, Nitris,
NRV-10 interFX, Octane, OMF, OMF Interchange, OMM, OnDVD, Open Media Framework, Open Media Management, Palladium,
Pinnacle, Pinnacle DistanTV, Pinnacle Geniebox, Pinnacle HomeMusic, Pinnacle MediaSuite, Pinnacle Mobile Media, Pinnacle PCTV,
Pinnacle PCTV HD Ultimate Stick, Pinnacle PCTV Nano Stick, Pinnacle PCTV To Go, Pinnacle Scorefitter, Pinnacle Studio,
Pinnacle Studio MovieBoard, Pinnacle Systems, Pinnacle VideoSpin, ProEncode, ProServices, ProSessions, Pro Tools, QuietDrive,
Recti-Fi, Reel Tape Delay, Reel Tape Flanger, Reel Tape Saturation, RetroLoop, rS9, rS18, Salesview, Sci-Fi, Scorch, Scorefitter,
ScriptSync, SecureProductionEnvironment, Session, Show Center, Sibelius, SIDON, Soft SampleCell, Soft-Clip Limiter,
Sound Designer II, SPACE, SPACEShift, SpectraGraph, SpectraMatte, Starplay, SteadyGlide, Streamfactory, Streamgenie, StreamRAID,
Strike, Structure, Studiophile, SubCap, Sundance Digital, Sundance, Symphony, SYNC HD, SynchroScience, SynchroScope, Syntax,
Targa, TDM FlexCable, Thunder, Titan, Titansync, TL Aggro, TL AutoPan, TL Drum Rehab, TL Everyphase, TL Fauxlder, TL In Tune,
TL MasterMeter, TL Metro, TL Space, TL Utilities, Torq, Torq Xponent, Transfuser, Trigger Finger, Trillium Lane Labs, TruTouch,
UnityRAID, Vari-Fi, Velvet, Venom, VideoRAID, Video Slave Driver, VideoSPACE, VideoSpin, Vortx, Xdeck, X-Form, Xmon, Xponent,
X-Session, and X-Session Pro are either registered trademarks or trademarks of Avid Technology, Inc. in the United States and/or other
countries.
Footage
Arri — Courtesy of Arri/Fauer — John Fauer, Inc.
Bell South “Anticipation” — Courtesy of Two Headed Monster — Tucker/Wayne Atlanta/GMS.
Canyonlands — Courtesy of the National Park Service/Department of the Interior.
Eco Challenge British Columbia — Courtesy of Eco Challenge Lifestyles, Inc., All Rights Reserved.
Eco Challenge Morocco — Courtesy of Discovery Communications, Inc.
It’s Shuttletime — Courtesy of BCP & Canadian Airlines.
).
4
Page 5

Nestlé Coffee Crisp — Courtesy of MacLaren McCann Canada.
Saturn “Calvin Egg” — Courtesy of Cossette Communications.
“Tigers: Tracking a Legend” — Courtesy of www.wildlifeworlds.com
"The Big Swell" — Courtesy of Swell Pictures, Inc.
Windhorse — Courtesy of Paul Wagner Productions.
Arizona Images — KNTV Production — Courtesy of Granite Broadcasting, Inc.,
Editor/Producer Bryan Foote.
Canyonlands — Courtesy of the National Park Service/Department of the Interior.
Ice Island — Courtesy of Kurtis Productions, Ltd.
Tornados + Belle Isle footage — Courtesy of KWTV News 9.
WCAU Fire Story — Courtesy of NBC-10, Philadelphia, PA.
Women in Sports – Paragliding — Courtesy of Legendary Entertainment, Inc.
News material provided by WFTV Television Inc.
, Carol Amore, Executive Producer.
GOT FOOTAGE?
Editors — Filmmakers — Special Effects Artists — Game Developers — Animators — Educators — Broadcasters — Content creators
of every genre — Just finished an incredible project and want to share it with the world?
Send us your reels and we may use your footage in our show reel or demo!*
For a copy of our release and Avid’s mailing address, go to
*Note: Avid cannot guarantee the use of materials submitted.
www.avid.com/footage.
Avid iNEWS v2017.1 User’s Guide • Created 10/16/17 • This document is distributed by Avid in online (electronic) form
only, and is not available for purchase in printed form.
5
Page 6

6
Page 7

Contents
Using This Guide . . . . . . . . . . . . . . . . . . . . . . . . . . . . . . . . . . . . . . . . . . . . . . . . . . 15
Symbols and Conventions . . . . . . . . . . . . . . . . . . . . . . . . . . . . . . . . . . . . . . . . . . . . . . . . . . . 15
If You Need Help . . . . . . . . . . . . . . . . . . . . . . . . . . . . . . . . . . . . . . . . . . . . . . . . . . . . . . . . . . 16
How to Order Documentation . . . . . . . . . . . . . . . . . . . . . . . . . . . . . . . . . . . . . . . . . . . . . . . . 17
Avid Training Services. . . . . . . . . . . . . . . . . . . . . . . . . . . . . . . . . . . . . . . . . . . . . . . . . . . . . . 17
Chapter 1 iNEWS System . . . . . . . . . . . . . . . . . . . . . . . . . . . . . . . . . . . . . . . . . . . . . . . . . . . . 18
Newsroom System Overview . . . . . . . . . . . . . . . . . . . . . . . . . . . . . . . . . . . . . . . . . . . . . . . . . 18
The iNEWS Workstation . . . . . . . . . . . . . . . . . . . . . . . . . . . . . . . . . . . . . . . . . . . . . . . . 18
The iNEWS Server . . . . . . . . . . . . . . . . . . . . . . . . . . . . . . . . . . . . . . . . . . . . . . . . . . . . . 19
The iNEWS Community. . . . . . . . . . . . . . . . . . . . . . . . . . . . . . . . . . . . . . . . . . . . . . . . . 19
Terms and Concepts . . . . . . . . . . . . . . . . . . . . . . . . . . . . . . . . . . . . . . . . . . . . . . . . . . . . . . . . 20
Chapter 2 Getting Started . . . . . . . . . . . . . . . . . . . . . . . . . . . . . . . . . . . . . . . . . . . . . . . . . . . . 22
Logging In to iNEWS. . . . . . . . . . . . . . . . . . . . . . . . . . . . . . . . . . . . . . . . . . . . . . . . . . . . . . . 22
The iNEWS Workstation’s Main Window. . . . . . . . . . . . . . . . . . . . . . . . . . . . . . . . . . . . . . . 24
Status Bar . . . . . . . . . . . . . . . . . . . . . . . . . . . . . . . . . . . . . . . . . . . . . . . . . . . . . . . . . . . . 25
Displaying or Hiding the Status bar . . . . . . . . . . . . . . . . . . . . . . . . . . . . . . . . . . . . 27
iNEWS Navigation Made Easy . . . . . . . . . . . . . . . . . . . . . . . . . . . . . . . . . . . . . . . . . . . . . . . 28
Using the Directory Panel . . . . . . . . . . . . . . . . . . . . . . . . . . . . . . . . . . . . . . . . . . . . . . . . 28
Opening a Directory . . . . . . . . . . . . . . . . . . . . . . . . . . . . . . . . . . . . . . . . . . . . . . . . 29
Closing a Directory . . . . . . . . . . . . . . . . . . . . . . . . . . . . . . . . . . . . . . . . . . . . . . . . . 29
Using the Go To Menu . . . . . . . . . . . . . . . . . . . . . . . . . . . . . . . . . . . . . . . . . . . . . . . . . . 30
Using the Destination Command. . . . . . . . . . . . . . . . . . . . . . . . . . . . . . . . . . . . . . . 30
Changing Your Password . . . . . . . . . . . . . . . . . . . . . . . . . . . . . . . . . . . . . . . . . . . . . . . . . . . . 31
Logging Out of iNEWS . . . . . . . . . . . . . . . . . . . . . . . . . . . . . . . . . . . . . . . . . . . . . . . . . . . . . 32
Chapter 3 The iNEWS Workspace . . . . . . . . . . . . . . . . . . . . . . . . . . . . . . . . . . . . . . . . . . . . . 33
Overview of an iNEWS Workspace. . . . . . . . . . . . . . . . . . . . . . . . . . . . . . . . . . . . . . . . . . . . 33
Opening an iNEWS Workspace . . . . . . . . . . . . . . . . . . . . . . . . . . . . . . . . . . . . . . . . . . . . . . . 35
Changing Workspace Color Settings . . . . . . . . . . . . . . . . . . . . . . . . . . . . . . . . . . . . . . . 36
Working with Panels. . . . . . . . . . . . . . . . . . . . . . . . . . . . . . . . . . . . . . . . . . . . . . . . . . . . . . . . 38
7
Page 8

Changing the Layout of Panels . . . . . . . . . . . . . . . . . . . . . . . . . . . . . . . . . . . . . . . . . . . . 38
Resizing a Panel in the Workspace . . . . . . . . . . . . . . . . . . . . . . . . . . . . . . . . . . . . . . . . . 39
Zooming in on a Panel . . . . . . . . . . . . . . . . . . . . . . . . . . . . . . . . . . . . . . . . . . . . . . . . . . 40
Moving From Panel to Panel in Zoom Mode . . . . . . . . . . . . . . . . . . . . . . . . . . . . . . . . . 40
Zooming out of a Panel . . . . . . . . . . . . . . . . . . . . . . . . . . . . . . . . . . . . . . . . . . . . . . . . . . 41
Displaying a Context Menu. . . . . . . . . . . . . . . . . . . . . . . . . . . . . . . . . . . . . . . . . . . . . . . 41
Arranging Multiple Workspaces. . . . . . . . . . . . . . . . . . . . . . . . . . . . . . . . . . . . . . . . . . . . . . . 41
Switching Between Workspaces . . . . . . . . . . . . . . . . . . . . . . . . . . . . . . . . . . . . . . . . . . . 42
Closing a Workspace . . . . . . . . . . . . . . . . . . . . . . . . . . . . . . . . . . . . . . . . . . . . . . . . . . . . . . . 42
Working with Multiple Monitors . . . . . . . . . . . . . . . . . . . . . . . . . . . . . . . . . . . . . . . . . . . . . . 43
Chapter 4 Toolbars . . . . . . . . . . . . . . . . . . . . . . . . . . . . . . . . . . . . . . . . . . . . . . . . . . . . . . . . . . 44
Standard Toolbars . . . . . . . . . . . . . . . . . . . . . . . . . . . . . . . . . . . . . . . . . . . . . . . . . . . . . . . . . . 44
Displaying or Hiding a Toolbar . . . . . . . . . . . . . . . . . . . . . . . . . . . . . . . . . . . . . . . . . . . 46
Moving a Toolbar . . . . . . . . . . . . . . . . . . . . . . . . . . . . . . . . . . . . . . . . . . . . . . . . . . . . . . 48
Custom Toolbars. . . . . . . . . . . . . . . . . . . . . . . . . . . . . . . . . . . . . . . . . . . . . . . . . . . . . . . . . . . 49
Creating a Custom Toolbar . . . . . . . . . . . . . . . . . . . . . . . . . . . . . . . . . . . . . . . . . . . . . . . 49
Modifying a Custom Toolbar . . . . . . . . . . . . . . . . . . . . . . . . . . . . . . . . . . . . . . . . . . . . . 51
Creating a Shortcut Button . . . . . . . . . . . . . . . . . . . . . . . . . . . . . . . . . . . . . . . . . . . . . . . 53
Shortcut Button Images . . . . . . . . . . . . . . . . . . . . . . . . . . . . . . . . . . . . . . . . . . . . . . 57
Chapter 5 Working with Queues . . . . . . . . . . . . . . . . . . . . . . . . . . . . . . . . . . . . . . . . . . . . . . . 58
Changing Forms for Viewing Queues . . . . . . . . . . . . . . . . . . . . . . . . . . . . . . . . . . . . . . . . . . 58
Changing the Width of a Queue Form Field. . . . . . . . . . . . . . . . . . . . . . . . . . . . . . . . . . . . . . 59
Easy Locking a Queue . . . . . . . . . . . . . . . . . . . . . . . . . . . . . . . . . . . . . . . . . . . . . . . . . . . . . . 59
Key Locking a Queue . . . . . . . . . . . . . . . . . . . . . . . . . . . . . . . . . . . . . . . . . . . . . . . . . . . . . . . 60
Moving a Queue . . . . . . . . . . . . . . . . . . . . . . . . . . . . . . . . . . . . . . . . . . . . . . . . . . . . . . . . . . . 61
Opening a Queue . . . . . . . . . . . . . . . . . . . . . . . . . . . . . . . . . . . . . . . . . . . . . . . . . . . . . . . . . . 61
Refreshing a Queue. . . . . . . . . . . . . . . . . . . . . . . . . . . . . . . . . . . . . . . . . . . . . . . . . . . . . . . . . 62
Searching for Text in a Queue . . . . . . . . . . . . . . . . . . . . . . . . . . . . . . . . . . . . . . . . . . . . . . . . 63
Specifying a Destination Queue . . . . . . . . . . . . . . . . . . . . . . . . . . . . . . . . . . . . . . . . . . . . . . . 63
Unlocking a Queue . . . . . . . . . . . . . . . . . . . . . . . . . . . . . . . . . . . . . . . . . . . . . . . . . . . . . . . . . 64
Using Abstract Display in Queue . . . . . . . . . . . . . . . . . . . . . . . . . . . . . . . . . . . . . . . . . . . . . . 65
Using Currency Total . . . . . . . . . . . . . . . . . . . . . . . . . . . . . . . . . . . . . . . . . . . . . . . . . . . . . . . 65
Viewing Queue Properties . . . . . . . . . . . . . . . . . . . . . . . . . . . . . . . . . . . . . . . . . . . . . . . . . . . 66
8
Page 9

MediaCentral | UX Integration . . . . . . . . . . . . . . . . . . . . . . . . . . . . . . . . . . . . . . . . . . . . . . . . 67
Chapter 6 Working with Wires. . . . . . . . . . . . . . . . . . . . . . . . . . . . . . . . . . . . . . . . . . . . . . . . 69
Viewing Priority Wire Stories . . . . . . . . . . . . . . . . . . . . . . . . . . . . . . . . . . . . . . . . . . . . . . . . 69
Viewing the Ten Most Recent Priority Wires . . . . . . . . . . . . . . . . . . . . . . . . . . . . . . . . . . . . 70
Chapter 7 Stories - Creation and Modification . . . . . . . . . . . . . . . . . . . . . . . . . . . . . . . . . . . 71
Understanding the Story Panel . . . . . . . . . . . . . . . . . . . . . . . . . . . . . . . . . . . . . . . . . . . . . . . . 72
Displaying Story Form Sub-Panel . . . . . . . . . . . . . . . . . . . . . . . . . . . . . . . . . . . . . . . . . 73
Displaying Instruction Sub-Panel . . . . . . . . . . . . . . . . . . . . . . . . . . . . . . . . . . . . . . . . . . 73
Navigating the Story Panel . . . . . . . . . . . . . . . . . . . . . . . . . . . . . . . . . . . . . . . . . . . . . . . 73
Changing Tab Settings for Story Text Sub-panel . . . . . . . . . . . . . . . . . . . . . . . . . . . . . . 74
Creating a New Story . . . . . . . . . . . . . . . . . . . . . . . . . . . . . . . . . . . . . . . . . . . . . . . . . . . . . . . 75
Creating Story Links . . . . . . . . . . . . . . . . . . . . . . . . . . . . . . . . . . . . . . . . . . . . . . . . . . . . 76
Opening a Story . . . . . . . . . . . . . . . . . . . . . . . . . . . . . . . . . . . . . . . . . . . . . . . . . . . . . . . . . . . 76
Changing Case of Text in Stories . . . . . . . . . . . . . . . . . . . . . . . . . . . . . . . . . . . . . . . . . . . . . . 76
Formatting Text . . . . . . . . . . . . . . . . . . . . . . . . . . . . . . . . . . . . . . . . . . . . . . . . . . . . . . . . . . . 77
Searching for Text in a Story . . . . . . . . . . . . . . . . . . . . . . . . . . . . . . . . . . . . . . . . . . . . . . . . . 78
Replacing Text in a Story . . . . . . . . . . . . . . . . . . . . . . . . . . . . . . . . . . . . . . . . . . . . . . . . . . . . 79
Using iNEWS Scratchpad. . . . . . . . . . . . . . . . . . . . . . . . . . . . . . . . . . . . . . . . . . . . . . . . . . . . 80
Pasting Text from the iNEWS Scratchpad . . . . . . . . . . . . . . . . . . . . . . . . . . . . . . . . . . . 81
Erasing the iNEWS Scratchpad . . . . . . . . . . . . . . . . . . . . . . . . . . . . . . . . . . . . . . . . . . . 81
Inserting a Download Link . . . . . . . . . . . . . . . . . . . . . . . . . . . . . . . . . . . . . . . . . . . . . . . . . . . 81
Inserting a Time Stamp. . . . . . . . . . . . . . . . . . . . . . . . . . . . . . . . . . . . . . . . . . . . . . . . . . . . . . 81
Adding Page Breaks to a Story. . . . . . . . . . . . . . . . . . . . . . . . . . . . . . . . . . . . . . . . . . . . . . . . 82
Spell-Checking a Story. . . . . . . . . . . . . . . . . . . . . . . . . . . . . . . . . . . . . . . . . . . . . . . . . . . . . . 82
Creating a Custom Dictionary. . . . . . . . . . . . . . . . . . . . . . . . . . . . . . . . . . . . . . . . . . . . . 83
Saving a Story. . . . . . . . . . . . . . . . . . . . . . . . . . . . . . . . . . . . . . . . . . . . . . . . . . . . . . . . . . . . . 84
Saving a Message as a Story . . . . . . . . . . . . . . . . . . . . . . . . . . . . . . . . . . . . . . . . . . . . . . 85
Chapter 8 Moving Stories . . . . . . . . . . . . . . . . . . . . . . . . . . . . . . . . . . . . . . . . . . . . . . . . . . . . 86
Selecting a Story . . . . . . . . . . . . . . . . . . . . . . . . . . . . . . . . . . . . . . . . . . . . . . . . . . . . . . . . . . . 86
Selecting Several Stories in a Sequence . . . . . . . . . . . . . . . . . . . . . . . . . . . . . . . . . . . . . 87
Selecting Several Stories out of Sequence . . . . . . . . . . . . . . . . . . . . . . . . . . . . . . . . . . . 87
Copying a Story . . . . . . . . . . . . . . . . . . . . . . . . . . . . . . . . . . . . . . . . . . . . . . . . . . . . . . . . . . . 88
Copying Several Stories in a Sequence. . . . . . . . . . . . . . . . . . . . . . . . . . . . . . . . . . . . . . 88
9
Page 10

Copying Several Stories out of Sequence . . . . . . . . . . . . . . . . . . . . . . . . . . . . . . . . . . . . 89
Moving a Story . . . . . . . . . . . . . . . . . . . . . . . . . . . . . . . . . . . . . . . . . . . . . . . . . . . . . . . . . . . . 91
Moving Several Stories in a Sequence . . . . . . . . . . . . . . . . . . . . . . . . . . . . . . . . . . . . . . 92
Moving Several Stories out of Sequence . . . . . . . . . . . . . . . . . . . . . . . . . . . . . . . . . . . . 93
Grouping Stories. . . . . . . . . . . . . . . . . . . . . . . . . . . . . . . . . . . . . . . . . . . . . . . . . . . . . . . . . . . 95
Importing a Story . . . . . . . . . . . . . . . . . . . . . . . . . . . . . . . . . . . . . . . . . . . . . . . . . . . . . . . . . . 96
Exporting a Story . . . . . . . . . . . . . . . . . . . . . . . . . . . . . . . . . . . . . . . . . . . . . . . . . . . . . . . . . . 97
Exporting Multiple Stories . . . . . . . . . . . . . . . . . . . . . . . . . . . . . . . . . . . . . . . . . . . . . . . 98
Mailing a Copy of a Story. . . . . . . . . . . . . . . . . . . . . . . . . . . . . . . . . . . . . . . . . . . . . . . . . . . . 99
Chapter 9 Stories - Protection . . . . . . . . . . . . . . . . . . . . . . . . . . . . . . . . . . . . . . . . . . . . . . . . 101
Easy Locking a Story . . . . . . . . . . . . . . . . . . . . . . . . . . . . . . . . . . . . . . . . . . . . . . . . . . . . . . 101
Edit Locking a Story. . . . . . . . . . . . . . . . . . . . . . . . . . . . . . . . . . . . . . . . . . . . . . . . . . . . . . . 102
Key Locking a Story. . . . . . . . . . . . . . . . . . . . . . . . . . . . . . . . . . . . . . . . . . . . . . . . . . . . . . . 103
Removing an Edit lock from a Story . . . . . . . . . . . . . . . . . . . . . . . . . . . . . . . . . . . . . . . . . . 104
Unlocking a Story . . . . . . . . . . . . . . . . . . . . . . . . . . . . . . . . . . . . . . . . . . . . . . . . . . . . . . . . . 104
Protecting a Story from Being Deleted. . . . . . . . . . . . . . . . . . . . . . . . . . . . . . . . . . . . . . . . . 105
Backing up a Story . . . . . . . . . . . . . . . . . . . . . . . . . . . . . . . . . . . . . . . . . . . . . . . . . . . . . . . . 105
Recovering a Backed-Up Story . . . . . . . . . . . . . . . . . . . . . . . . . . . . . . . . . . . . . . . . . . . . . . 106
Killing a Story. . . . . . . . . . . . . . . . . . . . . . . . . . . . . . . . . . . . . . . . . . . . . . . . . . . . . . . . . . . . 106
Retrieving a Killed Story . . . . . . . . . . . . . . . . . . . . . . . . . . . . . . . . . . . . . . . . . . . . . . . . . . . 107
Versions of Stories . . . . . . . . . . . . . . . . . . . . . . . . . . . . . . . . . . . . . . . . . . . . . . . . . . . . . . . . 107
Chapter 10 iNEWS Projects . . . . . . . . . . . . . . . . . . . . . . . . . . . . . . . . . . . . . . . . . . . . . . . . . . . 108
Overview of Projects and Facets . . . . . . . . . . . . . . . . . . . . . . . . . . . . . . . . . . . . . . . . . . . . . 108
Creating Projects. . . . . . . . . . . . . . . . . . . . . . . . . . . . . . . . . . . . . . . . . . . . . . . . . . . . . . . . . . 110
Date Variables for Searching . . . . . . . . . . . . . . . . . . . . . . . . . . . . . . . . . . . . . . . . . . . . 113
Creating Facets . . . . . . . . . . . . . . . . . . . . . . . . . . . . . . . . . . . . . . . . . . . . . . . . . . . . . . . . . . . 114
Creating a New Story inside a Project . . . . . . . . . . . . . . . . . . . . . . . . . . . . . . . . . . . . . . . . . 116
Associating Stories with Projects or Facets . . . . . . . . . . . . . . . . . . . . . . . . . . . . . . . . . . . . . 116
Creating a Navigation Shortcut Button. . . . . . . . . . . . . . . . . . . . . . . . . . . . . . . . . . . . . . . . . 118
Chapter 11 Scripted Stories . . . . . . . . . . . . . . . . . . . . . . . . . . . . . . . . . . . . . . . . . . . . . . . . . . . 120
Displaying a Production Cue . . . . . . . . . . . . . . . . . . . . . . . . . . . . . . . . . . . . . . . . . . . . . . . . 120
Enabling Autoscript . . . . . . . . . . . . . . . . . . . . . . . . . . . . . . . . . . . . . . . . . . . . . . . . . . . . . . . 121
Adding a Production Cue to a Story . . . . . . . . . . . . . . . . . . . . . . . . . . . . . . . . . . . . . . . . . . . 121
10
Page 11

Adding a CG Production Cue. . . . . . . . . . . . . . . . . . . . . . . . . . . . . . . . . . . . . . . . . . . . . . . . 122
Adding a Video Production Cue. . . . . . . . . . . . . . . . . . . . . . . . . . . . . . . . . . . . . . . . . . . . . . 123
Adding a Still Store Production Cue . . . . . . . . . . . . . . . . . . . . . . . . . . . . . . . . . . . . . . . . . . 123
Moving a Production Cue. . . . . . . . . . . . . . . . . . . . . . . . . . . . . . . . . . . . . . . . . . . . . . . . . . . 124
Deleting a Production Cue . . . . . . . . . . . . . . . . . . . . . . . . . . . . . . . . . . . . . . . . . . . . . . . . . . 124
Using Script Templates. . . . . . . . . . . . . . . . . . . . . . . . . . . . . . . . . . . . . . . . . . . . . . . . . . . . . 125
Using CG Title Entry . . . . . . . . . . . . . . . . . . . . . . . . . . . . . . . . . . . . . . . . . . . . . . . . . . . . . . 126
Primary Machine Control Event Placeholder. . . . . . . . . . . . . . . . . . . . . . . . . . . . . . . . . . . . 129
Inserting MOS Items from Video IDs . . . . . . . . . . . . . . . . . . . . . . . . . . . . . . . . . . . . . . . . . 129
Using MOS Placeholders . . . . . . . . . . . . . . . . . . . . . . . . . . . . . . . . . . . . . . . . . . . . . . . . . . . 130
Unscripting a Story. . . . . . . . . . . . . . . . . . . . . . . . . . . . . . . . . . . . . . . . . . . . . . . . . . . . . . . . 131
Chapter 12 Production Tasks . . . . . . . . . . . . . . . . . . . . . . . . . . . . . . . . . . . . . . . . . . . . . . . . . 133
Producer Basics . . . . . . . . . . . . . . . . . . . . . . . . . . . . . . . . . . . . . . . . . . . . . . . . . . . . . . . . . . 133
Endorsing a Story . . . . . . . . . . . . . . . . . . . . . . . . . . . . . . . . . . . . . . . . . . . . . . . . . . . . . . . . . 135
Inserting a Break Line . . . . . . . . . . . . . . . . . . . . . . . . . . . . . . . . . . . . . . . . . . . . . . . . . . . . . 135
Ordering a Queue . . . . . . . . . . . . . . . . . . . . . . . . . . . . . . . . . . . . . . . . . . . . . . . . . . . . . . . . . 136
Calculating Backtime from Out Time . . . . . . . . . . . . . . . . . . . . . . . . . . . . . . . . . . . . . . . . . 136
Displaying the Show Timing Clocks . . . . . . . . . . . . . . . . . . . . . . . . . . . . . . . . . . . . . . . . . . 137
Establishing Broadcast Control in a Queue . . . . . . . . . . . . . . . . . . . . . . . . . . . . . . . . . . . . . 138
Loading a Rundown Queue into Broadcast Control. . . . . . . . . . . . . . . . . . . . . . . . . . . . . . . 140
Placing a Rundown Queue in Show Timing Mode . . . . . . . . . . . . . . . . . . . . . . . . . . . . . . . 141
Production Locking a Queue . . . . . . . . . . . . . . . . . . . . . . . . . . . . . . . . . . . . . . . . . . . . . . . . 142
Setting Clock for Show Timing . . . . . . . . . . . . . . . . . . . . . . . . . . . . . . . . . . . . . . . . . . . . . . 142
Setting Story Start Times in a Rundown Queue. . . . . . . . . . . . . . . . . . . . . . . . . . . . . . . . . . 143
Synchronizing a Story. . . . . . . . . . . . . . . . . . . . . . . . . . . . . . . . . . . . . . . . . . . . . . . . . . . . . . 143
Synchronizing the First Story . . . . . . . . . . . . . . . . . . . . . . . . . . . . . . . . . . . . . . . . . . . . . . . . 143
Synchronizing a Rundown Queue During Broadcast . . . . . . . . . . . . . . . . . . . . . . . . . . . . . . 144
Timing Story Text. . . . . . . . . . . . . . . . . . . . . . . . . . . . . . . . . . . . . . . . . . . . . . . . . . . . . . . . . 144
Timing a Show . . . . . . . . . . . . . . . . . . . . . . . . . . . . . . . . . . . . . . . . . . . . . . . . . . . . . . . . . . . 146
Floating a Story. . . . . . . . . . . . . . . . . . . . . . . . . . . . . . . . . . . . . . . . . . . . . . . . . . . . . . . . . . . 146
Tracking a Show . . . . . . . . . . . . . . . . . . . . . . . . . . . . . . . . . . . . . . . . . . . . . . . . . . . . . . . . . . 147
Clearing AIR-DATE Field and ON-AIR Flags . . . . . . . . . . . . . . . . . . . . . . . . . . . . . . . . . . 147
Chapter 13 Printing . . . . . . . . . . . . . . . . . . . . . . . . . . . . . . . . . . . . . . . . . . . . . . . . . . . . . . . . . 148
11
Page 12

Local Printing Dialog . . . . . . . . . . . . . . . . . . . . . . . . . . . . . . . . . . . . . . . . . . . . . . . . . . . . . . 148
Local Printing a Queue . . . . . . . . . . . . . . . . . . . . . . . . . . . . . . . . . . . . . . . . . . . . . . . . . . . . . 153
Local Printing a Story . . . . . . . . . . . . . . . . . . . . . . . . . . . . . . . . . . . . . . . . . . . . . . . . . . . . . . 154
Chapter 14 Messages and Mail. . . . . . . . . . . . . . . . . . . . . . . . . . . . . . . . . . . . . . . . . . . . . . . . . 156
Checking User Names for Validity. . . . . . . . . . . . . . . . . . . . . . . . . . . . . . . . . . . . . . . . . . . . 156
Sending a Message . . . . . . . . . . . . . . . . . . . . . . . . . . . . . . . . . . . . . . . . . . . . . . . . . . . . . . . . 157
Message Indicators . . . . . . . . . . . . . . . . . . . . . . . . . . . . . . . . . . . . . . . . . . . . . . . . . . . . 158
Replying to a Message . . . . . . . . . . . . . . . . . . . . . . . . . . . . . . . . . . . . . . . . . . . . . . . . . . . . . 158
Recalling a Message . . . . . . . . . . . . . . . . . . . . . . . . . . . . . . . . . . . . . . . . . . . . . . . . . . . . . . . 159
Saving a Message as a Story. . . . . . . . . . . . . . . . . . . . . . . . . . . . . . . . . . . . . . . . . . . . . . . . . 159
Sending an Intersystem Message . . . . . . . . . . . . . . . . . . . . . . . . . . . . . . . . . . . . . . . . . . . . . 160
Sending Mail. . . . . . . . . . . . . . . . . . . . . . . . . . . . . . . . . . . . . . . . . . . . . . . . . . . . . . . . . . . . . 161
Reading Mail. . . . . . . . . . . . . . . . . . . . . . . . . . . . . . . . . . . . . . . . . . . . . . . . . . . . . . . . . . . . . 162
Replying to Mail . . . . . . . . . . . . . . . . . . . . . . . . . . . . . . . . . . . . . . . . . . . . . . . . . . . . . . . . . . 162
Forwarding Mail . . . . . . . . . . . . . . . . . . . . . . . . . . . . . . . . . . . . . . . . . . . . . . . . . . . . . . . . . . 163
Deleting Mail . . . . . . . . . . . . . . . . . . . . . . . . . . . . . . . . . . . . . . . . . . . . . . . . . . . . . . . . . . . . 163
Setting Mail Options. . . . . . . . . . . . . . . . . . . . . . . . . . . . . . . . . . . . . . . . . . . . . . . . . . . . . . . 164
Chapter 15 Sessions and Preferences. . . . . . . . . . . . . . . . . . . . . . . . . . . . . . . . . . . . . . . . . . . . 165
Working with Sessions . . . . . . . . . . . . . . . . . . . . . . . . . . . . . . . . . . . . . . . . . . . . . . . . . . . . . 165
Customizing User Preferences . . . . . . . . . . . . . . . . . . . . . . . . . . . . . . . . . . . . . . . . . . . . . . . 166
Setting Session Preferences. . . . . . . . . . . . . . . . . . . . . . . . . . . . . . . . . . . . . . . . . . . . . . 167
Setting Confirmation Preferences . . . . . . . . . . . . . . . . . . . . . . . . . . . . . . . . . . . . . . . . . 168
Setting Backup Preferences. . . . . . . . . . . . . . . . . . . . . . . . . . . . . . . . . . . . . . . . . . . . . . 169
Setting Refresh Preferences . . . . . . . . . . . . . . . . . . . . . . . . . . . . . . . . . . . . . . . . . . . . . 170
Setting Layout Preferences . . . . . . . . . . . . . . . . . . . . . . . . . . . . . . . . . . . . . . . . . . . . . . 171
Setting Search Preferences . . . . . . . . . . . . . . . . . . . . . . . . . . . . . . . . . . . . . . . . . . . . . . 172
Chapter 16 Macros . . . . . . . . . . . . . . . . . . . . . . . . . . . . . . . . . . . . . . . . . . . . . . . . . . . . . . . . . . 173
Types of Macros . . . . . . . . . . . . . . . . . . . . . . . . . . . . . . . . . . . . . . . . . . . . . . . . . . . . . . . . . . 173
Creating a Macro . . . . . . . . . . . . . . . . . . . . . . . . . . . . . . . . . . . . . . . . . . . . . . . . . . . . . . . . . 174
Using the State Keys in Macros . . . . . . . . . . . . . . . . . . . . . . . . . . . . . . . . . . . . . . . . . . . . . . 176
Chapter 17 Searching in iNEWS . . . . . . . . . . . . . . . . . . . . . . . . . . . . . . . . . . . . . . . . . . . . . . . 177
Types of Searches . . . . . . . . . . . . . . . . . . . . . . . . . . . . . . . . . . . . . . . . . . . . . . . . . . . . . . . . . 177
Basic Word Searches. . . . . . . . . . . . . . . . . . . . . . . . . . . . . . . . . . . . . . . . . . . . . . . . . . . 178
12
Page 13

Seek Queries . . . . . . . . . . . . . . . . . . . . . . . . . . . . . . . . . . . . . . . . . . . . . . . . . . . . . . . . . 179
Indexed Queries . . . . . . . . . . . . . . . . . . . . . . . . . . . . . . . . . . . . . . . . . . . . . . . . . . . . . . 179
Pattern Matching Searches . . . . . . . . . . . . . . . . . . . . . . . . . . . . . . . . . . . . . . . . . . 180
Phrase Searches . . . . . . . . . . . . . . . . . . . . . . . . . . . . . . . . . . . . . . . . . . . . . . . . . . . 180
The Find/Find Next Command. . . . . . . . . . . . . . . . . . . . . . . . . . . . . . . . . . . . . . . . . . . . . . . 183
Find/Find Next Search String . . . . . . . . . . . . . . . . . . . . . . . . . . . . . . . . . . . . . . . . . . . . 184
Using Find/Find Next in the Story Panel . . . . . . . . . . . . . . . . . . . . . . . . . . . . . . . . . . . 184
Using Find/Find Next in the Queue Panel . . . . . . . . . . . . . . . . . . . . . . . . . . . . . . . . . . 185
Using the Find All Command. . . . . . . . . . . . . . . . . . . . . . . . . . . . . . . . . . . . . . . . . . . . . . . . 186
Find All Search String. . . . . . . . . . . . . . . . . . . . . . . . . . . . . . . . . . . . . . . . . . . . . . . . . . 188
Find All Dialog Box . . . . . . . . . . . . . . . . . . . . . . . . . . . . . . . . . . . . . . . . . . . . . . . . . . . 189
Managing Your Favorite Searches . . . . . . . . . . . . . . . . . . . . . . . . . . . . . . . . . . . . 191
Date Variables for Searching. . . . . . . . . . . . . . . . . . . . . . . . . . . . . . . . . . . . . . . . . 193
Using the Find Global Command. . . . . . . . . . . . . . . . . . . . . . . . . . . . . . . . . . . . . . . . . . . . . 194
Search Results Pane . . . . . . . . . . . . . . . . . . . . . . . . . . . . . . . . . . . . . . . . . . . . . . . . . . . . . . . 195
Search Queues . . . . . . . . . . . . . . . . . . . . . . . . . . . . . . . . . . . . . . . . . . . . . . . . . . . . . . . . . . . 197
Word Delimiters . . . . . . . . . . . . . . . . . . . . . . . . . . . . . . . . . . . . . . . . . . . . . . . . . . . . . . . . . . 200
Basic Proximity Searches . . . . . . . . . . . . . . . . . . . . . . . . . . . . . . . . . . . . . . . . . . . . . . . . . . . 201
Field Searches. . . . . . . . . . . . . . . . . . . . . . . . . . . . . . . . . . . . . . . . . . . . . . . . . . . . . . . . . . . . 202
Searching Older Stories . . . . . . . . . . . . . . . . . . . . . . . . . . . . . . . . . . . . . . . . . . . . . . . . . . . . 205
Chapter 18 Local Databases . . . . . . . . . . . . . . . . . . . . . . . . . . . . . . . . . . . . . . . . . . . . . . . . . . 206
Local Database Structure . . . . . . . . . . . . . . . . . . . . . . . . . . . . . . . . . . . . . . . . . . . . . . . . . . . 206
Forms and Print Styles for Local Databases . . . . . . . . . . . . . . . . . . . . . . . . . . . . . . . . . 207
Local Database Security . . . . . . . . . . . . . . . . . . . . . . . . . . . . . . . . . . . . . . . . . . . . . . . . . . . . 208
Creating a Local Database . . . . . . . . . . . . . . . . . . . . . . . . . . . . . . . . . . . . . . . . . . . . . . . . . . 208
Logging into a Local Database . . . . . . . . . . . . . . . . . . . . . . . . . . . . . . . . . . . . . . . . . . . . . . . 210
Creating a Folder in Your Local Database . . . . . . . . . . . . . . . . . . . . . . . . . . . . . . . . . . . . . . 211
Creating a Queue in Your Local Database . . . . . . . . . . . . . . . . . . . . . . . . . . . . . . . . . . . . . . 212
Deleting a Folder or Queue from a Local Database . . . . . . . . . . . . . . . . . . . . . . . . . . . . . . . 213
Chapter 19 Connecting to a Remote Service . . . . . . . . . . . . . . . . . . . . . . . . . . . . . . . . . . . . . 214
Disconnecting from a Remote Service . . . . . . . . . . . . . . . . . . . . . . . . . . . . . . . . . . . . . . . . . 215
Appendix A System Shortcuts . . . . . . . . . . . . . . . . . . . . . . . . . . . . . . . . . . . . . . . . . . . . . . . . . 216
Directory Panel Shortcuts . . . . . . . . . . . . . . . . . . . . . . . . . . . . . . . . . . . . . . . . . . . . . . . . . . . 217
13
Page 14

Message and Mail Shortcuts. . . . . . . . . . . . . . . . . . . . . . . . . . . . . . . . . . . . . . . . . . . . . . . . . 217
Queue Panel Shortcuts . . . . . . . . . . . . . . . . . . . . . . . . . . . . . . . . . . . . . . . . . . . . . . . . . . . . . 218
Story Panel Shortcuts . . . . . . . . . . . . . . . . . . . . . . . . . . . . . . . . . . . . . . . . . . . . . . . . . . . . . . 220
Project Shortcuts . . . . . . . . . . . . . . . . . . . . . . . . . . . . . . . . . . . . . . . . . . . . . . . . . . . . . . . . . . 225
Workspace Shortcuts . . . . . . . . . . . . . . . . . . . . . . . . . . . . . . . . . . . . . . . . . . . . . . . . . . . . . . 225
Search Keyboard Shortcuts. . . . . . . . . . . . . . . . . . . . . . . . . . . . . . . . . . . . . . . . . . . . . . . . . . 226
Appendix B Icons . . . . . . . . . . . . . . . . . . . . . . . . . . . . . . . . . . . . . . . . . . . . . . . . . . . . . . . . . . . . 228
Directory Panel Icons . . . . . . . . . . . . . . . . . . . . . . . . . . . . . . . . . . . . . . . . . . . . . . . . . . . . . . 228
Messaging and Mail Icons . . . . . . . . . . . . . . . . . . . . . . . . . . . . . . . . . . . . . . . . . . . . . . . . . . 229
Queue Panel Icons . . . . . . . . . . . . . . . . . . . . . . . . . . . . . . . . . . . . . . . . . . . . . . . . . . . . . . . . 230
Chapter Glossary . . . . . . . . . . . . . . . . . . . . . . . . . . . . . . . . . . . . . . . . . . . . . . . . . . . . . . . . . 232
Index . . . . . . . . . . . . . . . . . . . . . . . . . . . . . . . . . . . . . . . . . . . . . . . . . . . . . . . . . . . . 238
14
Page 15

Using This Guide
Congratulations on your purchase of your Avid iNEWS newsroom computer system.
Avid iNEWS newsroom computer system offers a considerable amount of functionality for the
state-of-the-art newsroom, including newsroom system integration with playout control
software, and mobile or web-based applications. With Avid iNEWS, newsroom personnel can
easily create and manage rundowns for news broadcasts, create and edit stories, monitor wires,
and so forth.
This publication provides information on how to use the Avid iNEWS system.
The documentation describes the standard features of a basic system configuration. Therefore,
n
your system might contain certain features and hardware that are not covered in the
documentation.
Symbols and Conventions
Avid documentation uses the following symbols and conventions:
Symbol or Convention Meaning or Action
n
c
w
> This symbol indicates menu commands (and subcommands) in the
A note provides important related information, reminders,
recommendations, and strong suggestions.
A caution means that a specific action you take could cause harm to
your computer or cause you to lose data.
A warning describes an action that could cause you physical harm.
Follow the guidelines in this document or on the unit itself when
handling electrical equipment.
order you select them. For example, File > Import means to open the
File menu and then select the Import command.
This symbol indicates a single-step procedure. Multiple arrows in a list
indicate that you perform one of the actions listed.
Page 16

Symbol or Convention Meaning or Action
If You Need Help
(Windows), (Windows
only), (Macintosh), or
(Macintosh only)
Bold font Bold font is primarily used in task instructions to identify user interface
Italic font Italic font is used to emphasize certain words and to indicate variables.
Courier Bold font
Ctrl+key or mouse action Press and hold the first key while you press the last key or perform the
| (pipe character) The pipe character is used in some Avid product names, such as
If You Need Help
If you are having trouble using your Avid product:
1. Retry the action, carefully following the instructions given for that task in this guide. It is
especially important to check each step of your workflow.
2. Check the latest information that might have become available after the documentation was
published. You should always check online for the most up-to-date release notes or ReadMe
because the online version is updated whenever new information becomes available. To
view these online versions, select ReadMe from the Help menu, or visit the Knowledge Base
www.avid.com/support.
at
This text indicates that the information applies only to the specified
operating system, either Windows or Macintosh OS X.
items and keyboard sequences.
Courier Bold font identifies text that you type.
mouse action. For example, Command+Option+C or Ctrl+drag.
Interplay | Production. In this document, the pipe is used in product
names when they are in headings or at their first use in text.
3. Check the documentation that came with your Avid application or your hardware for
maintenance or hardware-related issues.
4. Visit the online Knowledge Base at
www.avid.com/support. Online services are available 24
hours per day, 7 days per week. Search this online Knowledge Base to find answers, to view
error messages, to access troubleshooting tips, to download updates, and to read or join
online message-board discussions.
16
Page 17

How to Order Documentation
To order additional copies of this documentation from within the United States, call Avid Sales at
800-949-AVID (800-949-2843). If you are placing an order from outside the United States,
contact your local Avid representative.
Avid Training Services
Avid makes lifelong learning, career advancement, and personal development easy and
convenient. Avid understands that the knowledge you need to differentiate yourself is always
changing, and Avid continually updates course content and offers new training delivery methods
that accommodate your pressured and competitive work environment.
For information on courses/schedules, training centers, certifications, courseware, and books,
please visit
800-949-AVID (800-949-2843).
www.avid.com/support and follow the Training links, or call Avid Sales at
How to Order Documentation
17
Page 18

1 iNEWS System
The iNEWS system is a modular newsroom computer system that is a powerful tool for
aggregating research material, creating rundowns, and editing stories. When combined with
other Avid systems, such as iNEWS | Command or MediaCentral | UX, it provides journalists,
producers, directors, and various technical personnel in the newsroom an array of high quality
tools to make their jobs easier.
While daily work is done at an iNEWS Workstation, it is still useful for you to have an
understanding of the larger architecture, which makes up the system.
The following topics provide more information on the iNEWS system:
Newsroom System Overview
•
• Terms and Concepts
Newsroom System Overview
Before discussing basic procedures and operations of iNEWS, it is important to describe the
components that make up the system and to review common terms and concepts specific to
iNEWS.
The iNEWS Workstation
The iNEWS newsroom computer system primarily consists of iNEWS Workstations, which
connect to iNEWS Servers. Journalists working at iNEWS Workstations can simultaneously
monitor news wires, work on stories, search archives, and access an array of online information
sources.
From individual workstations, producers and news directors can plan and monitor the progress
of shows by viewing their rundowns. Color highlights on the workstation screen show critical
status information, making it easy to see the current state of the show and production devices.
The iNEWS system enables users to collaborate on all aspects of the show production process.
Mail and messaging capabilities make group communication fast and efficient. And with the
iNEWS Community feature, personnel in various newsrooms can communicate and share data
across multiple iNEWS systems.
Page 19

Access to the iNEWS database is not limited to workstations in the newsroom because iNEWS
seamlessly integrates with another Avid product; MediaCentral | UX is a cloud-based, web
front-end that lets you connect from a desktop computer, laptop, or mobile device for real-time
access to production assets, metadata, and iNEWS stories.
The iNEWS Server
The iNEWS Server manages all of the day-to-day activities of the newsroom. System
administrators can create forms-based displays and customize rundowns specific to their
newsrooms.
The data you and others in your newsroom create—stories, scripts, news rundowns, etc.—are
saved in a database (file system) on the iNEWS Server. When the iNEWS Server receives new
information, such as additions or changes to stories, that information is immediately available to
all newsroom personnel.
Although iNEWS Server is referred to as a singular unit, an iNEWS system typically consists of
n
two or more computers called servers—all of which run the iNEWS Server software. Each
computer acts as a backup for the other to protect the overall stability of the system as a whole.
The iNEWS system protects your information by mirroring the database across all of the servers
within the system. The mirroring process provides redundancy, ensuring that any information
you add to your stories or rundowns is actually stored in multiple locations. Should anything
happen to one of the servers, the other servers can maintain services and ensure the integrity of
the database.
Newsroom System Overview
The iNEWS Community
The fast-paced nature of the news business requires the ability to turn content around quickly
and efficiently. Broadcasters must be able to gather news from a vast range of resources and
engage in collaborative efforts with others located in remote newsrooms.
The iNEWS Community feature eliminates communication barriers by allowing news teams to
drag and drop stories directly between systems, easily access and duplicate stories from other
iNEWS systems, and build shortcuts to remote locations. Journalists and producers at station
groups and large broadcast sites can access, view, edit, monitor and search for content across
various locations in a seamless fashion, thus enabling them to identify breaking news more
quickly, reducing the time and costs associated with getting stories to air. Users logged in to
systems within the same community can also communicate via the messaging feature of iNEWS.
19
Page 20

Terms and Concepts
The following iNEWS terms and concepts are used throughout iNEWS documentation and are
provided here as a convenience.
Term Description
Directory Panel The Directory panel is one of the three primary panels that make up the
iNEWS workspace. It has two tabs: the Directory tab, which is your guide to
the iNEWS database, organized in a tree-style structure and consisting of
directories, sub-directories, and queues; and the Projects tab, which displays
projects and facets in a similar tree-style structure.
Directories Like a file drawer in a file cabinet, a directory is a storage space. Directories
can contain several levels of subdirectories and one or more queues.
Queues Like a folder in a file drawer, queues are the lowest level in a file structure and
contain one or more stories. A queue is an area of the database that contains
related stories, such as wire stories, search queries, or a show rundown of
scripts. The name assigned to a queue should identify its contents. Whatever a
queue’s contents, the detailed information of each story is visible only in the
Story panel. Use the Queue panel to manage stories in a queue, such as the
order, and so forth.
Terms and Concepts
Queue Panel The Queue panel is one of the three primary panels that make up the iNEWS
workspace. The Queue panel displays a list of the stories in a queue. Stories
are added, deleted, moved, and ordered through this panel.
Stories A story is a document listed in a queue in the database. It might contain any
type of information from scripts with production cues to contact names and
addresses. A story may be displayed in its entirety in the Story panel of the
iNEWS workspace.
Story Panel The Story panel displays a story’s form, text, and any other pertitent
information, such as production cues. Of the three main panels that make up
the iNEWS workspace, the Story panel is unique because it may be divided
into three sub-panels, the Story Form panel, Instruction panel, and Story Text
panel.
Story Form
Sub-Panel
Instruction
Sub-Panel
The Story Form sub-panel contains metadata fields for describing the story,
such as a script’s page number, slug or title, format, Video ID, and so forth.
The data also appears in tabular form in the Queue panel.
The Instruction sub-panel contains production cues or machine control
instructions for production devices, such as character generators.
20
Page 21

Term Description
Terms and Concepts
Story Text
Sub-Panel
The Story Text sub-panel contains the text or script of a news story that is sent
to closed captioning and to the teleprompter to be read on-air. It is the only part
of the Story panel that is always displayed—unlike the Story Form and
Instruction panels, both of which can be hidden based on the nature of the
story or the user’s preferences.
Rundown The Rundown (also known as Running Order or Lineup) is a queue with
specific form fields and characteristics, which allow an ordered list of scripted
stories to be organized as a timed show. The timed-out list of scripts indicate
the order in which they will run during a news program. The rundown is
viewed in the Queue panel of the iNEWS workspace.
Monitor Server The monitor server is a utility program, running on the iNEWS Server. When
turned on, it checks its assigned rundown for machine control events, reports
any errors, and creates a playlist. When “loaded”, the monitor server sends its
playlist to a specified device automation system, such as iNEWS | Command
or ControlAir.
Project Projects are a way of categorizing stories by topic so that news teams working
on a particular topic can find everything related to it in a single place, without
moving or copying the original source information from its current location in
the database. Projects and facets are displayed on the Projects tab in the
Directory panel.
Facet Facets are sub-topics, providing additional granularity to projects.
21
Page 22

2 Getting Started
The following topics provide more information on using the iNEWS system:
Logging In to iNEWS
•
• The iNEWS Workstation’s Main Window
- Status Bar
• iNEWS Navigation Made Easy
- Using the Directory Panel
- Using the Go To Menu
• Changing Your Password
• Logging Out of iNEWS
Logging In to iNEWS
When you are ready to begin your iNEWS session by logging in, first start the application.
To start the application:
t Do one of the following:
- Double-click the iNEWS Workstation icon, usually located somewhere on the desktop.
- Select Start > Programs > Avid > iNEWS.
If the icon is not on the desktop or iNEWS is not located in the Start menu, check with your
n
system administrator to determine if the program is installed on the computer.
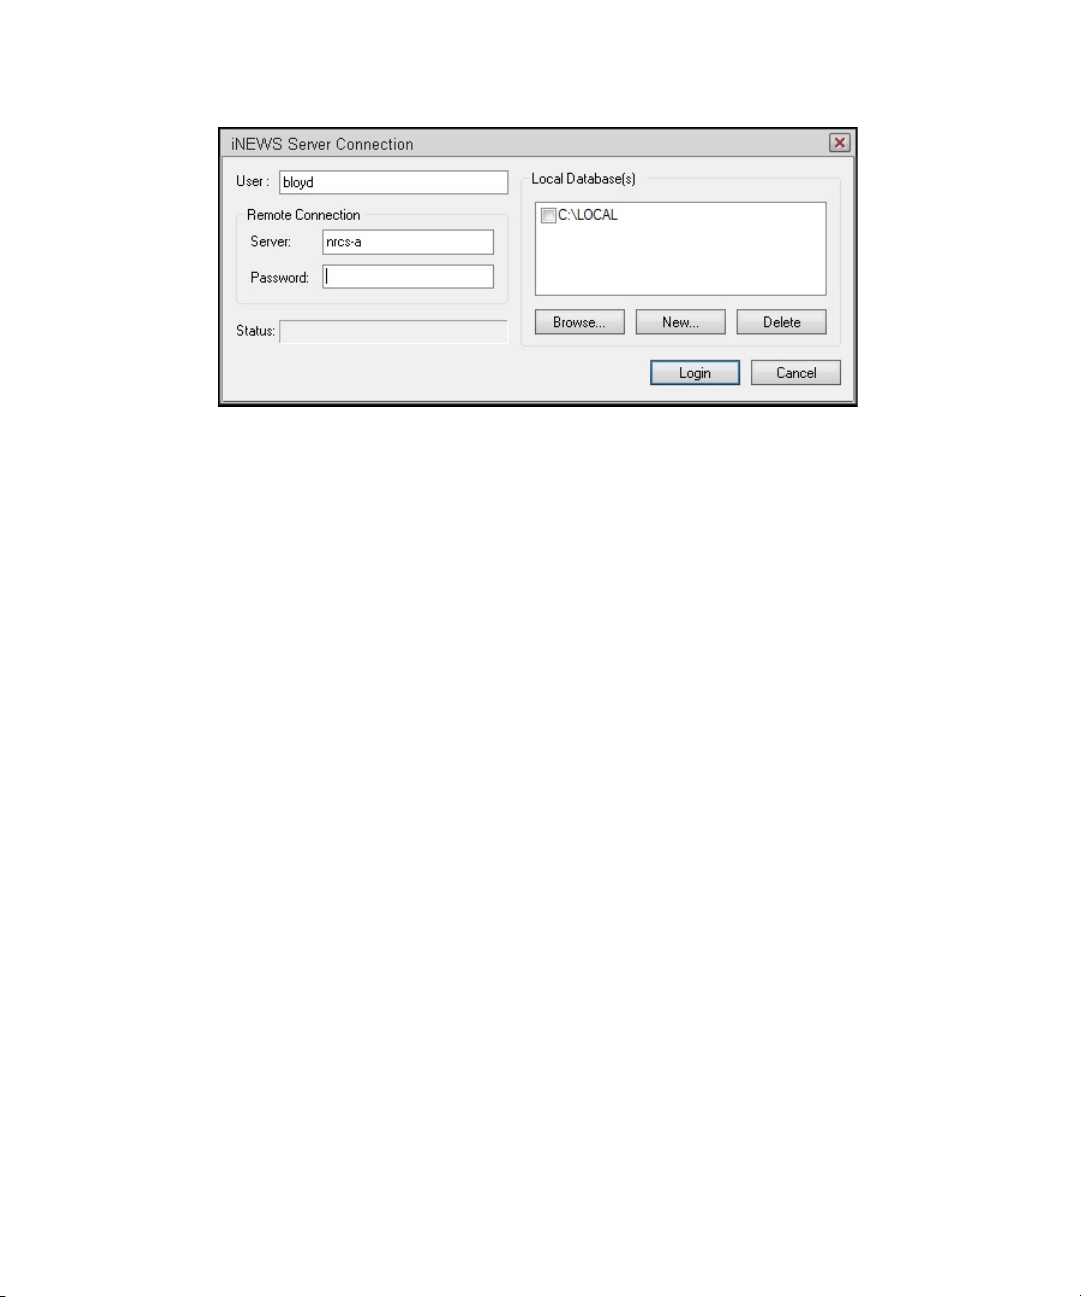
The iNEWS Server Connection dialog box appears.
Page 23
Logging In to iNEWS
You must then log in.
To log in to iNEWS:
1. From the iNEWS Server Connection dialog box, enter your user name in the User text box.
In most cases, the next two steps can be skipped. Typically, you will not have to choose a server
n
or local database. If you need to do so, and do not know the name of the server or local
database, contact your system administrator.
2. If necessary, choose a server to connect your workstation to the shared iNEWS Server
database.
3. If necessary, choose a local database to connect to a database stored on your workstation.
For more information about local databases, see
4. Enter your password in the Password text box. As you type in the password, symbols display
on screen in place of what you type to ensure confidentiality.
5. Click the Login button. One of the following will occur:
- A dialog box might prompt you to change your password. If this happens, follow the
procedure found in
- The Message of the Day might appear, which displays information such as: daily staff
notes, updates, and so forth. It can contain one or several messages, as determined by
your system administrator. If multiple messages exist, Previous and Next buttons are
provided so you can scroll through them. Otherwise, once you’ve read the messages,
click the Close button to continue on to the iNEWS Workstation’s main window.
- The iNEWS Workstation’s main window appears, containing the iNEWS Workspace.
This will happen automatically if there is no Message of the Day.
“Changing Your Password” on page 31.
23
“Local Databases” on page 206.
Page 24
The iNEWS Workstation’s Main Window
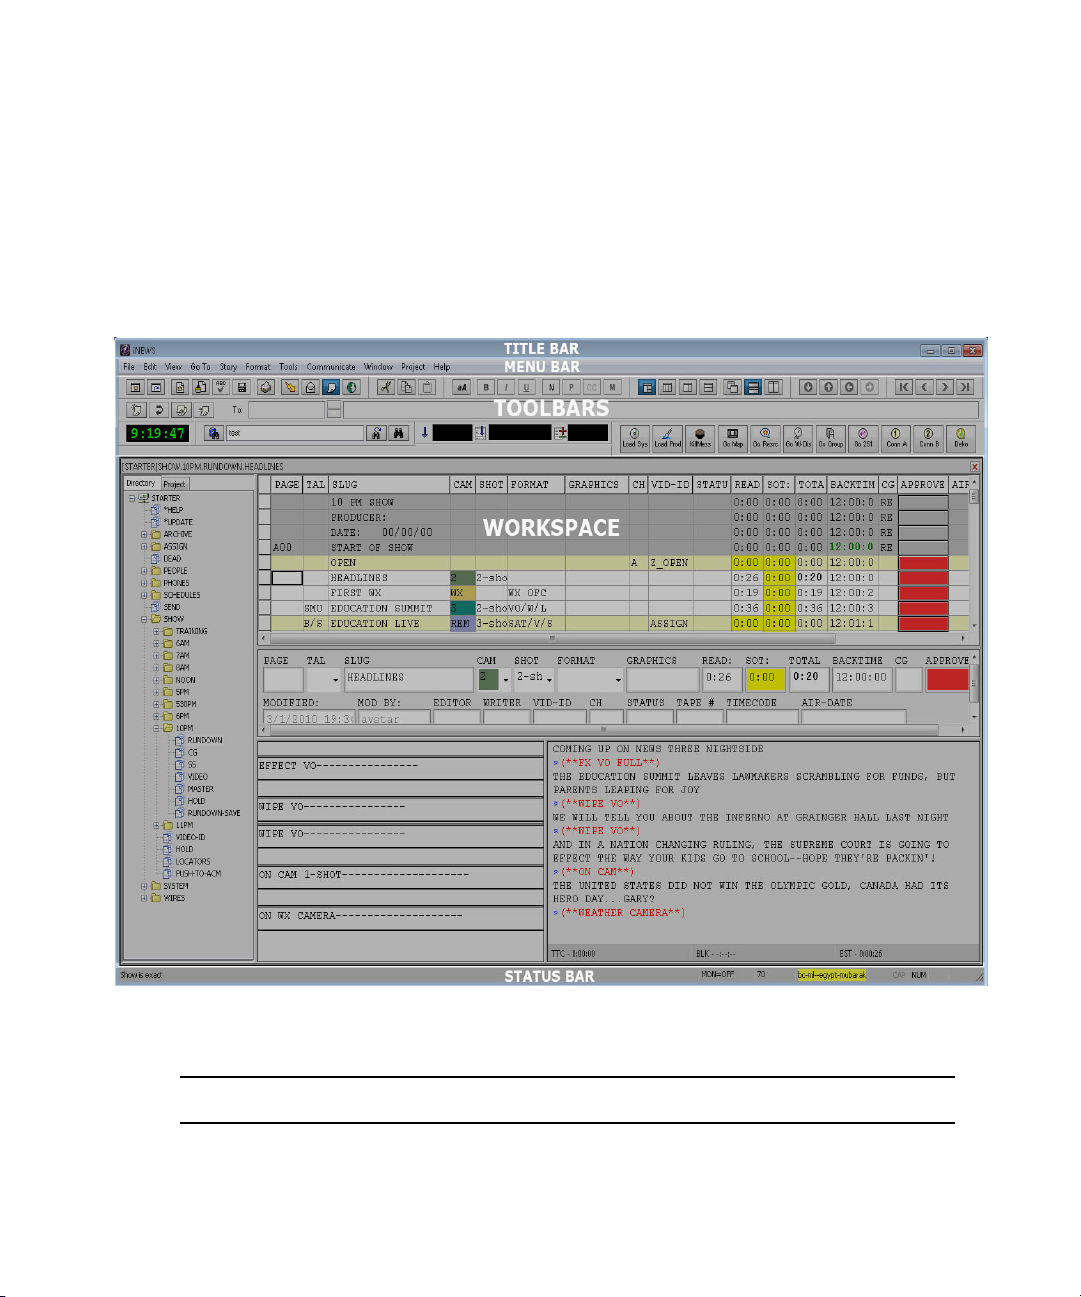
The iNEWS Workstation’s Main Window
Becoming familiar with the layout of the iNEWS Workstation and its main window will help you
navigate through the program more effectively. All of the work you do at an iNEWS Workstation
is performed in the application’s main window. From this window you can navigate through your
system—or another iNEWS system in your community—open queues and stories, edit and print
scripts, prepare broadcasts, send and receive messages or email, and search the database.
The main window is made up of five components, including toolbars and workspaces.
Component Description
Title bar A title bar appears at the top of every open workspace and window—including the
main window, which shows the name of the application.
24
Page 25

The iNEWS Workstation’s Main Window
Component Description
Menu bar The menus appear at the top of the main window, directly under the window’s title
bar. Each menu has a list of commands to choose from. You can initiate commands
from the menu bar with the mouse or the keyboard. An arrow to the right of a menu
command indicates that another menu, called a submenu, appears when you choose
that command.
Toolbar(s) The toolbar area is located directly under the menu bar. Toolbars have buttons that
display icons representing the tasks they perform. Toolbar buttons offer a fast way
to perform common tasks. When certains tasks are unavailable, the buttons
representing those tasks appear gray. The iNEWS system provides several standard
toolbars, but you can create custom toolbars as well. You can also customize
whether toolbars are displayed. For more information, see
Workspace(s) The workspace is the area of the main window in which you perform all of your
work, from editing and creating stories to reading wires or searching the database.
For more information, see
Status bar The status bar is an at-a-glance indicator, which appears at the bottom of the main
window. When urgent stories come in over the news wires, for instance, notices
appear in the status bar. For producers, the status bar displays important show
timing information and monitor status related to machine control integration.
“The iNEWS Workspace” on page 33.
“Toolbars” on page 44.
Status Bar
The iNEWS status bar is your key to vital information in an instant. It displays up-to-date
information related to urgent wires coming into the priority queue, monitor status for machine
control integration, and other important system messages as they happen. What appears will vary
depending on where you are working within the iNEWS application.
The status bar is divided into three areas where information can appear: the left end, the center,
and the right end.
Area Description
Left end Displays Ready or a show’s timing information.
Center Displays a notice if the user receives new mail.
Right end Segmented in eleven sections, with each designed to display certain types of status
notifications.
25
Page 26

The iNEWS Workstation’s Main Window
The following table explains the types of data provided in the sections on the right end of the
status bar.
Status Description
Monitor Displays the monitor server’s status:
• MON=ON (as shown in previous graphic), which means the monitor server
has been turned on for the current rundown queue.
• MON=LOAD (as shown at left), which means a rundown’s playlist has been
successfully loaded to all designated production devices, and the monitor
server is monitoring the situation. This section of the status bar appears green
when this status is displayed.
• MON=ERROR, which means an error has occurred and a problem exists
between iNEWS and the production device(s) for the current rundown queue.
This section of the status bar appears red when this status is displayed.
• MON=PARTIAL, which means a rundown’s playlist has been partially loaded
or loaded to only some of the designated production devices. This section of
the status bar appears yellow when this status is displayed.
Production Lock Displays PRD when the production lock is set for the opened queue. When not
locked this field appears blank.
Queue Info. Displays a numerical value representing the number of non-floated stories in a
rundown queue. (The monitor server does not load production cue data in floated
stories.)
The letters WAT appears in this section of the status bar when the user
n
opens a queue with the Watch Appends attribute, such as the WIRES.ALL
queue.
Sort/Order Displays the queue status:
• SRT, which means the queue the user has navigated to is sorted.
• ORD is displayed if the queue is manually ordered.
• If neither, then this field appears blank.
26
Page 27
The iNEWS Workstation’s Main Window
Status Description
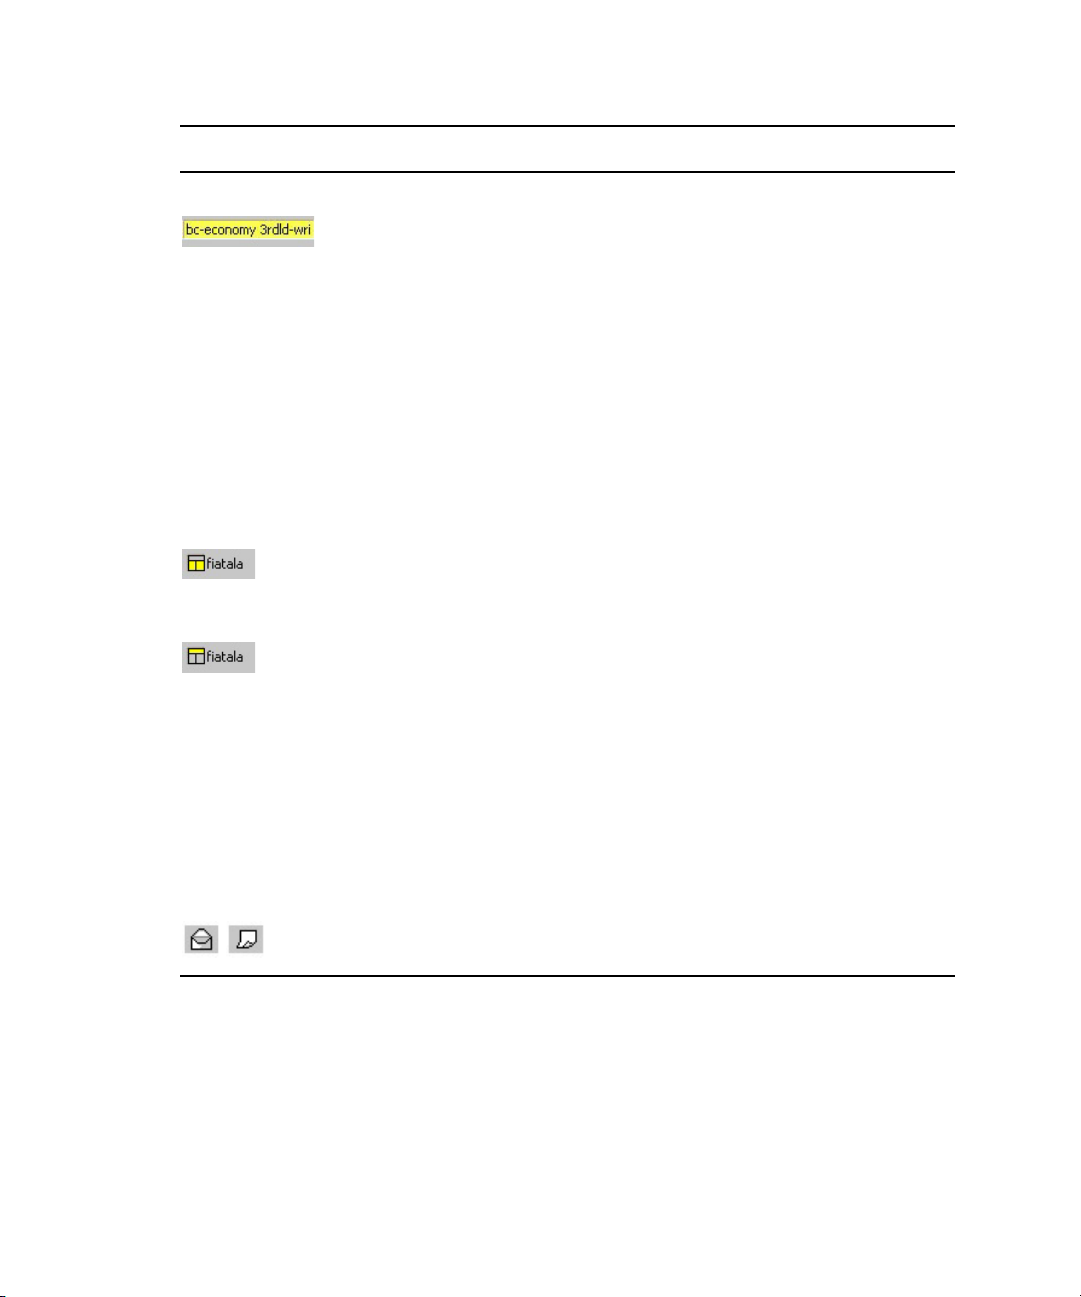
Priority Queue Displays various information related to urgent wire stories coming in to the
priority queue.
• When an urgent wire story arrives, the title of the story—often truncated—is
shown and the section appears in different colors, such as yellow or orange.
• When multiple urgent, unread wire stories are in the priority queue, a lightning
bolt icon appears along with the number of unread stories available (as shown
in previous graphic).
Double-clicking on this section will open the priority queue in a new workspace.
Right-clicking on this section will open the last 10 urgent stories in Alerts History
dialog box.
Also displays broadcast messages and technical warnings when received from
system administrators or the system itself.
Body Lock Appears empty unless the user has locked the body of the story, which is being
edited. When locked, the user’s ID appears next to the Body Lock icon.
Form Lock Appears empty unless the user has locked the story form. When locked, the user’s
ID appears (as shown at left).
Caps Lock Displays CAP when Caps Lock is activated on the keyboard. When not activated
this field appears blank.
Number Lock Displays NUM when the Number Lock is activated on the numerical keypad.
When not activated this field appears blank.
Overwrite Displays OVR when the word processing status is set to overwrite text as a user
types. When set to insert, this field on the status bar appears blank.
Mail/Message Displays an open envelope icon when the user receives new mail. If a new instant
message is received, then the section on the status bar displays an icon that looks
like a white sheet of paper. Both icons blink if the mail or messages are unread.
Displaying or Hiding the Status bar
While the iNEWS system provides the status bar to display vital, instant information, you can
decide whether to display or hide the status bar at any workstation.
To display or hide the status bar:
t Select View > Status bar.
The status bar, when unchecked, will not be displayed as part of the main window.
27
Page 28

iNEWS Navigation Made Easy
The iNEWS system offers numerous ways to navigate through the system, view directories, open
queues, and display stories without scrolling through the entire database.
The various methods include the Directory panel and the Go To menu. The Urgent button on the
Main toolbar enables users to navigate to wires and view urgent stories or news flashes. Users
can also create their own customized toolbars to navigate to specified locations with a single
click of shortcut buttons. For more information, see
Using the Directory Panel
The Directory panel, which is part of the iNEWS workspace, has two tabs. The Directory tab
outlines the contents (or file structure) of your host system’s news database. If you are familiar
with Microsoft Windows, you will be familiar with the tree-like structure of the iNEWS
directory. The Projects tab displays projects and facets in a similar, expandable structure. For
more information on the Projects tab, see
The Directory tab information in the Directory panel is grouped into local systems and
Communities, each with directories (or folders) and queues.
“Overview of Projects and Facets” on page 108.
iNEWS Navigation Made Easy
“Custom Toolbars” on page 49.
Icon Description
Indicates a local iNEWS system or a remote system in a Community
on the local system. The green light on the server icon appears red if
the system is unavailable.
Indicates a directory or subordinate folders. Each directory can
contain subordinate folders and queues. An exclamation mark in a
blue square appears over the folder icon if the directory is indexed.
Indicates a queue. An exclamation mark in a blue square appears
over the queue icon if the queue is indexed.
Indicates a search queue.
You can use your mouse or keyboard to easily navigate within the Directory panel. Here are
some common navigation keys:
Key Action
Home Moves the cursor to the top of the directory
28
Page 29

Key Action
Up arrow Moves the cursor up one item in the directory
End Moves the cursor to the bottom of the directory
Down arrow Moves the cursor down one item in the directory
Page Up Scrolls up one screen
Left arrow Closes an expanded directory
Page Down Scrolls down one screen
Right arrow Opens the selected directory or queue
Opening a Directory
Open a directory when you want to work with the queues and stories it contains.
To open a directory:
1. Select the directory you want to open.
2. Do one of the following:
iNEWS Navigation Made Easy
t Double-click the directory.
t Click the plus (+) sign to the left of the directory you want to open.
t Press the right arrow key.
The directory expands to show you all of the subfolders and queues in it.
Pressing the right arrow key on the keyboard when a queue is selected in the Directory panel will
n
open the queue. When you open a queue from the Directory panel, the contents of the queue
automatically open in the Queue panel, and the first story in that queue appears in the Story
panel.
Closing a Directory
Close a directory when you are finished working in it or if you want to view other information in
the Directory panel.
To close a directory:
t Click the minus sign (-) to the left of the directory you want to close.
t Press the left arrow key.
The directory collapses and hides all of the subdirectories and queues in it.
29
Page 30
Using the Go To Menu
The Go To menu allows you to quickly move through the system and access any user-specified
queue via the Destination command. It also provides quick access to the priority queue, which is
where the urgent news wires are located; by using this menu, you can either open the priority
queue to view all urgent wires or view a truncated list (last 10 urgent wire stories) in the Alerts
History dialog box.
When in the Queue panel, you can use the Go To > Time command to navigate to the next story
n
in the queue based on how old the story is.
To access the priority queue:
t Select Go To > Priority Queue.
The priority queue of urgent wire stories is also available via the Urgent button on the Main
n
toolbar.
To open the Alerts History dialog box:
t Select Go To > Alerts History.
Using the Destination Command
iNEWS Navigation Made Easy
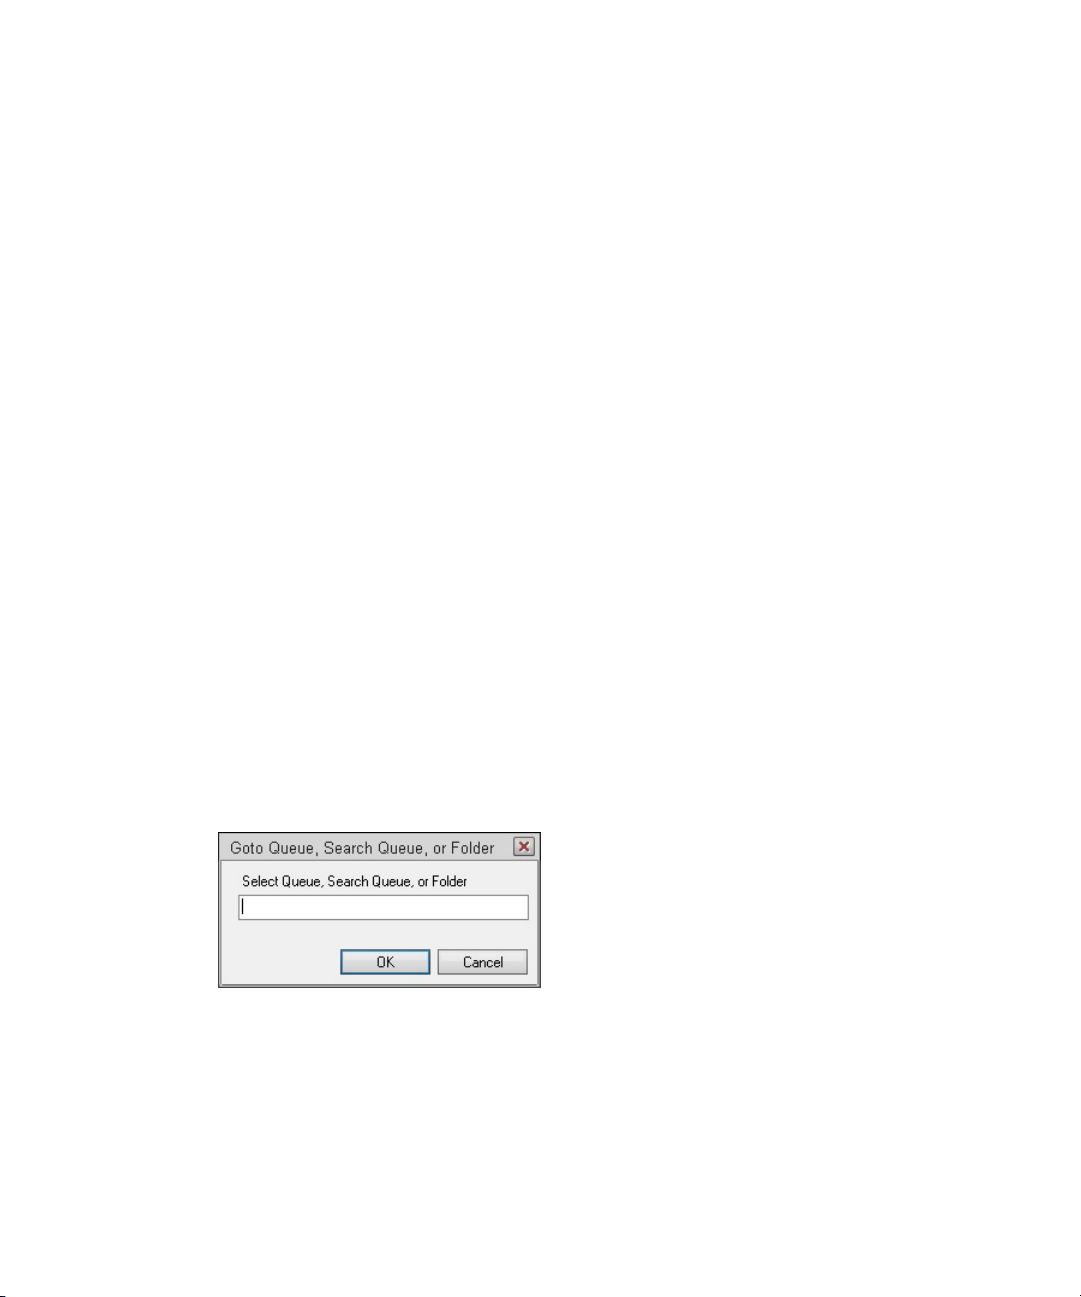
The Destination command takes you directly to a specified queue or folder.
To use the Destination command:
1. Select Go To > Destination.
The Go to Queue or Folder dialog box opens.
2. Specify the pathname of the queue or folder you want to open in the Destination text box.
You may not have to type the entire pathname; as you type, the iNEWS system’s
auto-complete feature will check the database and fill in the field as soon as a match is
found.
3. Click OK.
The dialog box will close and the specified queue or directory will open.
30
Page 31

If the destination you specify is located in a locked queue, you must enter the correct password to
n
open the queue.
Changing Your Password
You can change your password at any time. Your password should be alphanumeric and can
contain punctuation marks—such as a period, hyphen, asterisk, question mark, and so forth—but
it cannot contain any spaces. Any attempt to include a space is rejected with a warning that
appears in a dialog box, as shown:
By default, your password must be at least five characters and no more than 12 characters—
unless your system administrator specifies other requirements.
Changing Your Password
To change your password:
1. Select Tools > Options > Change Password.
The Change Password dialog box opens.
2. In the Old Password field, type your current password.
3. In the New password field, type your new password.
4. In the Confirm new field, type your new password again.
5. Click OK.
The next time you log in to iNEWS you will be required to enter your new password.
31
Page 32

Logging Out of iNEWS
When you finish working with iNEWS, end your session by logging out.
To log out of iNEWS:
1. Do one of the following:
t Select File > Exit.
t Click the X button in the upper right corner of the main window.
t Press Alt+F4.
It is possible for the system administrator to reconfigure the function of Alt+F4 to do something
n
else other than close the program. By default, this keystroke combination will close the program.
The system automatically saves your work.
A message box might open, telling you that your session will end.
Users can modify their preferences to turn off this message box so that it doesn’t appear, in which
n
case step 2 would no longer be necessary.
2. Click Yes to end the session and exit the iNEWS newsroom computer system.
Logging Out of iNEWS
32
Page 33

3 The iNEWS Workspace
The iNEWS software is a Windows-based application, which means it uses windows, menus,
and toolbars to manipulate and display information. All iNEWS windows contain several
components, which include: toolbars, the menu and status bars, and workspaces.
The following topics provide more information on the iNEWS workspace:
Overview of an iNEWS Workspace
•
• Opening an iNEWS Workspace
- Changing Workspace Color Settings
• Working with Panels
- Changing the Layout of Panels
- Resizing a Panel in the Workspace
- Zooming in on a Panel
- Moving From Panel to Panel in Zoom Mode
- Zooming out of a Panel
- Displaying a Context Menu
• Arranging Multiple Workspaces
- Switching Between Workspaces
• Closing a Workspace
Overview of an iNEWS Workspace
The primary workspace is known as the iNEWS workspace, but workspaces for other plug-ins,
such as Avid Deko Select, may also be viewed in the iNEWS window. Users may also have
multiple iNEWS workspaces open simultaneously within the window.
The following image shows a typical iNEWS workspace with its three primary panels identified.
Page 34

Overview of an iNEWS Workspace
The iNEWS workspace’s panels display various information stored in the iNEWS database. The
three primary panels available in a workspace are:
Panels Description
Directory Displays the directory or file structure of the iNEWS newsroom computer
system on the Directory tab. Use it to navigate through the iNEWS database.
Projects are also displayed in this panel on the Projects tab. By default this panel
appears on the left side of the iNEWS workspace.
Queue Displays a list of the stories in a queue in a spreadsheet format. Stories are
added, deleted, moved, and ordered through this panel. By default this panel
appears on the top right side of the iNEWS workspace.
34
Page 35

Opening an iNEWS Workspace
Panels Description
Story Displays the story’s text and any other pertinent information, such as production
cues. By default this panel appears on the bottom right side of the iNEWS
workspace. Of the three main panels that make up the iNEWS workspace, the
Story panel is unique because it may be divided into three sub-panels, which are
called: Story Form, Instruction, and Story Text. Of the three sub-panels, only the
Story Text sub-panel remains visible within the Story panel all of the time. A
user may hide the other two.
If a story is associated with a project or facet, the Story panel becomes tabulated
with two tabs: Story and Project, both of which are displayed side-by-side in this
panel when a user opens the story. The Story tab appears on top by default and
displays the body of the story as usual, including production cues and machine
instructions, if any. Users can click a story’s Project tab to view the projects and
facets with which that story is associated, along with related stories, if any. For
more information, see
page 116
.
“Associating Stories with Projects or Facets” on
A user can choose to view only one primary panel at a time or arrange the panels in one of four
different layouts. The layout options are defined in more detail in “Changing the Layout of
Panels” on page 38
.
Opening an iNEWS Workspace
Open a workspace when you want to view an area of the iNEWS database in a specific layout.
Users can open multiple workspaces within a single session of iNEWS.
To open a new workspace, using the default layout:
t Do one of the following:
- Click the New Workspace button on the Main toolbar to open a new workspace without
specifying a queue.
- Press Shift+Ctrl+N.
The workspace will open in the default layout without displaying a specific queue in the
Queue panel or any story in the Story panel. The iNEWS directory will appear in the
Directory panel so the user can then navigate to any folder and queue in the database.
To open a workspace to a specific queue:
1. Do one of the following:
t Click the Open Workspace button on the Main toolbar.
t Select Window > Open Workspace.
35
Page 36

t Press Shift+Ctrl+O.
The Open Workspace dialog box opens.
2. Enter the directory path of the queue you want to open.
3. Click a layout to open the workspace with that layout.
Changing Workspace Color Settings
You can change the color of the text and highlighting as it is displayed in iNEWS. Any changes
you make affect only your user account and will follow your login.
Opening an iNEWS Workspace
To change workspace color settings:
1. Select Tools > Options > Colors.
The Color Rules dialog box opens.
36
Page 37

Opening an iNEWS Workspace
2. Select a color rule from the Rule list.
The Test(s) and Affects fields change with your selection, and a sample of the rule you
selected appears in the Sample field.
3. Click Text Color to change the text color, or click Back Color to change the highlight color.
The Color dialog box opens.
4. Select a color and click OK.
37
Page 38

The Sample field in the Color Rules dialog box displays the color you selected.
5. Click Bold, Italic, or Underline if you want to apply that attribute to the text.
6. Do one of the following:
t Click Apply to make this change and continue making color changes.
t Click OK to make this change and close the dialog box.
Working with Panels
The workspace provides iNEWS users the chance to arrange its panels in a variety of ways to
best suit the needs of the user. Panel sizes can be modified, the layout altered, or users can zoom
in on a single panel.
This section provides more information about all of the ways you can adjust the primary panels
of an iNEWS workspace.
Changing the Layout of Panels
The iNEWS system gives you several ways to view your workspace layout. You can change the
layout at any time. The layout you choose remains until you log out of the system.
Working with Panels
There are four possible layout options:
Option Icon Description
#1 The default layout provides the Directory panel on the left, the Queue
panel on the top right, and the Story panel on the bottom right side of the
iNEWS workspace.
#2 The second option positions the panels in a 3-wide, vertical split with the
Directory panel on the left, the Queue panel in the middle, and the Story
panel on the right.
#3 The third option provides a two-panel simultaneous view, with a vertical
split. In this layout, the Story panel remains on screen on the right side of
the workspace. The user can toggle between viewing the other two panels
(Directory and Queue panels) on the left side of the workspace by selecting
that side and pressing Alt+Right or Left arrow.
38
Page 39

Working with Panels
Option Icon Description
#4 The fourth option provides a two-panel simultaneous view with a
horizontal split. In this layout, the Story panel remains on screen at the
bottom of the workspace. The user can toggle between viewing the other
two panels (Directory and Queue panels) on the top half of the workspace
by selecting that side and pressing Alt+Right or Left arrow.
To change the layout of panels in an open workspace:
1. Select View > Layout or press Shift-Ctrl+L.
The Select Workspace Layout dialog box opens.
2. Click the workspace layout you want. The workspace is changed to the layout you selected.
The first four buttons on the left of the Layout toolbar (shown below) can also be used to change
n
the layout of panels within the workspace.
The other three buttons pertain to arranging multiple workspaces. See “Arranging Multiple
Workspaces” on page 41 for more information.
Resizing a Panel in the Workspace
Resize a workspace panel when you need to view more of one panel and less of another.
To resize a workspace panel:
1. Place your cursor along border of the panel you want to resize.
As you move your cursor over the border, the cursor changes from a pointer to a splitter bar.
2. When the splitter bar is active, click the border and move it to resize the panels.
3. Release the button at the new position.
39
Page 40

The workspace panel is resized until the next time you resize the panels.
Zooming in on a Panel
You might want to zoom in on a panel when you want to concentrate on information in a
particular panel. When you zoom in on a panel, it occupies the entire workspace and hides the
other panels.
To zoom in on a panel:
1. Click on the panel you want to zoom in on.
2. Do one of the following:
t Select View > Zoom.
t Press Alt+Z.
The panel you chose now occupies the workspace.
You can press Alt+Z again to toggle back to the original multi-panel view.
n
Moving From Panel to Panel in Zoom Mode
Working with Panels
You can move from one panel to another in zoom mode. This is helpful if you want to view
detailed information for each panel.
To move from panel to panel in zoom mode:
1. Zoom in on a panel.
2. Do one of the following:
t To move left, press Alt+Left arrow.
t To move right, press Alt+Right arrow.
t To move from the story body to the story form, press Alt+Up arrow.
The pattern for navigating while in zoom mode is:
Navigation between the three main panels while in zoom mode does not loop. In other words,
n
pressing Alt+Right arrow while zoomed in to the Story panel will not move to the Directory
panel. If you are zoomed in to the Story panel and want to view the Directory panel, press the
Alt+Left arrow keystroke combination twice.
40
Page 41

Zooming out of a Panel
When you want to return to a normal two- or three-panel view of the workspace, you can zoom
out of a panel.
To zoom out of a panel:
t Select View > Zoom.
t Press Alt+Z.
You can press Alt+Z again to toggle back to the single-panel view.
n
Displaying a Context Menu
A context menu contains frequently used commands, making those commands readily accessible
in the panel in which you work. The command options available will vary depending on what
panel the mouse pointer is in when you right click.
To display a context menu:
t Right-click on the panel in which you want to work, and then select a command from the
context menu.
Arranging Multiple Workspaces
In the Directory panel, when you display the context menu, the options will reflect the location
n
of your cursor. For example, when you select a queue icon, the Properties menu option will
apply to that queue. If a folder icon is selected, the Properties menu option will apply to the
directory and its contents.
Arranging Multiple Workspaces
In iNEWS, you can arrange many workspaces in the main window. This allows you to work on
several stories at once with the workspace layout you like best.
To arrange multiple workspaces:
t Do one of the following:
- Select Window > Auto Arrange > option (either Off, Horizontally, or Vertically).
- Select one of the three arrangement buttons on the right of the Layout toolbar, shown
below:
The open workspaces are arranged according to the arrangement choice you made.
41
Page 42

Switching Between Workspaces
While the iNEWS Workstation allows you to open up several workspaces at once, to work in a
particular workspace, that workspace must be active. A workspace is active when its title bar is a
different color from the other workspaces.
To switch between workspaces:
t Click on any part of the workspace.
t Press Ctrl+Tab.
Closing a Workspace
You can close any workspace in the main window without exiting iNEWS.
To close a workspace:
1. In the main window, click the workspace you want to close. Ensure that its title bar is
highlighted. Usually, it will appear blue when active.
2. Do one of the following:
t Click the X button in the upper right corner of the workspace you want to close.
Closing a Workspace
t Select Window > Close.
The workspace closes, with any changes saved automatically. Any other open workspaces
will remain open in the main window.
By default, pressing Ctrl+F4 will close the active workspace, unless the system administrator
n
has reconfigured the Ctrl+F4 keystroke combination to do something else.
To close all workspaces simultaneously:
1. Do one of the following:
t Select Window > Close All.
t Press Alt+W, then type L.
42
Page 43

Working with Multiple Monitors
Users, such as news producers, might want to run iNEWS at workstations with multiple
monitors. Avid iNEWS does support this option; however, there are some things one must keep
in mind if running iNEWS client software on a dual monitor workstation.
• If the application is maximized at close, it will be maximized on the primary monitor when it
is reopened, regardless of which monitor it was on when closed.
• Moving a user from a dual monitor workstation to a single monitor computer, such as an
undocked laptop, could result in the application opening to a screen that no longer exists.
To move iNEWS to single available screen:
1. Right click on iNEWS in the Windows taskbar.
2. Select Move.
3. Press on of the Arrow keys on the keyboard; this will lock the application’s window to the
mouse pointer.
4. Use mouse to position mouse pointer onto the screen and the iNEWS main window will
move with it.
Working with Multiple Monitors
43
Page 44

4 Toolbars
In iNEWS, the standard toolbars allow you to easily access many of the same options you’ll find
in the menu. You can also create your own custom toolbars and shortcut buttons, utilizing
macros, to help speed up your productivity.
The following topics provide more information on toolbars:
Standard Toolbars
•
- Displaying or Hiding a Toolbar
- Moving a Toolbar
• Custom Toolbars
- Creating a Custom Toolbar
- Modifying a Custom Toolbar
• Shortcut Button Images
- Creating a Shortcut Button
Standard Toolbars
The iNEWS system provides ten standard toolbars with which you can access many of the same
options you’ll find in the menus; however, some buttons on toolbars are distinct from menu
commands.
Toolbars make it easy for you to quickly perform a function. By dragging and dropping a toolbar,
you can place it anywhere in the workspace to suit your needs. You can also choose to remove
toolbars that you don’t need to conserve screen space. By positioning the mouse pointer over any
button on a toolbar, you can view a tooltip that briefly describes the function of each button.
The standard toolbars cannot be altered, but they can be hidden or moved within the iNEWS
Workspace. Each standard toolbar is described in the following table:
Page 45

Standard Toolbars
Toolbar Description
Browse Lets you move easily among stories. Options include: First, Previous, Next, and Last.
Clock Displays the workstation clock time.
Edit Gives you quick access to editing tasks, such as: Cut, Copy, and Paste.
Find Searches queues and story panels for text you specify.
Format Lets you add styles and colors to text. Options include: Font, Bold, Italic, Underline,
Normal, Presenter Instruction, Closed Caption, and Machine Control Instructions.
Layout Lets you change the workspace layout and the arrangement of the window.
Main Lets you perform standard iNEWS tasks. Options include: Create a new workspace,
Open an existing workspace, Create a new story, Edit lock/unlock, Check spelling, Save
a story, and Print to a local printer. Additionally, the Main toolbar provides buttons for
viewing priority wires stories, such as bulletins, accessing your mail and messages, and
opening a Web browser within iNEWS. Icons on some buttons will blink when new,
unread data is received, such as urgent wires, mail, or messages.
Messages Lets you view and send instant messages between you and other iNEWS users.
45
Page 46

Toolbar Description
Navigation Lets you navigate around the workspace. The Up and Down Arrow buttons move you
through the panels of the workspace and back again. The Right and Left Arrow buttons
may be used to navigate back and forth between previously viewed queues within the
current session.
Timing Lets you view—from left to right—the item countdown, segment countdown, and
over/under times in a rundown. The show timing clocks are blank (as shown) when
show timing is off.
Displaying or Hiding a Toolbar
Standard Toolbars
You can display or hide any toolbar to help manage your work.
To display a toolbar:
1. Select View > Toolbars.
The Toolbars dialog box opens.
46
Page 47

Standard Toolbars
The toolbars that are already displayed have a checked box next to the toolbar name.
Search Results, although listed in the Toolbars dialog box, is not a toolbar. It is a special pane
n
that, like toolbars, can be displayed or hidden within the iNEWS window. For more information,
see “Search Results Pane” on page 195.
2. Click a toolbar check box to display that toolbar.
3. Click Close.
The toolbar you selected appears in the toolbar area of the main window.
To hide a toolbar:
1. Select View > Toolbars.
The Toolbars dialog box opens.
The toolbars that are already displayed have a checked box next to the toolbar name.
2. Click the box next to the toolbar you want to hide.
When the box is blank, that toolbar will not be displayed.
3. Click Close.
The toolbar you deselected no longer appears in the toolbar area.
You can right-click anywhere in the toolbar area at the top of the main window to access a
n
context menu with a list of toolbars and a customize option. Selecting the customize option will
open the Toolbars dialog box, allowing you to customize the display of toolbars or create new
custom ones.
47
Page 48

Moving a Toolbar
You can arrange the toolbar section of iNEWS to meet your needs. In addition to displaying and
hiding toolbars, you can also rearrange the order of the toolbars to appear in any order at the top
or on the side of the workspace. You can only move toolbars when they are displayed in the
workspace.
To move a toolbar:
1. Click anywhere just outside of the buttons in the toolbar you want to move.
2. Drag the toolbar and drop it in its new location.
Your new toolbar arrangement will be displayed until the next time you rearrange the
toolbars.
Custom Toolbars
A custom toolbar helps you work more effectively. The buttons you create will take you to
specific places in the database. Instead of navigating through the directory panel, you can go to a
queue with a single click of a button.
Custom Toolbars
When adding or modifying a shortcut button on a custom toolbar, you will define the:
• Button name
• Queue directory path
• Tooltip description for the button
• Button image
You can also delete a shortcut button when it is no longer useful.
Creating a Custom Toolbar
Create a custom toolbar for those tasks that you need to perform or destinations you need to
access often in iNEWS.
To create a custom toolbar:
1. SelectView > Toolbars.
The Toolbars dialog box opens, showing standard system toolbars. Any custom toolbars you
create will appear at the end of the list.
48
Page 49

2. Click New to add a custom toolbar name to the list.
The New Toolbar dialog box opens.
Custom Toolbars
3. Type the name you want to assign to the toolbar you are creating.
4. Click OK.
The Customize Toolbar dialog box opens.
49
Page 50

5. You can now create shortcut buttons for your toolbar.
Custom Toolbars
For more information, see “Creating a Shortcut Button” on page 53
6. Click OK to return to the Toolbars dialog box.
7. If it is not already checked, click the check box to the left of the toolbar you just created.
8. Click Close to close the Toolbars dialog box and return to the main window.
The toolbar you created appears at the top of the Directory panel. The following image is an
example of a custom toolbar displayed horizontally. Custom toolbars can be positioned
within the workspace vertically too.
9. Click the title bar of the new toolbar and drag it to the toolbar area of the iNEWS
Workspace.
Modifying a Custom Toolbar
If you have the proper security access, you can make modifications to a custom toolbar to fit
your needs. For instance, you can change the order in which the buttons appear in a custom
toolbar, or you can delete a button that you never use. See your system administrator to find out
if you are able to modify custom toolbars.
.
50
Page 51

To modify a custom toolbar:
1. Select View > Toolbars.
The Toolbars dialog box opens.
Custom Toolbars
2. Click the check box to the left of the customized toolbar you want to modify.
You cannot modify standard system toolbars; therefore, the Customize and Delete buttons
are only enabled when you select a customizable toolbar.
3. Click Customize.
The Customize Toolbar dialog box opens.
51
Page 52

4. In the Customize Toolbar dialog box, you can move, modify, add, or delete buttons from the
toolbar, and specify where to show text labels for toolbar buttons. Select the option you want
to perform.
5. If you modify or add a button, complete the Custom Toolbar Button dialog box and click OK
twice to return to the Toolbars dialog box.
If you selected any other option, click OK to return to the Toolbars dialog box.
6. If it is not already selected, click the toolbar you just modified to have it appear in the main
window.
7. Click Close.
The toolbar appears with the modifications you made to it. The following image is an
example of a custom toolbar displayed horizontally. Custom toolbars can be positioned
within the workspace vertically too.
It is strongly recommended that you log out after making any toolbar modifications so the
n
changes to custom toolbars during the current session are permanently saved into the system.
Should the workstation become disconnected without you properly logging off, those alterations
would be lost, forcing you to have to repeat the modifications.
Custom Toolbars
Creating a Shortcut Button
Shortcut buttons can be created on any custom toolbar in iNEWS. Customization is not
permitted on the standard toolbars.
These buttons can be used to shorten tasks, such as initiate macros, opening sessions, or
navigating to specific locations in the database. The procedure in this section covers the button
creation for all possible options. For information on an alternative procedure for creating a
“navigation shortcut button”, see
If you just created the toolbar, and the Toolbars dialog box is already open, you can skip steps 1
n
and 2, and begin with step 3.
To create a shortcut button:
1. Select View > Toolbars, or right-click on any customizable iNEWS toolbar.
The Toolbars dialog box opens.
“Creating a Navigation Shortcut Button” on page 118.
52
Page 53

2. Click the check box next to the customizable toolbar you want to work with.
3. Click Customize.
The Customize Toolbar opens.
Custom Toolbars
4. Select Text Labels if you want your customized shortcut buttons to have text titles.
After selecting the Text Labels check box, you can modify the width of the shortcut buttons, such
n
as changing the size of the default width of 16 pixels to a larger size of 43 pixels.
5. Click Add.
53
Page 54

The Customize Toolbar Button dialog box opens.
Custom Toolbars
6. In the Name field, enter a button name.
The name you type here will appear on the button if you select the Text Labels check box in the
n
Customize Toolbar dialog box.
7. In the Tooltip Text field, enter a description for the button.
This description appears on-screen when the mouse pointer rests on the button.
54
Page 55

Custom Toolbars
8. In the Action section, click one of the following radio buttons to select it:
Button Action
Navigate to: Enter the directory path of the queue you want the button to open. You can
also click the queue in the Directory panel and drag it into this field.
For more information on creating this button for navigation to projects or
facets, see
Session: Select the session you want the button to open.
Command Line: Type the keyboard shortcut or name for the command or program you want
the button to open. For instance:
“Creating a Navigation Shortcut Button” on page 118.
iexplore.exe
.
Options: Type an additional Web address or filename to open, such as
Macro: Type the macro commands you want the button to perform. For more
information on writing macros, see
The information in Options is dependent on data supplied in the Command Line. For instance,
n
you cannot type notepad.exe, which is the Notepad program, in the Command Line and then type
“Creating a Macro” on page 174.
www.avid.com
the name of a DOC file, such as script.doc, in Options because Notepad cannot open Word DOC
files. (Notepad can be used to open TXT files and view the source of HTML files.)
9. In the Image field, click one of the following radio buttons to select it:
Button Action
Predefined List: Select an image from the list provided in the Customize Toolbar Button
dialog box.
User defined: Browse through directories to find a bitmap image of your own. See
“Shortcut Button Images” on page 57 for more information about these
images.
10. Click OK.
The new button appears in the Current Buttons list of the Configure Shortcut Bar dialog box.
.
11. Click OK again.
The Toolbars dialog box opens.
12. Click the check box next to the new toolbar.
The new toolbar opens in the main window.
13. Click Close to return to the main window.
55
Page 56

Shortcut Button Images
Custom toolbars have shortcut buttons that, like standard toolbar buttons, require some type of
image or icon used to represent the button’s purpose. When creating a shortcut button, you can
select an image that will appear on the button from the standard iNEWS list, or you can import
an image. The same image can be used on several buttons.
If you choose to import your own image, the image must meet the following requirements:
• File format is Device Independent Bitmap (DIB)
• Bitmap is 16 pixels wide by 15 pixels high
• No more than 8 bits per pixel, uncompressed
• Background pixels must have the RGB value of (192, 176, 192)
The bitmap images will not be visible to multiple users at multiple workstations unless the
n
bitmaps are loaded in the same place on every workstation or in a shared network directory.
Custom Toolbars
56
Page 57

Custom Toolbars
57
Page 58

5 Working with Queues
A queue is an area of the database that contains related stories, such as wire stories or a show
rundown of scripts. The name assigned to a queue should identify its contents. Whatever a
queue’s contents, the detailed information of each story is visible only in the Story panel. Use the
Queue panel to manage stories in a queue, such as the order, and so forth.
A special type of queue known as search queues can be created to store pre-defined queries of
n
indexed queues. For information on this type of queue, see “Search Queues” on page 197.
The following topics provide more information about queues:
Changing Forms for Viewing Queues
•
• Changing the Width of a Queue Form Field
• Easy Locking a Queue
• Key Locking a Queue
• Moving a Queue
• Opening a Queue
• Refreshing a Queue
• Searching for Text in a Queue
• Specifying a Destination Queue
• Unlocking a Queue
• Using Abstract Display in Queue
• Using Currency Total
• Viewing Queue Properties
Changing Forms for Viewing Queues
Anytime a user opens a queue, it is displayed using its default queue form. The system
administrator sets up the default. A user can choose to display a queue’s contents in the Queue
panel using a different form.
Page 59

Changing the Width of a Queue Form Field
When a user has changed forms for a queue, they can return to the default form by exiting the
queue and reopening it.
You can only change forms for a queue when your cursor is in the Queue panel.
n
To change the form you use to view a queue’s contents:
1. Select View > Use Forms > Forms.
2. Select the form you want to use.
3. Click OK.
To return to the default form:
t Select View > Use Forms > Normal.
Changing the Width of a Queue Form Field
Occasionally, you might need to change the width of a form field in the Queue panel to view all
the information in a column. This change will last only as long as you are in the queue, and
cannot be saved or viewed by other users. Only your system administrator can make permanent
changes to forms.
To change the width of a queue form field:
1. Open the queue you want to change.
For more information, see
2. In the Queue panel, locate the field you want to widen or narrow and click it.
3. Move the cursor to the edge of the form field. When the cursor changes to a cross, click and
drag the column until it is as wide or narrow as you want it.
Easy Locking a Queue
Easy lock a queue when you want to limit other people’s access to a queue while you are
working in it. Easy lock limits access to your user name. This means that only someone signed
on with your user ID can open the queue after it has been easy locked. Remember, though, that
your system administrator can access your locked queue.
To easy lock a queue:
1. Open the queue you want to lock.
For more information, see
2. Select Tools > Lock Queue.
“Opening a Queue” on page 61.
“Opening a Queue” on page 61.
59
Page 60

The User Lock Queue dialog box opens.
3. Click the Easy Lock check box.
4. Click Lock.
The queue you selected is now locked, and only you can open it.
Key Locking a Queue
Key lock a queue when you want to limit other people’s access to a queue while you are working
in it. Unlike easy locking a queue, however, anyone who knows the "key" can open the queue
you key locked.
Key Locking a Queue
Your system administrator can access any key-locked queue at any time.
n
To key lock a queue:
1. Open the queue you want to lock.
For more information, see
2. Select Tools > Lock Queue.
The User Lock Queue dialog box opens.
3. Create a "key" by entering a password between 1 and 12 characters.
The key can contain numbers, letters, and some punctuation marks. As you enter the key,
asterisks replace the text you are typing. This is to secure your key from others.
4. Click Lock.
“Opening a Queue” on page 61.
60
Page 61

The Confirm Key dialog opens.
5. Re-enter your key to confirm the code.
The queue you selected is now locked, and can only be opened by individuals who know the
key.
Moving a Queue
When you move a queue, you remove its contents, such as stories, from their original directory
and add them to the destination directory. The queue itself is not moved. Any queue that is
locked or requires write-permission will be copied rather than moved.
Moving a Queue
To move a queue:
1. Click the queue you want to move.
2. Press and hold the Shift key, and drag the queue to the destination directory.
The queue’s contents are moved to the destination directory.
Opening a Queue
Queues are located within directories in the Directory panel. Open a queue when you want to
work with the stories in it.
In iNEWS, you can open a queue in two ways:
• When you open a queue from the Directory panel, you must first open directories and
subdirectories where the queue resides.
• When you open a queue using the Go To menu, you type the path to the queue you want to
open rather than clicking in the Directory panel until you locate the queue.
61
Page 62

Refreshing a Queue
To open a queue from the Directory panel:
1. In the Directory panel, double-click the directory containing the queue you want to open, or
click the plus (+) sign next to the directory to expand it.
A list of queues, and possibly subdirectories, appears.
2. Do one of the following:
t If the queue resides in a subdirectory, first double-click the subdirectory to expand it and
then double-click the queue to open it.
t If the queue resides in the directory you just opened, double-click the queue to open it.
To open a queue using the Go To menu:
1. Select Go To > Destination.
The Goto Queue or Folder dialog box opens.
2. In the Destination drop-down list, click the queue you want to open.
3. Click OK.
The queue and all the stories within it appear.
Refreshing a Queue
While you are working in a queue, other users may also be adding, deleting, renaming or
rearranging stories within the same queue. To see any changes that have been made to a queue by
others, you will need to refresh the queue periodically to update the information in it.
To refresh a queue:
t Choose Refresh from the View menu (or press F5).
Pressing the up arrow key when the cursor is at the top of a non-refresh queue will refresh the
n
queue.
The queue is updated and displays any changes that have been made since you opened the
queue.
62
Page 63

Searching for Text in a Queue
To search for text in a queue:
1. Open the queue you want to work with.
Searching for Text in a Queue
For more information, see
2. Select Edit > Find (or press Ctrl+F).
The Find dialog box opens.
3. In the Next Story Containing the Text field, enter the text you want to search for.
4. In the Search only in section, click a radio button to limit the parameters of your search.
5. Click Find.
The selection box moves to the first occurrence of the search text and highlights the text.
“Opening a Queue” on page 61.
Specifying a Destination Queue
You can quickly move between queues by using the Go To option.
To specify a destination queue:
1. Select Go To > Destination.
The Go To Queue or Folder dialog box opens.
63
Page 64

2. Select a path from the Destination list, or type the path of the queue you want to open.
Use periods to separate the directory names (for example: "show.6p.rundown"). If typing the
name, the system will automatically complete the directory or queue name as soon as it
detects a match. These destinations will be held in memory during the current session and
can be selected again by clicking the drop-down arrow. The destinations are cleared from
memory when the user logs out.
3. Click OK.
Unlocking a Queue
Unlock a queue when you no longer want to prevent another user from accessing the queue.
Unlocking a Queue
To unlock a queue:
1. Open the directory containing the queue you want to unlock.
2. In the Directory panel, click the locked queue.
3. Select Tools > Unlock Queue.
The User Unlock Queue dialog box opens.
4. Do one of the following:
t If you key locked the queue, enter the key in the Key field.
t If you easy locked the queue, click the Easy Lock box.
5. Click Unlock.
64
Page 65

Using Abstract Display in Queue
The Abstract Display in Queue feature gives you the ability to display a selected number of lines
of story body for each story in the queue view.
To enable abstract display in queue:
1. Select Tools > Options > Preferences.
2. Click on the Layout tab.
3. Click in the Preview Lines - Use Default check box.
4. Click OK.
5. To check the number of preview lines defined, right-click in the queue and select Queue
Properties to bring up the Queue Properties dialog and click on the User Interface tab.
Preview Lines shows the number of lines defined.
6. Select View > Story Preview to temporarily change the number of preview lines.
If you leave the queue you are on and return to it, the preview lines setting returns to the
default.
The Story Preview dialog opens.
Using Abstract Display in Queue
7. Click in the Lines to preview text box and type a new number.
8. Click OK to register your change.
If you click on the Default button the queue’s Property default will be selected.
Using Currency Total
Currency total allows you to click on individual cells or full columns in the Queue panel and
total these items.
65
Page 66

Viewing Queue Properties
To use currency total:
1. Click on the cells you want to total in the Queue panel (use the Ctrl key to select several
rows or columns simultaneously).
2. Right-click in the Queue panel, and select Total to Clipboard.
The total= appears in a tooltip with the sum of the values in the selected cells or columns.
The total of the cells or columns selected is copied to the clipboard.
Cells can contain currency or decimal numbers but should not be used with date or time values.
n
Viewing Queue Properties
You can view queue properties that are both administrator-controlled—such as sort
characteristics and printing capabilities—and user-controlled, such as production lock.
You do not need to open a queue to view its properties. Right-click on any queue in the Directory
n
panel and select Properties from the pop-up menu. The Queue Properties dialog box appears.
For information on altering queue properties, see the iNEWS Newsroom Computer System
Operations Manual.
To view queue properties from the Queue panel:
1. Open the queue whose properties you want to view.
For more information, see
“Opening a Queue” on page 61.
66
Page 67

2. Do one of the following:
t Right-click in the Queue panel and select Properties.
t Select Edit > Properties (or press Alt+Enter).
The Queue Properties dialog box opens.
MediaCentral | UX Integration
You can view information about queue forms, locks, sorting, and other properties associated
with the queue. These properties are described in more detail in the Avid iNEWS Setup and
Configuration Guide.
If viewing properties for search queues, only two tabs appear: Forms and Groups. The others do
n
not apply to search queues.
3. Click Close when you are finished viewing the queue properties.
MediaCentral | UX Integration
For users who want to participate in the story-centric workflow initiated from an assignment in
MediaCentral | UX, a field called Assignment must be added to the story forms used in that
workflow. Once the Assignment field is created and the story is part of an assignment destination
queue, you can click the assignment link, located in the story form’s Assignment field, to open
an Assignment pane from MediaCentral | UX within the iNEWS workspace. The pane presents
the assignment linked to the iNEWS story.
67
Page 68

MediaCentral | UX Integration
When a user tries to launch the Assignment pane for the very first time, a Login screen will
n
appear to let the user enter login credentials for Avid MediaCentral | UX.
68
Page 69

6 Working with Wires
The iNEWS system lets journalists monitor news wires from workstations and easily transition
that information into stories for broadcast.
The following topics provide more information on wires in the iNEWS system:
Viewing Priority Wire Stories
•
• Viewing the Ten Most Recent Priority Wires
Viewing Priority Wire Stories
Priority wire stories include bulletins, urgents, and flashes. They are incoming wire stories coded
as high priority by a wire service and placed in the priority queue. Each alert is color-coded
depending on whether it is a bulletin, urgent, or flash. The color is determined by your system
administrator.
When priority wire stories arrive, you are notified by an audio signal—usually a beep—and a
flashing Urgent icon. This icon looks like a yellow lightning bolt with an arrow tip. You can see
this icon in two locations of the user interface: on the Bulletin button in the Main toolbar or on
the status bar at bottom right of the iNEWS window. In the status bar, the number of priority wire
stories are also provided next to the Urgent icon.
For more information about what appears on the status bar, see
You can open the priority queue to view the stories at any time.
To open a priority wire story:
1. Do one of the following:
t Click the Bulletin button in the Main toolbar.
t Click the Urgent icon in the status bar.
t Select Go To > Priority Queue, or press F7.
A new workspace containing the priority queue opens, displaying a list of wire stories.
“Status Bar” on page 25.
Page 70

Viewing the Ten Most Recent Priority Wires
2. Double-click which wire story you want to view.
Viewing the Ten Most Recent Priority Wires
Use Alert History when you want to know immediately what the ten most recent priority wire
stories are.
To view the ten most recent priority wires:
1. Select Go To > Alerts History, or press Shift+F7.
The Alerts History dialog box opens with a list of the ten most recent priority wires.
2. Do one of the following:
t Select a wire story and click Open.
t Double-click a wire story to display it in your workspace.
70
Page 71

7 Stories - Creation and Modification
You can create and edit stories from within a queue. When you create new stories, you can save
them to the iNEWS Server for future review by you or others. The basics of editing stories
includes: creating a story, opening existing stories, navigating through stories, and editing text in
stories. In iNEWS, stories are created and edited in the Story panel and its three sub-panels.
The following topics provide more information about the creation and modification of stories:
Understanding the Story Panel
•
- Displaying Story Form Sub-Panel
- Displaying Instruction Sub-Panel
- Navigating the Story Panel
- Changing Tab Settings for Story Text Sub-panel
• Creating a New Story
• Opening a Story
• Changing Case of Text in Stories
• Formatting Text
• Searching for Text in a Story
• Replacing Text in a Story
• Using iNEWS Scratchpad
- Pasting Text from the iNEWS Scratchpad
- Erasing the iNEWS Scratchpad
• Inserting a Time Stamp
• Adding Page Breaks to a Story
• Spell-Checking a Story
• Saving a Story
Page 72

Understanding the Story Panel
The Story panel is the area of the workspace where you write and edit stories. Stories are either
scripted or unscripted. Unscripted stories do not contain production cues or machine control
instructions. A scripted story is a production version of the story that contains instructions for
broadcasting.
The Story panel can be divided into as many as three sub-panels, which display the various
information that is found within scripted and unscripted stories:
• Story Form - located across the top of the Story panel
• Story Text - located on the bottom (right side) of the Story panel.
• Instruction - located on the bottom (left side) of the Story panel.
The Story Text sub-panel is the only one that is always visible. Displaying either of the other two
is optional.
Understanding the Story Panel
Sub-panel Description
Story Form The Story Form sub-panel contains fields for data that can also
appear in the rundown’s Queue panel, such as a script’s slug or story
title, Video ID, status, etc.
The system manager defines the content and layout of the form
fields, which can be text fields or drop-down lists of predefined
options. Some fields may also be read only. Although you can
change the appearance of some fields during a session, you cannot
save these changes.
72
Page 73

Sub-panel Description
Story Text The Story Text sub-panel contains the text or script of the story and is
the only part that is always displayed as part of the Story panel. This
area is blank when you create a new story. As you type, the text
automatically wraps to the next line and scrolls down to keep the
current line visible on the screen.
Instruction The Instruction sub-panel contains production cues or machine
control data for still store, video, and character generator devices.
These instructions appear for scripted stories only.
Displaying Story Form Sub-Panel
The Story Form sub-panel is typically visible for both scripted and unscripted stories; however,
you can hide it to conserve space.
To hide the Story Form sub-panel:
t Select Story > Hide Form Area.
t Right click in the Story Form sub-panel and select Hide Form Area.
Understanding the Story Panel
To show a hidden Story Form sub-panel:
t Select Story > Show Form Area.
Displaying Instruction Sub-Panel
The Instruction sub-panel, which appears to the left of the Story Text sub-panel when displayed,
is typically hidden for unscripted stories and is only pertinent when writing or editing scripts that
contain production cues and machine control instructions. You can display it at any time,
regardless of whether the story contains such instructions, or hide it to conserve space.
To hide the Instruction sub-panel:
t Right click in the Instruction or Story Text sub-panels and select Hide Production Cues.
To show a hidden Instruction sub-panel:
t Right click in the Story Text sub-panel and select Show Production Cues.
The Instruction sub-panel will automatically appear whenever you add a production cue marker
n
to a story.
Navigating the Story Panel
Various keystroke combinations are available for navigating within the Story panel.
73
Page 74

To scroll through a story’s text:
t Press Ctrl+Up Arrow
t Press Ctrl+Down Arrow
If your computer’s mouse has a scroll wheel, you can roll the wheel towards you to scroll down
n
and away from you to scroll up. If you want the cursor to move, use the Up and Down Arrow keys
To navigate to the first or last production cue, ensure the cursor is in the Instruction sub-panel, then:
t Press Ctrl+Page Up to go to the first production cue in a script.
t Press Ctrl+Page Down to go to the last production cue in a script.
To navigate through the production cues, ensure the cursor is positioned within a production cue,
then:
t Press Tab to go to the next production cue.
t Press Shift+Tab to go to the previous production cue.
Changing Tab Settings for Story Text Sub-panel
Tab stops are the measurement by which the cursor will indent on a line when the user presses
the Tab key. Indentation settings determine left and right margins for text in the Story Text
sub-panel, as well as any indentation for first line of paragraphs.
Understanding the Story Panel
The Tabs option allows a user to change tab stop and indentation settings for their Story Text
sub-panel. After these are set, they are part of that user’s preferences.
To change settings for tab stops:
1. Select Format > Tabs.
The Tabs and Indentation dialog box opens.
74
Page 75

Creating a New Story
The Tabs option will only appear enabled in the Format menu when there is a story open in the
n
Story panel and your cursor is located in the Story Text sub-panel.
2. In the Tab stops section, type the length that a tab should indent, such as
3. Click Set.
4. Click OK.
To change settings for indentations:
1. Select Format > Tabs.
The Tabs and Indentation dialog box opens.
2. In the Indentation section, type the length you want for margins or indentation in the
appropriate field, such as
3. Click OK.
Creating a New Story
In addition to opening existing stories, you can create new stories in a queue.
To create a story:
1. Open the queue in which you want to create a story.
2. Position your cursor in the queue below where you want the new story created.
3. Do one of the following:
0.5”
for the first line of each paragraph.
0.5”
.
t Select File > New Story.
t Press Ctrl+N.
t Press the Insert key.
A new queue entry appears in the Queue panel as a blank row, and a blank story appears in
the Story panel.
4. In the Slug column of the Queue panel, enter the new story’s title.
5. Enter any other important information in the remaining columns for the new story.
6. In the Story panel, enter the story’s text.
Avid iNEWS supports the use of hyperlinks in the story body. Links can be in the form of http://
n
or www. E-mail addresses are also recognized. A user preference is available, defining whether
clicked links will open into an Internet Explorer workspace within the iNEWS application or into
the user‘s default browser outside of the iNEWS application.
75
Page 76

Creating Story Links
When the cursor is on a line in the Queue panel or in the Story Text sub-panel, the “Copy story
link to clipboard” option is available in both the context menu and Story menu. When this option
is selected, it creates a story link on the user’s clipboard, which can be pasted into another story.
You may also press Shift+Ctrl+K to create a link.
Opening a Story
Story links appear as:
new workspace displaying the linked story.
inews://<server>/<path>/<story>
Opening a Story
In iNEWS, you can open any unlocked stories in a queue. Open a story when you want to view,
edit, or delete information in the story.
To open a story:
1. Open the queue containing the story you want to open.
For more information, see
A list of stories appears in the Queue panel.
2. Click a story to open it in the Story panel.
If your have zoomed in to the Queue panel, you can open a story by double-clicking on the
n
selector button to left of the story you want to open.
“Opening a Queue” on page 61.
Changing Case of Text in Stories
There are four case formats for text within a story:
. Clicking the link will create a
Format Description
Upper case Changes case so all letters are capitalized.
Lower case Changes case so all letters are lower case.
Title case Changes case so the first letter of each word is capitalized. This can be useful for
character generator (CG) data, since many stations type their CGs in title-case
format.
Sentence case Changes case so the first letter of the first word at the beginning of each sentence
is capitalized.
76
Page 77

To capitalize all letters of a selected portion of text, do the following:
1. Highlight the text you want to change.
2. Do one of the following:
t Select Format > Case > UPPER CASE.
t Press Alt+O, then S, then U.
To lower case all letters of a selected portion of text, do the following:
1. Highlight the text you want to change.
2. Do one of the following:
t Select Format > Case > lower case.
t Press Alt+O, then S, then L.
To title case all letters of a selected portion of text, do the following:
1. Highlight the text you want to change.
2. Do one of the following:
t Select Format > Case > Title Case.
t Press Alt+O, then S, then T.
Formatting Text
To sentence case all letters of a selected portion of text, do the following:
1. Highlight the text you want to change.
2. Do one of the following:
t Select Format > Case > Sentence Case.
t Press Alt+O, then S, then S.
Formatting Text
You can format text in a story when you want to give it characteristics different from the rest of
the text. For instance, use different formats to indicate script directions, instructions for the crew,
or information for news presenters.
You format options are described in the following table:
Format Keystroke Description
Select Typeface Selecting a different typeface is a user customization that only
applies to your workstation. Selecting a different typeface has no
effect on printing.
77
Page 78

Searching for Text in a Story
Format Keystroke Description
Boldface Ctrl+B Displays and prints bold text.
Italic Ctrl+I Displays and prints italic text.
Underline Ctrl+U Displays and prints underlined text.
Normal Ctrl+Alt+N Displays and prints normal text.
Presenter Ctrl+Alt+P Identifies instructions for the news presenters. Presenter text can
appear on the teleprompter, but it does not get timed or go to
closed captioning.
Closed
Captioning
To format text:
1. Open the queue that contains the story you want to work with.
For more information, see “Opening a Queue” on page 61
2. Click a story to select it.
3. In the Story panel, highlight the text you want to format.
4. Do one of the following:
t Click on the appropriate formatting button located in the Format toolbar, if displayed.
t Select Format, and then select the format you want to apply to the text.
If you find that text placed in tables runs together and doesn’t display properly, select a
n
non-proportional typeface, such as Courier or Arial Monospaced, for viewing the story.
Ctrl+Alt+C Identifies text that can be used for closed captioning.
Searching for Text in a Story
Use the Find command to find individual occurrences of text within a story (for example, to find
all occurrences of the misspelled word seperate and change them to separate).
.
To search for text in a story:
1. Open the queue containing the story you want to work with.
For more information, see
2. Click a story to select it and then click in the Story panel.
3. Select Edit > Find (or press Ctrl+F).
The text Find dialog box opens.
“Opening a Queue” on page 61.
78
Page 79

Replacing Text in a Story
4. In the Find what field, enter the text you want to search for.
5. If you want the search to find text that exactly matches the word(s) you entered, click the
Match whole word only check box.
6. If you want the search to find only words that match the case you designated, click the
Match case check box.
7. Click Find Next.
The first occurrence of the search text is highlighted. If the search is unsuccessful, the
message "Finished Searching the story" appears.
You can press the Esc key to cancel a Find command search process within a few seconds.
n
Replacing Text in a Story
You can search for text in a story and replace it with alternative text that you specify. For
example if you write a story containing the word "Nelson" and you discover that the correct
spelling of the name is "Neilson," you can use the Replace command to make the correction.
To replace text in a story:
1. Open the queue containing story with which you want to work.
For more information, see
2. Click a story to select it.
3. Click anywhere in the Story panel.
4. Select Edit > Replace.
The Replace dialog box opens.
“Opening a Queue” on page 61.
79
Page 80

Using iNEWS Scratchpad
5. In the Find what field, enter the text you are searching for.
6. In the Replace with field, type the replacement text exactly as you want it to appear.
7. To ignore occurrences of the text inside a longer word ("honey," and not "Mahoney," for
example), click the Match whole word only check box.
8. To ignore occurrences of text with a different case ("US" and not "us," for example), click
the Match case check box.
9. Click Find Next to go to the story’s first occurrence of the text you specified.
10. Do one of the following:
t Click Replace to change the highlighted text and search for the next occurrence.
t Click Find Next to skip to the next occurrence without changing the highlighted text.
t Click Replace All to replace all occurrences of the specified text with the new text.
Using iNEWS Scratchpad
The iNEWS Scratchpad feature lets you copy multiple items, store them, and then paste them
into a story. Copy text to it when you want to gather information to insert into a story.
To copy text to the iNEWS Scratchpad:
1. Open the queue that contains the story you want to work with.
For more information, see
2. Click a story to select it.
3. In the story panel, select the text to be copied.
4. Select Edit > Scratchpad > Copy to Scratchpad (or press Shift+Ctrl+C).
The text is copied. Continue selecting and copying text until all the text you want to copy
has been placed on the scratch pad.
“Opening a Queue” on page 61.
80
Page 81

Pasting Text from the iNEWS Scratchpad
When you have copied text to the iNEWS Scratchpad, you can retrieve that text from it and place
the text into a story.
To paste text from the iNEWS Scratchpad:
1. Open the queue that contains the story with which you want to work.
Inserting a Download Link
For more information, see
2. Click a story to select it.
3. In the Story panel, click in the story where you want to paste the text.
4. Select Edit > Scratchpad > Paste from Scratchpad (or press Shift+Ctrl+V).
The text is pasted into the text area you selected.
“Opening a Queue” on page 61.
Erasing the iNEWS Scratchpad
You can erase the iNEWS Scratchpad after you have pasted text from it into another story.
To clear the iNEWS Scratchpad:
t Select Edit > Scratchpad > Erase Scratchpad (or press Shift+Ctrl+Delete).
All of the text is deleted from it.
Inserting a Download Link
If your iNEWS system is setup to integrate with a file server, then users can upload small-sized
files, such as PDFs, DOCs, or JPGs, to a file server and then include a download link to the file
within an iNEWS story. For instance, a download link to something on the file server might look
like this: http://fileserver/iNEWS/pressrelease.pdf.
Clicking on such a link in a story downloads the file from the file server to the user’s workstation.
n
To insert a download link into an iNEWS story:
t After uploading the file to the fileserver, enter the URL path to the file into the iNEWS story.
Inserting a Time Stamp
A user can insert the current time, based on their workstation clock, into a story using the Time
Stamp function.
The time stamp will be inserted at the current cursor location.
n
81
Page 82

To insert a time stamp, do one of the following:
t Press Ctrl+T
t Select Edit > Time Stamp.
Adding Page Breaks to a Story
You can manually force page breaks into a story where you want them to appear. Usually, you
add page breaks when you are preparing to print the story.
To add a page break when printing to a local printer:
1. Open the queue containing the story you want to work with.
Adding Page Breaks to a Story
For more information, see
2. Select a story, and open it into the Story panel.
3. Do one of the following:
t Press Ctrl+Alt+B.
t Select Story > Page Break.
A visible page break for local printing is added.
Spell-Checking a Story
The iNEWS system allows you to check the spelling in a story to ensure that it has no spelling
errors.
To spell-check a story:
1. Open the queue containing the story with which you want to work.
For more information, see
2. Click a story to select it and then click at the beginning of the story in the Story panel.
Spell check begins at wherever the cursor is. To check the spelling in production cues, you have
n
to click at the beginning of the first production cue in the story.
“Opening a Queue” on page 61.
“Opening a Queue” on page 61.
3. Select Tools > Spelling.
The Spelling dialog opens, with the first unrecognized word highlighted.
82
Page 83

Spell-Checking a Story
4. Use the spelling tool to check all words in the story.
t If a word is correct in the story but not recognized by the spelling tool, click Ignore, or
Ignore All to ignore all occurrences of the word in the story.
t If a word is incorrectly spelled in the story, enter the correct spelling of the word in the
Change To field or click a suggested word. Then click Change, or Change All to make a
global replacement of the word in the story.
t If a word is correct in the story, is unrecognizable by the spelling tool, but is used often
in many stories (your last name, for example), click Add to add it to your custom
dictionary.
When you have checked the entire story, a message box opens.
5. Click OK.
Creating a Custom Dictionary
Each user has a custom dictionary, which can be used to store words. These words are
considered additional listings to the standard dictionary installed with the software, and are used
by the system's spell checker. Each custom dictionary is associated with a specific user, and is
applied only when that user is logged on.
83
Page 84

To create a custom dictionary, or add words to a custom dictionary:
1. Click the Tools menu.
2. Select Custom Dictionary. The Custom Dictionary dialog box will appear.
3. Type in your list of words, pressing Enter between each one.
4. Click OK.
To delete a word from your custom dictionary:
1. Click the Tools menu.
2. Select Custom Dictionary. The Custom Dictionary dialog box will appear.
Saving a Story
3. Select a word in the listing, and delete it.
4. Click OK.
Saving a Story
Whenever you create or modify a story, you should save your changes frequently.
To save a story:
t Do one of the following:
- Select File > Save Story.
- Press Ctrl+S.
- Click the Save Story button on the Main toolbar.
The system is designed to automatically save your changes when you navigate out of a story.
n
84
Page 85

Saving a Message as a Story
You can save a message or messages from the Message History dialog box as a story in the
iNEWS system. For more information on how to do this, see
page 159
.
Saving a Story
“Saving a Message as a Story” on
85
Page 86

8 Moving Stories
When working in iNEWS, you will find it is often necessary to move or duplicate text, entire
stories, and entire queues from one location to another.
The following topics provide more information about the moving of stories or queues within the
iNEWS database:
Selecting a Story
•
- Selecting Several Stories in a Sequence
- Selecting Several Stories out of Sequence
• Copying a Story
- Copying Several Stories in a Sequence
- Copying Several Stories out of Sequence
• Mailing a Copy of a Story
• Moving a Story
- Moving Several Stories in a Sequence
- Moving Several Stories out of Sequence
• Grouping Stories
• Importing a Story
• Exporting a Story
- Exporting Multiple Stories
• Mailing a Copy of a Story
Selecting a Story
Select a story any time you want to open, move, copy, mail, float, or delete the story.
To select a story:
1. Open the queue containing the story you want to select.
For more information, see
“Opening a Queue” on page 61.
Page 87

2. In the Queue panel, locate the story you want to select and click the selector button to the left
of the story.
While in the Queue panel, holding the Shift key down and pressing the Space bar can also be
n
used to select a story.
The text of the highlighted story appears in the Story panel.
Selecting Several Stories in a Sequence
At times, you might want to select many stories grouped together in a Queue panel. You might,
for instance, want to move or copy them simultaneously rather than selecting each one manually.
To select several stories in a sequence:
1. Open the queue containing the stories you want to select.
Selecting a Story
For more information, see
2. In the Queue panel, locate the first story in the sequence of stories you want to select and
click the selector button to the left of that story.
3. Move to the last story in the sequence of stories and, while pressing the Shift key, click the
selector button to the left of that story.
All the stories between those you selected manually are also selected. Now you can move,
copy, or otherwise work with those selected stories.
“Opening a Queue” on page 61.
Selecting Several Stories out of Sequence
At times, you might want to select many stories within a queue that are located within in a Queue
panel but are not grouped together. You may, for instance, want to move or copy them
simultaneously rather than selecting each one manually.
To select several stories out of sequence:
1. Open the queue containing the stories you want to select.
For more information, see
2. In the Queue panel, locate the first story you want to select and click the selector button to
the left of that story.
3. While pressing the Ctrl key, click the selector button to the left each story you want to
highlight.
“Opening a Queue” on page 61.
All the stories you selected manually are highlighted. Now you can move, copy, or
otherwise work with those selected stories.
87
Page 88

Copying a Story
You can copy a story from one queue to another within a workspace or across multiple
workspaces. When you copy a story, you duplicate the story from the source queue and add it to
the destination queue. The source queue remains unchanged in the database.
To copy a story:
1. Open the queue containing the story you want to copy.
Copying a Story
For more information, see
2. In the Queue panel, highlight the story by doing one of the following:
t Click on the selector button next to the story you want to copy.
t Press Shift+Space.
3. Click again and, holding the selector button, drag the story to the destination queue.
The story is copied to the destination queue.
You can also copy a story by selecting Edit > Copy To, or by pressing Ctrl+D after selecting the
n
story to copy from one queue to another destination.
“Opening a Queue” on page 61.
Copying Several Stories in a Sequence
At times, you might want to copy multiple stories grouped together in a Queue panel. You might,
for instance, want to copy them all together rather than copying each one manually.
To copy several stories in a sequence:
1. Open the queue containing the stories you want to copy.
For more information, see
2. In the Queue panel, locate the first story in the sequence of stories you want to copy and
click the selector button to the left of that story.
“Opening a Queue” on page 61.
3. Move to the last story in the sequence of stories and, while pressing the Shift key, click the
selector button to the left of that story.
All the stories between those you selected manually are also selected.
88
Page 89

4. Do one of the following:
t Select Edit > Copy To.
t Press Ctrl+D.
The Copy Stories To Queue dialog box opens.
Copying a Story
5. In the Destination Queue field, select a queue from the menu or enter the destination queue’s
directory path, such as:
ARCHIVE.2014.JUN
6. In the Distribution Code field, select a code from the menu or enter the code you want to
assign to the story.
7. Click OK.
The stories are copied to the destination queue.
Copying Several Stories out of Sequence
At times, you may want to select multiple stories within a queue that are located within in a
Queue panel but are not grouped together. You may, for instance, want to copy them all together
rather than copying each one manually.
89
.
Page 90

To copy several stories out of sequence:
1. Open the queue containing the stories you want to copy.
Copying a Story
For more information, see “Opening a Queue” on page 61
.
2. In the Queue panel, locate the first story you want to copy and click the selector button to the
left of that story.
3. While pressing the Ctrl key, click the selector button to the left each story you want to
highlight
All the stories you selected manually are highlighted.
4. Do one of the following:
t Select Edit > Copy To.
t Press Ctrl+D.
The Copy Stories To Queue dialog box opens.
5. In the Destination Queue field, select a queue from the menu or enter the destination queue’s
directory path, such as:
ARCHIVE.2014.JUN
90
.
Page 91

6. In the Distribution Code field, select a code from the menu or enter the code you want to
assign to the story.
7. Click OK.
The stories are copied to the destination queue.
Moving a Story
When you move a story, you remove it from its original location and place it in its new location.
Stories can be moved within a single queue or between queues.
For instance, as stories in a rundown queue develop, the order they will be presented in a
newscast can change. Authorized individuals (usually production staff) can rearrange the order
of stories in a queue by moving them around in the Queue panel until the order works for that
newscast. Another possibility is when a story, written for one show, will actually be used in
another show, in which case a user could move the story from the original rundown queue to the
other.
You must have write permission to both the source and destination locations to move a story or
stories. Any stories that are locked or require write-permission will be copied rather than moved.
Moving a Story
To move a story:
1. Open the queue containing the story you want to move.
For more information, see
2. In the Queue panel, click the selector button to the left of the story you want to move.
If your cursor is on a row, you can select entire row by pressing Shift+Spacebar. If the row is
n
within a story group, holding the Shift down and pressing Spacebar twice will select all stories
(rows) in the story group.
3. Do one of the following:
t Drag the story to the new location within the queue.
t Press and hold the Shift key, then drag the story to another destination queue in the
Directory panel.
t If you have a second workspace open, you can drag the story from its original queue to a
destination queue opened in the other workspace.
If stories are dragged to a queue in a position within a story group, the stories will be added to
n
that story group. For more information on story grouping, see “Grouping Stories” on page 95.
“Opening a Queue” on page 61.
91
Page 92

The story is moved to its new location. The backtime of each story in a Queue panel is
automatically adjusted to reflect any changes made when the order of stories is changed.
Another method of moving stories in a queue is to cut and paste them from the Queue panel,
n
using the editing buttons on the toolbar or Ctrl+X to cut and Ctrl+V to paste.
You can also use Ctrl+M and type the pathname of the destination queue to move a story
between queues. See “Moving Several Stories in a Sequence” on page 92 and “Moving Several
Stories out of Sequence” on page 93 for more information.
Moving Several Stories in a Sequence
At times, you might want to move many stories grouped together in a Queue panel. You can
move a group of stories easily in iNEWS. Any stories that are locked or require write-permission
will be copied rather than moved.
To move several stories in a sequence:
1. Open the queue containing the stories you want to move.
Moving a Story
For more information, see
2. In the Queue panel, locate the first story in the sequence of stories you want to move and
click the selector button to the left of that story.
3. Move to the last story in the sequence of stories and, while pressing the Shift key, click the
selector button to the left of that story.
All the stories between those you selected manually are also selected.
4. Do one of the following:
t Select Edit > Move To.
t Press Ctrl+M.
The Move Stories To Queue dialog box opens.
“Opening a Queue” on page 61.
92
Page 93

Drag and drop is another alternative that may be used to move stories. See “Moving a Story” on
n
page 91 for more information.
5. In the Destination Queue field, select a queue name from the menu or enter a queue name,
such as:
6. In the Distribution Code field, select a story from the menu or enter the code you want to
assign to the story.
7. Click OK.
The stories are moved to the destination queue.
ARCHIVE.2008.JUN
.
Moving a Story
Moving Several Stories out of Sequence
At times, you might want to move many stories within a queue that are located within in a Queue
panel but are not grouped together. You can move a group of stories easily in iNEWS. Any
stories that are locked or require write-permission will be copied rather than moved.
To move several stories out of sequence:
1. Open the queue containing the stories you want to move.
For more information, see
2. In the Queue panel, locate the first story you want to move and click the selector button to
the left of that story.
3. While pressing the Ctrl key, click the selector button to the left each story you want to
highlight.
All the stories you selected manually are highlighted.
“Opening a Queue” on page 61.
93
Page 94

4. Do one of the following:
t Select Edit > Move To.
t Press Ctrl+M.
The Move Stories To Queue dialog box opens.
Moving a Story
Drag and drop is another alternative that may be used to move stories. See “Moving a Story” on
n
page 91 for more information.
5. In the Destination Queue field, select a queue name from the menu or enter a queue name,
such as:
6. In the Distribution Code field, select a story from the menu or enter the code you want to
assign to the story.
7. Click OK.
The stories are moved to the destination queue.
ARCHIVE.2008.JUN
.
94
Page 95

Grouping Stories
You can group stories within a queue for the purposes of linking them together. For instance, in a
rundown, a producer may want to link the presenter’s intro and tag before and after a reporter’s
package together as a story group. When stories in a queue can be grouped, a Story Group
column will appear as the second column in the Queue panel located next to first column of
selector buttons.
The following partial image of a rundown shows three story groups: the first with three stories
about Education, the second with three stories about a gun ban, and the third with only two
stories about an earthquake in Chile.
Grouping Stories
After a group is created, the group may be moved together within a queue or dragged and
dropped from one queue to another. Stories may also be created within an existing group or
removed from a story group.
To create a group from existing stories:
1. In the Queue panel, highlight two or more consecutive stories by doing one of the following:
t Click on the selector buttons next to the stories you want to group together.
t Press Shift+Space to select a row and then press the Up or Down Arrow buttons to
complete your selection of stories.
2. Do one of the following:
t Right-click and select Create Story Group.
t Select Tools > Create Story Group.
To add a story or stories to an existing group:
t Position your cursor within the group and create a new story. Creating a new story between
rows of a group will add the new story to that group.
t Drag and drop a story or selection of stories in between rows of a group.
95
Page 96

Importing a Story
t If the story you want to add is located in the row directly above or below the group to which
you want to add it, use the selector buttons to select it along with the story group, then do
one of the following:
- Select Tools > Create Story Group.
- Right-click and select Create Story Group.
To dissolve a group of stories:
t In the Queue panel, position your cursor on a story within the group and select Tools >
Dissolve Story Group.
t Right-click on any story within the group and select Dissolve Story Group.
To move a story group:
1. In the Queue panel, click on any square within the Story Group column (2nd column) to
select the group.
2. Drag and drop the group into its new location.
You can drag and drop a story group anywhere within a single queue or from one queue to
another in a different workspace and group associations are retained.
Using the selector buttons (1st column) to move a block of stories containing two or more stories
n
in a group will retain the story group association. If using the selector buttons to select a block of
stories in which only one is in a group, moving the block will dissolve any story group
association for that story.
To remove a story from a group:
t Click the story’s selector button, then drag it out of the group and to a new location in the
queue.
Importing a Story
You can import files from your PC to the iNEWS newsroom computer system. After the files are
imported, they appear as stories in the active queue.
To import a story:
1. Open the queue into which you want to import a story.
For more information, see
2. In the Queue panel, click where you want to insert the imported story.
It will be inserted above the selected story.
3. Select File > Import Story.
“Opening a Queue” on page 61.
96
Page 97

The Import Story dialog box opens.
Exporting a Story
4. Select a location from the Look in list.
5. Select the "Rich Text” or “Text only” (RTF or TXT) file to import.
6. Click Open.
The imported story is inserted and its contents appear in the Story panel.
Exporting a Story
You can export a story or stories from the iNEWS database to your local hard drive. When the
story has been exported as a file to your local hard drive, you can open it in other applications.
To export a story:
1. Open the queue from which you want to export a story.
For more information, see
2. Click the story you want to export.
3. Do one of the following:
“Opening a Queue” on page 61.
97
Page 98

Exporting a Story
t Select File > Export Story if you want to export just the information from the Story Text
panel (right-hand side of the Story panel).
t Select File > Export Story Extended if you want to export the production cues in the
Instruction sub-panel (left-hand side of the Story panel) as well as the information from
the Story Text panel.
The Export Story dialog box opens.
4. Select a destination from the Save in list.
5. In the File Name field, enter the name under which you want to save the exported file.
6. Select either "Rich Text” or “Text only” (RTF or TXT) from the Save as type list.
7. Click Save (or press Ctrl+S).
The story is converted to the file type you selected and is exported to the destination you
specified.
Exporting Multiple Stories
The steps are the same as exporting a single story, except that you select multiple stories in the
queue, using the selection buttons in the Queue panel. This feature allows you to select and
export all stories in a queue or selected segments. When exporting multiple stories, you will not
98
Page 99

be prompted to save each story; rather, the system will save all stories automatically using their
titles from iNEWS. If you specify a different filename in the Export Story dialog box, the system
will use that name and append numbers, such as -1, -2, or -3, to distinguish between each
subsequent story.
Mailing a Copy of a Story
You may want to pass along a story to another user of the system. Use the Mail option to copy a
story to another user.
To mail a copy of a story:
1. 1.Open the queue containing the story you want to mail.
Mailing a Copy of a Story
For more information, see
2. In the Queue panel, click the story you want to mail.
3. Select Story > Mail.
A mail workspace opens with the story’s contents in the text area of a new mail message.
You might have to close a workspace or rearrange the mail workspace to see the entire mail
window.
4. In the To field, enter the name of the user to whom you want to send the story.
5. In the Subject field, enter a subject.
6. In the CC field, enter a user name if you want to send the copy to another user.
7. Click Send to send a copy of the story to the user.
You can also mail a story including the story’s form content and production cues by selecting
n
Mail Extended from the Story menu. When this is done, the form content and production cue
instructions are sent as text with the story content. For instance, the example below shows story
form content at the beginning, followed by the story text and production cues, which appear in
triple angle brackets.
Page: B18
Shot: B2/C1
Tal: D/M
“Opening a Queue” on page 61.
Slug: LUNG-TREATMENT
Format: VO
Video ID: LUNG-TM
Vid Stat:
Status: READY
99
Page 100

Mailing a Copy of a Story
Audio: 0:42
Backtime: 17:35:23
Date: 10/4/14 14:41:46
Mod by: dm58
WR: dm58
App.: dm58
Cumetime: 0:04:07
_______________________________________________________________
<<< ON CAM >>>
((ON CAM))
PROMISING RESEARCH RESULTS INDICATE A NEW PILL CALLED "TRACLEER" COULD
TRANSFORM THE TREATMENT OF PULMONARY HYPERTENSION, A RELATIVELY RARE BUT
POTENTIALLY FATAL LUNG DISORDER.
<<< TAKE VO >>>
((TAKE VO))
<<< *CG 2LINE
PULMONARY HYPERTENSION
NEW TREATMENT >>>
THE ONLY TREATMENT CURRENTLY AVAILABLE HAS TO BE CONSTANTLY INFUSED INTO
THE BLOOD VIA A PERMANENT TUBE IN A VEIN IN THE NECK OR CHEST THAT IS
ATTACHED TO A PUMP STRAPPED TO THE BODY.
IN THIS WEEK’S ISSUE OF THE LANCET MEDICAL JOURNAL, SCIENTISTS DESCRIBE
HOW PATIENTS WHO TOOK "TRACLEER" HAD DRAMATIC IMPROVEMENTS IN THEIR
BLOOD TESTS, THEIR EXERCISE CAPACITY AND THEIR ABILITY TO DO EVERYDAY
TASKS WITHOUT SHORTNESS OF BREATH.
"TRACLEER" IS IN THE FINAL STAGES OF APPROVAL BY THE FOOD AND DRUG
ADMINISTRATION AND SHOULD BE AVAILABLE IN THE UNITED STATES IN A FEW
MONTHS. EUROPEAN APPROVAL IS EXPECTED NEXT YEAR.
100
 Loading...