

Page 1

iNEWS
TM
A vstar Newsroom Computer System
Operations Manual
Version 1.3
Page 2

iNEWS
Copyright and Disclaimer
Copyright © 2000 iNEWSTM All rights reserved. Printed in the U.S.A. All iNews products
are covered by U.S. and foreign patents, issued and pending. Information in this publication supersedes that in all previously published material. Specifications and price
change privileges reserved.
The software described in this document is furnished under a license agr eement and is
protected under the copyright laws of the United States and other countries.
U.S. GOVERNMENT USERS RESTRICTED RIGHTS: Use, duplication, or disclosure by
the U.S. Government is subject to restriction as set forth in subparagraph (b)(2) of the
Technical Data and Computer Software-Commercial items clause at DFARS
252.211-7015, or in subparagraph (c)(2) of the Commercial Computer Software-Restricted Rights clause at FAR 52.227-19, as applicable.
Microsoft, the Microsoft logo, MS, MS-DOS, Win 32, Windows, Windows NT, Windows
2000, Windows NT Server, and the Windows operating system logo are registered
trademarks of Microsoft Corporation in the United States of America and other countries. All other trademarks and registered trademarks used herein are the property of
their respective owners.
iNEWS
6400 Enterprise Lane
Madison, Wisconsin 53719 USA
Tel: +1-608-274-8686 Fax: +1-608-273-5876
iNEWS
Intec 1
Wade Road
Basingstoke Hants RG24 8NE UK
Tel: +44 1256 814300 Fax: +44 1256 814700
iNEWS
Unit 6
2 Eden Park Drive
North Ryde NSW 2113 AUSTRALIA
Tel: +61 2 8877 6880 Fax: +61 2 8877 6881
iNEWS
Tegel Forum
Breitenbachstraße 10
Berlin 13509 GERMANY
Tel: +49 30 5900993 0 Fax: +49 30 5900993 24
Avstar NRCS Operations Manual Version1.3
Document # 0130-00869 Rev. C
October 3, 2000
Printed in the United States of America
Page 3

iii
Contents
Preface
Who Should Use This Manual. . . . . . . . . . . . . . . . . . . . . . . . . . . . . . xxvii
About This Manual . . . . . . . . . . . . . . . . . . . . . . . . . . . . . . . . . . . . . . . xxviii
Sections . . . . . . . . . . . . . . . . . . . . . . . . . . . . . . . . . . . . . . xxviii
Symbols and Conventions . . . . . . . . . . . . . . . . . . . . . . . . . . . . . . . . . xxviii
Structure of Text . . . . . . . . . . . . . . . . . . . . . . . . . . . . . . . . . . . . . . xxviii
Cross References . . . . . . . . . . . . . . . . . . . . . . . . . . . . . . . . . . . xxix
Keyboard Conventions . . . . . . . . . . . . . . . . . . . . . . . . . . . . . . . . . xxix
Console Conventions. . . . . . . . . . . . . . . . . . . . . . . . . . . . . . . . . . . . xxx
If You Need Help…. . . . . . . . . . . . . . . . . . . . . . . . . . . . . . . . . . . . . . . . xxxi
…In Performing a System Operation . . . . . . . . . . . . . . . . . . . . . xxxi
…With the Syntax of Console Commands. . . . . . . . . . . . . . . . . xxxi
…With UNIX, or Specific Devices . . . . . . . . . . . . . . . . . . . . . . . xxxii
Other Documentation . . . . . . . . . . . . . . . . . . . . . . . . . . . . . . . . . . . . . xxxiii
Avstar Newsroom Computer System Documentation. . . . . . xxxiii
Broadcast Control System Documentation. . . . . . . . . . . . . . . . xxxiii
Other Products . . . . . . . . . . . . . . . . . . . . . . . . . . . . . . . . . . . . . . . xxxiv
If You Have Documentation Comments . . . . . . . . . . . . . . . . . . . . . xxxiv
Section I Avstar Overview and System Basics
Chapter 1 Introduction
What is Avstar? . . . . . . . . . . . . . . . . . . . . . . . . . . . . . . . . . . . . . . . . . . . . 1-2
iNEWS Products. . . . . . . . . . . . . . . . . . . . . . . . . . . . . . . . . . . . . . . . 1-3
Avstar Newsroom Computer System . . . . . . . . . . . . . . . . . . 1-4
iNEWS Media Browse 2000 . . . . . . . . . . . . . . . . . . . . . . . . . . . 1-5
iNEWS Broadcast Control System . . . . . . . . . . . . . . . . . . . . . 1-6
Links to Other Newsroom Products . . . . . . . . . . . . . . . . . . . . . . . 1-6
Page 4

iv
System Administrator Tasks. . . . . . . . . . . . . . . . . . . . . . . . . . . . . . . . . 1-8
Basic System Administration Tasks. . . . . . . . . . . . . . . . . . . . 1-8
User Tasks . . . . . . . . . . . . . . . . . . . . . . . . . . . . . . . . . . . . . . . . . 1-8
Database Tasks . . . . . . . . . . . . . . . . . . . . . . . . . . . . . . . . . . . . . 1-9
Security Tasks . . . . . . . . . . . . . . . . . . . . . . . . . . . . . . . . . . . . . . 1-9
Customizing Commands and Messages. . . . . . . . . . . . . . . 1-10
Storage Maintenance Tasks. . . . . . . . . . . . . . . . . . . . . . . . . . 1-10
Device Tasks . . . . . . . . . . . . . . . . . . . . . . . . . . . . . . . . . . . . . . 1-10
Reviewing Default Settings. . . . . . . . . . . . . . . . . . . . . . . . . . 1-11
Troubleshooting . . . . . . . . . . . . . . . . . . . . . . . . . . . . . . . . . . . 1-11
Chapter 2 The Avstar Console
Overview . . . . . . . . . . . . . . . . . . . . . . . . . . . . . . . . . . . . . . . . . . . . . . . . . 2-2
Commands You Can Type at the Console . . . . . . . . . . . . . . . . . . . . . 2-3
Console Control Commands. . . . . . . . . . . . . . . . . . . . . . . . . . 2-3
Example: The Computer Command. . . . . . . . . . . . . . . . . 2-4
Selecting Servers . . . . . . . . . . . . . . . . . . . . . . . . . . . . . . . . . . . . . . . . . . . 2-5
Selecting One or More Servers . . . . . . . . . . . . . . . . . . . . . . . . 2-5
Zooming in on One Server . . . . . . . . . . . . . . . . . . . . . . . . . . . 2-6
Console History. . . . . . . . . . . . . . . . . . . . . . . . . . . . . . . . . . . . . . . . . . . . 2-7
Pausing the Screen Display. . . . . . . . . . . . . . . . . . . . . . . . . . . 2-8
Viewing Recent Console History . . . . . . . . . . . . . . . . . . . . . . 2-8
Reading Older History. . . . . . . . . . . . . . . . . . . . . . . . . . . . . . 2-10
Console Function Keys. . . . . . . . . . . . . . . . . . . . . . . . . . . . . . . . . . . . . 2-11
Assigning a Command to a Function Key . . . . . . . . . . . . . 2-11
Changing the Assignment of a Function Key. . . . . . . . . . . 2-11
Deleting the Definition of a Function Key . . . . . . . . . . . . . 2-11
Displaying Function Key Assignments. . . . . . . . . . . . . . . . 2-12
Console Operations . . . . . . . . . . . . . . . . . . . . . . . . . . . . . . . . . . . . . . . 2-12
If the Console Freezes . . . . . . . . . . . . . . . . . . . . . . . . . . . . . . 2-12
Exiting the Console. . . . . . . . . . . . . . . . . . . . . . . . . . . . . . . . . 2-13
Starting the Console. . . . . . . . . . . . . . . . . . . . . . . . . . . . . . . . 2-14
The Remote Console. . . . . . . . . . . . . . . . . . . . . . . . . . . . . . . . . . . . . . . 2-14
Page 5

Dialing in to the Console . . . . . . . . . . . . . . . . . . . . . . . . . . . . 2-14
Executing Commands Remotely. . . . . . . . . . . . . . . . . . . . . . 2-15
Logging out from a Remote Console . . . . . . . . . . . . . . . . . . 2-16
Logging out a Remote User from the Main Console . . . . . 2-16
The Console Configuration File (console.cfg) . . . . . . . . . . . . . . . . . . 2-16
Looking at the Console Configuration File . . . . . . . . . . . . . 2-17
Editing the Configuration File. . . . . . . . . . . . . . . . . . . . . . . . 2-18
Console Configuration Keywords . . . . . . . . . . . . . . . . . . . . 2-19
Console Control Command Reference. . . . . . . . . . . . . . . . . . . . . . . . 2-21
Chapter 3 Getting Started
Logging in as System Operator . . . . . . . . . . . . . . . . . . . . . . . . . . . . . . . 3-2
Becoming a Console Superuser . . . . . . . . . . . . . . . . . . . . . . . . . . . . . . . 3-2
Entering Superuser Mode . . . . . . . . . . . . . . . . . . . . . . . . . . . . 3-3
Exiting Console Superuser Mode . . . . . . . . . . . . . . . . . . . . . . 3-3
Changing the System Administration Passwords . . . . . . . . . . . . . . . 3-3
Selecting Passwords . . . . . . . . . . . . . . . . . . . . . . . . . . . . . . . . . 3-3
Changing the System Operator Password. . . . . . . . . . . . . . . 3-4
Changing the Superuser Password. . . . . . . . . . . . . . . . . . . . . 3-4
Startup and Shutdown . . . . . . . . . . . . . . . . . . . . . . . . . . . . . . . . . . . . . . 3-5
Starting the System . . . . . . . . . . . . . . . . . . . . . . . . . . . . . . . . . . 3-5
Shutting Down the System . . . . . . . . . . . . . . . . . . . . . . . . . . . . . . . 3-9
v
Chapter 4 Users
Viewing User Accounts . . . . . . . . . . . . . . . . . . . . . . . . . . . . . . . . . . . . . 4-2
Modifying User Traits. . . . . . . . . . . . . . . . . . . . . . . . . . . . . . . . . . . . . . . 4-3
Modify User Account Dialog Box . . . . . . . . . . . . . . . . . . . . . . . . . 4-4
User Traits Summary . . . . . . . . . . . . . . . . . . . . . . . . . . . . . . . . 4-5
User Name. . . . . . . . . . . . . . . . . . . . . . . . . . . . . . . . . . . . . . .4-5
Type . . . . . . . . . . . . . . . . . . . . . . . . . . . . . . . . . . . . . . . . . . . .4-5
Edit Mode . . . . . . . . . . . . . . . . . . . . . . . . . . . . . . . . . . . . . . .4-6
Queues. . . . . . . . . . . . . . . . . . . . . . . . . . . . . . . . . . . . . . . . . .4-6
Get from Template... . . . . . . . . . . . . . . . . . . . . . . . . . . . . . .4-9
Page 6

vi
Changing a User’s Password . . . . . . . . . . . . . . . . . . . . . . . . . . . . . 4-9
Changing User Preferences . . . . . . . . . . . . . . . . . . . . . . . . . . . . . 4-10
Preferences Dialog Box . . . . . . . . . . . . . . . . . . . . . . . . . . . . . 4-11
Session Tab. . . . . . . . . . . . . . . . . . . . . . . . . . . . . . . . . . . . . 4-11
Confirmations Tab. . . . . . . . . . . . . . . . . . . . . . . . . . . . . . . 4-12
Backup Tab. . . . . . . . . . . . . . . . . . . . . . . . . . . . . . . . . . . . . 4-14
Refresh Tab. . . . . . . . . . . . . . . . . . . . . . . . . . . . . . . . . . . . . 4-15
Layout Tab . . . . . . . . . . . . . . . . . . . . . . . . . . . . . . . . . . . . . 4-16
Search Results Tab. . . . . . . . . . . . . . . . . . . . . . . . . . . . . . . 4-19
Simplified User Settings. . . . . . . . . . . . . . . . . . . . . . . . . . . . . . . . . . . . 4-19
Simplified User Setting Dialog Box. . . . . . . . . . . . . . . . . . . . . . . 4-20
Workspaces . . . . . . . . . . . . . . . . . . . . . . . . . . . . . . . . . . . . . . . 4-21
Application . . . . . . . . . . . . . . . . . . . . . . . . . . . . . . . . . . . . . . . 4-21
Setting up New Users in Avstar . . . . . . . . . . . . . . . . . . . . . . . . . . . . . 4-22
Creating a New User Area in the News Database . . . . . . . . . . 4-23
Adding a New User Account. . . . . . . . . . . . . . . . . . . . . . . . . . . . 4-26
Copying User Traits to Another User Account . . . . . . . . . 4-26
Creating a New User Account . . . . . . . . . . . . . . . . . . . . . . . 4-27
Enabling a New User to Receive Mail . . . . . . . . . . . . . . . . . . . . 4-29
Searching for Information About Users . . . . . . . . . . . . . . . . . . . . . . 4-29
Removing User Accounts . . . . . . . . . . . . . . . . . . . . . . . . . . . . . . . . . . 4-33
Creating a User Manager Account. . . . . . . . . . . . . . . . . . . . . . . . . . . 4-35
Creating a Database Manager Account. . . . . . . . . . . . . . . . . . . . . . . 4-36
Logging out All Users . . . . . . . . . . . . . . . . . . . . . . . . . . . . . . . . . . . . . 4-37
Chapter 5 Stories, Queues, and Directories
Overview . . . . . . . . . . . . . . . . . . . . . . . . . . . . . . . . . . . . . . . . . . . . . . . . . 5-2
Adding a Directory or Queue . . . . . . . . . . . . . . . . . . . . . . . . . . . . . . . . 5-3
A Few Restrictions:. . . . . . . . . . . . . . . . . . . . . . . . . . . . . . . . . . 5-3
Creating a New Directory. . . . . . . . . . . . . . . . . . . . . . . . . . . . . . . . 5-4
Creating a New Queue . . . . . . . . . . . . . . . . . . . . . . . . . . . . . . . . . . 5-6
Setting up the Outgoing Mail Queue . . . . . . . . . . . . . . . . . . 5-7
Setting up the Dead Letter Queue . . . . . . . . . . . . . . . . . . . . . 5-8
Page 7

vii
Creating a New Story. . . . . . . . . . . . . . . . . . . . . . . . . . . . . . . . . . . . 5-9
Removing a Directory or Queue . . . . . . . . . . . . . . . . . . . . . . . . . . 5-9
Renaming a Directory or Queue. . . . . . . . . . . . . . . . . . . . . . . . . . 5-10
Viewing Database Traits. . . . . . . . . . . . . . . . . . . . . . . . . . . . . . . . . . . . 5-13
From the Avstar Workstation... . . . . . . . . . . . . . . . . . . . . . . . . . . 5-13
From the Avstar Console... . . . . . . . . . . . . . . . . . . . . . . . . . . . . . . 5-14
Sending Output from the List Command to a Printer. . . . 5-15
Getting Information about Stories . . . . . . . . . . . . . . . . . . . . 5-15
Finding out Who Moved, Duplicated, or Killed a Story. . 5-17
Recovering a Killed Story. . . . . . . . . . . . . . . . . . . . . . . . . . . . 5-20
Changing Database Traits . . . . . . . . . . . . . . . . . . . . . . . . . . . . . . . . . . 5-21
Database Traits Summary . . . . . . . . . . . . . . . . . . . . . . . . . . . . . . . . . . 5-25
Directory/Queue Properties Dialog Box . . . . . . . . . . . . . . . . . . 5-25
Forms Tab. . . . . . . . . . . . . . . . . . . . . . . . . . . . . . . . . . . . . . . . . 5-27
Index Field/Story Form Compatibility Error Messages . .
5-30
Starting the Queue Sort Function . . . . . . . . . . . . . . . . . .5-33
Groups Tab. . . . . . . . . . . . . . . . . . . . . . . . . . . . . . . . . . . . . . . . 5-34
Abstract Tab. . . . . . . . . . . . . . . . . . . . . . . . . . . . . . . . . . . . . . . 5-36
Uses for Abstract Printing. . . . . . . . . . . . . . . . . . . . . . . . .5-37
Maintain Tab . . . . . . . . . . . . . . . . . . . . . . . . . . . . . . . . . . . . . . 5-38
Choosing Queues to be Purged . . . . . . . . . . . . . . . . . . . .5-40
Choosing a Purge Interval . . . . . . . . . . . . . . . . . . . . . . . .5-41
Matching Purge Intervals . . . . . . . . . . . . . . . . . . . . . . . . .5-41
Purge Intervals and the Purge Limit. . . . . . . . . . . . . . . .5-42
User Interface Tab . . . . . . . . . . . . . . . . . . . . . . . . . . . . . . . . . . 5-43
Locks Tab . . . . . . . . . . . . . . . . . . . . . . . . . . . . . . . . . . . . . . . . . 5-46
Locking and Unlocking. . . . . . . . . . . . . . . . . . . . . . . . . . . . . . . . . . . . . 5-47
Identifying Locked Queues and Stories . . . . . . . . . . . . . . . . . . . 5-47
From the Avstar Workstation.... . . . . . . . . . . . . . . . . . . . . . . 5-47
From the Avstar Console.... . . . . . . . . . . . . . . . . . . . . . . . . . . 5-48
Finding out Who Last Locked a Queue . . . . . . . . . . . . .5-48
Finding out Who Last Ordered a Queue . . . . . . . . . . . .5-48
Page 8

viii
Types of Locks . . . . . . . . . . . . . . . . . . . . . . . . . . . . . . . . . . . . . . . . 5-50
Unbusy Stories and Queues. . . . . . . . . . . . . . . . . . . . . . . . . . . . . 5-53
Chapter 6 Groups
Overview . . . . . . . . . . . . . . . . . . . . . . . . . . . . . . . . . . . . . . . . . . . . . . . . . 6-2
Viewing Group Information . . . . . . . . . . . . . . . . . . . . . . . . . . . . . . . . . 6-2
From the Console... . . . . . . . . . . . . . . . . . . . . . . . . . . . . . . . . . . . . . 6-2
From a Workstation... . . . . . . . . . . . . . . . . . . . . . . . . . . . . . . . . . . . 6-3
Creating a New Group. . . . . . . . . . . . . . . . . . . . . . . . . . . . . . . . . . . . . . 6-5
The Group Checker. . . . . . . . . . . . . . . . . . . . . . . . . . . . . . . . . . . . . . . . . 6-7
Group Checker Error Messages. . . . . . . . . . . . . . . . . . . . . . . . . . . 6-9
Renaming a Group . . . . . . . . . . . . . . . . . . . . . . . . . . . . . . . . . . . . . . . . 6-12
Deleting a Group. . . . . . . . . . . . . . . . . . . . . . . . . . . . . . . . . . . . . . . . . . 6-13
Creating or Modifying Multiple Groups in
Interactive Mode. . . . . . . . . . . . . . . . . . . . . . . . . . . . . . . . . . . . . . . . . . 6-14
Adding Members to an Existing Group . . . . . . . . . . . . . . . . . . . . . . 6-15
Users as Members of a Group . . . . . . . . . . . . . . . . . . . . . . . . . . . 6-15
Groups as Members of Other Groups . . . . . . . . . . . . . . . . . . . . 6-15
Workstations as Members of Groups . . . . . . . . . . . . . . . . . . . . . 6-17
Finding out Who Last Locked the Story . . . . . . . . . . . . 5-49
Edit Lock . . . . . . . . . . . . . . . . . . . . . . . . . . . . . . . . . . . . . . . . . 5-50
Removing a Story’s Edit Lock . . . . . . . . . . . . . . . . . . . . . 5-50
User Lock. . . . . . . . . . . . . . . . . . . . . . . . . . . . . . . . . . . . . . . . . 5-51
Removing a Story’s User Lock Without a Key . . . . . . . 5-51
Removing a Queue’s User Lock Without a Key . . . . . .5-52
Order Lock . . . . . . . . . . . . . . . . . . . . . . . . . . . . . . . . . . . . . . . . 5-52
Production Lock . . . . . . . . . . . . . . . . . . . . . . . . . . . . . . . . . . . 5-53
Step 1 - Choosing a Group Name. . . . . . . . . . . . . . . . . . . . . . 6-5
Step 2- Enter Group Name in System . . . . . . . . . . . . . . . . . . 6-6
Step 3- Specifying Members of New Group. . . . . . . . . . . . . 6-6
Step 1- Change Group Name in System . . . . . . . . . . . . . . . 6-12
Step 2- Change Group Name in SYSTEM.GROUPS. . . . . 6-12
Avoiding Recursion . . . . . . . . . . . . . . . . . . . . . . . . . . . . . . . . 6-16
Page 9

ix
Combining Permissions . . . . . . . . . . . . . . . . . . . . . . . . . . . . . 6 -18
Being More Restrictive . . . . . . . . . . . . . . . . . . . . . . . . . . .6-18
Being Less Restrictive . . . . . . . . . . . . . . . . . . . . . . . . . . . .6-19
Setting an Automatic Timeout . . . . . . . . . . . . . . . . . . . . . . . 6-19
Modifying Idle Timeout . . . . . . . . . . . . . . . . . . . . . . . . . .6-19
Modifying Login Timeout. . . . . . . . . . . . . . . . . . . . . . . . .6-20
Timeout Value Settings and Format . . . . . . . . . . . . . . . .6-20
Group Access and Usage Restrictions . . . . . . . . . . . . . . . . . . . . . . . . 6-20
Access and Usage Examples . . . . . . . . . . . . . . . . . . . . . . . . . 6-21
Group Traits for the Database . . . . . . . . . . . . . . . . . . . . . . . . . . . . . . . 6-22
Read Group . . . . . . . . . . . . . . . . . . . . . . . . . . . . . . . . . . . . . . . . . . . 6-23
Write Group . . . . . . . . . . . . . . . . . . . . . . . . . . . . . . . . . . . . . . . . . . 6-24
Notification Group. . . . . . . . . . . . . . . . . . . . . . . . . . . . . . . . . . . . . 6-25
Restricting Both Reading and Writing . . . . . . . . . . . . . . . . . . . . 6-26
Transferring Group Assignments . . . . . . . . . . . . . . . . . . . . . . . . 6-27
Hiding Queues and Directories . . . . . . . . . . . . . . . . . . . . . . . . . . 6-27
Mail Aliases . . . . . . . . . . . . . . . . . . . . . . . . . . . . . . . . . . . . . . . . . . . . . . 6-28
Creating a Mail Alias . . . . . . . . . . . . . . . . . . . . . . . . . . . . . . . . . . . 6-29
Mail Aliases for Other Machines or the Internet . . . . . . . . . . . . 6-30
Chapter 7 Keyboards and Macros
Understanding Macros and Keyboards . . . . . . . . . . . . . . . . . . . . . . . . 7-2
Customizing Workstation Keyboards . . . . . . . . . . . . . . . . . . . . . . . . . 7-3
Creating a New Keyboard Story. . . . . . . . . . . . . . . . . . . . . . . 7-3
Creating a Macro . . . . . . . . . . . . . . . . . . . . . . . . . . . . . . . . . . . . . . . . . . . 7-5
Adding Comments . . . . . . . . . . . . . . . . . . . . . . . . . . . . . . . . . . 7-6
Assigning Macros to Keys. . . . . . . . . . . . . . . . . . . . . . . . . . . . . . . . 7-6
Predefined System Function Keys . . . . . . . . . . . . . . . . . . . . . 7-8
The State Keys . . . . . . . . . . . . . . . . . . . . . . . . . . . . . . . . . . . . . . 7-9
Using Plain Text in Macros. . . . . . . . . . . . . . . . . . . . . . . . . . . . . . 7-11
Repeating Macros. . . . . . . . . . . . . . . . . . . . . . . . . . . . . . . . . . . . . . 7-11
Notes of Caution for Creating Macros. . . . . . . . . . . . . . . . . 7-12
Keyboard Checker. . . . . . . . . . . . . . . . . . . . . . . . . . . . . . . . . . . . . . . . . 7-13
Page 10

x
Assigning a Default Keyboard to a User. . . . . . . . . . . . . . . . . . . . . . 7-16
Customizing Keyboards for VT/DOS Terminals . . . . . . . . . . . . . . 7-19
Miscellaneous VT Macro Tips . . . . . . . . . . . . . . . . . . . . . . . . . . . 7-20
Assigning VT Macros to Standard Macro Keys . . . . . . . . . . . . 7-22
Assigning VT Macros to Extended Macro Keys . . . . . . . . . . . . 7-24
For VT Users Who Switch Between Keyboards . . . . . . . . . . . . 7-26
Chapter 8 Forms
Form Names and Locations. . . . . . . . . . . . . . . . . . . . . . . . . . . . . . . . . . 8-2
Guidelines for Designing Forms. . . . . . . . . . . . . . . . . . . . . . . . . . . . . . 8-2
Creating a Form. . . . . . . . . . . . . . . . . . . . . . . . . . . . . . . . . . . . . . . . . . . . 8-2
Assigning a Form as a Queue or Story Form . . . . . . . . . . . . . . . . . . 8-11
Form Field Types and Definitions . . . . . . . . . . . . . . . . . . . . . . . . . . . 8-13
Standard Avstar Forms . . . . . . . . . . . . . . . . . . . . . . . . . . . . . . . . . . . . 8-27
Account Queue Form . . . . . . . . . . . . . . . . . . . . . . . . . . . . . . . . . . 8-27
Mail Form . . . . . . . . . . . . . . . . . . . . . . . . . . . . . . . . . . . . . . . . . . . . 8-29
Timing Form. . . . . . . . . . . . . . . . . . . . . . . . . . . . . . . . . . . . . . . . . . 8-29
Print Form. . . . . . . . . . . . . . . . . . . . . . . . . . . . . . . . . . . . . . . . . . . . 8-30
Seek Form . . . . . . . . . . . . . . . . . . . . . . . . . . . . . . . . . . . . . . . . . . . . 8-31
Wire Story Form. . . . . . . . . . . . . . . . . . . . . . . . . . . . . . . . . . . . . . . 8-33
Mapping Netstation Characters to Avstar . . . . . . . . . . . . . . . . . . . . 8-34
Error Messages . . . . . . . . . . . . . . . . . . . . . . . . . . . . . . . . . . . . 7-13
Warning Messages . . . . . . . . . . . . . . . . . . . . . . . . . . . . . . . . . 7-14
The Pause Command. . . . . . . . . . . . . . . . . . . . . . . . . . . . . . . 7-20
The Blank Command . . . . . . . . . . . . . . . . . . . . . . . . . . . . . . . 7-20
Repeating VT Macros. . . . . . . . . . . . . . . . . . . . . . . . . . . . . . . 7-20
Extended Versus Standard Macro Keys . . . . . . . . . . . . . . . 7-23
Enabling F13 on the VT220 . . . . . . . . . . . . . . . . . . . . . . . . . . 7-24
Customizing Forms . . . . . . . . . . . . . . . . . . . . . . . . . . . . . . . . . 8-6
Label Borders. . . . . . . . . . . . . . . . . . . . . . . . . . . . . . . . . . . 8-11
Avstar MCS/BCS Fields and Forms . . . . . . . . . . . . . . . . . . 8-24
Page 11

Section II System Setup and Configuration
Chapter 9 Character Generator
Title Entry
Overview of CG Title Entry . . . . . . . . . . . . . . . . . . . . . . . . . . . . . . . . . . 9-2
Title Entry Setup and Configuration . . . . . . . . . . . . . . . . . . . . . . . . . . 9-4
Understanding CG Templates . . . . . . . . . . . . . . . . . . . . . . . . . . . . 9-4
CG Template Backgrounds . . . . . . . . . . . . . . . . . . . . . . . . . . . . . . . . . . 9-6
Required Bitmaps. . . . . . . . . . . . . . . . . . . . . . . . . . . . . . . . . . . . . . . 9-6
Capture Tool . . . . . . . . . . . . . . . . . . . . . . . . . . . . . . . . . . . . . . . . . . . 9-7
Hardware Requirements for Capture Tool . . . . . . . . . . . . . . 9-7
Installation of Capture Tool. . . . . . . . . . . . . . . . . . . . . . . . . . . 9-8
Using the Capture Tool . . . . . . . . . . . . . . . . . . . . . . . . . . . . . . 9-8
CG Template Editor. . . . . . . . . . . . . . . . . . . . . . . . . . . . . . . . . . . . . . . . 9-11
Edit Title Entry Template Window . . . . . . . . . . . . . . . . . . . 9-11
Creating a New Template . . . . . . . . . . . . . . . . . . . . . . . . . . . 9-15
Using Font PreSets . . . . . . . . . . . . . . . . . . . . . . . . . . . . . . . . . 9-20
Title Entry Security . . . . . . . . . . . . . . . . . . . . . . . . . . . . . . . . . . . . . . . . 9-23
Access to CG Template Editor . . . . . . . . . . . . . . . . . . . . .9-23
Access to CG Title Entry . . . . . . . . . . . . . . . . . . . . . . . . . .9-23
xi
Chapter 10 ed, the Line Editor
Overview - Before Editing . . . . . . . . . . . . . . . . . . . . . . . . . . . . . . . . . . 10-2
Making a Backup File Before Editing. . . . . . . . . . . . . . . . . . 10-2
Viewing the Contents of a File . . . . . . . . . . . . . . . . . . . . . . . 10-2
Printing a Copy of a File . . . . . . . . . . . . . . . . . . . . . . . . . . . . . 10-4
Using the UNIX Line Editor. . . . . . . . . . . . . . . . . . . . . . . . . . . . . . . . . 10-4
Launching ed. . . . . . . . . . . . . . . . . . . . . . . . . . . . . . . . . . . . . . . . . . 10-5
Specifying Lines to Edit . . . . . . . . . . . . . . . . . . . . . . . . . . . . . 10-5
Searching the File . . . . . . . . . . . . . . . . . . . . . . . . . . . . . . . . . . 10-7
Searching Tips. . . . . . . . . . . . . . . . . . . . . . . . . . . . . . . . . . .10-8
Editing Commands . . . . . . . . . . . . . . . . . . . . . . . . . . . . . . . . . . . . 10-9
Saving Changes. . . . . . . . . . . . . . . . . . . . . . . . . . . . . . . . . . . . . . . 10-14
Page 12

xii
Quitting ed . . . . . . . . . . . . . . . . . . . . . . . . . . . . . . . . . . . . . . . . . . 10-14
Chapter 11 Configuration Files
Licensing of Avstar System Components . . . . . . . . . . . . . . . . . . . . . 11-2
Device Types . . . . . . . . . . . . . . . . . . . . . . . . . . . . . . . . . . . . . . . . . . . . . 11-3
Viewing Information About Your Devices. . . . . . . . . . . . . . . . . . . . 11-4
List C Message Columns. . . . . . . . . . . . . . . . . . . . . . . . . . . . 11-5
The Site Configuration File (/site/config) . . . . . . . . . . . . . . . . . . . . 11-7
Testing the Site Configuration File After Changing. . . . . . . . . 11-9
Incorporating Configuration Changes . . . . . . . . . . . . . . . . . . . 11-10
Changing the Configuration File. . . . . . . . . . . . . . . . . . . . . . . . 11-15
The Hosts File (/etc/hosts) . . . . . . . . . . . . . . . . . . . . . . . . . . . . . . . . 11-17
System Profile Files. . . . . . . . . . . . . . . . . . . . . . . . . . . . . . . . . . . . . . . 11-17
Viewing the System Profile File. . . . . . . . . . . . . . . . . . . . . . . . . 11-18
Changing the System Profile File . . . . . . . . . . . . . . . . . . . . . . . 11-19
Listing Parameter Settings . . . . . . . . . . . . . . . . . . . . . . . . . . . . . 11-20
System Profile Parameters . . . . . . . . . . . . . . . . . . . . . . . . . . . . . 11-21
Adding Devices to Your Avstar System . . . . . . . . . . . . . . . . . . . . . 11-29
Adding a PCU . . . . . . . . . . . . . . . . . . . . . . . . . . . . . . . . . . . . . . . 11-30
PCU Device Numbering . . . . . . . . . . . . . . . . . . . . . . . . . . . 11-34
Adding a Workstation. . . . . . . . . . . . . . . . . . . . . . . . . . . . . . . . . 11-35
Adding a DOS PC Workstation . . . . . . . . . . . . . . . . . . . . . 11-39
Phase 1 . . . . . . . . . . . . . . . . . . . . . . . . . . . . . . . . . . . . . . . . . . 11-39
Phase 2 . . . . . . . . . . . . . . . . . . . . . . . . . . . . . . . . . . . . . . . . . . 11-39
Phase 3 . . . . . . . . . . . . . . . . . . . . . . . . . . . . . . . . . . . . . . . . . . 11-40
Adding a Printer . . . . . . . . . . . . . . . . . . . . . . . . . . . . . . . . . . . . . 11-41
Adding a Wire . . . . . . . . . . . . . . . . . . . . . . . . . . . . . . . . . . . . . . . 11-47
Alternative Editing of the Site Configuration File. . . . . . . . . . . . . 11-48
Intersystem Messaging. . . . . . . . . . . . . . . . . . . . . . . . . . . . . . . . . . . . 11-51
Sending Intersystem Messages . . . . . . . . . . . . . . . . . . . . . . . . . 11-51
Receiving Intersystem Messages. . . . . . . . . . . . . . . . . . . . . . . . 11-53
Database Change . . . . . . . . . . . . . . . . . . . . . . . . . . . . . . . . . 11-56
Avstar Workstation Session Behavior . . . . . . . . . . . . . . . . 11 - 56
Page 13

Chapter 12 Printers
System Printing . . . . . . . . . . . . . . . . . . . . . . . . . . . . . . . . . . . . . . . . . . . 12-2
The Printer Profile Files (in /site/printers) . . . . . . . . . . . . . . . . 12-2
Customizing Print Effects (Fonts) . . . . . . . . . . . . . . . . . . . . . . . . 12-4
Defining Print Forms . . . . . . . . . . . . . . . . . . . . . . . . . . . . . . . . . . . 12-5
Printer Profile Options. . . . . . . . . . . . . . . . . . . . . . . . . . . . . . . . . . 12-7
Using Special Characters in a Profile. . . . . . . . . . . . . . . . . . . . . 12-19
Creating and Using Print Styles . . . . . . . . . . . . . . . . . . . . . . . . . . . . 12-23
Creating a Style Story. . . . . . . . . . . . . . . . . . . . . . . . . . . . . . . . . . 12-24
Local Printing. . . . . . . . . . . . . . . . . . . . . . . . . . . . . . . . . . . . . . . . . . . . 12-31
Local Printing Dialog Box . . . . . . . . . . . . . . . . . . . . . . . . . . . . . . 12-32
xiii
VT Session Behavior . . . . . . . . . . . . . . . . . . . . . . . . . . . . . . . 11-56
Defining a Font . . . . . . . . . . . . . . . . . . . . . . . . . . . . . . . . . . . . 12-4
Combining Print Effects. . . . . . . . . . . . . . . . . . . . . . . . . . . . . 12-4
Defining a Form. . . . . . . . . . . . . . . . . . . . . . . . . . . . . . . . . . . . 12-6
Combining Setup Options . . . . . . . . . . . . . . . . . . . . . . . . . . . 12-6
Font and Form Space Available . . . . . . . . . . . . . . . . . . . . . . 12-7
Profile-Only Options. . . . . . . . . . . . . . . . . . . . . . . . . . . . . . . . 12-8
Profile and Style Options . . . . . . . . . . . . . . . . . . . . . . . . . . . 12-13
Standard Header and Footer Options . . . . . . . . . . . . . . . . 12-15
User-Selected Headers and Footers . . . . . . . . . . . . . . . . . . 12-16
Profile Option Defaults. . . . . . . . . . . . . . . . . . . . . . . . . . . . . 12-17
Using Nonprinting Characters . . . . . . . . . . . . . . . . . . . . . . 12-19
Adding Nonprinting Characters by Alias . . . . . . . . . .12-19
Adding Nonprinting Characters by Decimal Value. .12-20
Avoiding Characters Used by the System. . . . . . . . . . . . . 12-20
Changing System Profile Options. . . . . . . . . . . . . . . . . . . . 12-25
Selecting Forms . . . . . . . . . . . . . . . . . . . . . . . . . . . . . . . . . . . 12-26
Identifying and Selecting Fonts. . . . . . . . . . . . . . . . . . . . . . 12-26
Using Styles with Local Printing on Video Termin al Only. . . .
12-30
Scope . . . . . . . . . . . . . . . . . . . . . . . . . . . . . . . . . . . . . . . . .12-33
Page 14

xiv
Local Print Style Options . . . . . . . . . . . . . . . . . . . . . . . . . . . . . . 12-38
Managing Printers. . . . . . . . . . . . . . . . . . . . . . . . . . . . . . . . . . . . 12-47
Chapter 13 Wires
Adding a Wire to Your Avstar System . . . . . . . . . . . . . . . . . . . . . . . 13-2
Wires Profile Files. . . . . . . . . . . . . . . . . . . . . . . . . . . . . . . . . . . . . . . . 13-11
Wire Profile Options. . . . . . . . . . . . . . . . . . . . . . . . . . . . . . . . . . . . . . 13-13
Using Special Characters in a Profile. . . . . . . . . . . . . . . . . . . . . . . . 13-26
Entering Nonprinting Characters . . . . . . . . . . . . . . . . . . . . . . . 13-26
Avoiding Characters Used by the System . . . . . . . . . . . . . . . . 13-27
Converting Text with Accents and Diacritical Marks . . . . . . 13-28
Distributing Stories from the Wire. . . . . . . . . . . . . . . . . . . . . . . . . . 13-31
Defining Distribution of Wire Stories. . . . . . . . . . . . . . . . . . . . 13-31
Story Preview. . . . . . . . . . . . . . . . . . . . . . . . . . . . . . . . . . 12-34
Options . . . . . . . . . . . . . . . . . . . . . . . . . . . . . . . . . . . . . . . 12-35
Copies . . . . . . . . . . . . . . . . . . . . . . . . . . . . . . . . . . . . . . . . 12-36
Grid . . . . . . . . . . . . . . . . . . . . . . . . . . . . . . . . . . . . . . . . . . 12-37
Print Preview and Network buttons . . . . . . . . . . . . . . 12-37
Banner Format Options . . . . . . . . . . . . . . . . . . . . . . . . . . . . 12-44
Example Style Story . . . . . . . . . . . . . . . . . . . . . . . . . . . . . . . 12-46
Removing a Pending Print Request. . . . . . . . . . . . . . . . . . 12-47
Restarting the Current Print Request . . . . . . . . . . . . . . . . 12-48
Reordering a Pending Print Request. . . . . . . . . . . . . . . . . 12-48
Cancelling a Runaway Print Job. . . . . . . . . . . . . . . . . . . . . 12-48
Responding to a “Printer Offline” Problem . . . . . . . . . . . 12-48
Phase 1 . . . . . . . . . . . . . . . . . . . . . . . . . . . . . . . . . . . . . . . . . . . 13-2
Phase 2 . . . . . . . . . . . . . . . . . . . . . . . . . . . . . . . . . . . . . . . . . . . 13-2
Phase 3 . . . . . . . . . . . . . . . . . . . . . . . . . . . . . . . . . . . . . . . . . . . 13-7
Phase 4 . . . . . . . . . . . . . . . . . . . . . . . . . . . . . . . . . . . . . . . . . . . 13-9
Entering Characters by Alias . . . . . . . . . . . . . . . . . . . . . . . 13-26
Entering Characters by Decimal Value . . . . . . . . . . . . . . . 13-27
Creating a Distribution Name . . . . . . . . . . . . . . . . . . . . . . 13-32
Identifying a Destination Queue . . . . . . . . . . . . . . . . . . . . 13-33
Page 15

xv
Changing Notification Priority . . . . . . . . . . . . . . . . . . . . . . 13-33
Setting the Transmit or Always Options . . . . . . . . . . . . . . 13-34
Adding a Distribution Line. . . . . . . . . . . . . . . . . . . . . . . . . . . . . 13-35
Avoiding Hidden Categories . . . . . . . . . . . . . . . . . . . . . . . . . . . 13-35
Using the WIRES.ALL Notification Priority. . . . . . . . . . . . . . . 13-36
Distributing Unknown Wires . . . . . . . . . . . . . . . . . . . . . . . . . . . 13-37
Maximum Number of Lines . . . . . . . . . . . . . . . . . . . . . . . . . . . . 13-38
Mailboxes. . . . . . . . . . . . . . . . . . . . . . . . . . . . . . . . . . . . . . . . . . . . 13-38
Purge Intervals . . . . . . . . . . . . . . . . . . . . . . . . . . . . . . . . . . . . . . . 13-38
Internationalization . . . . . . . . . . . . . . . . . . . . . . . . . . . . . . . . . . . 13-39
Operating Wire Keyword Searches. . . . . . . . . . . . . . . . . . . . . . . . . . 13-39
Setting up Keyword Searching. . . . . . . . . . . . . . . . . . . . . . . . . . 13-39
Additional Information about Search Jobs. . . . . . . . . . . . . . . . 13-42
Suppressing a Search . . . . . . . . . . . . . . . . . . . . . . . . . . . . . . 13-42
Default Entry . . . . . . . . . . . . . . . . . . . . . . . . . . . . . . . . . . . . . 13-42
Keyword Limitations . . . . . . . . . . . . . . . . . . . . . . . . . . . . . . 13-43
Keyword Searching . . . . . . . . . . . . . . . . . . . . . . . . . . . . . . . . . . . 13-43
Using Parentheses in Searches . . . . . . . . . . . . . . . . . . . . . . 13-45
Tips on Building Search Rules. . . . . . . . . . . . . . . . . . . . . . . 13-46
User Notification . . . . . . . . . . . . . . . . . . . . . . . . . . . . . . . . . . 13-47
Removing a Rule Set. . . . . . . . . . . . . . . . . . . . . . . . . . . . . . . 13-47
Sending a Story to More Than One Queue . . . . . . . . . . . . 13-48
Default Directory Paths . . . . . . . . . . . . . . . . . . . . . . . . . . . . 13-48
The Keyword Mailbox . . . . . . . . . . . . . . . . . . . . . . . . . . . . . 13-48
Keyword Checker Messages . . . . . . . . . . . . . . . . . . . . . . . . . . . . . . . 13-49
Chapter 14 Servers
Overview. . . . . . . . . . . . . . . . . . . . . . . . . . . . . . . . . . . . . . . . . . . . . . . . . 14-2
Adding a Server Program to the System . . . . . . . . . . . . . . . . . . . . . . 14-3
Job Lists: Queues, Stories, and Commands . . . . . . . . . . . . . . . . . . . . 14-7
Defining Tasks for Servers . . . . . . . . . . . . . . . . . . . . . . . . . . . . . . 14-7
Adding a Scan Line in a Job List Story. . . . . . . . . . . . . . . . . 14-9
Defining a Priority Queue. . . . . . . . . . . . . . . . . . . . . . . . .14-9
Page 16

xvi
Defining an Every Entry Queue . . . . . . . . . . . . . . . . . . 14-10
Defining a Server Command Set . . . . . . . . . . . . . . . . . . . . 14-10
Processing Deleted Stories . . . . . . . . . . . . . . . . . . . . . . . 14-12
Ordered Queues and the Order Command. . . . . . . . .14-13
Defining Mailbox Tasks . . . . . . . . . . . . . . . . . . . . . . . . . . . . . . . 14-13
Using Mailboxes . . . . . . . . . . . . . . . . . . . . . . . . . . . . . . . . . . 14-14
Reserved Mailboxes . . . . . . . . . . . . . . . . . . . . . . . . . . . . 14-16
Assigning a Mailbox to a Queue . . . . . . . . . . . . . . . . . . . . 14-17
Defining Timed-Interval Tasks . . . . . . . . . . . . . . . . . . . . . . . . . 14-18
Example of Timed-Interval Tasks. . . . . . . . . . . . . . . . . 14-20
Action Servers . . . . . . . . . . . . . . . . . . . . . . . . . . . . . . . . . . . . . . . . . . . 14-21
Adding an Action Server . . . . . . . . . . . . . . . . . . . . . . . . . . . . . . 14-22
Assigning Field Validation. . . . . . . . . . . . . . . . . . . . . . . . . . . . . 14-26
Background and Possible Uses of Validation. . . . . . . . . . 14- 26
Using Validation with Action Servers or Tx Links . . . . . 14-27
Using the Validation Feature . . . . . . . . . . . . . . . . . . . . . . . 14-28
Validation Job List Commands. . . . . . . . . . . . . . . . . . . . . . 14-29
Distribution Servers . . . . . . . . . . . . . . . . . . . . . . . . . . . . . . . . . . . . . . 14-30
Assigning Distribution Codes . . . . . . . . . . . . . . . . . . . . . . . . . . 14-32
Using Wildcards and the Destination Queue. . . . . . . . . . 14-33
From the Command Line . . . . . . . . . . . . . . . . . . . . . . . . . . 14-34
Using an Action Server or Tx Link. . . . . . . . . . . . . . . . . . . 14-34
Using Dup or Move Commands in Job Lists . . . . . . . 14-34
Using Validate Commands in Job Lists . . . . . . . . . . . .14-35
Instructions in the Wire Distribution Story . . . . . . . . . . . 14-35
Matching and Case. . . . . . . . . . . . . . . . . . . . . . . . . . . . . . . . 14-36
Matching and Order. . . . . . . . . . . . . . . . . . . . . . . . . . . . . . . 14-36
Adding a Distribution Server. . . . . . . . . . . . . . . . . . . . . . . . . . . 14-38
Parallel Wire Servers . . . . . . . . . . . . . . . . . . . . . . . . . . . . . . . . . . . . . 14-41
Database Components for Backup Wire Distribution 14-42
Adding a Parallel Wire Server. . . . . . . . . . . . . . . . . . . . . . . . . . 14-43
Keyword Servers. . . . . . . . . . . . . . . . . . . . . . . . . . . . . . . . . . . . . . . . . 14-51
Database Components for Expanded Wire Keyword
Page 17

xvii
Searches . . . . . . . . . . . . . . . . . . . . . . . . . . . . . . . . . . . . . . .14-52
Adding a Keyword Server . . . . . . . . . . . . . . . . . . . . . . . . . . . . . 14-54
System Servers . . . . . . . . . . . . . . . . . . . . . . . . . . . . . . . . . . . . . . . . . . . 14-60
Seek Servers. . . . . . . . . . . . . . . . . . . . . . . . . . . . . . . . . . . . . . . . . . 14-60
Installing a Seek Server. . . . . . . . . . . . . . . . . . . . . . . . . . . . . 14-61
Fast Text Search (FTS) Servers . . . . . . . . . . . . . . . . . . . . . . . . . . 14-63
FTS Workflow . . . . . . . . . . . . . . . . . . . . . . . . . . . . . . . . . . . . 14-63
FTS Indexing. . . . . . . . . . . . . . . . . . . . . . . . . . . . . . . . . . .14-64
Installing FTS Components. . . . . . . . . . . . . . . . . . . . . . . . . . . . . 14-66
...On the Windows NT Server . . . . . . . . . . . . . . . . . . . . . . . 14-67
Installing ftsidx.exe and ftssch.exe . . . . . . . . . . . . . . . .14-67
Starting ftsidx.exe and ftssch.exe. . . . . . . . . . . . . . . . . .14-68
Stopping ftsidx.exe and ftssch.exe. . . . . . . . . . . . . . . . .14-69
...On Avstar Servers (UNIX) . . . . . . . . . . . . . . . . . . . . . . . . 14-69
Setting up ftsseek and ftsindex Servers . . . . . . .14-72
Starting and Stopping ftsindex and ftsseek on the Avstar
Server . . . . . . . . . . . . . . . . . . . . . . . . . . . . . . . . . . . . . . . . .14-74
Batch Indexing. . . . . . . . . . . . . . . . . . . . . . . . . . . . . . . . . . . . 14-75
Batch Indexing Directories (Folders). . . . . . . . . . . . . . .14-76
Dynamic Indexing . . . . . . . . . . . . . . . . . . . . . . . . . . . . . .14-76
Archival and Backup . . . . . . . . . . . . . . . . . . . . . . . . . . . . . . 14-76
Copying and Archiving the Index Base Files. . . . . . . .14-76
Removing the Index Base and Reindexing (Optional)14-77
Print Servers . . . . . . . . . . . . . . . . . . . . . . . . . . . . . . . . . . . . . . . . . 14-78
Adding a Print Server. . . . . . . . . . . . . . . . . . . . . . . . . . . . . . 14-79
Mail Servers. . . . . . . . . . . . . . . . . . . . . . . . . . . . . . . . . . . . . . . . . . 14-80
Disabling Mail to All Users . . . . . . . . . . . . . . . . . . . . . . . . . 14-81
Using Network Mail . . . . . . . . . . . . . . . . . . . . . . . . . . . . . . . 14-81
Using 8-Bit Characters in Mail . . . . . . . . . . . . . . . . . . . . . . 14-82
Character Conversion Table for Underscore-Prefix Format. . .
14-83
Networking Two or More Servers Using Rx/Tx Links. . . . . . . . . 14-88
Sending Story Forms . . . . . . . . . . . . . . . . . . . . . . . . . . . . . . . . . . 14-89
Page 18

xviii
Understanding the READY Field. . . . . . . . . . . . . . . . . . . . 14-90
Setting Automatic Update . . . . . . . . . . . . . . . . . . . . . . . . . . 14-90
Updating Queue Considerations . . . . . . . . . . . . . . . . . . . . 14-91
Changing Queue Order. . . . . . . . . . . . . . . . . . . . . . . . . . . . 14-92
Adding Rx/Tx Links. . . . . . . . . . . . . . . . . . . . . . . . . . . . . . . . . . 14-93
Adding Network Links . . . . . . . . . . . . . . . . . . . . . . . . . . . . 14-94
Chapter 15 Web Publishing
Overview . . . . . . . . . . . . . . . . . . . . . . . . . . . . . . . . . . . . . . . . . . . . . . . . 15-2
Setting Up Tx/net to Send HTML . . . . . . . . . . . . . . . . . . . . . . . . . . . 15-2
Default HTML Skeleton Story Form and Queue. . . . . . . . 15-4
Creating an HTML Story Form. . . . . . . . . . . . . . . . . . . . . . . . . . . . . . 15-5
Adding Story Entity References . . . . . . . . . . . . . . . . . . . . . . . . . 15-5
NSML to HTML Conversion . . . . . . . . . . . . . . . . . . . . . . . . . . . 15-10
Web Story Directives . . . . . . . . . . . . . . . . . . . . . . . . . . . . . . 15-14
Using Optional Format Strings . . . . . . . . . . . . . . . . . . . . . . . . . 15-14
Time and Date Elements . . . . . . . . . . . . . . . . . . . . . . . . . . . 15-15
Time and Date Fields . . . . . . . . . . . . . . . . . . . . . . . . . . . . . . 15-17
Time and Date Field Example. . . . . . . . . . . . . . . . . . . . 15-17
A Sample HTML Story Form. . . . . . . . . . . . . . . . . . . . . . . . . . . 15-18
Characteristics of the Story . . . . . . . . . . . . . . . . . . . . . . . . . 15-18
Contents of the Form . . . . . . . . . . . . . . . . . . . . . . . . . . . . . . 15-20
Resulting HTML Output. . . . . . . . . . . . . . . . . . . . . . . . . . . 15-22
Chapter 16 Web Access
Overview . . . . . . . . . . . . . . . . . . . . . . . . . . . . . . . . . . . . . . . . . . . . . . . . 16-2
Starting the Web Server . . . . . . . . . . . . . . . . . . . . . . . . . . . . . . . . . . . . 16-2
Web Access Login . . . . . . . . . . . . . . . . . . . . . . . . . . . . . . . . . . . . . 16-3
Web Access Story Templates. . . . . . . . . . . . . . . . . . . . . . . . . . . . . . . . 16-3
Default Story Template . . . . . . . . . . . . . . . . . . . . . . . . . . . . . 16-6
Web Access Directory and Queue Templates. . . . . . . . . . . . . . . . . . 16-7
Template Entities . . . . . . . . . . . . . . . . . . . . . . . . . . . . . . . . . . . . . . 16-8
Default Directory Template . . . . . . . . . . . . . . . . . . . . . . . . 16-18
Page 19

Default Queue Template . . . . . . . . . . . . . . . . . . . . . . . . . . . 16-19
Web Access Configuration. . . . . . . . . . . . . . . . . . . . . . . . . . . . . . . . . 16-20
Section III System Operations and Troubleshooting
Chapter 17 Connect Services
Network Services. . . . . . . . . . . . . . . . . . . . . . . . . . . . . . . . . . . . . . . . . . 17-2
Dialogs for Connect Services . . . . . . . . . . . . . . . . . . . . . . . . . . . . . . . . 17-2
Building a Dialog . . . . . . . . . . . . . . . . . . . . . . . . . . . . . . . . . . . . . . 17-2
Dialog Commands . . . . . . . . . . . . . . . . . . . . . . . . . . . . . . . . . 17-4
Dialog Examples . . . . . . . . . . . . . . . . . . . . . . . . . . . . . . . . . . . 17-5
Adding System Services . . . . . . . . . . . . . . . . . . . . . . . . . . . . . . . . . . . . 17-5
Setting up the Service. . . . . . . . . . . . . . . . . . . . . . . . . . . . . . . . . . . 17-6
Console Connect Sessions. . . . . . . . . . . . . . . . . . . . . . . . . . . . . . . . . . 17-11
Serial Connect Services. . . . . . . . . . . . . . . . . . . . . . . . . . . . . . . . . . . . 17-13
Chapter 18 Database Security
Establishing Security Procedures . . . . . . . . . . . . . . . . . . . . . . . . . . . . 18-2
User Passwords . . . . . . . . . . . . . . . . . . . . . . . . . . . . . . . . . . . . . . . . . . . 18-3
Checking Password Status . . . . . . . . . . . . . . . . . . . . . . . . . . . . . . 18-3
Forcing Individual Users to Change Their Passwords. . . . . . . 18-6
. . . At an Avstar Workstation . . . . . . . . . . . . . . . . . . . . . . . . 18-6
Tracking User Activity . . . . . . . . . . . . . . . . . . . . . . . . . . . . . . . . . . . . . 18-7
Tracking User Login Activity and Date Created. . . . . . . . . . . . 18-8
. . . At an Avstar Workstation . . . . . . . . . . . . . . . . . . . . . . . . 18-8
. . . At the Avstar Console. . . . . . . . . . . . . . . . . . . . . . . . . . . . 18-9
Listing Users Currently Logged in . . . . . . . . . . . . . . . . . . . . . . . 18-9
Recording Logins . . . . . . . . . . . . . . . . . . . . . . . . . . . . . . . . . . . . . 18-10
Using Group Security to Control System Access . . . . . . . . . . . . . . 18-12
xix
Chapter 19 Database Management
Monitoring Free Space . . . . . . . . . . . . . . . . . . . . . . . . . . . . . . . . . . . . . 19-2
Understanding Database Storage Units . . . . . . . . . . . . . . . . . . . 19-3
Monitoring the Free List . . . . . . . . . . . . . . . . . . . . . . . . . . . . . . . . 19-3
Page 20

xx
Understanding How the System Copies Stories. . . . . . . . . . . . 19-4
Tracking Database Space over Time . . . . . . . . . . . . . . . . . . . . . . . . . 19-5
Using the hogs Command to Obtain Information . . . . . . . . . . 19-5
Using dbpurge and dbfree to Obtain Information . . . . . . . . . . 19-6
Increasing Database Space for Immediate Use. . . . . . . . . . . . . . . . . 19-7
Maintaining the Database . . . . . . . . . . . . . . . . . . . . . . . . . . . . . . . . . . 19-8
Checking the Database for Errors . . . . . . . . . . . . . . . . . . . . . . . . 19-8
Cleaning the Database. . . . . . . . . . . . . . . . . . . . . . . . . . . . . . . . . . 19-9
Cleaning Your Database Offline. . . . . . . . . . . . . . . . . . . . . 19-10
Chapter 20 Backing up Your System
Tape Operations . . . . . . . . . . . . . . . . . . . . . . . . . . . . . . . . . . . . . . . . . . 20-2
Establishing Policies for Backup Procedures. . . . . . . . . . . . . . . 20-2
Backing up the Avstar Database. . . . . . . . . . . . . . . . . . . . . . . . . . . . . 20-3
The dbdump Command . . . . . . . . . . . . . . . . . . . . . . . . . . . . . . . . 20-4
Backing up Entire Database . . . . . . . . . . . . . . . . . . . . . . . . . . . . . 20-5
Backing up Individual Queues . . . . . . . . . . . . . . . . . . . . . . . . . . 20-7
Notes on Backing up the Database . . . . . . . . . . . . . . . . . . . . . . . 20-9
Restoring Data to the Avstar Database . . . . . . . . . . . . . . . . . . . . . . 20-10
The dbrestore Command . . . . . . . . . . . . . . . . . . . . . . . . . . . . . . 20-10
Restoring a First-Level Directory . . . . . . . . . . . . . . . . . . . . . . . 20-10
Listing Tape Contents and Backup Dates. . . . . . . . . . . . . 20-11
Listing Contents of a Tape . . . . . . . . . . . . . . . . . . . . . . . 20-12
Listing Items Dumped on a Particular Date . . . . . . . . 20-13
Listing the Date of Each Backup . . . . . . . . . . . . . . . . . . 20-14
Searching a Tape. . . . . . . . . . . . . . . . . . . . . . . . . . . . . . . . . . 20-14
The searchtape Command . . . . . . . . . . . . . . . . . . . . . . . 20-14
Searching a Tape for Stories. . . . . . . . . . . . . . . . . . . . . . 20-15
Searching a Tape by Word(s). . . . . . . . . . . . . . . . . . . . . 20-15
Searching a Tape by Word and Date Range . . . . . . . . 20-16
Searching a Tape by Word and Day. . . . . . . . . . . . . . . 20-17
Searching a Tape by Word and Month . . . . . . . . . . . . 20-17
Specifying a Maximum Number of Stories to Search 20-17
Page 21

Checking for Free Space on a Database. . . . . . . . . . . . . . . 20-18
Adding Blocks to the Free List. . . . . . . . . . . . . . . . . . . .20-18
Notes on Restoring the Database. . . . . . . . . . . . . . . . . . . . . . . . 20-19
Disaster Recovery Planning . . . . . . . . . . . . . . . . . . . . . . . . . . . . . . . . 20-20
Disaster Recovery Dbdump . . . . . . . . . . . . . . . . . . . . . . . . . . . . 20-20
Create Minimal dbdump. . . . . . . . . . . . . . . . . . . . . . . . .20-20
Disaster Recovery Dbrestore. . . . . . . . . . . . . . . . . . . . . . . . . . . . 20-21
Backing up Software . . . . . . . . . . . . . . . . . . . . . . . . . . . . . . . . . . . . . . 20-22
The softdump Command . . . . . . . . . . . . . . . . . . . . . . . . . . . . . . 20-23
Using the softdump Command to Back up System Software 20-23
SCO Emergency Boot and Root Floppies . . . . . . . . . . . . . . . . . 20-24
Backing up Site Files . . . . . . . . . . . . . . . . . . . . . . . . . . . . . . . . . . . . . . 20-25
The sitedump Command. . . . . . . . . . . . . . . . . . . . . . . . . . . . . . . 20-25
Chapter 21 Disconnects
Normal System Status. . . . . . . . . . . . . . . . . . . . . . . . . . . . . . . . . . . . . . 21-2
Detecting a Disconnect . . . . . . . . . . . . . . . . . . . . . . . . . . . . . . . . . . . . . 21-3
Types of Disconnects. . . . . . . . . . . . . . . . . . . . . . . . . . . . . . . . . . . . . . . 21-5
Causes of Disconnects. . . . . . . . . . . . . . . . . . . . . . . . . . . . . . . . . . . . . . 21-6
Disconnect Recovery. . . . . . . . . . . . . . . . . . . . . . . . . . . . . . . . . . . . . . . 21-7
Overview . . . . . . . . . . . . . . . . . . . . . . . . . . . . . . . . . . . . . . . . . . . . . 21-7
Procedures. . . . . . . . . . . . . . . . . . . . . . . . . . . . . . . . . . . . . . . . . . . . 21-8
Worksheet . . . . . . . . . . . . . . . . . . . . . . . . . . . . . . . . . . . . . . . . . . . 21-17
xxi
Chapter 22 Troubleshooting
Avstar Workstation Problems . . . . . . . . . . . . . . . . . . . . . . . . . . . . . . . 22-2
A User Cannot Log in . . . . . . . . . . . . . . . . . . . . . . . . . . . . . . . . . . 22-2
A User Cannot Establish a Session. . . . . . . . . . . . . . . . . . . . . . . . 22-3
A User Cannot Access an Item. . . . . . . . . . . . . . . . . . . . . . . . . . . 22-5
Group Permissions. . . . . . . . . . . . . . . . . . . . . . . . . . . . . . .22-5
Busy Stories. . . . . . . . . . . . . . . . . . . . . . . . . . . . . . . . . . . . . . . . . . . . . . . 22-6
Wire Problems . . . . . . . . . . . . . . . . . . . . . . . . . . . . . . . . . . . . . . . . . . . . 22-7
System Printer Problems. . . . . . . . . . . . . . . . . . . . . . . . . . . . . . . . . . . . 22-9
Page 22

xxii
Locked Blocks . . . . . . . . . . . . . . . . . . . . . . . . . . . . . . . . . . . . . . . . . . . 22-11
How to Check Process Status(ps Command) . . . . . . . . . . . . . . . . . 22-11
Power Failure. . . . . . . . . . . . . . . . . . . . . . . . . . . . . . . . . . . . . . . . . . . . 22-13
Hard Drive Failure . . . . . . . . . . . . . . . . . . . . . . . . . . . . . . . . . . . . . . . 22-14
Network Failure . . . . . . . . . . . . . . . . . . . . . . . . . . . . . . . . . . . . . . . . . 22-14
netstat -i Command . . . . . . . . . . . . . . . . . . . . . . . . . . . . . . . 22-15
Output Errors (Oerrs) . . . . . . . . . . . . . . . . . . . . . . . . . . . . . 22-15
Input Errors (Ierrs) . . . . . . . . . . . . . . . . . . . . . . . . . . . . . . . . 22-16
Section IV System Reference
Appendix A Command References
Programs Invoked by Avstar . . . . . . . . . . . . . . . . . . . . . . . . . . . . . . . . A-2
Commands Used by iNews personnel Only. . . . . . . . . . . . . . . . . . . . A-3
UNIX Commands Used in Avstar . . . . . . . . . . . . . . . . . . . . . . . . . . . . A-4
Console Server Commands. . . . . . . . . . . . . . . . . . . . . . . . . . . . . . . . . . A-4
Job List Commands. . . . . . . . . . . . . . . . . . . . . . . . . . . . . . . . . . . . . . . . A-42
Dialog Commands . . . . . . . . . . . . . . . . . . . . . . . . . . . . . . . . . . . . . . . . A-48
Appendix B System Files
/etc/bootptab . . . . . . . . . . . . . . . . . . . . . . . . . . . . . . . . . . . . . . . . . . . . . B-2
SCO-UNIX Specific. . . . . . . . . . . . . . . . . . . . . . . . . . . . . . . . . . B-2
SGI-Irix Specific . . . . . . . . . . . . . . . . . . . . . . . . . . . . . . . . . . . . B-3
DEC/MIPS Specific . . . . . . . . . . . . . . . . . . . . . . . . . . . . . . . . . B-4
/etc/hosts . . . . . . . . . . . . . . . . . . . . . . . . . . . . . . . . . . . . . . . . . . . . . . . . B-4
/etc/networks. . . . . . . . . . . . . . . . . . . . . . . . . . . . . . . . . . . . . . . . . . . . . B-5
/site/config . . . . . . . . . . . . . . . . . . . . . . . . . . . . . . . . . . . . . . . . . . . . . . . B-6
/site/printers/ti830 . . . . . . . . . . . . . . . . . . . . . . . . . . . . . . . . . . . . . . . . B-8
/site/system . . . . . . . . . . . . . . . . . . . . . . . . . . . . . . . . . . . . . . . . . . . . . . B-8
/site/wires/anpa7 . . . . . . . . . . . . . . . . . . . . . . . . . . . . . . . . . . . . . . . . . B-9
console.cfg . . . . . . . . . . . . . . . . . . . . . . . . . . . . . . . . . . . . . . . . . . . . . . . B-10
SYSTEM.CLIENT.WINDOWS . . . . . . . . . . . . . . . . . . . . . . . . . . . . . . B-11
SYSTEM.CONFIGURE.301-ACTION . . . . . . . . . . . . . . . . . . . . . . . . B-12
SYSTEM.MAP . . . . . . . . . . . . . . . . . . . . . . . . . . . . . . . . . . . . . . . . . . . . B-13
Page 23

SYSTEM.RESOURCE . . . . . . . . . . . . . . . . . . . . . . . . . . . . . . . . . . . . . . B-15
SYSTEM.WIRES.DISTRIBUTION . . . . . . . . . . . . . . . . . . . . . . . . . . . . B-17
SYSTEM.WIRES.KEYWORDS. . . . . . . . . . . . . . . . . . . . . . . . . . . . . . . B-18
SYSTEM.WIRES.KEYWORDS-AP . . . . . . . . . . . . . . . . . . . . . . . . . . . B-19
SYSTEM.WIRES.KEYWORDS-AP2 . . . . . . . . . . . . . . . . . . . . . . . . . . B-19
Appendix C Standard Dictionaries
Using Dictionaries to Define Messages and Commands. . . . . . . . . . C-2
Customizing Dictionaries. . . . . . . . . . . . . . . . . . . . . . . . . . . . . . . . . . . . C-4
Changing Default Dictionary Values. . . . . . . . . . . . . . . . . . . . . . . C-4
Restoring Dictionary Defaults . . . . . . . . . . . . . . . . . . . . . . . . . . . . C-8
Utility Messages Dictionary (/site/dict/messages) . . . . . . . . . . . . . . C-9
CCU Messages Dictionary (/site/dict/ccumsgs). . . . . . . . . . . . . . . C-15
Commands Dictionary (/site/dict/ccucmds). . . . . . . . . . . . . . . . . . C-19
Console Commands. . . . . . . . . . . . . . . . . . . . . . . . . . . . . . . . . . . . C-20
Job List Commands . . . . . . . . . . . . . . . . . . . . . . . . . . . . . . . . . . . . C-25
Video Attribute Dictionary (/site/dict/ccuvideo). . . . . . . . . . . . . . C-26
Queues Dictionary (/site/dict/queues). . . . . . . . . . . . . . . . . . . . . . . C-27
Words Dictionary (/site/dict/words) . . . . . . . . . . . . . . . . . . . . . . . . C-29
Connect Dictionary (/site/dict/doac) . . . . . . . . . . . . . . . . . . . . . . . . C-33
Telex Dictionary (/site/dict/telex). . . . . . . . . . . . . . . . . . . . . . . . . . . C-37
Dial Dictionary (/site/dict/dial). . . . . . . . . . . . . . . . . . . . . . . . . . . . . C-39
Keyboard Macros Dictionary (/site/dict/keymacros) . . . . . . . . . . C-40
Printer Messages Dictionary (/site/dict/printmsgs). . . . . . . . . . . . C-43
Case-Shifting Dictionary (/site/dict/shift). . . . . . . . . . . . . . . . . . . . C-44
VT Map Dictionary (/site/dict/vtmap). . . . . . . . . . . . . . . . . . . . . . . C-46
xxiii
Appendix D PCU/CCU Reference
Overview. . . . . . . . . . . . . . . . . . . . . . . . . . . . . . . . . . . . . . . . . . . . . . . . . . D-2
Network CCUs. . . . . . . . . . . . . . . . . . . . . . . . . . . . . . . . . . . . . . . . . . . . . D-3
Connecting Devices to a CCU. . . . . . . . . . . . . . . . . . . . . . . . . . . . . D-4
Physical Specifications for CCU II and CCU III. . . . . . . . . . . . . . D-5
Environmental Requirements . . . . . . . . . . . . . . . . . . . . . . . . . D-5
Page 24

xxiv
CCU II. . . . . . . . . . . . . . . . . . . . . . . . . . . . . . . . . . . . . . . . . . . . . . . . . . . . D-6
Resetting a CCU II . . . . . . . . . . . . . . . . . . . . . . . . . . . . . . . . . . D-7
Locating Panel Lights . . . . . . . . . . . . . . . . . . . . . . . . . . . . D-7
Connecting Devices to a CCU II. . . . . . . . . . . . . . . . . . . . . . . D-8
Locating Ports . . . . . . . . . . . . . . . . . . . . . . . . . . . . . . . . . . D-8
Connecting a CCU to the System . . . . . . . . . . . . . . . . . . . . . . . . . D-8
CCU III . . . . . . . . . . . . . . . . . . . . . . . . . . . . . . . . . . . . . . . . . . . . . . . . . . D-10
Resetting a CCU III . . . . . . . . . . . . . . . . . . . . . . . . . . . . . . . . . . . . D-10
Locating Panel Lights. . . . . . . . . . . . . . . . . . . . . . . . . . . . . . . D-11
Understanding the LED Display . . . . . . . . . . . . . . . . . . . . . D-11
POST Error Messages. . . . . . . . . . . . . . . . . . . . . . . . . . . . . . . D-12
Connecting Devices to a CCU III. . . . . . . . . . . . . . . . . . . . . . . . . D-14
Locating Ports . . . . . . . . . . . . . . . . . . . . . . . . . . . . . . . . . . . . . D-14
Connecting a CCU to the System . . . . . . . . . . . . . . . . . . . . . . . . D-15
CCU III Backplane . . . . . . . . . . . . . . . . . . . . . . . . . . . . . . . . . D-15
Setting the Host Baud Rate DIP Switch . . . . . . . . . . . . D-16
CCU IV . . . . . . . . . . . . . . . . . . . . . . . . . . . . . . . . . . . . . . . . . . . . . . . . . . D-16
Resetting a CCU IV . . . . . . . . . . . . . . . . . . . . . . . . . . . . . . . . . . . . D-16
Locating Front Panel Lights . . . . . . . . . . . . . . . . . . . . . . . . . D-17
Understanding the LED Display . . . . . . . . . . . . . . . . . . . . . D-18
Connecting Devices to a CCU IV. . . . . . . . . . . . . . . . . . . . . . . . . D-19
Locating Ports . . . . . . . . . . . . . . . . . . . . . . . . . . . . . . . . . . . . . D-19
Connecting a CCU IV to the System. . . . . . . . . . . . . . . . . . . . . . D-20
CCU IV Interior. . . . . . . . . . . . . . . . . . . . . . . . . . . . . . . . . . . . D-20
PCU. . . . . . . . . . . . . . . . . . . . . . . . . . . . . . . . . . . . . . . . . . . . . . . . . . . . . D-21
Resetting a PCU . . . . . . . . . . . . . . . . . . . . . . . . . . . . . . . . . . . . . . . D-21
Locating Front Panel Lights . . . . . . . . . . . . . . . . . . . . . . . . . D-22
Understanding the LED Display . . . . . . . . . . . . . . . . . . . . . D-22
PCU LED Codes . . . . . . . . . . . . . . . . . . . . . . . . . . . . . . . . . . . D-22
Connecting Devices to a PCU . . . . . . . . . . . . . . . . . . . . . . . . . . . D-24
Locating Ports . . . . . . . . . . . . . . . . . . . . . . . . . . . . . . . . . . . . . D-24
Connecting a PCU to the System. . . . . . . . . . . . . . . . . . . . . . . . . D-24
Page 25

Appendix E Character Mapping Code Tables for Wires
ASCII (7-bit) Character Set. . . . . . . . . . . . . . . . . . . . . . . . . . . . . . . . . . . E-2
IBM Character Set . . . . . . . . . . . . . . . . . . . . . . . . . . . . . . . . . . . . . . . . . . E-8
dbrestore Conversion Map. . . . . . . . . . . . . . . . . . . . . . . . . . . . . . . . . . E-15
Sample Arabic Wire Profile . . . . . . . . . . . . . . . . . . . . . . . . . . . . . . . . . E-16
Appendix F Environment Variables
Registry Editor . . . . . . . . . . . . . . . . . . . . . . . . . . . . . . . . . . . . . . . . . . . . . F-2
Environment Variables. . . . . . . . . . . . . . . . . . . . . . . . . . . . . . . . . . . . . . F-3
CCColor . . . . . . . . . . . . . . . . . . . . . . . . . . . . . . . . . . . . . . . . . . . . . . . F-3
DestinationOrder . . . . . . . . . . . . . . . . . . . . . . . . . . . . . . . . . . . . . . . F-5
MailLookup. . . . . . . . . . . . . . . . . . . . . . . . . . . . . . . . . . . . . . . . . . . . F-7
MsgMailAlert . . . . . . . . . . . . . . . . . . . . . . . . . . . . . . . . . . . . . . . . . . F-8
PIColor . . . . . . . . . . . . . . . . . . . . . . . . . . . . . . . . . . . . . . . . . . . . . . . F-10
RGB Hexadecimal Color Chart . . . . . . . . . . . . . . . . . . . . . . . F-11
ShowTimingBar . . . . . . . . . . . . . . . . . . . . . . . . . . . . . . . . . . . . . . . F-12
Scan Codes . . . . . . . . . . . . . . . . . . . . . . . . . . . . . . . . . . . . . . . . F-13
SyncToServer. . . . . . . . . . . . . . . . . . . . . . . . . . . . . . . . . . . . . . . . . . F-16
VT Compatibility . . . . . . . . . . . . . . . . . . . . . . . . . . . . . . . . . . . . . . F-18
Delete_Notify . . . . . . . . . . . . . . . . . . . . . . . . . . . . . . . . . . . . . . . . . F-19
xxv
Appendix G Managing Traits at Console
Viewing User Traits from the Console. . . . . . . . . . . . . . . . . . . . . . . . . G-2
Modifying User Traits from the Console . . . . . . . . . . . . . . . . . . . . . . . G-3
Users’ Passwords. . . . . . . . . . . . . . . . . . . . . . . . . . . . . . . . . . . . G-4
Listing Users Who Do Not Have Passwords. . . . . . . . . G-7
User Traits Console Command Summary. . . . . . . . . . . . . . . . . . . . . G-11
Managing Database Traits from the Console . . . . . . . . . . . . . . . . . . G-15
Getting Basic Information . . . . . . . . . . . . . . . . . . . . . . . . . . . G-15
Getting Detailed Information . . . . . . . . . . . . . . . . . . . . . . . . G-16
Changing Database Traits from the Console. . . . . . . . . . . . . . . . . . . G-17
Changing a Parent Directory Only. . . . . . . . . . . . . . . . . . . . G-17
Database Traits Console Command Summary. . . . . . . . . . . . . . . . . G-18
Page 26

xxvi
Sortfield . . . . . . . . . . . . . . . . . . . . . . . . . . . . . . . . . . . . . . . . . . G-25
Changing a Queue’s Sort Field . . . . . . . . . . . . . . . . . . . G-25
Starting the Queue Sort Function from the Console . G-26
Purge Interval . . . . . . . . . . . . . . . . . . . . . . . . . . . . . . . . . . . . . G-27
Abstract Printing. . . . . . . . . . . . . . . . . . . . . . . . . . . . . . . . . . . G-28
Abstract Printer . . . . . . . . . . . . . . . . . . . . . . . . . . . . . . . . G-29
Abstract Lines . . . . . . . . . . . . . . . . . . . . . . . . . . . . . . . . . G-29
Abstract Style. . . . . . . . . . . . . . . . . . . . . . . . . . . . . . . . . . G-30
Mailbox . . . . . . . . . . . . . . . . . . . . . . . . . . . . . . . . . . . . . . . . . . G-31
The dis Column. . . . . . . . . . . . . . . . . . . . . . . . . . . . . . . . . . . . G-31
Preview Lines. . . . . . . . . . . . . . . . . . . . . . . . . . . . . . . . . . G-32
Refresh . . . . . . . . . . . . . . . . . . . . . . . . . . . . . . . . . . . . . . . G-33
Managing Group Traits at the Console . . . . . . . . . . . . . . . . . . . . . . . G-34
Groups . . . . . . . . . . . . . . . . . . . . . . . . . . . . . . . . . . . . . . . . . . . G-34
Read Group . . . . . . . . . . . . . . . . . . . . . . . . . . . . . . . . . . . G-34
Write Group . . . . . . . . . . . . . . . . . . . . . . . . . . . . . . . . . . . G-35
Notify Group . . . . . . . . . . . . . . . . . . . . . . . . . . . . . . . . . . G-35
Restricting Access Using Read and Write Limitations. . . . . . . G-36
Removing Directory or Queue Restrictions. . . . . . . . . . . . . . . . G-37
Glossary
Index
Reader’s Comments
Page 27

Preface
This Operations Manual provides information on how to manage the
Avstar Newsroom Computer System, consisting of:
•A console
• One or more servers
• Various clients, such as Avstar Workstations and printers
Who Should Use This Manual
This manual is written for system administrators who are managing
the Avstar Newsroom Computer System (NRCS). It is strongly recommended that system administrators have prior experience in or classroom knowledge of UNIX system administration. Avstar system
administrators need to:
• Manage user accounts, security and permissions
• Start up and shut down Avstar NRCS
• Perform file system maintenance, backup, and recovery
• Maintain disks
• Monitor processes
• Configure and monitor the network
Page 28

xxviii
About This Manual
This manual provides information in the following format:
Sections
• Section I, Avstar Overview and System Basics, provides an overview of A vstar NRCS: information about the Avstar console; users,
groups, directories, queues, and stories; keyboard macros; and
forms. It contains Chapters 1-8.
• Section II, System Setup and Configuration, provides information
about UNIX, printers, wires, servers, web publishing, and web
access. It contains Chapters 9-16.
• Section III, System Operations and Troubleshooting, discusses
connect services, system security, database management, backing
up your system, and troubleshooting. It contains Chapters 17-22.
• Section IV, System Reference, contains a command reference, sample system files, information about standard dictionaries, PCU/
CCU references, and character mapping codes for wires. It contains Appendices A-G, the Glossary, Index, and the Reader’s Comments form.
Symbols and Conventions
This manual uses the following special symbols and conventions:
Structure of Text
1. Numbered lists, when the order of the primary items is important.
a. Alphabetical lists, when the order of secondary items is
important or in the case of optional procedures.
• Bulleted lists, when the order of primary items is unimportant.
Preface
Page 29

xxix
- Indented dashed lists, when the order of secondary items is
unimportant.
Look here in the margin
for tips and environment-specific information.
n
c
Cross References
In the margin you will find tips that help you perform tasks more easily and efficiently. You will also find information specific to a particular operating environment.
A note provides important related information, reminders, recommendations,
and strong suggestions.
A caution means that a specific action you take could harm your
computer or cause you to lose data.
Cross references are provided throughout this manual to give readers
locations where additional—sometimes more detailed—information
on a certain topic can be found. In some cases, the chapter name and
number is provided. In most cases, a two-part page number is given
along with the name of a section header. The first number in the page
number is actually the chapter number.
For instance: See “Changing Database Traits” on page 5-21 for more
information.
See “About This Manual” on page xxviii for
more information on
what chapte rs are in
which sections of this
manual.
In this example, information on how to change database traits can be
found on page 21 in Chapter 5, which is in Section I. Chapters are
numbered consecutively; page number restart at one in each chapter.
Section numerals are not pr o vided in cross references. So, a cr o s s reference that shows page number 17-2, for instance, indicates that the
information is in Chapter 17.
Keyboard Conventions
•CTRL-x means to press and hold down the Control key and then
press another key on the keyboard, represented here by x. This is
also used for other key-combinations such as ALT-x or Shift-x.
Symbols and Conventions
Page 30

xxx
• “Type” in a command procedure means to type the command on
the command line and then “press” the Enter key.
• “Select” means to choose an operation on a drop-down menu or
list.
• “Click” means to click the left mouse button, usually in response
to a dialog box. “Right-click” means to click the right mouse button.
Console Conventions
Commands that you enter at the console, console screen displays, and
console prompts are pr esented in a typewriter-style typeface called
Courier:
• Commands that you need to type are in Bold Courier. For
example, if you are instructed to type a console command, the
instructions may appear as follows:
Preface
Type so at the login: prompt.
• Output to the console screen is in plain Courier:
AVSTAR-A: list s
T11 miller A
T23 stevens A
T82 allen B
Lengthy console displays may be edited to emphasize only the most
important information. An ellipsis (...) represents portions of the
console display not shown in the text.
The console can display each server’s prompt based on the system ID
(typically a station’s call letters) and the server’s name. Examples in
this manual use a fictional station and system ID, AVSTAR. For
instance, the following is the console prompt for server A on the
AVSTAR system:
AVSTAR-A:
Page 31

If You Need Help…
…In Perf ormi ng a System Opera tion
If you are having trouble performing a system operation, you should:
1. Repeat the procedure, carefully following the instructions provided for the task in this guide.
2. Refer to the documentation included with your hardware to
review the maintenance procedures or the hardware-related
issues.
3. Check the Support section of iNews’ Web site at
http://www.inewsroom.com for online technical publications
and additional telephone support phone numbers.
4. Check iNews’ Web Bulletin Board, at
http://support.inewsroom.com/~avstar for information
about product and user conferences. If you do not find the answer
to your question, you can exchange information with other Avstar
customers and iNews Customer Support representatives.
xxxi
5. Maintenance Agreement contract customers can contact iNews’
Customer Support personnel at:
• 1-800-869-7009 in the USA
• +44-1256-814222 in Europe
• +61-2-8877-6888 in Asia/Pacific
• e-mail support@inewsroom.com
…With th e Syntax of Co nsole Commands
If you are at the console, and are unsure about the function of a console command, use the help command.
If You Need Help…
Page 32

xxxii
To view instructions about using a command, type help followed by
the name of the command. For instance, type help dbvisit for an
explanation of the dbvisit command. The following data appears:
dbvisit -<d or v> -{r or m name] -[s] [block# ...]
‘r’ for read only
‘s’ for “slow” to eliminate cache usage
‘m’ for machine name to disconnect
‘i’ to just validate isam files
n
Because of the margin limitations of this manual, console command lines may
appear wrapped to multiple lines. This does not neces sarily indicate the need
to press an Enter key. Unless otherwise indi c ated, console commands should
be typed on a single line, allowing the comput er to wrap the text whenev er the
command line stretches beyond the screen margin.
…With UNIX, or Specific Devices
Your best source for more detailed information about UNIX is the
UNIX documentation for your operating system. Any UNIX features
not mentioned in this manual are not supported in the Avstar system.
For more information about any device connected to your Avstar system, refer to the documentation included with the device.
Preface
Page 33

Other Documentation
The following documents provide more information pertaining to
™
iNews
Avstar Newsroom Computer System Documentation
• Avstar Newsroom Computer System Installation Manual for SCO and
• Avstar Newsroom Computer System Update Manual for SCO and SGI
• Avstar Newsroom Computer System Update Manual for the DEC/MIPS
• Avstar Newsroom Computer System Release N otes provides
products.
SGI Systems describes the installation process for customers not
now using Avstar Newsroom Computer System.
Systems describes the process for updating from an Avid
NetStation™ system to Avstar Newsroom Computer System.
System describes the process for updating from an A vid NetStation
system to Avstar Newsroom Computer System.
installation, administration, and user-level information that may
not have been available at the time the other documentation was
printed.
xxxiii
• Avstar Newsroom Computer System Introduction to A vstar W orkstation
Training Guide provides basic user-level information.
• Avstar Newsroom Computer System online help gives you
quick-reference information about user-level software functions.
Broadcast Control System Documentation
• Broadcast Control System (BCS) online help describes the
user-level software functions for the Broadcast Control System.
• Broadcast Control System Operations Manual provides A vstar system
administrators with operational and maintenance information
about BCS.
Other Documentation
Page 34

xxxiv
Other Products
• Broadcast Control System Release Notes provides installation, admin-
istration, and user-level information that may not have been available at the time the other documentation was printed.
• Contact your iNews Sales Representative for documentation and
information on other iNews
EditStar
®
, LeaderPlus™, NewStar®, and so forth.
™
products, such as Media Browse,
If You Have Documentation Comments
We continuously seek to improve our customer documentation. We
value your comments about this manual or other iNews-supplied
technical publications. That is why we include a Reader’s Comments
form at the back of this manual. You can fill it out and mail it to the
address provided on the form, or you can send your documentation
comments by e-mail to the iNews’ Technical Publications department
at: TechPubs@inewsroom.com
Please include the publication title, part number, revision letter (if
any), all of which can be found at the bottom of the copyright page in
this manual. Also include the specific section that you are commenting
on in all correspondence.
Preface
Page 35

SECTION I
Avstar Overview and System Basics
This section introduces the Avstar Newsroom
Computer System. The section consists of the
following chapters:
• Chapter 1, Introduction
• Chapter 2, The Avstar Console
• Chapter 3, Getting Started
• Chapter 4, Users
• Chapter 5, Stories, Queues, and Directories
• Chapter 6, Groups
• Chapter 7, Keyboard Macros
• Chapter 8, Forms
Page 36

Page 37

CHAPTER 1
Introduction
Avstar Newsroom Computer System is an integrated, digital news creation and production system. It provides journalists, producers, directors, writers, and technical personnel in a newsroom with an array of
tools to make their jobs easier.
This chapter contains:
•What is Avstar?
• iNEWS Products
• Links to Other Newsroom Products
• System Administrator Tasks
Page 38

1-2
What is Avstar?
The Avstar system consists of three iNews products: the Avstar Newsroom Computer System, the Avstar Media System, and the Avstar
Broadcast Control System. Y our newsroom may have any one or all of
these products.
An Avstar Newsroom Computer System (NRCS) provides:
• News gathering from video, audio, and text sources
• News production, including:
• News to air, including:
- Story creation and script editing
- Show planning and creation, with media flagging and cutting
- Machine control capabilities for on-air operations
- File exporting
Introduction
- Internet publishing
Page 39

1-3
The figure below shows a typical workflow in an environment with an
Avstar system:
iNEWS Products
Figure 1-1 Typical Avstar System Workflow
This section diagrams and describes the interrelationship between the
three iNews products that make up the Avstar system:
• Avstar Newsroom Computer System
• Avstar Media System
• Avstar Broadcast Control System
What is Avstar?
Page 40

1-4
Figure 1-2 Interrelationship of iNEWS Products
Avstar Newsroom Computer System
The Avstar Newsroom Computer System consists of the Avstar Workstation and Avstar Server components. All components work together
as an integrated system and provide journalists, producers, and news
directors with an array of digital tools for producing and monitoring
shows.
Journalists sitting at Avstar Workstations can simultaneously moni tor
news wires, work on stories, scan archives, and access an array of
online information sources. The Avstar Workstations in your newsroom are linked together via a network so they can share information.
When the server receives new information, such as additions or
changes to stories, it is immediately available to all newsroom person-
Introduction
Page 41

1-5
nel. Mail and messaging capabilities make group communication fast
and efficient.
From their individual workstations, producers and news directors can
plan a show and view the progress o f a predefin ed rundown. They can
also create rundowns and display timing information for programs.
Color highlights on the workstation screen show critical status info rmation, such as overrun, unapproved, and video-ready segments,
making it easy to access the status of the show.
Authorized users can log in and access the story database using any
standard Web browser. Users can also publish news stories directly to
a Web server in Hypertext Markup Language (HTML) with a single
command.
The Avstar Server manages all the day-to-day activities of the newsroom. System administrators can create forms-based displays and customize rundowns specific to their newsrooms. The system features a
fully mirrored database for immediate cutover in the event of a system
failure.
iNEWS Media Browse 2000
The iNews Media Browse 2000 system integrates video production
into A vstar Newsroom Computer System, enabling journalists to view
and edit low-resolution video on a single workstation. Journalists can
view the latest media as it is recorded into the Media Asset Server,
marking shots, and annotating and organizing shots into a sequence
ready for air or final polish in a high-resolution editing application.
The iNews Media Browse 2000 system removes barriers between
newsroom computing and video production. It enables story creation
decisions made by journalists to be executed on Avid’s NewsCutter
high-resolution video editing system. Since the edit decisions are
saved as Open Media Framework
automatically for on-air delivery. NewsCutter can fine-tune stories
further, adding titles and special effects.
®
®
(OMF®) files, they can be recreated
What is Avstar?
, a
Page 42

1-6
For more informa tion about Med ia Brows e 2000, see Medi a Browse 2000
Online Help System or Media Browse 2000 Operations Manual.
iNEWS Broadcast Control System
The iNews Broadcast Control System (BCS) is a machine co ntrol system for on-air operations. BCS can operate in both integrated and
stand-alone operations, and directly controls production and playback
devices. It receives information from the Avstar Workstation as control
events are entered into scripts, and enables back-to-back show production. If required, it can handle several shows at the same time.
BCS consists of a server and client graphical user interface (GUI). Technical directors have their ow n Windows-based GUI client to control
events on the BCS server.
For more information about iNews Broadcast Control System, see the
Broadcast Control System Operations Manual.
Links to Other Newsroom Products
The A vstar product set is constructed on a modular, open architecture,
enabling its components to work efficiently not only with other iNews
products but also with third-party hardware and software. Avsta r
NRCS provides efficient links to other iNews products for additional
scripting and video capabilities. One example is Digit al News Gathering (DNG), a disk-based production system that stores digital video,
audio, and graphics data in a single central library access ible by client
workstations for recording, editing, and playback.
All iNews products operate on industry-standard technologies,
including Windows 95 and Windows NT operating systems,
Intel-based PCs, Intel and SGI servers, and TCP/IP Internet networking protocols. Also, iNews is publishing open A pplications Programming Interfaces (APIs) for the Broadcast Control System that will
enable integration with third-party softwa re and hardware.
Introduction
Page 43

1-7
Figure 1-3 shows a sample la yout of an Avstar Newsroom Computer
System.
Figure 1-3 Sample Avstar NRCS Layout
What is Avstar?
Page 44

1-8
System Administrator Tasks
The following sections introduce many system administrator responsi-
bilities and the system’s capabilities and funtio ns.
Basic System Administration Tasks
Before you can customize or maintain the Avstar Newsroom Computer System, you must learn several basic tasks, wh ich include:
• Start up or shut down Avstar NRCS, which includes logging out
users and taking the system offline.
• Backing up a site file before making file modifications.
• Send system administrator commands from the console to one or
more of your system’s computers.
• Be a console superuser, capable of setting up special superuser
permissions.
User Tasks
Introduction
A user is anyone who can log in to the database and use Avstar NRCS.
Your responsibilities regarding users are:
• Monitor user information, such as users’ access privileges and
which users are currently logged in.
• Customize the traits of users’ account s to enable users to more
effectively use the system.
• Provide a new employee access to the information stored in the
Avstar NRCS database by creating a new user account.
• Remove user accounts of former employees to prevent improper
access to the Avstar NRCS database.
Page 45

Database Tasks
1-9
The A vstar system database contains the information your oganization
needs to function. A system administrator ’s tasks associated with the
database include:
• Design forms (that is, story templates) to display important infor-
mation about stories in a queue.
• Monitor changes to files and qu eues in the database.
• Unlock or delete any item in the database, and recover items that
were accidentally deleted or corrupted.
• Create new folders or queues in the Avstar system database to
meet your organization’s expanding needs.
• Remove a directory or queue from the database, if it is no longer
used.
• Change the name or traits of a an existing directory or queue.
• Assign the mailbox trait to queues for configuring automatic story
distribution into and out of queues.
Security Tasks
There are many ways to ensure the security of your Avstar system.
Your responsibilities regarding system security include:
• Monitor and change passwords or force users to change them by
setting up system checks and modifi cations.
• Monitor user login activity to guard against unauthorized use of
the A vstar system.
• Assign security to a dir ectory or queue, limiting access to a specific
group of users.
• Restrict database access by placing users into security groups
based on job roles and need for information.
System Administrator Tasks
Page 46

1-10
Customizing Commands and Messages
Your responsibilities regarding commands and mess ages include:
• Customize command names, message text, and other items by
changing their entries in your system’s dictiona ry f iles.
• Remove your custom dictionary translations by reverting to the
default settings for command names, me ssage text, and other
items.
Storage Maintenance Tasks
You will want to monitor the database regularly to ensure adequate
storage. Storage maintenance tasks include:
• Monitor how much free space is available in the database and, if
necessary, increase the amount to prevent the system from running out of space.
• Perform preventive database maintenance by periodically running
certain utility programs that can find and automatically fix minor
problems before they become serious.
Device Tasks
Introduction
• Backup the entire database or portions of it onto a tape, so if necessary, the information can be restored to the database later.
• Make a backup copy of the Avstar system software.
• Make a backup copy of files, such as the site file, on tape any time
you make a important changes.
A device is any kind of hardware or software that performs a specific
function when it is set up on the Avstar system. Your responsibilities
regar d i ng devices incl ud e:
• List the parameters of any device running on your system or list
all devices of one type.
• Add any type of device to your system, if you have the capacity
and license permission.
Page 47

1-11
• Use the UNIX line editor, known as Ed, to change the setup infor-
mation for a device in your system’s con fi guration file.
• Reconfigure the system so it recognizes any changes y ou make to
your system’s devices.
• Change each printer on your system so each has its own set of
printing profile options.
• Setup servers which are utility programs that automatically per-
form various actions on the stories in your database.
• Change wire distribution and sorting of data coming into your
database from a wire service to queues based on their category
codes or content.
• W rite dialogs (lists of instructions) fo r each service to automate the
connection process. A service is a device that connects a user to a
remote computer system.
• Design and assign custom keyboards for users with a unique set of
keyboard macros.
Reviewing Default Sett ings
Your responsibilities regarding system profiles, default settings, and
command syntax include:
• Changing a system profile setting to change your system’s opera-
tion.
• Reviewing default settings of all system profile parameters.
• Reviewing command syntax for edit, console, and job list com-
mands.
Troubleshooting
Your troubleshooting responsibilities include:
• Transfer system activities from a halted computer to other system
computers. If a computer connected to the system has been halted,
System Administrator Tasks
Page 48

1-12
bring the system back to operation using the remaining com puters.
• Reconnect a computer that has been halted. Following routine
maintenance, reintegrate a computer into your system’s operation.
Introduction
Page 49

CHAPTER 2
The Avstar Console
The Avstar console is an IBM/Intel-compatible personal computer
(PC) running custom-created Avstar software. The console serves as a
“command center” that enables you to monitor and maintain your
Avstar Newsroom Computer System.
This chapter contains information about:
•Overview
• Commands You Can Type at the Console
• Selecting Servers
• Console History
• Console Function Keys
• Console Operations
• The Remote Console
• The Console Configuration File (console.cfg)
• Console Control Command Reference
Page 50
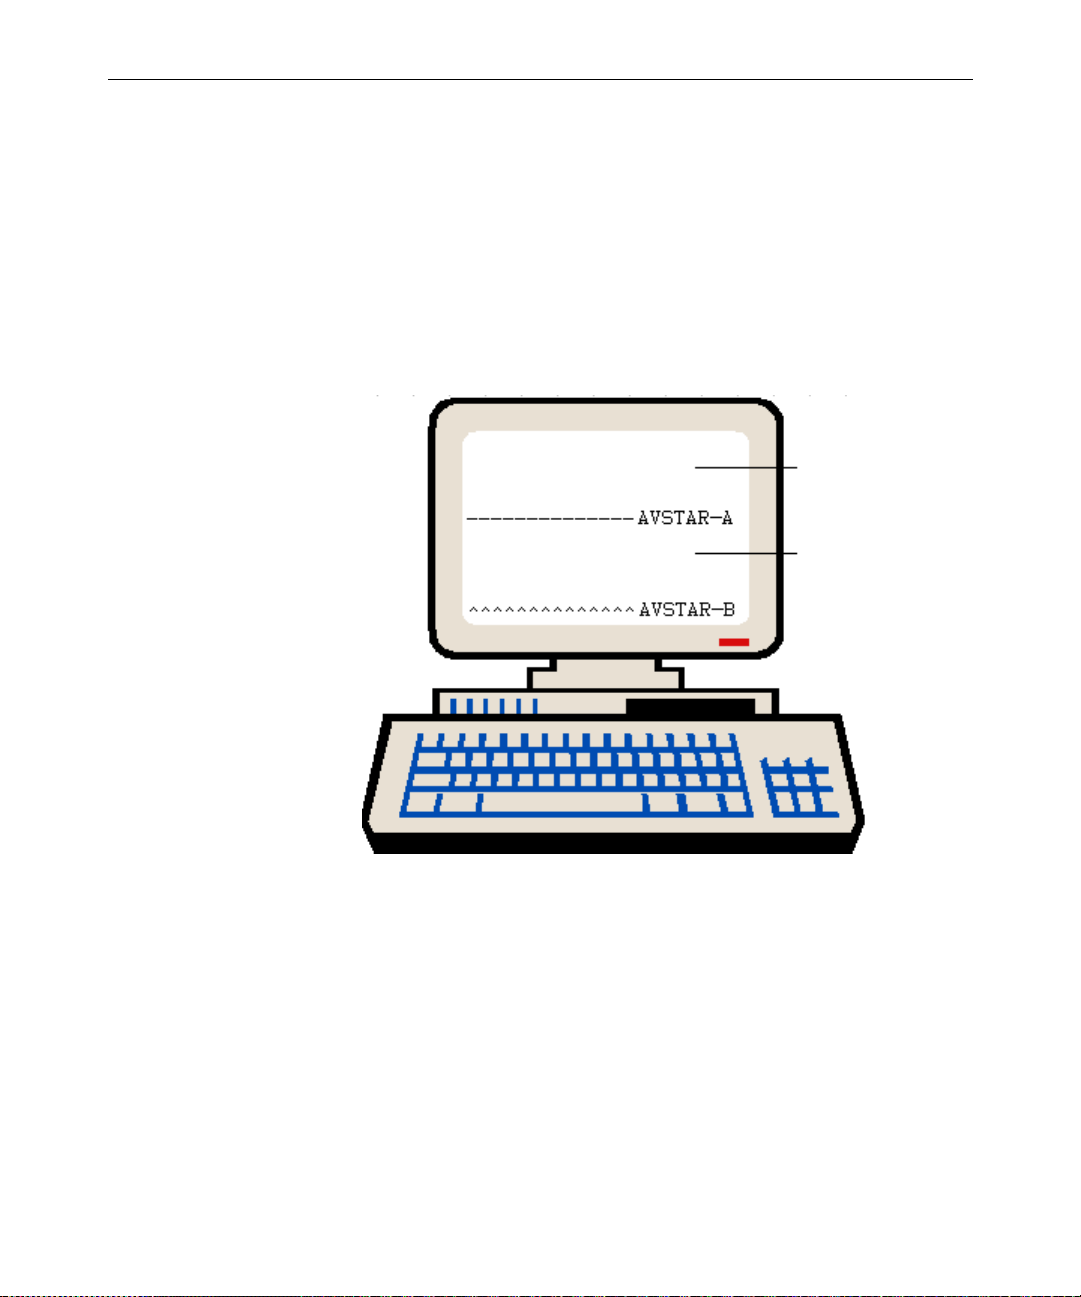
2-2
Overview
Although the console can control multiple computers, known as servers, your console has one screen, which is often divided into r egions to
separate the output from each server. Figure 2-1 shows a console in a
dual-server system—the console screen is divided into two regions.
Your console screen has as many regions as there are host servers in
your system.
“A” computer
region
“B” computer
region is
selected.
The Avstar Console
Figure 2-1 Console Screen for a Dual-Server System
To identify which region belongs to which server, the console displays
the name of the server that a region represents in that region’s lower
right corner. In the example shown in Figure 2-1, the top region displays the output from server A, and the bottom region displays the
output from server B. The wavy lines (^^^) to the left of the identifier
for server B indicate that it is currently selected.
Page 51
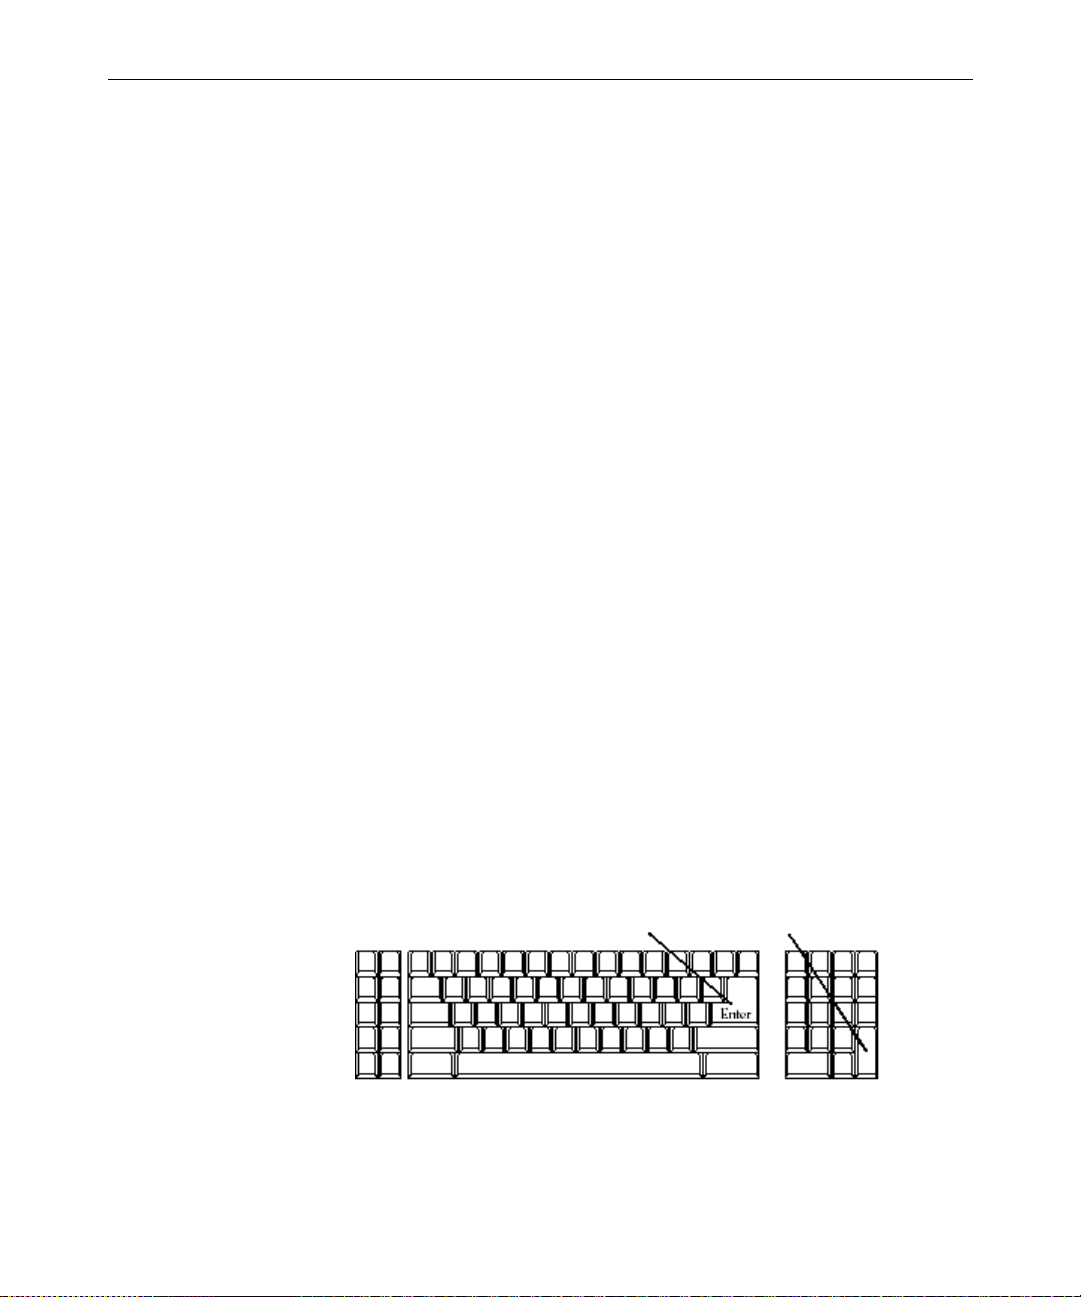
Commands You Can Type at the Console
You can type two kinds of commands at the console:
• Server commands are sent to the Avstar servers. For instance, the
list s command sent to an Avstar server will return information
about who is logged in.
These commands are all explained in other chapters of this manual and are summarized in Appendix A, “Command References.”
• Console control commands are sent to the Avstar console software
that communicates with the servers.
Some common console control commands are explained in the fol-
lowing section. For a complete list and description, see Table 2-4
on page 2-21.
Console Control Commands
To type console control commands, first press the Enter key on the
numeric keypad in the lower right corner of the keyboard.
2-3
The Enter key on the
numeric keypad will be
called the Command
key throughout this
manual to prevent confusion with the Enter
key on the keyboard.
The Enter key on the numeric keypad is the console’s Command
(CMD) key. When you press it, the console displays the COMMAND
prompt—also called the command line—from which you can type in
commands. After you type a command, you need to press the Enter
key—also called the Return key— on the standard keyboard for the
command to be executed. Figure 2-2 shows the location of the two
keys on a typical Avstar console keyboard.
Return key CMD key
Figure 2-2 Typical Avstar Console Keyboard
Commands You Can Type at the Console
Page 52

2-4
Example: The Computer Command
A typical example is the following sequence that will switch the computer selection in Figure 2-1 from server B to server A:
1. Press the Command key.
2. Type one of the following:
a. computer a
-OR-
b. c a
3. Press the Enter key.
You might follow the previous sequence with server commands to
server A, which you would type after the server prompt; it looks
something like this:
AVSTAR-A:
To type another console control command, again press the Command
key.
n
The Avstar Console
If you make a mistake when typing a command, use the Backspace
key or move the cursor back and then type over it. You can also cancel
the entire line and start over by typing the “at” character (@)—press
Shift-2.
If you need to stop a command, press Delete. If that does not work,
hold down the Control (CTRL) key and press the Backslash (\) key.
This action stops the command’s execution and displays the login:
prompt. Type so at the prompt to log in again.
On SGI systems, you m i ght have to press CTRL-D several time s to regain
normal console function.
If the server sends a message while you are typing a command, the
console stops displaying your keystrokes to display the message.
However, it continues to record what you type. After it has displayed
the message, the console displays the data that you typed while the
message was being displayed.
Page 53

2-5
n
If you are interrupted by a console display or have mistyped a line, type the
“at” character (
Selecting Servers
On the console, you can select one server or multiple servers at the
same time. For instance, some commands must be executed on all
servers at the same time, so on a two-server system, you would have
to select both server A and B before typing in the command. The previous example of the Computer Command showed you how to select
server A. Here are a few additional examples.
Selecting One or More Servers
To select only server B:
1. Press the Command key.
2. Type one of the following:
a. computer b
-OR-
@
) to cancel what you have typed.
b. c b
3. Press the Enter key.
To select both the A and B servers:
1. Press the Command key.
2. Type one of the following:
a. computer ab
-OR-
b. c ab
3. Press the Enter key.
Selecting Servers
Page 54

2-6
To select all servers in the Avstar system:
1. Press the Command key.
2. Type c *.
3. Press the Enter key.
Selecting all servers enables you to send a co mmand to all of them
simultaneously. When you select all servers, each server region’s bottom line changes to a row of ^ characters. Only one cursor appears,
usually in the top region. However, the command information you
type appears simultaneously in each region of the console screen.
Zooming in on One Server
In addition to the computer command, you can also use the zoom
command to select a server. Unlike the computer command, which
operates in split screen mode, zoom selects one server at a time and
devotes the entire console screen to that server.
Figure 2-3 shows the console screen after “zooming in” on server B’s
region.
The Avstar Console
Figure 2-3 “Zooming In” On Server B
Page 55

To zoom in on one server, such as server B:
1. Press the Command key.
2. Type one of the following:
3. Press Enter.
To restore the scre en to its fo rmer split-scr ee n state, use the computer
command to select any server. It does not matter which one you select.
For instance, type c a for server A. The console screen will display
multiple regions, and the region for server A will be selected.
Console History
2-7
a. zoom b
-OR-
b. z b
Relatively short system responses to your commands appear on the
console screen below your command text.
Longer output, however, sometimes scrolls off the screen. You might
want to go back and view this in screen-sized chunks; you can do this
by pausing the screen display.
Console History
Page 56

2-8
Pausing the Screen Display
To pause the screen display, press CTRL-S, which temporarily stops
the console screen from scrolling. When the scree n is full of text, XOFF
appears at the bottom of the selected region, as shown in Figure 2- 4.
Figure 2-4 XOFF Message Indicating Scrolling Is Paused
To resume scrolling, press CTRL-Q. Even if you do not press CTRL-Q,
the console automatically resumes scrolling after a pause of 60 seconds.
n
Pressing CTRL-S does no t have any effect if you ar e u sing a r emote co nsole. A
remote console is connected to the network by a modem dial-in from an exter-
nal location. See “The Remote Console” on page 2-14 for more information.
Viewing Recent Console History
The console maintains a history buffer containing messages that have
appeared on the screen. You can go back in “console history” to review
prior activity on any of the Avstar NRCS servers. The “top” of the
buffer contains the oldest information; the “bottom” of the buffer contains the most current.
The Avstar Console
Page 57

To view recent history on a particular server:
1. Select and zoom in to the server whose history you want to r eview.
2. Press the Command key.
3. Type one of the console history commands: up, down, top, or
bottom.
4. Press Enter.
Table 2-1 shows examples of console history commands.
Table 2-1 History Commands
Console History Command Has the following effect:
2-9
up monitor
up 180
down 50
top
bottom
Goes up in history searching for the word
“monitor.”
Goes up 180 lines from the current line.
Goes down 50 lines from the current line.
Goes to the top of console history.
Goes to the bottom of console history.
When you are in console history, the console prompt changes to
History to indicate you are in history viewing mode and the console
is ready to accept another history viewing command.
Once you have found the section of the console history you are look-
ing for, you can “print” a section to the screen as new console output.
For instance, after you have gone up 180 lines by pressing the Command key and typing up 180, you might want to print the next 20
lines. To do that, type pr 20.
To print all lines, from your current location in the history to the most
recent console activity, type:
pr all.
Console History
Page 58

2-10
Reading Older History
Y ou can configure Avstar to log console history to disk for later review.
The logs are written to the hard drive on your console PC, traditionally
in the C:\Console directory. The logs are named as shown in
Table 2-2.
Table 2-2 Log Names
File for server A: File for server B: Contains the following
information:
log.a1 log.b1
log.a2 log.b2
log.a3 log.b3
log.a4 log.b4
The log.a1 file is a duplicate of what is in current history; you can
also view it as shown in prior examples using the up command.
As the log.a1 file fills up, old files are renamed and a new log.a1
file is created as follows:
• log.a1 is renamed log.a2
• log.a2 is renamed log.a3
• log.a3 is renamed log.a4
•A new log.a1 is created
The log files are ASCII text files that can be read with any word pro-
cessing program. You must exit the Console program if yo u want to
edit the logs in any way.
Most recent history
Old history
Older history
Oldest history
n
The Avstar Console
You can use the console
or exiting to DOS, but
down. You cannot move back or search for words.
view
command to view the log viles without editing
view
only lets you start at the top of the file and scroll
Page 59

Both the presence or absence of disk logging and the size of the log
files can be configured in the CONSOLE.CFG file. See “The Console
Configuration File (console.cfg)” on page 2-16 for more information.
Console Function Keys
You can preprogram your keyboard function keys to execute commands. For instance, you might program F1 to select server A, F2 to
select server B, and F7 to move up 200 lines in the console history
buffer.
Assigning a Command to a Function Key
To assign a command to a function key:
1. Press the Command key.
2. Type the name of the function key you want to use, followed by
the equal sign (=) and the command the key is supposed to execute. The following example assigns the command of choosing
server A to the F1 key: f1=c a.
2-11
3. Press Enter.
To assign a command sequence to a function key—that is, include the
Command and Enter keys in the definition—use the open brace ({) to
represent Command, and the close brace (}) to represent Enter. For
example, to program the complete command sequence (press Command key, type computer command to select all servers, and press
Enter) to function key F10, you would type: f10={c *}
Changing the Assignment of a Function Key
To change a command assigned to a function key, assign a new definition to the key.
Deleting the Definition of a Function Key
To delete a function key’s command ass ignment, assign it a null value.
Console Function Keys
Page 60

2-12
Displaying Function Key Assignments
To find out the command (if any) assigned to a key:
1. Press the Command key.
2. Type the name of the key, such as, F9.
3. Press Enter.
Press Command again to clear the command assignment from the console screen.
Console Operations
This section explains what to do if the console freezes and how to start
and exit the console.
If the Console Freezes . . .
The Avstar Console
If the servers on your system are not r esponding to commands and a re
not displaying messages:
1. Check to make sure that you or someone else has not stopped
scrolling. (If that is the case, XOFF is displayed under the region
where scrolling has stopped.)
2. Type CTRL-Q to start scrolling.
It may also be possible that the server ports have stopped sending and
receiving. To start that activity again:
1. Press the Command key.
2. Type x.
3. Press Enter.
If this does not restore the console, static electricity may have frozen
one or more of the servers’ I/O ports. You may be able to unfreeze
these ports using the reset command. To do that:
1. Select the affected server(s).
Page 61

2-13
2. Press the Command key.
3. Type r (for reset).
Another possible cause of a frozen console is an application program
that will not stop running. If you suspect this probl em :
1. Select the affected server(s).
2. Hold down the Control and Shift keys, and type a backslash (\).
This stops the program on the selected servers and causes them to
display the login: prompt.
3. Press Enter and log in as system operator.
See “Logging in As System Operator” on page 3-2 for more information.
n
Exiting the Console
On SGI systems, you m i ght have to press CTRL-D several time s to regain
normal console function. If you press CTRL-D one too many times, you
might log out as system operator and have to log back in again, as explained
in “Logging in As System Operator” on page 3-2.
If the console still does not respond, exit the console program and
restart it as described in the following sections.
You should normally leave the console on at all times while the Avstar
system is running. However, the following situations may require you
to exit the console:
• The console is frozen, and you are unable to unfreeze it using the
methods described in “If the Console Freezes . . .” on page 2-12.
• You need to change the console’s configuration file. See “The Console Configuration File (console.cfg)” on page 2-16 for more information.
To exit the console:
1. Press the Command key.
Console Operations
Page 62

2-14
2. Type CTRL-e.
3. When COMMAND EXIT appears, press Enter.
Once the console software completely shuts down, the prompt for
your operating system will appear.
Starting the Console
If your console has been turned completely off, it should start the console program automatically when it boots up.
However, if you are starting up the console from your operating system prompt, do the following:
1. Type console.
2. Press Enter.
The Remote Console
The Avstar console can have a modem attached to it. This enables
someone in another location to call up the console and log in, thereby
turning the remote computer into a remote console. The primary use for
a remote console is to enable technicians or system administrators to
perform diagnostic and maintenance work on the Avstar system from
a remote location.
This sections explains how to dial in over a modem line, what you can
expect to see on the remote screen, and how to execute commands
remotely.
Dialing in to the Console
To dial in to the console, you must have a terminal or computer that
transmits and receives ASCII characters. You must also have set the
following modem options:
• Eight data bits
•No Parity
The Avstar Console
Page 63

• One stop bit
• Any baud rate supported by your console’s modem
To prevent unauthorized people from dialing in to the console, remote
access is protected with a password. When you dial in, you see a
PASSWORD prompt on the screen. (If you do not see the prompt immediately, pressing Enter should display it.) After you type the correct
password, the console connects you to the first server listed in the console configuration file, usually server A.
At the console, MDM is displayed at the bottom of the region representing the server that was selected from the remote console. Commands
typed at the remote console are sent to that se rver and displayed on its
console region. Likewise, commands sent by that server are displayed
both on the console and the remote console.
Executing Commands Remotely
Once logged in, you can type commands and review history almost as
if you were seated at the console itself. All commands except zoom
and history are available from the remote console. Just as at the con-
sole, these commands can be abbreviated using the first letter in each
command.
2-15
There are also some differences when using a remote console:
• The remote console displays screen input and output for only one
server at a time, even if you have more than one selected.
When you select two or more servers, the order in which you list
the servers in the computer command determines which server’s
display you see. For instance, if y ou type c ba to select servers B
and A, you see output only from server B on the remote, even
though what you type is sent to both A and B.
• Use the Escape key instead of the Command key to display the
command prompt.
The Remote Console
Page 64

2-16
Logging out from a Remote Console
When you have finished using the remote console, log out by doing
the following:
1. Press the Escape key.
2. Type l (for logout).
3. Press the Enter key.
4. When the remote console redisplays the PASSWORD prompt, hang
up your modem.
Logging out a Remote User from the Main Console
If you are at the main console and discover that you or someone else
has been using the remote console but did not log out when they wer e
done, you can log them out by doing the following:
1. Press the Command key.
2. Type m (for modem).
3. Press the Enter key.
n
Always follow this procedure before disconnecting the modem on the main
console.
The Console Configuration File (console.cfg)
The Avstar console uses information in a configuration file (a text file
called console.cfg) to set a number of parameters, such as:
• Whether or not disk logging is enabled
• Information about each of the servers connected to the console
• Information about the remote console
This section shows a sample configuration, and defines the console
configuration keywords and their parameters.
The Avstar Console
Page 65

Looking at the Console Configuration File
To view the configuration file:
1. Zoom to display only one region on the screen. For example:
a. Press the Command key.
b. Type z a.
c. Press Enter.
2. Use the view command to view the configuration file:
a. Press the Command key.
b. Type v console.cfg.
3. Press Enter to display the first line in the console configuratio n
file.
4. Continue pressing Enter to scroll through the file.
Here is a sample console configuration fil e:
log b:log
computer ;”A” server
name a
label AVSTAR
irq 3
hostess 2c0
speed 1200
;
computer ;“B” server
name b
label AVSTAR
irq 3
hostess 2c8
speed 1200
;
2-17
The Console Configuration File (console.cfg)
Page 66

2-18
computer ;“C” server
name c
label ARCHIVE
irq 3
hostess 2d0
speed 9600
;
modem ;Remote console
password turtle
irq 3
hostess 2d8
speed 1200
As you can see, this file consists of a list of keywords (such as, name
and label), most of which are followed by parameters (such a s, a and
AVSTAR). The keywords are described in detail in Table 2-3, “Console
Configuration Keywords” on page 2-19.
The keywords modem and computer identify the start of the modem
(remote console) section and the server sections. Each server (including the archive server, if your system has one) and the modem must
have their own sections in the console configuration file.
Editing the Configuration File
Probably the only modification you will ever need to make to the console’s configuration file is to change the modem password.
n
The Avstar Console
The console configuration file is stored on a DOS PC, so you need to use a
DOS editing tool, such as edit to change it. You could also copy the file to a
diskette and take it to another location to edit using Microsoft’s program,
NOTEPAD, on a Windows-based PC.
Page 67

2-19
Console Configuration Keywords
Table 2-3 lists all the configuration keywords and their parameters, if
they have any.
Table 2-3 Console Configuration Keywords
Keyword Explanation
computer Indicates the beginning of a server section. Must appear at the
top of each server section on the configuration file.
hostess <
irq <
port-address>
interrupt-request
-number>
label <
log <
server(s)
[
region-name>
drive:filename
] [
>
max size
Indicates which port address (in hex) the console uses to communicate with a particular device (that is, a server or the
modem). This information, which is dictated by the h ardware,
was placed in the configuration file when your system was
installed and should not be changed.
To get the attention of the console, each device (that is, the
servers and the modem) connected to the console must have
its own interrupt request with which it can signal the console.
irq keyword tells the console which interrupt r equest to
The
expect from each device.
This information, which is dictated by the hardware, was
placed in the configuration file when your system was
installed and should not be changed.
Defines a label that the console uses to identify each server’s
region of the console screen. The label can be up to 15 al phanumeric characters long.
Enables disk logging. No matter what filename (for example,
]
history) you designate here, the system always uses exten-
sions like A1, A2, and B1, as indicated in “Reading Older History” on page 2-10. If you do not follow t he filena me with a list
of the servers for which you want history to be recorded, the
console records history for all servers. If you omit a log size it
defaults to 16,384 bytes.
This example creates a history file on server B for servers A
and B:
log b:history ab
The Console Configuration File (console.cfg)
Page 68

2-20
Table 2-3 Console Configuration Keywords (Continued)
Keyword Explanation
modem
name <
password <
computer-name>
password>
portaddress <
speed <
baud-rate>
port>
Indicates the beginning of a modem section of the configuration file.
Names the server describe d in that se ction of the configurat ion
file. Each server must have A, B, C, or D as its name.
The modem password that must be typed w hen someon e logs
in at a remote console. The password can have up to eight
alphanumeric characters.
Selects the DOS address (in hex) the console should use to
communicate with a particular device, such as a modem. This
information which is dicta ted by the hardw are, is placed in th e
configuration file during installation and should not be
changed. Each device must have a port address defined in its
section. The portaddress keyword is used instead of host-
ess when your system has five servers or four servers and a
modem. In that case, the fifth server or the modem must use
com1 as its port. The port parameter should al ways be defined
as 3f8.
Sets the baud rate for communication between the console and
the server modems. The baud rate is the only communication
parameter you can alter; the console ports always communicate at 9600 baud, eight data bits, no parity, and one stop bit.
timeout <minutes:seconds
The Avstar Console
>
Allows you to set a time-out value for any modem connection.
The system automatically logs out a modem connection if
there is no ac tivity f or a spe cified am ount of time. F or instan ce,
a value of 6:00 w ould au tomatica lly log out a modem conn ection after six minutes of inactivity. This keyword, which
should only be used in the modem section, provides added
protection should a user forget to logout from a modem connection to the console.
With a value of 0:00—the default value—the feature is dis-
abled, which means the system will not log out a modem connection regardless of inactivity length. The maximum value is
546 minutes and 7 seconds (546:7).
Page 69

Console Control Command Reference
Table 2-4 lists available con sole control commands and their functions.
Table 2-4 Control Command Reference
Keyword Explanation
2-21
bottom
computer [
name(s)
down <
down <
| *]
number-of-lines>
keyword
computer-
> Causes a search for the keyword from your current position for-
Moves you to the newest (bottom) line in the history.
Selects one or more of your system’s servers, so that you can type
a command on the selected server(s). Follow the command with
the name(s) of the servers you want to select, or type an asterisk
(*) to select all servers, such as computer *.
Moves you that many lines forward in the history. For example,
typing down 10 takes you 10 lines forward. If you follow down
with a number greater than the number of lines between your current position and the last line in the histo ry, down moves you to
the last line in the history.
ward. For example, down list moves forward to a line containing the word “list.” The command
down one line. The down command is not case sensitive. If you
specify PEOPLE, down considers people to be a valid match. If
down does not find the keyword befor e reach ing the bottom of the
history, the console beeps and you are returned to the curre nt line.
A wildcard character (#) can be used to match any character or to
a search fo r a nu mber. For instance, down 160# will search fo r the
number 160 instead of moving down 160 lines.
down by itself moves you
Exit Function To leave the Avstar console program and return to the MS-DOS
prompt:
1. Press the Command key.
2. Press CTRL-E.
3. Press Enter.
(You cannot type
Type console at the prompt to restart the console program.
exit at the Command prompt.)
Console Control Command Reference
Page 70

2-22
Table 2-4 Control Command Reference (Continued)
Keyword Explanation
function-key-number
definition
list [
#-of-lines
=
| all]
Assigns a command to a console function key. For instance, to
assign the list s command to the F9 key, type f9=list s. To
include Command and Enter keys in a function key definition,
use braces. For instance, to include those keystrokes in the previous assignment example, type f9={list s}. To list the current
assignment of a function k ey, type the key number by i tse lf on t he
command line. The valid range is f1-f14. It is recommend no
definition be made for F14, which defaults to the Command key.
F13 corresponds to th e plus (+) key on the numerical ke ypad.
Sends some number of lines of the history to the printer.
• list follow ed by a number, such as list 3, prints that ma ny
lines of the history beginning at the current line.
•
list all prints everything from the current line to the
newest line.
list with no parameter prints the current line.
•
When using list, the wor d PRINTER appears on the command
line. If
PRINTER is displayed but nothing is being printed,
ensure that the printer is plugged in, turned on, online, and has
paper. The console assumes a printer is connected to the PC’s parallel port, where output is sent. To cancel a list command while
output is printing, press an y key; printi ng stops and your posi tion
in the history moves to the last line sent to the printer
logclose Writes all history currently in memory to disk and then disables
disk logging. You can use it to change log disks.
logopen Resumes history disk logging after it has been suspended with
logclose.
logout Logs you out from a remote console. To log out, press the Escape
key and type logout. The remote console displays the
PASSWORD prompt, and you can then hang up your modem.
modem Typed at the main console, this command logs out a remote con-
sole user. Before you type this command, make sure that the
remote console user is not in the middle of an operation.
The Avstar Console
Page 71

Table 2-4 Control Command Reference (Continued)
Keyword Explanation
2-23
print [
| all]
number-of-lines
Displays a number of lines of the history on the console screen.
print followed by a number displays that many lines of the his-
tory beginning at the current line.
print all displays everything from the current line to the
newest line.
print with no parameter displays the current line.
To cancel a print command while it is displaying console history, press any key. The console stops at the line last displayed on
the screen, and your position in the history moves to that line.
reset Attempts to unfreeze one or more of the console’s I/O ports, if
communication has failed between the console and your system’s
servers.
reset, select the servers that are affected, press the
To use
Command key, and type the command.
top Moves you to the oldest line in recent console history. To see his-
tory older than this, use the view command to view a history log
file on disk.
up [
number-of-lines
keyword
]
|
Moves you backward (up) some number of lines in the history.
up
number-of-lines
history. For example, typing up 30 moves you back 30 lines.
up
keyword
current position for that word. For example, to search backward
for a line containing dbpurge, type up dbpurge.
searches backward through the history from your
moves you that many lines back in the
up with no parameter moves you back one line.
The up command is not case sensitive. If you specify PEOPLE, up
considers
keyword before reaching the bottom of the history, the console
beeps and you are returned to the current line.
A wildcard character (#) can be used to match any character or to
a search for a number. For instance, up 160# will sea r ch for th e
number 160 instead of moving up 160 lines.
people to be a valid match. If up does not find the
Console Control Command Reference
Page 72

2-24
Table 2-4 Control Command Reference (Continued)
Keyword Explanation
view <
x
zoom <
drive:filename>
computer-name>
Displays a DOS text file on your console screen.
Use this command to look at old history that has been saved to
disk or to read other disk files, such as the console configuration
file. Before you type this command, use the zoom comm and to
display only one server’s region on the console screen. (You can
choose any server.)
While you are viewing a file, you can only move down through it
(as opposed to back or up in the file). Each time you press the
Enter key, the file scrolls down one line.
To stop viewing the file and return to normal console operation,
press the Command key.
Restarts the sending and receiving of information by the computers’ console ports.It stands for XON and causes an XON character
to be sent to the server for each selected region. If you are having
trouble communicating with your servers from the console, try
this command. If it does not work, use the reset command.
Selects a server and fills the console screen with its region. To
return the screen to its normal split-screen state, select any server
with the computer comma nd.
The Avstar Console
Page 73

CHAPTER 3
Getting Started
As the Avstar system administrator you will need to log on to Avstar
NRCS differently than other users. You will have access to features
that others do not. As system administrator, you will be responsible
for knowing how to startup an d s hutdown Avstar NRCS.
This chapter contains information about:
• Logging In As System Operator
• Becoming a Console Superuser
• Changing the System Ad ministration Passwords
• Startup and Shutdown
Page 74

3-2
Logging in as System Operator
Ordinarily, you are always logged in on each of your system’s servers
as the system operator.
To log in as the system operator, do the following:
1. When any of your server s dis plays the login: pr ompt, select that
server .
2. Type so.
3. Press Enter.
4. If your system has a passwo rd for this acco unt (most do), then
type in the password when prompted.
For information about creating or changing the system operator password, see “Changing the System Operator Password” on page 3-4.
Becoming a Console Superuser
A console superuser has special system privil eges that allow more
powerful (and therefore potentially more dangerous) commands. The
console’s prompt is the visual indicator for whether you are logged in
as a system operator or a superuser . The system operator prompt ends
with a colon (:). The superuser prompt ends in a pound sign (#). If a
command example in this manual shows the superuser prompt —ending in a pound sign (#)—you must be a superuser to use the command.
The superuser prompt looks like this:
AVSTAR-A#
The system operator prompt looks like this:
AVSTAR-A:
Follow the procedures explained in the next section to get to the superuser prompt.
Getting Started
Page 75

Entering Superuser Mode
To become a console superuser, you need the console superuser password.
To log in as a console superuser:
1. Type su.
2. Type the superuser password at the password prompt.
To keep the password confidential, the console does not display
what you type.
After you type the password correctly, the console shows that you are
a console superuser by changing the colon (:) at the end of the console prompt to a pound sign (#). If you enter an incorrect password,
the console displays an error message and lets you try again.
3-3
c
To prevent users from typing unauthorized commands, never leave
the console unattended when in superuser mode. You should log in
as superuser only when you need to type a superuser command, a nd
exit console superuser mode immediately after typing the command.
Exiting Console Superuser Mode
To exit from console superuser mode and return to the system operator mode, press CTRL-D. The console shows that you are a console
system operator by changing the pound sign (#)at the end of the console prompt to a colon (:).
Changing the System Administration Passwords
This section contains information about selecting passwords and
changing the passwords for system operator and superuser.
Selecting Passwords
The system differentiates between uppercase and lowercase characters, so always enter your password in the same case you used when
Changing the System Administration Passwords
Page 76

3-4
you created it.The Avstar system operator password must be between
six and ten characters and contain at least one numeric character.
Keep a confidential record of changes to system administrator passwords. Knowing the passwords is critical not onl y f or dbtraits and
other commands, but for iNews Customer Support technicians who
may require access for problem diagnosis and reconfiguration. If you
forget your passwords, the system may have to be rebooted after all
the software is reloaded by iNews Customer Support technicians.
Changing the System Operator Pass word
To change the system operator pass word:
1. When you are logged on as system operator, type:
passwd
2. When prompted, type a new password.
n
Systems using a SCO UNIX platform let you choose a password or have the
system provide one. Select option 1 to choose your own password. You will be
prompted to enter the passwor d.
3. When prompted to confirm, type the new password a second
time.
Changing the Superuser Pass word
To change the superuser password:
1. Become a console superuser by typing su and the superuser password at the password prompt.
The UNIX name for
superuser is root.
n
Getting Started
2. Type passwd root.
3. When prompted, type a new password.
Systems using a SCO UNIX platform let you choose a password or have the
system provide one. Select option 1 to choose your own password. You will be
prompted to enter the passwor d.
Page 77

4. When prompted, type the new password a second time.
If the password does not match, the system assumes that you
made an error and displays an error message. If you see this message, type passwd root again.
5. Press CTRL-D to exit from console superuser.
Startup and Shutdown
The following sections describe procedures for starting up and shutting down the Avstar Newsroom Computer System (NRCS).
Starting the System
The following procedure shows you how to reboot your servers and
synchronize them so that they run together as a single system.
Depending on how you shut down your system, you can begin the
procedure in one of two ways:
3-5
n
• If you turned off the servers and they have an autoboot switch,
ensure each server’s autoboot switch is on. Then turn on the servers as described in Step 1a, in the following procedure.
• If you halted servers when you shut down the system, use the
boot command described in Step 1b, in the following procedure.
Because server types vary, certain displays associated with the startup procedure may also vary. Examples are provided in each case and the type of server
is shown in the margin. Because this procedure applies to an entire system
that has been shut down, you must perform all the steps on all servers, except
where otherwise indicated.
To start your Avstar system, do the following:
1. Power up or reboot servers in one of the following ways, depending on how you shut down your system:
a. If you turned off servers when you shut down your system,
boot them to the login prompt by turning them on.
Startup and Shutdown
Page 78

3-6
b. If you halted the servers when you shut down your system,
boot each server from the console. Servers that have their
operating systems halted display the boot prompt on the console. Select all servers using the C * command and enter your
server’s boot command.
SGI Systems
SCO Systems
For an SGI IRIX system, if you turned off the servers, turn on each
server. The console displays: (only partial displ ay sho wn)
Running power-on diagnostics...
Starting up the system...
To perform system maintenance instead, press
<ESC>
...
The system is ready.
Avstar News System
login:
For a SCO UNIX system, if you turned off the servers, turn on each
server, which then displays a boot prompt, as in the following
example:
SCO UNIX System V/386 on i0486
Boot
:
Press Enter to continue. As each server boots, it displays copyright
and hardware configuration messages such as these:
hd(40)unix systty=sio auto
Loading kernel hd(40)unix .text
.............................................
Loading kernel hd(40)unix .data
.............................................
Loading kernel hd(40)unix .bss
...
Getting Started
Page 79

3-7
n
c
The system will prompt you to type either the root password for system maintenance or CTRL-D for normal startup to continue booting. It will also display the current system time and prompt you to type in a new time. If the
displayed time is correct, you can just press Enter and continue booting.
The system is ready...
Avstar News System
login:
When each server finishes booting, it displays a login: prompt.
If you did not shut down the system as described, check the console
history for messages indicating that all servers shut down at the
same time. Do not connect servers unless you are sure they are mirrored. If you cannot find messages indicating simultaneous shutdown, or are otherwise unsure whether the disks are mirrored, call
iNews Customer Support for assistance before proceeding.
If you shut down the system as instructed, the system mirrors the
databases and you can continue the startup procedure.
2. Select all servers. See “Selecting One or More Servers” on page 2-5
for more information.
3. Type so and the password, when prompted, to log in as system
operator.
4. Type connect # to connect.
The # character acts as a place holder for each server name. It is
replaced with each server’s computer name before the console
sends the connect command to all servers in the system. This
allows system administrators to send commands to multiple servers without having to select each server and send commands individually. For instance, the connect # command sends
connect a to server A, connect b to server B, and so forth.
When connected, each server displays status messages and the
system prompt returns.
Startup and Shutdown
Page 80

3-8
Messages similar to the follow ing appear:
Network interface in0 marked UP address
125.0.0.1 netmask 255.0.0.0
100 aliases longest (alias producer) 15 bytes,
4000 bytes total
A is offline
System is AB. Master is A.
Disk status is OK.
AVSTAR-A:
Connecting servers provides each server with a unique name and
causes each one to read and interpret the system profile. The servers can work together as a system after reading the system profile
information.
5. (Optional) Check for edit and order locks if you are restarting the
system after a power failure.
During a power failure, the system may not have had time to
remove edit and order locks from the database before shutting
down. When you restart the system, remove these locks.
Getting Started
n
Checking for edit and order locks may take time depending on the size of the
database. In an emergency, bypass this step to get the system running. Go
back later and r emo v e lo cks to provide syste m access.
The system can detect invalid locks and will ignore them.
To remove edit and order locks, select one server and type:
-
dbclean
-
The
with a skip flag, reducing the time it takes to run.
The period (.) after the
directory of the database, so that it does not miss any part of the
database not marked with a skip flag.
6. Select all servers. See “Selecting One or More Servers” on page 2-5
for more information.
x .
x option tells dbclean to skip queues or directories marked
-
x causes dbclean to start at the root
Page 81

7. Type startup to start the system.
Information similar to the following appears:
A Fri Aug 17 17:32:15 msg: System being
configured.
checking free space
data base size (113977) free blocks (1100)
starting news programs
booting pcu 10 on port 1
booting pcu 20 on port 2
The startup command does the following:
• Causes the master computer (usually server A) to read the
configuration file
• Brings each server online so users can log in
The console displays device-ready messages (Hot-to-go) as each
device starts up, indicating that the device is online and available.
3-9
n
Resources used for Avstar Workstation sessions do no t print any messages
until a workstation establishes a connection.
Shutting Down the System
If you need to turn off your servers or reboot the system, first shut
down the system. Shutting down the system:
• Saves any open stories
• Removes any remaining edit and order locks
• Ensures that each server’s copy of the database is the same
Startup and Shutdown
Page 82

3-10
n
Because the system requires that you shut down all servers at the same time,
most steps in this procedure are performed on all servers simultaneously.
Except where instructed to do otherwise, ensure that you have selected all
servers using the computer command before performing each step. See
“Selecting One or M ore Servers” on page 2-5 for more information.
To shut down your Avstar Newsroom Computer System, do the following:
1. Select all servers and type offline to take the system offline.
The offline command prevents users from logging in.
2. Select all servers and type broadcast followed by the message
warning users already logged in that the system will be shut
down. Include the time the system will be shut down. Here’s an
example:
AVSTAR-A: broadcast WARNING!System shut down 12PM
The broadcast command broadcasts a message to all users
logged in at present.
3. At the specified shutdown time, select one server and type the
commandlist s to check who is still logged in.
A message similar to the follow ing appears:
Getting Started
T11 miller A
T82 allen B
T101 stevens A
R801 stevens A
The list s command lists:
• The device controlling the session
• The user account used for the session
• The server servicing the session
4. Select all servers.
Page 83

3-11
5. Type logout all to log out all users. If a user is editing a story,
this saves the file and logs out the user.
6. Type list s again to check for connect session users.
The logout all console command does not log out users who
are currently in a connect session.
AVSTAR-A: list s
T101 stevens A
R801 stevens A
If any users are still logged in, notify them of the shutdown by
some other means, such as by telephone.
c
If a user is in a connect session when you shut down the system, t he
user’s workstation stops, the session is disconnected, and any
unsaved work is lost. Ensure any connect session users have logged
out before you continue the shutdown procedure.
7. Type shutdown to shut down the system.
A message similar to the following appears:
WARNING! This will stop all devices on this
computer, and close the database.
To prevent loss of work in progress, ’logout
all’ first.
Do you really want to do this (y/n)?
8. Type y to continue:
Do you really want to do this (y/n)? y
/exc/shutdown: Stopping all devices
/exc/shutdown: Closing database
The shutdown process stops all workstations, wires, and other
devices, and no further changes can be made to the database.
Startup and Shutdown
Page 84

3-12
9. Type the su command at the prompt and the superuser password
at the password prompt to become a console superuser:
AVSTAR-A: su
password:
SU: so /dev/console
SGI Systems
SCO Systems
On SGI servers, type sync to save changes to the system soft-
ware, and type halt to halt the system. You must be a superuser.
AVSTAR-A# sync
AVSTAR-A# halt
Shutdown started...
...Running power-on diagnostics...
OK to power off system now
Press any key to restart
As shown, the console displays a message when it is ok to continue.
On SCO systems, shut down the system by typing init 0 (that is,
zero) at the prompt. You must be a superuser.
AVSTAR-A# init 0
INIT: New run level: 0
The system is coming down. Please wait.
System services are now being stopped.
...
The system is down.
** Safe to Power Off **
-or** Press Any Key to Reboot **
Getting Started
10. Turn off each server.
When you are ready to start up your system, follow the procedure
described in “Starting the System” on page 3-5.
Page 85

CHAPTER 4
Users
People in your newsroom must have user accounts to use the Avstar
Newsroom Computer System (NRCS). Each user account has various
user traits associated with it that capture information about the user’s
interaction with the system—information such as passwords, keyboard preferences, and permissions for story editing.
This chapter tells how the system administrator can access and change
user account information from any Avstar Workstation. However , user
traits can also be viewed and modified at the Avstar console. The procedures for using the console is covered in Appendix G, “Managing
Traits at Console,” on page G-1.
• Viewing User Accounts
• Modifying User Traits
• User Traits Summary
• Simplified User Settings
• Setting up New Users in Avstar
• Searching for Information About Users
• Removing User Accounts
• Creating a User Manager Account
• Creating a Database Manager Account
Page 86

4-2
Viewing User Accounts
To look at the traits associated with a particular user account:
1. Click on the Tools drop-down menu.
2. Select Options.
3. Select Users from the Options submenu.
The Manage User Accounts dialog box appears.
An asterisk (*) in the
User ID field will result
in all user accounts
listed when you cl ic k
Search or press Enter.
Users
4. Enter the user name in the User ID field.
5. Click Search or press Enter. The results of the search appear in the
User List field located in the center of the dialog box.
6. Do one of the following:
a. Double-click the user name in the User List field.
-OR-
b. Click the name once to select it, and then click the Modify/
Display button.
Page 87

4-3
n
The Modify button will appear with the word Display on it if you do not have
authority to modify user accounts. This applies to user managers (umanager)
who cannot alter superuser accounts. Also, the traits shown in the dialog box
will appear gray to indicate that the information is for viewing only.
The Modify User Account dialog box appears.
The dialog box shows user traits associated with the accou nt you
chose, such as the user’s name, read rate, and mail queue name. All
the traits shown in the various sections of the Modify User Account
dialog box are explained in detail in “Modify User Account Dialog
Box” on page 4-4.
Modifying User Traits
You must be logged on as a superuser or user manager (umanager) to
change user traits. For an explanation of the umanager account and
privileges, see “Creating a User Manager Account” on page 4-35.
To modify a user’s traits from an Avstar Workstation, do the following:
1. Access the Modify User Account dialog box as explained in
“Viewing User Accounts” on page 4-2.
Modifying User Traits
Page 88

4-4
2. Select or deselect check boxes, as required. Fill in the fields in the
Queues section of the dialog box. See “User Traits Summary” on
page 4-5 for more inform ation.
You can click the Get from Template button to copy traits from
another pre-defined user account. The template must be selected
prior to the start of account modification or the button wi ll be
inaccessible (grayed out). See “Copying User Traits to Another
User Account” on page 4-26 for more information.
3. Change or setup a password, as explained in “Changing a User’s
Password” on page 4-9.
4. Click User Preferences and modify settings, as explained in
“Changing User Preferences” on page 4-10.
5. Click OK to save modifications, or click Cancel to close the dialog
box without saving changes.
Modify User Account Dialog Box
Users
Page 89

User Traits Summary
4-5
The Modify User Account dialog box divides the user’s traits into sections, such as Type, Edit Mode, Queues, and so forth. These sections
are explained in the following summary of all user traits.
User Name
The User Name field contains the user’s real name. It should not be
confused with the User ID, which the system uses to identify account
activity. For instance, Daniel Mitchell may have an account with a user
ID danielmi; his real name is Daniel Mitchell, but he will type
danielmi to log on to Avstar NRCS.
Type
The Type section contains the check boxes that determine what type of
user account is assigned to the user, and consequently, what privileges. If the check box is selected, the type is applied to that user
account.
• Superuser – A superuser account allows the user com-
plete access to administration features, such
as user accounts, the database, the System
directory, and connect sessions to the Avstar
console that controls the servers.
• Black Listed – A black listed account cannot be used to log
in to an Avstar Workstation. This type is
used for special accounts, such as umanager
and dbmanager. It is not intended for stan-
dard user accounts.
• Simplified – A simplified account sets certain access lim-
its, such as the maximum number of Avstar
Workspaces allowed. See “Simplified User
Settings” on page 4-19 for more information.
Modifying User Traits
Page 90

4-6
Edit Mode
The Edit Mode section’s radio buttons set up the condition of the PC
keyboard’s Insert key at log in.
•Insert – The Insert editing mode, when selected,
means if a user types text between two characters, the text is inserted at the cursor position without overwriting the character to the
right of the cursor.
• Overwrite – The Overwrite editing mode, when selected,
means if a user types text between two characters, the character to the right of the cursor
is replaced with the new text.
Queues
Avstar NRCS provides a People directory in the database file structure
that allows the system administrator to set up a personal directory and
two queues for each user as data storage. The Queues fields in the
Modify User Account dialog box indicate the navigation paths (or
locations) of the user’s personal directory and queues.
Users
n
The actual directory and queues are not created here. See “Creating a New
User Area in the News Database” on page 4-23 for more information.
• Home – The Home field contains the path to the
directory (folder) where the Destination and
Mail queues are stored in the database file
structure.
Page 91

4-7
• Destination – The Destination field contains the path to the
queue provided for the user as a storage
location, such as Notes.
• Mail – The Mail field contains the path to the user’s
Mail queue, which is where all e-mail to that
user is kept in the database.
Read Rate
The Read Rate is the user’s spoken reading rate in words per minute.
The average English reading rate is 180 words per minute. Avstar
NRCS uses the read rate of the designated user (presenter) to determine the audio (air) time of a story.
Session/Configuration/Queue Features
There are three sections of the Modify User Account dialog box pertaining to features.
The Session Features section defines access to other parts of the system, such as the Video server.
• Media Browse – The Media Browse check box determines
access to search the Video server.
• Broadcast Control – The Broadcast Control check box determines
access to the Avstar Broadcast Control System (BCS) workstation—typically operated
by the technical director.
• Connect Services – The Connect Services check box determines
access to any services defined in the system.
Modifying User Traits
Page 92

4-8
The Configuration Features section pertains to the look of the Avstar
Workspace.
• Toolbars – The Toolbars check box determines whether
the user can create custom toolbars.
• Color Highlights – The Color Highlights check box determines
whether the user can customize the highlighting status colors in the queue.
• Highlight Read ... – The Highlight Read Stories check box speci-
fies that unread stories in the queue are highlighted on the user’s screen. The highlight is
removed when the cursor is positioned on
the story
.
The Queue Features section pertains to access privileges in the Queue
panel of the Avstar Workspace.
• Reorder Stories – The Reorder Stories check box determines
authority to alter the order of the stories in a
queue.
See “Changing a User’s
Password” on page 4-9
for more information.
Users
• Create/Kill ... – The Create/Kill Folders/Queues check box
determines authority to create or delete
queues and folders (directories) in the database file structure, as seen in the Directory
panel of the Avstar Workspace.
• Kill All Stories – The Kill All Stories check box determines
authority to delete all stories from a queue at
one time. The data is actually moved from
the selected queue to the DEAD queue
where it remains (and can be accessed) until
purged.
Password
• Password – The Password button opens a dialog box that
you can use to set up or change the password protecting access to the user account.
Page 93
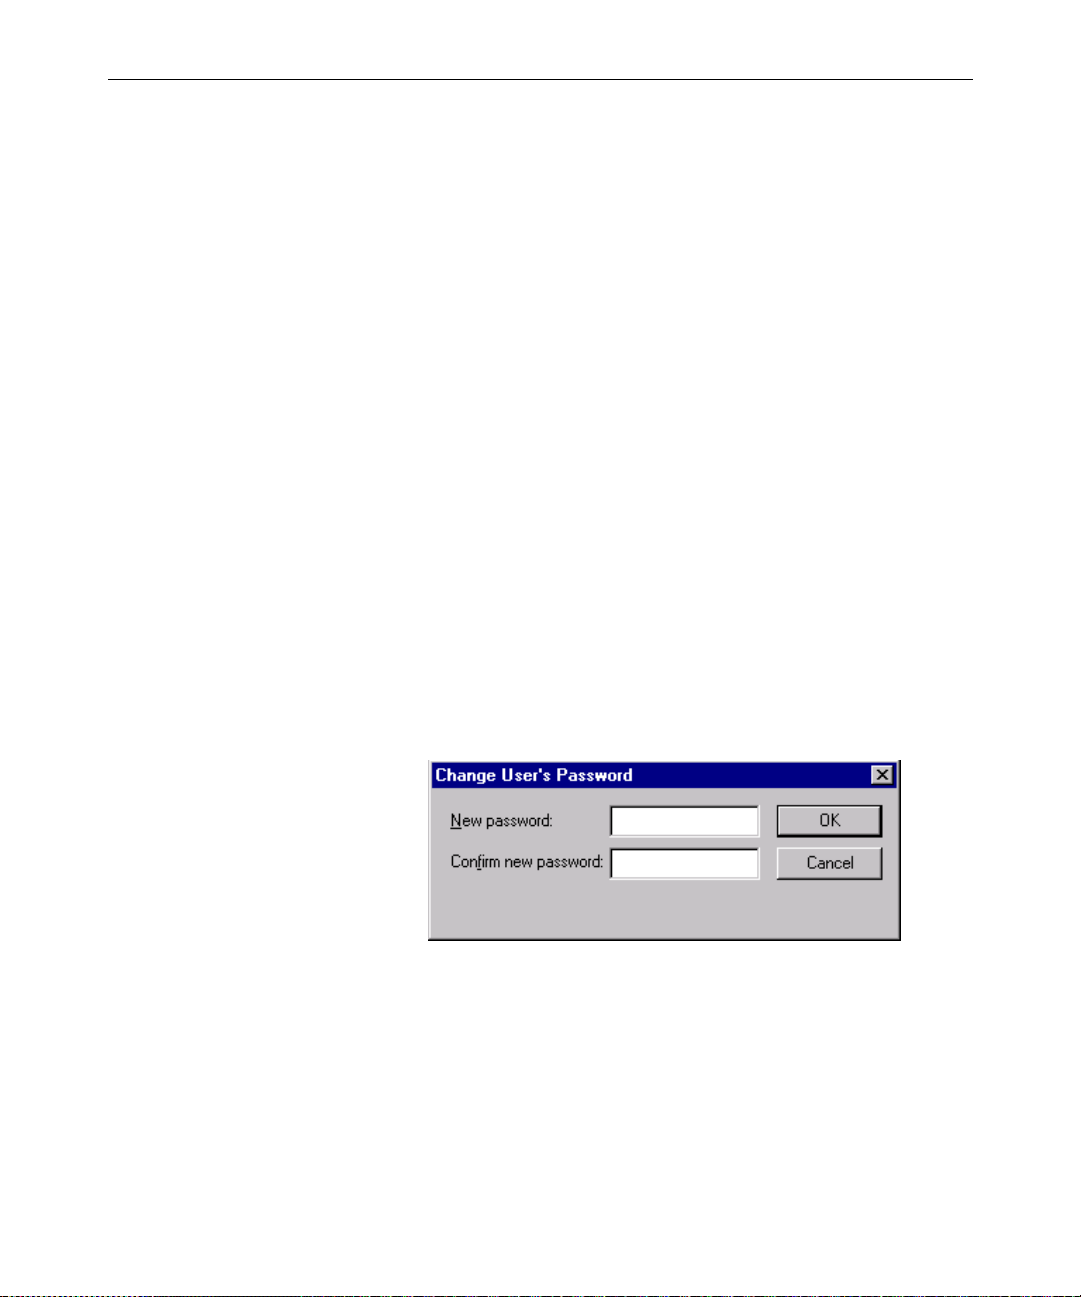
4-9
See “Forcing Individual Users to Change
Their Passwords” on
page 18-6 for more
information.
• Force Change – The Force Change check box determines
User Preferences...
Th User Preferences button is used to view and/or modify a user’s
preferences, such as keyboard, printer, and confirmation settings. See
“Changing User Preferences” on page 4-10 for more information.
Get from Template...
The Get from Template button is only used when copying the traits of
one user’s account to another. See “Adding a New User Account” on
page 4-26 for more information.
Changing a User’s Password
To change a user’s password, do the following:
1. Click Password in the Modify User Account dialog box. The
Change User’s Password dialog box appears:
whether the user is forced to change the
assigned password the next time he logs on.
n
2. Type the password in the New password field.
3. Confirm the new password by retyping it in the Confirm new
password field.
The password must be a minimum of five alphanumeric characters (and a
maximum of 12 characters) with no spaces. Use the system profile to set or
change a required length for all passwords for your site.
Modifying User Traits
Page 94

4-10
4. Do one of the following:
a. Click OK to save the password and close the dialog box.
-OR-
b. Click Cancel to close the dialog box without saving changes.
Changing User Preferences
To change user preferences, do the following:
1. Click User Preferences in the Modify User Account dialog box.
The Preferences dialog box will appear, containing several tabs.
Users
2. Modify the preference settings o n each tab as needed. The settings
are described in detail in the next section of this chapter.
3. Do one of the following:
a. Click OK to save them and close the dialog box.
-OR-
b. Click Cancel to close the dialog box without saving preferen ce
changes.
Page 95

Preferences Dialog Box
System administrators can use the Preferences dialog box to set up
default preferences for users, such as a default printer. However, the
Preferences dialog box is—by default—accessible to users, so they can
alter these settings at any time. To learn how you, as the system
administrator, can limit access to this dialog box and its features, see
“Simplified User Settings” on page 4-19.
Session Tab
The Session tab has two sections, which system administrators can use
to set up default user preferences.
4-11
• Keyboard – The keyboard drop-down list contains a list
of keyboards (or sets of macros) that can be
assigned to the user account as a default for
when he logs in. The Reload button allo ws
the keyboard assignment to take effect without having the user log off and back on.
• Printing – The Printing drop-down lists contain two
lists: one of Printers and another of
Modifying User Traits
Page 96

4-12
pre-defined Styles that can be assigned to the
user account as defaults for when he prints
data from an Avstar Workstation.
Confirmations Tab
The Confirmations tab is divided into sections and contains check
boxes that determine whether Avstar NRCS prompts the user to confirm a request before completing the command.
Users
• Drag/Drop section
- Story Operations – Avstar Workstation (ASWS), when
Story Operations is checked, will display a confirmation message before
moving a story when you use the
mouse to drag it to its new position.
- Queue Operations – ASWS, when Queue Operations is
checked, will display a confirmation
message before moving all stories in a
queue when you use the mouse to
drag them to their new position.
Page 97

- Queue Reorder – ASWS, when Queue Reorder is
checked, will display a confirmation
message before moving a story to a
new location in the same queue.
• Delete/Kill section
- Story – ASWS, when Story is checked, will dis-
play a confirmation message before
deleting a story or stories.
- Mail or Message – ASWS, when Mail or Message is
checked, will display a confirmation
message before deleting e-mail or
instant messages.
4-13
A production cue
marker (shown
here) is called a
grotch or grommet and
appears in the Story
Text panel.
- Production Cue – ASWS, when Production Cue is
checked, will display a confirmation
message before deleting a production
cue and its marker from a story.
• Saving Story – ASWS, when Saving Story is checked, will
display a confirmation message to save
changes before closing an edited story. The
confirmation also appears as a user moves
the cursor from one story to another when
building a show rundown. If you do not
select the Saving Story check box, the system
automatically saves changes before closi ng
stories.
• Large Print Jobs – ASWS, when Large Print Jobs is checked, will
display a confirmation message before sending potentially large print jobs to the printer,
such as the text of all stories in a queue.
• Exit – ASWS, when Exit is checked, will displa y a
confirmation message when the user
attempts to close the Avstar NRCS program
at the workstation.
Modifying User Traits
Page 98

4-14
Backup Tab
The Backup tab defines the settings for the Avstar Workstation to a utomatically back up work in a current session to a specified location at
specific time intervals.
Users
• Interval – Interval specifies the number of minutes
between story backups. The default is 10
minutes. Set the interval to 0 (zero) minutes
to turn off the automatic backup feature.
• Directory – Directory specifies the path name—the loca-
tion in which ASWS should store backup
copies of stories. The location should be a
directory (folder) on the harddrive of the
local PC/workstation. You can type the path
in manually, or click the Browse button to
select the directory from the Browse dialog
box.
Page 99

4-15
Refresh Tab
The Refresh tab sets the seconds for refreshing the screen at the workstation. This preference is unique because it only affects the workstation on which it is set. Set the number to zero (0) for instant
updating—that is, if you do not want to delay refreshes.
Modifying User Traits
Page 100

4-16
Layout Tab
The Layout tab is divided into sections and contains buttons and check
boxes that determine the layout of panels and workspaces in the
Avstar Workstation main window.
Users
• Start in Session – The Start in Session field specifies the default
session that will appear on screen when the
user logs in to Avstar Workstation (ASWS).
• Arrangement section
- – ASWS, depending on which Arrangement button is selected, will display
the panels of the Avstar Workspace
accordingly.
- Zoom – ASWS, when Zoom is checked, will
display the A vstar Workspace in zoom
mode—that is, zoomed into one of the
three panels: Directory, Queue or
Story.
 Loading...