

Page 1

DEKO500
Character Generator
Value, Performance, Reliability
User’s Guide
PPN: 253000-USRMAN Revision B
280 N. Bernardo, Mountain View, CA 94043
Page 2

COPYRIGHT
Copyright © 1999 Pinnacle Systems, Inc., All Rights Reserved.
Portions of the software described in this document Copyright © 1985-1999
Microsoft Corporation. All Rights Reserved.
Portions of the software described in this document Copyright © 1991-1999
Arthur D. Applegate. All Rights Reserved.
TRADEMARKS
Microsoft is a registered trademark, and Windows and Windows NT are
trademarks of Microsoft Corporation.
PINNACLE PART NUMBER: 253000-USRMAN Revision B
Page 3

Table of Contents
Introduction
Welcome!...................................................................................................................................5
How to Use This Manual ...........................................................................................................6
How to Contact Pinnacle Systems..............................................................................................7
Starting Windows NT ................................................................................................................8
Starting Deko500 .......................................................................................................................8
Exiting Deko500........................................................................................................................ 9
Exiting Windows NT .................................................................................................................9
Overview of Deko500
The Deko500 Desktop..............................................................................................................11
About Graphic Files.................................................................................................................11
The Program Window..............................................................................................................11
Creating a Graphic...................................................................................................................12
Saving a Graphic File............................................................................................................... 12
Opening a Graphic File............................................................................................................15
Keying......................................................................................................................................17
Frame Grabbing .......................................................................................................................18
Suppressing Motion .................................................................................................................18
Composing Text
Selecting Text ..........................................................................................................................19
Selecting a Typeface................................................................................................................ 20
Using an International Character Set........................................................................................21
Bold and Italic..........................................................................................................................22
Underlining Text......................................................................................................................22
Rotating Text............................................................................................................................22
Skewing Text ...........................................................................................................................23
Small Caps...............................................................................................................................24
Changing Text Case.................................................................................................................24
Changing the Text Field Box...................................................................................................25
Scaling Text .............................................................................................................................25
Character Spacing (Kerning)....................................................................................................26
Character Width.......................................................................................................................27
Row Spacing (Leading)............................................................................................................28
Typing On a Curve...................................................................................................................28
Cutting and Pasting Text..........................................................................................................31
Deleting Text............................................................................................................................31
Finding and Replacing Text.....................................................................................................32
Moving Text.............................................................................................................................32
Justifying Text..........................................................................................................................33
Deko500 User’s Guide
Page 4

Tab Stops .................................................................................................................................35
Using Undo..............................................................................................................................36
Creating Styles
SPECIFYING A FONT
About Fonts..............................................................................................................................38
The Style/Font Window...........................................................................................................38
Installing TrueType and Postscript Fonts.................................................................................40
Copying and Pasting a Font .....................................................................................................40
Custom Typeface .....................................................................................................................41
SPECIFYING A LOOK
About Looks.............................................................................................................................43
The Style/Look Window..........................................................................................................43
Face..........................................................................................................................................44
Face Attributes.........................................................................................................................45
Edge .........................................................................................................................................45
Edge Attributes.........................................................................................................................46
Shadow.....................................................................................................................................48
Shadow Attributes.................................................................................................................... 49
Underline..................................................................................................................................51
Underline Attributes.................................................................................................................52
Frame .......................................................................................................................................53
Frame Attributes.......................................................................................................................54
Cutting and Pasting Details and Looks ....................................................................................55
SPECIFYING A SHADER
About Shaders..........................................................................................................................57
Activating a Shader..................................................................................................................58
Applying a Color......................................................................................................................58
Applying a Ramp..................................................................................................................... 59
Ramp Options ..........................................................................................................................59
Highlight Options.....................................................................................................................60
Applying a Texture ..................................................................................................................60
Texture Options........................................................................................................................61
The Color Picker......................................................................................................................63
Picking a Color.........................................................................................................................64
Using Preset Shaders................................................................................................................ 65
WORKING WITH STYLES
The Current Style Window ......................................................................................................66
Saving a Style...........................................................................................................................67
Copying and Pasting a Style.....................................................................................................67
Assigning a Style to a Style Preset...........................................................................................67
Retrieving a Style.....................................................................................................................68
Saving Preset Styles.................................................................................................................69
Saving a Pre-rendered Style.....................................................................................................70
Table of Contents ii
Graphics and Layers
Video Standard.........................................................................................................................71
About Layers and Backgrounds...............................................................................................71
The Background.......................................................................................................................73
Adding a Text Field .................................................................................................................74
Text Field Properties................................................................................................................75
Adding a Rectangle Layer........................................................................................................77
Adding an Ellipse Layer...........................................................................................................77
Specifying Layer Properties.....................................................................................................78
Layer Properties.......................................................................................................................78
Selecting a Layer......................................................................................................................79
Deko500 User’s Guide
Page 5

Clearing a Graphic...................................................................................................................79
Clearing or Deleting a Layer....................................................................................................80
Cutting and Pasting Layers ......................................................................................................81
Appending a Graphic to Second Graphic.................................................................................81
Reordering Layers....................................................................................................................82
Pasting Layers to the Background............................................................................................82
Combining Text Fields.............................................................................................................82
Moving a Layer........................................................................................................................82
Justifying a Layer.....................................................................................................................84
Rotating a Layer.......................................................................................................................84
Scaling a Layer.........................................................................................................................85
Skewing a Layer.......................................................................................................................86
Effects and Sequences
About Deko500 Effects............................................................................................................87
Creating a Sequence.................................................................................................................88
Composing Rolls......................................................................................................................90
Composing Crawls ...................................................................................................................91
Browsing for Graphics in a Sequence......................................................................................91
Selecting Events.......................................................................................................................92
Cutting and Pasting Events ......................................................................................................93
Inserting and Deleting Events..................................................................................................93
Playing a Sequence ..................................................................................................................94
Pausing Sequence Playback.....................................................................................................94
Using a GPI Trigger.................................................................................................................95
Stopping Sequence Playback ...................................................................................................96
Table of Contents iii
User Preferences
Deko500 Layouts.....................................................................................................................97
User Preferences.......................................................................................................................97
Common Preferences............................................................................................................. ..99
Prompts Preferences.................................................................................................................99
Paths Preferences ...................................................................................................................100
Cursor Preferences.................................................................................................................101
Marker Preferences................................................................................................................102
Advanced Preferences............................................................................................................103
Managing Files
Opening Files.........................................................................................................................105
Closing Files ..........................................................................................................................106
Saving Files............................................................................................................................106
Deleting Files.........................................................................................................................107
Sharing Files ..........................................................................................................................107
Creating a Directory...............................................................................................................107
Working with Macros
INTRODUCTION TO MACROS
Commands and Macros..........................................................................................................109
Working in the Macro Window..............................................................................................110
USING THE MACRO RECORDER
Recording a Macro.................................................................................................................111
Playing a Macro.....................................................................................................................111
Pausing a Macro.....................................................................................................................112
Stopping Macro Playback......................................................................................................113
Deko500 User’s Guide
Page 6

Single-Stepping a Macro........................................................................................................113
Editing a Macro......................................................................................................................114
Saving a Macro ......................................................................................................................114
Appending to a Macro............................................................................................................115
Converting a Graphic or Sequence into a Macro...................................................................115
MACRO PROGRAMMING LANGUAGE
Commands .............................................................................................................................116
Command Syntax...................................................................................................................116
Parameters..............................................................................................................................117
Variables ................................................................................................................................119
Operators...................................................................................................................... ..........121
Comments ..............................................................................................................................124
Conditional Commands and Loops........................................................................................124
Subroutines.............................................................................................................................126
Return Values.........................................................................................................................127
Objects ...................................................................................................................................127
Data Type Conversions..........................................................................................................128
Deko500 Options
About Deko500 Options ........................................................................................................130
Automation.............................................................................................................................130
Chyron Import........................................................................................................................135
FastAction Keyboard .............................................................................................................137
Sportsware..............................................................................................................................140
StillDeko ................................................................................................................................144
Table of Contents iv
Menus
Baseline ..................................................................................................................................147
Channel..................................................................................................................................148
Edit.........................................................................................................................................149
File .........................................................................................................................................151
Help........................................................................................................................................152
Layer......................................................................................................................................152
Macro.....................................................................................................................................153
Options...................................................................................................................................154
Presets....................................................................................................................................155
Sequence ................................................................................................................................155
Shader ....................................................................................................................................156
Style .......................................................................................................................................157
Text........................................................................................................................................158
Timecode................................................................................................................................159
View.......................................................................................................................................159
Window ..................................................................................................................................161
Shortcut Keys.........................................................................................................................163
F1 - F12 Keys.........................................................................................................................166
Glossary .................................................................................................................................167
Index ......................................................................................................................................190
Deko500 User’s Guide
Page 7

Introduction
WELCOME!
5
This is the User’s Guide for Deko500, a full-color video character generator
from Pinnacle Systems, Inc. Based on the Windows NT operating system,
Deko500 offers unprecedented performance in a broadcast-quality character
generator, including:
The highest picture quality available for television graphics
The ease of use and networking capabilities of Windows NT
The power of a word processor, a page layout program and a
“slide show” presentation program, in a single application
Like a word processor, Deko500 offers a variety of tools for typing text and for
selecting fonts and styles.
Like a page layout program, Deko500 allows total flexibility in positioning text
and full-color graphic elements on the screen.
Like a presentation program, Deko500 plays back a series of graphic pages
using a wide range of real-ti me effects, incl uding rolls and crawls.
We think you’ll be pleased with Deko500’s quality, power and flexibility. Our
goal is to make Deko500 the number one video character generator. If you have
any suggestions for features to include in future software releases, we would
very much like to hear from you. See How to Contact Pinnacle Systems, Inc.,
page 7.
Deko500 User’s Guide
Page 8

HOW TO USE THIS MANUAL
The Deko500 User’s Guide is a reference manual that describes the operation of
Deko500. The User’s Guide is derived largely from Deko500’s on-line Help
screens—you’ll find pretty much the same information in both places.
One difference between this manual and the on-line Help is how we define new
terms and keywords. In the on-line Help, new terms appear in green—you click
on a term with the mouse to see its definition. In the User’s Guide, there is no
green and no mouse. So, whenever a new term is defined, we show it in bold
italic type.
Please refer to the Glossary for a definition.
You need not read the User’s Guide cover to cover. Most chapters are arranged
as a series of step-by-step “To do” instructions, such as “To add an edge” or “To
rotate selected text.” A good approach is to read through the Table of Contents
to get an idea of Deko500’s capabilities, then refer to specific sections as
necessary.
We strongly suggest, however, that you read the chapter, An Overview of
Deko500. It provides an overall description of Deko500’s user interface and
operating philosophy.
Using this Manual and Contacting Pinnacle 6
Hardware issues, including installation and setup of Deko500, are covered
separately, in the Deko500 Installation Guide.
If you’re familiar with other Windows applications like Word or WordPerfect,
we think you’ll find using Deko500 easy and natural. If you know Windows, but
not Windows NT, you have nothing to worry about—their operation is almost
identical.
If you’re new to Windows, we suggest that you pick up a book on the subject to
familiarize yourself with the basic Windows concepts. For the most part, this
User’s Guide assumes a working knowledge of Windows.
Deko500 User’s Guide
Page 9

Using this Manual and Contacting Pinnacle 7
HOW TO CONTACT PINNACLE SYSTEMS
Pinnacle Systems, Inc.
280 N. Bernardo
Mountain View, CA 94043
What to do before you call:
Whenever you contact Pinnacle Systems for technical support, please have the
following information available:
Product name and software version number
Product serial number (in the Help menu, choose About)
Type of computer hardware you are using
Precise description of problem and attempted solutions
Exact wording of any error messages
Pinnacle Systems Technical Support by Phone:
Pinnacle Systems technical support for the Deko product line is available 8:00am
to 8:00pm Eastern time, Monday through Friday.
Phone: (650) 237-1800
Information and Technical Support on the Internet:
For the latest information on Deko upgrades, visit our website at:
www.pinnaclesys.com.
Our e-mail address for technical support is:
broadcast-support@pinnaclesys.com.
Deko500 User’s Guide
Page 10
STARTING WINDOWS NT
Starting and Exiting Deko500 8
To start Windows NT:
1. Turn on the power to the PC. The computer monitor shows a series of diagnostic
screens, then displays the Windows NT startup screen. Press Ctrl+Alt+Delete to
log on.
2. Enter your user name and password, then press Enter. If you don’t have a user
name, log on a s user Deko500. This user name is installed at the factory and
does not require a password.
STARTING DEKO500
Notes
Once you log on, you will see the Windows NT Program
Manager. This is the main screen of Windows NT, from which
you can launch any application program, including Deko500.
You must be privileged as a System Administrator or Power
User to run Deko500. For more information about Windows
NT, refer to the Windows NT documentation supplied with
Deko500.
To start Deko50 0:
1. Close or minimize windows, if necessary, to access the start-up screen
of your desktop.
2. Do one of the following:
Double-click the Deko500 program icon.
Hold Ctrl and press Tab as necessary to activate the Deko500
program group, use the cursor keys to highlight the Deko500
program icon, then press Enter.
To start Deko500 automatically, every time you boot up Windows NT:
1. From the Options menu, choose Preferences.
2. Choose Common at the top of the Preferences dialog box.
3. Check On re-boot, automatically log on to NT.
4. Enter your user pass word .
5. Press Enter or click OK.
Note
To use the auto-login feature, you must be privileged as a
System Administra tor and must also supply a password. Please
refer to the Windows NT documentation fo r details.
Deko500 User’s Guide
Page 11

EXITING DEKO500
Starting and Exiting Deko500 9
To start Deko500 automatically, every time you log on:
In the Windows NT Program Manager, hold Ctrl down and drag
the Deko500 program icon into the Startup group. Refer to your
Windows NT documentation for more information.
To exit Deko500 and return to the Program Manager:
Do one of the following:
Double-click the control icon at the left end of the Deko500
program title bar, or choose Close from the control icon menu.
From the File menu, choose Exit.
To have Deko500 prompt before exiting:
1. From the Options menu, choose Preferences.
2. Choose Prompts at the top of the Preferences dialog box.
EXITING WINDOWS NT
3. Check Prompt before exiting Deko500.
To use other applications without exit ing Deko500:
1. Do one of the following:
Click the minimize button in the upper-right corner of the Deko500
application window.
Choose Minimize from the control icon menu.
Hold Alt down and press Tab repeatedly to switch to other open
applications.
2. When you are ready to return to Deko500, double-click the Deko500
icon.
To log off from Windows NT:
1. Exit Deko500.
2. In the Windows NT Program Manager, do one of the following:
Press Ctrl+Alt+Delete, then choose Logoff.
Double-click the control icon at the left end of the Program
Manager title bar, then choose Log off.
From the File menu, choose Logoff.
3. Click OK to log off. After you log off, Windows NT remains active,
allowing you or another user to log back on. Shared files are still
accessible from other networked workstations.
Deko500 User’s Guide
Page 12

Starting and Exiting Deko500 10
To shut down Windows NT:
1. Exit Deko500.
2. In the Windows NT Program Manager, do one of the following:
Press Ctrl+Alt+Delete, then choose Shutdown.
Double-click the control icon at the left end of the Program
Manager title bar, then choose Shutdown.
From the File menu, choose Shutdown.
3. Click OK to shut down Windows NT. Don’t turn off the power to your
computer until a message on the screen tells you it’s OK to do so. Once
shut down, Windows NT must be restarted before you or another user
can log back on. Shared files are not accessible from other networked
workstations.
Deko500 User’s Guide
Page 13

Overview of Deko500
THE DEKO500 DESKTOP
All creation and playback of Deko500 graphics is done using the mouse and
keyboard to interact with the various controls and windows on Deko500’s
desktop.
The appearance of the desktop depends on the current layout, as selected from
the Window menu.
11
ABOUT GRAPHIC FILES
THE PROGRAM WINDOW
The main function of Deko500 is the creation and display of graphic files. You
create a Deko500 graphic, including text and background elements, in a
Program window. Once created, a graphic may be saved on disk in a graphic
file.
A graphic consists of one or more layers and a background. Each layer can be
text or a geometric shape—a rectangle or an ellipse. See Graphics and Layers.
Each character of text is rendered in a particular style, which specifies its font
and look. Each geometric shape is rendered in a particular look. See Creating
Styles.
Deko500 provides a variety of tools for typing, justifying, positioning, sizing
and otherwise editing text and shapes. See Composing Text.
Graphic files may be recalled from disk individually—“opened,” in Windows
terminology. You can play back a series of graphic files by entering them into a
sequence. See Effects and Sequences.
All graphics are created in a Program window.
The Program window shows the current on-air graphic. The contents of this
window match Deko500’s video output, with the addition of a cursor, safe-title
lines and other markers. There is only one Program window.
Deko500 User’s Guide
Page 14

CREATING A GRAPHIC
SAVING A GRAPHIC FILE
Creating and Saving Graphics 12
To create a Dek o500 graphic:
1. Activate a Program window. If desired, clear any previous graphic
by pressing F8 once, or press F8 twice to clear the background,
too.
2. Use the cursor keys or click the mouse to position the text cursor.
3. Type any desired text.
4. Use any of Deko500’s compositional tools to select fonts and
styles, add geometric shape or text layers, position layers, etc.
5. Save the graphic, by choosing Save Graphic As (F12) from the Fil e
menu.
To save a graphic under a new name:
1. Activate the graphic wi ndow (F5).
Note
2. From the File menu, choose Save Graphic As (F12).
3. In the dialog box, navigate to the drive and directory where you
will store the file.
4. Type a new file name in the File Name text box, then click OK or
press Enter.
Deko500 automatically attaches “.dko” to the file name. Do
not type a different extension.
Deko500 User’s Guide
Page 15

Creating and Saving Graphics 13
To save a modified grap hic:
1. Activate the graphic wi ndow.
2. From the File menu, choose Save Graphic (Ctrl+S or Alt+F12) to
replace the previous version of the .dko file.
To save a graphic under a diff erent video standard:
1. From the File menu choose Save Graphic As (F12).
2. In the Save Graphic As dialog box, choose Options.
3. Do one of the following:
In the Video Standard text box, select NTSC.
In the Video Standard text box, select PAL.
In the Video Standard text box, select custom, then enter
Horizontal pixel and Vertical pixel values.
4. Click OK or press Enter.
Deko500 User’s Guide
Page 16

Creating and Saving Graphics 14
To specify whether or not to save character gl yphs:
1. From the File menu choose Save Graphic As (F12).
2. In the Save Graphic As dialog box, choose Options.
3. Select whether to save graphic files with pre-rendered glyphs
Always, Never or If not already in pre-rendered style.
4. Click OK or press Enter.
Note
Graphic files that include a large font or complicated look
occupy more disk space when saved with character glyphs, but
can be retrieved faster.
To save a fully rendered bitmap with a graphic file:
1. From the File menu choose Save Graphic As (F12).
2. In the Save Graphic As dialog box, choose Options.
3. Check Save rendered bitmap, for faster recall.
4. Click OK or press Enter.
Note
Graphic files that are saved with pre-rendered bitmaps occupy
more disk space, but can be retrieved much faster.
To save a graphic with an automatic comme nt:
1. From the File menu choose Save Graphic As (F12).
2. In the Save Graphic As dialog box, choose Options.
3. Check Add automatic comment, based on text in file.
4. Click OK or press Enter. Deko500 will automatically fill in the
comment field with the content of the graphic’s first text field.
To use file compression when saving TIFF and Targa files:
1. From the File menu choose Save Graphic As (F12).
2. In the Save Graphic As dialog box, choose Options.
3. Under When saving TIFF and Targa files, check Use file
compression.
4. Click OK or press Enter.
To save TIFF and Tar ga files with alpha channel:
1. From the File menu choose Save Graphic As (F12).
2. In the Save Graphic As dialog box, choose Options.
3. Under When saving TIFF and Targa files, check Save with alpha
channel (32-bit).
4. Click OK or press Enter.
Deko500 User’s Guide
Page 17

OPENING A GRAPHIC FILE
Opening Graphic Files 15
To open a graphic file:
1. From the File menu, choose Open (Ctrl+O or F9).
2. In the Open dialog box, navigate to the drive and directory that
contain the file.
3. Choose the file from the File Name list box or type the file name in
the File Name text box, then click OK or press Enter.
Notes
Warning
The next time you call up the File Open dialog box, Deko500
will prompt you with the name of the nex t file in the current
directory. Use the cursor up and down keys to scroll through
other file names.
Deko500 can import several file types, including text files
(.txt), Windows Bitmap files (.bmp), TIFF files (.tif), Targa
files (.tga) JPEG files (.jpg), Graphics Factory stills (.g f )
videoDesigner stills (.tv), Kseries/ Presto ppic files (.2 0k), and
Pinnacle (.g) files created in FlashFile, Lightning or Genie.
Unlike many Windows applications, Deko500 does not always
open a new window when you open a file. If a graphic
(Program) window is already open, Deko500 will open a
graphic into that window, replacing the previous file. Be sure
to save any modified file before opening another file in the
same window.
To browse for graphic files to add to a sequence:
1. Activate the Sequence window (F11).
2. Do one of the following:
From the Sequence menu, choose Browse for Files (Ctrl+L).
Select Browser from the View window (Ctrl+L).
3. Double-click a thumbnail to enter it into the sequence
To open a graphic recorded under a different aspect ratio:
1. From the File menu, choose Open (Ctrl+O or F9).
2. In the dialog box, choose Options.
3. Choose one of the following in the File Open Options dialog box:
For native (.dko) files of non-native aspect ratio:
Clip to fit.
Scales a 4 x 3 graphic to fit a 16 x 9 screen horizontally, but
chops off part of the top and bottom.
Deko500 User’s Guide
Page 18

Opening Graphic Files 16
Chops off part of the left and right sides of a 16 x 9 graphic,
leaving a 4 x 3 center.
Pad to fit.
Centers a 4 x 3 graphic, padding the right and left sides.
Shrinks a 16 x 9 graphic to fit horizontally, padding the top
and bottom.
Scale to fit.
Stretches a 4 x 3 graphic horizontally, but not vertically, to fit
the full 16 x 9 screen.
Compresses a 16 x 9 graphic horizontally, but not vertically,
to fit the 4 x 3 screen.
For non-native (not .dko) files:
Scale to full screen
Adjusts width and height and does not maintain pixel aspect
ratio.
Square pixels, preserve height
Adjusts width to maintain aspect ratio of pixels assu med to be
square.
Square pixels, preserve width
Adjusts height to maintain aspect ratio of pixels assumed to be
square.
4. Click OK or press Enter.
5. In the Open dialog box, navigate to the drive and directory that
contain the file.
6. Choose the file from the File Name list box or type the file name in
the File Name text box, then click OK or press Enter.
Note
Clip to fit and Pad to fit maintain the graphic’s original a spect
ratio. Scale to fit distorts it.
To re-open the graphic file in the active window:
From the File menu, choose Revert.
Deko500 User’s Guide
Page 19

Opening Graphic Files 17
To transfer a GF/Halo/Kseries/Presto image to Deko500:
1. <Record> the GF/Halo image as a still or Kseries/Presto as ppic.
2. Insert a compatible disk formatted for DOS into one of the
GF/Halo drives.
3. <Do> dos export. Export the GF/Halo still to the DOS disk as a
DOS file with a .gf extension for GF or .20k for Kseries/Presto.
4. Remove the disk from the GF/Halo drive and insert it into a drive
on the PC running Deko500.
5. From the File menu, choose Open, then navigate to the drive and
directory that contain the.gf file or .20k file.
6. Choose the file from the File Name list box or type the file name in
the File Name text box, then click OK or press Enter.
KEYING
Note
Using Deko500’s built-in keyer, you can key text and graphics over live video.
Or, you can use Deko500’s linear key output to key text and graphics
downstrea m, using a switcher.
You can reverse this process to transfer graphics from
Deko500 to GF/Halo.
Only graphic files (still, targa, tiff and dko, g and bmp) can be
shared. Text files are not compatible.
To turn Deko500’s keyer on:
1. Connect an input video signal to Deko500. See Video Inputs in the
Deko500 Installation Guide.
2. From the Options menu, choose Hardware Settings then Input
Selection, and select an input video source.
3. From the Channel menu, choose Keyer On.
To turn Deko500’s keyer off:
From the Channel menu, choose Keyer Off.
To output only the key of a graphic:
From the Channel menu, choose Show Key Output.
To output only the key of a graphic:
From the Channel menu, choose Show Key Output.
Deko500 User’s Guide
Page 20

FRAME GRABBING
Keying / Frame Grabbing / Motion Suppression 18
To set grab option s:
In the Channel menu, click Grab Options, then click to select or
de-select options from the drop-down menu. A checkmark next to
an option indicates that it is selected.
Grab With Key
Select to enable frame grabbing video input with key. This option
must be selected to enable fram grabbing of shaped input video.
Input Video Is Shaped
Select to enable frame grabbing of shaped input video. This
selection is not available if Grab With Key is not selected.
To grab a frame of vi deo:
1. Connect an input signal to Deko500. See Video Inputs in the
Deko500 Installation Guide.
2. From the Channel menu, choose Frame Grab.
SUPPRESSING MOTION
Note
Use a digital input source for the highest qua lity frame
grabbing.
To apply motion supp ression when frame gr abbing:
1. From the Channel Menu, choose Motion Suppress.
2. Check Motion Suppress When Grabbing.
To apply motion suppression to the cu rrent background:
1. From the Channel Menu, choose Motion Suppress.
2. Check Motion Suppress Now.
To specify motion suppression options:
1. From the Channel Menu, choose Motion Suppress.
2. Do one of the following:
Check Interpolate Scan Lines to specify interpolation between
every other scan line.
Check Duplicate Scan Lines to specify duplication of every
other scan li ne.
3. Check either Preserve Field 1 (odd field) or Preserve Field 2 (even
field) to specify which field’s scan lines to interpolate or duplicate.
Deko500 User’s Guide
Page 21
Composing Text
SELECTING TEXT
19
To select a block of text:
Drag across, then down or up the text.
Use arrow keys (↑ → ↓ ←) to move the cursor to the beginning or end
of the text block, then hold Shift and press arrow keys as necessary.
To select multiple blocks of text:
Hold Ctrl as you drag across, then down or up the text.
Choose Select More from the Edit menu. For each block of text, use
arrow keys (
the text block, then hold Shift and press arrow keys to select the block.
↑ → ↓ ←) to move the cursor to the beginning or end of
To select a word:
Double-click the word.
Use arrow keys (↑ → ↓ ←) to move the cursor to the beginning or end
of the word, then hold Shift and press right or left arrow.
To select all text in a text field:
From the top left of the text, drag across, then down the text.
Press Insert and Tab to the text field, or choose Select Field from the
Edit menu.
Deko500 User’s Guide
Page 22
Selecting Text, Selecting a Typeface, Using an International Charact er Set 20
SELECTING A TYPEFACE
To select all text characters in a gr aphic:
Choose Select All (Crl+A) from the Edit menu.
To select all text char acters in the current style:
Choose Select Style from the Edit menu.
To de-select text:
Click anywhere in the text field.
Press any arr ow key (↑ → ↓ ←).
To select a typeface:
1. Select the text to which you will apply the new typeface. If no text
is selected, Deko500 applies changes to the current style.
2. Do one of the following:
From the View menu, choose Browser, then choose Browse
Typefaces from the File menu.
On the text bar, click the Typeface drop-down list box.
In the Style window, choose Font, then click Browse.
In the Style window, choose Font, then click the Typeface
drop-down list box.
3. Double-click a typeface on the browser or the drop-down list, or
type the name of the typeface in the text box.
Note
If you select a custom typeface, Deko500 automatically sets
the font to the size at which no scaling will occur. You may
then select any font size.
To select a typeface from a graphic:
Note
1. Move the text cursor immediately to the right of a character in the
desired typeface.
2. From the Text menu, choose Pick Font.
If you check “Cursor movement sets font and look” in the
Options/Preferences/Cursor dialog box, the current style will
always show the style of the character to the left of the text
Deko500 User’s Guide
Page 23
Selecting Text, Selecting a Typeface, Using an International Charact er Set 21
cursor, unless a text character or layer is selected.
USING AN INTERNATIONAL CHARACTER SET
To type a character from an international character set:
1. From the View menu, choose International.
2. In the International window, click the Character Set list box, then
choose a character set from the drop-down list.
3. In the graphic window, position the insertion point where you
wish to insert the character.
4. Click the desired character in the International window.
Note
Not all TrueType or Postscript fonts include every character in
every character set. The International window displays a small
box in place of any character that is not available in the
current font.
To change the current keyboard layout:
1. From the View menu, choose Style.
2. In the Style window, choose Font, then click the Keyboard list box.
3. Type or scroll to the new keyboard layout.
Notes
Any keyboard layout installed in Windows NT is automatically
available in Deko500. In the Windows NT Program Manager,
double-click Main, Control Panel, then International. Refer to
Windows NT documentation for more detailed information.
Deko500 supports most alphabet-based languages as well as
several ideographic languages. For the following languages,
you must install the local version of Windows NT: A ra bic,
Chinese, Hebrew, Japanese, Korean, and Thai.
Deko500 User’s Guide
Page 24
BOLD AND ITALIC
Changing Text Appearance, Size, and Spacing 22
To change normal text to bold:
1. Select the text to be changed, or select nothing to change the
current style.
2. Do one of the following:
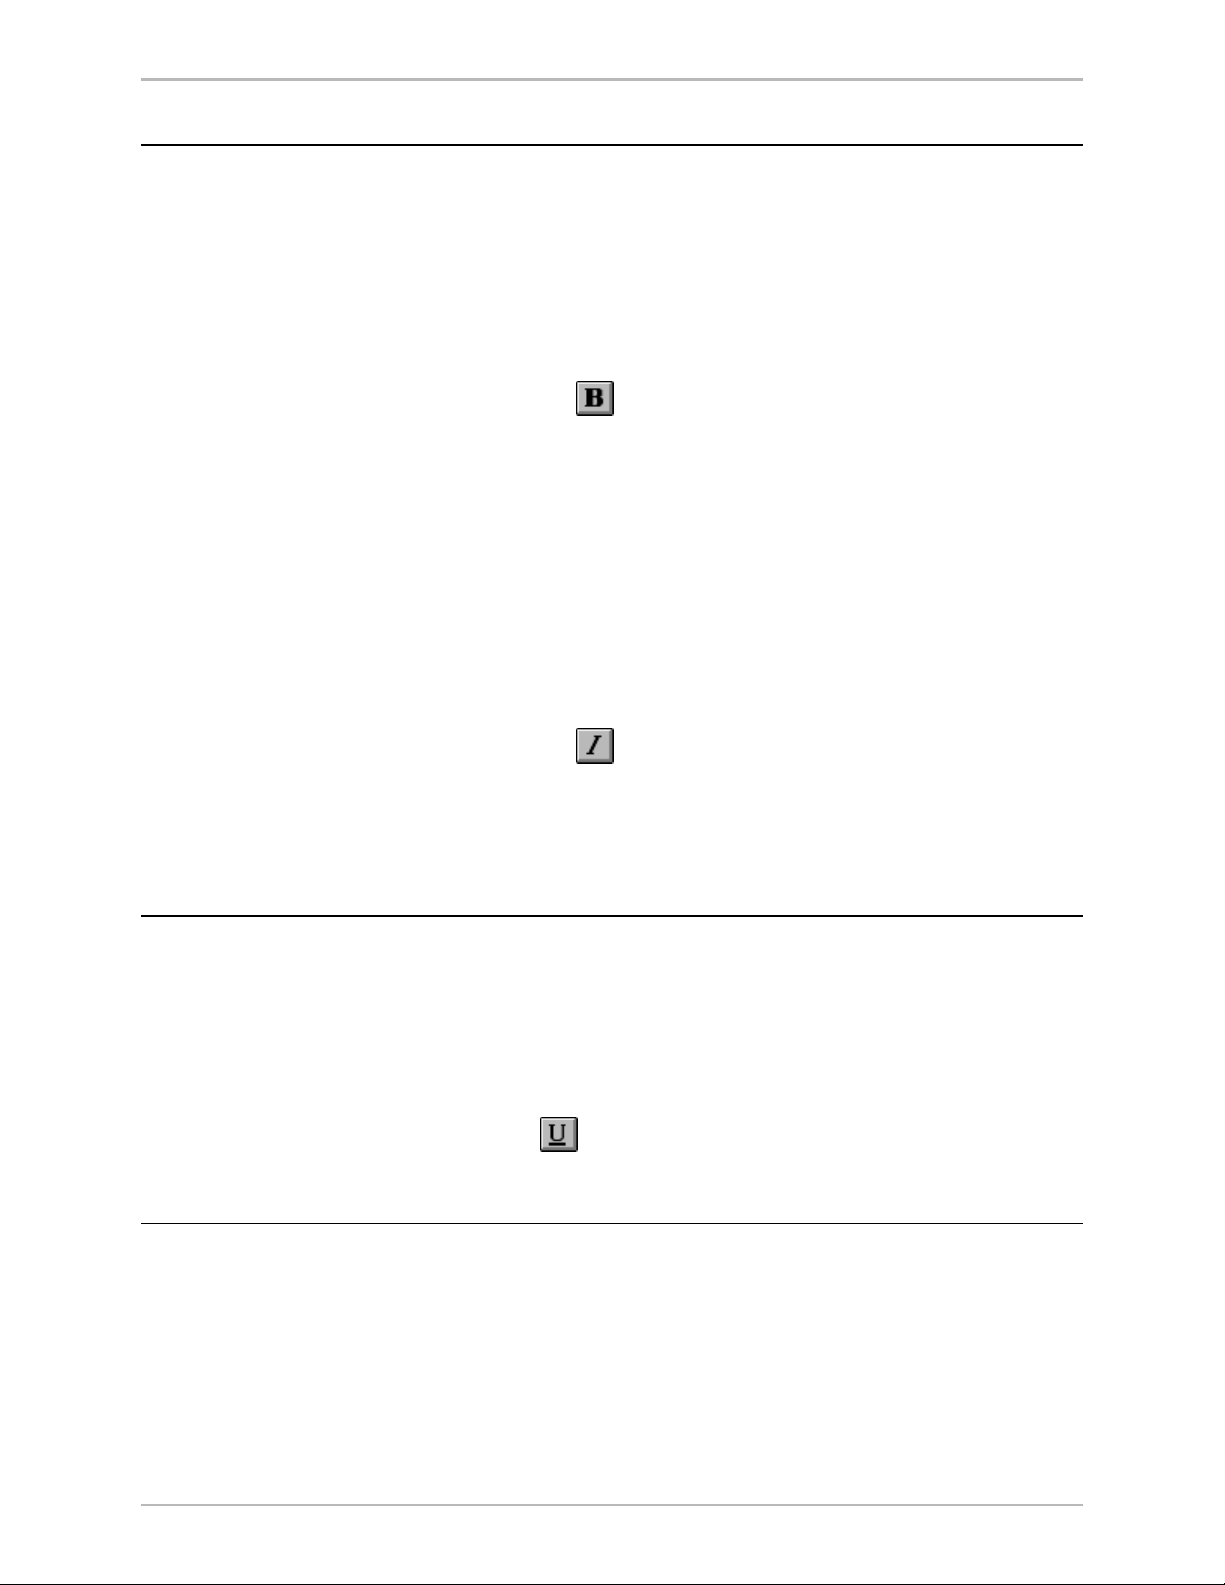
Press the bold button on the text bar (Ctrl+B).
Activate the Style window, select Font at the top of the Style
window, then check Bold.
3. To change text back to normal, unpress the bold button or uncheck
Bold.
To change normal text to italic:
1. Select the text to be changed, or select nothing to change the
current style.
UNDERLINING TEXT
ROTATING TEXT
2. Do one of the following:
Press the italic button on the text bar (Ctrl+I).
Activate the Style window, select Font at the top of the Style
window, then check Italic.
3. To change text back to normal, unpress the italic button or uncheck
Italic.
To underline text:
1. Select the text to be underlined, or select nothing to add an
underline to the current style .
2. Press the underline button on the text bar (Ctrl+U).
To change text back to normal, unpress the underline button.
To rotate text using the keyboard:
1. In the Options menu, choose Transform/Rotate & Skew (Ctrl+R).
2. In the Options menu, choose Transform and set increment of
change to Coarse or Fine (Ctrl+spacebar).
Deko500 User’s Guide
Page 25
Changing Text Appearance, Size, and Spacing 23
3. Select the text to rotate.
4. Hold down Alt and press either the down arrow (
selected text clockwise, or the up arrow (
counterclockwise.
↑) to rotate
To rotate text using the mouse:
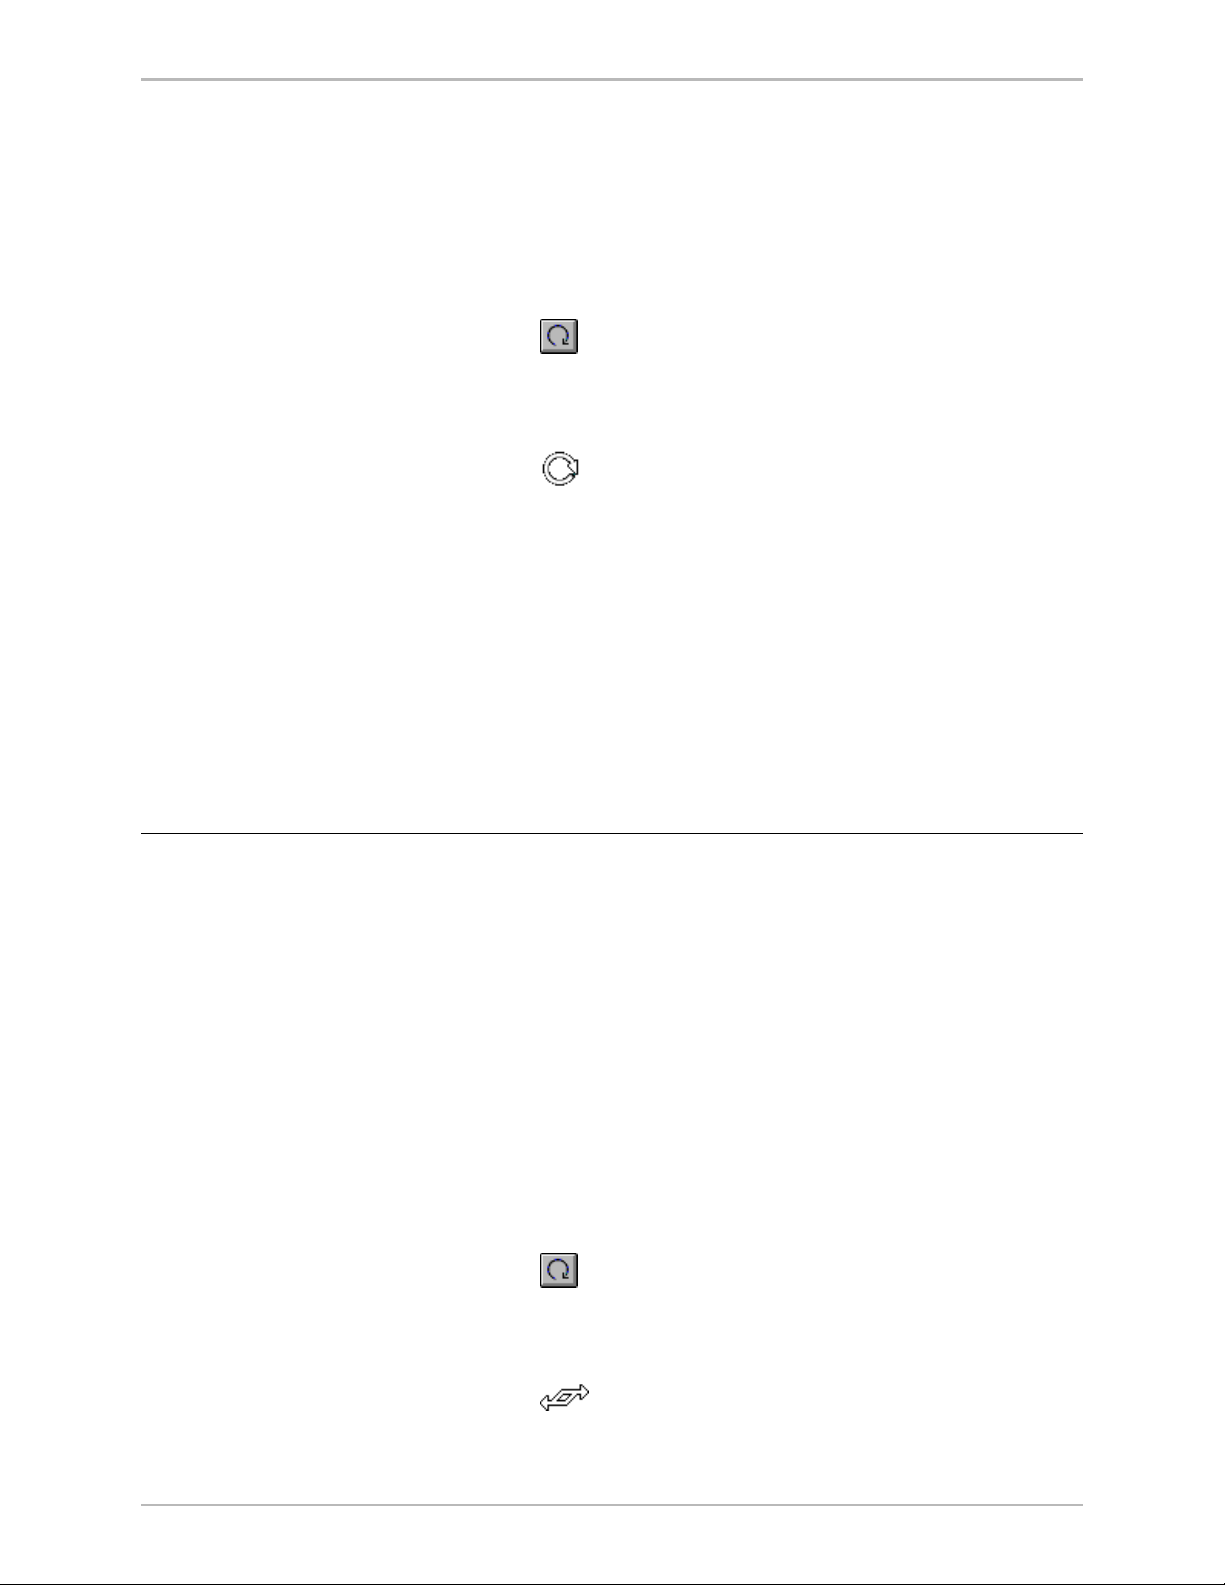
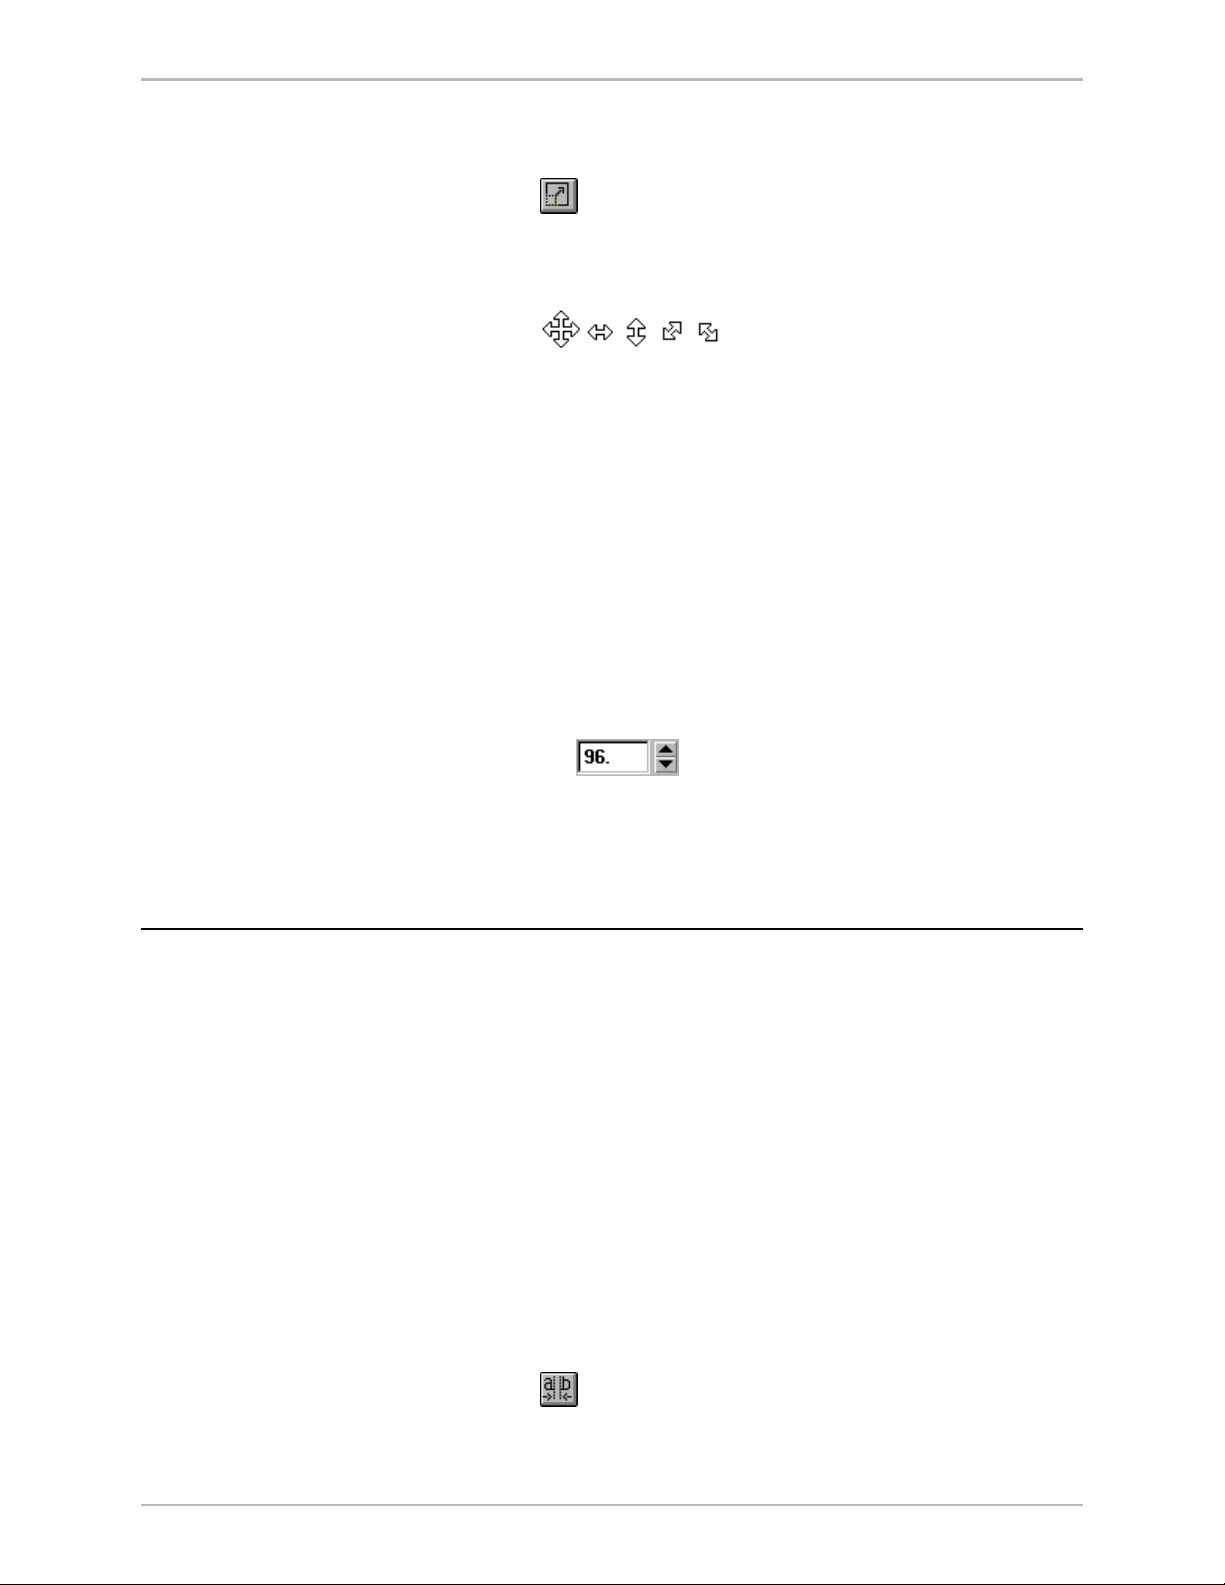
1. Click the rotate/skew button in the Tools window.
2. Select the text to rotate.
3. Move the pointer near the dotted line surrounding selected text, so
that the pointer becomes the rotation tool.
4. Drag to rotate selected text.
To specify a numerical value f or rotation:
1. Select the text to rotate. If no text is selected, Deko500 applies
changes to the current style.
2. Activate the Style window.
3. Choose Font at the top of the Style window.
↓) to rotate the
SKEWING TEXT
4. Double-click the Rotation text box, then type or scroll to a value.
Negative values set counterclockwise rotation of the selected text,
and positive values set clockwise rotation.
To skew text using th e keyboard:
1. In the Options menu, choose Transform/Rotate & Skew (Ctrl+R).
2. In the Options menu, choose Transform and set increment of
change to Coarse or Fine (Ctrl+spacebar).
3. Select the text to skew.
4. Hold down Alt and press either the right arrow (
selected text clockwise, or the left arrow (
counterclockwise.
To skew text using the mous e:
1. Click the rotate/skew button in the Tools window.
2. Select the text to skew.
→) to skew the
←←←←) to skew
3. Move the pointer over the top-right-corner handle of the selected
text, so that the pointer becomes the skewing tool.
Deko500 User’s Guide
Page 26
Changing Text Appearance, Size, and Spacing 24
4. Drag the handle to skew selected text.
To specify a numerical value for skewing:
1. Select the characters to skew. If no text is selected, Deko500
applies changes to the current style.
2. Activate the Style window.
3. Choose Font at the top of the Style window.
4. Double-click the Skew text box, then type or scroll to a value.
Negative values skew text counterclockwise, and positive values
skew text clockwise.
SMALL CAPS
CHANGING TEXT CASE
Note
Skew can be used to italicize text to angles different from the
default italic angle.
To change lower case text to small uppe r case text:
1. Select the text to be capitalized, or select nothing to change the
current style.
2. Do one of the following:
Press the small caps button on the text bar.
In the Style/Fo nt window, check Small Caps.
To change text back to normal, unpress the small caps button or
uncheck Sma l l Caps.
To change the first character of each word to upper case:
1. Select the text to be changed, or select nothing to change all text in
the current text field.
2. From the Text menu, choose Capitalize.
To change selected text to upper case:
1. Select the text to be changed, or select nothing to change all text in
the current text field.
2. From the Text menu, choose Upper Case.
Deko500 User’s Guide
Page 27
Changing Text Appearance, Size, and Spacing 25
To change selected text to lower case:
1. Select the text to be changed, or select nothing to change all text in
2. From the Text menu, choose Lower Case.
CHANGING THE TEXT FIELD BOX
To change the text field bo x, using the keyboard:
1. From the Options menu, choose Transform/Move (Ctrl+M).
2. In the Options menu, choose Transform and set increment of
3. Select a text field.
the current text field.
change to Coarse or Fine (Ctrl+spacebar).
SCALING TEXT
To change the text field box, using the mouse:
Important
4. Hold Alt down and press arrow keys (
field box up, down, left or right.
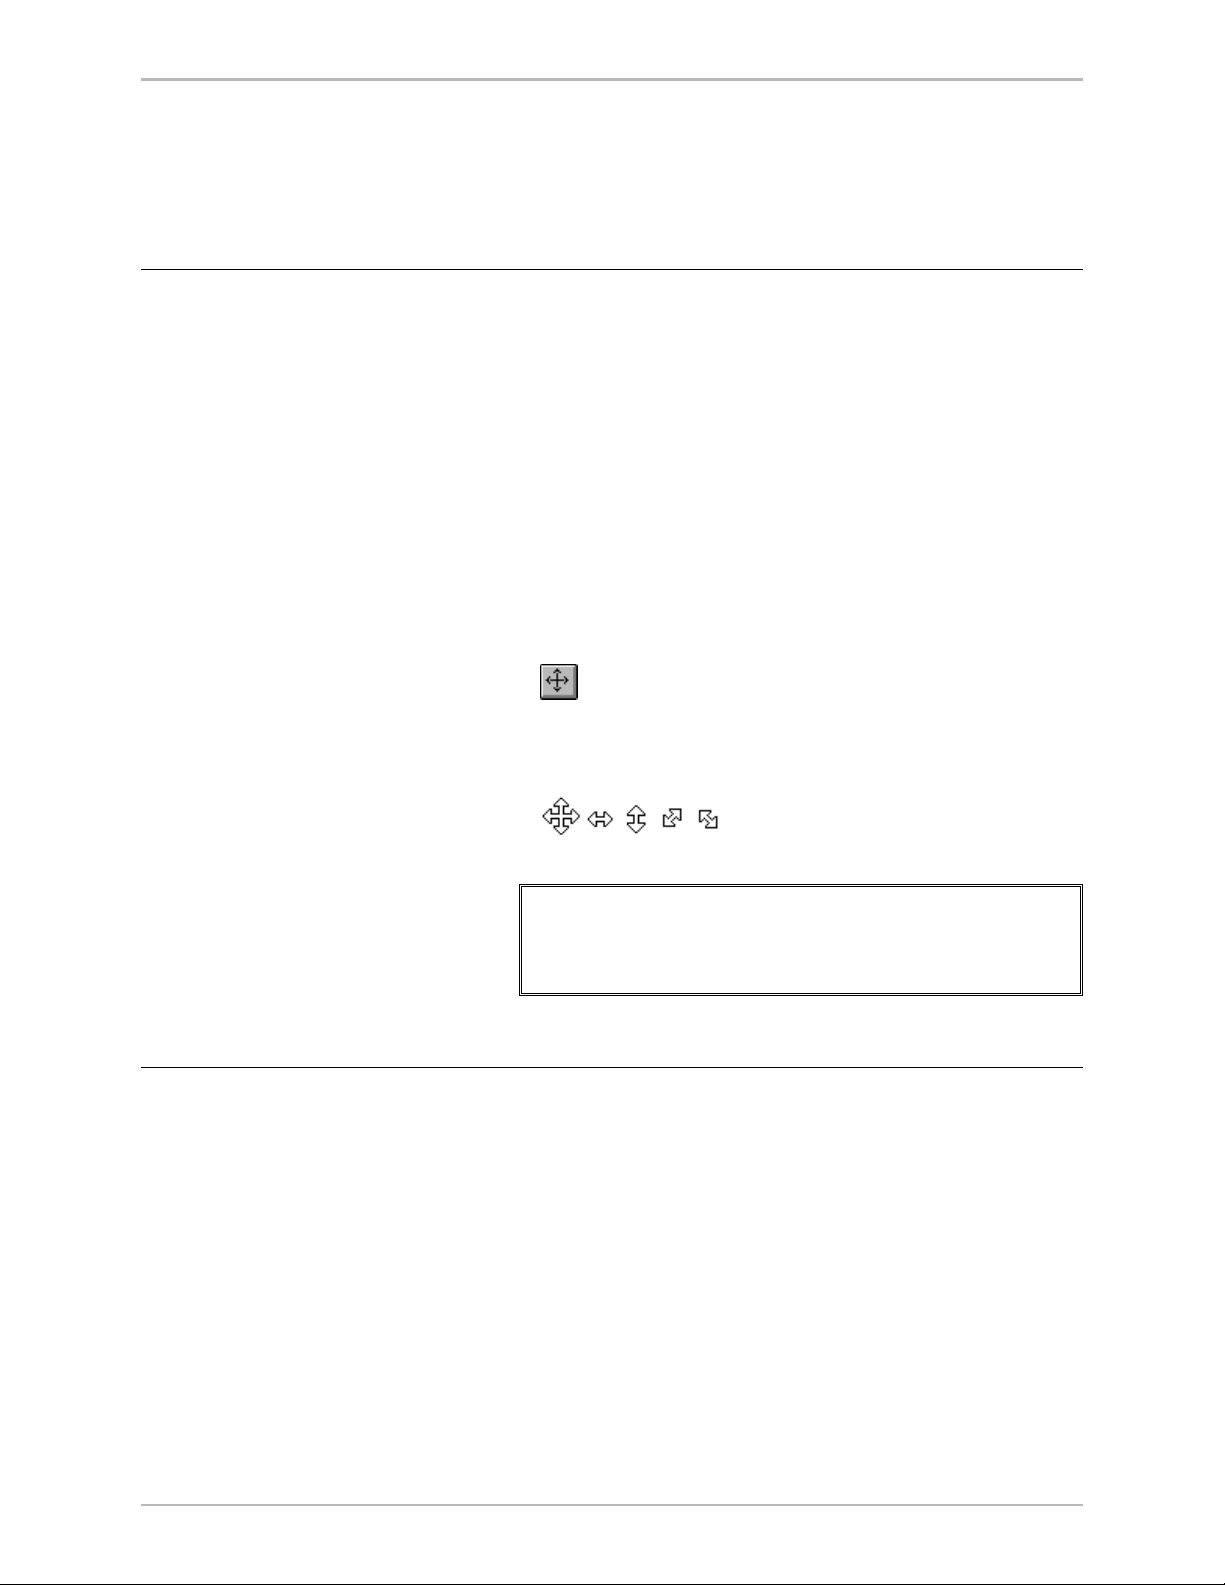
1. Click the move button in the Tools window.
2. Select a text field.
3. Position the pointer near the border or a handle of the field, so that
the pointer becomes the moving tool or a sizing tool.
4. Drag to move or size the text field box.
When you size the text field box, Deko500 does not scale the
text along with the box. The text remains the same size, but
wraps differently to fit within the box. To scale the text along
with the box, see Scaling a Layer.
↑↓→ ←←←←) to move the text
To scale text using the keyboard:
1. In the Options menu, choose Transform/Scale & Width (Ctrl+W).
2. In the Options menu, choose Transform and set increment of
change to Coarse or Fine (Ctrl+spacebar).
3. Select the text for scaling.
4. Hold down Alt and press either the up or down arrow (
increase or decrease text size, or the right or left arrow (
increase or decrease text width.
Deko500 User’s Guide
↑↓) to
→ ←←←←) to
Page 28
Changing Text Appearance, Size, and Spacing 26
To scale text using the m ouse:
1. Click the scaling button in the Too ls window.
2. Select the text for scaling.
3. Move the pointer to a handle on any side or corner of selected text,
so that the pointer becomes one of the scaling tools.
4. Drag a handle either outward to increase or inward to decrease text
size.
Corner handles control height and width together; middle handles
on the right or left control width only; and middle handles on the
top or bottom control height only.
Hold Ctrl down while dragging a corner handle to preserve the
aspect ratio of the text — height and width scale together.
To specify a numerical value for font size:
1. Select the text to scale. If no text is selected, Deko500 applies
changes to the current style.
2. Do one of the following:
3. In the text box, type or scroll to a new font size.
4. Press Enter to apply the new size.
CHARACTER SPACING (KERNING)
To kern text using the keyboard:
1. In the Options menu, choose Transform/Kerning & Leading
2. In the Options menu, choose Transform and set increment of
3. Select the characters to kern.
4. Hold down Alt and press either the right arrow (
On the text bar, double-click the Size text box.
In the Style/Fo nt window, then double-click the Size text box.
(Ctrl+K).
change to Coarse or Fine (Ctrl+spacebar).
→) to widen the
space between selected characters, or the left arrow (
character spacing.
←←←←) to reduce
To kern text using the mouse:
1. Click the kerning/leading button in the Tools window.
Deko500 User’s Guide
Page 29
Changing Text Appearance, Size, and Spacing 27
2. Select the characters to kern.
3. Move the pointer to a handle at either side of the selected text, so
that the pointer becomes the kerning tool.
4. Drag the handle either outward to widen spacing between
characters or inward to decrease character spacing.
To specify a numerical value for kerning:
1. Select the characters to kern. If no text is selected, Deko500
applies changes to the current style.
2. Activate the Style window.
3. Choose Font at the top of the Style window.
4. Double-click or Tab to the Kerning text box, then type or scroll to
the desired value. A positive kerning value increases space
between characters; a negative value decreases the space. To use
default kerning, specify a value of zero.
CHARACTER WIDTH
To change character width using the keyboard:
1. In the Options menu, choose Transform/Scale & Width (Ctrl+W).
2. In the Options menu, choose Transform and set increment of
change to Coarse or Fine (Ctrl+spacebar).
3. Select the characters to change.
4. Hold Alt down and press either the right arrow (
characters, or the left arrow (
←) to decrease character width.
→) to widen
To change character width using the mouse:
1. Click the scale button in the Tools window.
2. Select the characters to change.
3. Move the pointer to a handle on either side of selected text, so that
the pointer becomes the widening tool.
4. Drag the handle either outward to widen characters or inward to
decrease character width.
To specify a numerical value for character width:
1. Select the characters to change. If no text is selected, Deko500
applies changes to the current style.
2. Activate the Style window.
3. Choose Font at the top of the Style window.
Deko500 User’s Guide
Page 30
ROW SPACING (LEADING)
Changing Text Appearance, Size, and Spacing 28
4. Double-click or Tab to the Width % text box, then type or scroll to
a percentage of normal character width.
To change leading us ing the keyboard:
1. In the Options menu, choose Transform/Kerning & Leading
(Ctrl+K).
2. In the Options menu, choose Transform and set increment of
change to Coarse or Fine (Ctrl+spacebar).
3. Select the text for leading.
4. Hold down Alt and press either the up arrow (
space between rows of selected text, or the down arrow (
decrease space.
To change leading using the mouse:
1. Click the kerning/leading button in the Tools window.
2. Select the text for leading.
3. Move the pointer to a handle above or below selected text, so that
the pointer becomes a leading tool.
4. Drag the handle downward to increase the space between rows, or
upward to reduce row spacing.
To specify a numerical value for leading:
1. Select the text for leading. If no text is selected, Deko500 applies
changes to the current style.
2. Activate the Style window.
↑) to increase the
↓) to
TYPING ON A CURVE
3. Choose Font at the top of the Style window.
4. Double-click the Leading text box, then type or scroll to the
desired value. A positive value increases the space between rows; a
negative value decreases it. The default value is zero.
To activate the Baseline Edit window:
Do one of the following:
From the Layer menu, choose Edit Baseline (to activate the
Baseline Edit window).
If the Baseline Edit window is open but not active, check
Baseline Edit in the Window menu.
Deko500 User’s Guide
Page 31

Cutting, Pasting, Finding, Replacing, and Moving Text 29
To draw a curved baseline:
1. Select the layer whose baseline you wish to modify.
2. Activate the Baseline Edit window.
3. Do one of the following:
In the Baseline menu, check Draw Curve.
Click the curve drawing tool button in the Tools window.
4. Position the drawing tool where you will begin the curve, and drag
the mouse to draw the curve.
To draw a line-segment baseline:
1. Select the layer whose baseline you wish to modify.
2. Activate the Baseline Edit window.
3. Do one of the following:
In the Baseline menu, check Draw Curve.
Click the curve drawing tool button in the Tools window.
4. Click to begin the line, then move the drawing tool to the desired
end point and click again. Repeat this step as desired to draw
multiple line segments.
5. To break the line, move the cursor out of the Baseline Edit
window.
To use a rectangle or ellipse as a baseline:
1. Select the layer whose baseline you wish to modify.
2. Activate the Baseline Edit window.
3. Click the rectangle or ellipse button in the Tools window, then
drag the cursor in the Baseline Edit window to define the rectangle
or ellipse.
4. Once you release the mouse button, you will be in Edit Curve
mode. Drag points as desired to edit the baseline.
Note
Holding Ctrl as you drag the cursor maintains a square or
round baseline.
To apply a baseline:
Once you have drawn or edited the baseline as desired, do one of
the following:
To apply the baseline and remain in baseline edit mode,
choose Apply Baseline (Enter) from the Baseline menu.
To apply the baseline and close the Baseline Edit window,
choose Accept Baseline (Alt+Enter) from the Baseline menu.
Deko500 User’s Guide
Page 32

Cutting, Pasting, Finding, Replacing, and Moving Text 30
To delete or insert a point on a baseline:
1. If not already in the Baseline Edit mode, choose Edit Baseline
from the Layer menu.
2. In the Baseline menu, check Edit Curve.
3. Do one of the following:
Click the point you wish to delete, then choose Delete
Selected Point (Delete) from the Baseline menu.
Choose Insert Point (Insert) from the Baseline menu, then
click on the curve where you wish to insert the point.
To reverse the direction of the baseline:
1. If not already in the Baseline Edit mode, choose Edit Baseline
from the Layer menu.
2. In the Baseline menu, choose Reverse Baseline.
To change the type of a point on the baseline:
1. In the Baseline menu, check Edit Curve.
2. Click the point to select it.
3. In the Baseline menu, do one of the following:
Check Move To, for a point that begins a new section of the
baseline.
Check Line To, for a point connected to the previous point by
a straight line.
Check Bezier, for a point connected to the previous point by a
Bezier curve.
To adjust the continuity between two Bezier cu rves:
1. In the Baseline menu, check Edit Curve.
2. Click the point shared by the two curves.
3. In the Baseline menu, do one of the following:
Check Cusp for no continuity. The control points on either
side of the shared point move independently.
Check Smoo th for C1 continuity.
Check Symmetric for C2 continuity.
To cancel changes to a baseline:
1. Do one of the following:
To cancel all changes and exit the Baseline Edit window,
choose Cancel from the Baseline menu.
If Undo is enabled, you can choose Undo (Ctrl+Z) from the
Edit menu, for each change you wish to undo.
Deko500 User’s Guide
Page 33

Cutting, Pasting, Finding, Replacing, and Moving Text 31
CUTTING AND PASTING TEXT
To cut or copy text:
To paste text:
1. Select the text to be cut or copied.
2. Do one of the following:
To cut selected text, from the Edit menu, choose Cut (Ctrl+X),
or click the cut button on the text bar.
To copy selected text, from the Edit menu, choose Copy
(Ctrl+C), then Selected, or click the copy button on the text
bar.
1. Position the cursor where you will insert the text.
DELETING TEXT
2. From the Edit menu, choose Paste (Ctrl+V), or click the paste
button on the text bar.
Notes
When you cut or copy text, it is saved in the Windows NT
clipboard.
Unlike moving text, cutting and pasting text changes the
location of the text cursor. When you move text, the cursor
appears in the original location of the text even after the text
has been moved, but when you cut and paste text, the cursor
follows the text.
To delete text:
1. Select the text to be deleted.
2. Choose Delete (Delete) from the Edit menu.
To delete all text within a text field:
1. Select a text field.
2. From the Layer menu, choose Clear Text. The emptied layer
remains in the graphic.
Deko500 User’s Guide
Page 34

Cutting, Pasting, Finding, Replacing, and Moving Text 32
FINDING AND REPLACING TEXT
To find text within a graphic:
To find and replace text within a graphic:
1. From the Edit menu, choose Find (Ctrl+F).
2. In the dialog box, type the text in the Find What text box.
3. If desired, check Match Case or Match Whole Word Only.
4. Choose Find Next (Ctrl+G) to find and select the next occurrence
of the text.
5. Click Cancel to close the dialog box.
1. From the Edit menu, choose Replace (Ctrl+H).
2. In the dialog box, type original text in the Find What text box.
3. Type replacement text in the Replace With text box.
4. If desired, check Match Case or Match Whole Word Only.
5. Do one of the following:
Choose Find Next (Ctrl+G) to find and select the next
occurrence of original text. Then choose Replace to remove
and replace selected text, or Find Next to skip to the next
occurrence of original text.
MOVING TEXT
To find and replace all occurrences of original text, choose
Replace All.
6. Click Cancel to close the dialog box.
To move text using the keyboard:
1. In the Options menu, choose Transform/Move (Ctrl+M).
2. In the Options menu, choose Transform and set increment of
change to Coarse or Fine (Ctrl+spacebar).
3. Select the text to move.
4. Hold down Alt and press arrow keys (
text up, down, right or left.
To move text using the mouse:
1. Select the text to move.
2. Click the move button in the Tools window.
↑↓→ ←←←←) to move selected
3. Move the pointer near the dotted line surrounding selected text, so
that the pointer becomes the moving tool.
Deko500 User’s Guide
Page 35

Cutting, Pasting, Finding, Replacing, and Moving Text 33
4. Drag to move selected text in any direction.
JUSTIFYING TEXT
Note
Unlike cutting and pasting text, mo ving text does not change
the location of the text cursor. When you cut and paste tex t,
the cursor follows the text, but when you move text, the cursor
appears in the original location of the text even after the text
has been moved.
If no text is selected:
Alt +
Alt +
Alt +
Alt +
↓ moves the cursor row and all lower rows down.
↑ moves the cursor row and all lower rows up.
→ moves all characters from the cursor to the end of the
row (or tab field) to the right.
←←←← moves all characters from the cursor to the end of the
row (or tab field) to the left.
To justify text using the mouse:
1. Select the text, or select nothing to justify the entire field of text.
2. Do one of the following:
On the text bar, click the appropriate justification button to
alter horizontal justification, vertical justification, or both,
then choose the desired setting.
From the Text menu, choose Justify, then select a setting for
horizontal justification, vertical justification or both. The
choices are self-explanatory, except for full and spread
justification.
Full horizontal justification makes selected text, except any row with a newline
character (hard return), flush with the left and right sides of the text field box.
Full vertical justification makes the top and bottom lines of selected text flush
with the top and bottom of the field box.
Deko500 User’s Guide
Page 36

Justifying Text and Using Tab Stops 34
Spread justification makes all lines of selected text flush with both the left and
right sides of the text field box. To do this, space is inserted between words and
between letters, as controlled by the Spread % in the Style/Layers window.
To justify text using the keyboard:
1. Select the text, or select nothing to justify the entire field of text.
2. Hold Ctrl down and press one of the numbers on the numeric
keypad to justify selected text in the corresponding position of the
selected text field.
7 89
Top left Top center Top right
4 56
Middle left Middle center Middle right
1 23
Bottom left Bottom center Bottom right
0
Justification off
Notes
If you select only some of the text in a field, that text will be
justified in a separate field.
Deko500 User’s Guide
Page 37

TAB STOPS
Justifying Text and Using Tab Stops 35
To set a tab stop:
1. Position the cursor where you will insert the tab stop.
2. From the Text menu, choose Tab Set.
3. Choose an alignment (Right, Left, Center or Decimal) from the
drop-down menu.
4. The current tab settings for a text field are displayed at the bottom
of the text field box, using the following markers:
Left:
5. Whenever you Tab to a tab stop, a similar tab marker is displayed
Right: Center: Decimal:
to the left of the first character at the tab stop.
To clear a selected tab stop:
1. Tab to the tab stop.
2. From the Text menu, choose Tab Clear.
To clear all tabs within a layer:
From the Text menu, choose Tab Clear All.
To move a tab stop:
1. Position the cursor to the left of the tab stop.
2. In the Options menu, choose Transform and set increment of
change to Coarse or Fine (Ctrl+spacebar).
3. Do one of the following:
In the Options menu, select Transform, then Move.
Click the move button in the Tools window.
4. Hold Alt and use the right or left arrow keys (→ ←
tab stop.
To cut or copy a tab stop:
1. Select the tab stop you wish to cut or copy.
2. Do one of the following:
To remove the selected tab stop from its current position,
choose Cut (Ctrl+X) from the Edit menu, or click the cut
button in the Tools window.
To copy and leave the selected tab stop intact, choose Copy
(Ctrl+C), then Tabs, from the Edit menu, or click the copy
button in the Tools window.
Deko500 User’s Guide
←) to move the
←←
Page 38

Justifying Text and Using Tab Stops 36
To paste a cut or copied tab stop:
1. If necessary, open the file into which you will paste the tab stop.
2. Position to text cursor where you will insert the cut or copied tab
stop.
3. From the Edit menu, choose Paste (Ctrl+V), or click the paste
button in the Tools window.
To change the decimal tab character:
1. From the Options menu, choose Preferences.
2. At the top of the dialog box, choose Common.
3. In the Decimal tab char text box, type a new decimal tab character.
4. Choose OK or press Enter.
USING UNDO
To display or hide tab mark ers:
1. From the Options menu, choose Preferences.
2. In the dialog box, under Markers, check or uncheck Tab stops.
To undo the previous action(s):
From the Edit menu, choose Undo (Ctrl+Z) for each action you
wish to undo. The Edit menu tells you what will be undone.
To redo undone actions:
From the Edit menu, choose Redo (Ctrl+Y) for each action you
wish to redo. The Edit menu tells you what will be redone.
To enable or disable Undo:
In the Edit menu, check or un-check Undo enabled.
Notes
The default setting is Undo enabled. Undo uses several
megabytes of space on your hard drive and may slow some
Deko500 operations. Disabling Undo frees space on your hard
drive and may speed up Deko500’s performance.
You cannot disable Undo, then enable Undo and use it to
undo actions performed while it was disabled.
Undo will not undo changes to a ma cro or custom typeface,
and is disabled during sequence playback. When you play a
sequence, Deko500 resets the Undo buffer so that no previous
Deko500 User’s Guide
Page 39

actions can be undone.
Using Undo 37
Deko500 User’s Guide
Page 40

Creating Styles
SPECIFYING A FONT
A
BOUT FONTS
38
A font is a single typeface in a particular size and orientation. In Deko500, the
current font and the current look make up the c urrent style.
Deko500 supports alphabet-based fonts as well as fonts of several ideographic
languages. Fo r the following languages, you must install the loca l version of
Windows NT: Arabic, Chinese, Hebrew, Japanese, Korean, and Thai.
The preceding Composing Text chapter described how to select and manipulate
a font interactively. This section describes howto use the controls in the
Style/Font Window to change the attributes of the current font.
Later sections describe how to install TrueType or Postscript fonts and how to
create a Custom Typeface.
To change the attributes of the current fon t:
THE STYLE/FONT WINDOW
To display the Style/Font Window:
Do one of the following:
Use the text bar to choose the current typeface, size, bold,
italic and justification rules.
Use the Style/Font Window to control all aspects of the
current font.
1. In the View menu, Choose Style (F6).
2. Click Font at the top of the Style window.
Deko500 User’s Guide
Page 41

Specifying a Font 39
Controls in the Style/Font Window:
Typeface
The name of the current typeface. Click this box to call up a list of
available typefaces. The list includes TrueType and Postscript
fonts as well as Deko500 Custom Typefaces. The latter are
indicated by the word “(deko)” after the typeface name.
Browse
Opens the Typeface Browser window, showing the current font
and a sample of each available typeface. Double-click a typeface
sample to select it.
Size
The height of the current font, in screen units.
Width
Percent of normal width. Enter a percent less than 100 to condense
the font, or greater than 100 to expand it.
Bold
Selects a bold version of the current typeface. If no bold version is
available, this item is dimmed.
Italic
Selects an italic version of the current typeface. If no italic version
is available, this item is dimmed.
Small Caps
Turns all lower case characters into small upper case characters.
Leading
Controls the spacing between rows of text. A value of zero
produces the default row spacing. Values greater than zero increase
the space between rows; values less than zero decrease it.
Kerning
Controls the spacing between characters. A value of zero produces
the default kerning. Values greater than zero increase the space
between characters; values less than zero decrease it.
Rotation
Controls the angle of the baseline, in degrees.
Skew
Controls the amount of skew applied to the characters. This is
independent of the italic setting.
Spacing
Chooses the type of character spacing for the font:
proportional
Characters are spaced according to their widths.
monospace
All characters are forced to have the same widths.
Deko500 User’s Guide
Page 42

Specifying a Font 40
digits
The digits 0-9 are monospace, but all other characters are
proportional.
Note
Note
For many typefaces, there is no difference between
“proportional” and “digits” spacing. In other words, the fonts
were designed with monospaced digits.
Keyboard
Selects the keyboard language layout for typing with the font.
Orientation
Determines field orientation, i.e. left-to-right, top-to-bottom, etc.
Right-to-left is available only for Arabic or Hebrew, and topto-bottom and top-to-bottom-rotated are available only fo r
Chinese, Japanese or Korean.
Pre-rendered style
Indicates that this style was previously rendered and saved so it
can be typed quicker.
INSTALLING TRUETYPE AND POSTSCRIPT FONTS
To install a TrueType or Postscript font:
1. Close or minimize windows as necessary to access the start-up
screen of your desktop.
Note
COPYING AND PASTING A FONT
To copy and paste a font:
2. Click the Start button in the bottom lefthand corner of the screen,
then click Settings, then Control Panel.
3. Double-click Fonts.
4. Select the fonts to install. Refer to help for the Fonts dialog box for
detailed help with font installation.
Once fonts have been installed in Windows NT, you must
restart Deko500 before those fonts are available in Deko500.
1. Select text whose font you wish to copy.
2. From the Edit menu, choose Copy (Ctrl+C), then Font.
3. Select the text or position the cursor where you will apply the font.
4. From the Edit menu, choose Paste (Ctrl+V), or click the paste
button on the text bar.
Deko500 User’s Guide
Page 43

Specifying a Font 41
CUSTOM TYPEFACE
Note
When you copy a font, it is saved in the Windows NT
clipboard.
The Custom Typeface feature enables you to create custom
characters for use in Deko500 graphics
To open a Custom Typeface window:
Do one of the following:
From the Window menu, choose Select Layout, then Typeface
Edit.
From the View menu, choose Custom Typeface.
From the File menu, choose Open, navigate to the drive and
directory containing an existing custom typeface, then press
Enter or click OK.
To import an active graphic as a character into a custom typeface:
1. Activate the Program window and open the graphic you wish to
import as a character.
2. Activate the Custom Typeface window and optionally open an
existing custom typeface.
3. Click or use arrow keys to select the character.
4. From the File menu, choose Import Character.
To import a graphic file as a character into a custom typeface:
1. Activate the Custom Typeface window and optionally open an
existing custom typeface.
2. Click or use arrow keys to select the character.
3. From the File menu, choose Import Character From File.
4. In the dialog box, navigate to the drive and directory that contain
the file that will become the custom character.
5. Type the file name in the File Name text box or choose it from the
File Name list box, then click OK or press Enter. Deko500 copies
the file into the selected character.
Note
Deko500 can import several file types to use as custom
characters, including Deko500 graphics (.dko), Windows
bitmap files (.bmp), Graphics Factory stills (.gf),
videoDesigner stills (.tv), JPEG files (.jpg), TIFF files (.tif)
and Targa files (.tga).
Deko500 User’s Guide
Page 44

Specifying a Font 42
To change pin location and set width of a character:
1. In the Custom Typeface window, double-click the character you
wish to edit. Deko500 displays the character in its own window.
2. In the character window, type in or scroll to X and Y values for the
character’s pin location.
3. Type in or scroll to a Width value for the character’s set width.
4. To close the character window, double-click its control icon.
Note
Multiple character windows can be open at one time.
To specify custom typeface properties:
1. Activate the Custom Typeface window and open the custom
typeface.
2. In the Custom Typeface window, click Properties.
3. Edit properties as desired, then click OK.
Custom Typeface Properties
Font size
The default size of the typeface, i.e. the size at which no
scaling will occur.
Cap height
The height of upper case characters, as a percentage of the
font size.
Ascender
The maximum distance of character ascenders from the
baseline, as a percentage of the font size.
Descender
The maximum distance of character descenders from the
baseline, as a percentage of the font size.
Underline size
Underline height, as a percentage of the font size.
Underline position
Underline position, relative to character position, as a
percentage of the font size.
Space width
Space between characters, specified as a percentage of the font
size.
Number width
Number width, specified as a percentage of the font size.
Deko500 User’s Guide
Page 45

SPECIFYING A LOOK
A
BOUT LOOKS
43
This section describes how to control the current style’s look. The look controls
everything about the way a text character looks, including colors, edges,
shadows, etc.
A look consists of a list of details. Each detail is a face, edge, frame, shadow, or
underline, and has its own set of attributes which dictate color, size, shape, etc.
A look coupled with a font makes up a style.
To change the attributes of the current look:
Do one of the following:
Use the text bar to turn on and off the first face, edge, shadow,
underline and frame of a look, and to choose colors for each.
Use the Style/Look Window to control all aspects of the
current look, including additional edges, shadows, etc.
THE STYLE/LOOK WINDOW
To display the Style/Look Window:
Controls in the Style/Look Window:
1. In the View menu, Choose Style (F6).
2. Click Look (Alt+L) at the top of the Style window.
Details
The list of details for the current look. The selected detail is
highlighted, and its attributes are displayed in the lower half of the
window.
Details come in these flavors:
Edge
An edge around the character. The edge is based on details
above it in the list of details.
Face
The face of the character. Most looks have only a single face,
which is usually the first detail in the list of details.
Frame
A frame behind the character.
Shadow
A shadow of the character. The shadow is based on details
above it in the list of details. A look can have up to two
shadows.
Deko500 User’s Guide
Page 46

FACE
Specifying a Look 44
Underline
An underline below the character. A look can have only one
underline.
Frame
A frame behind the character. A look can have up to two
frames.
Add
Adds a new detail to the current look. A pop-up menu lets you
choose which kind of detail to add. The new detail is added after
the selected detail.
Delete
Deletes the selected detail.
To add or remove a f ace:
1. Select the text to change. If no text is selected, a face is added to or
removed from the current style.
2. Click the face button on the text bar to toggle the face on or off.
To change the color of a face:
1. Select the text to change. If no text is selected, Deko500 applies
changes to the current style.
2. Do one of the following:
Click the shader button next to the face button on the text bar
(only for the first face of a look).
Open the Style window (F6), select Look (Alt+L) at the top of
the Style window, click on the appropriate face detail, then
click the Shader button.
3. In the Shader window, choose a Color, Ramp or Texture.
Deko500 User’s Guide
Page 47

FACE ATTRIBUTES
Specifying a Look 45
To change other attributes of a face:
1. Select the text to change. If no text is selected, Deko500 applies
changes to the current style.
2. Activate the Style window.
3. Choose Look (Alt+L) at the top of the Style window.
4. In the Details list, choose the face. Deko500 displays face
attributes in the lower half of the Style window.
Hide
Check this box to hide the face. A hidden face can still affect other
details, based on its Priority and the “From previous detail”
settings of other details.
Shader
Opens the Face Shader window. Use the Face Shader to apply a
color, ramp or texture to the face.
EDGE
Blur
Controls the amount of blur, from 0 (no blur) to 100.
Priority
Determines whether the face appears in front of or behind other
details. By default, Deko500 assigns a priority to each detail so
that they render from front to back, in the order they appear in the
Details list. Use Priority to change the rendering order. Priority
ranges from 0 (closest to viewer) to 1000 (farthest from viewer).
Priority also controls the rendering order of overlapping details
from different styles.
To add or remove an edge:
1. Select the text to change. If no text is selected, an edge is added to
or removed from the current style.
2. Click the edge button on the text bar to toggle the edge on or off.
This button controls only the first edge of a look.
To add additiona l edges:
1. Activate the Style window.
2. Choose Look at the top of the Style window.
3. Next to the Details list, choose Add, then choose Edge from the
popup menu. The edge is added after the selected detail.
Deko500 User’s Guide
Page 48

Specifying a Look 46
To change the color of an edge:
1. Select the text to change. If no text is selected, Deko500 applies
changes to the current style.
2. Do one of the following:
Click the shader button next to the edge button on the text bar
(only for the first edge of a look).
Open the Style window (F6), select Look at the top of the
Style window, click on the appropriate edge detail, then click
the Shader button.
3. In the Shader window, choose a Color, Ramp or Texture.
To change other attributes of an edge:
1. Select the text to change. If no text is selected, Deko500 applies
changes to the current style.
2. Activate the Style window.
3. Choose Look at the top of the Style window.
EDGE ATTRIBUTES
4. In the Details list, choose the edge. Deko500 displays Edge
Attributes in the lower half of the Style window.
Hide
Hides the edge. A hidden edge can still affect other details, based
on its Priority and “To next detail” settings.
Shader
Opens the Edge Shader window. Use the Edge Shader to apply a
color, ramp or texture to the edge.
Blur
Controls the amount of blur, from 0 (no blur) to 100.
Shape
Specifies the shape of the edge:
round
creates a rounded edge.
square
creates a rectangular edge.
Type
Specifies the type of edge:
outer
creates an edge that extends outward from the outer edge of
the edged detail.
Deko500 User’s Guide
Page 49

Specifying a Look 47
inner
creates an edge that extends inward from the outer edge of the
edged detail.
border
creates an edge that extends both outward and inward from the
outer edge of the edged detail.
filled
creates an edge that extends outward from the outer edge of
the edged detail; the inside is filled with the edge color.
Outer Inner Border Filled
Size
Controls the size of the edge, from 0 (no edge) to 100 (very large
edge).
Priority
Determines whether the edge appears in front of or behind other
details. By default, Deko500 assigns a priority to each detail so
that they render from front to back, in the order they appear in the
Details list. Use Priority to change the rendering order. Priority
ranges from 0 (closest to viewer) to 1000 (farthest from viewer).
Priority also controls the rendering order of overlapping details
from different styles.
From previous detail
Specifies which other details in the look provide the shape on
which this edge is based:
face
produces an edge based only on the face detail.
frame
produces an edge around the first frame detail above the edge
in the Details list.
previous
produces an edge based on the “To next detail” setting of the
detail immediately above the edge in the Details list.
underline
produces an edge around the first underline above the edge in
the Details list.
To next detail
Determines what this edge will send to the detail immediately
below it in the Details list:
previous
sends whatever was sent to the edge from the detail above it.
Deko500 User’s Guide
Page 50

SHADOW
Specifying a Look 48
merged
sends the combinations of the edge and whatever was sent to
the edge from the detail above it.
this
sends the edge only.
To add or remove a shadow:
1. Select the text to change. If no text is selected, a shadow is added
to or removed from the current style.
2. Click the shadow button on the text bar to toggle the shadow on or
off.
This button controls only the first shadow of a look.
To add additional shadows:
1. Activate the Style window.
2. Choose Look at the top of the Style window.
3. Next to the Details list, choose Add, then choose Shadow from the
popup menu. The shadow is added after the selected detail.
Deko500 User’s Guide
Page 51

Specifying a Look 49
To change the color of a shadow:
1. Select the text to change. If no text is selected, Deko500 applies
changes to the current style.
2. Do one of the following:
Click the shader button next to the shadow button on the text
bar (only for the first shadow of a look).
Open the Style window (F6), select Look at the top of the
Style window, click on the appropriate shadow detail, then
click the Shader button.
3. In the Shader window, choose a Color, Ramp or Texture.
To change other attributes of a shadow:
1. Select the text to change. If no text is selected, Deko500 applies
changes to the current style.
2. Activate the Style window.
SHADOW ATTRIBUTES
3. Choose Look at the top of the Style window.
4. In the Details list, choose the shadow. Deko500 displays Shadow
Attributes in the lower half of the Style window.
Hide
Hides the shadow. A hidden shadow can still affect other details,
based on its Priority and “To next detail” settings.
Shader
Opens the Shadow shader window. Use the Shadow Shader to
apply a color, ramp or texture to the shadow.
Blur
Controls the amount of blur, from 0 (no blur) to 100.
Angle
Controls the angle that the shadow is offset from the detail(s) being
shadowed. An angle of zero produces a shadow directly above the
shadowed detail.
Deko500 User’s Guide
Page 52

Specifying a Look 50
Type
Determines the type of shadow:
drop
creates a single shadow of the detail being shadowed.
deep
creates a thick shadow, as if the detail were extruded.
Drop Deep
Distance
Controls the distance of the shadow from the shadowed detail(s).
Priority
Determines whether the shadow appears in front of or behind other
details. By default, Deko500 assigns a priority to each detail so
that they render from front to back, in the order they appear in the
Details list. Use Priority to change the rendering order. Priority
ranges from 0 (closest to viewer) to 1000 (farthest from viewer).
Priority also controls the rendering order of overlapping details
from different styles.
From previous detail
Specifies which other details in the look provide the shape on
which this shadow is based:
face
produces a shadow based only on the face detail.
previous
produces a shadow based on the “To next detail” setting of the
detail immediately above the shadow in the Details list.
frame
produces a shadow of the first frame detail above the shadow
in the Details list.
underline
produces a shadow of the first underline above the shadow in
the Details list.
To next detail
Determines what this shadow will send to the detail immediately
below it in the Details list:
previous
sends whatever was sent to the shadow from the detail above
it.
this
sends the shadow only.
Deko500 User’s Guide
Page 53

UNDERLINE
Specifying a Look 51
merged
sends the combination of the shadow and whatever was sent to
the shadow from the detail above it.
To add or remove an u nderline:
1. Select the text to change. If no text is selected, an underline is
added to or removed from the current style.
2. Click the underline button on the text bar to toggle the underline on
or off.
This button controls only the first underline of a look.
To change the color of an underline:
1. Select the text to change. If no text is selected, Deko500 applies
changes to the current style.
2. Do one of the following:
Click the shader button next to the underline button on the text
bar (only for the first underline of a look).
Open the Style window (F6), select Look at the top of the
Style window, click on the appropriate underline detail, then
click the Shader button.
3. In the Shader window, choose a Color, Ramp or Texture.
Deko500 User’s Guide
Page 54

UNDERLINE ATTRIBUTES
Specifying a Look 52
To change other attributes of an underline:
1. Select the text to change. If no text is selected, Deko500 applies
changes to the current style.
2. Activate the Style window.
3. Choose Look at the top of the Style window.
4. In the Details list, choose the underline. Deko500 displays
Underline Attributes in the lower half of the Style window.
Hide
Hides the underline. A hidden underline can still affect other
details, based on its Priority and “To next detail” settings.
Shader
Opens the Underline Shader window. Use the Underline Shader to
apply a color, ramp or texture to the underline.
Blur
Controls the amount of blur, from 0 (no blur) to 100.
Shape
Specifies the shape of the underline:
round
produces an underline with rounded corners.
square
produces an underline with rectangular corners.
Height
Controls the height of the underline. The default value is 100
percent.
Width
Specifies an additional amount of underline that extends be yond
the width of underlined text. A value of zero produces an underline
that exactly matches the width of underlined text.
V offset
Specifies a vertical offset from the underline’s normal position.
Negative values move the underline down, a nd positive values
move it up.
Spaces
Underlines the spaces between words.
Deko500 User’s Guide
Page 55

Specifying a Look 53
Priority
Determines whether the underline appears in front of or behind
other details. By default, Deko500 assigns a priority to each detail
so that they render from front to back, in the order they appear in
the Details list. Use Priority to change the rendering order. Priority
ranges from 0 (closest to viewer) to 1000 (farthest from viewer).
Priority also controls the rendering order of overlapping details
from different styles.
To next detail
Determines what this underline will send to the detail immediately
below it in the Details list:
previous
sends whatever was sent to the underline from the detail above
it.
this
sends the underline only.
merged
sends the combination of the underline and whatever was sent
to the underline from the detail above it.
FRAME
To add or remove a frame:
1. Select the text to change. If no text is selected, a frame is added to
or removed from the current style.
2. Click the frame button on the text bar to toggle the frame on or off.
This button controls only the first frame of a look.
To add additiona l frames:
1. Activate the Style window.
2. Choose Look at the top of the Style window.
3. Next to the Details list, choose Add, then choose Frame from the
popup menu. The frame is added after the selected detail.
Deko500 User’s Guide
Page 56

Specifying a Look 54
To change the color of a frame:
1. Select the text to change. If no text is selected, Deko500 applies
changes to the current style.
2. Do one of the following:
Click the shader button next to the frame button on the text bar
(only for the first frame of a look).
Open the Style window (F6), select Look at the top of the
Style window, click on the appropriate frame detail, then click
the Shader button.
3. In the Shader window, choose a Color, Ramp or Texture.
To change other attributes of a frame:
1. Select the text to change. If no text is selected, Deko500 applies
changes to the current style.
2. Activate the Style window.
FRAME ATTRIBUTES
3. Choose Look at the top of the Style window.
4. In the Details list, choose the frame. Deko500 displays Frame
Attributes in the lower half of the Style window.
Hide
Hides the frame. A hidden frame can still affect other details,
based on its Priority and “To next detail” settings.
Shader
Opens the Frame Shader window. Use the Frame Shader to apply a
color, ramp or texture to the frame.
Blur
Controls the amount of blur, from 0 (no blur) to 100.
Shape
Determines the shape of the frame:
round
creates a frame with rounded corners.
square
creates a frame with rectangular corners.
Height
Specifies the height of the frame.
Width
Specifies the width of the frame.
Deko500 User’s Guide
Page 57

Specifying a Look 55
H offset
Offsets the frame horizontally relative to the detail being framed.
V Offset
Offsets the frame vertically relative to the detail being framed.
Descenders
Lowers the bottom of the frame to accommodate lower case
descender characters like g, j and y.
Spaces
Frames the spaces between words.
Priority
Determines whether the frame appears in front of or behind other
details. By default, Deko500 assigns a priority to each detail so
that they render from front to back, in the order they appear in the
Details list. Use Priority to change the rendering order. Priority
ranges from 0 (closest to viewer) to 1000 (farthest from viewer).
Priority also controls the rendering order of overlapping details
from different styles.
To next detail
Determines what this frame will send to the detail immediately
below it in the Details list:
previous
sends whatever was sent to the frame from the detail above it.
this
sends the fra me only.
merged
sends the combination of the frame and whatever was sent to
the frame from the detail above it.
CUTTING AND PASTING DETAILS AND LOOKS
To cut or copy a detail:
1. Activate the Style window.
2. Choose Look at the top of the Style window.
3. In the Details list, click on the detail you wish to cut or copy.
4. Do one of the following:
To remove the selected detail from its current position, choose
Cut Detail (Ctrl+X) from the Edit menu, or click the cut
button in the Tools window.
To copy and leave the selected detail intact, choose Copy
Detail (Ctrl+C) from the Edit menu, or click the copy button
in the Tools window.
Deko500 User’s Guide
Page 58

Specifying a Look 56
To paste a detail into a Details list:
1. If necessary, open the Style file into which you will paste the
detail.
2. Click on the detail in the Details list where you will insert the cut
or copied detail.
3. From the Edit menu, choose Paste Detail (Ctrl+V), or click the
paste button in the Tools window.
To copy and paste a look:
1. Select text whose look you wish to copy.
2. From the Edit menu, choose Copy (Ctrl+C), then Look.
3. Select the text or position the cursor where you will apply the look.
4. From the Edit menu, choose Paste (Ctrl+V), or click the paste
button on the text bar.
Note
When you copy a look, it is saved in the Windows NT
clipboard.
Deko500 User’s Guide
Page 59

SPECIFYING A SHADER
A
BOUT SHADERS
To apply color to text or graphics, Deko500 uses a shader.
Each detail in a look (face, edge, frame, shadow or underline) has its own
shader. The shader determines how color is applied to the detail.
Deko500 shaders come in three flavors:
Any detail can have any kind of shader. For instance, a face can have a color
shader, an edge a ramp shader, and a shadow a texture shader, all within a single
look.
Specifying a Look 57
A color shader produces a detail with a single, solid color.
A ramp shader produces a detail with a four-color ramp and
an optional highlight.
A texture shader produces a detail with a bitmap texture.
Multiple occurrences of the same type of detail within a look do not have to
have the same type of shader. For example, a look with three edges can have a
different shader for each edge.
You can use the same type of shader on multiple details within a graphic. In
addition, each graphic’s background has its own shader. Using the background
shader, you can make a solid, ramped or textured background for any graphic.
Shaders are specified in the Shader window (F7). Any shader can be stored as a
preset shader. The preset shaders can be saved in a .shd file for future use.
Deko500 User’s Guide
Page 60

ACTIVATING A SHADER
Specifying a Shader 58
To activate a shader for the current look’s first face, edge, shadow, underline or fram e:
Click the appropriate detail shader button on the text bar.
face edge shadow underline frame
APPLYING A COLOR
Note
If you click the shader button for a deta il that is not in the
Details list, Deko500 automatically adds the detail.
To activate the background shader:
Click the background-shader button (Ctrl+F7) on the text bar.
To activate the shader for any detail in the current style:
1. Activate the Style window.
2. In the Style window, click the desired detail in the Details list box.
3. In the Style window, click the Shader button.
To apply a solid color to a detail:
1. Activate the detail’s shader.
2. At the top of the Shader window, choose Color. The Color button
near the top of the window displays the detail’s current color.
3. Use the color picker to pick a color.
4. When you are satisfied with the color, right-click the Color button
to set the detail’s shader to that color. The color is automatically
applied to the detail.
Deko500 User’s Guide
Page 61

APPLYING A RAMP
Specifying a Shader 59
To apply a ramp to a detail:
1. Activate the detail’s shader.
2. At the top of the Shader window, choose Ramp. The Sample box
near the top of the window displays the detail’s current ramp.
3. For each of the four colors in the ramp, click the color button, use
the color picker to pick a color, then right-click the color button to
set it to that color.
4. Choose Options and specify ramp options as desired.
RAMP OPTIONS
To apply highlighting to a ramp:
1. Follow above instructions for applying a ramp.
2. Click the Hilite button, then use the color picker to pick a color for
the highlight.
3. When you are satisfied with the color right-click the Hilite button
to set it to that color.
4. Check the Hilite box to turn the highlight on.
5. Choose Options and specify highlight options as desired.
Group
Specifies how the ramp should be applied:
letter
applies the ramp individually to each letter.
word
applies the ramp to each word.
row
applies the ramp to each row of text.
page
applies the ramp to the entire page of text.
Opacity
Controls overall transparency of the ramp, in addition to any
transparency in the individual colors of the ramp. Enter a value for
ramp opacity from zero (transparent) to 100 percent (opaque).
Deko500 User’s Guide
Page 62

HIGHLIGHT OPTIONS
Specifying a Shader 60
H Scale
Determines the width of the ramp relative to the group. For settings
less than 100 percent, only part of the ramp is applied to the group.
V Scale
Determines the height of the ramp relative to the group. For
settings less than 100 percent, only part of the ramp is applied to
the group.
Highlight Size
Specifies the size of the highlight relative to the height of the ramp,
up to 100 percent.
Highlight Angle
Specifies the angle (-360 to 360) of the highlight. An angle of zero
produces a horizontal high light.
Highlight H Offset
Specifies the horizontal position of the highlight in the ramp.
Negative values offset the highlight to the left, positive values to
the right.
APPLYING A TEXTURE
Highlight V Offset
Specifies the vertical position of the highlight in the ramp.
Negative values offset the highlight down, positive values up.
To apply a texture to a detail:
1. Activate the detail’s shader.
2. At the top of the Shader window, choose Texture.
3. Do one of the following:
In the File Name text box, type name of the texture file.
Press Browse, then double-click a thumbnail in the Texture
Browser.
Notes
4. Specify texture options as desired.
The Sample box in the Shader window displays the current
texture.
Deko500 User’s Guide
Page 63

TEXTURE OPTIONS
Specifying a Shader 61
The texture is copied from its file, in its original size, and
“pasted” onto the detail. The texture’s size does not change —
the larger the detail, the greater the area of texture that is
applied to it.
In addition to Deko500 (.dko) graphics, Deko500 can import
Windows bitmap files (.bmp), Graphics Facto ry stills (.gf),
videoDesigner stills (.tv), JPEG files (.jpg), TIFF files (.tif),
Targa files (.tga) and Pinnacle (.g) files created in FlashFile,
Lightning or Genie, to use as textures.
Multiple Deko500 graphics can use the same texture file.
File Name
The name of the texture file.
If you check the File Name check box (the default), Deko500 saves
only the name of the texture file when saving the graphic. Any
changes you make to the texture file will be reflected in the graphic
as well.
If you un-check File Name, Deko500 copies the bitmap from the
original texture file and saves it as part of the graphic. The word
“unnamed” appears in the File Name text box to indicate that the
texture is being stored with the graphic. The graphic will increase
in size by approximately the size of the texture file. Any
subsequent changes you make to the original texture file will not
affect the texture bitmap saved with the graphic.
Details using textured shaders can save only the name of the
texture file; they cannot store an unnamed texture.
Group
Specifies how the ramp should be applied:
letter
applies the texture individually to each letter.
word
applies the texture to each word.
row
applies the texture to each row of text.
page
applies the texture to the entire page of text.
Opacity
Controls the texture’s opacity, from zero (transparent) to 100
(opaque).
H offset
Offsets the texture relative to its horizontal alignment.
V offset
Offsets the texture relative to its vertical alignment.
Deko500 User’s Guide
Page 64

Specifying a Shader 62
H Alignment
Specifies how the original texture is aligned with the selected
detail(s), depending on the Group setting:
left
aligns the left edge of the texture with the left edge of the
group.
center
aligns the center of the texture with the center of the group.
right
aligns the right edge of the texture with the right edge of the
group.
V Alignment
Specifies how the original texture is mapped onto the selected
detail(s), depending on the group setting:
top
aligns the top of the texture with the top of the group.
middle
aligns the middle of the texture with the middle of the group.
baseline
aligns the middle of the texture with the baseline of the group.
bottom
aligns the bottom of the texture with the bottom of the group.
Deko500 User’s Guide
Page 65

THE COLOR PICKER
Specifying a Shader 63
Use Deko500’s color picker to pick colors for the color shader and ramp
shader.
RGB
Selects the RGB color space. Click a color on the palette, or enter
numerical values up to 100 percent for each of red, green and blue.
HSV
Selects the HSV color space. Click a color on the palette, or enter
numerical values to specify:
Hue
the spectral shade of the color, represented by an angle (0-360)
around the color wheel or vector scope.
Sat
the color’s saturation, its percentage of pure color. Black,
white and gray have zero saturation. A 100 percent saturated
color is pure color—it contains no white or gray.
Value
the brightness of the color, represented by the maximum of
either red , blue or green. While not a true luminance amount,
Value is closely related to the brightness of a color.
Opacity
Controls the translucence of the color. An opacity of zero produces
a completely transparent color, while 100 percent is completely
opaque.
Deko500 User’s Guide
Page 66

PICKING A COLOR
Specifying a Shader 64
Selected Component
Selects the color component RGB or HSV to display in the
Selected Component Bar. In the picture above, Value is the
selected component. If Opacity is selected, Deko500 displays a
gray scale in the Selected Component Bar.
Un-selected Components
The large square displays the two un-selected RGB or HSV
components. In other words, if Value is the Selected Component,
this square shows Hue along the vertical axis and Saturation along
the horizontal axis. If Opacity is the Selected Component,
Deko500 displays a gray scale in this square.
Current Color
Shows the current color, the color whose numerical values appear
above.
Eyedropper
Enables selection of a color directly from the desktop.
To pick a color:
1. Choose a color space by selecting RGB or HSV.
2. Use the color picker to pick a color, or enter numerical amounts for
Red, Green and Blue or Hue, Saturation and Value. Enter an
amount for Opacity, if desired.
3. To deposit the color into a color shader or ramp shader, right-click
on one of the color buttons near the top of the Shader window.
To pick a color from anywhere on the desktop:
1. Move the mouse pointer over the eyedropper button, then press
and hold the left mouse button down.
The cursor changes to an eyedropper.
2. Keep ho lding the left mo use button down, and move the
eyedropper cursor anywhere on the desktop. With the mouse
pointer over the desired color, release the mouse button.
Deko500 User’s Guide
Page 67

USING PRESET SHADERS
Specifying a Shader 65
The 18 Preset Shader buttons appear at the bottom of the Shader window. Any
type of shader may be assigned to any preset.
To apply a preset shad er to a detail:
1. Activate the detail’s shader.
2. In the Shader window, click the preset button.
To assign the current shader to a preset shader button:
Do one of the following:
Right-click the preset shader button.
Activate the Shader window (F7), then choose Preset Shader
Set from the Shader menu and select a preset shader from the
drop-down menu.
To save the current preset shaders:
1. Activate the Shader window (F7).
2. From the File menu choose Save Preset Shaders (Ctrl+S or
Alt+F12) or Save Preset Shaders As (F12).
3. To name the file, navigate in the Save As dialog box to the drive
and directory where you will store the file, type a name in the File
Name text box, then click OK or press Enter.
Note
When you save a preset shader file, Deko500 automatically
attaches “.shd” to the file name. Do not typ e a different
extension.
Deko500 User’s Guide
Page 68

WORKING WITH STYLES
T
HE CURRENT STYLE WINDOW
The Current Style window shows the current style.
This window shows the current font and look, in the actual size they would
appear if typed in the default Program window. If you are creating a style with a
very large font, you can enlarge the window to accommodate the larger sample
characters.
Specifying a Shader 66
To move the Current Style window:
1. In the Window menu, make sure Freeze is not checked.
2. Move the selection cursor over the window’s title bar.
3. Drag the window anywhere on the desktop.
To re-size the Current Style window:
1. In the Window menu, make sure Freeze is not checked.
2. Move the selection cursor anywhere over the border of the
window. The cursor becomes a sizing cursor.
3. Drag the border to change the window’s size.
To return the Current Style window to its original position:
1. Move the selection cursor over the window’s title bar.
2. Drag the window offscreen left. The window will pop back to its
original spot in the lower left corner.
Deko500 User’s Guide
Page 69

SAVING A STYLE
Working With Styles 67
To save an unnamed style or to rename a style:
1. Activate the Style window (F6 ).
2. Choose Save Style As (F12) from the File menu.
3. In the dialog box, navigate to the drive and directory where you
will store the file.
4. Type a file name in the File Name text box, then click OK or press
Enter.
Note
To save a modified style:
COPYING AND PASTING A STYLE
To copy and paste a style:
When you save a style file, Deko500 automatically attaches
“.sty” to the file name. Do not type a different extension.
1. Activate the Style window (F6 ).
2. Choose Save Style (Ctrl+S or Alt+F12) from the File menu.
Deko500 replaces the previously saved version of the file.
1. Select text whose style you wish to copy.
2. From the Edit menu, choose Copy (Ctrl+C), then Style.
3. Select the text or position the cursor where you will apply the
style.
4. From the Edit menu, choose Paste (Ctrl+V), or click the paste
button on the text bar.
Note
When you copy a style, it is saved in the Windows NT
clipboard.
ASSIGNING A STYLE TO A STYLE PRESET
To assign the current style to a preset style button:
1. If the Preset Style window is not visible, choose Preset Styles
(Alt+F7) from the View menu.
2. Right-click the preset style button.
Deko500 User’s Guide
Page 70

Working With Styles 68
To pick up a style from a graphic and assign it to a preset style button:
1. Activate a grap hi c wi nd o w.
2. Move the text cursor immediately to the left of a character in the
desired style.
3. Select the character or choose Pick Style from the Text menu. The
style of that character is now the current style.
4. Right-click the preset button.
RETRIEVING A STYLE
Note
If “Moving cursor sets font and look” is checked in the
Options/Preferences/Cursor dialog box, you can omit step 3.
To pick up multiple styles from a graphic and assign them to preset style buttons:
1. Activate a grap hi c wi nd o w.
2. From the Text menu, choose Pick Presets. Deko500 assigns the
first style in the graphic to the first preset button, the next style to
the second preset button, and so on.
To select a preset style for t yping:
1. Activate the Preset Style window (Alt+F7).
2. Click on one of the eight preset styles. That style is now the current
style.
To retrieve a style from a preset styles (.pst) file:
1. Activate the Preset Style window (Alt+F7).
2. Choose Open (Ctrl+O or F9) from the File menu.
3. In the dialog box, navigate to the drive and directory that contain
the preset styles file.
4. Type the file name in the File Name text box or choose it from the
File Name list box, then click OK or press Enter.
5. In the Preset Style window, click a preset button. That preset is
now the curr ent style.
Deko500 User’s Guide
Page 71

SAVING PRESET STYLES
Working With Styles 69
To retrieve a style from a style (.sty) file:
1. Activate the Style window (F6 ).
2. Choose Open (Ctrl+O or F9) from the File menu.
3. In the dialog box, navigate to the drive and directory that contain
the style file.
4. Type the file name in the File Name text box or choose it from the
File Name list box, then click OK or press Enter. The style in the
.sty file is now the current style.
To save the eight preset styles in a Presets file:
1. Activate the Preset Style window (Alt+F7).
2. Choose Save Preset Styles As (F12) from the File menu.
3. In the dialog box, navigate to the drive and directory where you
will store the file.
4. Type a new file name in the File Name text box, then click OK or
press Enter.
Note
When you save a preset style file, Deko500 automatically
attaches “.pst” to the file name. Do not type a different
extension.
To save modified preset styles:
1. Activate the Preset Style window (Alt+F7).
2. Choose Save Preset Styles (Ctrl+S or Alt+F12) from the File
menu.Deko500 replaces the previously saved version of the file.
Deko500 User’s Guide
Page 72

SAVING A PRE-RENDERED STYLE
To save the current style as a pre-rendered style:
1. Activate the Style window (F6 ).
2. From the File menu choose Render and Save Style.
3. In the dialog box, navigate to the drive and directory where you
4. Type a file name in the File Name text box, then click OK or press
Working With Styles 70
will store the file.
Enter.
Notes
When saving a pre-rendered style, Deko500 renders each
character in the style’s font using the style’s look. For
complicated styles, this can take several minutes.
A pre-rendered style file occupies more disk space than a
normal style file. However, when you type pre-rendered
characters, they appear on screen more quickly than
characters that must be rendered “on the fly” as they are
typed.
Pre-rendered styles are indicated at the bottom of the
Style/Font window by a check next to Pre-rendered Style, and
in the Preset Style window by an (R) in front of the typeface
name.
Deko500 User’s Guide
Page 73

Graphics and Layers
VIDEO STANDARD
You can create Deko500 graphics in standard 4 x 3 aspect ratio or in the wider
16 x 9 aspect ratio used for some feature films, music videos and commercials.
The default video standard is standard NTSC.
To change the aspect ratio:
To change the current video standard:
From the Options menu, select Hardware Settings, then choose
4 x 3 or 16x9.
1. Right-click the Windows desktop, choose Properties from the
drop-down menu, then click the Pinnacle tab.
2. Click the Setup button, then choose PAL or NTSC.
3. Close all dialog boxes and windows and re-start Windows NT.
Notes
When you change the video standard, Deko500 automatically
changes related input/output settings (number of scan lines,
pedestal, blanking width, etc.).
If this is the first time you are switching to a new standard,
you must recalibrate all levels and delays—Deko500
maintains a separate set of values for each standard.
ABOUT LAYERS AND BACKGROUNDS
Each graphic consists of a background and one or more layers.
The layers:
A layer is one element of a Deko500 graphic. A graphic can have an unlimited
number of layers. Each layer is one of two types:
a text layer—also called a text field
a geometric shape layer—a rectangle or an ellipse
Deko500 User’s Guide
Page 74

About Layers and Backgrounds 72
Layers are rendered in order from front to back, starting with the first layer.
Using the Layer menu, layers may be selected, reordered, hidden, moved,
rotated, scaled, etc.
The background:
Behind the final layer is the background, a full-screen rectangle that is either
off or on.
When off, the background is effectively transparent. This is
where “live video” shows through when Deko500 graphics are
keyed over external video.
When on, the background’s shader determines its color. Like
all Deko500 shaders, the background can be a solid color, a
ramp or a texture.
Deko500 User’s Guide
Page 75

THE BACKGROUND
About Layers and Backgrounds 73
To turn the background on:
Do one of the following:
Click the background button on the text bar.
In the Layer menu, check Show Background.
To turn the background off:
Do one of the following:
Click the background button on the text bar.
From the Edit menu, choose Clear Background (Ctrl+F8).
In the Layer menu, un -c he ck S ho w Ba ck gr o und.
To apply a color, ramp or texture to the background:
1. Follow the above instructions to turn on the background.
2. Activate the Background Shader window (Ctrl+F7).
3. Select a color, ramp, or texture shader.
To open a graphic directly into the background:
1. Activate a grap hi c wi nd o w.
2. From the File menu, choose Replace Background (Ctrl+F9).
3. In the dialog box, navigate to the drive and directory that contain
the file.
4. Choose the file from the File Name list box or type the file name in
the File Name text box, then click OK or press Enter.
To turn the background into a layer:
In the Layer menu, choose Background to Layer.
Notes
The background turns into a full-screen rectangle, but keeps
the shader it had as a background. The graphic now has a
transparent background.
If the background is an unnamed texture, you cannot turn it
into a layer.
To replace the background key with luminance from a graphic file:
1. Activate a grap hi c wi nd o w.
Deko500 User’s Guide
Page 76

About Layers and Backgrounds 74
2. From the File menu, choose Replace Background Key.
3. In the dialog box, navigate to the drive and directory that contain
the graphic file.
4. Choose the file from the File Name list box or type the file name in
the File Name text box, then click OK or press Enter.
ADDING A TEXT FIELD
Note
This is useful if your graphic has a “companion” graphic in
which the luminance represents the key of the original.
To add a text field to a graphic, using the keyboard:
From the Layer menu choose Add Text Field. Deko500 adds a text
layer based on the boundaries of the safe title area.
To add a text field to a graphic, using the mouse:
1. Click the add-text-field button in the Tools window.
2. In the graphic, the cursor becomes a text layer cursor.
3. Drag the cursor to define the text field box.
Notes
Holding Ctrl as you drag the cursor maintains a square fie l d
box.
Deko500 always adds a new text field as the frontmost layer.
To create a new field or fields for selected text:
Select the text you wish to move to a new field or fields.
Do one of the following:
To put selected text into a single new field, choose Text to
Field from the Text menu.
To create a new field for each discrete group of selected text,
choose Text to Multiple Fields from the Text menu.
Deko500 User’s Guide
Page 77

TEXT FIELD PROPERTIES
Adding Layers to a Graphic 75
To specify text field properties:
1. Select the text field.
2. Do one of the following:
From the Layer menu, choose Properties.
Open the Style window (F6) and choose Layer at the top of
the window.
3. Specify text field properties as desired.
Box
Defines the text field box. All values refer to the original text field
box, before any transformation — scaling, rotation or skewing.
Left, Top
The left and top edges of the text field box, in screen units.
Width, Height
The width and height of the text field box.
Aspect
The ratio of width to height.
Fixed aspect
Maintains the text field’s aspect ratio, whenever the width or
the height changes.
Transform
Defines how the text field box is transformed fro m its or iginal
position:
H Scale, V Scale
Horizontal and vertical scale factors.
Rotation
Text field rotation in degrees.
Skew
Text field skew amount.
H Origin, V Origin
The center of rotation.
Same priority as previous layer
Specifies that the current layer appears in the same plane as the
layer in front of it. In other words, Deko500 renders this layer as if
it were part of the layer in front of it.
Hidden
Hides the text field.
Deko500 User’s Guide
Page 78

Adding Layers to a Graphic 76
More
Displays more Text Field Properties.
Justification
Specifies default justification for text within the text field:
Horizontal
Justifies text between the left and right edges of the text field.
Vertical
Justifies text between the top and bottom of the text field.
Spread %
When Horizontal justification is set to “spread,” specifies how
much additional space to add between the letters within a
word, compared to the space added between words.
Word wrap
Automatically wraps words to the next row, as necessary, to keep
text within the text field box.
Auto-scaling
None
No automatic text scaling.
Scale to fit box
Scales text to exactly fit the text field.
Shrink to fit box
Scales text down, if necessary, to fit within the text field.
Text initialization
Determines how the text field is initialized when its graphic is
opened.
String
A text string to display in the field or the name of a macro file.
Usage
Specifies whether Deko500 use text, a macro (which must
return a string), or data in an .aut file, or requests data from an
automation host to initialize the field.
Macro
Uses a macro, which must return a string.
Query
Causes the Automation interface to request updates from the
host at user-specified intervals.
Replace
Replaces the graphic’s replace fields with the data in an
automation (.aut) file.
Deko500 User’s Guide
Page 79

ADDING A RECTANGLE LAYER
To add a rectangle to a graphic, using the keyboard:
To add a rectangle to a graphic, using the mous e:
Adding Layers to a Graphic 77
Update freq
Specifies how often, in seconds, to run a macro or request data
from an automation host.
From the Layer menu choose Add Rectangle. A rectangle layer is
added at the center of the screen.
1. Click the rectangle button in the Tools window.
In the graphic, the cursor becomes a rectangle cursor.
Notes
ADDING AN ELLIPSE LAYER
To add an ellipse to a gr aphic, using the k e yboard:
To add an ellipse to a graphic, using the mous e:
2. Drag the cursor to define the rectangle.
Holding Ctrl as you drag the cursor maintains a square
rectangle.
Deko500 always adds a new rectangle as the frontmost layer.
From the Layer menu choose Add Ellipse. An ellipse layer is
added at the center of the screen.
1. Click the ellipse button in the Tools window.
2. In the graphic, the cursor becomes a ellipse cursor.
Notes
3. Drag the cursor to define the ellipse.
Holding Ctrl as you drag the cursor constrains the ellipse to a
circle.
Deko500 adds a new ellipse as the frontmost layer.
Deko500 User’s Guide
Page 80

SPECIFYING LAYER PROPERTIES
To specify properties of a layer:
LAYER PROPERTIES
Adding Layers to a Graphic 78
1. Select the layer.
2. Do one of the following:
From the Layer menu, choose Properties
Open the Style window (F6) and choose Layer at the top of
the window.
3. Specify layer properties as desired.
Box
Defines the box surrounding the ellipse or rectangle. All values
refer to the original box, before any transformation — scaling,
rotation or skewing.
Left, Top
The left and top edges of the ellipse or rectangle, in screen
units.
Width, Height
The width and height of the ellipse or rectangle.
Aspect
The ratio of width to height.
Fixed aspect
Maintains the shape’s aspect ratio, whenever the width or the
height changes.
Transform
Defines how the box is transformed from its original position.
H Scale, V Scale
Horizontal and vertical scale factors.
Rotation
Rotation in degrees.
Skew
Skew amount.
H Origin, V Origin
The center of rotation.
Same priority as previous layer
Specifies that the current layer appears in the same plane as the
layer in front of it. In other words, Deko500 renders this layer as if
it were part of the layer in front of it.
Deko500 User’s Guide
Page 81

SELECTING A LAYER
Adding Layers to a Graphic 79
Hidden
Hides the layer.
Lock
Prevents selection or modification of the layer.
To select a layer in the active graphic:
Do one of the following:
Click on an ellipse, rectangle or the box around a text field.
Page Up or Page Down to the layer.
Choose the layer from the list at the bottom of the Layer
menu.
To select the layer in front of the currently s elected layer:
Do one of the following:
Activate the graphic window and press Page Up.
From the Layer menu, choose Select Previous Layer
(Alt+Page Up).
To select the layer behind the currently selected layer:
Do one of the following:
Activate the graphic window and press Page Down.
From the Layer menu, choose Se lect Next Layer (Alt+Page
Down).
To select all layers in the active graphic:
Choose Select Layers from the Edit menu.
To select multiple layers in the active graphic:
1. Check the Select More toggle in the Edit menu.
2. Use one of the above methods to select each layer individually.
CLEARING A GRAPHIC
To clear the layers from the active graphic:
From the Edit menu, choose Clear Layers (F8). Deko500 replaces
the layers with a single, empty text field.
Deko500 User’s Guide
Page 82

To clear the background from the active grap hic:
To clear the layers and the background from the active graphic:
To have Deko500 prompt you to save m odified file s before clearing them:
1. From the Options menu, choose Preferences.
2. Choose Prompts at the top of the Preferences dialog box.
3. In the Prompts dialog box, check Prompt to save before clearing or
CLEARING OR DELETING A LAYER
Selecting and Working with Layers 80
From the Edit menu, choose Clear Background (Ctrl+F8).
From the Edit menu, choose Clear All (press Alt+F8 or press F8
twice in rapid succession).
opening windo w.
To delete a layer:
1. Select the layer.
2. From the Layer menu, choose Delete Layer.
To delete all layers:
From the Edit menu, choose Clear Layers (F8).
Note
Clear Layers replaces all the layers in the graphic with a
single, empty text field. The Background remains intact.
To clear text from a text field:
1. Select a text field.
2. From the Layer menu, choose Clear Text. The empty text field
remains in the graphic.
Deko500 User’s Guide
Page 83

CUTTING AND PASTING LAYERS
To cut or copy a layer:
To paste a layer:
Selecting and Working with Layers 81
1. Select the layer to be cut or copied.
2. Do one of the following:
To cut the selected layer, from the Edit menu, choose Cut
(Ctrl+X), or click the cut button on the text bar.
To copy the selected layer, from the Edit menu, choose Copy
(Ctrl+C), then Selected, or click the copy button on the text
bar.
1. If you are moving the laye r to a different file, open the destination
file.
2. Select a layer.
3. From the Edit menu, choose Paste (Ctrl+V), or click the paste
button on the text bar.
Deko500 pastes the cut or copied layer directly in front of the
selected layer.
APPENDING A GRAPHIC TO SECOND GRAPHIC
To append one graphic to another graphic:
1. Open the first graphic file.
2. From the File menu, choose Append Layers (Alt+F9).
3. In the dialog box, navigate to the drive and directory containing the
second graphic file.
4. Choose the file from the File Name list box or type it in the File
Name text box, then click OK or press Enter.
Note
Deko500 appends the second graphic’s layers behind the
layers of the first graphic. The second graphic’s background is
not used.
Deko500 User’s Guide
Page 84

Selecting and Working with Layers 82
REORDERING LAYERS
To move a layer forward or backward in a graphic:
1. Select the layer.
2. From the Layer menu, choose one of the following:
Send Back One Layer (Ctrl+-)
Swaps the layer with the layer behind it.
Bring Forward One Layer (Ctrl++)
Swaps the layer with the layer in front of it.
Send to Back (Alt+-)
Makes the layer the backmost layer, just in front of the
background.
Bring to Front (Alt++)
Makes the layer the frontmost layer.
PASTING LAYERS TO THE BACKGROUND
COMBINING TEXT FIELDS
MOVING A LAYER
To combine all layers in the acti ve graphic:
From the La yer menu, choose Layers to Background.
Note
Deko500 copies the layers to combine them in the background.
The original layers remain until you choose Clear Layers (F8)
from the Edit menu.
To combine multiple text fields into a single text field:
1. Select the text fields you wish to combine. Hold Ctrl and drag the
mouse to select the fields.
2. From the Laye r menu, choose Text to Field.
Note
Deko500 combines the fields into a single, new field.
To move a layer us ing the keyboard:
1. From the Options menu, choose Transform/Move (Ctrl+M).
2. In the Options menu, choose Transform and set increment of
change to Coarse or Fine (Ctrl+spacebar).
Deko500 User’s Guide
Page 85

Selecting and Working with Layers 83
3. Select the layer.
4. Hold down Alt and press arrow keys (
up, down, left or right.
↑↓→ ←) to move the layer
To move a layer using the mouse:
1. Click the move button in the Tools window.
2. Select the layer.
3. Position the pointer near the border of the layer, so that the pointer
becomes the moving tool.
4. Drag to move the layer in any direction.
To specify numerical valu es for layer position:
1. Select the layer.
2. Activate the Style window.
3. Choose Layer at the top of the Style window.
4. In the Styl e window, enter values for Le ft, Top, Width and Height.
Deko500 User’s Guide
Page 86

JUSTIFYING A LAYER
Selecting and Working with Layers 84
To justify a rectan gle, ellipse, or text layer:
1. Select the rectangle, ellipse, or text layer.
2. Do one of the following:
On the text bar, click the appropriate justification button to
alter horizontal justification, vertical justification, or both,
then choose the desired setting.
From the Text menu, choose Justify, then select a setting for
horizontal or vertical justification or bo t h.
Hold Ctrl down and press one of the numbers on the numeric
keypad to justify the rectangle or ellipse in the corresponding
position of the Program window.
7 89
Top left Top center Top right
ROTATING A LAYER
4 56
Middle left Middle center Middle right
1 23
Bottom left Bottom center Bottom right
0
Justification off
To rotate a layer usin g the keyboard:
1. From the Options menu, choose Transform/Rotate & Skew
(Ctrl+R).
2. In the Options menu, choose Transform and set increment of
change to Coarse or Fine (Ctrl+spacebar).
3. Select the layer.
4. Hold down Alt and press either the down arrow (
layer clockwise, or the up arrow (
↑) to rotate it counterclockwise.
↓) to rotate the
To rotate a layer using the mouse:
1. Click the rotate button in the Tools window.
2. Select the layer.
Deko500 User’s Guide
Page 87

SCALING A LAYER
Changing a Layer’s Appearance or Size 85
3. Position the pointer near the border of the layer, so that the pointer
becomes the rotation tool.
4. Drag to rotate the layer.
To specify a numerical value f or rotation:
1. Select the layer.
2. Activate the Style window.
3. Choose Layer at the top of the Style window.
4. Double-click the Rotation text box, then type or scroll to a value.
To scale a layer using the keyboard:
1. From the Options menu, choose Transform/Scale & Width
(Ctrl+W).
2. In the Options menu, choose Transform and set increment of
change to Coarse or Fine (Ctrl+spacebar).
3. Select the layer.
4. Hold down Alt and press either the up or down arrow (
increase or decrease layer size, or the right or left arrow (
increase or decrease layer width.
To scale a layer using the mouse:
1. Click the scale button in the Tools window.
2. Select the layer.
3. Position the pointer over a handle on any side or corner of the
layer, so that the pointer becomes a scaling tool.
4. Drag to scale the layer.
To specify a numerical value f or layer scaling:
1. Select the layer.
↑↓) to
→ ←) to
Note
2. Activate the Style window.
3. Choose Layer at the top of the Style window.
4. In the Style window, enter values for H Scale and V Scale.
When you scale a text field, Deko500 scales all text within the
field. To change the size of the text field without scaling the
text, change the Box value in Text Field Properties.
Deko500 User’s Guide
Page 88

SKEWING A LAYER
Changing a Layer’s Appearance or Size 86
To skew a layer using the keyboard:
1. From the Options menu, choose Transform/Rotate & Skew
(Ctrl+R).
2. In the Options menu, choose Transform and set increment of
change to Coarse or Fine (Ctrl+spacebar).
3. Select the layer.
4. Hold down Alt and press either the right arrow (
selected layer clockwise, or the left arrow (
counterclockwise.
←) to skew
To skew a layer using the mouse:
1. Click the skew and rotate button in the Tools windo w.
2. Select the layer.
3. Position the pointer over the top-right-corner handle of the selected
layer, so that the pointer becomes the skewing tool.
4. Drag the handle to skew the layer.
To specify a numerical value for skewing:
1. Select the layer.
2. Activate the Style window.
3. Choose Layer at the top of the Style window.
4. Double-click the Skew text box, then type or scroll to a value.
→) to skew the
Deko500 User’s Guide
Page 89

Effects and Sequences
ABOUT DEKO500 EFFECTS
You can play back graphic files individually or in series, using a variety of
effects.
Transitional Effects
A Transitional Effect replaces the on-air (Program) graphic with
another (Preview) graphic.
clear
Clears the layers, background or all of the Program graphic.
cut
The Preview graphic replaces the Program graphic.
dissolve
The Program graphic fades out as the Preview graphic fades
in.
push up/down/left/right
The Preview graphic pushes the Program graphic offscreen.
repeat thru
Repeats the previous effect on each subsequent file up to the
specified file.
slide up/down/left/right
The Preview graphic slides on top of the Program graphic.
slideoff up/down/left/right
The Program graphic slides off to reveal the Preview graphic.
wipe up/down/left/right
The Program graphic is wiped off in place, revealing the
Preview graphic.
Text Effects operate primarily on text fields:
roll
Text scrolls continuously up the Program graphic, bottom to
top.
Deko500 User’s Guide
Page 90

CREATING A SEQUENCE
About Deko500 Effects 88
crawl
Text moves co ntinuously across the Program graphic, right to
left.
reveal
Text is typed onto the Program graphic, one character, word or
row at a time.
Macro Effect
One additional, powerful effect, command, is available with the
Automation option. The command effect runs the macro specified
in the File Name column during sequence playback.
To open a Sequence window:
Do one of the following:
From the Windows menu, choose Select Layout, then
Sequence Playback.
From the View menu, choose Sequence (F11).
To create a sequence:
1. Activate the Sequence window.
2. From the Sequence menu, choose Clear Sequence, if necessary, to
clear all events.
3. Use the Tab or arrow keys to move to the various fields, enter the
following information for each event in the sequence:
Control/Time
Controls the timing of the event:
(blank)
Starts as soon as the previous event is done.
pause
Waits for a GPI trigger, right mouse click, or a Pause
Sequence (Pause) or Play Sequence (Alt+Enter) command
before playing.
delay
Pauses “Time” fields before playing.
stop
Stops the sequence, returning control to the user. To resume
playback, choose Play Sequence (Alt+Enter).
skip
Skips to the next event. This is useful for inserting a comment.
Deko500 User’s Guide
Page 91

Creating a Sequence 89
loop
Repeats subsequent events “Time” times, until an “end” is
encountered. Loops can be nested.
end
Ends the current loop.
go to
Skips to event number in “Time” field.
Effect
See About Deko500 Effects for descriptions of effects.
Layers
The graphic element, e.g. layers, background, row, etc., on
which to perform the effect. Options depend on the specified
effect. Leave this column blank to perform the effect on the
entire graphic.
File Name
The name of the graphic file on which to perform the effect.
Press Ctrl+L or click the Browse button to select the file from
the Graphic Browser window.
Rate
The rate at which Deko500 performs the effect, as specified
here or with Sequence/Playback Rate.
Units
The unit of measurement for rate.
To save a sequence:
1. Activate the Sequence window.
2. From the File menu, choose Save Sequence As (F12).
3. In the dialog box, navigate to the drive and directory where you
will store the file.
4. Type a file name in the File Name text box, then click OK or press
Enter.
Note
When you save a sequence, Deko500 automatically attaches
“.seq” to the file name. Do not type a different extension.
To append a sequence to the active sequence:
1. Activate the Sequence window in which you will insert the second
sequence.
2. From the File menu, choose Append to Sequence.
3. In the Append Sequence dialog box, navigate to the drive and
directory that contain the sequence (.seq) file you wish to append.
Deko500 User’s Guide
Page 92

COMPOSING ROLLS
Creating a Sequence 90
4. Choose the file from the File Name list or type it in the File Name
text box, then click OK or press Enter.
To compose a graphic for a “roll” effect:
1. Activate a grap hi c wi nd o w (F5) .
2. In the Text menu, select Vertical Scrolling. A scrollable graphic
can be higher than one screen height.
3. Compose the text for the roll, scrolling down as necessary.
4. Save the graphic.
To run a roll effect:
1. Activate the Sequence window (F11).
2. Enter the graphic’s file name, specify “roll” as the effect, and enter
a playback rate.
3. Press Alt+Enter to run the effect.
To adjust duration or spacing for smooth roll playback:
1. Activate the Sequence window (F11).
2. From the Sequence menu, choose Smooth Roll Playback
Adjustment, then select one of the following from the drop-down
menu:
None—Turns off Smooth Roll Playback Adjustment.
Deko500 will not suggest any adjustments.
Full and Half Vertical Resolution Rates—Deko500 suggests
adjustments based on acceptability of full and half vertical
resolution rates. Allows some aliasing.
Only Full Vertical Resolution Rates—Deko500 suggests
adjustments based on acceptability of full vertical resolution
rates only. Allows only clean rates.
3. Choose OK or press Enter.
Note
When you enter a playback rate for a roll effect, Deko500
displays any suggested adjustments in a dialog box. You can
choose to decrease or increase duration of the ro ll or original
line spacing of the graphic. Line spacing adjustments are not
offered when they would not be effective, e.g. if the document
is non-scrollable or if you choose a page-per-second rate.
Deko500 User’s Guide
Page 93

COMPOSING CRAWLS
Creating a Sequence 91
To compose a graphi c for a "crawl" effect:
1. Activate a grap hi c wi nd o w (F5) .
2. In the Text menu, select Horizontal Scrolling.
3. Compose the text for the crawl. If you are composing more than
one row of text to crawl, use the Enter key to create up to three
additional rows.
4. Save the graphic.
Notes
By default, text composed without horizonta l scrolling selected
crawls across the bottom of the screen.
You can create multi-row crawls of up to four rows of text
To run a crawl effect:
1. Activate the Sequence window (F11).
2. Enter the graphic’s file name, specify “crawl” as the effect, and
enter a playback rate.
3. Press Alt+Enter to run the effect. See Creating a Sequence.
To crawl text across a specific row of the screen:
1. Follow the above instructions for composing a graphic for a
“crawl” effect.
2. Before you save the grap hic, move the curs or to the top row of
text. Press Alt+
location.
3. Follow the above instructions for running the crawl effect.
BROWSING FOR GRAPHICS IN A SEQUENCE
↓ to move the text down to the desired screen
To browse for graphic files to add to a sequence:
1. Activate the Sequence window (F11).
2. Do one of the following:
From the Sequence menu, choose Browse for Files (Ctrl+L).
Select Browser from the View window (Ctrl+L).
3. Double-click a thumbnail to enter it into the sequence.
Deko500 User’s Guide
Page 94

Creating a Sequence 92
To automatically advance to the next event while browsing for graphics to put into a sequence:
1. Activate the Sequence window (F11).
2. In the Sequence menu, select Auto Advance From Browser.
SELECTING EVENTS
Note
If the next event is empty, Deko500 duplicates the last event.
To select a single event:
Do one of the following:
Double-click the event number.
Use arrow keys (
hold Shift and press the down arrow (
↑↓) to position the cursor on the event, then
↓).
To select multiple events:
Do one of the following:
Drag the mouse across the event numbers.
Use arrow keys (
event you wish to select, then hold Shift and press an arrow
↑↓) to highlight the events.
key (
↑↓) to position the cursor on the first or last
To select all events from the current to the first event:
Do one of the following:
Press Shift+Home.
Press Ctrl+Shift+Home.
Note
Which keys you press depends on how you have “Home and
End key behavior” se t in Options/Preferences/Cursor.
To select all events from the current to the last event:
Do one of the following:
Press Shift+End.
Press Ctrl+Shift+End.
Note
Which keys you press depends on how you have “Home and
End key behavior” se t in Options/Preferences/Cursor.
Deko500 User’s Guide
Page 95

CUTTING AND PASTING EVENTS
To cut or copy an event or group of events:
To paste events into a sequence
Creating a Sequence 93
1. Select an event or group of events.
2. Do one of the following:
To cut events, choose Cut Events (Ctrl+X) from the Edit
menu, or click the cut button on the text bar.
To copy events, choose Copy Events (Ctrl+C) from the Edit
menu, or click the copy button on the text bar.
1. Position the cursor at the event where you will insert cut or copied
events.
2. From the Edit menu, choose Paste Events (Ctrl+V), or click the
paste button on the text bar.
INSERTING AND DELETING EVENTS
To insert a blank event above the current event:
To delete the current event:
To delete a group of events:
1. Select the group of events to be deleted. See Selecting Events.
2. Press Delete.
Choose Insert Event (Alt+Insert) from the Sequence menu.
Choose Delete Event (Alt+Delete) from the Sequence menu.
Deko500 User’s Guide
Page 96

PLAYING A SEQUENCE
Playing a Sequence 94
To specify the starting event:
1. Activate the Sequence window.
To play a sequence:
PAUSING SEQUENCE PLAYBACK
To pause sequence playback:
2. Press the up or down arrow (
Deko500 always begins a sequence with the current event.
1. Activate the Sequence window.
2. Do one of the following:
Click the play button in the Sequence window.
Choose Play Sequence (Alt+Enter) from the Sequence menu.
In the Sequence window, the play button lights up green to
indicate that sequence playback is in progress.
Do one of the following:
Click the pause button in the Sequence window.
↑↓) to move the cursor to an event.
Choose Pause Sequence (Pause) from the Sequence menu..
The play button light goes off and the pause button lights up
yellow to indicate that a sequence has been paused.
To specify a pause in a sequence:
In the Control column, select pause.
During playback, Deko500 pauses the sequence and displays the
message “Sequence paused. Press Alt+Enter to continue.”
Deko500 User’s Guide
Page 97

Playing a Sequence 95
To resume a paused sequence:
Do one of the following:
Right-click the mouse.
Click the pause button in the Sequence window.
Choose Pause Sequence (Pause) from the Sequence menu.
Choose Play Sequence (Alt+Enter) from the Sequence menu.
Click the play button in the Sequence window.
Use a GPI trigger.
The pause button light goes off and the play button lights up
green.
USING A GPI TRIGGER
To connect a GPI trigger:
1. Connect the triggering device to an available com port, if it is not
already connected. Refer to the figure below.
2. Restart Deko500.
CD
TR
ND
J1
DE9S
1
2
3
4
5
6
7
8
9
SW1
To enable GPI triggering:
1. Activate the Sequence window (F11).
R1
4.7K
CR2
(RED)
R2
510
Optional circuitry
CR1
(GREEN)
2. From the Sequence menu, choose GPI Settings.
3. In the GPI Trigger Settings dialog box, check GPI Enabled, enter
the Com port name (e.g. COM2), then choose OK.
Deko500 User’s Guide
Page 98

STOPPING SEQUENCE PLAYBACK
To stop sequence playback:
Playing a Sequence 96
Do one of the following:
Press Esc.
Click the stop button in the Sequence window.
Choose Stop Sequence Playback (Ctrl+Pause) from the
Sequence menu.
Deko500 User’s Guide
Page 99

User Preferences
DEKO500 LAYOUTS
Deko500 offers six standard layouts for creating, editing and playing back
graphics and macros:
Graphic Compose
To compose text and graphics.
Style Edit
To create and edit styles.
Sequence Playback
To control the playback of a series of graphic files.
Macro Edit
USER PREFERENCES
To create and edit macros.
Macro Record
To see a macro as it is being recorded.
Typeface Edit
To create and edit user-defined custom typefaces.
To specify preferences:
1. From the Options menu, choose Preferences.
2. In the dialog box, select the tab for the type of preferences you
wish to specify: Common, Prompts, Paths, Cursor, Marker or
Advanced.
Note
Hardware settings are describe d in the Deko500 Installation
Guide.
To save current preferences:
In the Options menu, check Save Settings Now.
Deko500 User’s Guide
Page 100

Specifying User Preferences 98
To automatically save current preferences each time you exit Deko500:
In the Options menu, check Save Settings on Exit.
To reset preferences to factory default settings:
1. From the Options menu, choose Preferences.
2. In the dialog box, choose the type of preference you wish to
change: Common, Prompts, Paths, Cursor, Markers or Advanced.
3. In the dialog box, choose Set this page to defaults, then click OK
or press Enter.
To reset all preferences, hardware settings or software settings to factory defa ults:
1. From the Options menu, choose Factory Defaults.
2. Select the type of settings you wish to change:
User Preferences as set in Options/Preferences
Hardware Settings as set in Options/Hardware Settings
Software Settings, which includes all program settings not
explicitly set in Hardware Settings or Preferences — current
preset styles and shaders, window freeze status, etc.
3. Click OK or press Enter.
Deko500 User’s Guide
 Loading...