

Pinnacle Design 37T100105 User Manual

MediaStream Media Gateway
Version 2.50
Installation, Setup, and Operations Guide
Pinnacle® Systems, Inc.
280 N. Bernardo Avenue
Mountain View, CA 94043
June, 2005
P/N 37T100105
REV. D

Trademarks
All brand or product names mentioned her e in are used for identification purposes only and may be trademarks or
registered trademarks of their respective companies.
Copyright © 2005 Pinnacle Systems, Inc.
All Rights Reserved.
Reproduction, adaptation, or translation of this document without pri or written permissio n is prohibited, except as
allowed under copyright laws.
Printed in the United States.
Note: The information in this document is subject to change without notice or obligation.
2

Official Notices and Warranties
Software License Agreement
IMPORTANT—READ CAREFULLY: This Software License Agreement is a legal agreement
between You and Pinnacle (or its suppliers). This System contains certain Pinnacle computer
software (“Software”), associated media, printed materials, and electronic documentation. By
using the Software, You agree to be bound by the terms of this Software License Agreement. If
You do not agree to the terms of this Software License Agreement, Pinnacle is unwilling to
license the Software to You. In such case, Y ou may not use or copy the Software. This system also
contains certain third party software, which is provided to You upon the condition that You agree
to the terms outlined in the third party software licenses included with the materials shipped with
the System.
License: Pinnacle grants to You a nonexclusive, personal, perpetual, nontransferable, limited
license to use the installed Software exclusively on hardware on which Pinnacle has loaded
the Software, or other hardware on which Pinnacle has authorized it to be loaded, but solely
in connection with the operation of Your internal business, and not for the benefit of any third
party. Such Software may only be enabled by Pinnacle or its authorized agent. Pinnacle and
its licensors retain all right, title and interest in and to all Software, but title to the media on
which the Software is delivered is transferred to You.
Restrictions: The Software is copyrighted and may contain material that is protected by
patent, trade secret or other laws pertaining to proprietary rights. You may not copy the Software, except that it may make a single copy for archival purposes. You may not modify the
Software or permit or assist any third party in doing so. You may not decompile, reverse engineer, disassemble, or otherwise reduce the Software to source code or other human-readable
form, or attempt or permit any third party to do so. Any violation of this Software license
shall be a material breach and shall immediately entitle Pinnacle to exercise any remedy that
may exist at law or in equity.
Copyright: All title and copyrights in the Software (and any copies thereof) and the accompanying printed materials are owned by Pinnacle. All rights not specifically granted under
this Software License Agreement are reserved by Pinnacle.
Limited Warranty: Pinnacle warrants that (a) the Software will perform substantially in
accordance with the published specifications for a period of one year
and (b) any Pinnacle hardware will be free from defects in materials and workmanship under
normal use and service for a period of one year
This warranty will not apply to repair or replacement necessitated by accident, disaster,
improper or inadequate maintenance, customer or customer-supplied interfacing or machines,
unauthorized modifications or repairs, improper electrical current, misuse, abuse or improper
installation. This warranty is personal to You and may not be assigned or transferred. Pinnacle does not warrant that the Software will operate error-free.
from the date of receipt.
from the date of receipt
THE LIMITED WARRANTY SET FORTH HEREIN IS THE ONLY WARRANTY,
EXPRESS, IMPLIED OR STA TUT ORY THAT PINNACLE MAKES WITH RESPECT TO

THE PRODUCTS. ALL IMPLIED WARRANTIES, INCLUDING, BUT NOT LIMITED
TO, THE IMPLIED WARRANTIES OF MERCHANTABILITY, FITNESS FOR A PARTICULAR PURPOSE AND NONINFRINGEMENT, ARE DISCLAIMED.
Limitation of Liability
PINNACLE SHALL NOT BE LIABLE FOR INDIRECT, SPECIAL, INCIDENTAL, OR
CONSEQUENTIAL DAMAGES; FOR DAMAGES THA T DIRECTLY OR INDIRECTLY
ARISE FROM YOUR USE OF, OR INABILITY TO USE, THE SYSTEM; FOR
COMMERCIAL LOSS OF ANY KIND; FOR THE PROCUREMENT OF SUBSTITUTE
GOODS--WHETHER ARISING IN TORT, CONTRACT OR ANY OTHER LEGAL
THEORY, EVEN IF PINNACLE HAS BEEN ADVISED OF THE POSSIBILITY OF
SUCH DAMAGES. IN ANY EVENT, PINNACLE’S LIABILITY SHALL BE LIMITED
TO THE AMOUNT ACTUALLY PAID BY YOU FOR THE SYSTEM GIVING RISE TO
ANY SUCH DAMAGE. THIS LIMITATION IS INTENDED TO LIMIT PINNACLE’S
LIABILITY AND SHALL APPLY NOTWITHSTANDING ANY FAILURE OF
ESSENTIAL PURPOSE OF ANY LIMITED REMEDY.
4
Liquid blue MSS 8000 NS Installation Guide

Table of Contents
CHAPTER 1: INTRODUCTION . . . . . . . . . . . . . . . . . . . . . . . . . . . . . . . . . . . . . . . . . . . . . . . . . . . . 7
System Overview . . . . . . . . . . . . . . . . . . . . . . . . . . . . . . . . . . . . . . . . . . . . . . . . . . . . . . . . . . . . 7
MediaStream Media Gateway Application. . . . . . . . . . . . . . . . . . . . . . . . . . . . . . . . . . . . . . . . . . . . . . 7
ConnectPlus 1000 Gateway Computer. . . . . . . . . . . . . . . . . . . . . . . . . . . . . . . . . . . . . . . . . . . . . . . . . 8
Liquid blue Workstation. . . . . . . . . . . . . . . . . . . . . . . . . . . . . . . . . . . . . . . . . . . . . . . . . . . . . . . . . . . . 8
MMG System Requirements . . . . . . . . . . . . . . . . . . . . . . . . . . . . . . . . . . . . . . . . . . . . . . . . . . . 8
About This Guide . . . . . . . . . . . . . . . . . . . . . . . . . . . . . . . . . . . . . . . . . . . . . . . . . . . . . . . . . . . . 9
CHAPTER 2: SYSTEM CONNECTIONS . . . . . . . . . . . . . . . . . . . . . . . . . . . . . . . . . . . . . . . . . . . . . 11
Liquid blue Connections . . . . . . . . . . . . . . . . . . . . . . . . . . . . . . . . . . . . . . . . . . . . . . . . . . . . . 11
Attach the Software Protection Dongle . . . . . . . . . . . . . . . . . . . . . . . . . . . . . . . . . . . . . . . . . . . . . . . 12
Liquid Client Computer to LAN/WAN . . . . . . . . . . . . . . . . . . . . . . . . . . . . . . . . . . . . . . . . . . . . . . . 13
ConnectPlus 1000 Gateway Connections . . . . . . . . . . . . . . . . . . . . . . . . . . . . . . . . . . . . . . . . 14
CHAPTER 3: INSTALLATION AND SETUP . . . . . . . . . . . . . . . . . . . . . . . . . . . . . . . . . . . . . . . . . . 15
Install Liquid blue . . . . . . . . . . . . . . . . . . . . . . . . . . . . . . . . . . . . . . . . . . . . . . . . . . . . . . . . . . 15
Begin the Installation . . . . . . . . . . . . . . . . . . . . . . . . . . . . . . . . . . . . . . . . . . . . . . . . . . . . . . . . . . . . . 15
Installing the MMG Client . . . . . . . . . . . . . . . . . . . . . . . . . . . . . . . . . . . . . . . . . . . . . . . . . . . . 18
Configure the FileZilla (FTP) server connection . . . . . . . . . . . . . . . . . . . . . . . . . . . . . . . . . . . 20
To change the user and password: . . . . . . . . . . . . . . . . . . . . . . . . . . . . . . . . . . . . . . . . . . . . . . . . . 20
To change the home directory: . . . . . . . . . . . . . . . . . . . . . . . . . . . . . . . . . . . . . . . . . . . . . . . . . . . . 21
FileZilla configuration for a PS100:. . . . . . . . . . . . . . . . . . . . . . . . . . . . . . . . . . . . . . . . . . . . . . . . . . 22
To configure users: . . . . . . . . . . . . . . . . . . . . . . . . . . . . . . . . . . . . . . . . . . . . . . . . . . . . . . . . . . . . . . . 22
Configure Speed Limits . . . . . . . . . . . . . . . . . . . . . . . . . . . . . . . . . . . . . . . . . . . . . . . . . . . . . . . . . . . 23
Configure the MMG . . . . . . . . . . . . . . . . . . . . . . . . . . . . . . . . . . . . . . . . . . . . . . . . . . . . . . . . . . . . . . 24
Installing the MMG Server on the Gateway . . . . . . . . . . . . . . . . . . . . . . . . . . . . . . . . . . . . . . 27
Liquid Blue Setup . . . . . . . . . . . . . . . . . . . . . . . . . . . . . . . . . . . . . . . . . . . . . . . . . . . . . . . . . . . 29
Setting Up a Timeline in Blue . . . . . . . . . . . . . . . . . . . . . . . . . . . . . . . . . . . . . . . . . . . . . . . . . . . . . . 29
Editing While Transfer . . . . . . . . . . . . . . . . . . . . . . . . . . . . . . . . . . . . . . . . . . . . . . . . . . . . . . . . . . . . 30
Audio Settings For Blue . . . . . . . . . . . . . . . . . . . . . . . . . . . . . . . . . . . . . . . . . . . . . . . . . . . . . . . . . . . 31
Setting up Blue Codecs . . . . . . . . . . . . . . . . . . . . . . . . . . . . . . . . . . . . . . . . . . . . . . . . . . . . . . 34
Preset 1: SD PS 420 IBBP . . . . . . . . . . . . . . . . . . . . . . . . . . . . . . . . . . . . . . . . . . . . . . . . . . . . . . . 35
Setup the Codec Preset 1 in the timeline . . . . . . . . . . . . . . . . . . . . . . . . . . . . . . . . . . . . . . . . . . . . 35
XSend a sequence with 420 . . . . . . . . . . . . . . . . . . . . . . . . . . . . . . . . . . . . . . . . . . . . . . . . . . . . . . 36
Preset 2: SD PS S422 IBBP and SD PS E422 IBBP . . . . . . . . . . . . . . . . . . . . . . . . . . . . . . . . . . . 38
Setup the Codec Preset 2 in the timeline . . . . . . . . . . . . . . . . . . . . . . . . . . . . . . . . . . . . . . . . . . . . 39
XSend a sequence with Standard 422 (s422) . . . . . . . . . . . . . . . . . . . . . . . . . . . . . . . . . . . . . . . . . 39
XSend a sequence with Extended 422 (e422). . . . . . . . . . . . . . . . . . . . . . . . . . . . . . . . . . . . . . . . . 39
Preset 3: SD MXF S422 I-Frame only and SD MXF E422 I-Frame only . . . . . . . . . . . . . . . . . . . 40
Setup the Codec Preset 3 in the timeline . . . . . . . . . . . . . . . . . . . . . . . . . . . . . . . . . . . . . . . . . . . . 41
XSend a sequence with MXF Standard 422 (s422) . . . . . . . . . . . . . . . . . . . . . . . . . . . . . . . . . . . . 41
Preset 4: HD 420 IBBP. . . . . . . . . . . . . . . . . . . . . . . . . . . . . . . . . . . . . . . . . . . . . . . . . . . . . . . . . . 42
Setup the Codec Preset 4 in the timeline . . . . . . . . . . . . . . . . . . . . . . . . . . . . . . . . . . . . . . . . . . . . 42
XSend a sequence with HD420 . . . . . . . . . . . . . . . . . . . . . . . . . . . . . . . . . . . . . . . . . . . . . . . . . . . 43
Preset 5: HD 422 IBBP . . . . . . . . . . . . . . . . . . . . . . . . . . . . . . . . . . . . . . . . . . . . . . . . . . . . . . . . . 44
Setup the Codec Preset 5 in the timeline . . . . . . . . . . . . . . . . . . . . . . . . . . . . . . . . . . . . . . . . . . . . 45

Contents
XSend a sequence with HD422 . . . . . . . . . . . . . . . . . . . . . . . . . . . . . . . . . . . . . . . . . . . . . . . . . . . 45
CHAPTER 4: WORKFLOW AND FILE TRANSFER . . . . . . . . . . . . . . . . . . . . . . . . . . . . . . . . . . . . 47
Using the MMG Client. . . . . . . . . . . . . . . . . . . . . . . . . . . . . . . . . . . . . . . . . . . . . . . . . . . . . . . . . . . . 47
Transferring a File . . . . . . . . . . . . . . . . . . . . . . . . . . . . . . . . . . . . . . . . . . . . . . . . . . . . . . . . . . 49
Files Pending Transfer . . . . . . . . . . . . . . . . . . . . . . . . . . . . . . . . . . . . . . . . . . . . . . . . . . . . . . . 51
Renaming Files & Partial Transfers . . . . . . . . . . . . . . . . . . . . . . . . . . . . . . . . . . . . . . . . . . . . . 52
Monitoring Jobs . . . . . . . . . . . . . . . . . . . . . . . . . . . . . . . . . . . . . . . . . . . . . . . . . . . . . . . . . . . . 53
Using XReceive . . . . . . . . . . . . . . . . . . . . . . . . . . . . . . . . . . . . . . . . . . . . . . . . . . . . . . . . . . . . 55
Using XSend . . . . . . . . . . . . . . . . . . . . . . . . . . . . . . . . . . . . . . . . . . . . . . . . . . . . . . . . . . . . . . 58
Extracting Audio . . . . . . . . . . . . . . . . . . . . . . . . . . . . . . . . . . . . . . . . . . . . . . . . . . . . . . . . . . . 60
CHAPTER 5: WORKFLOW SCENARIOS . . . . . . . . . . . . . . . . . . . . . . . . . . . . . . . . . . . . . . . . . . . . 61
Workflow 1: XReceive From SAN to Blue . . . . . . . . . . . . . . . . . . . . . . . . . . . . . . . . . . . . . . . 62
Workflow 2: XSend from Blue to SAN . . . . . . . . . . . . . . . . . . . . . . . . . . . . . . . . . . . . . . . . . . 66
Workflow 3: XReceive from San to PS100 . . . . . . . . . . . . . . . . . . . . . . . . . . . . . . . . . . . . . . . 69
Workflow 4: XSend from PS100 to SAN . . . . . . . . . . . . . . . . . . . . . . . . . . . . . . . . . . . . . . . . 70
Workflow 5: MSI to Liquid blue . . . . . . . . . . . . . . . . . . . . . . . . . . . . . . . . . . . . . . . . . . . . . . . 71
CHAPTER 6: TROUBLESHOOTING . . . . . . . . . . . . . . . . . . . . . . . . . . . . . . . . . . . . . . . . . . . . . . . 75
Logs . . . . . . . . . . . . . . . . . . . . . . . . . . . . . . . . . . . . . . . . . . . . . . . . . . . . . . . . . . . . . . . . . . . . . 75
Basic Troubleshooting . . . . . . . . . . . . . . . . . . . . . . . . . . . . . . . . . . . . . . . . . . . . . . . . . . . . . . . 77
eVTR File Fails to Transfer into the SAN Cluster . . . . . . . . . . . . . . . . . . . . . . . . . . . . . . . . . . . . . . . 77
Transfer from Liquid blue to MSS Fails. . . . . . . . . . . . . . . . . . . . . . . . . . . . . . . . . . . . . . . . . . . . . . . 78
Standard Transfer from MSS to Liquid blue Fails . . . . . . . . . . . . . . . . . . . . . . . . . . . . . . . . . . . . . . . 79
Newcopy or Audio Demux from MSS to Liquid blue Fails. . . . . . . . . . . . . . . . . . . . . . . . . . . . . . . . 80
6 Liquid blue MSS 8000 NS Installation Guide

Chapter 1: Introduction
m
L
Liquid blue Workstation
Pinnacle System’s MediaStream Media Gateway (MMG) solution provides the following
common production workflows:
• Partial and full file copy from the SAN to a Liquid blue workstation and importing into Liquid
blue for editing while still actively transferring.
• File transfer from a Liquid blue workstation to the SAN, where the file is played by a Media
Stream Server. A finished sequence can be fused to a file in a designated directory.
• Newcopy (partial) and full file copies between MSS clusters controlled by the copyDLL.
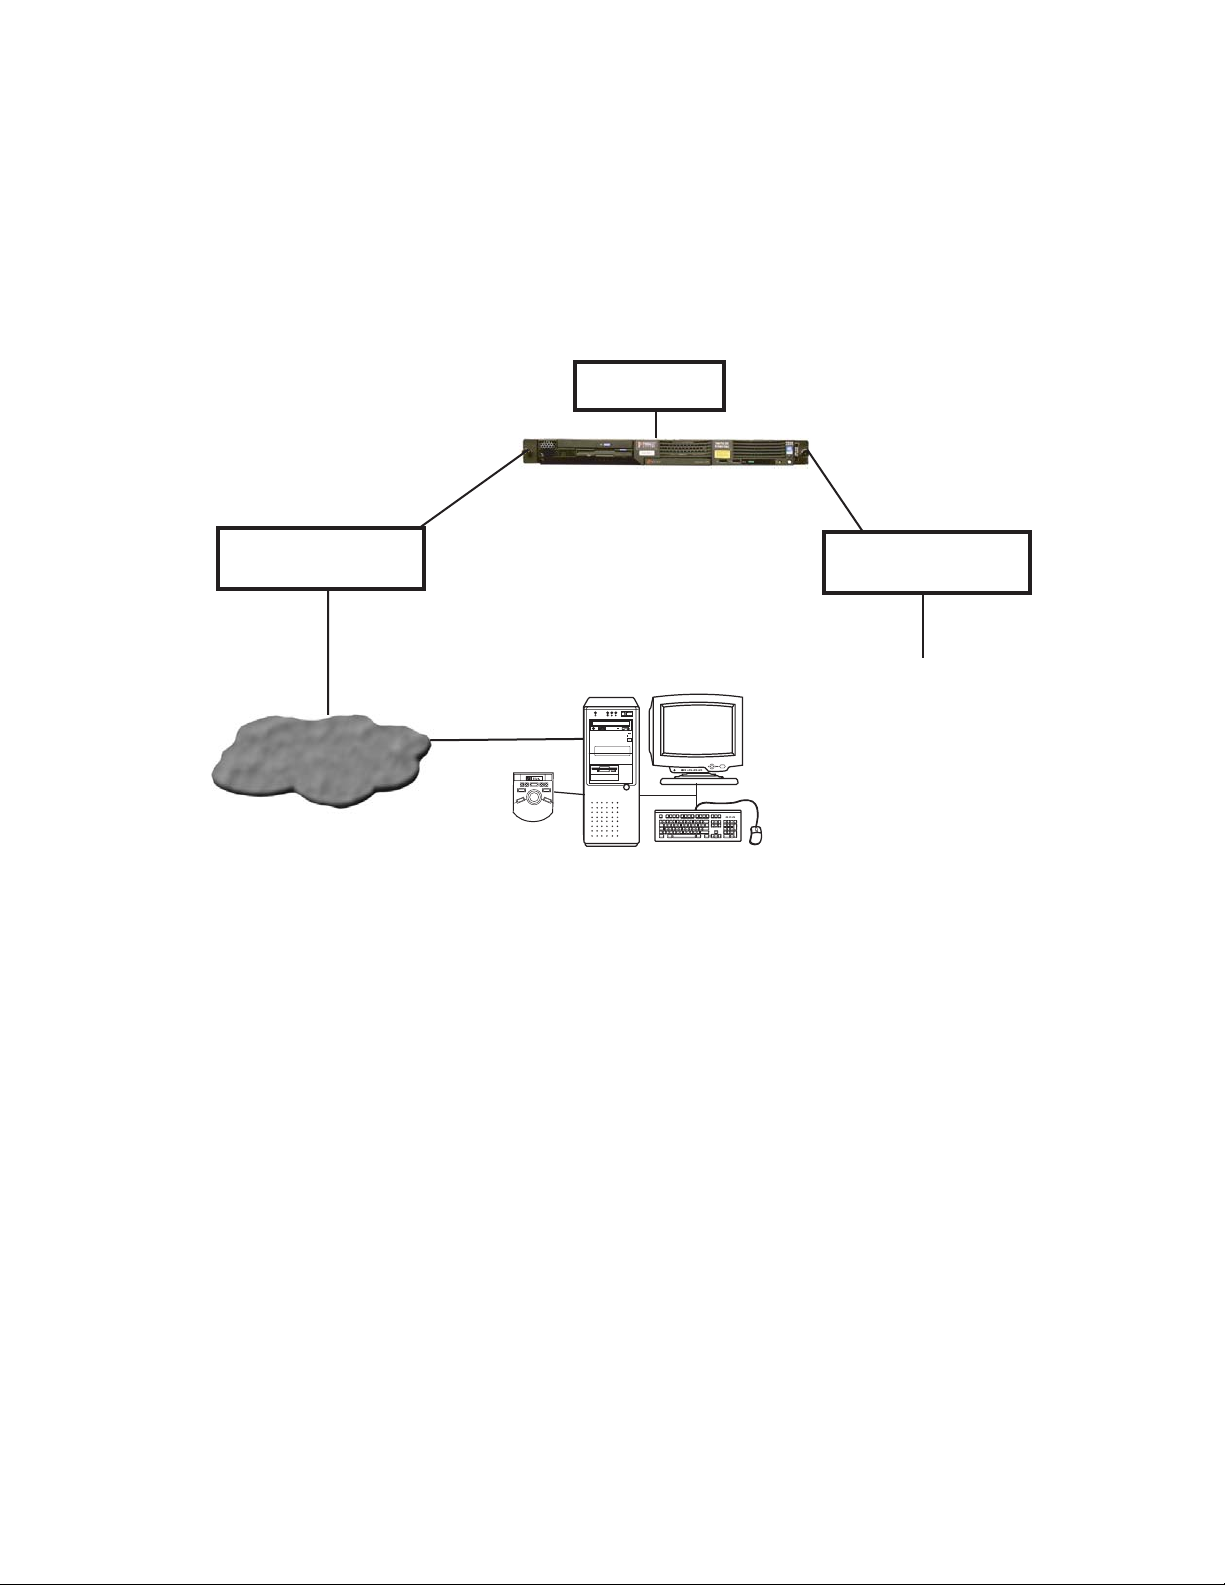
System Overview
Pinnacle System’s MediaS tream Media Gateway product is a client-server application that is used
for partial and full file transfers between MediaStream Server Cluster and Liquid blue
workstations, and between and within MediaStream Server Clusters. The MMG server
application is installed on a ConnectPlus 1000 gateway computer . The MMG client application is
installed on the Liquid blue workstation for the editing configuration, while the copyDLL controls
both full and newcopy operations between and within MediaStream Server Clusters. Additional
hardware components include one or more MSS 8000 NS servers and the MediaStream
Networked Storage System.
iquid blue Application/MMG Client Application
Note: High-volume production environments may require a second ConnectPlus 1000 gateway
and a dedicated Palladium Exchange computer for each gateway to manage their video transfers.
Media Management Gateway (MMG) Server Application
MSS 8000 NS Servers
ConnectPlus 1000 Gateway
Networked Storage Syste
Figure 1-1: System Overview
MediaStream Media Gateway Application
The MediaStream Media Gateway (MMG), a client-server application that you access via a
graphical user interface, controls file transfers using FTP (File Transfer Protocol) between a
stand-alone Liquid blue workstation and MSS 8000 NS servers.
MMG enables you to select clips for import into the Liquid blue workstation by file name and to
fuse and copy an edited file back to MediaStream Servers. Partial (subclip) transfers and audio
extraction are also supported.
The MMG client is installed on the Liquid blue workstation. The MMG server is installed on each
ConnectPlus 1000 gateway computer in the system.
Chapter 1: Introduction
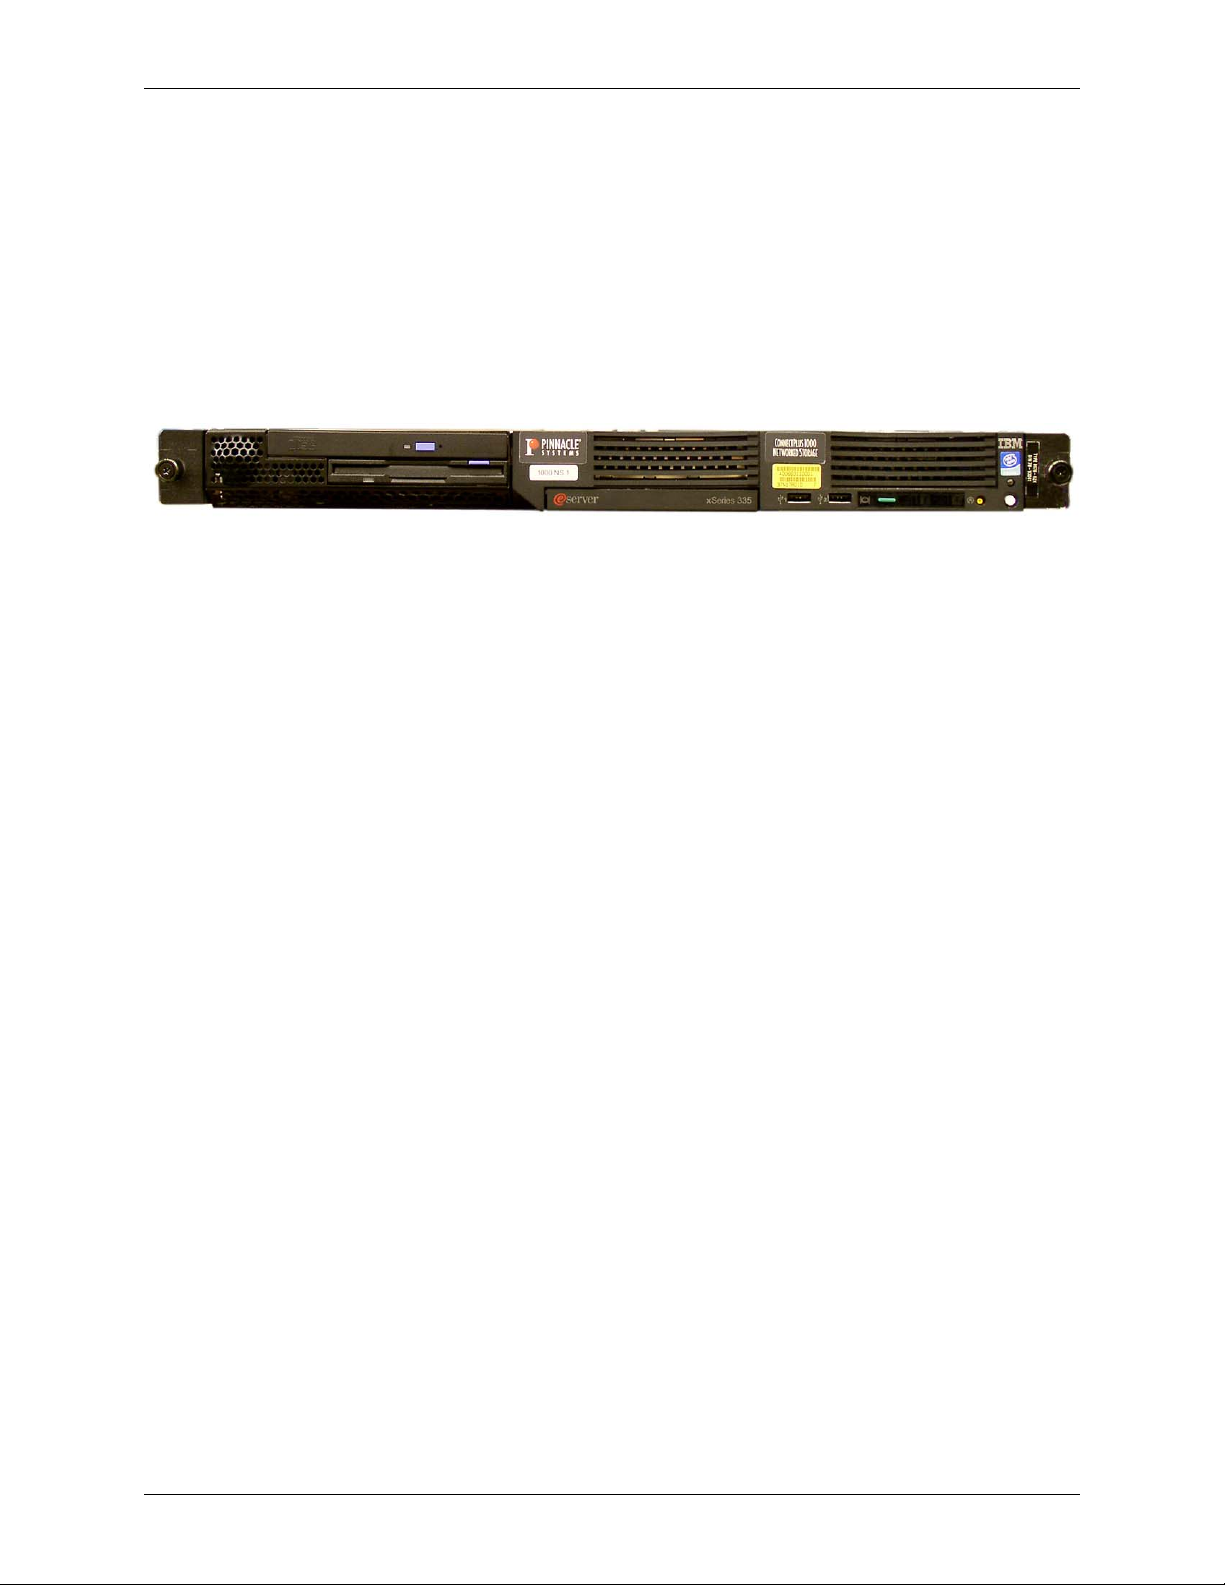
ConnectPlus 1000 Gateway Computer
The ConnectPlus 1000 gateway consists of a computer with an Intel processor that runs the
Microsoft Windows OS. It also includes a Fibre Channel card for connection to the storage arrays
via the Fibre Channel switches. This gateway connects the Liquid blue workstation with the
MediaStream Networked Storage Systems and the MSS 8000 NS server.
ConnectPlus 1000 provides high-speed connectivity with up to 300 Mbps performance over
industry-standard Gigabit Ethernet. Network data transfer is accomplished through Pinnacle’s
implementation of standard FTP.
Figure 1-2: ConnectPlus 1000 Gateway Chassis
Liquid blue Workstation
Pinnacle Liquid blue non-linear editing workstations deliver native support for major standard
video formats, resulting in format independence and eliminating transcoding and degradation by
recompression. Any combination of DV, DVCAM, DVCPRO25/50, MPEG-2, MPEG IMX,
Digital Betacam, and uncompressed D1/D5 can be used within a single timeline, all with realtime playback. High-speed transfer via SDTI reduces capture and mastering time.
The Liquid blue application and the MediaStream Media Gateway client application are installed
on the Liquid blue workstation.
MMG System Requirements
• MSS platforms supported: 900 NS, 8000 NS and 8000SI
• MSS 900 NS: Release 2.22 or greater
• MSS 8000 NS and MSS 8000si: Release 3.14 or greater
• Connect Plus 1000: Version 3.03.7 or greater
• MediaStream Server copyDLL: Version 4.9 or greater
• MXF is MSS blue compatible MXF format (4ch/16bit)
• Not supported on integrated ConnectPlus 1000/MSi PC of 8000si
• Limit of one TCS server per ConnectPlus 1000
• MMG must be loaded on source cluster
• Liquid blue client 6.1 with Liquid Blue Service Pack 2 supported
• Supported on ConnectPlus 1000 IBM 335 and Avnet GWY100 PCs
8
MMG Installation, Setup, and Operations Guide

Chapter 1: Introduction
About This Guide
This Guide provides instructions for installing and configuring product-specific components of
the Pinnacle Systems MediaStream Media Gateway.
For instructions on setting up and configuring your MediaStream network and the ConnectPlus
1000 gateway, connecting your Liquid blue workstation components, and installing and working
with Palladium Exchange, see the specific documentation for these components that is included
with your system.
This Guide assumes that you have a working MediaStream network with a ConnectPlus 1000
gateway and that the Palladium Exchange application and the Liquid blue workstation application
has been installed.
MMG Installation, Setup, and Operations Guide
9

Chapter 1: Introduction
10
MMG Installation, Setup, and Operations Guide
Chapter 2: System Connections
This chapter describes the connections for the Liquid blue workstation and the ConnectPlus 1000
gateway, which are connected to a networked storage system with one or more MSS 8000 NS
servers. For instructions on connecting your networked storage system, see your Liquid Reference
Manual and the MSS 8000 NS Installation and Site Guide.
Ethernet
Gigabit Ethernet Switch
LAN/WANLAN/WAN
VLAN to FSCs
Connect Plus 1000 NS
Connect to Any Port
Liquid blue
Workstation
Figure 2-1: System Connection Overview
VLAN Connection
to MSS 8000 NS /
MSS 900 NS / 8000si
Fibre Channel
Connect to Any Port
Fibre Channel Switches
Connection to
Storage Arrays
Liquid blue Connections
First, complete the steps for connecting the components of a stand-alone system. See your Liquid
Installation Guide for instructions on connecting the Liquid system.
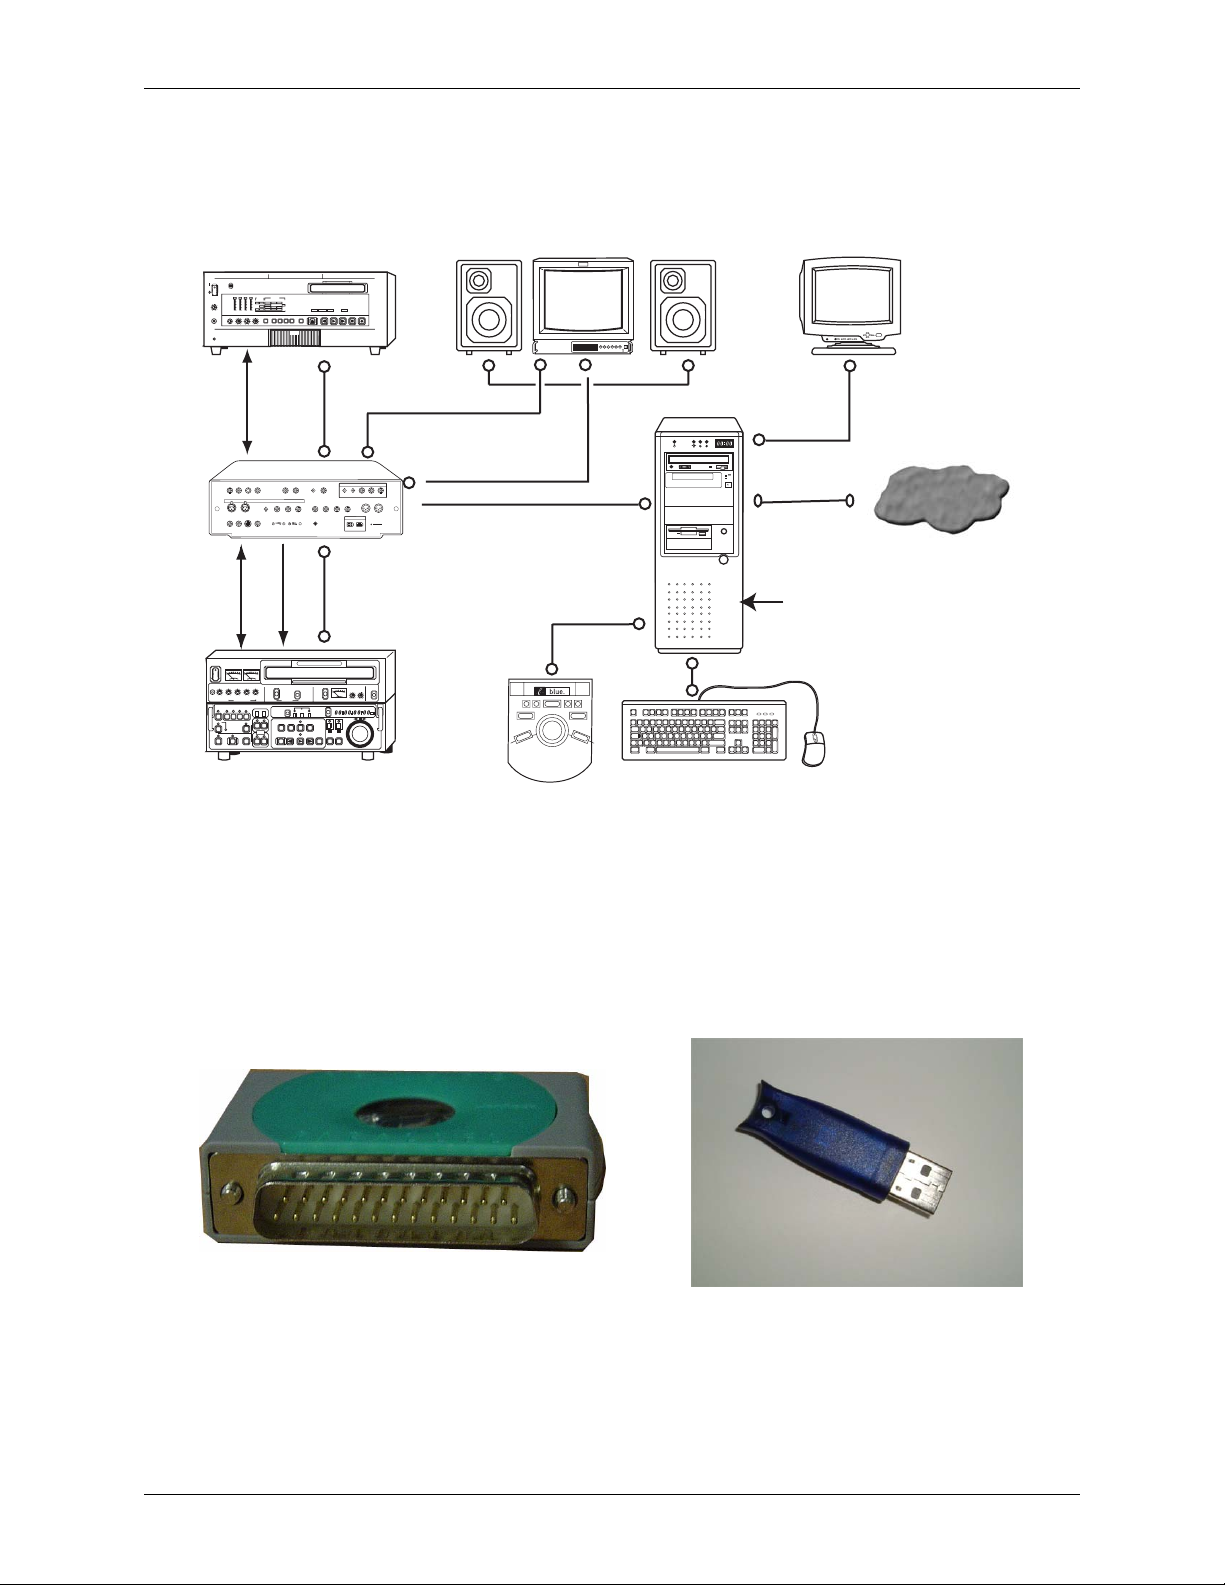
Chapter 2: System Connections
Figure 2-2 shows the connections between the Liquid blue workstation and other system
components.
DV Tape I/O
FireWire
Liquid blue Box
.
Audio/Video
Digital VTR Tape I/O
Sync
Connections via
Liquid blue Box
RS-422 RS-422/1394
Audio/Video Monitor
PCI
Codec
in PC
Liquid blue Control
VGA Monitor
PC
LAN/WANLAN/WAN
Internal "R" Drive
for internal storage
of "rendered" media
?
Keyboard/Mouse
Figure 2-2: Liquid Connections to Other System Com ponents
Attach the Software Protection Dongle
Before you connect the Liquid blue client computer to your network, you must attach a software
protection dongle to the back of the computer. The dongle is wrapped in plastic and packaged
with your Liquid computer. You may have a parallel port dongle or a USB port dongle.
USB Port
Parallel Port
Figure 2-3: Li qui d blue Dongles
• Attach the USB type of dongle to any USB port on the Liquid blue client computer (preferably in the back).
12
MMG Installation, Setup, and Operations Guide
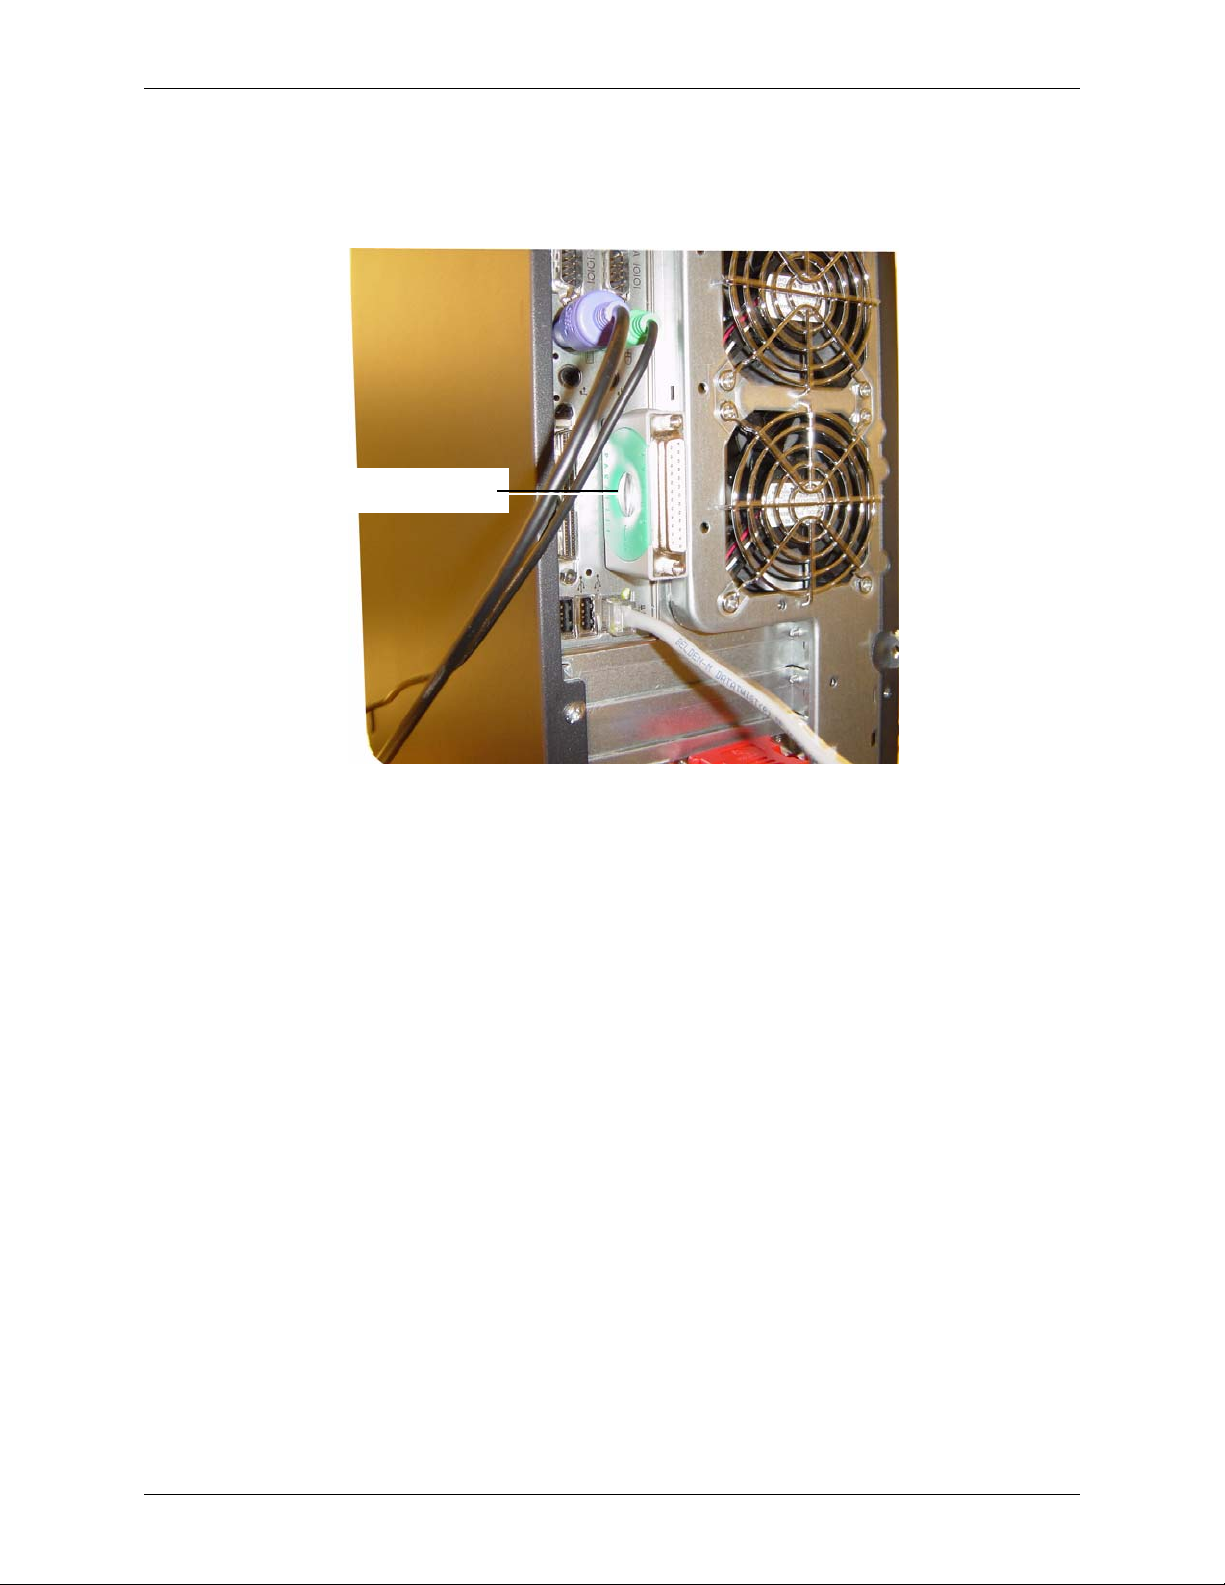
Chapter 2: System Connections
• Attach the parallel type of dongle to the parallel port in the back of the Liquid blue client computer as shown in Figure 2-4. Tighten the thumbscrews on the parallel port dongle to ensure
that it is attached securely.
Dongle attached to
parallel port
Figure 2-4: Liquid Dongle Parallel Port Placement
Liquid Client Computer to LAN/WAN
Cable: Gb RJ-45 cable
Connection: The Liquid client computer’s on-board Gb Ethernet port to your network.
MMG Installation, Setup, and Operations Guide
13
Chapter 2: System Connections
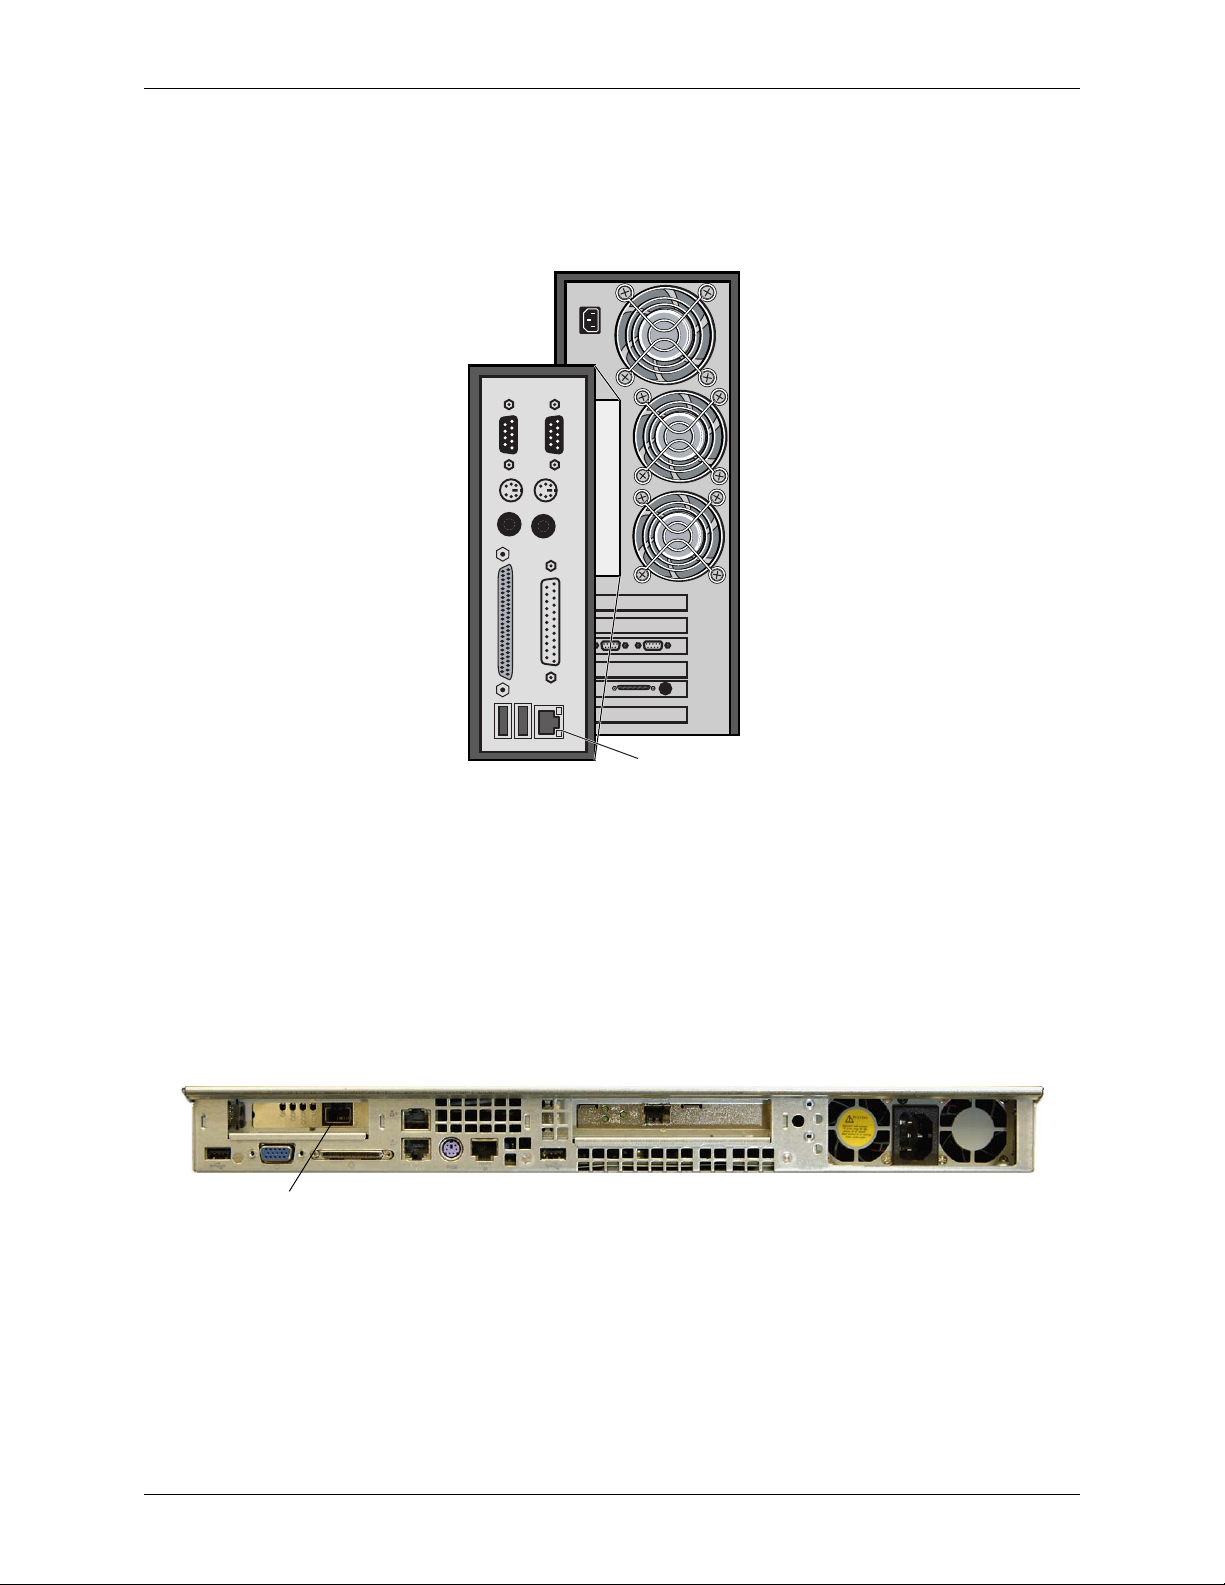
Figure 2-5 shows the GNIC (Gb Ethernet) port on the Liquid client computer that connects to
your network.
Liquid Workstation Rear Panel
(enlarged)
GNIC Port
Figure 2-5: Liquid blue Workstation’s GNIC Port
ConnectPlus 1000 Gateway Connections
A Gigabit Ethernet port provides the LAN/WAN connection to your network. The Gigabit
Ethernet port is typically a standard RJ-45 Ethernet connection cable that you either connect to
any port on the Gigabit Ethernet Switch, or directly to the LAN/WAN.
See your ConnectPlus 1000 documentation for instructions on VLAN connections to the FSCs
(each gateway computer can be connected to the same port on each of the switches), and the
MediaStream 8000 NS servers and the Fibre Channel connections to the storage system:
Ethernet Port
Figure 2-6: Ethern et Port Location
14
MMG Installation, Setup, and Operations Guide
Chapter 3: Installation and Setup
The Liquid blue application and the MediaStream Media Gateway client application are installed
on the Liquid blue workstation. The MediaStream Media Gateway server application is installed
on the ConnectPlus 1000 gateway(s).
Install Liquid blue
This section covers the installation of Liquid blue v6.10 build 4190. Installation of Liquid Blue
Service Pack 2 build 4312 is also covered.
Begin the Installation
To install Liquid blue:
1. Insert the Liquid blue version 6.10 Installation CD in your CD-ROM drive. If the install exe-
cutable does not begin automatically, go to the main CD directory and double-click Liquidblue.Setup.exe.
2. Click Yes to accept the license agreement.
3. After the Welcome screen is displayed, click Next.
4. Complete the registration information (your name and company), and press Next
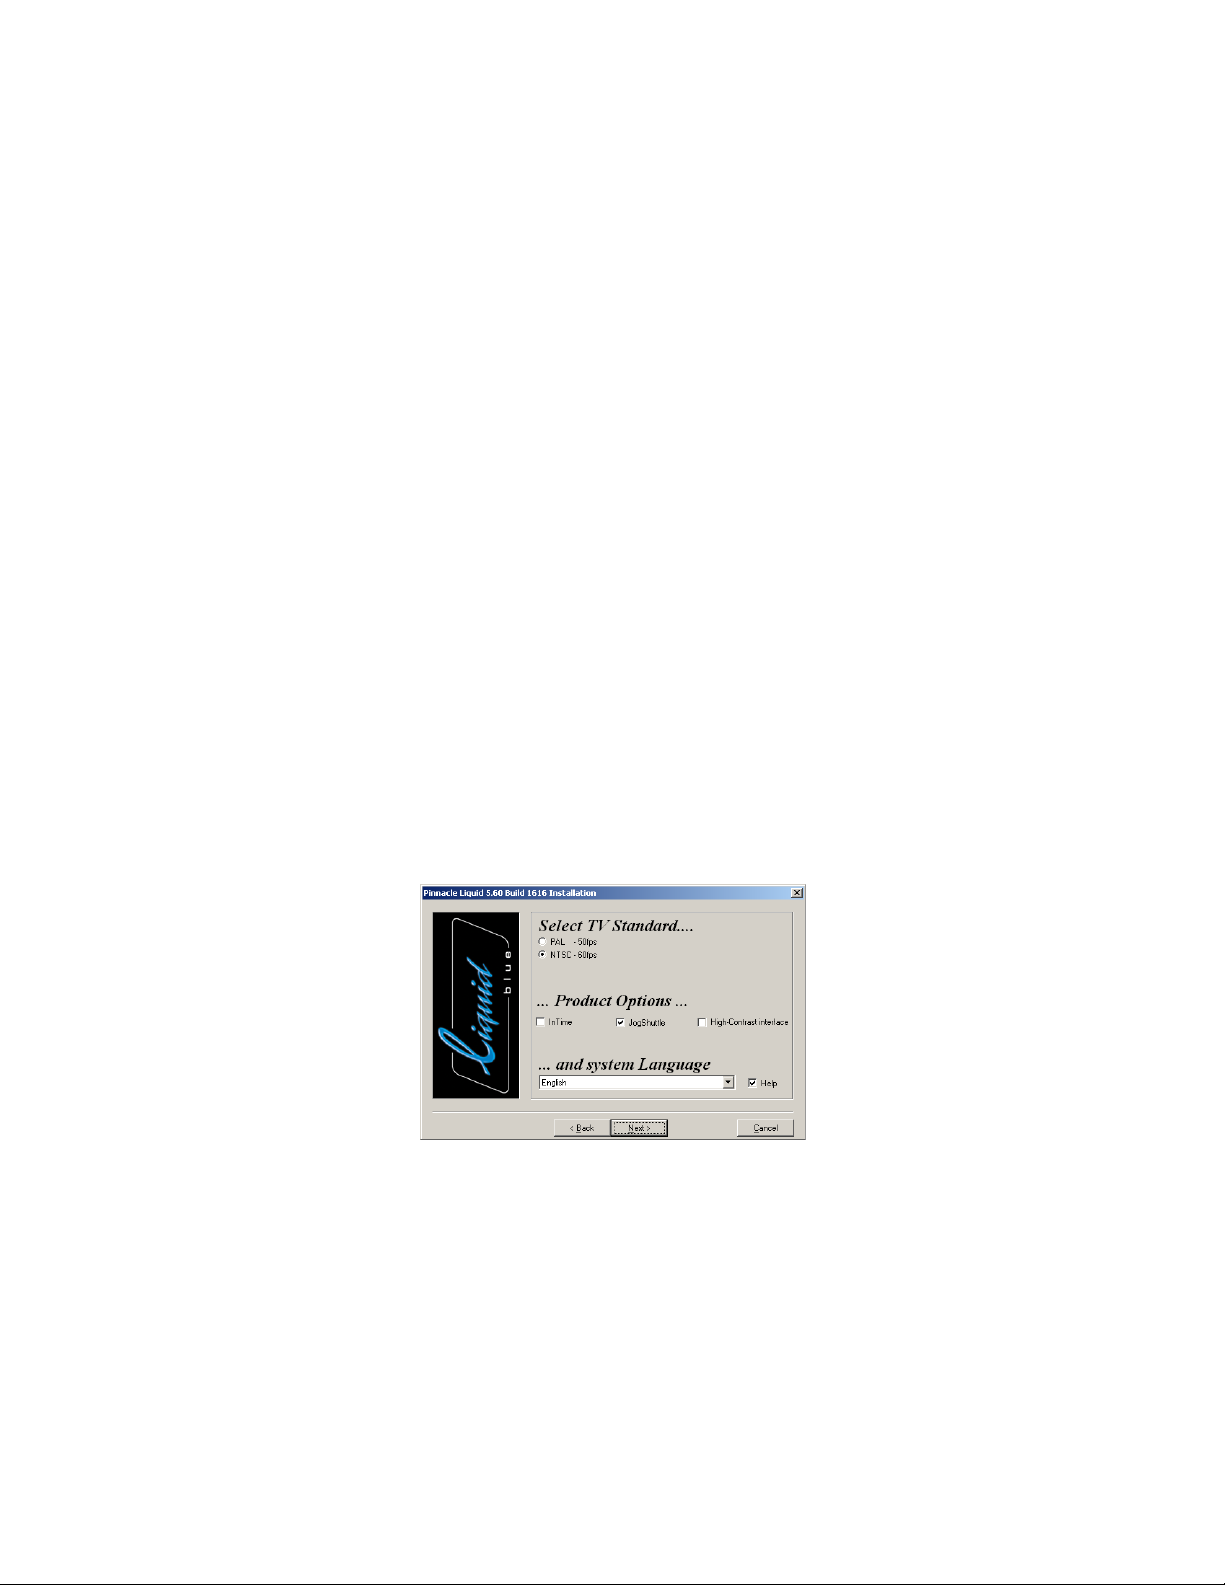
5. Select the TV Standard, Product options, and your language. Consult with Pinnacle T echnical
Support if you have any questions.
Figure 3-1: Setup Optio ns
6. In the Select Destination Directory for Temporary Render Files window, click Browse and
select your render directory.
7. In the Select the Directory for AV Capturing window , click the Browse button and select your
capture directory.
8. When the Ready to Install screen is displayed, click Next if you want to install the product
with your current selections. Click Back to make any changes in your selections before
returning to this screen and clicking Next to start the installation.
Chapter 3: Installation and Setup
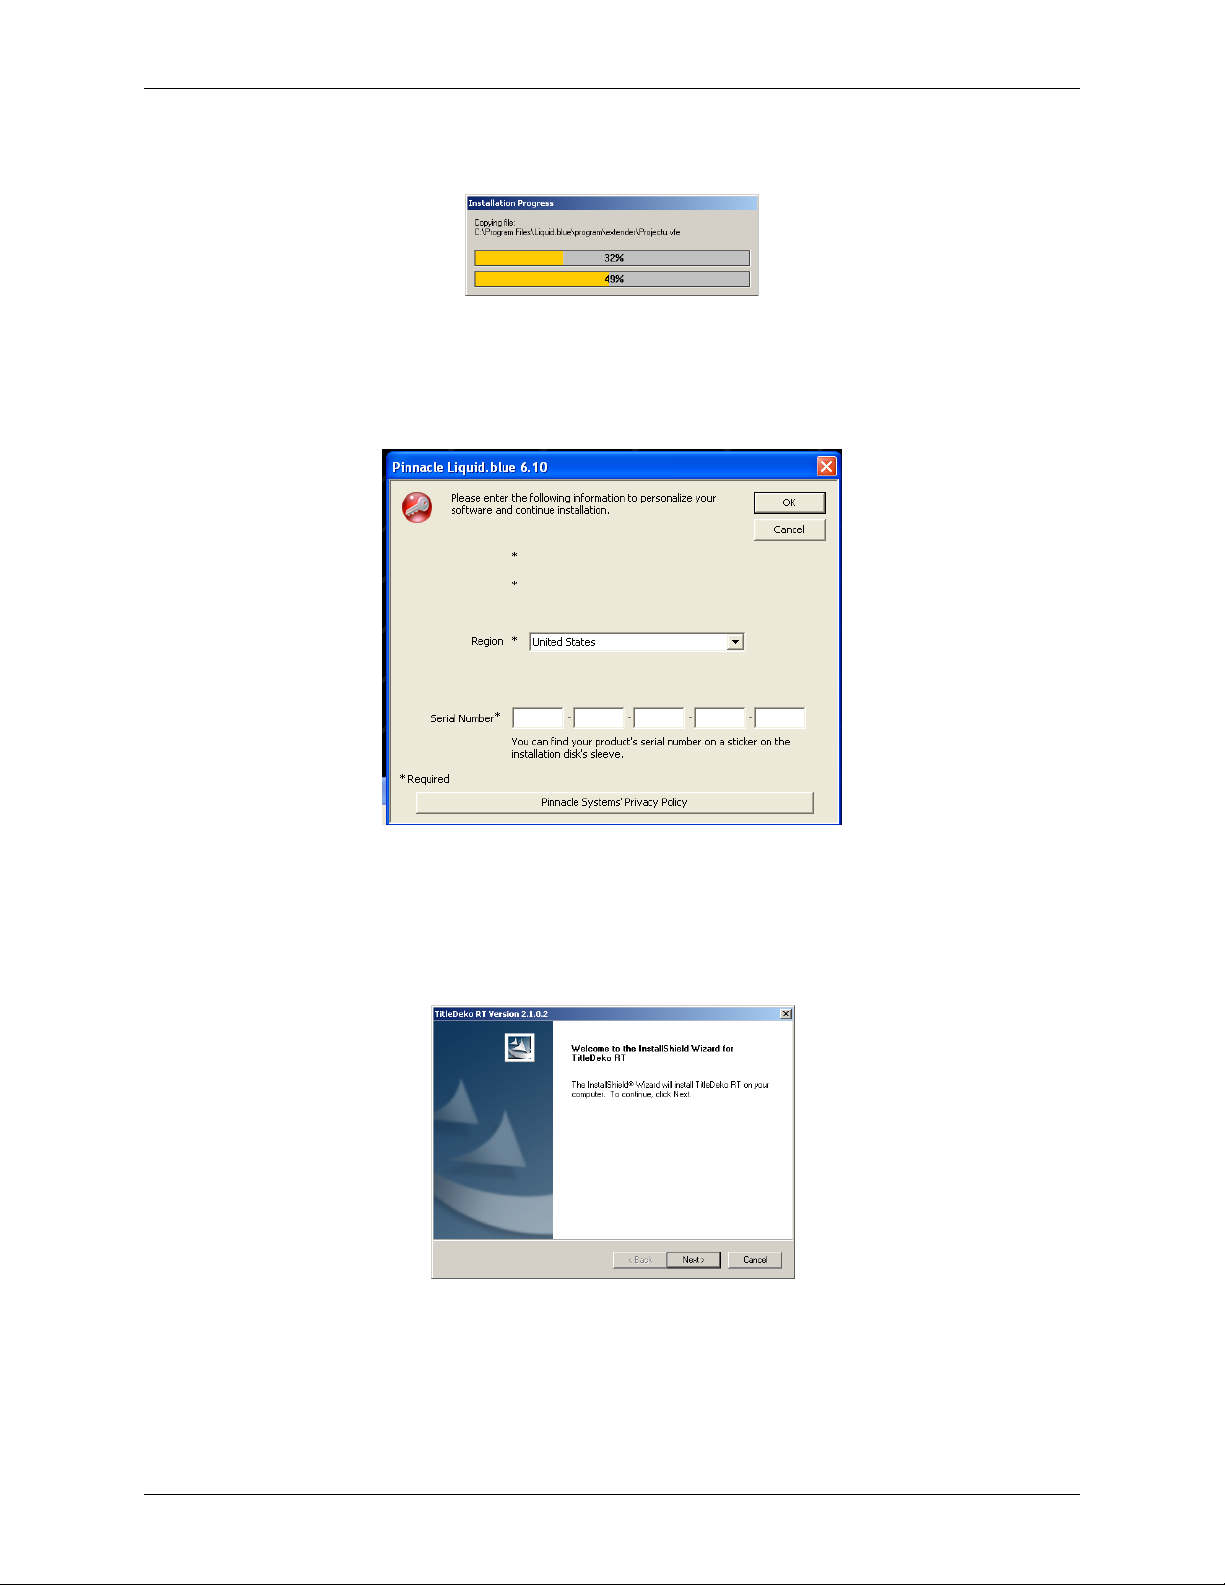
9. A progress bar shows the percentage of the installation completed.
Figure 3-2: Installation Progress Bar
10. Enter your serial number as shown in Figure 3-3. The Serial number is located on the Blue
installation CD sleeve. If you can not locate your serial number, call Pinnacle technical
support.
Figure 3-3: Serial Number Dialog
11. After Liquid blue is installed, files are extracted for the TitleDeko setup. When prompted,
select the language for the setup and click OK.
12. The Welcome screen for the TitleDeko application is displayed. Click Next.
Figure 3-4: TitleDeko Welcome Screen
13. Click Yes to accept the License Agreement.
14. Choose the destination directory for the TitleDeko program files. You can select
PinnacleLiquid or create a new folder. Click Next.
16
MMG Installation, Setup, and Operations Guide
Chapter 3: Installation and Setup
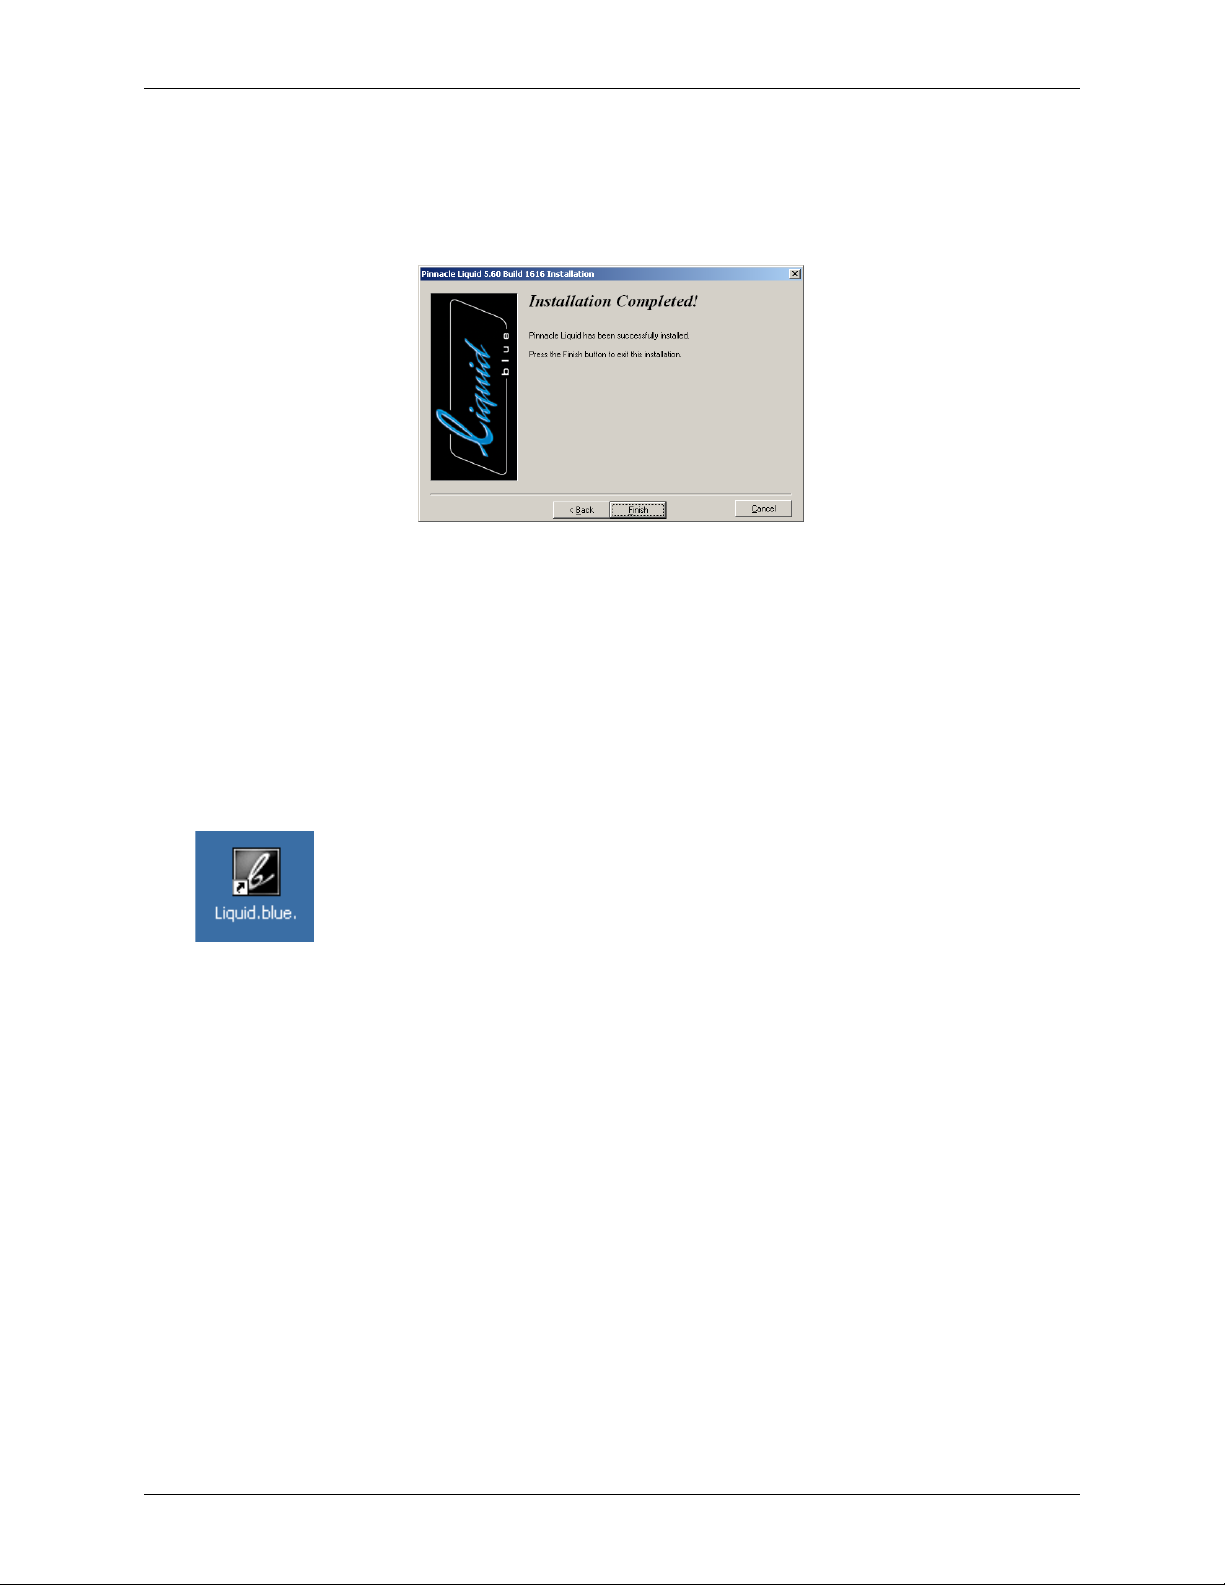
15. When finished, the Install Wizard Complete window is displayed. Click Finish.
16. When the Installation Completed! window is displayed, the Liquid blue application has been
successfully installed. Click Finish to leave the installer.
Figure 3-5: Liquid blue Installation Completed Screen
17. Before using Liquid blue, you need to install the service packs. Insert the MMG program CD
and find the directory Liquid V6.10SP2.
18. Run the application liquid.XML.Setup.exe in that directory.
19. When that application is complete, run the application liquid.XDCAMP2.Setup.exe in the
same directory.
20. When that application is complete, run the application liquid.SP2.Setup.exe in the same
directory.
21.Restart the computer. The Liquid blue shortcut appears on the desktop.
Double-click this shortcut to launch Liquid blue.
MMG Installation, Setup, and Operations Guide
17
Chapter 3: Installation and Setup
Installing the MMG Client
The MMG Client is installed on the Liquid blue workstation or PS100 server (if applicable).
Note: For PS100 systems, the MMG client should be installed on the PS100 system and all of the
Blue clients. The MMG Client installer modifies masfilter.ini on Blue clients. If the MASFilter is
re-installed, the MMG Client should be re-installed, or masfilter.ini should be edited;
“audioenc.exe;” should be added to the string after “applist=” in masfilter.ini. The MASFilter
needs to be restarted after any change.
To install the MMG client:
1. Insert the MMG installation disk into the workstation’s CD drive. Locate the
MMG-Client.exe and double-click it to start the installation.
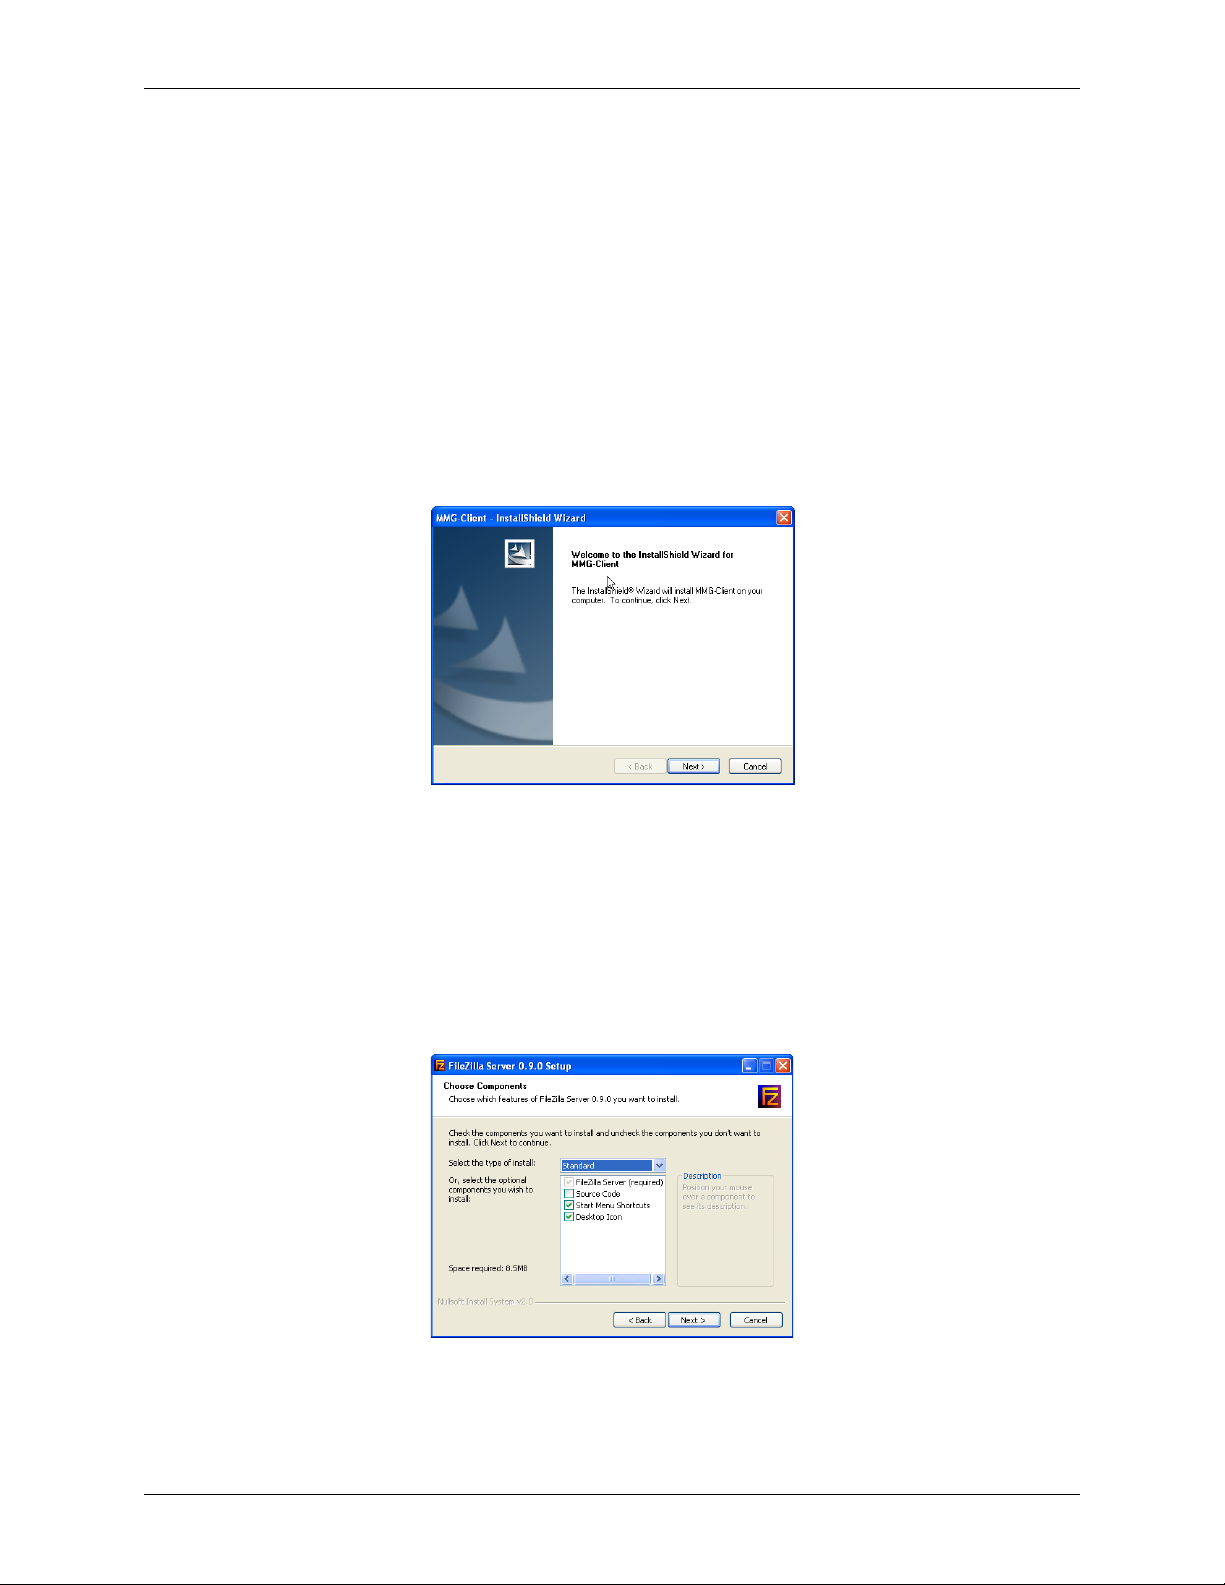
Figure 3-6: MMG Client In st all Welcome
2. After the Welcome window is displayed, click Next to continue with the installation.
3. The installer automatically launches the installer for the File Zilla FTP server. Read the terms
of the license agreement. Click I Agree to start the installation if you accept these terms.
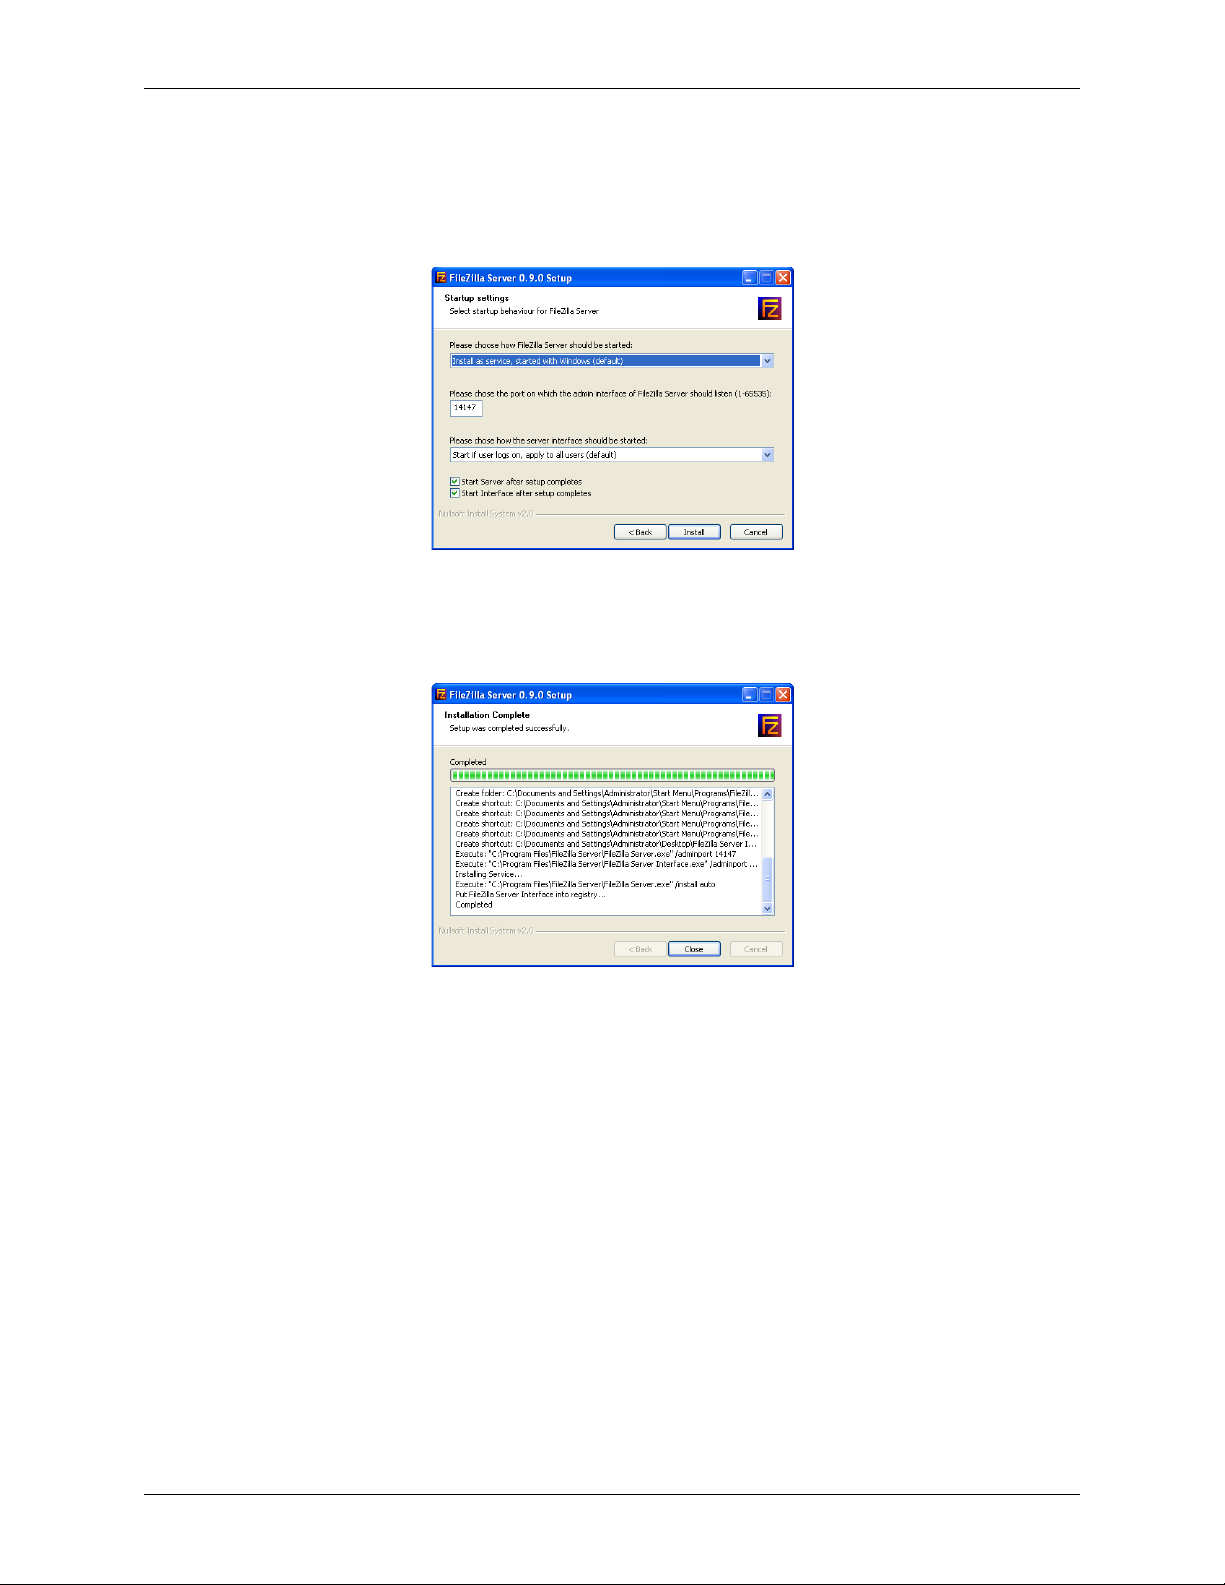
4. Select the components to be installed. You must install the FileZilla server. You can start and
stop the server from the FileZilla shortcut on your desktop, as well as from the Start menu.
Select only the Start Menu Shortcuts and Desktop Icon options for installation.
Figure 3-7: Select Components for Installation
18
MMG Installation, Setup, and Operations Guide
Chapter 3: Installation and Setup
5. Select the destination folder for the installed application or accept the default location. Click
Next.
6. In the Startup Settings window (Figure 3-8), accept all of the default values.
Figure 3-8: Server Setup Window
7. Click Install to start the installation. A progress bar shows the percentage of the installation
completed.
Figure 3-9: Installati on Status Window
8. After the installation is complete, the InstallShield Wizard Complete window is displayed.
Click Finish.
Note: The FileZilla server automatically initiates a console connection after install. The default
configuration uses a login: root, and password: .root. It also uses a default home directory:
R:\import. If you are using these settings, you can skip the next section, Configure the FileZilla
(FTP) server connection. If you are installing the MMG client on a PS100 system, you need to
change the home directory and set speed limits. Please see FileZilla configuration for a PS100: on
page 22.
MMG Installation, Setup, and Operations Guide
19
Chapter 3: Installation and Setup
Configure the FileZilla (FTP) server connection
1. In the Connect to Server dialog box, accept the default values given for the local host IP
address (127.0.0.1) and the port (14147) for administrative connections. No password is
required.
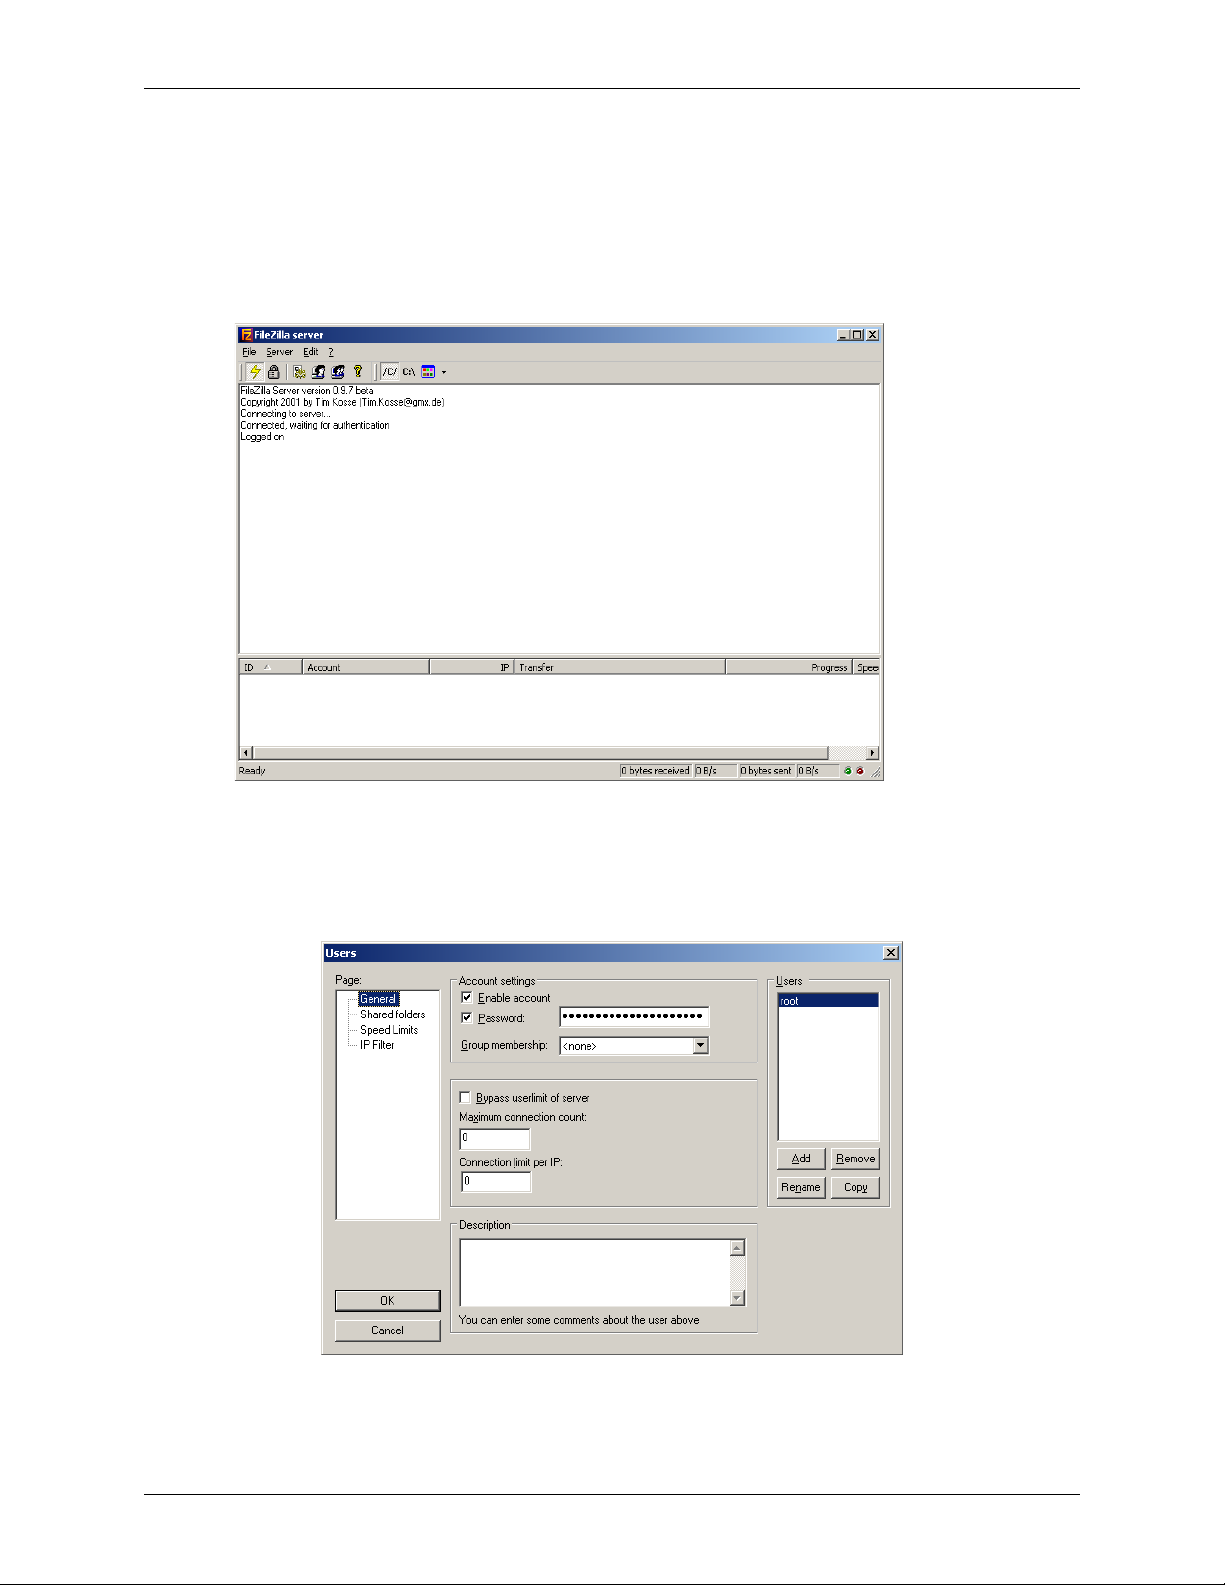
2. The FileZilla server window is displayed (Figure 3-10).
Figure 3-10: FileZill a Window
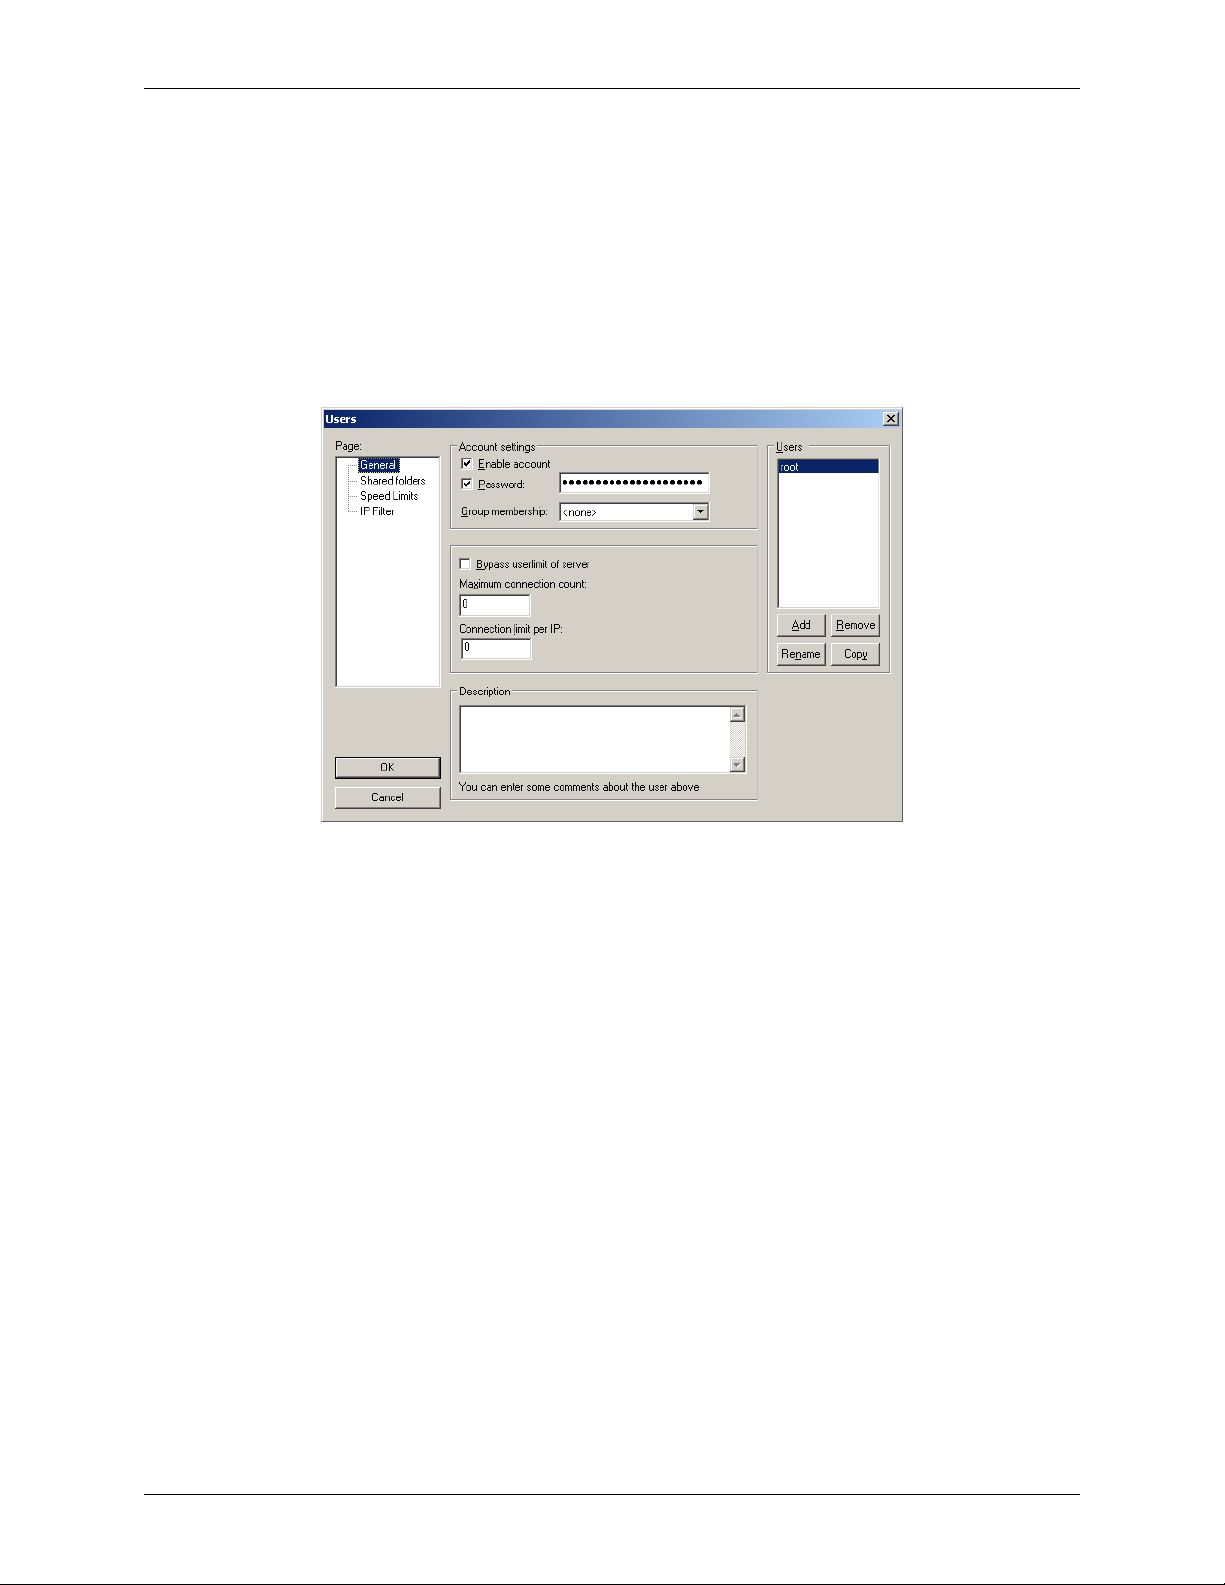
To change the user and password:
1. From the FileZilla window, click edit >users and the users configuration window appears:
Figure 3-11: User Edit Dialog
20
MMG Installation, Setup, and Operations Guide
Chapter 3: Installation and Setup
2. Highlight the user you want to change, root in Figure 3-11, and click the rename button. T ype
the new name in the edit box and click OK. Delete all of the dots in the password box and
type a new password. Click OK.
To change the home directory:
1. From the FileZilla window, click edit >users and the users configuration window appears:
Figure 3-12: User Edit Dialog
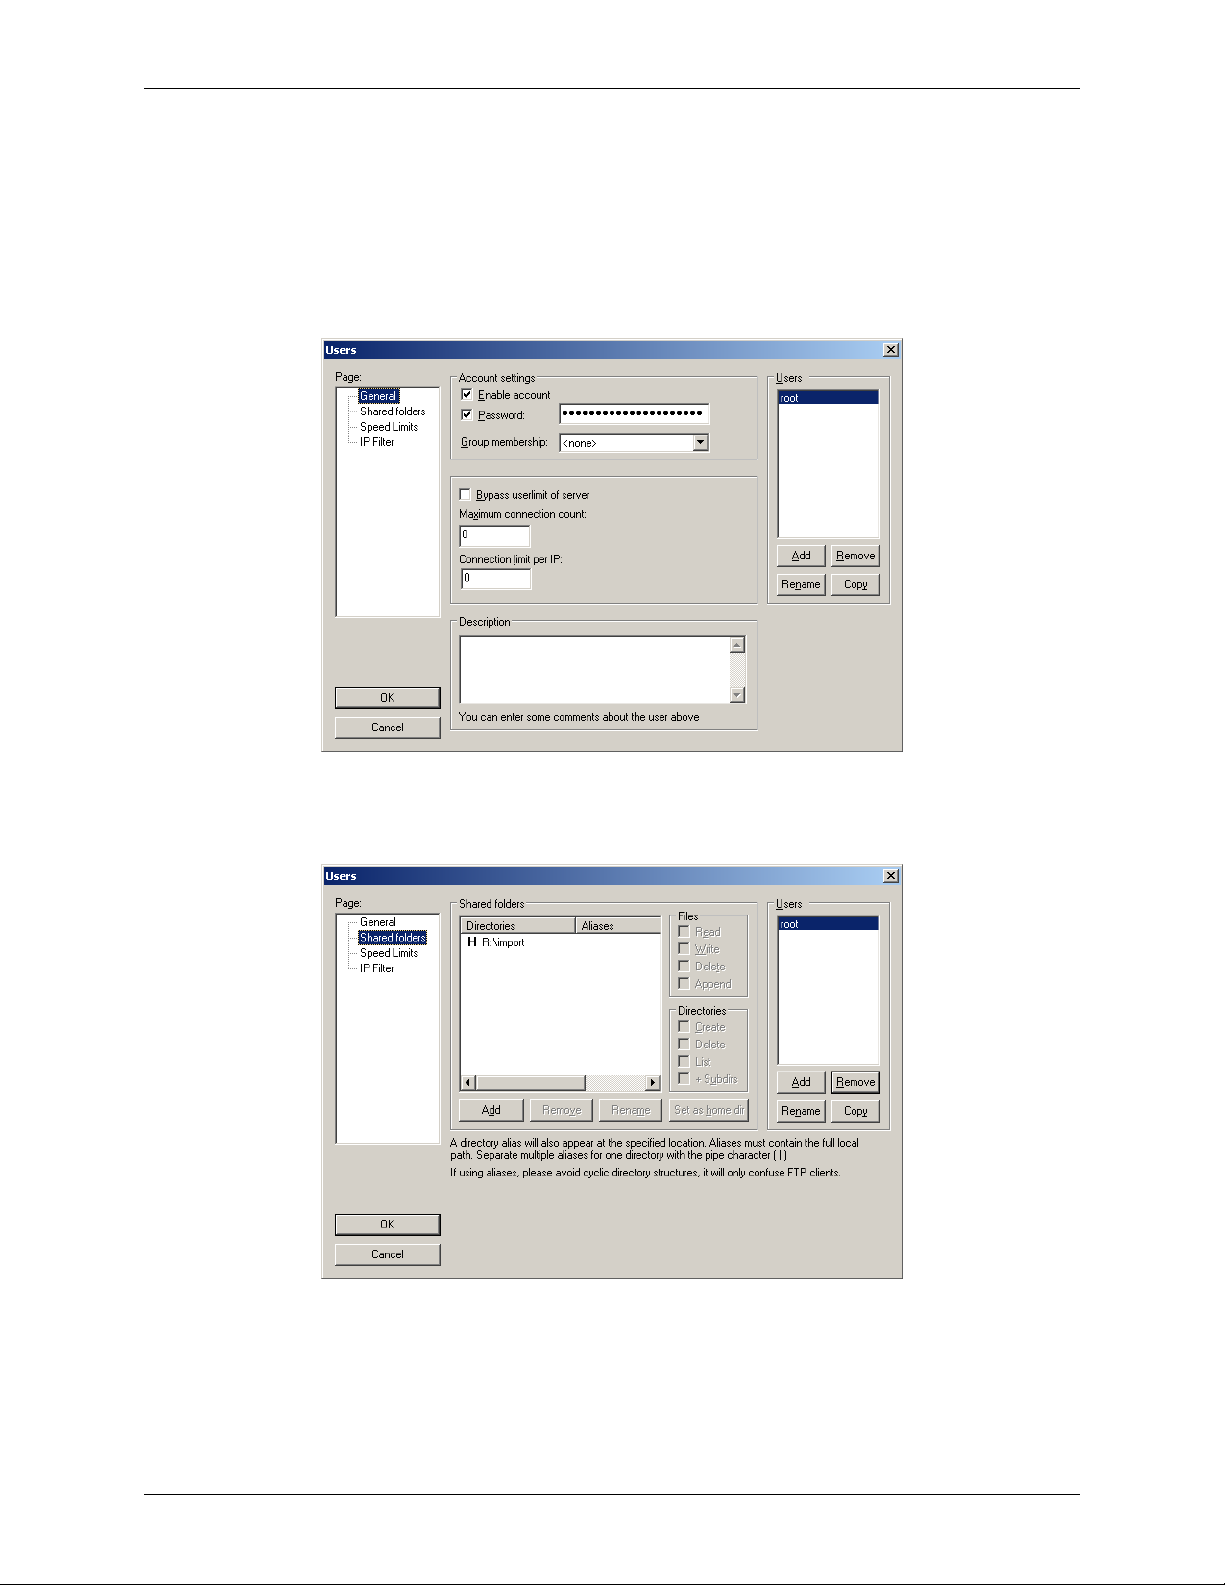
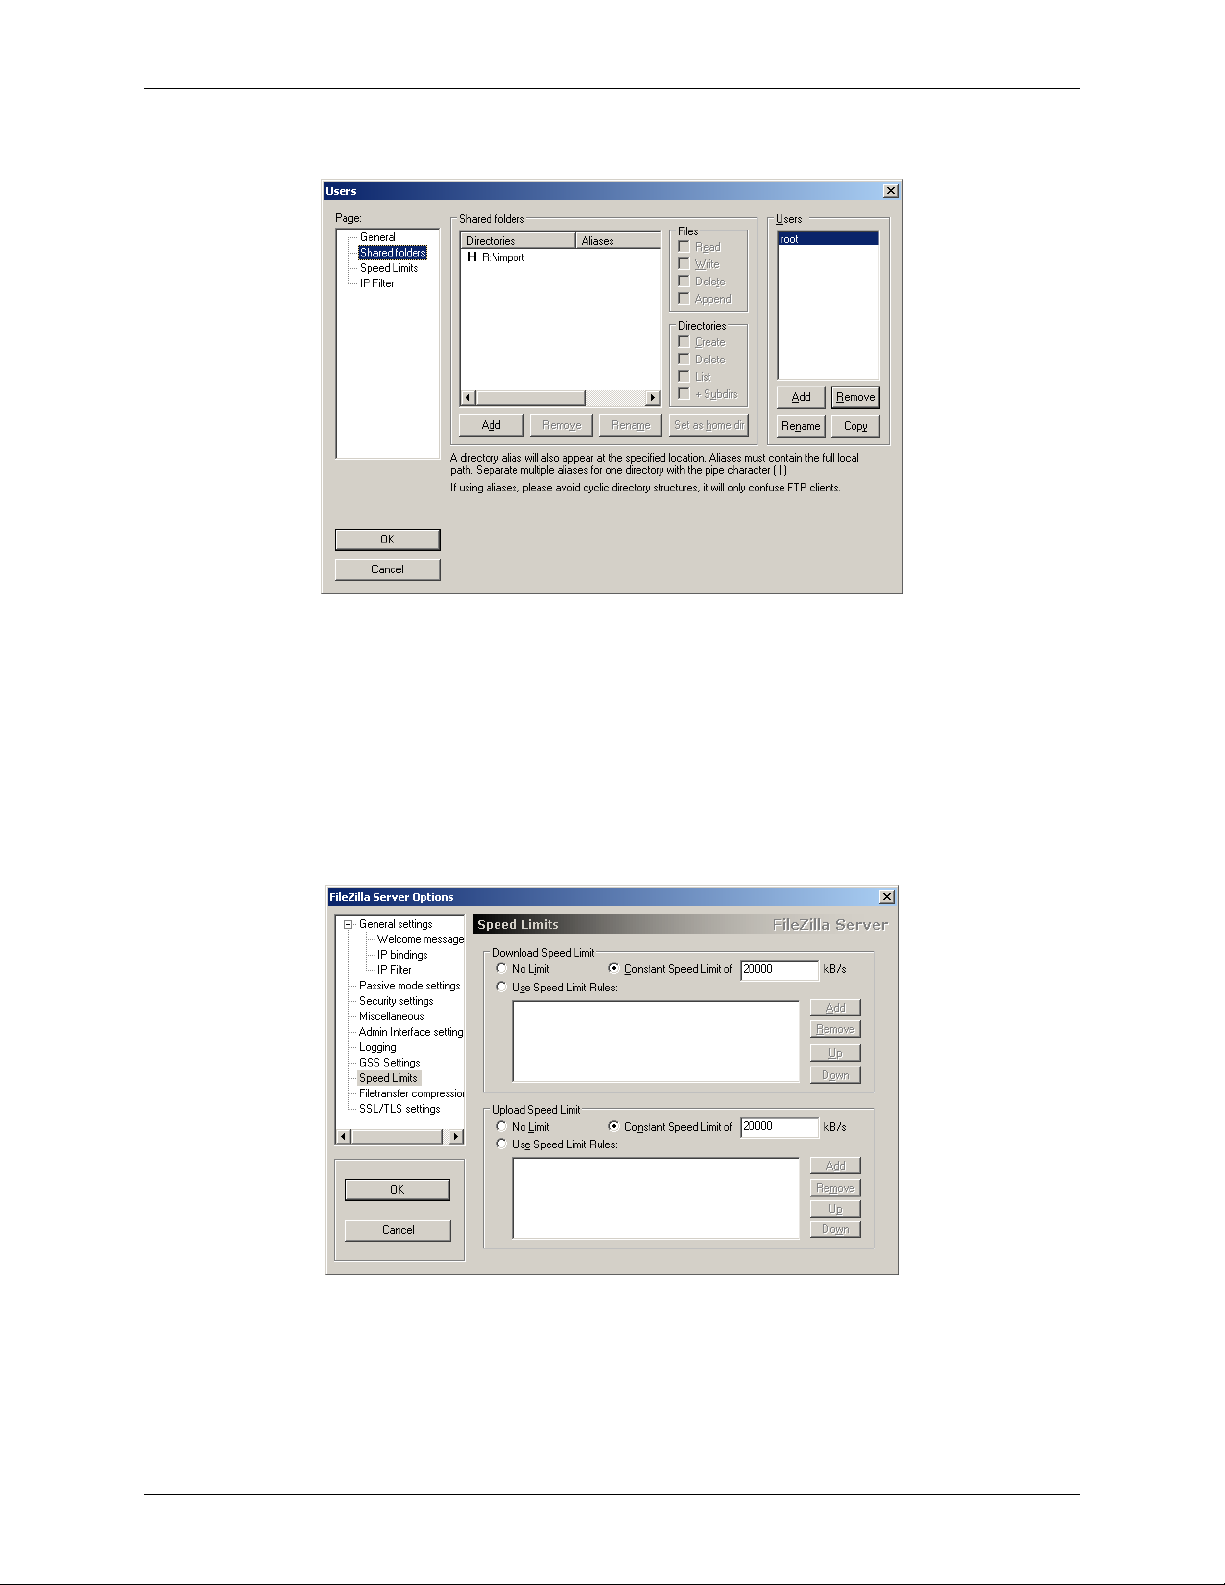
2. Click on Shared Folders:
Figure 3-13: Shared Folders
3. Highlight the default folder, R:\Import in Fi gure 3-13, and click the Remove button. Click the
Add button and navigate to the folder you wish to use. Check all 8 checkboxes in the Shared
Folders group box and click the Set as home dir button.
MMG Installation, Setup, and Operations Guide
21
Chapter 3: Installation and Setup
FileZilla configuration for a PS100:
Because the PS100 uses shared storage, a separate watch folder and login should be used for each
Blue client to ensure correct autoimport functionality . Speed limits should also be set to ensure the
PS100 has ample bandwidth for real-time operations. Create a folder on the PS100 V drive for
each Blue client, i.e. V:\Blue1, V:\Blue2 etc. Perform the following steps on the PS100.
To configure users:
1. From the FileZilla window, click edit >users and the users configuration window appears:
Figure 3-14: User Edit Dialog
2. Click the add button in the Users group box. Type the new login name in the edit box and
click OK. Delete all of the dots in the password box and type a new password. Click OK.
22
MMG Installation, Setup, and Operations Guide
3. Click on the shared folders tab.
Chapter 3: Installation and Setup
Figure 3-15: Shared Folders
4. Highlight the user added in step 4 above. In the shared folder group box, click the add button.
Navigate to the folder designated for that user and click OK. Check all 8 checkboxes in the
Shared Folders group box and click the Set as home dir button.
5. Repeat steps 2-4 for each Blue client connected to the PS100.
Configure Speed Limits
1. From the FileZilla window, click edit >Settings. Click the Speed Limits directory on the left.
Figure 3-16: Speed Limits Dialog
2. In both the Download Speed Limit and Upload Speed Limit group boxes, click the Constant
Speed Limit radio button and enter 20000 (see note) in the edit box to the right as shown in
Figure 3-16.
MMG Installation, Setup, and Operations Guide
23
Chapter 3: Installation and Setup
Note: This number may change depending on the number of clients connected to the PS100, and
the client’s bandwidth allocatio n. The total MAS bandwidth allo cation (-lb on the MAS command
line) should be adjusted to compensate for the reserved bandwidth given to FileZilla.
Configure the MMG
The MMG needs the network information of the TCS server, the source host(s), and the
destination host(s). The IP addresses of these machines must be entered for MMG to function. To
configure MMG launch the MMG config tool by double clicking on the MMG Config icon on the
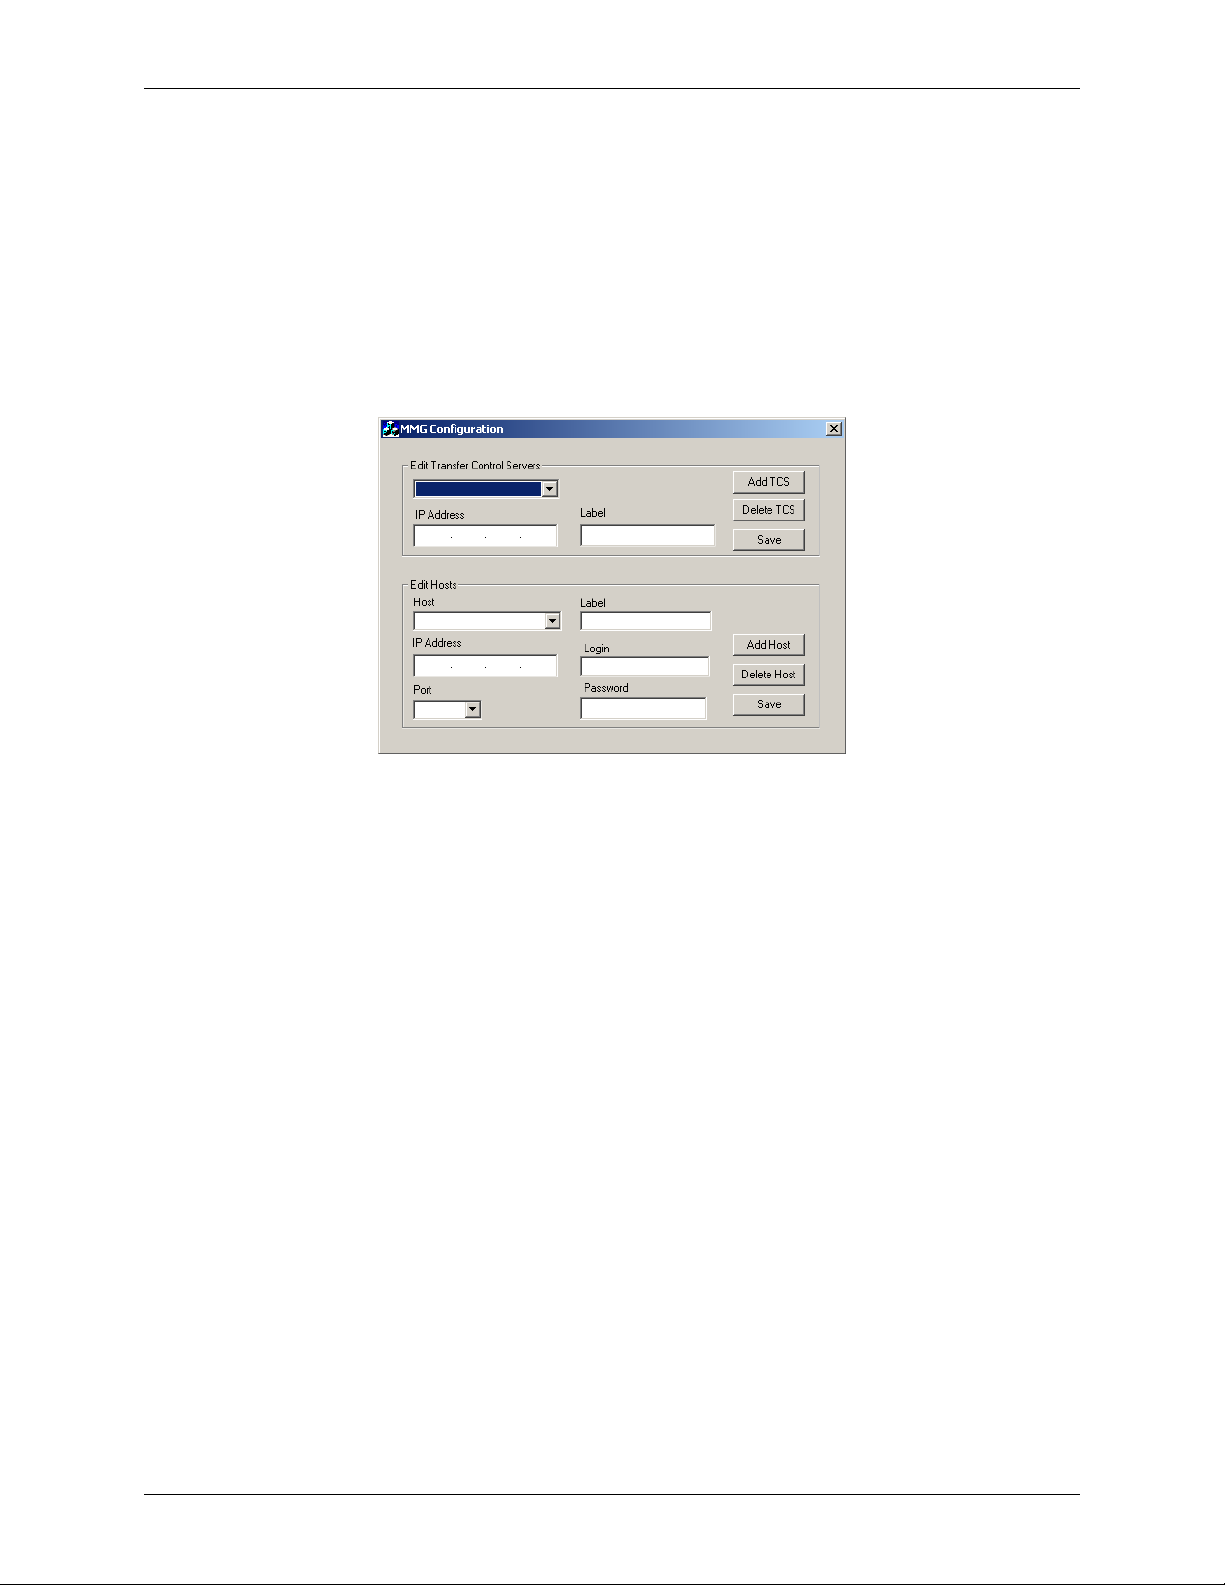
desktop. This launches the MMG configuration tool as shown in Figure 3-17.
Figure 3-17: Configuration Tool
There are two sections in the configuration tool, the TCS servers and the Hosts. The TCS section
contains only the IP addresses of the machines running the TCS applications. The Host section
contains the information of all of the source and destination machines.
To add a TCS server to MMG, edit the fields in the top group box labeled Edit Transfer Control
Servers:
1. Enter the IP address of the TCS server. The TCS server runs on the ConnectPlus gateway.
2. Enter a label for the TCS server corresponding to the IP address. The label can be the
hostname of the machine, or any unique label to identify the machine. This label appears in
the TCS dropdown list of the MMG application.
24
MMG Installation, Setup, and Operations Guide
 Loading...