

Page 1
GardenShed
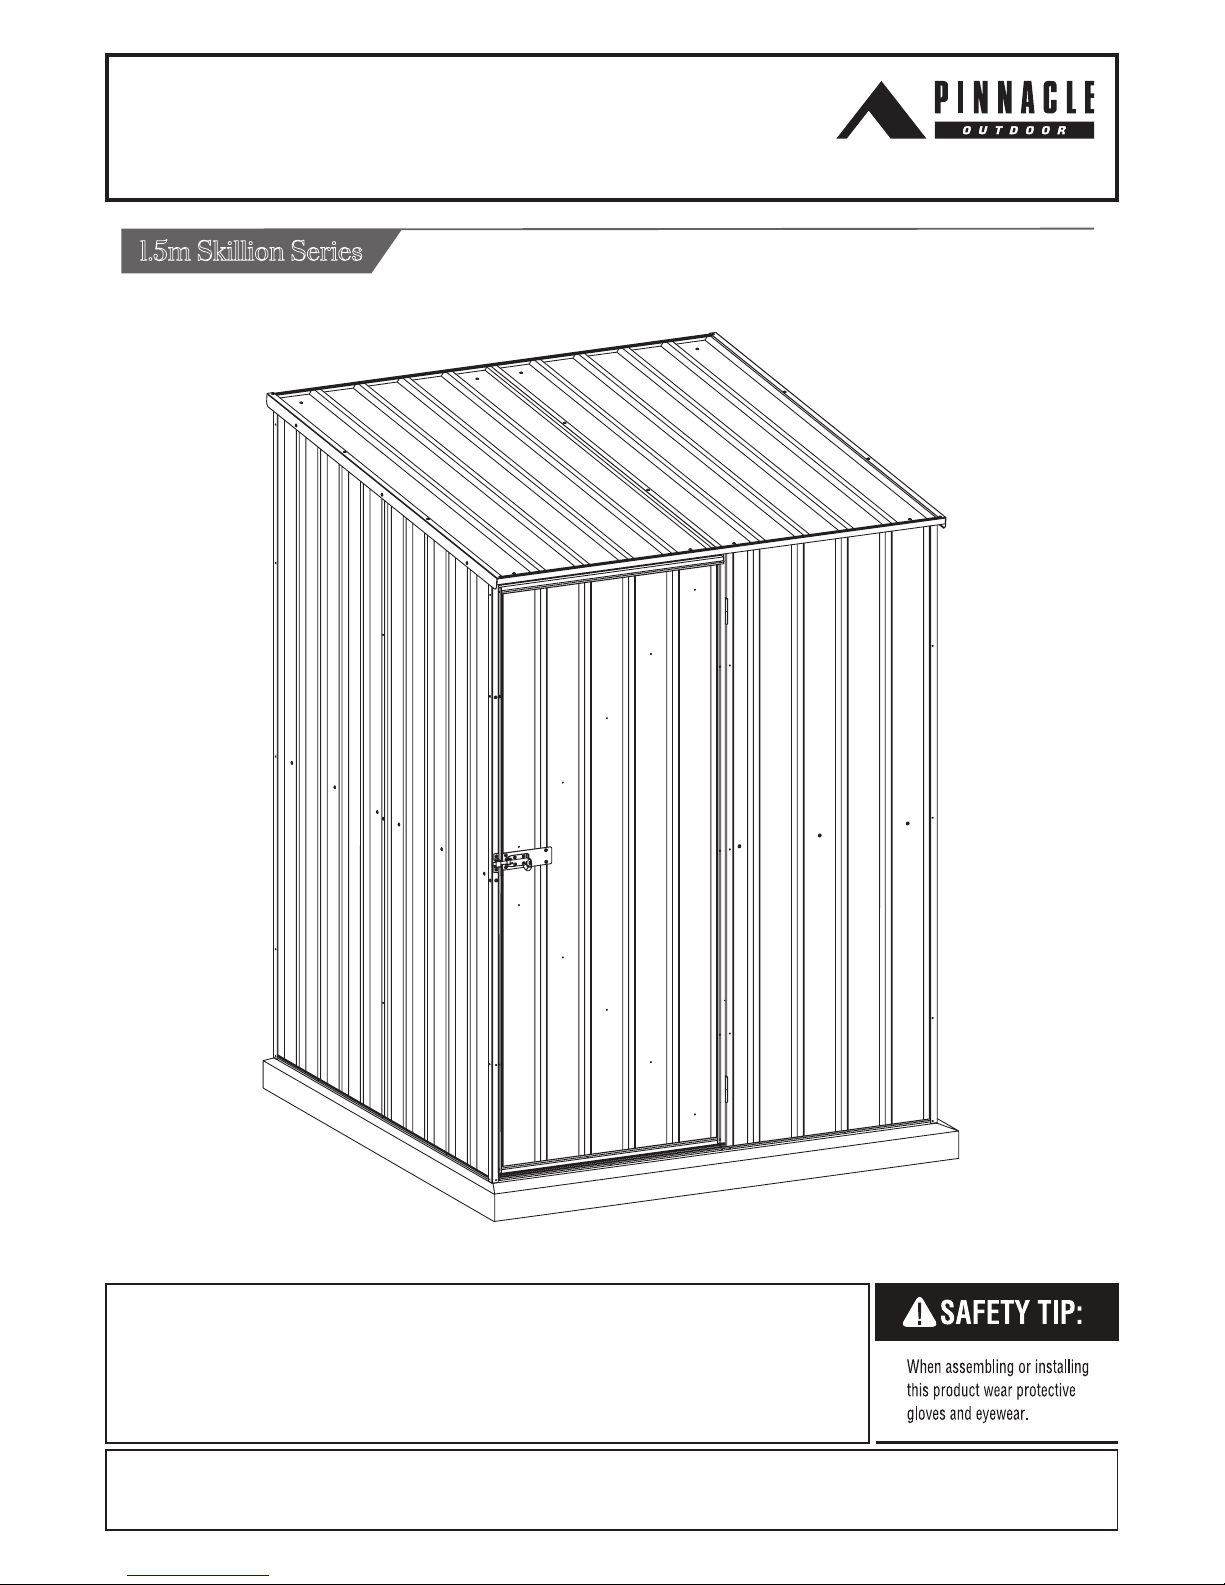
1.5W x 1.5D x 2.1Hm
Tools required: Drill, measuring tape, Phillips-head screw driver, rivet gun, rubber mallet, sturdy ladder, shifting spanner, 2 saw horses, 3mm
steel drill bit, 4mm steel drill bit and a 9mm masonry drill bit.
1.5m Skillion Series
Assembly instructions
Congratulations on purchasing your new Pinnacle garden shed. Before assembling, we recommend
you read the instructions thoroughly. Your new shed comes with pre-drilled holes to make assembly
quicker. We recommend you assemble the shed using a trestle table or sawhorses and planks. This
will ensure that you are working off the ground and make it easier for you. Assembly is a two-person
job and should not be attempted in windy conditions.
Page 2
GardenShed 1.5 x 1.5 x 2.1m
Build your garden shed in 7 easy steps!
Step 1: Check all parts against the component list
Step 2: Assemble the rear wall panels
Step 3: Assemble the side wall panels
Step 4: Assemble the roof panels
Step 5: Assemble the front wall panel
Step 6: Assemble the front door
Step 7: Fit the panels together
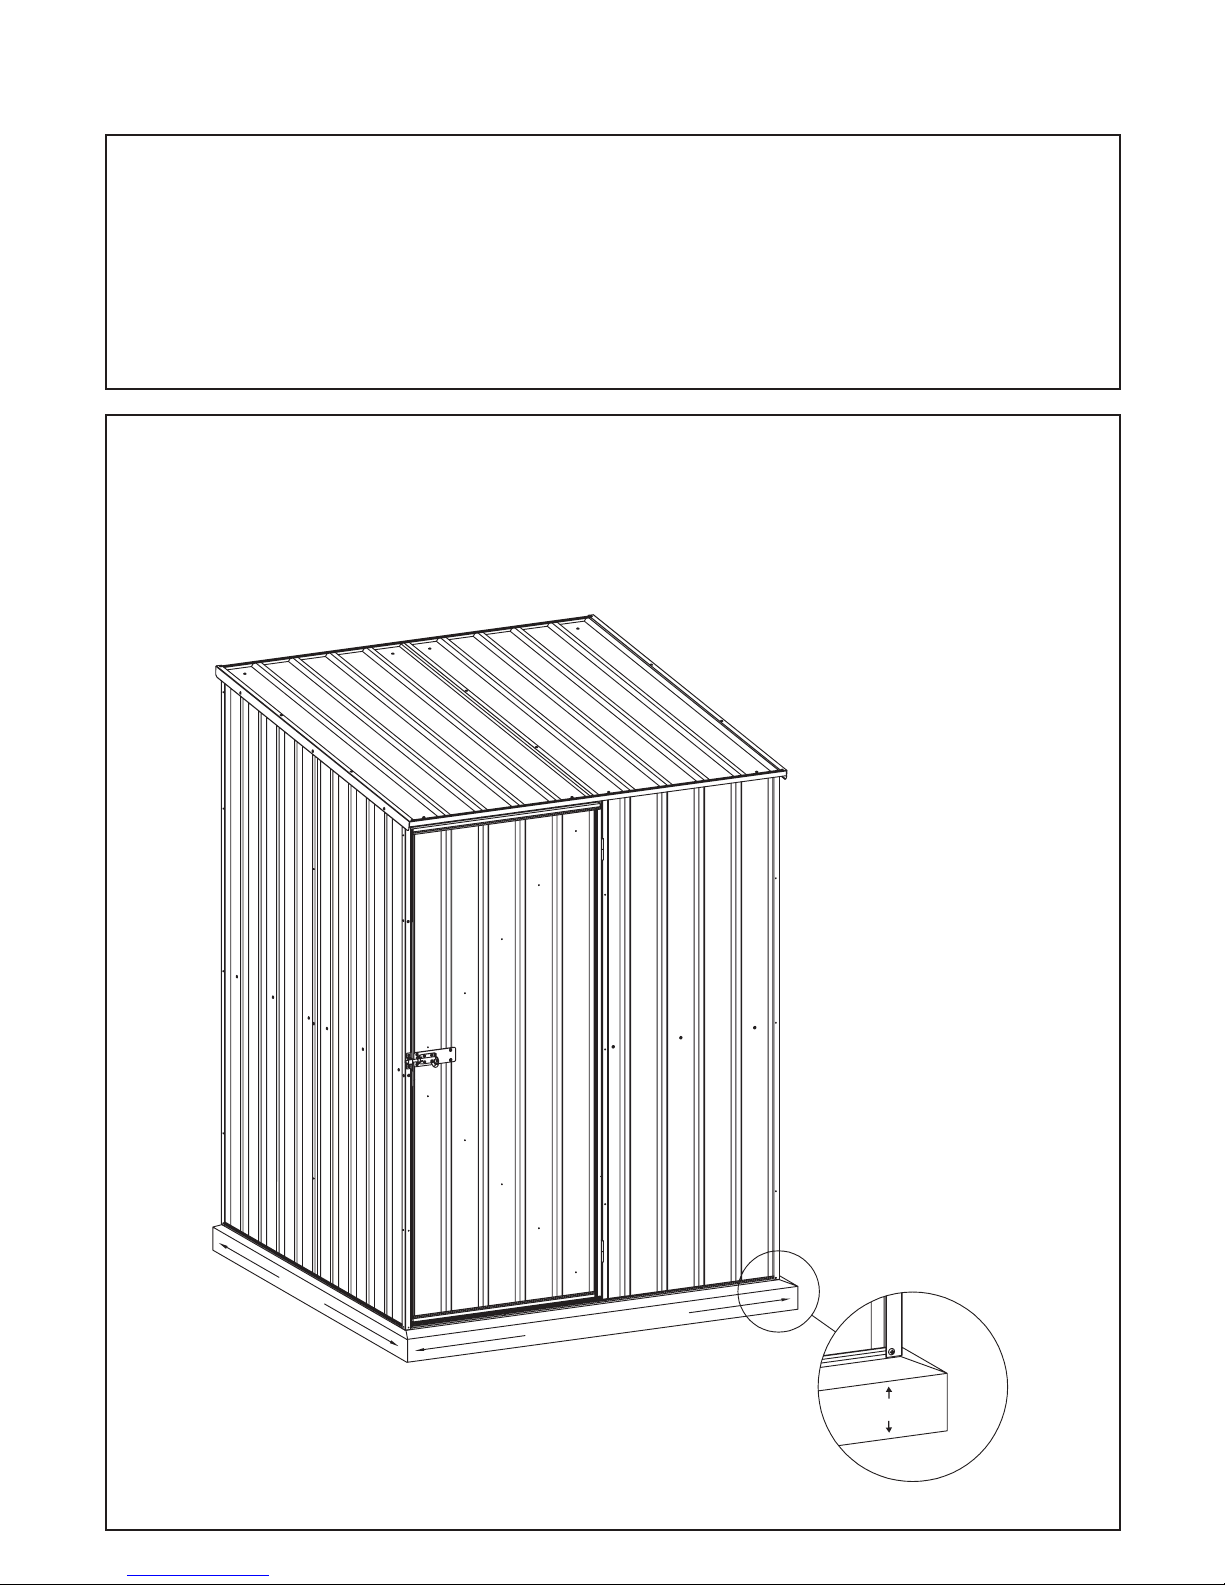
IMPORTANT: It is recommended that your new shed is secured to a concrete slab as per the specifications in this manual.
Concrete slab: Please ensure that your site is level. It is recommended that your slab is 100mm thick and you use builder’s
plastic and F52 reinforcing mesh. We recommend that you make your slab approximately 100mm bigger than the base
dimensions of your shed. This will allow for a 50mm edge around your shed. We recommend that you slope the 50mm edges
downward by 10mm so that rain water can drain away from your shed.
CONCRETE SLA
B
1600mm
1600mm
100mm
Page 3
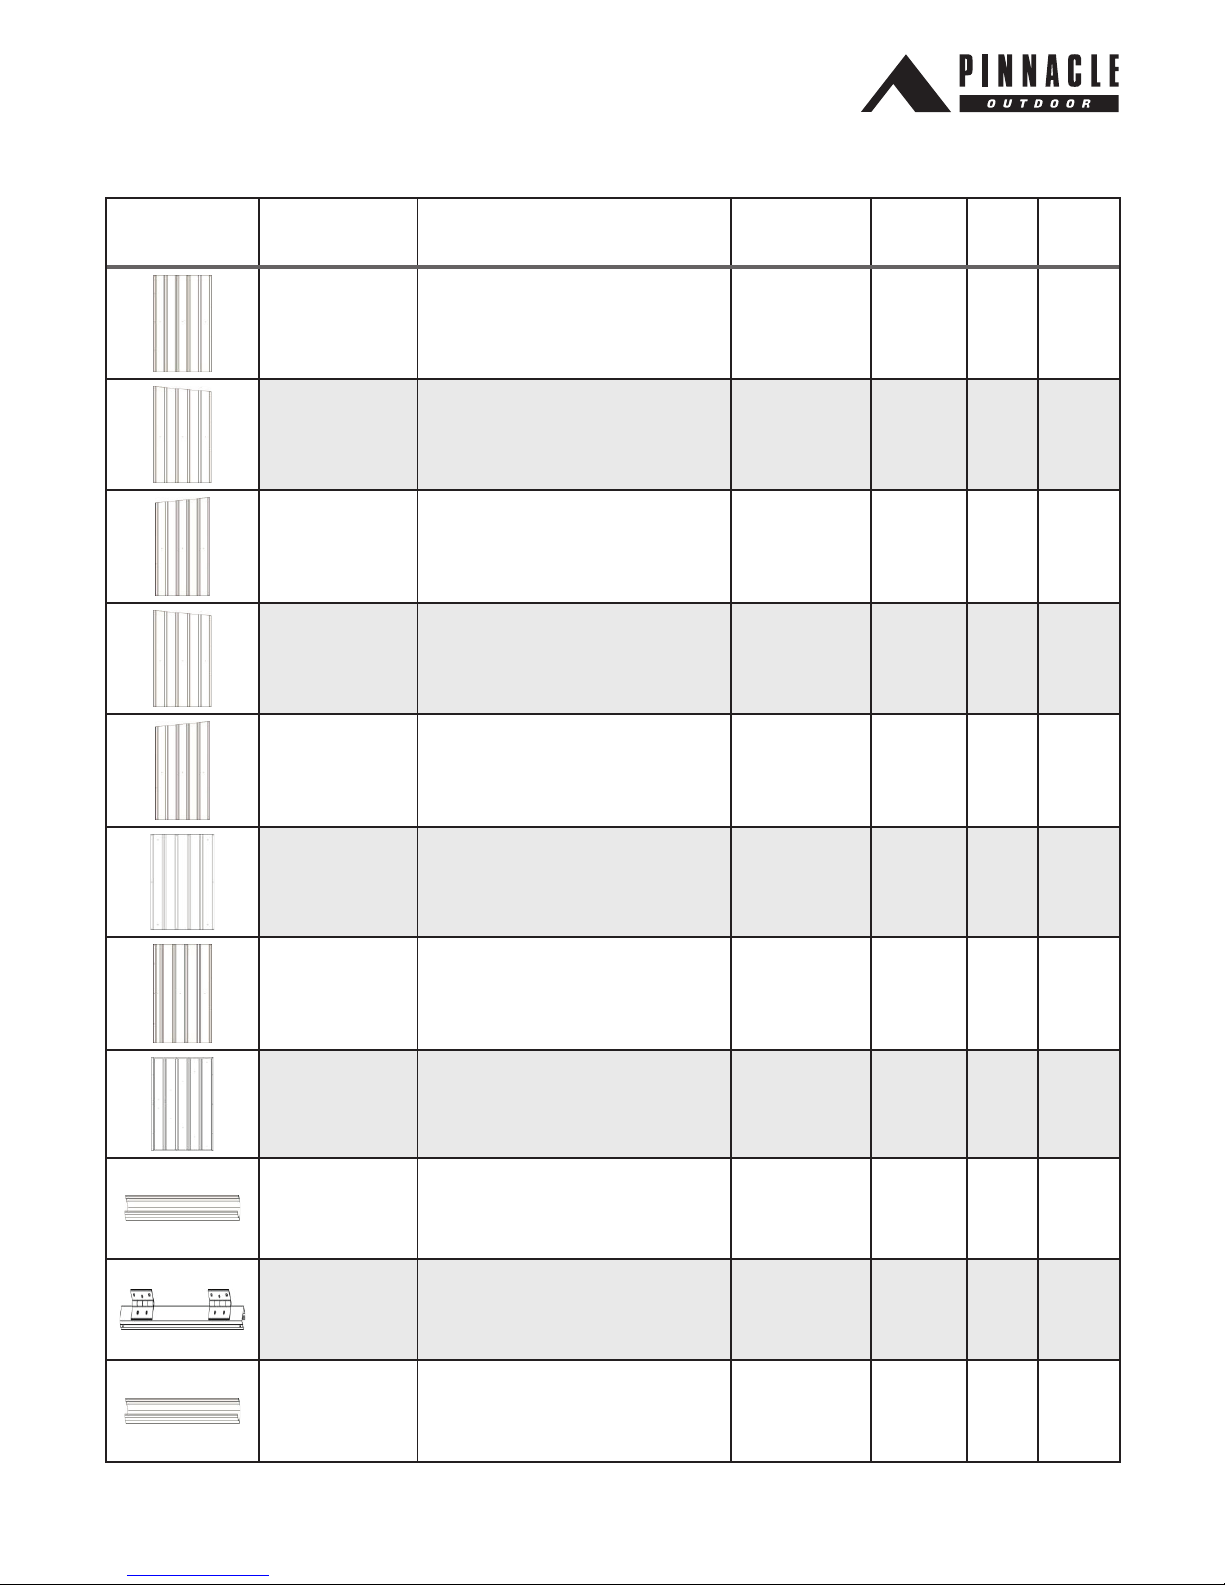
Step 1: Check all parts against the component list
Lay out all parts with number facing outwards and check off against parts list.
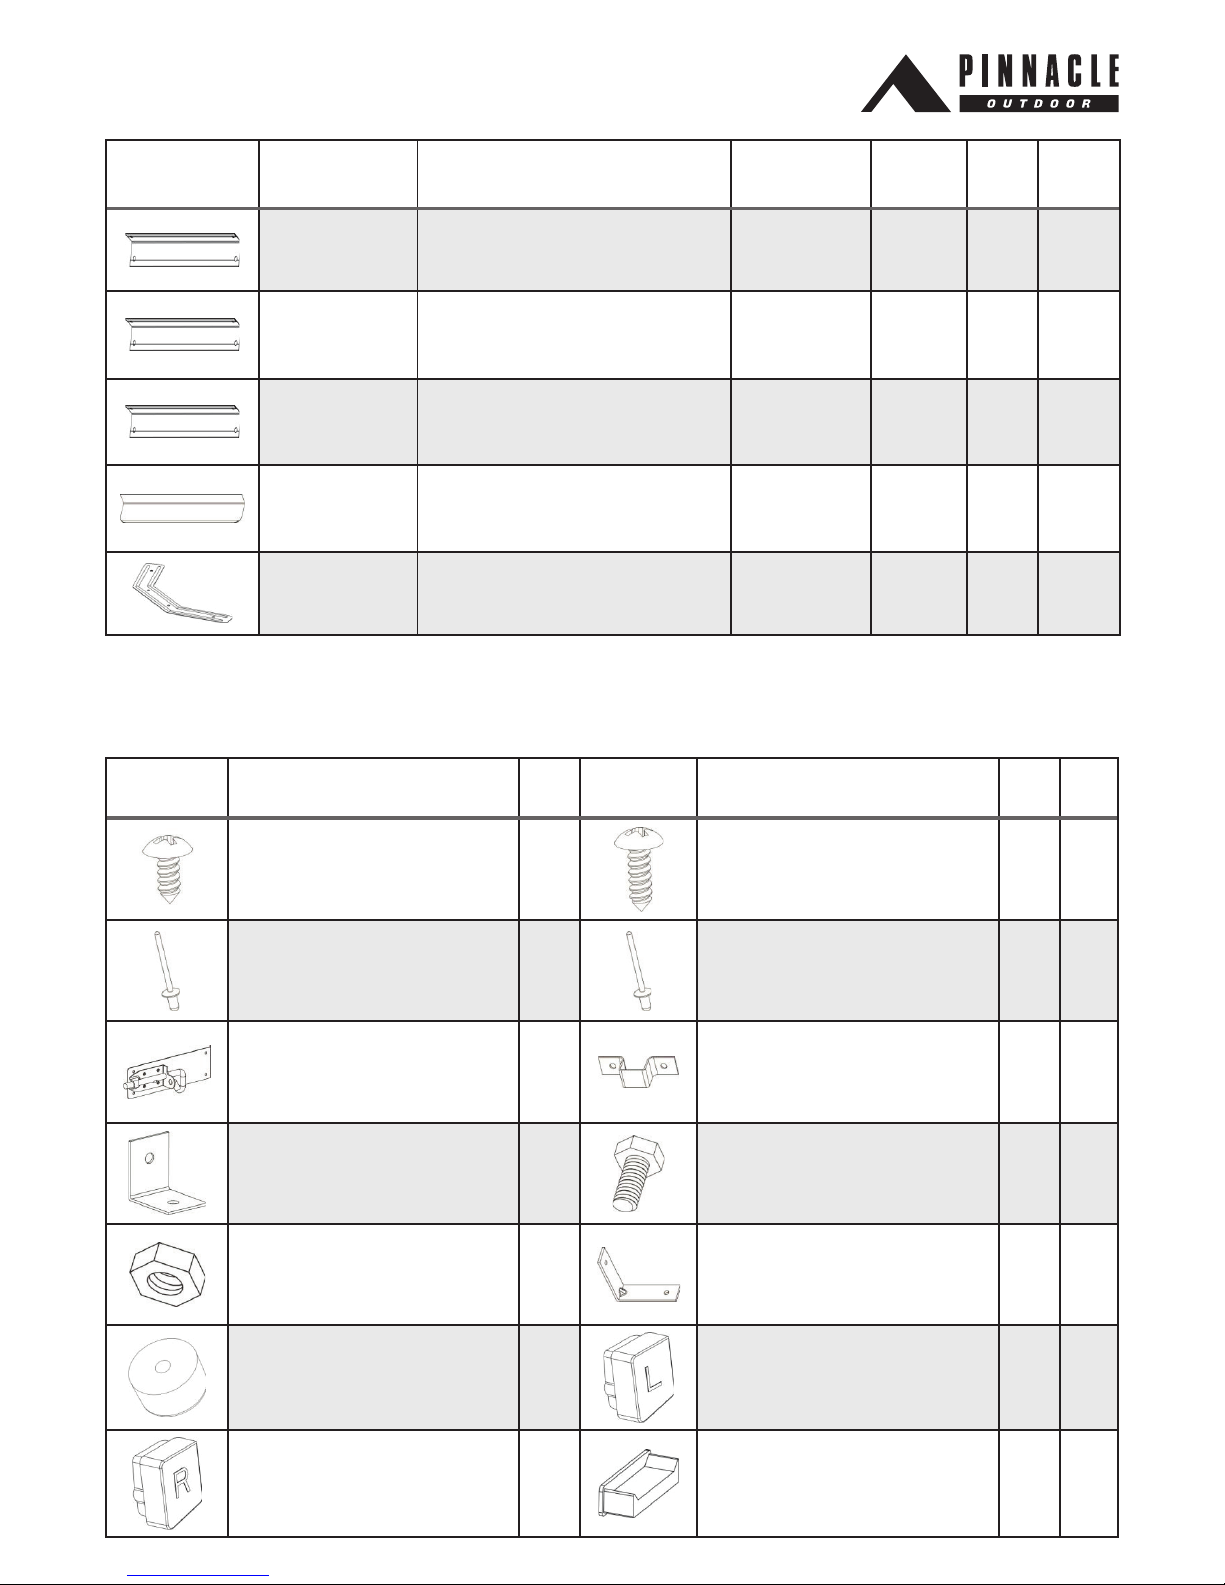
Picture Description Component Location
Part
No.
QTY Check
Sheet Sheet 2057x770 Rear wall 6A 2
Sheet
Sheet 1977-2057x770
Left
Side wall 7A 1
Sheet
Sheet 1977-2057x770
Right
Side wall 7B 1
Sheet
Sheet 1900-1980x770
Left
Side wall 2L' 1
Sheet
Sheet 1900-1980x770
Right
Side wall 2D 1
Sheet Sheet1600x770 Roof 8 2
Sheet Sheet 1900x708 Front 4B 1
Door Sheet Sheet 1845x770 Door 5B 1
Channel Channel 1843 Door 24F 1
Channel Channel 1843 Door 24G 1
Channel Channel 768 Door M26 2
Page 4
GardenShed 1.5 x 1.5 x 2.1m
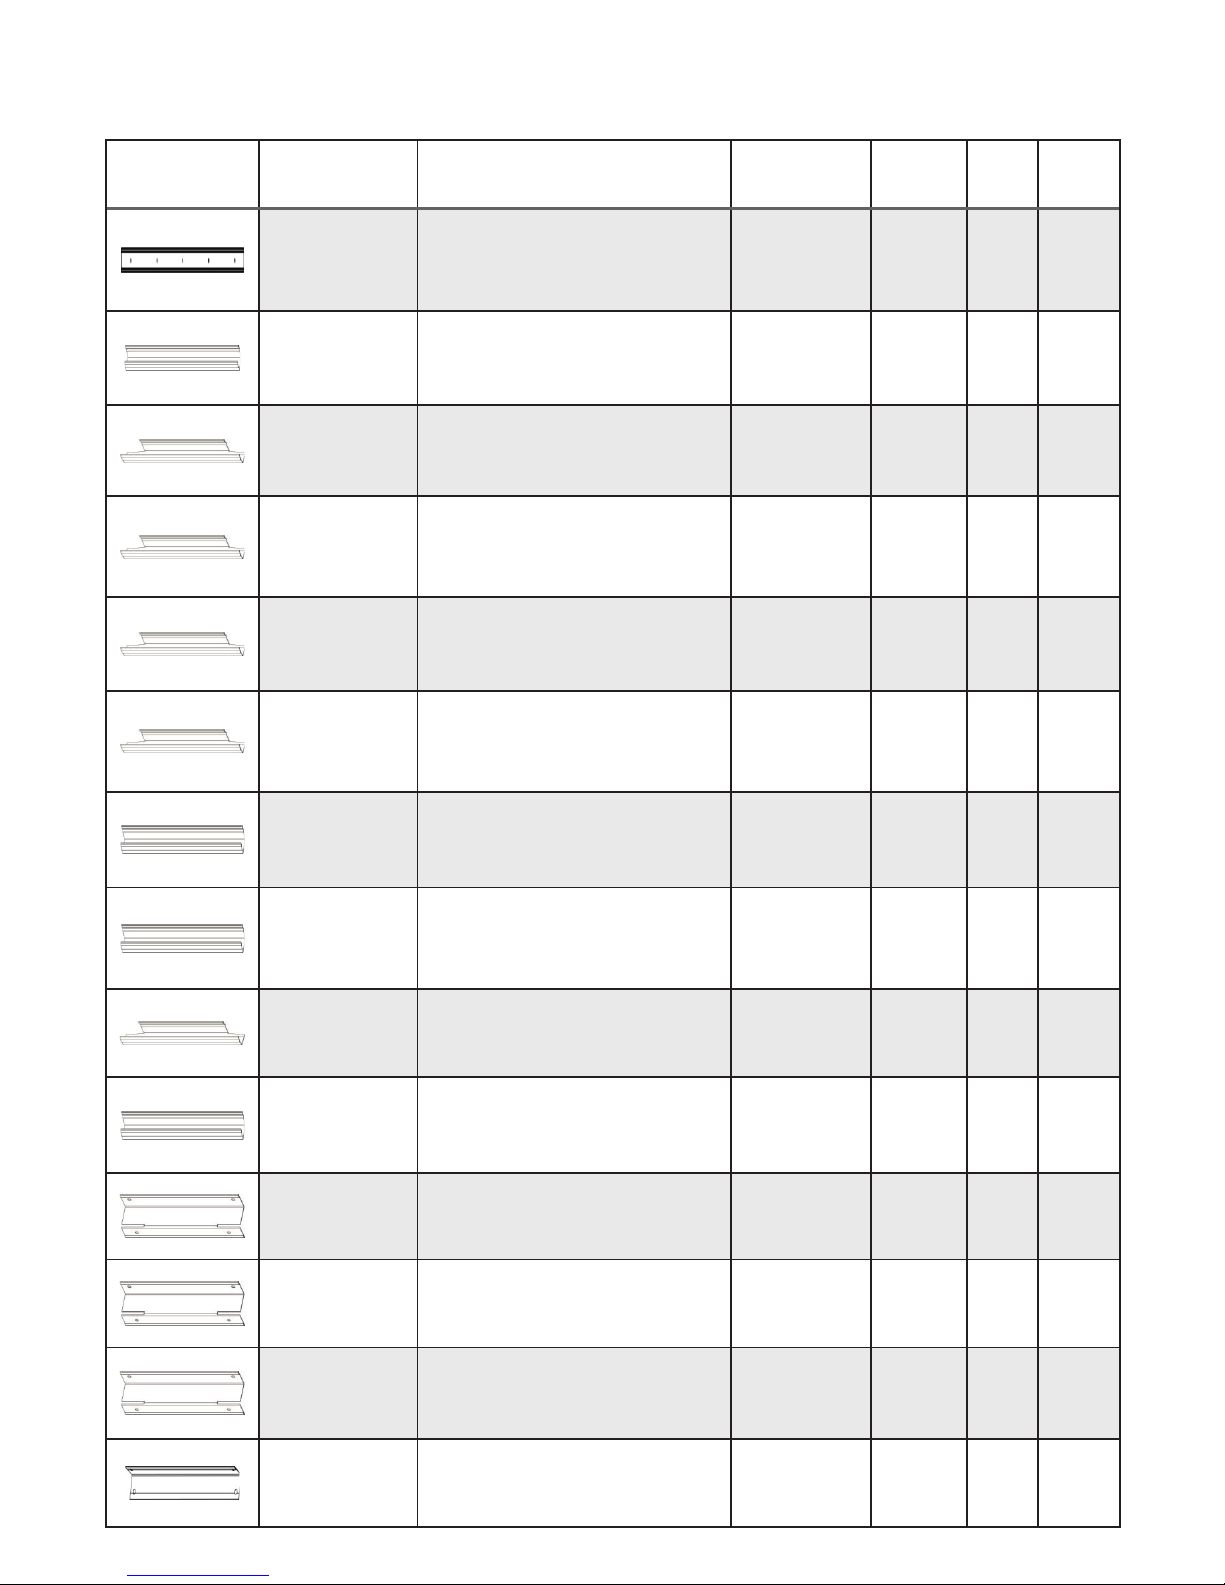
Picture Description Component Location
Part
No.
QTY Check
Brace Brace 1034 Door U12 2
Channel Channel 1508
Roof side
wall
20A 4
Channel Channel 1508 Rear wall 20B 1
Channel Channel 1508 Rear wall 20C 1
Channel Channel 1508 Front 20D 1
Channel Channel 1508 Front 20E 1
Channel Channel 1515 Side wall 25 2
Channel Channel 775 Front 23 1
Channel Channel 1458
Rear wall
side wall
31 3
Channel Channel 674 Front 33R 1
Jamb Jamb 1898 Front 41A 1
Jamb Jamb 1898 Front 41B 1
Jamb Jamb 775 Front 42 1
Brace Corner brace 1898 Corner Z19 1
Page 5
Picture Description Component Location
Part
No.
QTY Check
Brace Corner brace 1898 Corner Z20 1
Brace Corner brace 2055 Corner Z21 1
Brace Corner brace 2055 Corner Z22 1
Lip Lip 1601 Roof 51 2
Joining brace Joining brace Door W 1
Fittings part list: All fittings in this list are located in box 2
Picture Component QTY Picture Component QTY √
Self tapping screws (10mm) 150 Self tapping screws (16mm) 20
4 x 10mm Rivet 12 3 x 10mm Rivet 40
Pad bolt 1 Keeper 1
Bracket 8 5/16 x 19mm Hexagonal bolt 8
5/16 Hexagonal Nut 8 Mid wall brace bracket 3
Self tapper safety cover 25
Channel safety cover
(L type)
1
Channel safety cover
(R type)
1 Plastic stopper 4
Page 6

GardenShed 1.5 x 1.5 x 2.1m
6
Shed overview:
Picture Component QTY Picture Component QTY √
Sleeve anchor bolt 8
72
71
25
2D
6A
7A
7B
2L'
8
8
4B
20A
20A
20B
20C
20A
20A
25
20D
20E
41A
41B
23
42
51
51
31
33R
31
31
70
U12
W
5B
M26
24F
24G
U12
M26
Z21
Z22
Z19
Z20
6A
Qty checking date: ____ / ____ / _____
Qty checking personal badge number: _______________
Signature: _________________________________________
In the unlikely event that you find you are missing a part, please contact Pinnacle at 1800 349 776. A copy of proof of purchase may be requested.
Page 7
7
Step 2: Assemble the rear wall panels
You will find it easier to assemble your shed using sawhorses with timber studs attached (timber needs to be the same length as the
shed (1.5m)) or alternatively, a trestle table.
Place 2 x part 6A (sheet) on your worktable and join together with the self-tapping screws as per the diagram below.
Now fit part 20B (top channel) and part 20C (bottom channel) to the sheeting by tapping it in (diagram A) or sliding it in (diagram B).
Make sure the small lip of the channel is always facing out. This ensures rainwater cannot build up inside your shed.
A
950mm
20B
20C
TOP
6A
6A
RIDGES FACING UP
A
ROOF TOP EDGE
Page 8

GardenShed 1.5 x 1.5 x 2.1m
8
31
31
20B
20C
B
950mm
20B
20C
6A
6A
Step 2: Assemble the rear wall panels (continued)
Now fit part 31 (mid wall channel) to the sheeting and position it with the self-tapping screws provided. Please note the groove should
face downwards. Position the top and bottom channels with self-tapping screws as well. NOTE: All screws marked with a cross should
not be fixed at this stage.
Tip: If panel and screw holes do not line up, try pulling panel to match up holes.
TOP
B
ROOF TOP EDGE
RIDGES FACING DOWN
Page 9

9
7A
2D
25
20A
31
Step 3: Assemble the side wall panels
Place part 2D and 7A (sheet) on your worktable and tap or slide on part 25 (top channel) and part 20A (bottom channel).
Position and fix part 31 (mid wall channel) using the self-tapping screws. Fix part 20A (bottom channel) with self-tapping
screws but not part 25 (top channel) at this stage. Make sure that the small lip of the channels is always facing out. This ensures
rainwater cannot build up inside your shed. Repeat the same steps for part 2L and part 7B (the other sidewall). NOTE: All
screws marked with a cross should not be fixed at this stage.
RIDGES FACING UP
ROOF TOP EDGE
ROOF TOP EDGE
Note: Channel 31
should face down.
RIDGES FACING UP
Page 10

GardenShed 1.5 x 1.5 x 2.1m
10
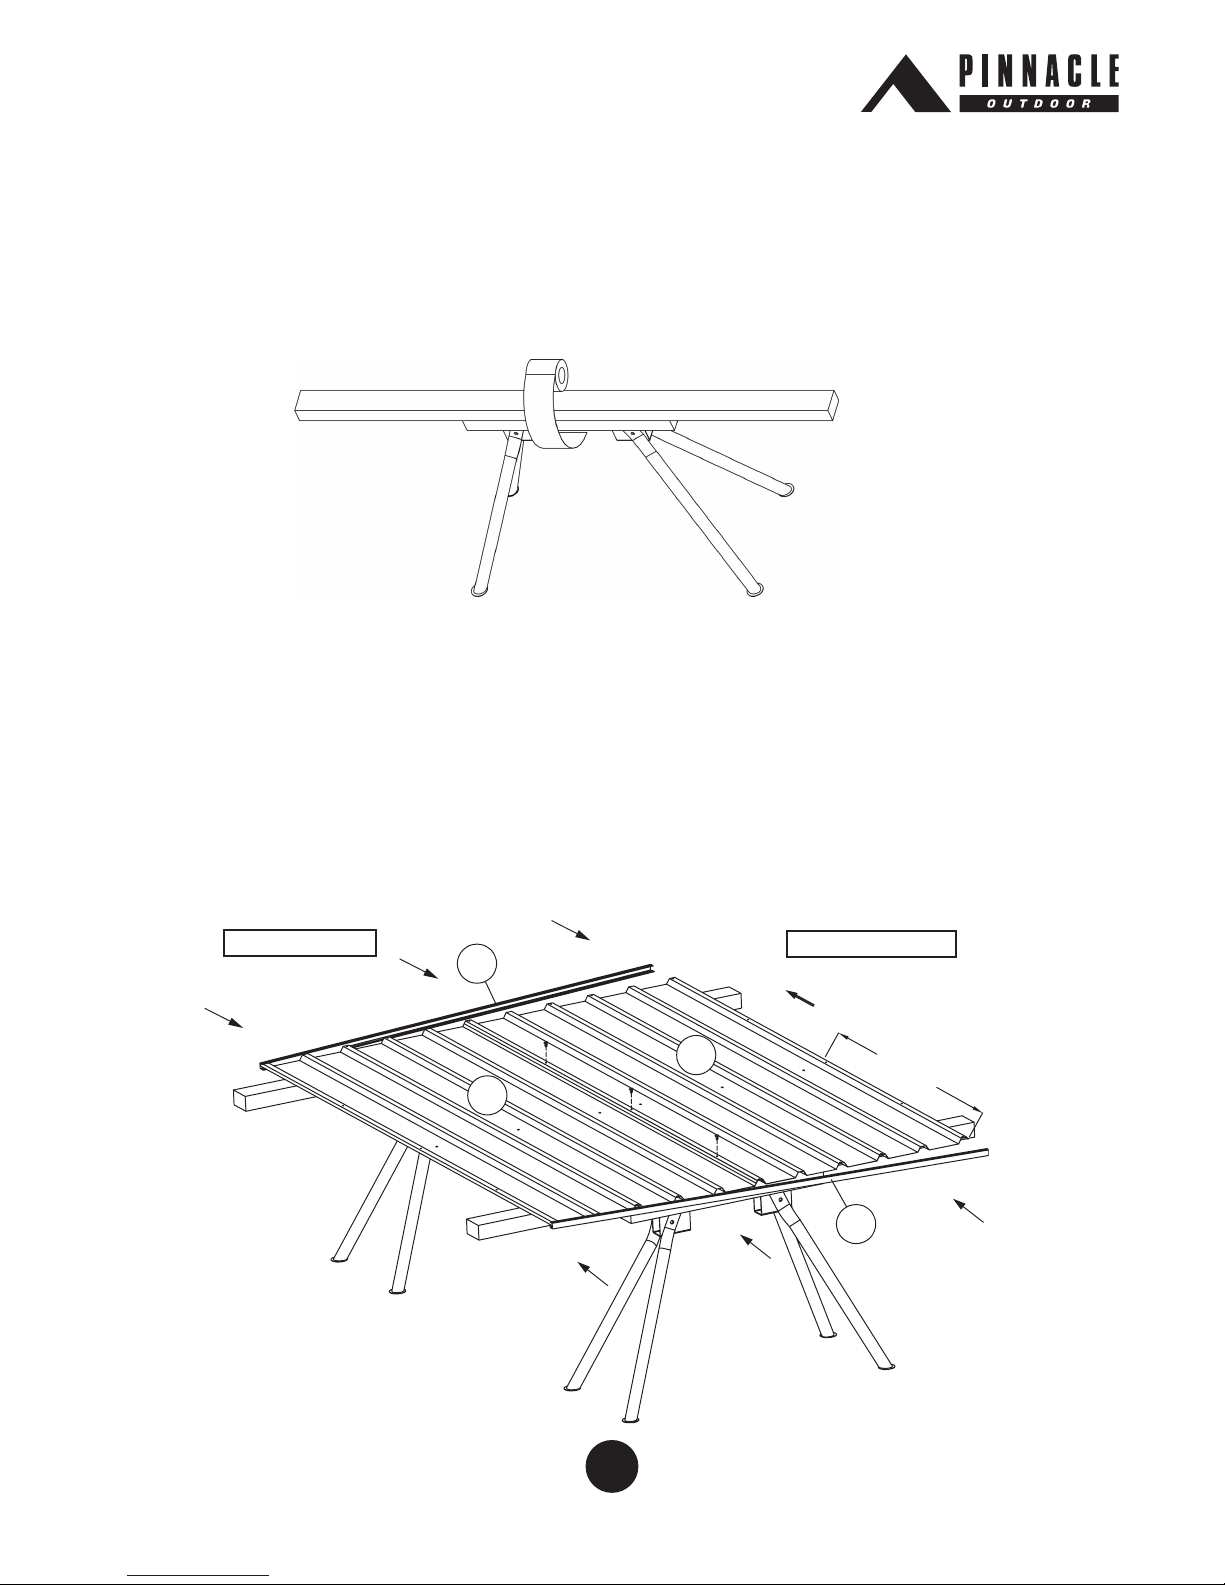
Step 4: Assemble the roof panel
Place 2 x part 8 (sheet) on your worktable and join together with the self-tapping screws provided as per the diagram below.
8
8
Now tap or slide in 2 x part 20A (channels) onto the sheeting and fix them to the top and bottom with the self-tapping screws provided.
Make sure that the small lips on channels 20A are always facing out. This ensures rainwater cannot build up inside your shed.
20A
51
51
20A
Page 11

11
Step 4: Assemble the roof panel (continued)
Now fit 2 x part 51 (side lips) to the sheeting and fix them with the self-tapping screws provided.
51
Page 12

GardenShed 1.5 x 1.5 x 2.1m
12
42
20D
20E
41B
4B
41A
33R
23
Step 5: Assemble the front wall panel
Place part 4B (sheet) on the worktable. Fit part 20D (top channel), part 20E (bottom channel) and part 41B (jamb) (There are pre-drilled
holes for the next step on both parts 4B and 41B that must be aligned) and part 33R (mid wall channel) to the sheeting and fix them
with the self-tapping screws. NOTE: All screws marked with a cross should not be fixed at this stage. Make sure that the small lips on
channels 20D and 20E are always facing out. This ensures rainwater cannot build up inside your shed.
Fit part 41A (jamb), part 42 (jamb) and part 23 (bottom channel) and fix them with the self tapping screws (except those
marked with a cross). Make sure both joins (diagrams A and B) are fixed the same followed by diagrams C and D.
RIDGES FACING UP
Note: Small lip on
channels 20D &
20E should always
be facing out.
Note: Channel 33R
should face down.
C
A
B
D
ROOF TOP EDGE
Page 13

13
M26
M26
FIXW ITH3 .0*10MMR IVET
FIXW ITH3 .0*10MMR
IVET
FIXW ITH3 .0*10MMR IVET
5B
24F
24G
Step 6: Assemble the front door
Place part 5B (door sheet) on the worktable and fix 2 x part M26, part 24G and part 24F (channels) with the provided 3.0 x 10mm rivets.
Make sure the small lips on channels M26 are always facing out. This ensures rainwater cannot build up inside your shed.
RIDGES FACING UP
FIX WITH 3.0MM RIVETS
FIX WITH 3.0MM RIVETS
FIX WITH 3.0MM RIVETS
RIDGES FACING UP
Page 14

GardenShed 1.5 x 1.5 x 2.1m
14
5B
W
BACK
U12
U12
Step 6: Assemble the front door (continued)
Once channels are fitted to both doors, align 2 x part U12 (brace) and part W (joining brace) with holes on the back of the door and
position temporarily with some tape or simply hold in place.
Turn door over so the
ridges are facing down.
Page 15

15
WHITEP L
ASTIC
STOPPER
WHIT
EP LASTIC STOPPER
FIXW ITH3 .0*10MMR IVET
Step 6: Assemble the front door (continued)
Turn door over with bracing aligned with holes (make sure the ridges of the door are facing up) and fix the bracing with the provided 3.0 x
10mm rivets through the front of the panel. Then turn door over and insert plastic stoppers at the ends of braces as shown below.
Note: Fix rivets
through the front panel
with ridges facing up.
FIX WITH 3.0MM RIVETS
WHITE PLASTIC STOPPER
WHITE PLASTIC
STOPPER
ROOF TOP EDGE
RIDGES FACING UP
RIDGES FACING DOWN
Page 16

GardenShed 1.5 x 1.5 x 2.1m
16
5B
70
70
A
B
Step 6: Assemble the front door (continued)
Fit part 5B (assembled door) to the front wall panel as per the diagram below. Use a rivet gun to fix the door using the pre-drilled
holes. Fix the pad bolt (but NOT its keeper at this stage) using the pre-drilled holes and the self-tapping screws (diagram A) or the
rivets (diagram B) provided.
RIDGES FACING UP
FIX PAD BOLT WITH
3.0 X 10MM RIVETS
FIX DOOR HINGES WITH
4.0 X 10MM RIVETS
A
B
ROOF TOP EDGE
Page 17

17
71
FIXP ADBOLT KEEPE
R
WITH 16mm SCREWS
B
71
FIXP ADBOLT KEEPER
WITH 3.0*10MM RIVE
T
A
Z19
Z21
Z21
Z20
Z22
Step 7: Fit the panels together
Attach the side walls to the back wall, then the front wall, then the roof. Fix all the components using self tapping screws. Fix part 71
(pad bolt keeper) using 16mm self-tapping screws (diagram A) or using rivets (diagram B) ensuring the keeper lines up with the pad
bolt. Also attach parts Z19, Z20, Z21 and Z22 (Corner brace) to each corner using the self-tapping screws provided.
FIX PAD BOLT KEEPER
WITH 16MM SCREWS
FIX PAD BOLT KEEPER
WITH 3.0 X 10MM RIVETS
A
B
Page 18

GardenShed 1.5 x 1.5 x 2.1m
18
Now fit the bolt down kit as per the diagram. Strengthen the mid wall braces by applying part 72 (mid wall brace bracket) to
each corner if necessary.
WALL SHEE
T
BOLT & NUT
SLAB
STEELA NGLE
SLEEVEA NCHORB OLT
DOOR
72
DOOR
BOLT & NUT
STEEL ANGLE
WALL SHEET
SLEEVE ANCHOR BOLT
Page 19

19
Apply channel safety cover (L type) to part 31 (channel) and channel safety cover (R type) to part 33R (channel). Also apply the
self-tapper covers to screw ends visible in the walls on the inside of the shed as per the diagram below.
33R
31
L
L
R
R
Page 20

GardenShed 1.5 x 1.5 x 2.1m
20
The door can be hinged on the opposite side as well. Align the door with the edge and make holes using a cordless drill. Remove
the pins from the hinges and reverse their direction before you attach the door. If you are concerned about the visibility of any pre-
drilled holes, you can fill them with rivets. Perform the same procedure for the pad bolt.
Page 21

21
Warranty statement:
This warranty against defects is given by:
Pinnacle Hardware.
Business Address: 28 Hudson Court, Keysborough VIC 3173
Ph: 1800 349 776
Email: support@pinnacle.net.au
New Zealand customers please contact:
HARCO (Harkness & Young Ltd)
Ph: 09 276 4071
Email: sales@harknessyoung.co.nz
Details of Manufacturer’s Warranty
This product comes with a 15 year limited structural warranty (“the Warranty Period”) from the date of purchase. This warranty
also applies where there are missing or damaged parts identified in the parts list referred to in the instruction kit within the
product packaging.
Please ensure that you keep this warranty form in a safe place along with your proof of purchase.
Product: ………………………………………………………….
Place of purchase & Postcode: ...........................................
Date of Purchase: ........ /........ /........
The benefits of this warranty are in addition to your rights under the Australian Consumer Law (ACL) and in particular, the
guarantees implied under the ACL and any other rights and remedies of the consumer under a similar law in relation to the
goods and services to which this warranty relates.
Process of claiming warranty:
To make a claim under the warranty within the warranty period, you will need to contact the manufacturer directly by
phone or email:
Claims Department contact number: 1800 349 776
Claims Department email: support@pinnacle.net.au
You will be required to produce proof of purchase (this is at discretion of the manufacturer) at the time of the claim.
The manufacturer bears the cost of replacing the products or spare parts or repairing the products and reasonable direct
expenses of claiming under this warranty:
– Where parts are replaced, the manufacturer will bear the cost of sending the spare part and will endeavour to deliver it to
the customer’s nearest reseller within 10 working days for the customer to pick up. At such time the customer may be required
to return the alleged faulty parts.
– Where assessment is required in case of replacing or repairing the product, the manufacturer will appoint an assessor within
10 working days to identify the alleged defect. The manufacturer will bear the repair costs by appointing a local tradesman. The
manufacturer may choose to replace the product if the repair or the cost of repair is not feasible. The replacement product will
be available for collection from the nearest reseller within 10 working days. The customer will bear the cost of assembly for the
replacement product.
Page 22

GardenShed 1.5 x 1.5 x 2.1m
22
IMPORTANT
1. Manufacturer’s Disclosure
This warranty against defects shall not apply in the following situations:
A) Where the product is not assembled in accordance with the instructions provided in the product kit.
B) Where the product is used to store corrosive materials such as fertilizer, chlorine etc;
C) Where the damage to the product is caused by storms.
2. Notes
This product is weatherproof to a certain level; however driving windy rain may cause the product to leak. Condensation may
also occur in some weather conditions such as extreme heat or cold. The product should only be used for storing items such as
gardening equipment and should not be used for articles that may be prone to damage if they come into contact with moisture.
We strongly recommend you use a waterproof sealant to fill any gaps or joins in order to minimise the risk of water entering.
3. Major Defects
If the manufacturer is satisfied that the defect is a major defect, the purchase price may be refunded in lieu of providing a
replacement product or repairing the product.
Our goods come with guarantees that cannot be excluded under the Australian Consumer Law. You are entitled to a
replacement or refund for a major failure and for compensation for any other reasonably foreseeable loss or damage. You
are also entitled to have the goods repaired or replaced if the goods fail to be of acceptable quality and the failure does not
amount to a major failure.
 Loading...