

Page 1
X-keys
®
PS/2 Programmable Keyboards by
P.I. Engineering, Inc.
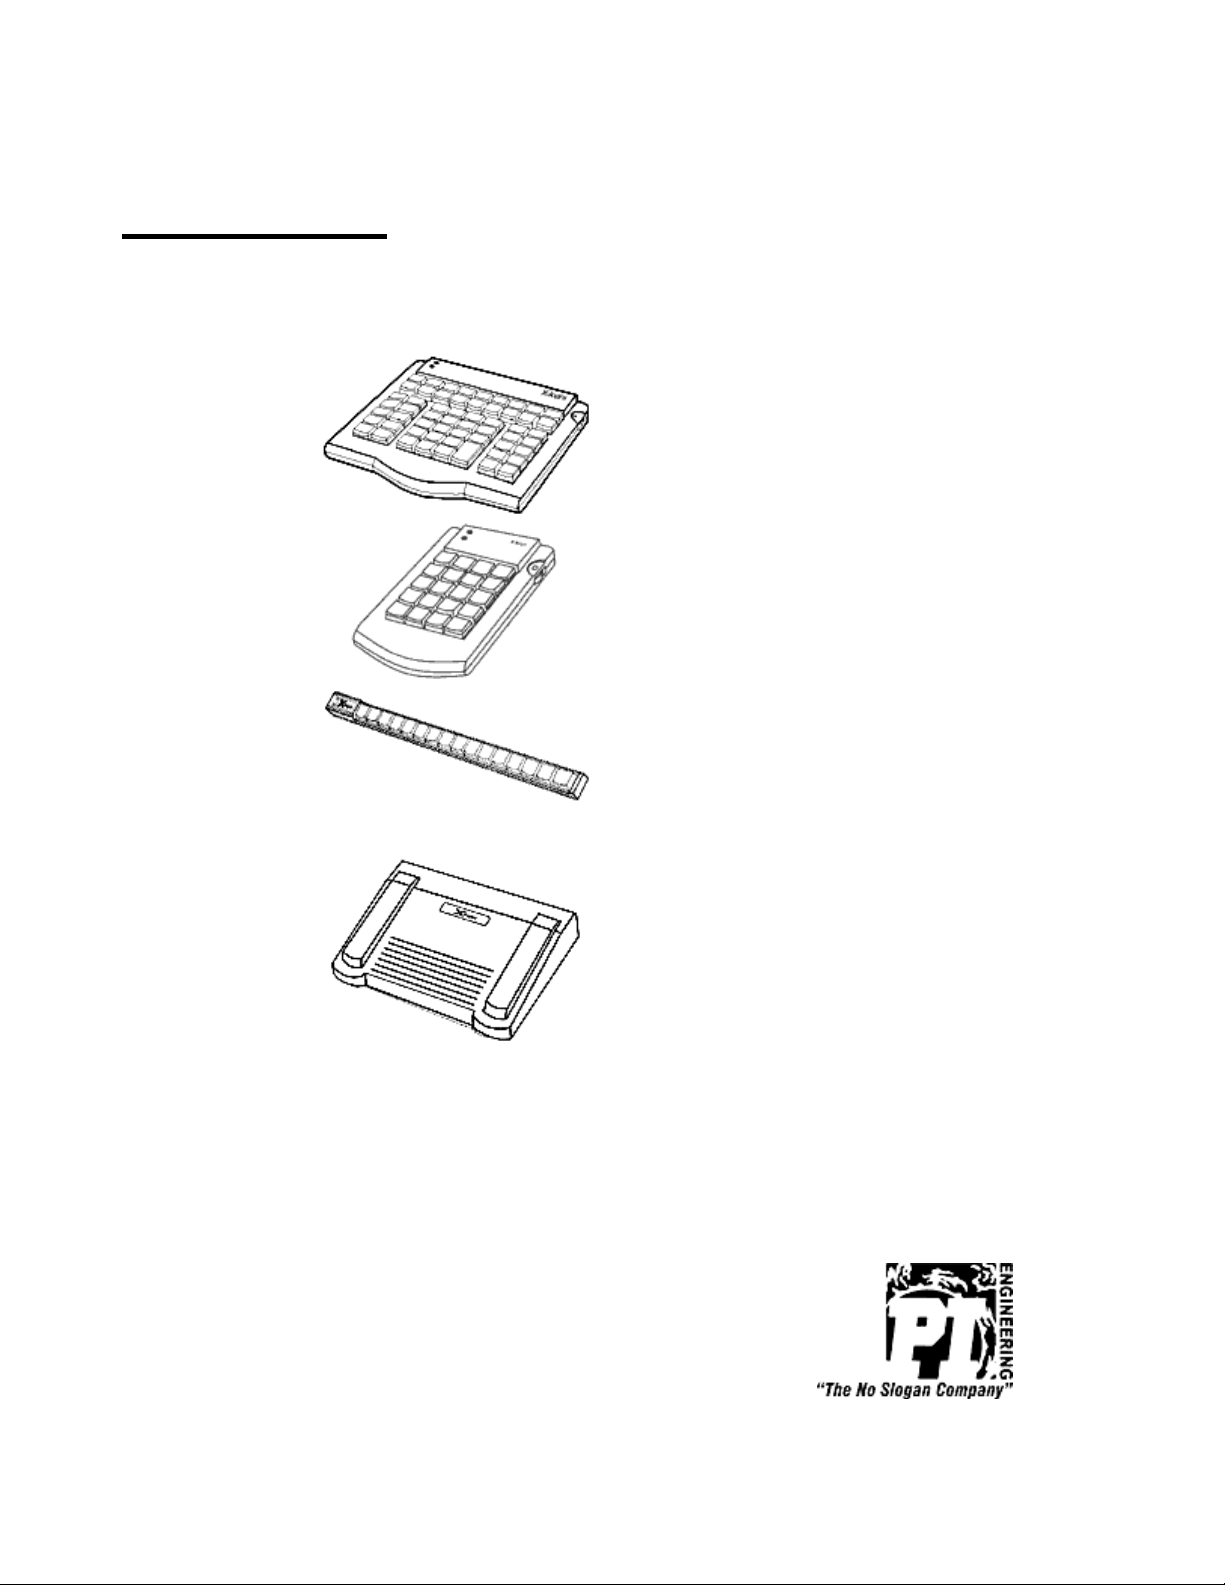
X -keys® Pro
(58 keys)
X -keys® Desktop
(20 keys)
X -keys® Stick
(16 keys)
P.I. Engineering, Inc.
101 Innovation Parkway
Williamston, Michigan 48895-1663
517•655•5523
FAX 517•655•4926
e-mail: info@ymouse.com
www.xkeys.com
October, 02
X -keys® Foot Pedal
(3 keys)
Product Manual
Page 2
X-keys PS/2 Programmable Keyboards - Quick Start
Compatibility:
The PS/2 X-keys will work on any system with a PS/2 keyboard port. This includes the vast majority of
Windows based PCs as well as some Unix based
systems.
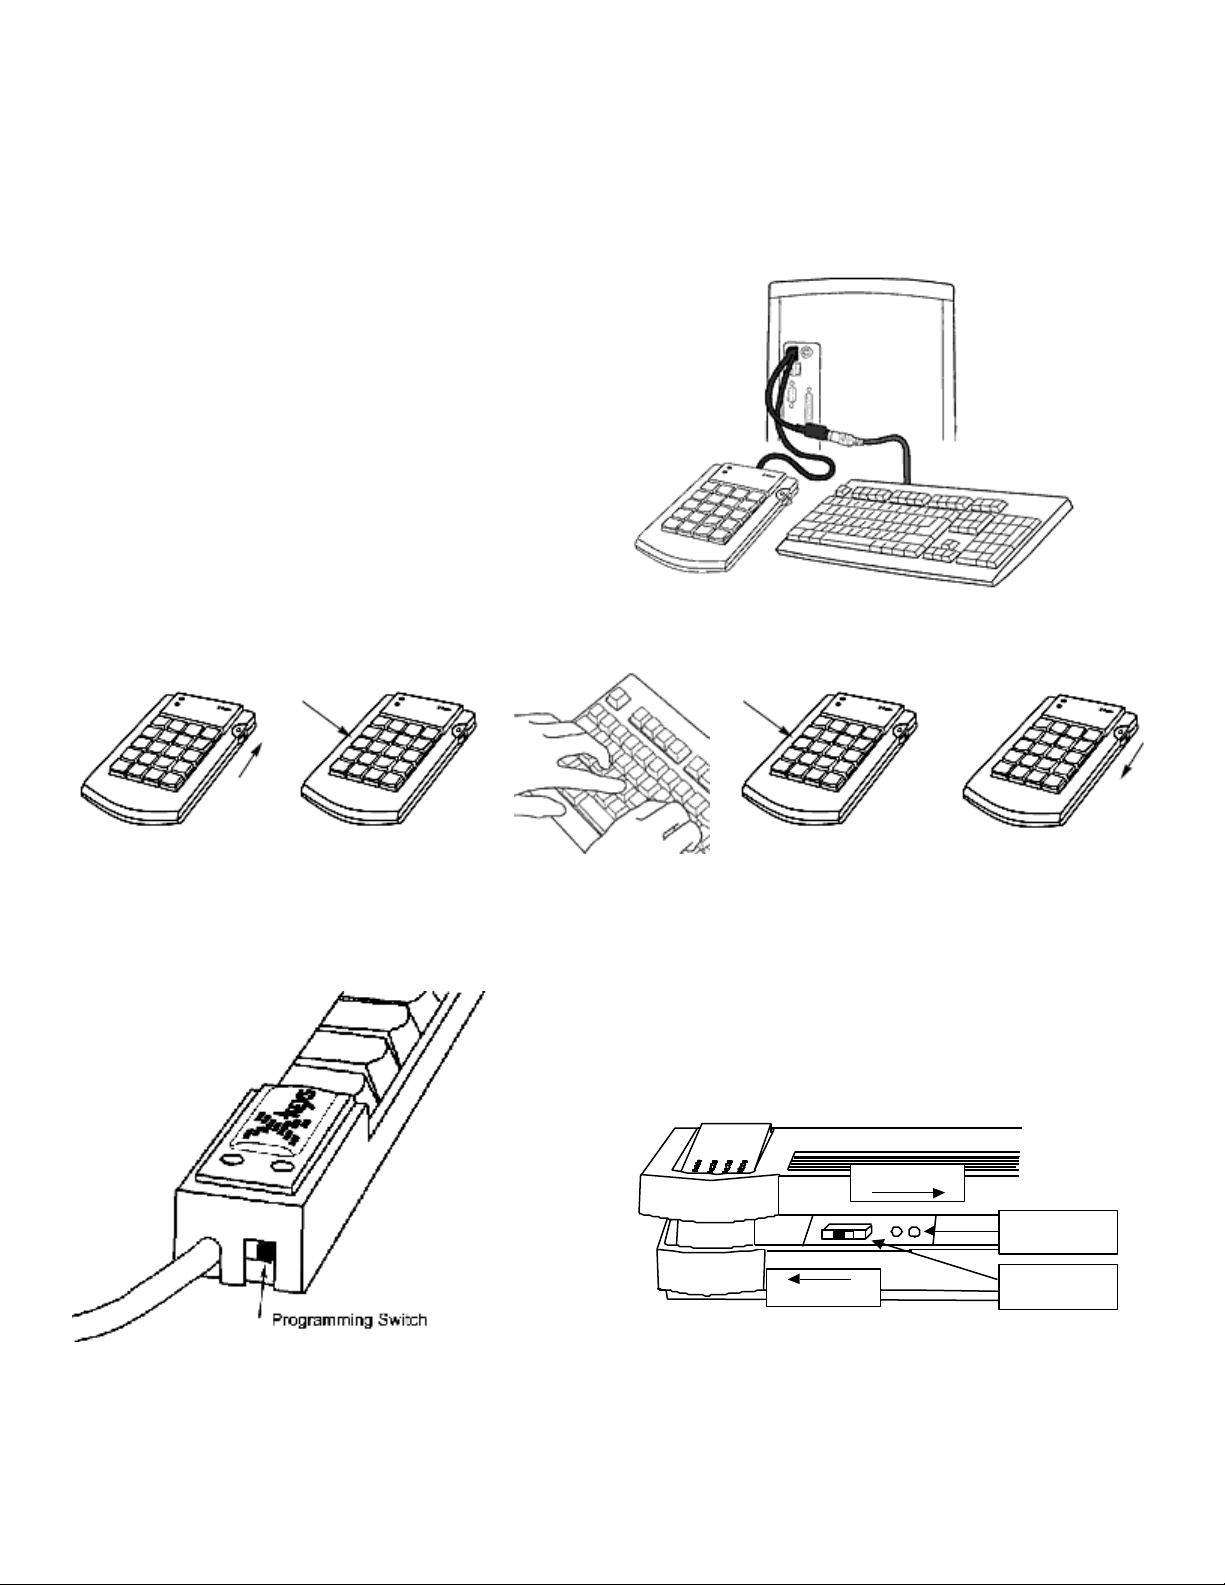
How to Install Your PS/2 X-keys Device:
1. Turn off your computer.
2. Unplug your PS/2 keyboard.
3. Plug your keyboard into the female end of the cord
on the X-keys.
4. Plug the male end of the X-keys cord into the
keyboard port of your computer.
How to Program Your PS/2 X-keys Device:
1 2 3 4 5
Slide programming
switch up
(red dot showing)
Press a key to
program on the
X-keys
On the X-keys Stick, the programming switch is
located on the end nearest the cord. Slide the
switch toward the cord for Programming Mode,
and away from the cord for Operating Mode.
Type Press the same key
to end
programming on
that key
PROGRAM
OPERATE
Slide programming
switch down (or
select another key to
program).
GREEN & RED
INDICATORS
PROGRAMMING
SWITCH
On the X-keys Foot Pedal, the programming switch is
located under the center pedal, about an inch left of
center. Use a non-metallic object like a Popsicle stick
to slide the switch.
2
Page 3

How to Use Your X-keys:
Each key on the X-keys can record a series of keystrokes or key combinations, as they are typed on the
keyboard and accurately reproduce the sequence every time the key is hit. From your computer's point of view,
playback from the X-keys is the same as rapid typing from the keyboard.
Programming Tips:
The X-keys records the exact sequence of each key pressed and released while it is programming. Since the Xkeys does not record the time between keystrokes, you may type slowly and accurately. When typing key
combinations, it is very important to get the sequence correct. Just as typing an uppercase C requires that the C
key is pressed before the Shift key is released, so does the keyboard shortcut Ctrl + C require the C to be
pressed before the Ctrl key is released. If the Ctrl key is released before the C key is pressed, the X-keys will
record them as separate keystrokes, and not a key combination.
Reprogramming the Keys:
Reprogramming a key is as simple as reselecting it. Follow the same steps you use for programming.
Identifying the Keys:
The cardstock grid included with your X-keys is provided for hand written legends. The keycaps snap off with
a fingernail or small screwdriver. Fit the label under the keycap, and replace it. To print legends on a laser or
inkjet printer, go to our web site ( www.xkeys.com) for templates formatted for popular applications. The key
caps hold a legend 0.575" wide and 0.5" high (14.6mm x 12.7mm).
Horizontal and Vertical Double-keys:
Horizontal and/or vertical double-keys can replace two single keys on the X-keys Pro and/or X-keys Desktop.
Remove two adjacent keys, with the provided key-puller by positioning the key-puller teeth under the key and
pulling straight up on the key cap. Press the double -key in place over the two exposed switch stems.
NOTE: If the indivi dual keys were programmed before, erase both before installing a double-key. Various assortments of horizontal,
vertical and large square replacement keys are available from P.I. Engineering.
Programming a Second Layer:
Each key on the X-keys can have two separate functions, one on the green layer, and another on the red layer.
The X-keys has green and red layer indicators to show which layer is active. The green layer is active by
default. To use the red layer, you must first program a "layer toggle key," and switch to the red layer. To
program a layer toggle key, see the "Single Key Special Programming Features" instructions below.
Programming Multiple X-keys:
P.I. Engineering offers software which copies data from one X-keys to multiple units. Contact our Technical
Support Department for more information. E-mail: tech@ymouse.com or phone: (517)-655-5523.
3
Page 4

Special Programming Features:
All special programming features on the X-keys are accessed by the same steps:
1. Slide the programming switch to put the X-keys into programming mode (the layer indicator will blink).
2. Tap the key that you want to program (the layer indicator will double-blink).
3. Press and hold the Esc key.
4. Press and release the associated command key (see table and instructions below).
5. Release the Esc key.
6. Confirm programming on the key (the layer indicator will blink).
7. Slide the programming switch back to the operating position (the layer indicator will glow steadily).
Once you become familiar with the special programming features on the following pages, this list of key
commands serves as a useful reference.
Command Symbol Legend
Þ indicates when to press and hold a key down
Ú indicates when to tap a key
Ý indicates when to release the key.
<> Chevrons indicate the key to be pressed
NOTE: All numbers are on the alphanumeric section of the keyboard (not the number pad).
Single Key Programming Features
Feature Associated Keystrokes
Layer-toggle
Layer-shift
Repeating Key
Separate Press and Release
Pause
Erasing a Key
Entire Keyboard Programming Features
Feature Associated Keystrokes
Slow Transmission Speed
Normal Speed
Caps Lock/Unlock Memory
Caps Lock/Shift Unlock Memory
No Caps Lock Memory
Resetting the Keyboard
Þ<Esc> Ú<2> Ý<Esc>
Þ<Esc> Ú<1> Ý<Esc>
Þ<Esc> Ú<Left-Shift> Ý<Esc>
Þ<Esc> Ú<Left-Ctrl> Ý<Esc>
Þ<Esc> Ú<5> Ý<Esc>
Ú<Esc> Ú<Esc> Ú<Esc>
Þ<Esc> Ú<3> Ý<Esc>
Þ<Esc> Ú<4> Ý<Esc>
Þ<Esc> Ú<8> Ý<Esc>
Þ<Esc> Ú<9> Ý<Esc>
Þ<Esc> Ú<7> Ý<Esc>
Ú<Esc> Ú<Backspace> Ú<Esc> Ú<Esc>
Ú<Esc>
Backlighting toggle key
Default backlighting on/off
Backlighting on X-keys Stick
Þ<Esc> Ú<B> Ý<Esc>
Þ<Esc> Ú<L> Ý<Esc>
4
Page 5

Single key Special Programming Features:
All numbers referred to in combination with the Esc key are number keys on the alpha-numeric section of the
keyboard (NOT the Num Pad).
Programming a Layer-toggle Key (Esc + 2):
Assigning one key as a layer toggle or layer shift, doubles the capability of the remaining keys. Each key may
now have one set of commands programmed on the green layer of the X-keys, and a second set of commands
programmed on the red layer. A layer toggle key must be programmed to gain access to the red layer. This key
can be changed to a layer shift key when programming on the red layer is finished.
To Program a Second Layer:
After programming a layer-toggle key (see above), change to the second layer by tapping the layer-toggle key
(the X-keys must be in operating mode to change layers). The green and red layer indicators on the X-keys will
show which layer is active. Select the red layer and switch the X-keys into programming mode. Follow the
same procedure used for programming the green layer. Do not reprogram the layer-toggle key or you will not
be able to change layers.
Programming a Layer-shift Key (Esc + 1) :
A layer-shift key works like the layer toggle key, only it must be held down to access the red layer. If you wish
to use the red layer with a shift, rather than a toggle key, reprogram the layer-toggle key as a layer-shift key
after programming the red layer.
Programming Repeating keys (Esc + Left Shift):
Keys on the X-keys are not automatically repeating keys, but it’s easy to program them to repeat. To make a
key a repeating key, use the Esc + Left Shift combination, then enter the key sequence or combination to be
repeated.
Programming Separate Press and Release Commands (Esc + Left Ctrl) :
The X-keys can generate one command when a key is pressed and another when released. This is particularly
useful when a key sequence requires a single key variable or a mouse action to be entered before continuing. To
create a key with separate press and release commands, start programming a key with the commands for the
"press" of the key, then enter the Esc + Left Ctrl combination, then enter the commands to be sent on the release
of the key.
Programming a Pause ( Esc+ 5):
Regardless of the speed with which keystrokes are entered when programming the X-keys, the sequence is
played back faster than most users can type. Sometimes it may be useful to pause after or between keystrokes
so the associated software can register the command. This is particularly useful when the command opens a
menu. To add a half-second pause to a key sequence, during programming, enter the Esc + 5 combination
where the pause is needed.
NOTE: If all of the keystrokes are too fast, see the topic “Slow Transmission Speed” below.
5
Page 6

Erasing a Key (Esc Esc Esc):
Reprogramming a key on the X-keys automatically erases the previously saved keystrokes. When using a
double keycap, it is necessary to leave one of the keys blank so that the X-keys does not send an extra set of
commands when the key is pressed. To erase a key and leave it blank, put the X-keys in programming mode
and select a key, press and release the Esc key three times, and confirm programming on the key.
Entire X-keys Special Programming Features
These features affect the entire unit and include changing the transmission speed, changing the Caps Lock
memory and erasing the entire unit.
Slow Transmission Speed (Esc + 3) :
Some applications or systems have a slower response time and the default X-keys speed is too fast. To slow the
rate at which the X-keys sends key commands, program a key with the Esc + 3 combination. The key may be
reprogrammed with a key sequence, and the X-keys will retain the slow transmission rate setting.
Normal Transmission Speed (Esc + 4) :
Normal Transmission Speed is the default for the X-keys. If you previously programmed Slow Transmission
Speed and you want to return the X-keys to Normal Transmission Speed, program a key with the Esc + 4
combination. The key may be reprogrammed with a key sequence, and the X-keys will retain the normal
transmission rate setting.
Caps Lock Features
The next three features affect how the X-keys handles the Caps Lock state of the standard keyboard, and are
particularly useful if you are recording case sensitive words or commands.
Caps Lock/Unlock Memory (Esc + 8):
If you want the X-keys to ignore the Caps Lock state of the keyboard and play back the letters exactly as they
were typed, turn this feature on.
Caps Lock/Shift Unlock Memory (Esc + 9):
If you are working with a keyboard which uses the Shift Key to release the Caps Lock State (French, German,
etc.), and you want the X-keys to ignore the Caps Lock state of the keyboard and play back the letters exactly as
they were entered, turn this feature on.
No Caps Lock Memory (Esc + 7) :
If you want the case of letters coming from the X-keys to be determined by the Caps Lock state of the keyboard,
turn Caps Lock Memory off (the default setting for the X-keys).
Resetting the X-keys (Esc Backspace Esc Esc Esc):
To erase the entire X-keys, put the X-keys into Programming mode and tap any key. Type, <Esc>
<Backspace> <Esc> <Esc> <Esc> on the standard keyboard. Resetting the X-keys removes all programming
from all keys on both layers.
6
Page 7

Back-lighting on the X-keys Stick (Esc + B) (Esc + L):
The LED back-lighting on the X-keys Stick can be controlled by one or both of these settings. To create a key
which will toggle the back-lighting on and off, program a key with the Esc + B combination. To turn the backlighting on when the X-keys Stick is powered up, program a key with the Esc + L combination. To return the
Stick to the default setting (back-lighting off), program a key with the Esc + L combination again.
Programming Errors:
If the X-keys encounters programming errors, the red and green layer indicators will blink simultaneously on
and off. Turn the programming switch off and back on to reset the X-keys to programming mode.
Errors can occur if:
a) There is an unreliable cable connection, check all cords for proper connection.
b) The computer is not operating in a mode to accept the entered commands (for example, pressing <Ctrl>,
<Alt> and <Delete> may cause a PC to reboot and the X-keys will not boot-up in programming mode).
c) Memory in t he X-keys is exceeded. The entire X-keys will memorize 800 to 1,000 keystrokes depending
on the device and the keystrokes. If you think you have exceeded the memory capacity, contact our tech
support department for tips to conserve memory on the X-keys.
Box Contents Additional Accessories**
• X-keys Pro, X-keys Desktop, X-keys
Stick, or X-keys Foot Pedal
• Two vertical double-keys*
• One horizontal double -key*
• One key-puller*
• Instruction manual
How to Find Us
• Basic Accessory Pack:
ü Two vertical double-keys
ü One horizontal double-key
ü One key-puller
• Vertical Keys Pack contains 10 vertical double-keys
• Horizontal Keys Pack contains 10 horizontal double-keys
• Single Keys Pack contains 10 single keys
• Square Key Pack contains 4 square keys (one square key
replaces 4 single keys)
*Not included with X-keys Foot Pedal
**Available from P.I. Engineering (visit: xkeys.com)
Address: 101 Innovation Parkway
Williamston, MI 48895
U.S.A.
Telephone: 517/655-5523 • 800/628-3185
Fax: 517/655-4926
Web: www.ymouse.com or www.xkeys.com
E-mail: Sales Department Ø info@ymouse.com
Technical Support Ø tech@ymouse.com
7
Page 8

FCC Declaration of Conformity
This device complies with Part 15 of the FCC rules. Operation is subject to the following two
conditions: (1) This device may not cause harmful interference, and (2) this device must accept any
interference received, including interference that may cause undesired operation.
This equipment has been tested and found to comply with the limits for a Class B digital device, pursuant to part 15 of the FCC rules. These
limits are designed to provide reasonable protection against harmful interference when the equipment is operated in a residential
installation. This equipment generates, uses, and can radiate radio frequency energy and if not installed and used in accordance with the
instruction manual may cause harmful interference to radio communications. However, there is no guarantee that interference will not
occur in a particular installation. If this equipment does cause harmful interference to radio or television reception, which can be
determined by turning the equipment off and on, the user is encouraged to try to correct the interference by one or more of the following
measures:
• Reorient or relocate the receiving antenna.
• Increase the separation between the equipment and the receiver.
• Connect the equipment into an outlet on a circuit different from that to which the receiver is connected.
• Consult the dealer or an experienced radio TV technician for help.
Any changes or modifications not expressly approved by the manufacturer could void the user’s authority to operate the equipment.
LIMITED WARRANTY
For all X-keys products purchased and installed in the United States and Canada, P.I. Engineering warrants that
the X-keys product will be free from defects in materials and workmanship under normal use and service, and
will meet the specifi cations presented by P.I. Engineering at the time of original purchase, for one year as
evidenced by a copy of the purchase receipt. Under this warranty, P.I. Engineering will, at its sole option,
repair or replace any X-keys product which is defective, provided that you are responsible for ( i) the cost of
transportation of the product to P.I. Engineering or its designated service facility, and (ii) any loss or damage to
the product resulting from such transportation.
Upon discovery of a defect in the product within the Warranty Period, you should notify P.I. Engineering
Technical Support via telephone to obtain an RMA (return authorization number) and instructions for shipping
the product to a service location designated by P.I. Engineering. You should send the product, shipping charges
prepaid, to the designated location, accompanied by the return authorization number, your name, address, and
telephone number, proof of purchase, and a description of the defect. P.I. Engineering will pay for return of
product(s) to the customer.
P.I. Engineering shall have no responsibility to repair or replace the X-keys product if the failure has resulted
from accident, abuse, mutilation, misuse, or repair/modification performed by any entity other than
P.I. Engineering.
THIS WARRANTY IS EXCLUSIVE OF ALL OTHER WARRANTIES, WHETHER EXPRESSED, IMPLIED, OR STATUTORY. P.I. ENGINEERING DOES
NOT WARRANT THIS X-keys PRODUCT FOR FITNESS FOR A PARTICULAR PURPOSE OR MERCHANT ABILITY. P.I. ENGINEERING AND ITS
EMPLOYEES SHALL NOT BE HELD LIABLE FOR ANY CONSEQUENTIAL, INDIRECT, OR INCIDENTAL DAMAGES, EVEN IF ADVISED OF THEIR
POSSIBILITY, ARISING OUT OF THE USE OR INABILITY TO USE THIS PRODUCT. SOME STATES DO NOT ALLOW FOR THE EXCLUSION OR
LIMITATION OF CERTAIN LIABILITIES, SO THE ABOVE LIMIT ATIONS MAY NOT APPLY TO YOU. THIS WARRANTY GIVES YOU SPECIFIC LEGAL
RIGHTS, AND YOU MAY ALSO HAVE OTHER LEGAL RIGHTS WHICH VARY FROM STATE TO STATE.
In the event that the above limitations are held unenforceable, P.I. Engineering’s liability for any damages to you or to any party shall not exceed the
purchase price you paid, regardless of the form of any claim.
This limited warranty is valid for and only applies to products purchased and used inside the United States (and its territories) and Canada.
This limited warranty is governed by the laws of the United States of America and the state of Michigan.
X-keys Electronic design: P.I. Engineering, Inc., Williamston, Michigan
X-keys Pro & Desktop industrial design: Rienhold Weiss Design, Chicago, Illinois
Patent # 4964075
© 2002 P.I. Engineering, Inc. All rights reserved.
PS/2 is a registered trademark of International Business Machines, Inc. All other trademarks are property of their respective owners.
Y-mouse, Y-see two, Y-key key, X-keys, and the “P.I. Eclipse” are trademarks of P.I. Engineering, Inc.
8
Page 9

Products from P.I. Engineering
Visit our web site (www. xkeys.com) for detailed descriptions
Y-mouse® Dual Mouse Adapter:
• Use a mouse and a trackball simultaneously on a single port (PS/2 or Serial)
• Great for adding an alternative pointing device to your system
Y-key key® Dual Keyboard Adapter:
• Use two keyboards on one computer
• Great for adding an alternative keyboard to your system
Y-mouse® Keyboard and Mouse Adapter for USB:
• Convert standard PC (PS/2) keyboards or mice to USB
• Like a mini docking station on your laptop
Y-see two
X-keys
X-keys
X-keys
X-keys
X-keys
X-keys
X-keys
Custom/OEM Products:
RailDriver
Visit our web site (www.raildriver.com) for detailed descriptions
®
Video Splitter:
• Connect two monitors to a single video port
• Great for presentations to clients or classes
®
Pro
• 58 user reprogrammable keys
• Put all of your shortcuts at your fingertips
®
Desktop
• 20 user reprogrammable keys
• An efficient companion to your keyboard
®
Stick
• 16 user reprogrammable keys
• Add 16 function keys to your keyboard
®
Foot Pedal :
• 3 user reprogrammable pedals
• Use your foot to activate keyboard commands or mouse clicks.
®
Switch Interface:
• 12 ports for 1/8" mini plugs
• Any external switch can activate keyboard commands
®
Controller:
• Precision MDM joystick integrated with 46 programmable keys
• For any application requiring accurate, reliable control
®
Editor:
• Jog & Shuttle knob integrated with 46 programmable keys
• Great for non-linear editing applications
• Y-mouse & Y-key key boards add dual ports to your OEM system
• X-keys matrix boards create a programmable key matrix for your custom input device
• Train Cab Controls & Cyclopedias
• Resources for the scale or digital train modeler
9
 Loading...