

Page 1

Pico Genie M400 Pro
User Manual
Pl ease r ead th is use r m anu al car efu lly befo re usi ng you r u nit
Page 2
Contents
Features 3
Safety Instructions 4
Box Contents 5
Projector Exterior View 7
Remote Instructions 8
Projection Distance and Size 9
Operation Instructions 9
Input Source Select 10
Connecting to Devices 11-12
Supported File Types 13
Wireless connection options
DLNA 14
Widi-Miracast Connection 15-17
OSD Menu / Picture / Sound 18-19
PPT conversion 20
3D Function 21-22
Trouble Shooting 23
Technical Specification 24
Page 3

Key Features
•
300 lumens of brightness, up to a 100” projected image
•
Multiple wireless options now in-built inc DLNA, Widi and wireless apps
•
HD 1280×800 (720p) resolution with DLP (Supports 1080p playback)
•
Built-in rechargeable li-ion battery, project at full brightness on battery power
•
3D Projection straight from the box (DLP-LINK / 3D READY support)
•
HDMI / VGA/ AV/ USB/ MicroSD inputs. HDMI port can power smart dongles
•
4GB MicroSD card, VGA/AV cable & HDMI cable included
•
Keystone Correction (+/-40 degrees)
•
20,000+ hour LED light-source, no bulb or filter to replace
•
Coaxial audio output for multi-channel surround sound
•
100% offset image
•
Easy to set up and use - Instant ON/OFF with 16.7 million colour Display
Page 4

Safety Instructions
•
Only use the power adaptor provided, others may damage the machine.
•
Do not disassemble, modify, throw or drop the projector otherwise it may cause damage
•
The projector can only be repaired by approved professionals
•
The battery is integrated, do not cover up, modify or remove it.
•
Do not allow objects into the projector vents, or to fall into the projector, otherwise it will result in
machine damage; if any foreign objects fall into it, please turn off the power quickly, contact the
retailer
or manufacturer
•
Do not place liquids near or on the projector. If liquid is spilled on the machine, i
mmediately turn off the
power
•
Ensure the projector is used in a well ventilated area and do not obstruct the vents as this may cause
a fire hazard.
•
Acceptable environment conditions: Temperature 0-35℃. Humidity 0~85%. Elevation 0~2000M
•
Do not use the projector under hot / bright lights or highly magnetic areas
•
Do not use the projector in excessively dirty or dusty environments
•
Do not look at the lens while the projector is in operation
Page 5

Box Contents
Projector Remote SD Card AV Cable
Power Cable
VGA / AV Cable + HDMI Cable
Adapter
Page 6

Warning: Read before Use. Viewing 3D content
•
Watching for extended periods at a close distance may affect vision, cause eye fatigue or dizziness
•
Pregnant ladies, elderly people, patients with heart disease & those prone to vomiting should avoid
excessive viewing
•
Be aware of people and objects around you when watching 3D content
•
Children under 5 should not view 3D content from this projector, it may affect visual development
•
People with epilepsy, photosensitivity (light anaphylactic) or light allergy should consult a doctor before
viewing. If you experience negative symptoms whilst using the projector, immediately stop viewing.
•
It may take your eyes a moment to adapt to viewing 3D content.
•
Under fluorescent lights (50Hz~60Hz), 3-wavelength lights&
around windows the image may appear to
flicker when watching. We recommend blocking out as much light as possible for viewing.
•
Active 3D glasses that support DLP-LINK must be used to view 3D content
Page 7

Projector Exterior View
Page 8
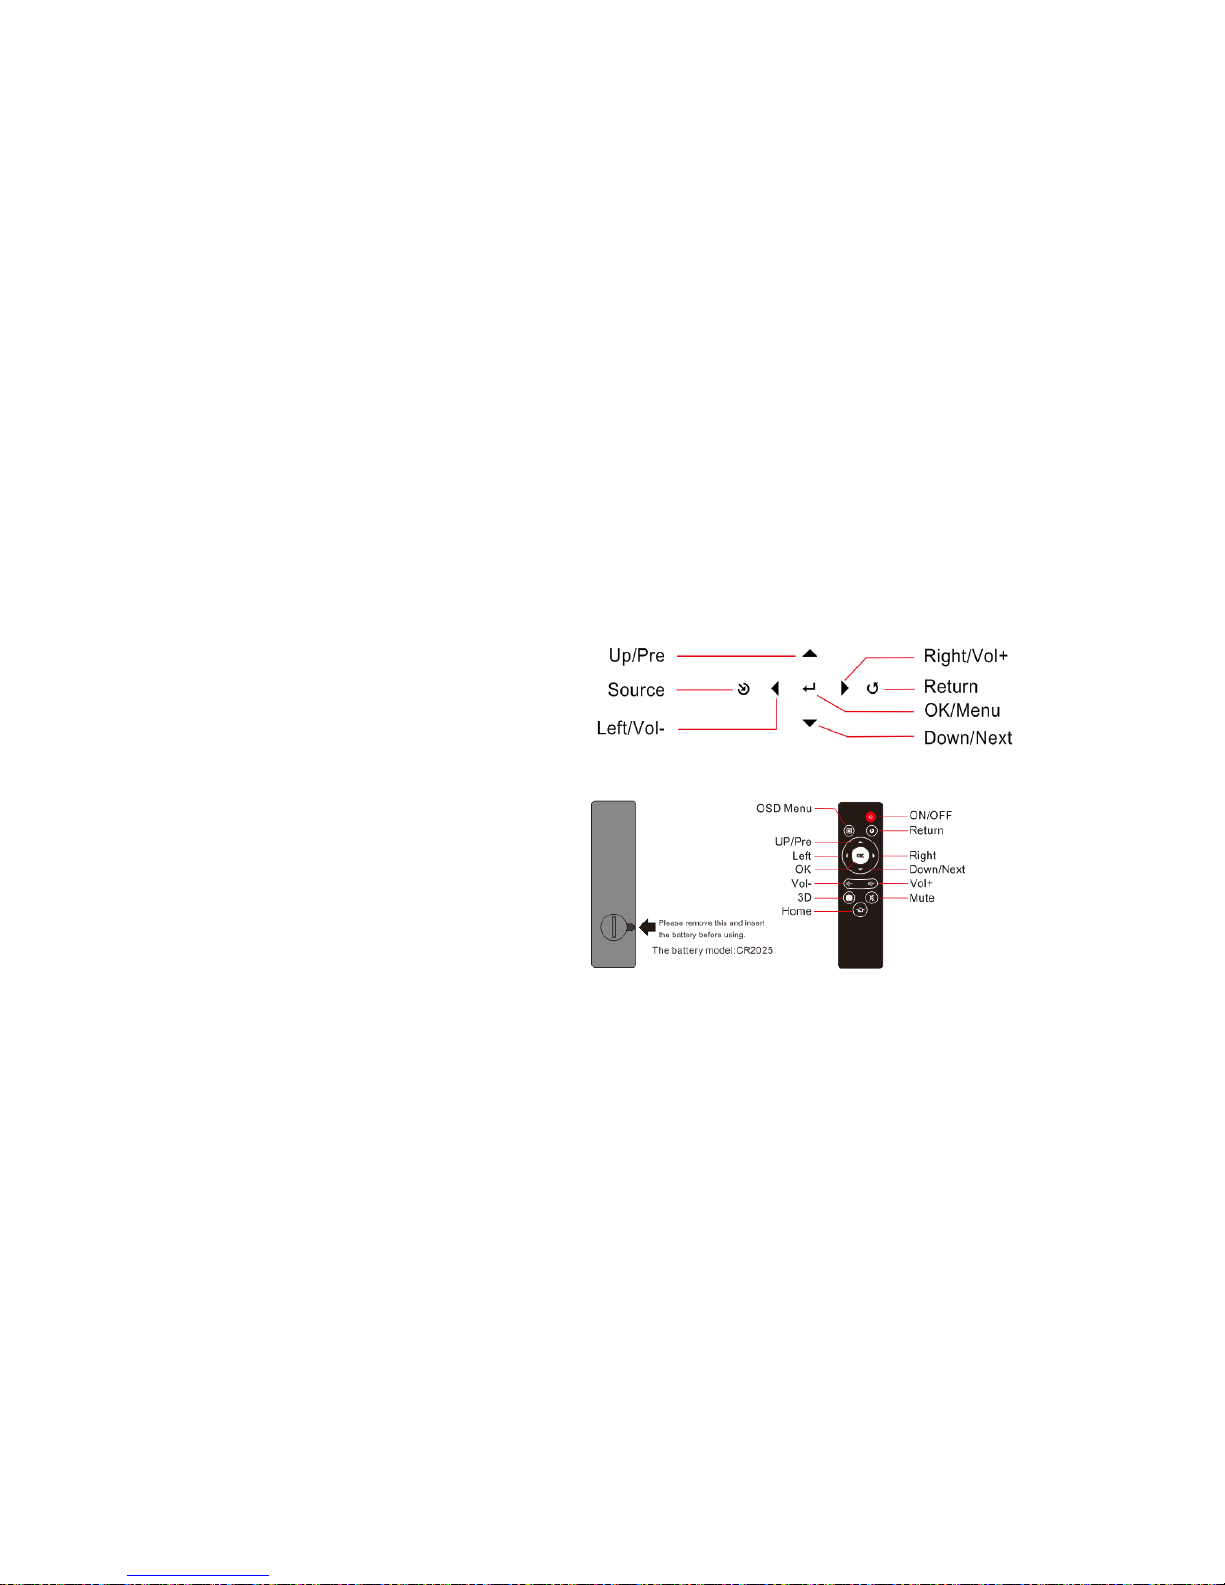
Touch Key Instructions
Remote Instructions
Page 9
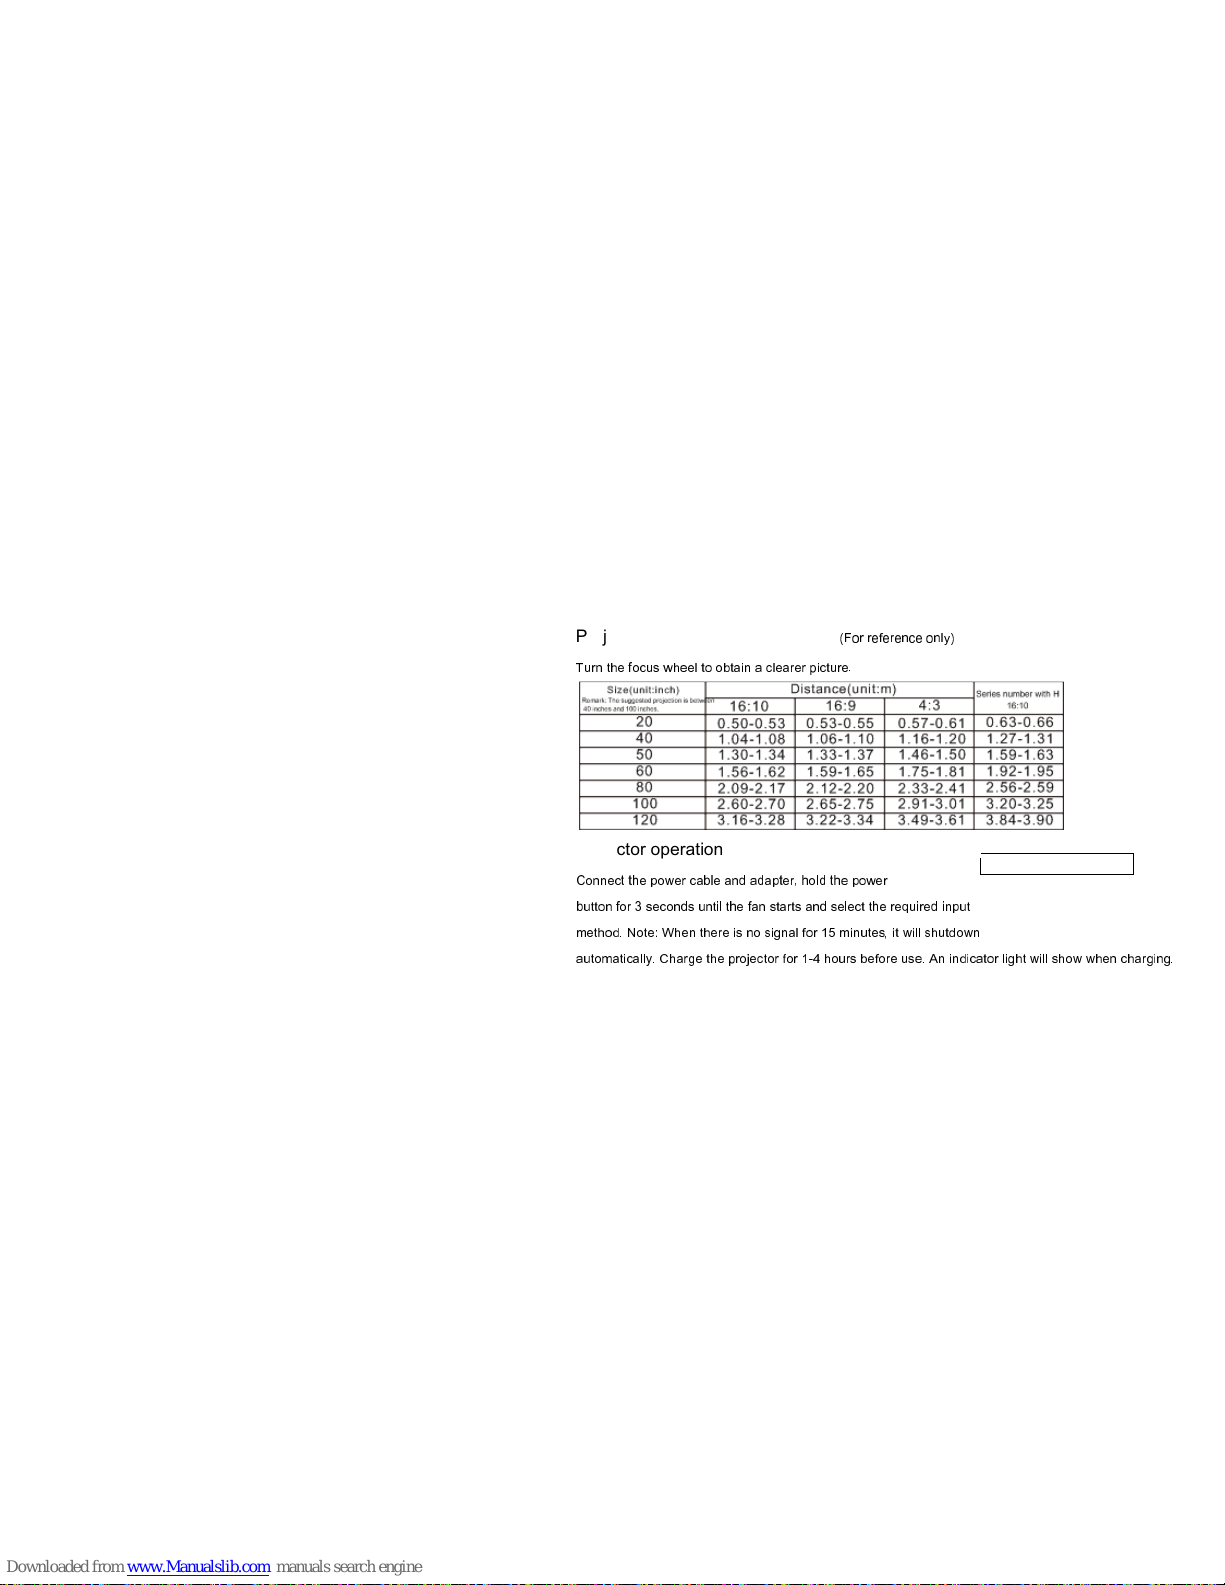
Projection size and distance table
(For reference only)
Turn the focus wheel to obtain a clearer picture.
Projector operation
Connect the power cable and adapter, hold the power
button for 3 seconds until the fan starts and select the required input
method. Note: When there is no signal for 15 minutes, it will shutdown
automatically. Charge the projector for 1-4 hours before use. An indicator light will show when charging.
Page 10

Input Source Selecting
To change the input source,
select the “Source” button on the
projector itself (see image above)
OR press the home button on the
remote control, navigate to the
“Input Source” option and select
it, then select your required input
method.
Page 11
Multimedia
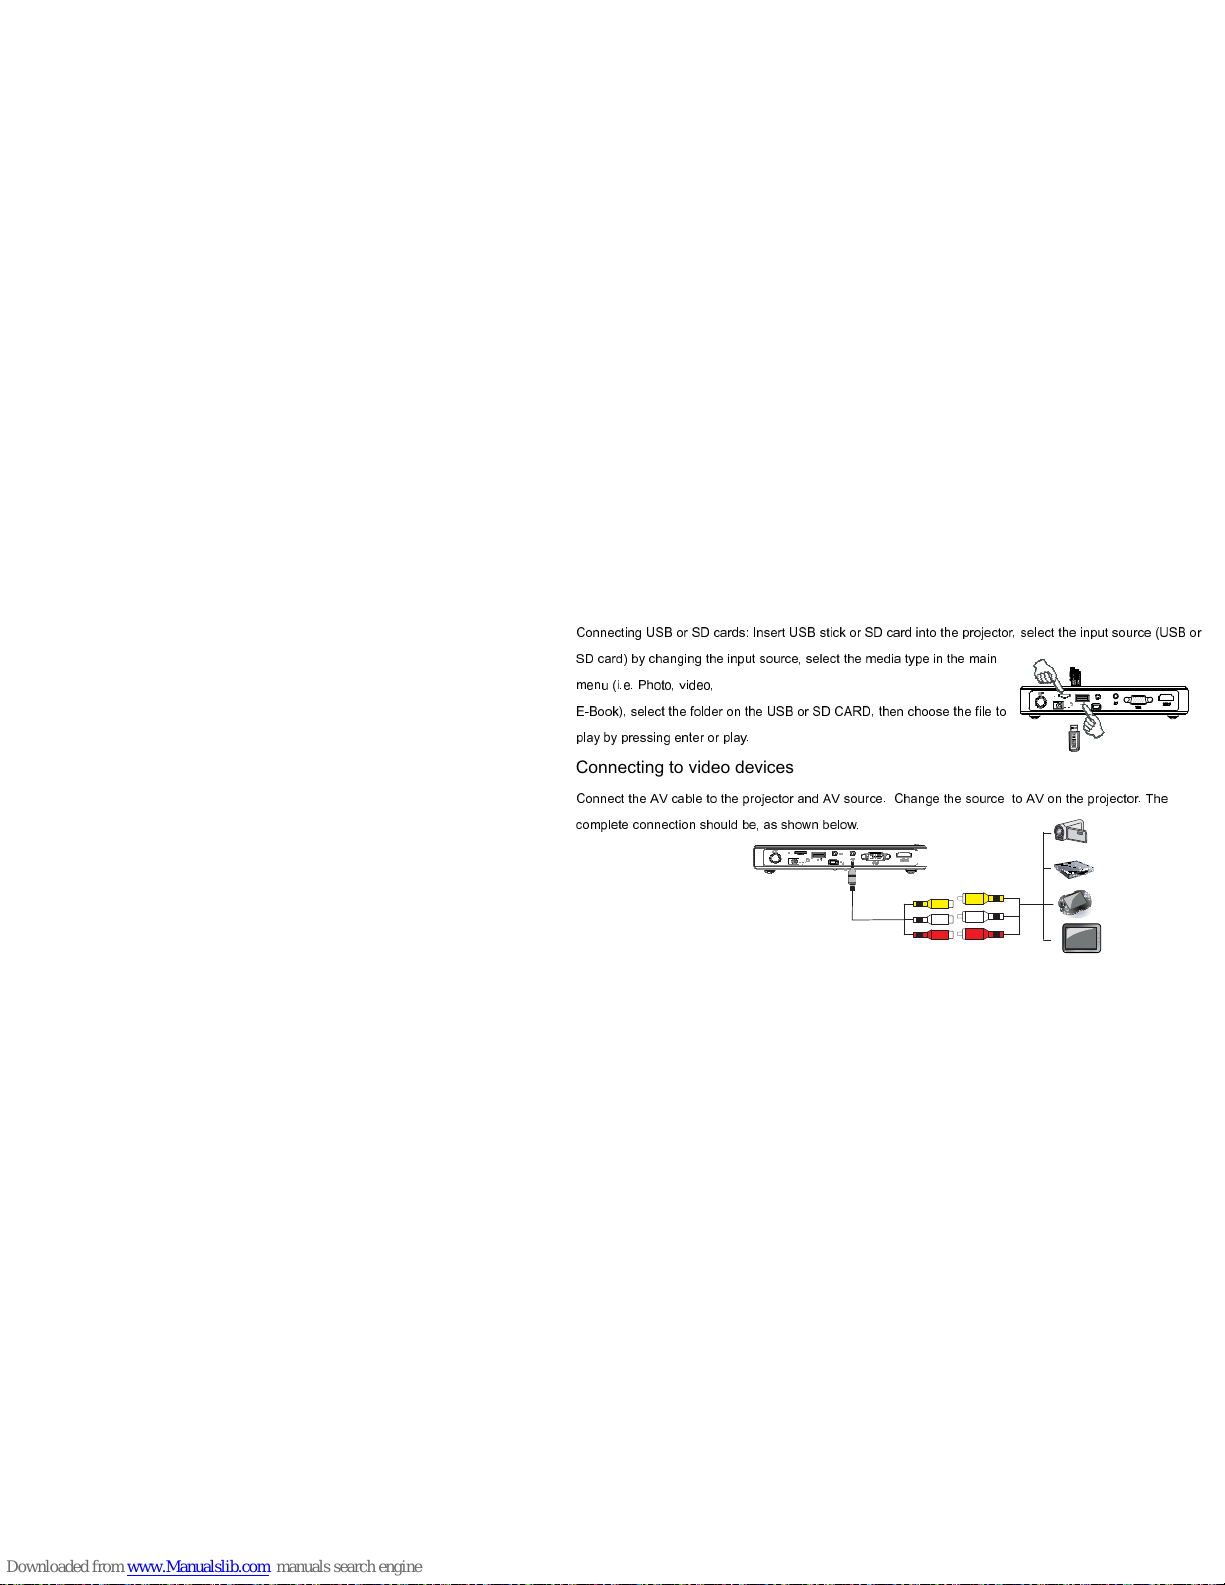
Connecting USB or SD cards: Insert USB stick or SD card into the projector, select the input source (USB or
SD card) by changing the input source, select the media type in the main
menu (i.e. Photo, video,
E-Book), select the folder on the USB or SD CARD, then choose the file to
play by pressing enter or play.
Connecting to video devices
Connect the AV cable to the projector and AV source. Change the source to AV on the projector. The
complete connection should be, as shown below.
Page 12

Connecting to HDMI devices
Connect one end of the HDMI cable to the projector, the other end to the HDMI device. Change the “Source”
on
the projector to HDMI input. The complete connection should be as shown below.
The HDMI port can power Android / Smart sticks.
For Laptops, press FN+OSD (on-screen display) button to switch screen output.
Connecting to PC
Connect one end of the VGA cable to the projector, the other end to the pc or laptop.
Change the ‘Source’ on the projector to change to VGA.
The complete connection should be as shown below.
You may need to change the computer’s resolution to 1280 x 720.
You may need to change your computer’s display settings to
output through the VGA port.
Page 13

Video Format:
Suffix Name
Internal Code Max
Resolutio
n Max Baud Rate
MPEG
1 DAT/MPG/MPE
G \ 1920×1080/30
P 20Mbp
s
MPEG
2 MPE
G \ 1920×1080/30
P 20Mbp
s
MPEG
4 AVI/MP
4 DIVX.XVI
D 1920×1080/30
P 20Mbp
s
RM/RMV
B RM/RMV
B RV8,RV9,1280×720/30
P 10Mbp
s
H.26
4 MKV/MO
V H.26
4 1920×1080/30
P 20Mbp
s
MJPEG AVI H.264 640×
480/30P
10Mbps
Samplin
g
Rate
Baud Rate
Sound Channe
l
WMA 8K-48K
32K-320Kbp
s Mono.Stere
o
MP3
32K-48K
32K-320Kbp
s Mono.Stere
o
M4A(AAC) 8K-
32K-320Kbp
s Mono.Stere
o
Multimedia Menu – Supported File Types
The projector can play these media files (video/photo/music/text), and the support format includes
Video Format: supports video play with subtitles and file suffix: srt,idx,ssa,ass,smi,txt,ttx,sub
Photo Format:
Music Format:
Photo Format Max Resolution
JPEG 15360×8640
BMP 9600×6400
PNG 9600×6400
Page 14
Wireless Connection Options
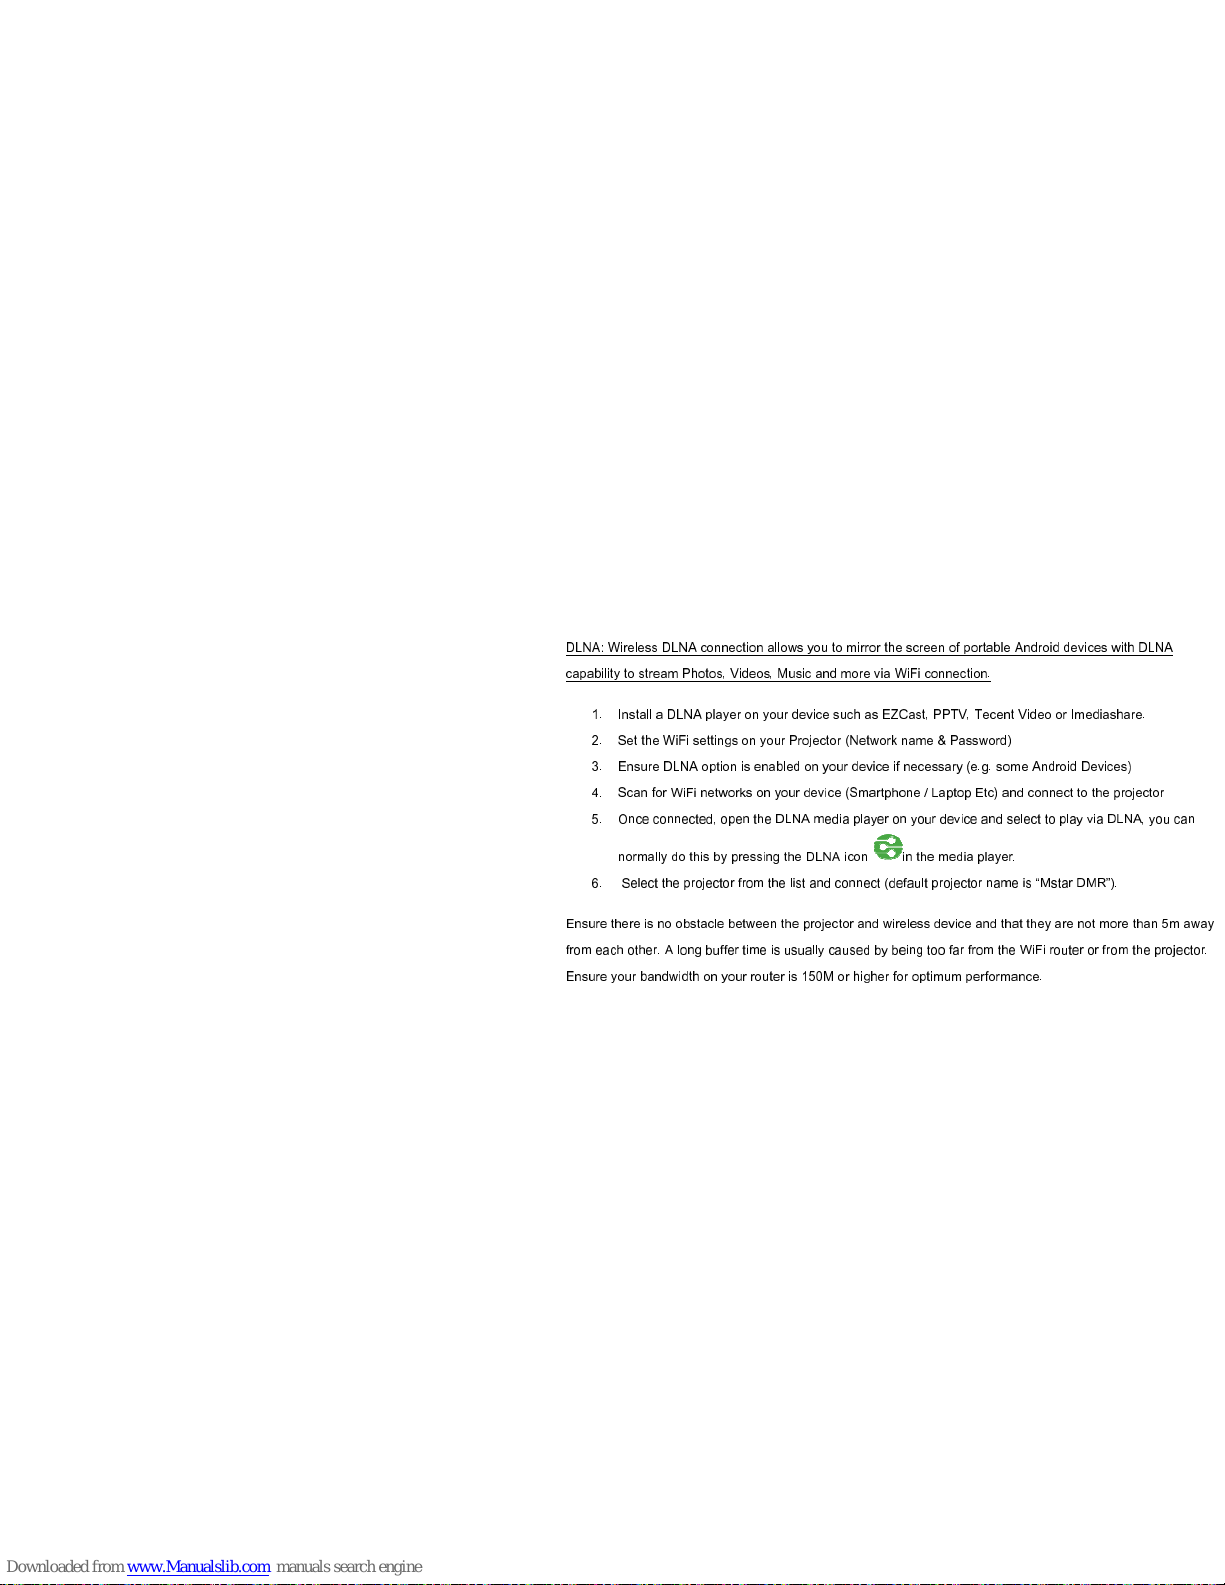
DLNA: Wireless DLNA connection allows you to mirror the screen of portable Android devices with DLNA
capability to stream Photos, Videos, Music and more via WiFi connection.
1.
Install a DLNA player on your device such as EZCast, PPTV, Tecent Video or Imediashare.
2.
Set the WiFi settings on your Projector (Network name & Password)
3. Ensure DLNA option is enabled on your device if
necessary (e.g. some Android Devices)
4.
Scan for WiFi networks on your device (Smartphone / Laptop Etc) and connect to the projector
5.
Once connected, open the DLNA media player on your device and select to play via DLNA, you can
normally do this by pressing the DLNA icon
in the media player.
6.
Select the projector from the list and connect (default projector name is “Mstar DMR”).
Ensure there is no obstacle between the projector and wireless device and that they are not more than 5m away
from each other. A lon
g buffer time is usually caused by being too far from the WiFi router or from the projector.
Ensure your
bandwidth on your router is 150M or higher for optimum performance.
Page 15

.
WiDi/Miracast Connection
You can mirror the picture & sound of your Android Smartphone or tablet under
WiDi/Miracast mode or any laptop / device with intel’s WiDi wireless chip.
Firstly, confirm that your smart devices supports Widi/Miracast with the manufacturer.
Page 16

Connecting via WiDi / Miracast
Press the home button on the remote control, navigate to WiDi / Miracast on the homescreen, press select / OK.
Enable the screen mirroring option on your Smartphone / device and search for “Projector” (the default name of
the projector). Press connect then wait a few seconds until the screen is displayed by the projector.
Page 17

Connecting via Intel Wireless:
Navigate to the “Wireless App” option displayed on home screen, press select / OK. Open the Intel Wireless
display programme on your device and follow Intel’s instruction to mirror your screen. For more information, view
Intel’s website.
Note: Ensure there is no obstacle between the projector and wireless device and that they are not more than 5m
away from each other.
Page 18

OSD Menu
(On Screen Display
Menu)
The on screen display (OSD) menu allows you to change projection settings = It can be changed as
follows
:
Page 19

•
Picture mode – Brightness, Contrast, White Balance, Sharpness Warmth, Aspect, Colour
Range, Noise reduction
• Sound mode – Balance, SPDIF, Surround, SRS, Auto volume
• 3D
• Media Reader
• DLNA Network
• Keystone Correction ( up to +/-40 degrees)
• Projection Mode
• Language
• Software Update
• Projector Reset (to default settings)
• Zoom Out (6 options)
Page 20

PPT/PDF File Play
•
The projector has a pre-installed software to convert PDF/PPT files which converts the files to MPTG
files to play them via the projector
•
For powerpoint you can also Save As .jpg (instead of /ppt) when you select Save As in Powerpoint
To convert your .PPT files to MPTG:
1 insert the SD card in the computer and find the installer saved on it.
2 double-click the icons to run the installation wizard, then follow the screen instructions.
3 when installation is complete, an icon will appear on your desktop.
4 double-click the icon to start program.
Page 21

Using the 3D function
This projector works with Active Shutter DLP-Link 3D glasses (sold separately).
No external equipment other than 3D glasses and 3D content are required to view 3D content.
3D projection formats included side-by-side, bypass, 2d-3d, top/bottom, BluRay / DVD
3D can be played from any 3D source e.g. SD card, USB, BluRay player, DVD, Laptop etc.
2D to 3D conversion is available on the device, however for optimum 3D performance always use 3D files /
movies which were originally shot in 3D / designed for 3D viewing.
How to view your 3D content
1. Turn on the projector
2. Choose the file source e.g. HDMI, USB, SD-card by selecting ‘Source’ on the remote control
3. To switch the device into 3D mode, press the F1 button on the remote control and select format type e.g.
side-by-side for use with DLP-link 3D Active Shutter glasses. There are 5 options available.
4. Ensure 3D glasses are fully charged and switched on.
Page 22

Watching 3D Content
•
Optimum viewing angle (up/down/left/right): 9 degrees.
•
Optimum viewing distance: 3 - 5 meters away from projected screen.
•
Optimum screen size: 60 inches.
•
Viewing conditions: The room should be as dark as possible as ambient light will affect use of the
DLP-3D glasses and the screen may not appear as vivid in brightly lit environments.
•
The maximum resolution for 3D mode is 1280 x 720 at a max 120Hz frequency.
•
If your DLP-link 3D glasses flash whilst watching 3D content, please turn off all the lights and test in a
dark environment as there may be too much ambient light. Otherwise there may be a problem with the
glasses.
Page 23

Trouble Shooting
If you still cannot solve the problem after using this guide, please contact the distributor.
Projector cannot be powered on
Check the power connection and the power indicator works. If the indicator does work, please replace the
power cable or the adaptor.
Over-heat protection
If the projector has been on for a long time it may shut down overheats the unit will automatically power off.
Blurred image
Use the manual focus wheel by turning it to adjust the image.
No image
Check that the correct ‘Source’ is selected on the projector. E.g. I
f you are connecting a HDMI source, check the
input method is set to HDMI. Also check that the input cables are working correctly by testing them with other
devices
Remote control failure
Try replacing the battery, check there is no barrier between the remote and the projector and make sure you’re
within range (The distance cannot exceed 5m).
Page 24

Technical Specification
Name Pico Genie M400
Pro
projector
Resolution
1280×800
Keystone correction +/- 40 degrees
Page 25

 Loading...