

Page 1

1
Mobile Phone
User Manual
Model Name: 101
Trademark: enspire
Page 2

2
TABLE OF CONTENT
BASIC INFORMATION ............................. 5
1.
1.1. BRIEF INTRODUCTION ........................................... 5
2. BEFORE USE ............................................... 6
2.1. NAME AND EXPLANATION OF EACH PART ............. 6
2.1.1. Appearance Sketch Map ........................... 6
2.1.2. Description of the Standby Pictures .......... 6
2.1.3. Description of Keys .................................. 8
2.2. INSTALL SIM CARD AND MEMORY CARD ........... 10
2.2.1. SIM Card ................................................. 10
2.2.2. Memory Card .......................................... 10
2.3. BATTERY ............................................................ 11
2.3.1. Install the Battery .................................... 11
2.3.2. Charging .................................................. 11
2.4. SECURITY PASSWORD ......................................... 12
3. QUICK USER GUIDE ............................... 13
Page 3

3
3.1. DIAL A CALL ....................................................... 13
3.2. REJECT A CALL ................................................... 13
3.3. RECEIVE A CALL ................................................. 14
3.4. END A CALL ........................................................ 14
3.5. EMERGENCY SERVICES ....................................... 14
3.6. EXTENSION SPEED DIAL ..................................... 14
3.7. DIALED CALLS/MISSED CALLS/RECEIVED
CALLS/REJECTED CALLS .............................................. 15
3.8. CALL FORWARD .................................................. 15
3.9. CALL WAITING ................................................... 15
3.10. CALL BARRING ................................................... 15
3.11. POWER OFF THE PHONE ...................................... 16
3.12. T-FLASH CARD ................................................... 16
4. FUNCTION MENU .................................... 16
4.1. CONTACTS .......................................................... 16
4.2. MESSAGE ............................................................ 17
4.3. CALL LOGS ......................................................... 18
4.4. SETTINGS ............................................................ 20
4.5. MULTIMEDIA ...................................................... 23
4.6. ORGANIZER ........................................................ 25
4.7. PROFILES ............................................................ 26
Page 4

4
4.8. INTERNET ........................................................... 26
5. TEXT INPUT .............................................. 27
6. CARE AND MAINTENANCE .................. 28
7. FCC NOTE .................................................. 31
Page 5

5
1. Basic Information
1.1. Brief Introduction
Thanks for selecting enspire 101 mobile phone. Through
reading the manual, you can fully know how to use 101 mobile
phone, appreciate its complete function and simple operating
method.
101 mobile phone is designed aiming at GSM/GPRS network
environment; the phone is Two Card Two Standby, but yo u can`t
call another SIM card when one SIM card is under phone call.
Besides basic call functions, 101 also provides many kinds of
practical functions, such as name card holder, scene mode,
message, audio and video player, camera and video, alarm clock,
calculator, STK, time and date, auto power-on and shut-down and
etc. so that convenient for your work and leisure activities. In
addition, 101 adopts personalized human-computer interface
design, its complete function can meet your different requirements.
101 mobile phone accords with GSM/GPRS criterion, has
obtained the certification of competent authority.
Page 6

6
The more the stripe is, the stronger the signal is.
The company reserves the rights to revise the contents of the
manual without prior notice.
2. Before Use
2.1. Name and Explanation of Each Part
2.1.1. Appearance Sketch Map
The picture is only for your reference.
2.1.2. Description of the Standby Pictures
Network signal strength
When SIM card 1s inserted in card slot 1, standby
screen will show the icon.
Page 7

7
The full the fill is, the more electric quantity is.
Network signal strength
The more the stripe is, the stronger the signal is.
When SIM card 1s inserted in card slot 2, standby
screen will show the icon.
Battery strength
Standby screen will show the icon.
Normal mode
When scene mode is set as normal mode, standby
screen will show the icon.
Silent mode
When scene mode is set as mute mode, standby
screen will show the icon
Meeting mode
When scene mode is set as meeting mode
, standby screen will show the icon.
Indoor mode
When scene mode is set as Indoor mode, standby
screen will show the icon.
Outdoor mode
When scene mode is set Outdoor mode, standby
screen will show the icon.
Page 8
8
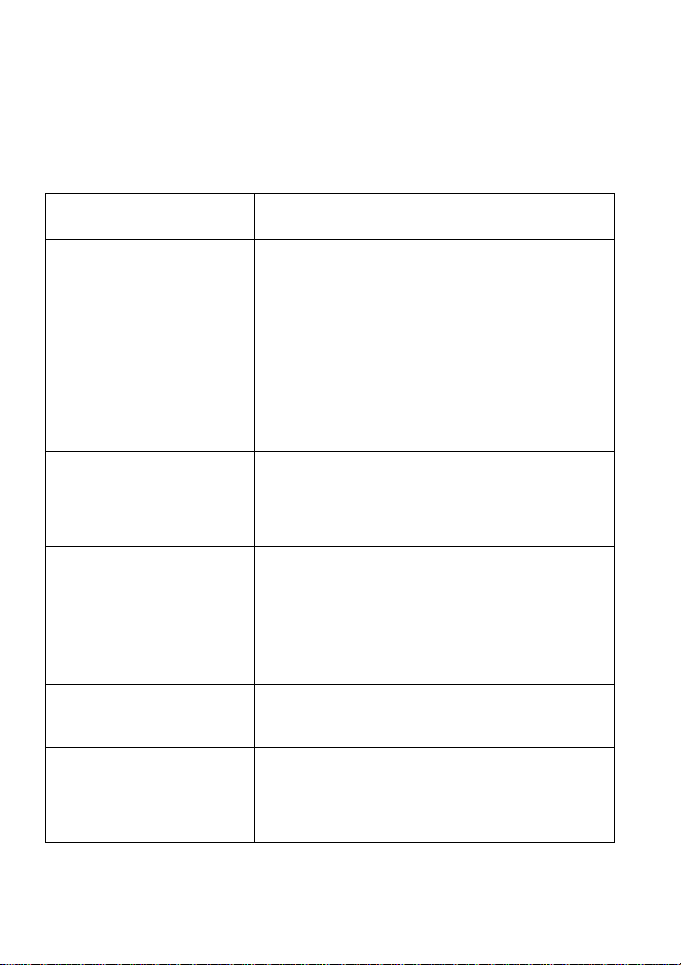
2.1.3. Description of Keys
Keys
Function
1. Execute functions that the
n other interfaces, it equals to
for special functions.
Dial key
OK key
End key
1. Mainly used as power on/off.
left-down/right-down corner indicator
Left soft key/
Right soft key
shows.
2. In the standby mode, press Left Soft
key to access Menu, Right Soft key to
access Contacts.
Navigation key
O
navigation key and direction key except
1. Press this key to dial or receive an
incoming call.
2. When in the standby mode, press this
key to access Dialed Calls.
In the dial panel mode, press this key to
show or hide dial panel.
2. Press to return to standby screen in
any interface.
Page 9

9
Number key
# Key
press "#"
* Key
3. End calls or reject incoming calls.
It is used to dial and input numbers or
characters. Press and hold Number
key 1 or 2 to get through the preset
voice inbox.
On the standby interface, input *; after
inputting telephone number, if you want
to input extension number, please press
twice asterisk key, after the display
screen shows “+”, please input your
extension number.
1. In text editing interface,
key to switch text the input method.
2. On the standby interface Press and
hold "#" key to transfer the profile of
Normal/Meeting.
Page 10

10
2.2. Install SIM Card and Memory Card
2.2.1. SIM Card
Before using the phone, you must insert valid SIM
(Subscriber Identity Module) card in the phone. SIM c ard 1s
provided by network supplier.
When you subscribe to a cellular network, you will receive a
plug-in SIM card complete with your subscription details, such as
your PIN, and available optional services.
Caution: Do not bend or scratch your SIM card. Avoid
exposing your SIM card to static electricity, water or dirt.
:Face the gold color contact point of SIM card towards the
Tips
cell phone and push the SIM card into the slot.
2.2.2. Memory Card
Aim at the T card slot and push the T card gently, and the card
will be inserted correctly.
Prompt: If the memory card is failed, please check whether it
is correctly placed and good contact of metal point.
Page 11

11
2.3. Battery
2.3.1. Install the Battery
Take off the rear cover, of the mobile.
Make one end of battery with metal surface aim at the battery
connector.
Then gently press the battery downward using the finger, and
then press the other end to install the battery.
Prompt: Please operate correctly to avoid damaging the
battery connector.
2.3.2. Charging
Insert the charger on the charging interface at the side end of
the phone.
Connect the charger to a standard wall outlet and the battery
power icon in the up-right corner of the screen will start scrolling.
When the battery bar stops scrolling, it means the battery charge is
complete. Press the two sides of the charger plug and disconnect
the charger from the phone.
Prompt: In order to ensure normal operation of the phone,
Page 12

12
please make sure to use the designated charger.
2.4. Security Password
PIN
PIN (Personal Identification Number) is used to prevent your
SIM card from being used illegally. PIN is usually provided with
SIM card together. If you input wrong PIN for continuous three
times, please input PUK to unlock it. Please contact with network
operations company for more details.
PIN 2
You need to input PIN2 when enterin g some functions (such
as call charge); if you input wrong PIN2 for continuous three times,
you need to input PUK2 to unlock it. Pleas e contact with network
operations company for more details.
PUK
When changing the locked PIN, you need to input PUK
(Personal Unlock Key). PUK is provided with SIM card together.
If it is not provided, please contact with your service provider. If
you input wrong PUK for continuous ten times, the SIM card can’t
be used again. Please contact with your service provider to buy
new card. You can’t change PUK. If you lose the code, please
contact with your service provider.
PUK2
Page 13

13
When changing the locked PIN2, you need to input PUK2. If
you input wrong PUK2 for continuous ten times, you can’t use the
functions that need PIN2. Please contact with your service provider
to buy new card. You can’t change PUK 2. If you lose the code,
please contact with your service provider.
3. Quick User Guide
3.1. Dial a Call
In standby mode, press numerical keys to input phone
number to dial phone number. When you finish inputting phone
number, press the dial key to make a call. If you're making a long
distance call, add the area code preceding the telephone number.
Press left soft key to access Options.
3.2. Reject a Call
You can press End key to reject an incoming call.
Page 14

14
3.3. Receive a Call
When an incoming call arrives, the phone will give out the
corresponding prompt (such as vibration, ring tone, and etc.); if
network support, the phone screen will show the name and
telephone number of the caller; at this time, you can press Dial key
to receive an incoming call.
3.4. End a Call
After finishing a call, you can press End key to end a call.
3.5. Emergency Services
You can directly dial an emergency service call without SIM
card.
Different network uses different emergency numbers, please
consult your network operations company for more details.
3.6. Extension Speed Dial
After inputting telephone number, if you want to input branch
number, please press and hold “*”, input your extension number
after the display screen shows “P”. After getting through the call, it
will directly dial the extension.
Page 15

15
3.7. Dialed Calls/Missed Calls/Received
Calls/Rejected Calls
You can enter call log to check the relevant details of dialed
calls, missed calls, received calls and rejected calls.
Prompt: The record of incoming call from blacklist number
will be saved in Rejected Calls.
3.8. Call Forward
After call forward function is started, according to different
forward conditions settings (Call Forward Unconditionally,
Forward Busy, Forward No Answer, Forward Can Not Reach), you
can select to switch the incoming call to voice inbox or other
telephone numbers.
3.9. Call Waiting
After call waiting function is started, when you are calling,
the other call can be put through.
3.10. Call Barring
After call barring function is started, according to different
restricted conditions settings (all the dialed calls, all the incoming
calls, incoming calls when roaming, dialed international calls,
Page 16

16
outgoing international calls when roaming), you can restrict the
call under the corresponding conditions (need to apply to network
operator for business).
3.11. Power off the Phone
In the standby mode, press and hold End key to power off
the phone.
3.12. T-flash Card
Insert the T-Flash card into phone from the background.
This will expand the Flash memory of the phone.
Tap Multimedia menu, you can browse MP3, MP4, pict ur e, vid eo ,
photograph etc.
4. Function Menu
4.1. Contacts
list.
When this device standby, select [contacts] and open the name
Page 17

17
The contacts are listed in the order of unnamed, special
symbol, digit and English letter respectively (for Chinese names,
the English letter corresponding to their pinyin prevails).
4.2. Message
Message service is actually a network service. This menu
works soundly depending on the type of your SIM card and the
service provided by the network operator. Therefore, please check
it before applying such function.
Write message
Please have the service center number from the network
operator before applying this function. The storage capacity of
SIM card depends on its type.
――SMS
Under idle situation, press “information service” button to
enter into the mailbox list interface, press [Write message→ New
SMS] to enter into the message editor interface, manual input or
insert the contacts from the address list as the recipients, press
“send” button to send the messages after editing the contents.
Inbox
Page 18

18
Save the received SMS
Outbox
Save the SMS not sent out successfully.
Drafts
Save the unsent messages.
Sent box
Save the SMS you sent successfully.
Templates
Directly use the default phrases when writing the messages.
Settings: Set relevant parameters for the short messages,
multimedia messages and push messages.
Message capacity: Show the memory capacity of the messages.
4.3. Call logs
Call logs
Display your recent call log.
Missed calls
Page 19

19
Display the list of your recent missed numbers. The operation
is the same as the Dialed.
Dialed calls
Display the list of your recent dialed numbers.
Received calls
Display the list of your recent answered numbers. The operation
is the same as the Dialed.
Rejected calls
Display the incoming call records in the blacklist.
Delete all
You could delete all the records of the Dialed, Received,
Missed and Rejected.
Call timers
Display information details of SIM1/SIM2: Last Call, Received
Calls, Dialed Calls, and All Calls. Press left soft key to "Reset".
GPRS counter
Display information details of SIM1/SIM2: Last sent, Last
Page 20

20
received, Total sent, and Total received. Press left soft key to
"Reset".
4.4. Settings
You can customize the settings, such as time and date,
language, call settings etc.
Call settings
Including:
Dual-SIM: Including Standby mode, Reply by orig inal SIM, Set
SIM name, Set dual SIM call divert.
Call divert: When “call divert” function is started up, you can
transfer the incoming call to voice inbox or other phone number
according to the tasked “call divert” conditions.
Call waiting: You can start up or shut down the function. Whe n it
is started up, even when you are making a call, you can also
receive another income call.
Call barring: All outgoing calls, incoming calls, roaming
incoming calls, international outgoing calls, roaming international
outgoing calls are available.
Hide ID: Set the display mode of the phone number.
Others: The setting options include Call time minute reminder,
Auto redial, Vibration when connected, Reply SMS after reject,
Page 21

21
Auto record voice call.
Phone settings
Date & time: You can set up the date and time on the phone as
well as their display mode.
Language settings: You can select phone language.
Shortcut settings: You can set the menu when you press
navigation button to enter in standby interface.
Auto Power on/off: You can set the time and repeat mode of
power-on and power-off.
Power saving mode: When setting pattern set to save electricity
mode. And can view your battery power.
Dial vibrate switch: Can choose to open or close when dialing
vibration effect.
Restore factory settings: You can restore part of the phone
settings as factory settings. The default code of restoring factory
settings is: 0000.
Display
Animation effect: Including Power on display, Power off display.
Wallpaper Settings: Supported: Static wallpaper and more
pictures.
Idle display settings:
Contrast: Adjust the screen backlight.
Backlight: Adjust the backlight time.
Page 22

22
Keypad backlight time: Adjust the keypad backlight time.
Security
PIN: Start and close of PIN code and the modification of PIN.
Modify PIN2: Modification of PIN2 code.
Phone locked
:Open or close the phone lock. The default password
is “0000”.
Modify the cellphone password: Change the phone and privacy
password.
Privacy: Set the privacy protection. The default password is
“0000”.
Auto keypad lock: Set the time of mobile phone automatically
locked.
Lock screen by end-key: Choose open or closed by red key
locking function.
Guard lock: You can start up or shut down anti-theft function or
revise anti-theft function password (the password shall be 6-digit).
The default anti-theft password is 123456.
Fixed dialing: Start and close of the fixed dialing, and
management of the fixed dialing list
Blacklist: Set the Settings of the blacklist and management of the
list.
Connections
The items are:
Page 23

23
Network account: Manage internet account, and support editor
and delete.
GPRS Service: Choose turn on or off GPRS service.
Data connection settings: Select to connect as needed or all the
time.
Network selection: Select to automatically or manually connect.
4.5. Multimedia
Camera
The device is equipped with a webcam with high pixels. You
can take photo at any time and save the photo in the device or
SIM card. Press OK key to get the picture.
DV
The device is equipped with a video capture so that you can
chat with your friends through it. A driver is needed to be
installed when the video capture function is used. The details can
be found in driver installation guide.
Image
Check the pictures and shoot photos in the memory card
through the photo album.
Edit the opened pictures, press options, can do Set as wallpaper,
Page 24

24
Set as contact icon, Delete, Share, Renam e, Sli de pl ay , D etails.
Audio
This phone could play the MP3 stored in the phone memory
and support the backgroun d p lay. Press the navigation key into the
song list. Press OK to play or pause, press the navigation button to
stop playing. Press up key and down key to adjust volume.
FM radio
You can listen to FM radio only when using a headphone. Enter
the radio interface. Press the left and right navigation key to switc h
on a channel and a channel. Press the ok keys to stop/play
broadcasting FM radio. Press the navigation button start FM
recording. According to * and adjust the volume # key.
Video
This phone supports the video format of 3GP, AVI and MP4.
Enter the video play list interface, press left soft key, you could go
on the following operations.
Recorder
Use this function you can record or listen to your own record.
The record file format: wav.
My files
My files manager can manage the files in the memory card.
(make sure the card has been inserted).
Page 25

25
Games
This mobile phone provides, pushing and snake two small
game, please see the in-game help illustrate specific operation
4.6. Organizer
Calendar
You can use this feature to view the year, date and solar term
easily. Use up/down/left/right direction key to navigator other date.
Alarm
You can edit alarm, time, ring and repeated ring mode.
In “ alarm edit” mode, you can scroll up or down direction
key, when the cursor goes to the desired option, press “OK”, then
you can select desired settings.
Calculator
The function will make your device a calculator with which
you can carry out simple math calculation.
Torch
You can turn on/off torch light or long press 0 key in standby
interface.
Page 26

26
4.7. Profiles
The preset modes are Normal mode, Silent mode, Meeting
mode, Indoor mode, Outdoor mode and Earphone mode. It
support custom profiles, define at most 5 profiles, and users can
set the parameters of the profiles.
Instruction: The preset profiles do not support delete, while the
custom profiles support delete.
More Functions
Choose one mode, to open the option menu:
Rename: Rename the current mode.
Ring settings: Set the SIM1/SIM2 call ring and message ring.
Adjust volume: Adjust volume for Caller rin g tone, Message ring
tone, Alarm& calendar ring tone and Power ring tone.
Ring type: Set the SIM1/SIM2 call alert and message alert, Alarm
& calendar remind.
Other alert rings: Set the other alert rings, such as Key tone,
Battery low alert, Power ring tone, Dial tone.
4.8. Internet
The device is compatible with WAP service. You can visit
Page 27

27
various WAP services, for instance, news, weather forecast and
airlines etc. The services are specially designed for the device and
are maintained by WAP service supplier.
WAP service requires network backup. You can consult the
network operator or service supplier about the availability, rates
and tax of WAP services.
5. Text Input
The device provides several text input modes so that you can
write text or input data in your “contacts”, edit “contacts” record,
search English names and write SMS and to-do list.
In “text input” mode, if you want to change the input way,
you can press “#” key. The selected input way will appear on the
top left of the screen.
Letter (Capital, Normal)
Enter edit page, press “#”and switch the input mode to
“letter”, then press the keys on keypad, selected letters will
appear on the screen.
Press the number key can get the first letter marked on the key,
press twice quickly can get the second letter marked on the key.
Page 28

28
Similarly, if the letter you want to input have the same key with the
former letter, please wait until the cursor appears again, then input
the new letter.
For example, if you want to input “ok”, you need to press the
“6” key three times continuously and get “o”, then press the
key”5” twice, “ k” will appear on the screen. Press right soft key,
you can delete the text you input.
Number
Enter “edit” mode, press “#” key yo u can change the input
way to “ number”. Then press the keys, number will appear on the
screen. The key 0-9 separately represents the figure from 0 to 9.
You can press corresponding key to get desired number. Press right
soft key can delete the number you input.
6. Care and Maintenance
Maintenance of battery
·Your device is powered by a rechargeable battery. It is necessary
to have the battery charged when it is going to wea r out. The full
performance of a new battery is achieved only when it is fully
wore out.
Page 29

29
·Unplug the charger from the electrical plug and the device when
not in use. Do not leave fully a charged battery connected to a
charger over a week, since overcharging may shorten its lifetime.
·Temperature tends to affect the limit of battery to be charged.
Therefore, it is necessary for the battery to be cooled or warmed
before it is charged. If the temperature of batter exceeds 40ºC ,the
battery cannot be charged.
·Use the battery only for its intended purpose and avoid
short-circuiting. Accidental short-circuiting can occur when a
metallic object causes direct connection of the positive (+) and
negative (-) terminals of the battery.
·Do not use damaged battery.
·Leave the battery in hot or cold places will reduce the capacity
and lifetime of the battery. A device with a hot or cold battery may
not work temporarily, even when the battery is fully charged.
·Do not dispose of batteries in a fire as they may explode. Dispose
of batteries according to local regulations.
Care of maintenance of your device
The suggestions below will help you protect your warranty
coverage.
·Keep the device and accessories out of the reach of small children.
·Keep the device dry. All types of liquids or moisture will corrode
electronic circuits.
Page 30

30
· Do not store the device in hot areas. High temperatures can
shorten the life of electronic devices and warp or melt certain
plastics.
·Do not attempt to open the device other than as instructed in this
guide. Non-professional handling may damage the device.
·Do not use harsh chemicals or strong detergents to clean the
device.
ROHS Declaration
Declaration of Conformity with the requirements of the e-waste
Management Rules, 2011 (adopted by Notification S.O.1035 (E) of
Ministry of Environment and Forests)
The Product is in conformity with the requirements of Rule 13 of
the e-waste Rules. The content of hazardous substance with the
exemption of the applications listed in SCHEDULE II of the
e-waste Rules:
1. Lead (Pb) – not over 0.1% by weight;
2. Cadmium (Cd) – not over 0.01% by wei ght ;
3. Mercury (Hg) – not over 0.1% by weight;
4. Hexavalent chromium (Cr6+) – not over 0.1% by weight;
5. Polybrominated biphenyls (PBBs) – not over 0.1% by weight;
6. Polybrominated diphenyl ethers (PBDEs) – not over 0.1% by
Page 31

31
weight.
7. FCC NOTE
This device complies with part 15 of the FCC Rules. Operation
is subject to the condition that this device does not cause
harmful interference
Changes or modifications not expressly approved by the party
responsible for compliance
could void the user's authority to operate the equipment.
NOTE: This equipment has been tested and found to comply
with the limits for a Class B digital device, pursuant to Part 15
of the FCC Rules. These limits are designed to provide
reasonable protection against harmful interference in a
residential installation. This equipment generates, uses and can
radiate radio frequency energy and, i f not installed and used in
accordance with the instructions, may cause harmful
interference to radio communications. However, there is no
guarantee that interference will not occur in a particular
installation.
If this equipment does cause harmful interference to radio or
Page 32

32
television reception,
which can be determined by turning the equipment off and on,
the user is
encouraged to try to correct the interferen ce by one or more of
the following
measures:
-- Reorient or relocate the receiving ant enna.
-- Increase the separation between the equipment and receiver.
-- Connect the equipment into an outlet on a circuit different
from that to which the receiver is connected.
-- Consult the dealer or an experienced radio/TV technician for
help.
Specific Absorption Rate (SAR) information:
This Mobile Phone meets the government's requirements for
exposure to radio waves. The guidelines are based on standards
that were developed by independent scientific organizations
through periodic and thorough evaluation of scientific studies.
The standards include a substantial safety margin designed to
assure the safety of all persons regardl ess of age or health.
FCC RF Exposure Information and Statement The SAR limit of
USA (FCC) is 1.6 W/kg averaged over one gram of tissue.
Device types: 101 (FCC ID: 2AICV-101) has also been t ested
against this SAR limit. The highest SAR value reported under
Page 33

33
this standard during product certificatio n for use at the ear is
0.622W/kg and when properly worn on the body is 0.756W/kg.
This device was tested for typical body-worn operations with
the back of the handset kept 10mm from the body. To maintain
compliance with FCC RF exposure require ments, use
accessories that maintain a 10mm separat ion distance between
the user's body and the back of the handset. The use of belt clip s,
holsters and similar accessories shoul d not contain metallic
components in its assembly. The use of accessories that do not
satisfy these requirements may not comply with FCC RF
exposure requirements, and should be avoided.
Body-worn Operation
This device was tested for typical body-worn operations. To
comply with RF exposure requirements, a minimum separation
distance of 10cm must be maintained between the user’ s body
and the handset, including the antenna. Third-party belt-clips,
holsters, and similar accessories used by this device should not
contain any metallic components. Body-worn accessories that
do not meet these requirements may not comply with RF
exposure requirements and should be avoided. Use only the
supplied or an approved antenna.
 Loading...