

Page 1
L I M I T E D W A R R A N T Y
Phoenix Gold International,Inc.(or "Phoenix Gold") warrants its products against defects
in materials and workmanship for a limited period of time. For a period of 90 days from date of
original purchase,we will repair or replace the product, at our option,without charge for parts
and labor. Customer must pay all parts and labor charges after the limited warranty period
expires.The limited warranty period for factory refurbished products expires after ninety (90)
days from date of original purchase.The warranty is extended to 2 years from date of purchase
if installed by an authorized Phoenix Gold dealer. This limited warranty applies only to
purchases from authorized Phoenix Gold Electronics/Speaker retailers.
This limited warranty is extended only to the original purchaser and is valid only to
consumers in the United States.Consumers are required to provide a copy of the original sales
invoice from an authorized Phoenix Gold dealer when making a claim against this limited
warranty. This limited warranty only covers failures due to defects in materials or workmanship
that occur during normal use. It does not cover failures resulting from accident, misuse,abuse,
neglect,mishandling, misapplication,alteration, faulty installation,modification, service by
anyone other than Phoenix Gold,or damage that is attributable to Acts of God. It does not cover
costs of transportation to Phoenix Gold or damage in transit.
This warranty will become void if the serial number identification has been wholly or
partially removed, altered or erased.Repair or replacement under the terms of this warranty
does not extend the terms of this warranty. Should a product prove to be defective in
workmanship or material,the consumer's sole remedies will be repair or replacement as
provided under the terms of this warranty. Under no circumstances shall Phoenix Gold be liable
for loss or damage,direct,consequential or incidental,arising out of the use of or inability to
use the product.There are no express warranties other than described above.
C A U T I O N
Tantrum-X Components are capable of extremely high sound
volumes.Prolonged exposure to these high sound levels can cause
hearing loss. We want you to enjoy your Phoenix Gold speakers for a
long time to come. Please exercise reason and restraint accordingly.
Congratulations on your purchase of a new Tantrum-X Component
loudspeaker system. By purchasing Phoenix Gold, you’ve demonstrated a desire to own the finest in audio reproduction. Phoenix
Gold strives to provide you, the customer, with the most thoroughly
engineered and tested car audio products possible.
© 2003 P H O E N I X G O L D IN TERN AT I O N A L
9300 North Decatur • Portland, OR 97203
www.phoenixgold.com
TA N T R U M - X COM P ONEN T F E AT U R E S
• Developed by Phoenix Gold from the ground up to set new standards in performance.
• 25mm,ferro-fluid filled, parachute-silk dome tweeters.
• Grained aluminized polypropylene cone material is precisely injection molded to be very
light and rigid for excellent signal tracking.
• Optimized magnet/motor structures result in high efficiency and clarity.
• Advanced butyl rubber surround is more rugged than foam,won’t break down from
moisture or UV, and is extremely well damped.
• Flat linear roll spider reduces distortion and provides maximum voice coil centering.
• Rigid powder coated steel frame
• Optimized 24dB/octave acoustic crossover.
• Standard mounting sizes and bolt patterns
• Flexible tweeter mounting system.
12.02 REV A
Page 2
S P E C I F I C AT I O N S
M O D E L POWER F R E Q U E N C Y IMPEDANCE S E N S I T I V I T Y MOUNTING MOUNTING
H A N D L I N G ( H Z ) ( O H M S ) ( D B ) D E P T H D I A M .
( R M S / P E A K ) ( I N S . ) ( I N S . )
T X 5 . 0 6 0 / 1 2 0 7 0 - 2 0 K 4 8 9 2 3 /8 4 1/2
T X 6 . 0 7 0 / 1 4 0 6 5 - 2 0 K 4 9 0 2 1/2 5 1 /8
T X 6 . 5 7 0 / 1 4 0 6 5 - 2 0 K 4 9 0 2 3 /4 5 5/8
CROSSOVER I N STA L L AT I O N :
The crossover included with the Tantrum-X component set is computer optimized to
give the most accurate in-car response possible. Use only the crossover provided.
The use of any other crossover may result in poor performance or damage to one or
more of the Tantrum-X components.The Tantrum-X crossover can be mounted anywhere that is convenient. Common mounting positions are under the dashboard, in
the kick panel, or under the rear deck. Be cautious when mounting the crossover
inside of a door panel that might be exposed to moisture.Remove the crossover
cover to access the two internal mounting holes. Use the supplied mounting screws
to secure the crossover. Make sure that there is ample clearance on both sides of
the mounting surface to avoid damaging other equipment in the vehicle.Wire the
crossover to the component speakers and amplifier as shown.
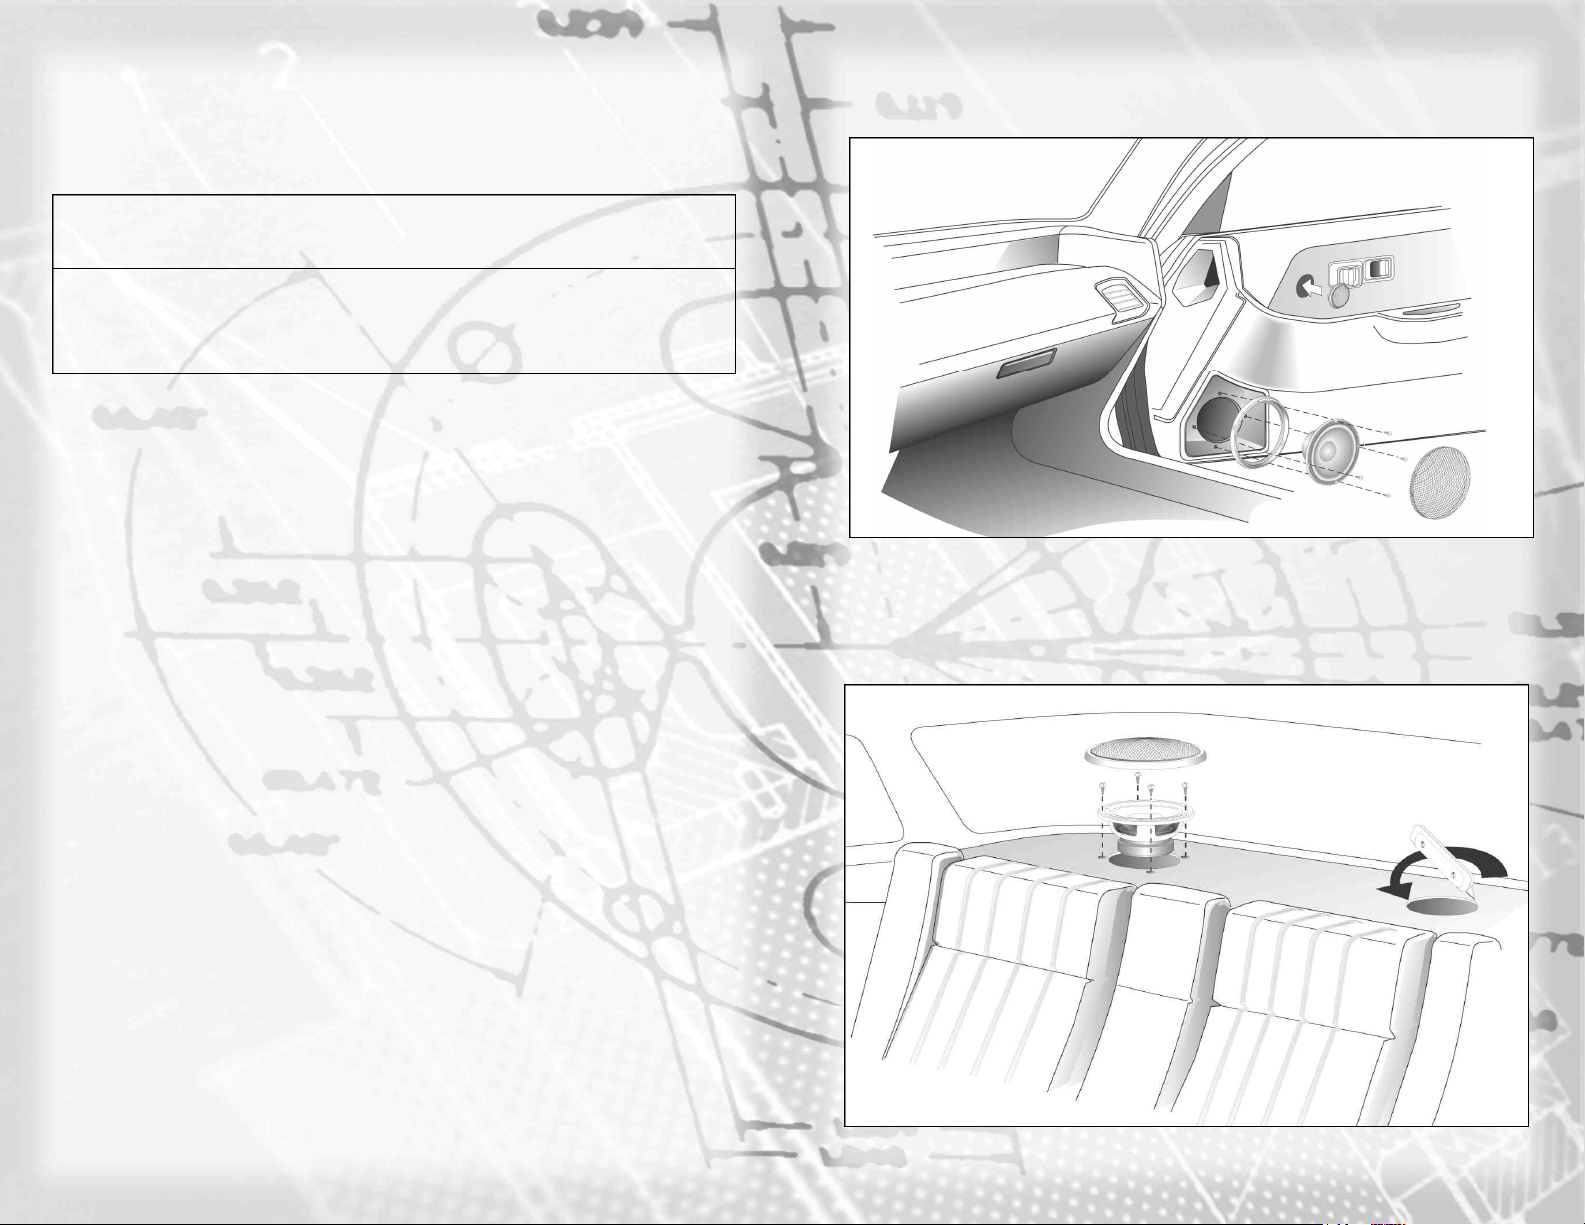
Figure 1: Factory speaker location
Figure 2: Creating new speaker location
IMPORTANT NOTE:
The Tantrum-X crossover has been redesigned with flexibility in mind. We have
added a switch inside the crossover to allow either flat, musical response or +3dB
from the tweeter if desired. Make sure to adjust the tweeter crossover to your preferred setting before hiding the crossover in the door or panel!
2 7
Page 3

TA N T R U M - X CO M P O N E N T INSTA L L AT I O N
Selecting the placement of your new Tantrum-X Component speakers may be as easy as
using the existing factory locations or may require you to create a new location. Speaker
placement in the door, dash, or rear deck is the most common. See your local Phoenix Gold
Dealer for additional location options and mounting assistance.
TA N T R U M - X WO O F E R IN S TA L L AT I O N
1. Many vehicles already have factory locations (Figure 1.) to house the "DROP IN" feature
of the Tantrum-X Component line. If no existing locations are available or are not used
(Figure 2.),check the desired location for adequate cutout area and any depth obstructions. Make sure to allow sufficient clearance for window tracks, structural braces, trunk
lid springs,etc.
2.Assuming enough area and depth is available,use the provided template and trace the
speaker cutout and mounting holes onto the surface of the mounting location.
3. If the mounting surface is not structurally strong enough to accommodate screws, (i.e.
plastic, cardboard) use the provided speed clips which will act as a nut for the supplied
screws.
4.Always provide water protection if not supplied in the vehicle. We suggest using a rain
shield or equivalent. If in doubt, please contact your Phoenix Gold Dealer.
T Y P I C AL SY S T E M HOOKU P
+
–
+
–
6
3
Page 4

TWEETE R I N S TA L L AT I O N
The Tantrum-X Component series features several types of unique mounting options.
The tweeter is easy to install in any vehicle. Each Tantrum-X component set comes with
a flush mount,surface mount, and angle mount hardware kit. For other custom
mounting configurations contact your Phoenix Gold Dealer.
FLUSH MO UNT: For optimal tweeter installation,use the flush
mount option.The Flush mount requires a 7/8" depth and 2 1/8"
mounting hole in the mounting surface.The flush mount tweeter
housing is a two piece design that twists counter clockwise for
opening,to insert the tweeter driver.A clockwise twist will lock
the housing assembly together. Use the hex bolt and pronged
spring retainer to secure the housing to the mounting surface.
S U R FACE MOUNT: Use the surface mount option when,
cutting a hole in the door panel,or other mounting surface is
not possible.Make sure that the surface mount location is free
of passenger movement that might damage the tweeter. Use
the kit screws supplied to secure the mount to the surface.
FLU S H MOU N T A SSE M BLY
S U R F ACE M OUN T A SS E M B LY
ANGLE MO UNT: This other surface mount type of housing
is a two piece unit that opens just like the flush mount part.It
should be used when a surface angle directs the tweeter axis
away from the listener. This can be useful in dashboard and
kick panel mounting situations.
TA N T R U M - X TWEE T ER P L A C E M E N T
For the best results always try to maintain equal path lengths between the right and left tweeters and the listening position.This can usually be accomplished by mounting as low and deep
as possible,in a kick panel installation,or high and deep in a dashboard installation.Be cautious
in dashboard installations not to reflect the tweeter off of the windshield.This increases reflections and greatly diminishes the overall performance of the tweeter. The angle mount housing
can help to point the tweeter at the listener. For door panel installations try to angle the tweeter
toward the listener to minimize cross cancellation.
4
ANGL E MOU N T A SSE M B LY
5
 Loading...