

Page 1
ATCLCR6
In-Ceiling LCR Cinema Speaker
Congratulations on your purchase of the Phoenix Gold
Innovative Home Audio ATCLCR6 In-Ceiling LCR Cinema
Speaker. This product is designed to reproduce the audio
portion of your home entertainment system with accuracy
and detail that will satisfy the most discriminating listener.
Please read this Installation Manual to ensure the proper
installation and performance of your ATCLCR6 speaker.
You will need the following tools:
4) A Pencil
ceiling where you plan to place your speakers. The ATCLCR6
Additionally, you should allow an extra inch in all directions
You should now check for obstructions like cross bracing above
After selection of the mounting location, mark the hole to be
ATCLCR6 speaker for your convenience. Locate and align the
template, then mark with pencil on the ceiling surface. If you are
where the speakers are to be mounted, cut a small hole in the
will make replacement, if necessary, a much easier task and
yield a better fi nish when patching the work.
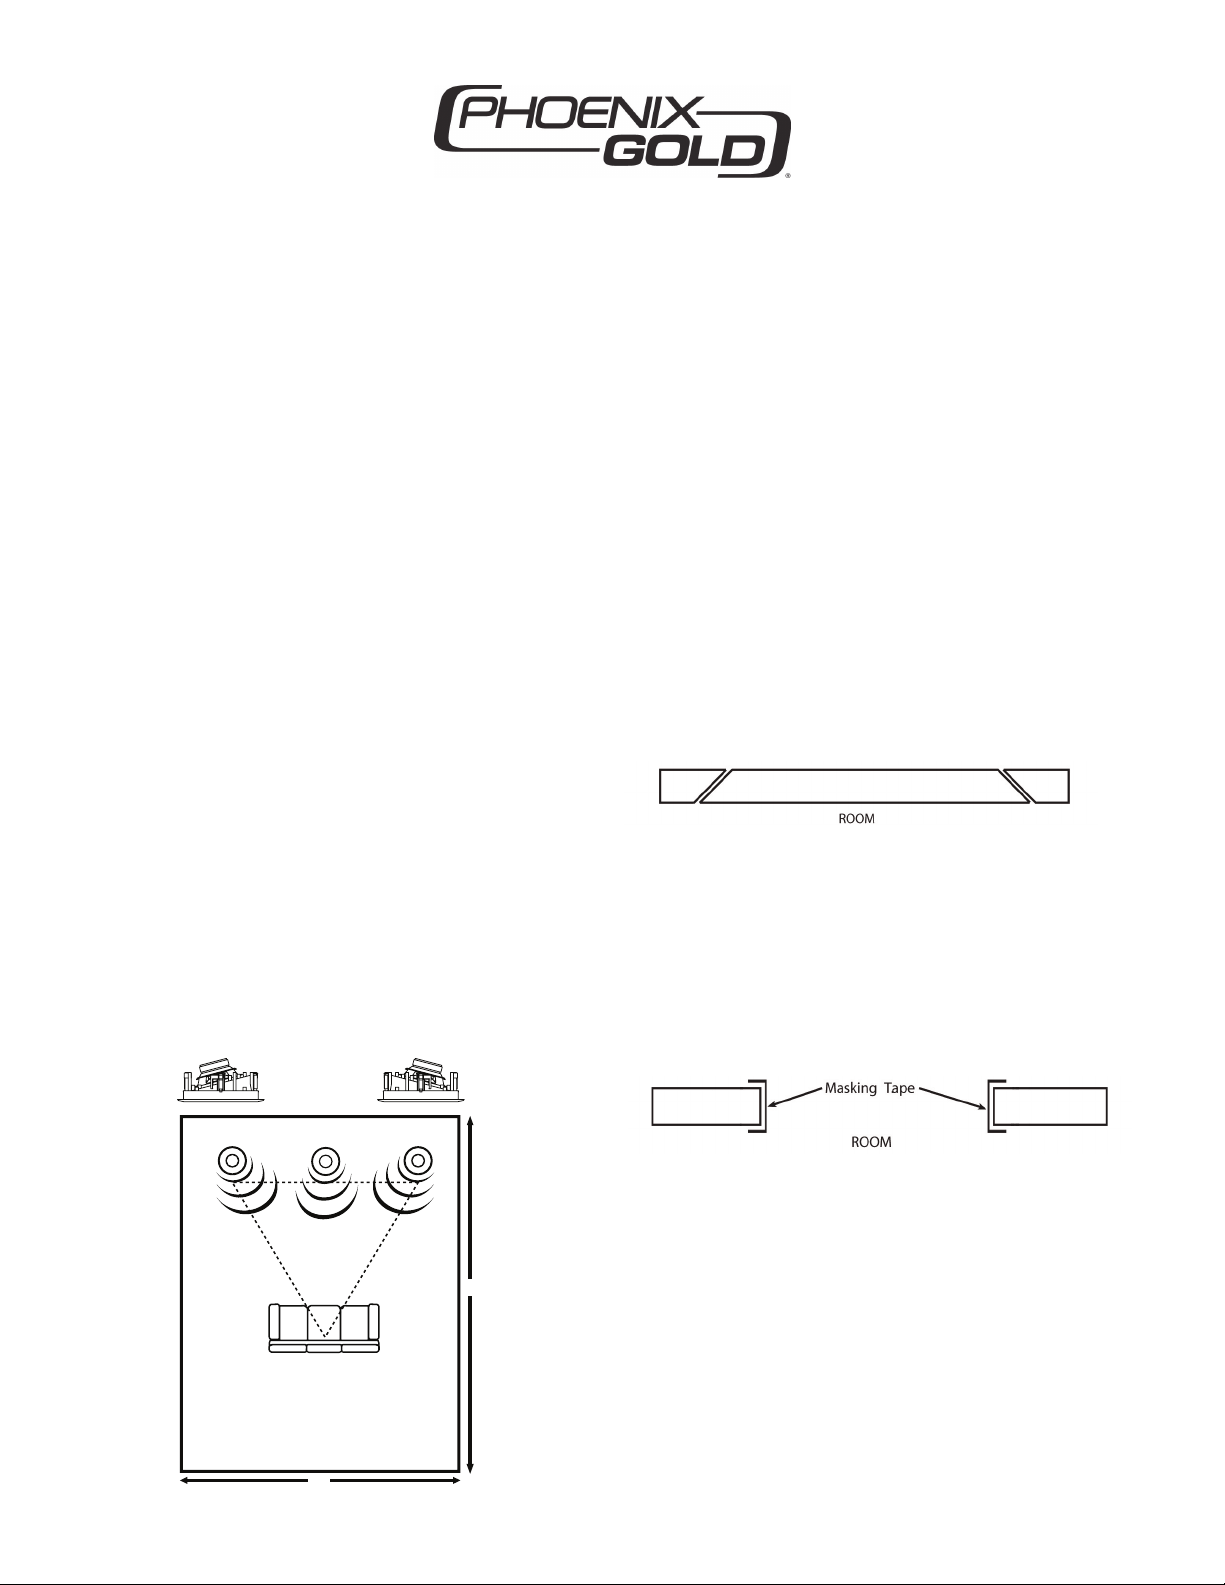
the wallboard with masking tape (Fig. 3). This will prevent the
wire parallel to the 110V power lines to prevent picking up
wire needs to cross a 110V power line, place it at a right angle
to the 110V line to minimize any hum or interference.
Innovative Home Audio
20’
14’
Directional In-Ceiling
retain the frame to the ceiling surface to swing into position.
unsure whether there are obstructions behind the ceiling surface
Page 2
www.phoenixgold.com
+
-
(+)
(-)
Figure 5
Figure 4
Your speaker wire is usually coded to maintain proper system
found on the other. Identify which type of polarity coding that
your wire is using. You must carefully observe that the positive
terminal of the speaker output on your amplifi er is connected
to the positive terminal of the ATCLCR6 speaker. Likewise, the
To further enhance the performance of your
ATCLCR6 speakers, the ceiling joist cavity where you plan to
fi berglass insulation. If un-insulated, stuff the area on either
side of the speaker opening with 6” thick insulation to a depth of
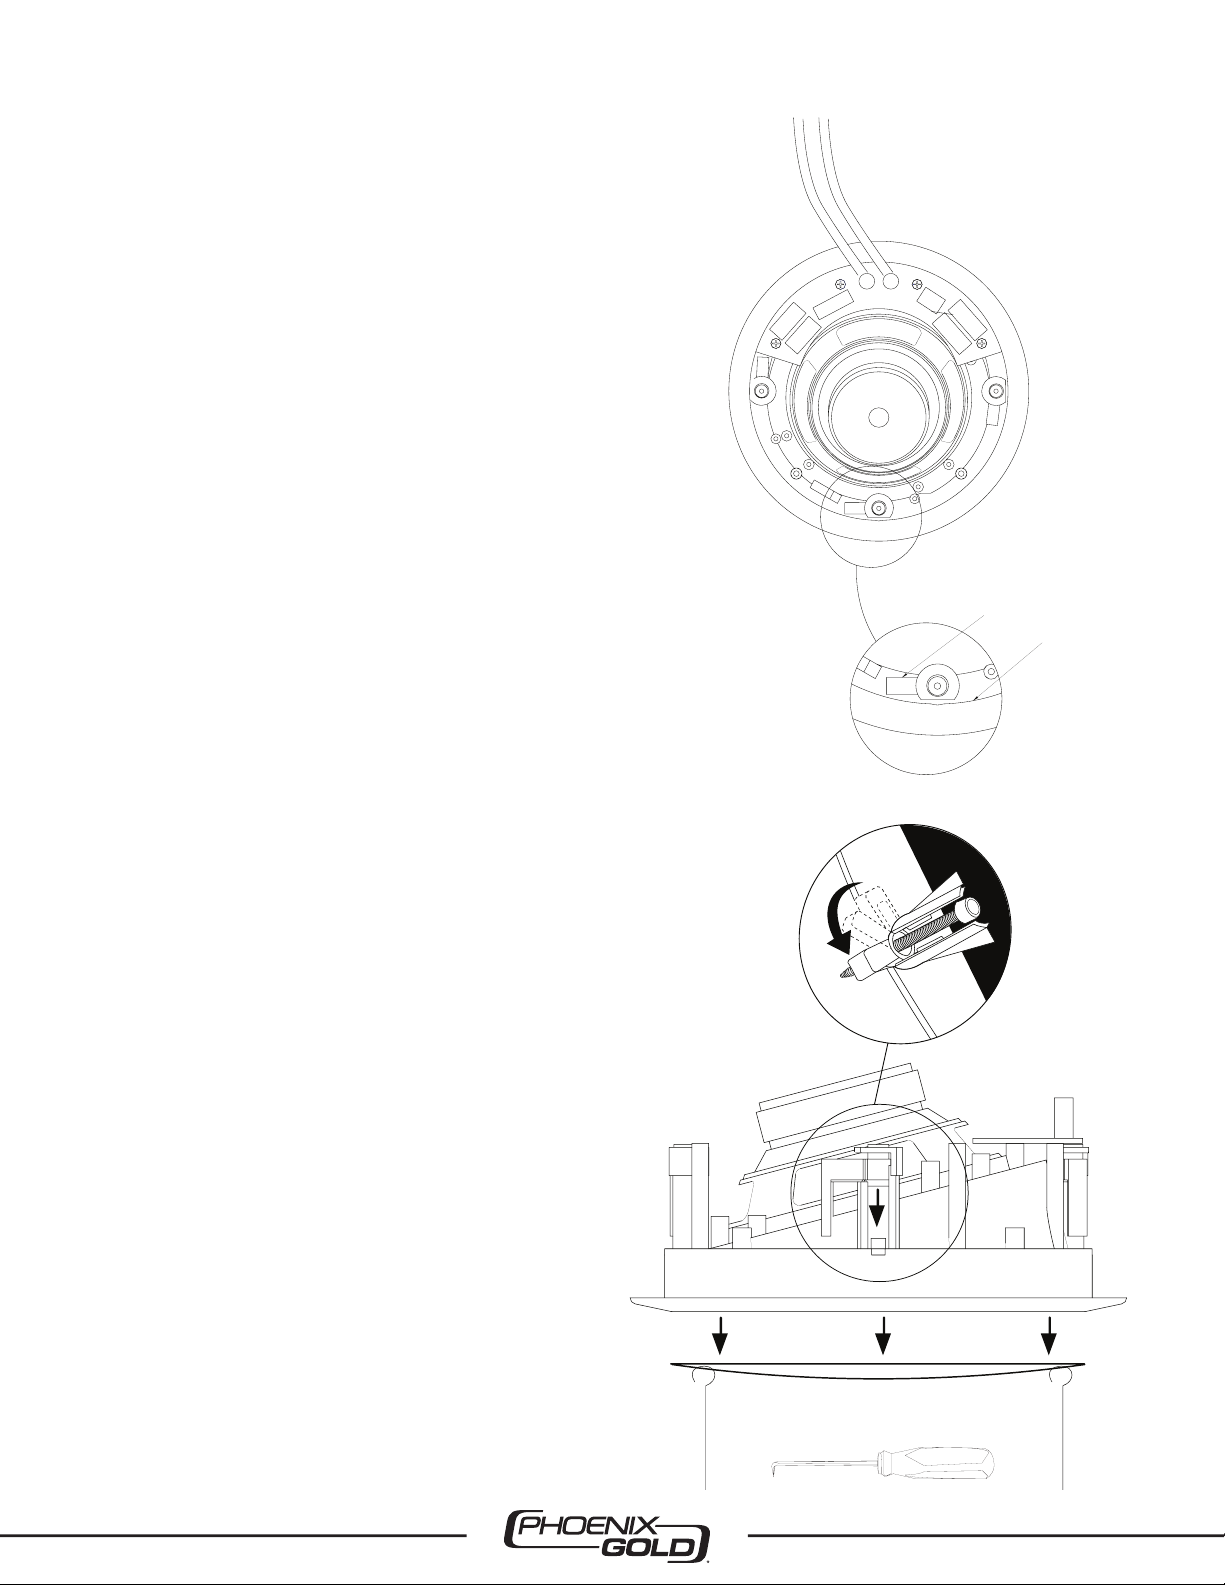
frame of the speaker (Fig. 5).
taken to not distort its shape while removing it.
While looking at the motor structure (rear) of the speaker
the large and resonant cavity of the un-insulated ceiling.
paper clip or stiff wire will work as well). Hook your
With the grill removed, place the speaker in the ceiling opening.
Page 3

www.phoenixgold.com
the dogleg is loose from its resting position. Now turn the screw
clockwise until you feel the dogleg contact the ceiling surface.
wall surface. Caution: Do not over tighten!
Aiming the Tweeter
tweeter housing. Apply gentle pressure to swivel the tweeter to
the listening area you will hear a coherent and stable center
A paint shield is included in the ATCLCR6 speaker package.
You can now safely paint the speaker frame to match your
When painting the grill caution should be taken to ensure that
four mounting screws counter-clockwise until the doglegs lock
frequency region of your audio program, as well as a loss of
1
2
3
4
ceiling surface if you desire.
out of position in their resting seats.
Page 4

ATCLCR6 Specifi cations
workmanship that occur during normal use. It does not cover failures resulting from accident, fi re, fl ood, misuse, neglect, mis-handling,
Acts of God. It does not cover costs of transportation to Phoenix Gold or damage in transit. The customer should return their defective
workmanship or material, the consumer’s sole remedies will be repair or replacement as provided under the terms of this warranty. If the
the use of or inability to use the product. There are no express warranties other than described above.
www.phoenixgold.com email: support@phoenixgold.com
Innovative Home Audio
 Loading...