

Phoenix Spider MT505 User Manual
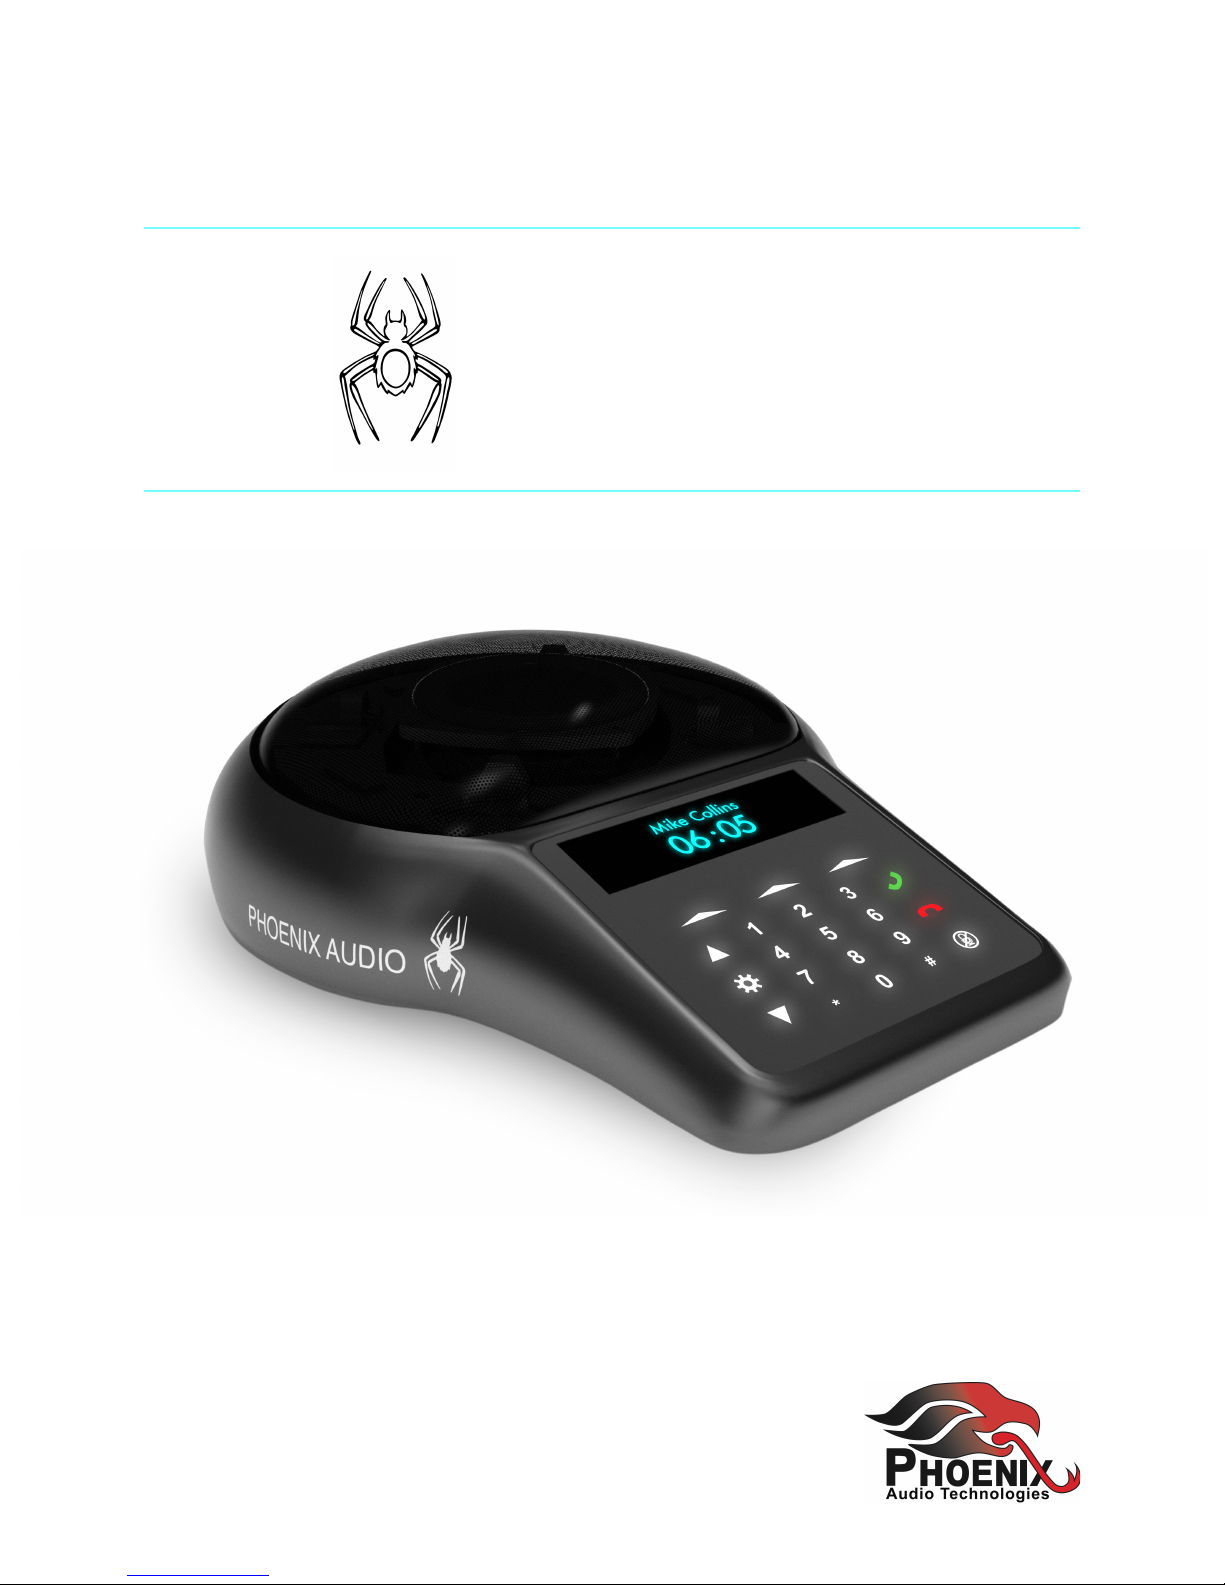
Spider MT505 SIP
USER MANUAL
Page 1

INDEX
Overview
.....................................................Page 03
Connecting the Spider
.....................................................Page 04
The Control Portal
.....................................................Page 05
Using the Spider
.....................................................Page 06
• Dialing
.....................................................Page 06
• Incoming Call
.....................................................Page 06
• During A Call
.....................................................Page 07
Display
.....................................................Page 08
Device Menu
.....................................................Page 09
External Mic/Speaker
.....................................................Page 13
Daisy Chaining
.....................................................Page 15
Specifications
.....................................................Page 17
Warranty
.....................................................Page 18
Page 2
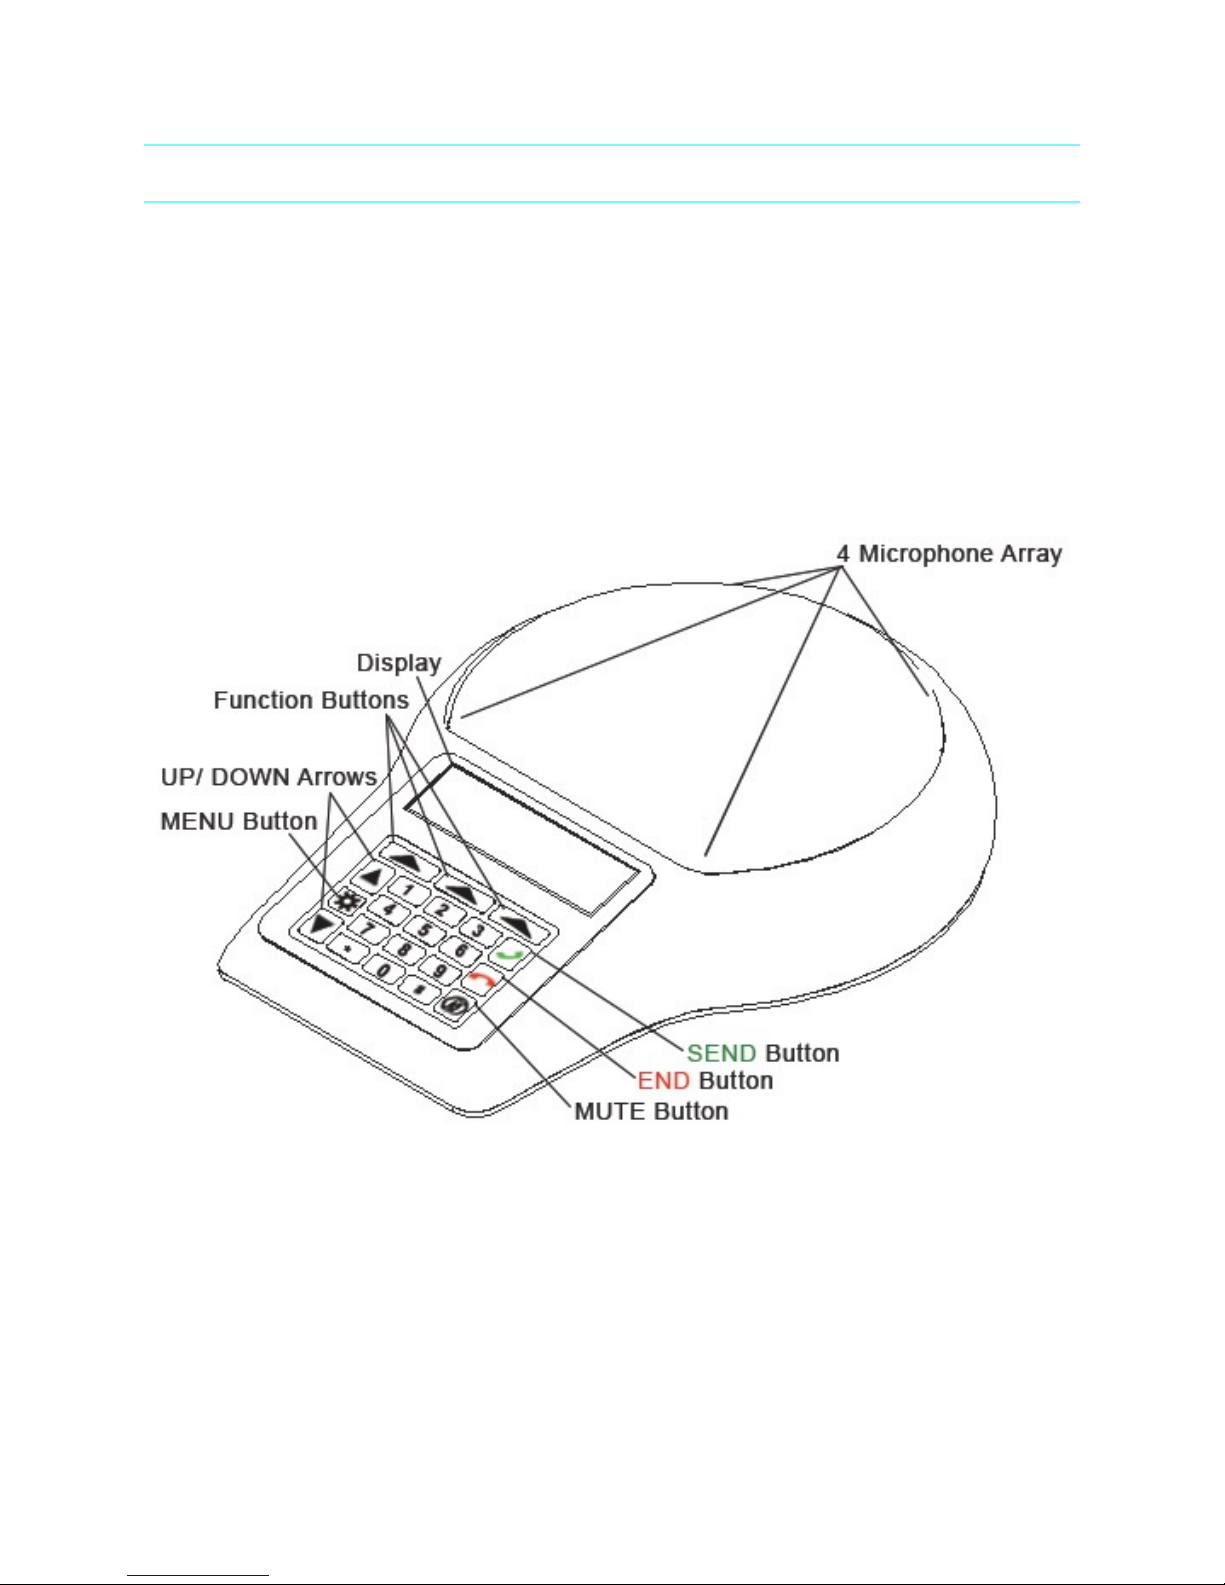
SPIDER 505 SIP OVERVIEW
The Spider is a high-quality conference speakerphone that will turn any room into a
professionally sounding conference room. It has an exceptionally large pickup and broadcasting
range, yet is small in size and discreet in design.
The Spider utilizes multiple microphones, a uniquely designed speaker, and a powerful DSP to
achieve commanding performance.
This guide will help you learn how to use your conference phone and will reveal all the features
that come with it.
Page 3
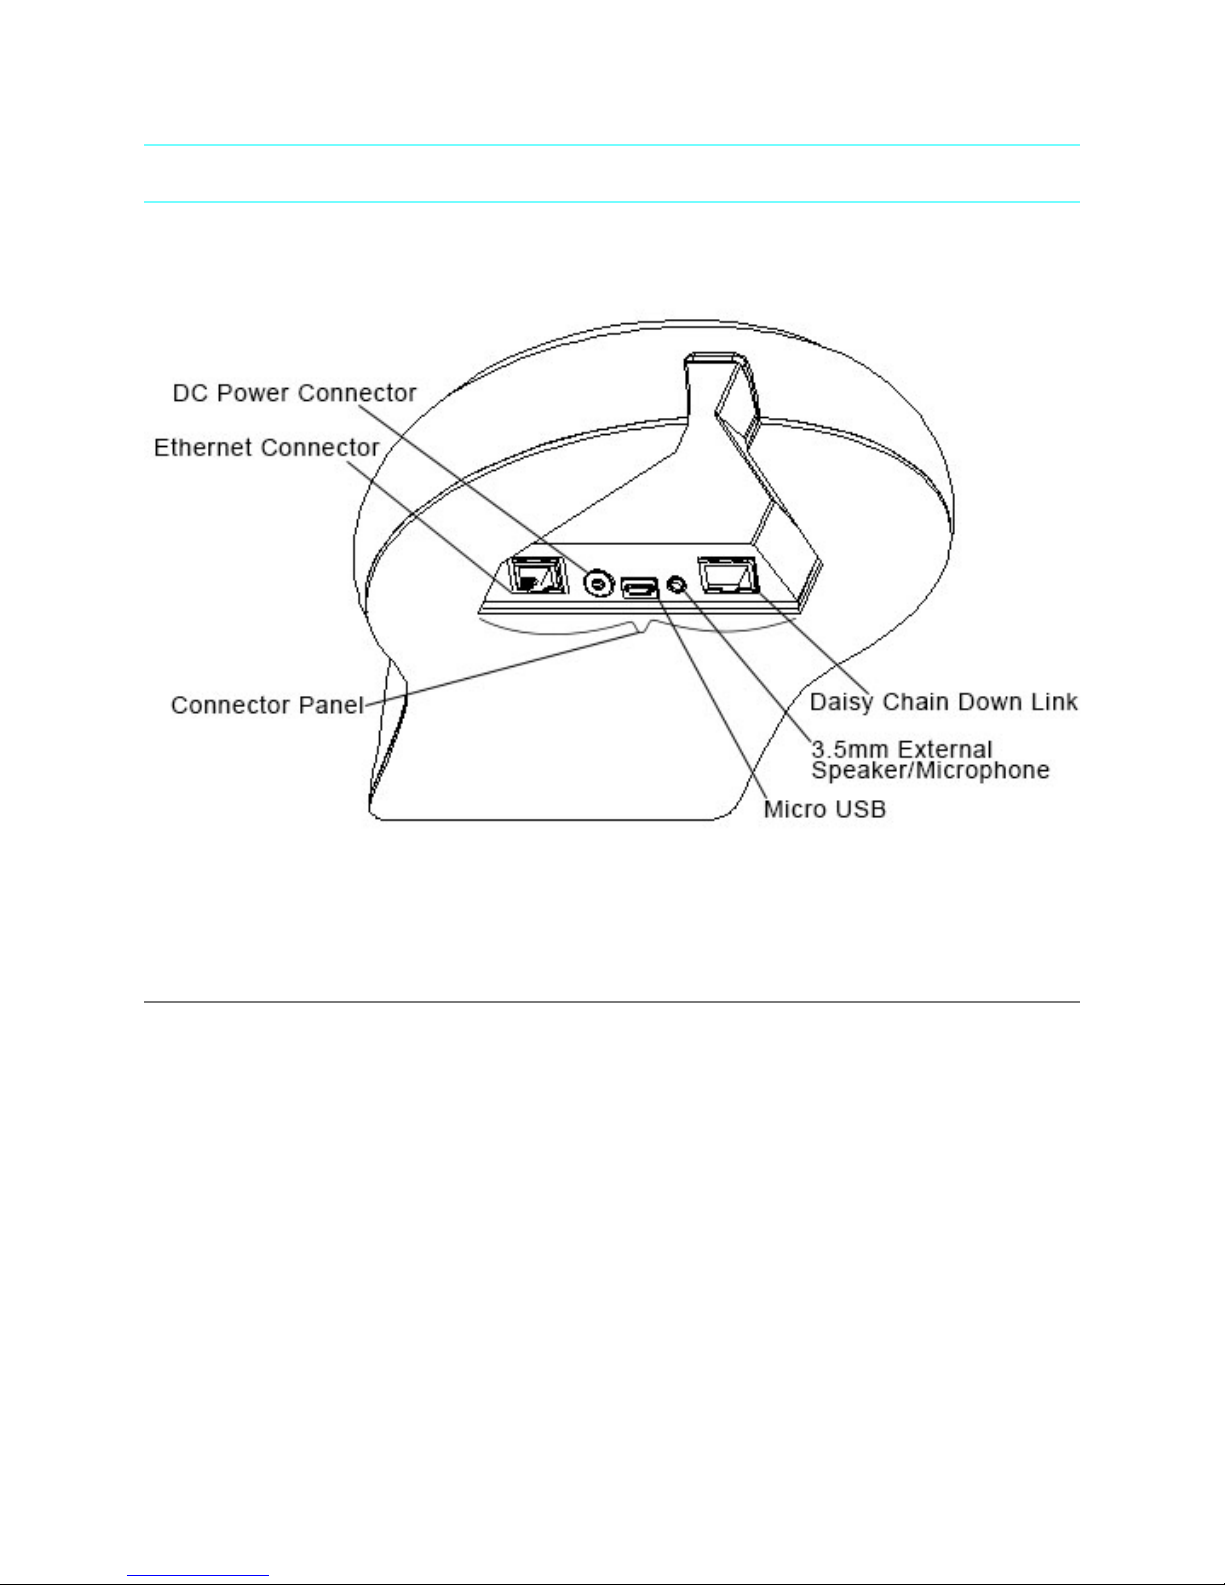
CONNECTING YOUR SPIDER
CONNECTING TO A COMPUTER
This connection is for any session using your computer, such as Voice over IP applications
(Skype, Vidyo, etc.).
‣
Using the USB cable provided, plug the micro USB side of the cable into the Spider
(USB connector located on the connector panel below the unit).
‣
Plug the USB end of the cable into any USB port on your computer.
‣
Connect the provided Power Supply to the DC connector located on the connector panel
below the unit. Once you plug the Power Supply into a power source, your Spider is
ready for use.
No additional drivers or steps are needed. However, we do recommend downloading and using
our “Phoenix Audio Setup Utility” for optimal audio control and performance. This utility can be
found on our website: www.phnxaudio.com/downloads/audiosetup/
Page 4

CONNECTING TO A SIP/IP LINE
For any session using an IP telephone provider (IP/SIP).
‣
Using the Ethernet cable provided, plug one end of the cable into the Spider’s Ethernet
connector (located on the connector panel below the unit).
‣
Plug the other end of the cable directly into your Ethernet wall socket.
‣
Make sure that the Spider is either plugged into a power source OR that your home or
office is equipped with Power over Ethernet (PoE).
‣
It is important that your Spider is registered with an IP service provider (See the
following Control Portal section).
THE CONTROL PORTAL (SETTING UP THE SIP)
The online control portal will allow you to control and adjust all of your IP phone settings. To
access:
‣
Enter the phone menu by pressing .
‣
Using the and buttons, scroll to “Information” and click to select (or just
press the number 7 after entering the menu).
‣
The first option under the “Information” submenu is your unit’s IP address.
‣
Open a web browser and type in your Spider’s IP address in the address bar and press
enter.
‣
A Username / Password prompt will appear. Enter admin as your username and 1234
as your password, then click on “Log In”.
NOTE: To access the portal, your computer must be located on the same LAN as the Spider.
PORTAL OVERVIEW
QUICK SETUP
Adjust the LAN, SIP Proxy, and Registrar options.
PERSONAL SETTINGS
Directory
Add contacts to phone.
Page 5

Speed Dial
Assign up to 10 numbers for the speed dial list.
Tones
Select from the existing ringtones or upload custom ringtones (not implemented in all
versions).
NETWORK CONNECTIONS
Adjust the LAN and VLAN settings.
USING THE SPIDER
DIALING
‣
If the keypad is dimmed, press any key to turn on the backlight.
‣
Dial the desired number and press . .
OR
‣
Press to get a dial tone. The screen will display the last dialed number. Press
again to redial, or dial any new number at will.
INCOMING CALL
When the Spider receives an incoming call, the display will notify you of the caller ID, a ringtone
will play, and the grill lights will flash blue.
TAKE CALL
Press OR the left function button .
REJECT CALL
Press OR the right function button (this will hang-up the call).
SILENCE CALL
Press the middle function button (the Spider will continue ringing, only without an
audible ringtone).
Page 6
 Loading...