

Page 1
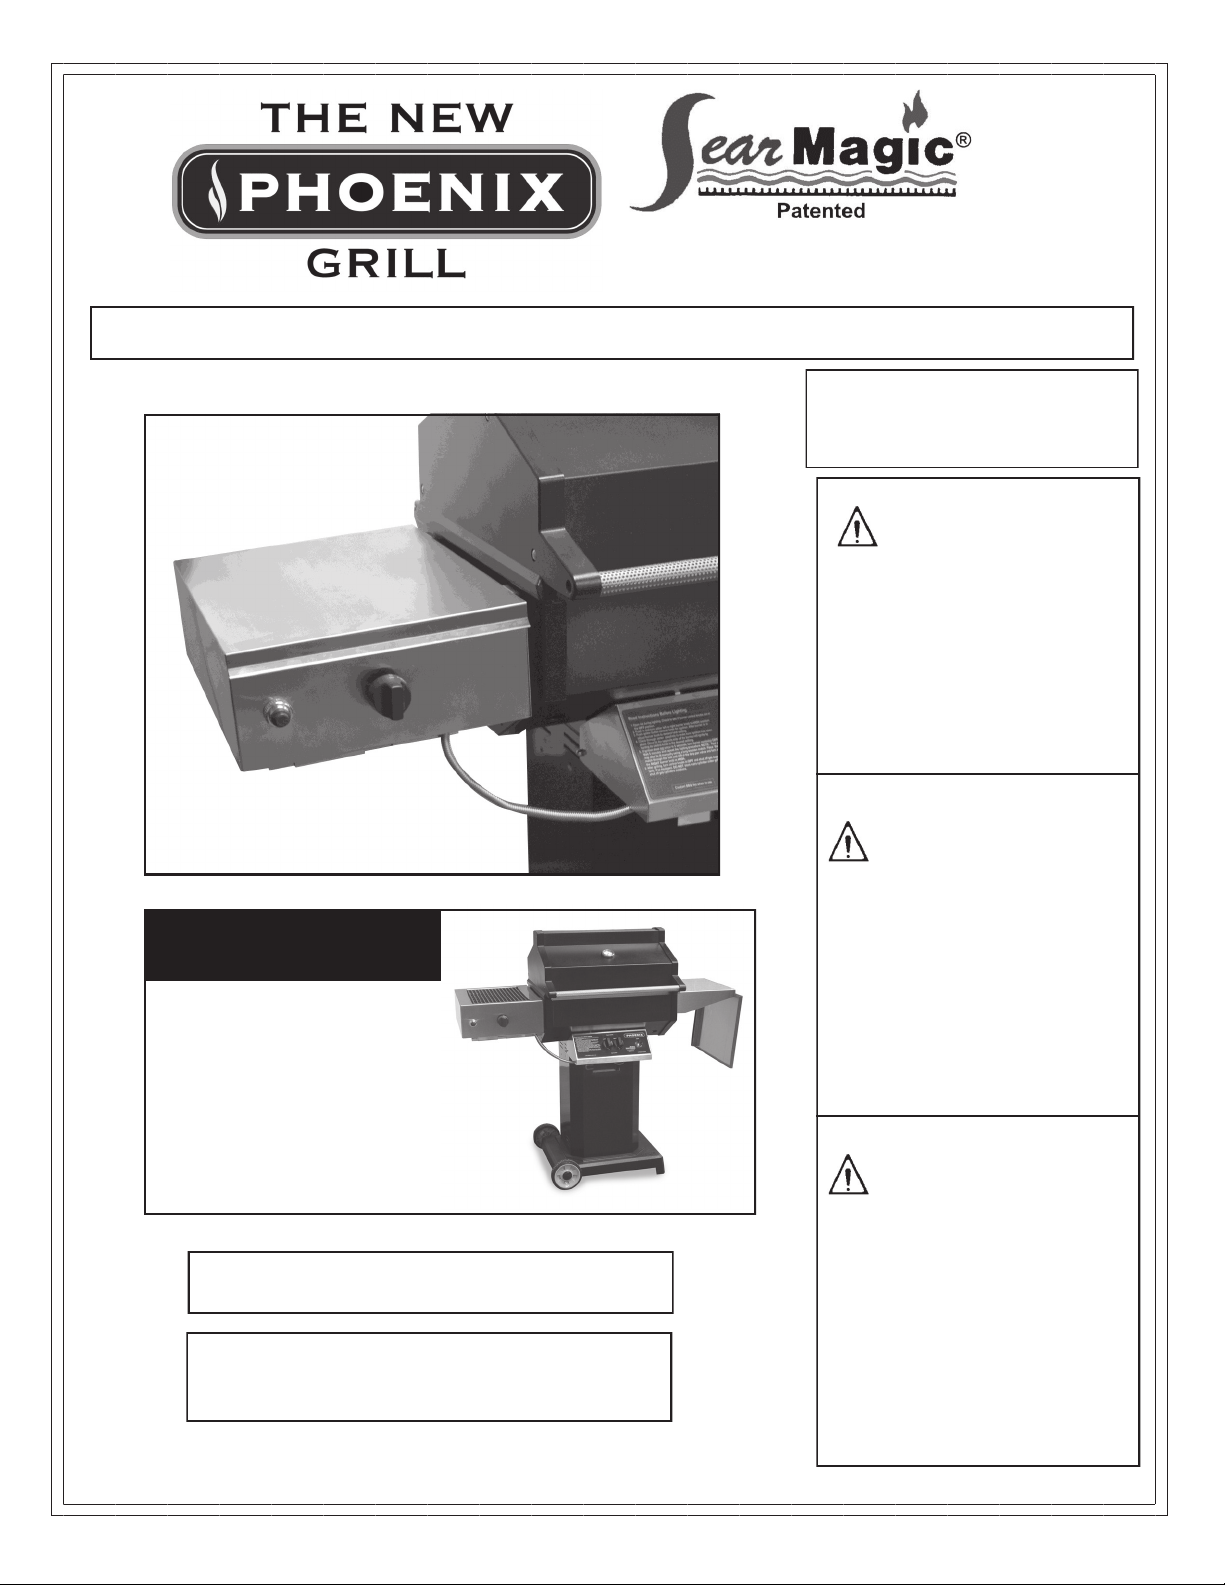
Assembly and Maintenance Instructions
Pros of SearMagic
Infrared Zone
Uniform Heating Surface
High Temperature Option
Energy Efficiency
Extremely Hot, Sealing in
Meat Juices
Tasty and Juicy Food
YOU MUST READ THIS OWNERS MANUAL
BEFORE OPERATING YOUR GAS GRILL.
THESE INSTRUCTIONS SHOULD BE LEFT
WITH THE CUSTOMER. KEEP THESES INSTRUCTIONS FOR FUTURE REFERENCE.
Infrared Zone
THIS GAS APPLIANCE IS
DESIGNED FOR OUTDOOR
USE ONLY.
FOR YOUR SAFETY
If you smell gas:
1. Shut off gas to appliance.
2. Extinguish any open flame.
3. Open Lid.
4. If odor continues, immediately call your gas supplier
or your fire department.
FOR YOUR SAFETY
1. Do not store or use gasoline
or other flammable vapors
and liquids in the vicinity of
this or any other appliance.
2. An LP cylinder not connected for use shall not be
stored in the vicinity of this
or any other appliance.
FOR YOUR SAFETY
Follow all leak-test procedures
carefully in this manual before
using. Do this even if the grill
was dealer assembled. Do not
try to light this appliance with-
out reading the “Lighting” in-
structions in this manual.
Page 2
Congratulations on your purchase of Phoenix SearMagic Infrared Zone, providing your Phoenix Grill with greater versatility.
This unique searing system gets hot extremely fast sealing in meat juices quickly without drying out. Meat juices will be
sealed inside keeping the chicken, steak or additional cut of meat juicy and tender. The high intense heat reduces flare-ups
by vaporizing juices instantly. Also, with the fast heat-up and faster cooking, makes your Phoenix SearMagic Infrared Zone
more energy efficient.
Caution: Before Starting To Assembly Your SearMagic Infrared Zone. Be sure the gas
supply is turned off. Turn grill to “OFF”. Close Valve on LP Tank and disconnect the hose/regulator assembly from
tank. OR, if your grill is a natural gas unit; close valve on main gas supply going to the grill.
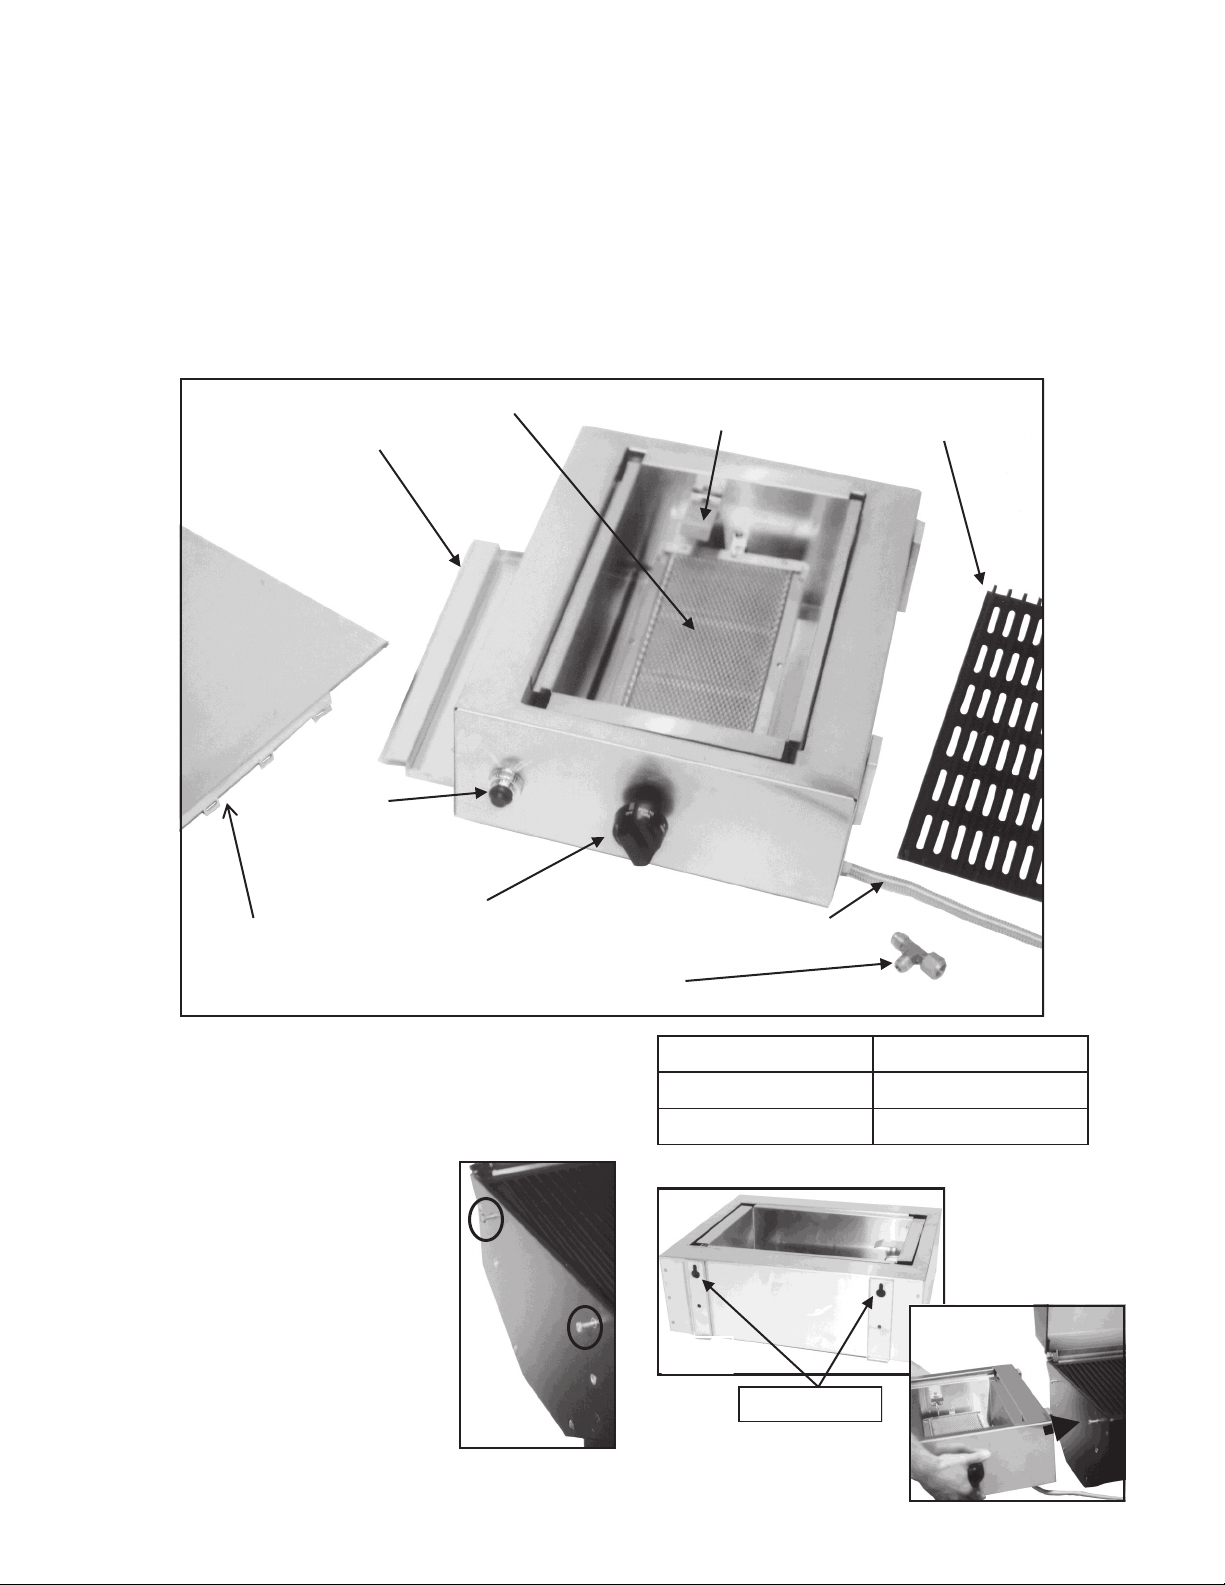
Getting to Know Your SearMagic Infrared Zone and Assembly
ELECTRONIC
COVER
DRIP PAN
IGNITER
BURNER
CONTROL
BURNER
BRASS
“T”
CONNECTOR
IGNITER
ELECTRODE
FLEX HOSE
SearMagic
COOKING GRID
SearMagic Infrared Zone Assembly
Hardware
1. If your grill has two (2) shelves, remove the left shelf
from the grill bottom (facing the grill).
2. Open Grill Lid. Screw 1/4-20 x 1 1/2" hex
bolts in the two (2) upper holes. NOTE:
Screw in leaving approx. 1" exposed.
(Fig. 1)
3. Hang SearMagic Burner key holes on
extended hex bolts and let rest (do not
tighten). (Fig. 2)
4. Secure the SearMagic bottom with the
two 1/4-20 x 1 1/2" hex bolts, lock washers, fender washers and tighten. Proceed
to tighten the 2 top bolts.
(Fig. 1)
2 1 1/2" Fender Washers
2 Lock Washers
4 1/4-20 x 1 1/2" Hex Bolts
(Fig. 2)
Key Holes
Page 3

Changing Valve Connector
IMPORTANT: Be Sure Gas Supply Is
“OFF” Before Starting.
1. If your grill head is mounted on a column, the access
panel must be removed to expose the valve. (Fig. 3)
Upward
Pressure
Fig., 3
Special “T”
Connector
Fits All Grill
Valve
Positions
Stainless Steel
Flex Hose
NOTE: The
Flex Hose is
Factory
Assembly
to the
Burner
Regulator
Access Panel
Valve Angles
to Left
Use 2
Wrenches
Infrared Burner Lighting Instructions
1. Always remove the cover before lighting.
2. Keep your head and body at least 1 foot away when
lighting the burner. Do not lean over an open burner.
3. Turn the burner on the “HIGH” position, and depress the
electronic igniter until the burner lights.
4. If the burner fails to light, turn control knob “OFF”, wait 5
minutes for gas to clear and try lighting again.
5. If the igniter doesn’t spark, check the gap between the
wire probe burner screen. It should be approximately
3/16 inches wide. If it is too small, the spark may be inefficient. Gently readjust the wire probe as needed. If the
gap is normal, check the wire connections at the spark
module and igniter probes, located underneath the control panel.
6. If the igniter still doesn’t work, try replacing the battery.
Remove the collar around the igniter button by turning it
counter-clockwise. Replace the AAA battery, “+” side
down. Fig. 5
7. In the unlikely event these previous measures don’t
work, you can light the burner manually. Turn the burner
control knob to “OFF”. Remove the cooking grid from
above the burner and ignite a match. Place the match
directly on the burner screen, remove your hand from
above the burner and turn the burner control knob on
“HIGH”. Once the burner is lit, you can replace the cook-
ing grid.
Fig. 5
Spring
Use 2 Wrenches
For All Gas
Connections
Fig. 4
2. Loosen and remove the gas supply hose to the grill valve (in
the center of the control panel). Attach the special “T” connector to the grill valve in the position shown then reattach the
gas supply hose to the “T” connector. Tighten securely using
two wrenches. Fig. 4
3. CAUTION: The system must be checked for leaks. Check
all connections with 50/50 solution of detergent and water
to see where bubbles appear. Retighten the connections.
SearMagic Infrared Zone Cover
When Burner is in Use, Remove
and Hang on the Right Shelf
Push
Button
+
AAA Battery
Electronic
Ignitor
Infrared Care and Maintenance
1. After each use, remove the cover and light the burner on
“HIGH” and burner for 5 minutes. This will burn off any food
drippings and enhance the burner performance and increase
the burner longevity.
2. Never use water or liquid chemicals to clean the ceramic burner. Burner may be damaged. Burner failure caused by im-
proper care and maintenance is not covered under warranty.
3. If the burner develops ash over the surface, clean if gently with
a vacuum cleaner. Use a brush attachment so as not to damage the burner.
4. If the burner should get wet, it is important to dry it out completely before attempting to use the burner. IMPORTANT:
Replace Cover When Burner Is Not In Use.
5. Never let anything heavy, hard or sharp fall onto the burner.
The ceramic is very fragile and can easily be damaged.
Page 4

Infrared Cooking Tips.
1. Infrared burners get very hot. Do not leave food unattended on the grill for any length of time.
2. Estimate cooking times to be 30% to 50% less than a conventional grill.
3. Always thaw food thoroughly before cooking to achieve better, more predictable results.
4. Always use long handled grill tools for grilling. A grilling mitt may be useful for handling hot items.
5. The use of a fork is not recommended for grilling on your new SearMagic Infrared Zone. A fork may mar the surface of the cooking
grid. Piercing foods while cooking will allow the juices to escape, causing the finished product to be drier than may be desired.
6. To minimize flare-up, trim fat from meats or remove skin from poultry.
7. If a flare-up occurs, don’t try to control it with water. Water can cause burner damage. Instead, move the food to another part of
the cooking grid, lower the heat setting or remove the food. Burner Failure Caused By Water Damage Is Not Covered Under
Warranty.
8. Allow the burner to heat up for 5 minutes on “HIGH” before cooking.
9. Place the food on the SearMagic cooking grid while the grill is on “HIGH” to sear the food thoroughly. Searing is the key to locking
in the juices for that delicious grilled flavor.
10. After searing for 2-3 minutes per side, lower the temperature to finish cooking the food as desired.
11. The SearMagic cooking grid allow for greater versatility when grilling. Chicken breasts, steaks, pork chops or hamburgers can be
seared over the ribbed side at a higher temperature. Delicate foods like seafood and vegetables can cooked over a lower temperature with the smooth side up.
12. To clean the SearMagic Infrared Zone after cooking, burn at “HIGH” for at least 5 minutes. With the grill still on “HIGH”, clean the
cooking grid with a long-handled brass bristle brush. Regular cleaning will ensure optimum performance of you SearMagic Infrared
WARRANTY
LIFETIME WARRANTY: SearMagic Cooking Grid
10-Year Warranty: Stainless Steel Enclosure and Cover
5-Year Warranty: Infrared Burner
1-Year Warranty: Igniter System • Gas Valve
WHAT IS NOT COVERED:
Transportation and shipping costs.
Labor for replacement or repairs.
Damage from accident, misuse, alteration, abuse, improper installation or storage.
Removal and reinstallation cost.
Finishes on surfaces that are damaged by improper installation, improper storage, accident, misuse, abuse or altera-
tion.
Inoperable due to improper installation or storage.
The costs of a service call to diagnose a problem.
All warranties are non-transferable and apply only to the original purchaser.
Warranties are null and void if SearMagic Infrared Zone is put into commercial or community use.
This warranty does not imply or assume any responsibility for consequential damages that might result form
use, misuse, or improper installation of this cooking appliance. This warranty does not cover claims, which
do not involve defective workmanship or materials. A bill of sale, cancelled check, or payment record should
be kept to verify purchase date and establish warranty period.
5565North 124th Street • Butler, Wisconsin 53007
Phone: 262.781.4657 • 888.761.4657
Fax: 262.781.3965 • 888.781.3965
Email: info@profiregrills.com
a division of Modern Home Products Corp.
Web Site: www.newphoenixgrills.com
Other Quality Products From Modern Home Products
Everglow
First in Outdoor Gas Grills First in Grill Replacement Parts
©2012 Modern Home Products Corp. MHP configuration, SearMagic, ProFire Grills are registered trademarks of Modern Home Products Corp.
Because of constant product improvement, ProFire Grills reserves the right to change specification without notice. 4/12
Stainless Steel Grills
Outdoor Lighting
 Loading...