

Page 1

THIS LEAFLET HAS BEEN PREPARED TO HELP YOU
USE AND UNDERSTAND YOUR GAS FIRE
PLEASE READ THE INSTRUCTIONS CAREFULLY
BEFORE YOU START USING THIS FIRE AND KEEP
THE BOOKLET HANDY FOR FUTURE REFERENCE
PHOENIX GAS FIRES LTD
..MA'Nfj~ACTi.JREtIB.:y::>
::~lf:iffi!JRMS SHEET METAtJ:~:~q••
«:,:,:,:.:,:,,,,:::::,:::>.
HAMMOND CLOSE
.<::<.»»»:::::< ..
ATT4B!§Q]:-lOUGH FIELDS INDUSTRIA4·6,$TATE
::\:::V
"::.:·:::·!'iiY
NU
"!5llFll11(9)61
1
6
RY<.«<.««<
i:
TEL;'I~[63505b2~~~: 024~:~~@329
:':-:-:-:-. :';';':-:-:':':-:':':':':':':':':':':':'. .::;:::;:::;:::;:::;::::::: ..,:::::::::::.:::::::::::::::::::::=::::::::- .....-..
T:'~'~'!tll'1Irlll,'[lilfil!11'~~~~B)
PRIOR TO INSTALLATIQN:':ENSURE:THATJJJI;:'L;QCAL DISTRIBUTION
CONDITIONS (G2of'ANQA"fl~jWI;II~'TSRjFTHE APPLIANCE
USER INS·TRUCTION
AI/Instructions Must
Be
Handed To User For Safe Keeping
~7998
Page 2
IMPORTANT NOTES & REGULATIONS
Installation must only be carried out by a competent person. 8ee Imp
Notes in Installation Instructions (Page 2). Failure to do so will deem the
warranty invalid and may be dangerous.
It is advisable. that additional prpt~ction is provided for children and elderly
or infirm by fitting as fire guard which complies with the requirements of
886539 (1984) specifications for fireguards or 886778 (1986) suitable for
use with solid fuel fires.
The chimney should be swept before the appliance is installed.
The hearth at the front of the fire must never be covered with combustible
flooring or materials.
Never allow any rubbish to be thrown onto the coals /fire.
An odour may be noticeable when the fire is first lit, this arises from the
newness of the materials used and will disperse after a few hours usage.
Do not handle the grate front when the fire is in use as it gets very hot and
coals may fall out if moved. Wait until it has cooled down before touching
it.
The fir~ should not be used with the coals fitted in any other position than
as described in the diagram nor should any be removed or more added.
Do not place any combustible items such as furniture of soft wall
coverings too close to the fire as they will scorch. Do not under any
circumstances use the fire to dry clothes.
It is recommended that the fire is serviced by a competent person at least
once a year. The flue system should also be checked yearly to ensure
there is no sort of build up of soot or debris which will block the safe
dispersal of combustible products.
If the pilot light goes out for any reason do not attempt to relight for at least
three minutes
Only use the cast iron fret supplied with this appliance. Use of a different
fret could prove dangerous and may affect the performance of the fire .
.Page -16~·_··--.. -----
J7 98
Page 3
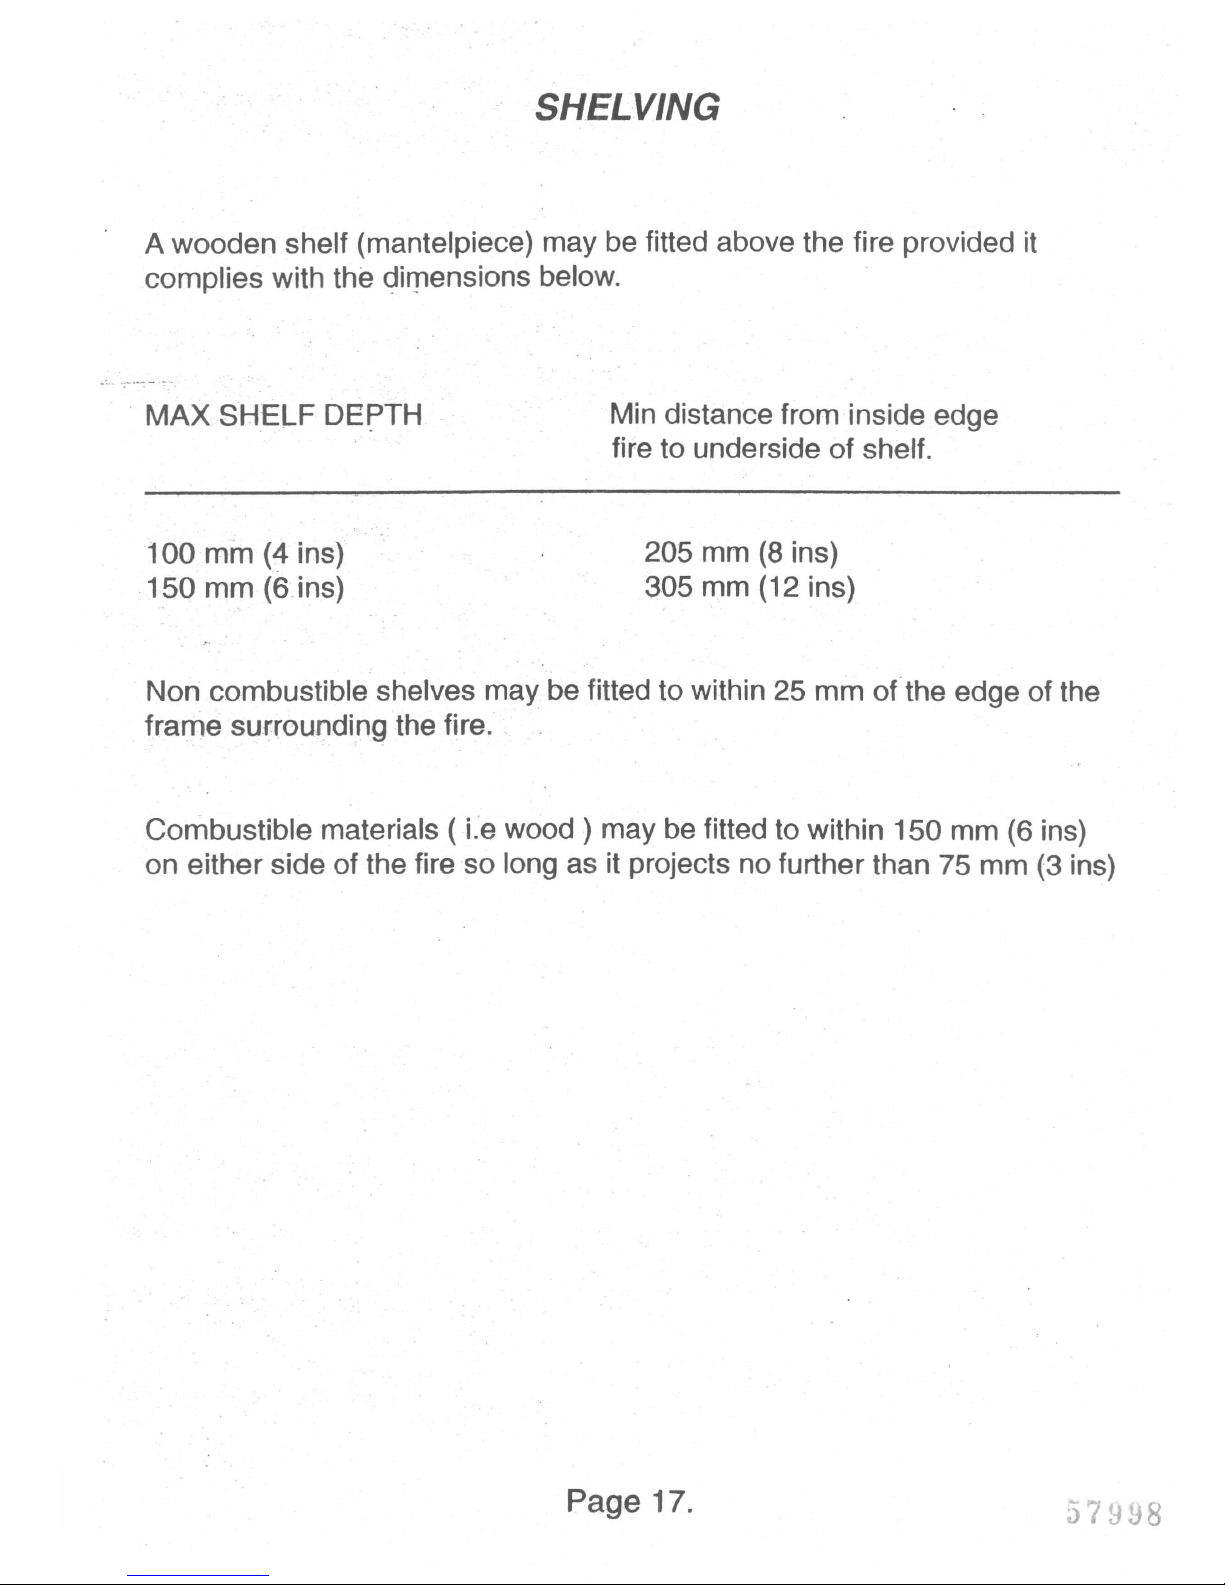
SHELVING
A wooden shelf (mantelpiece) may be fitted above the fire provided it
complies with the c;Jil}1ensionsbelow .
. MAX SHELF DEpTH
Min distance from inside edge
fire to underside of shelf.
100 mm (4 ins)
150 mm (6 ins)
..
"
205 mm (8 ins)
305 mm (12 ins)
Non combustible shelves may be fitted to within 25 mm ofthe edge of the
frame surrounding the fire.
Combustible materials ( Le wood) may be fitted to within
150
mm (6 ins)
on either side of the fire so long as it projects no further than 75 mm (3 ins)
Page 17.
Page 4
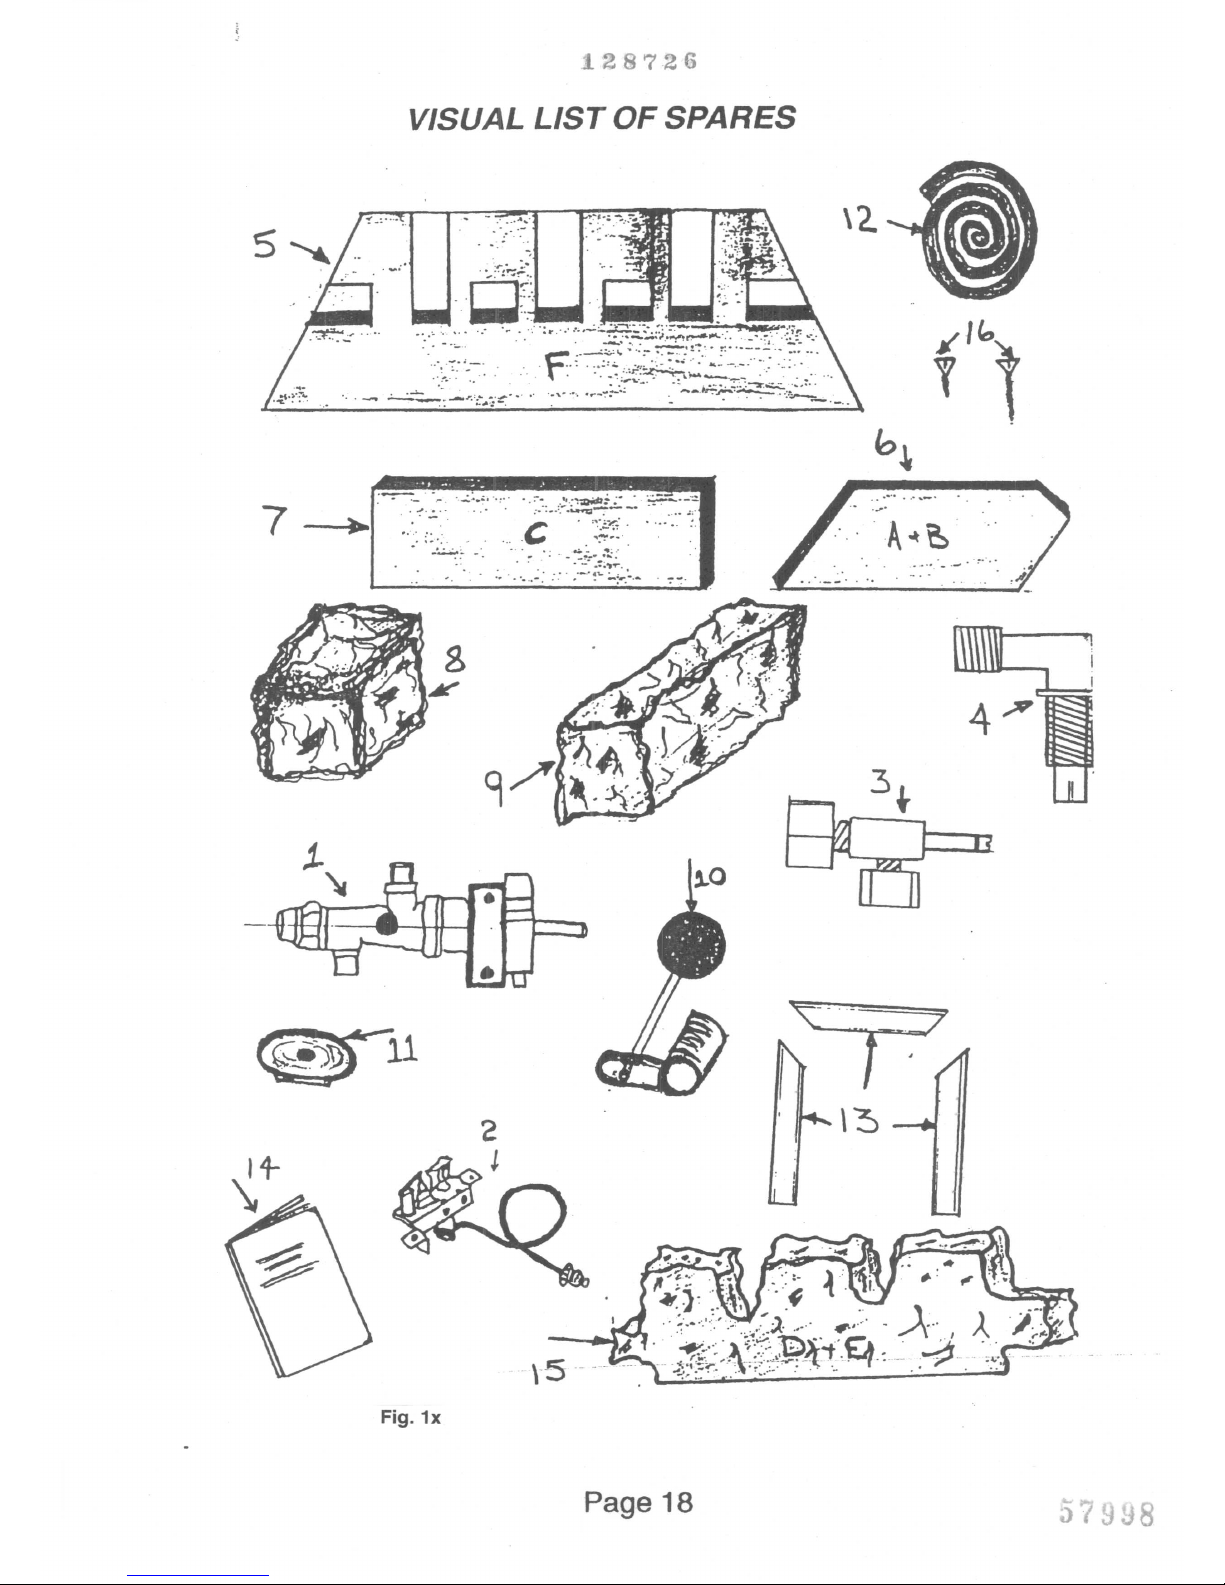
VISUAL LIST OF SPARES
\'2.
b~
L-o--
o. -;
...
,.,..
.
"'A~~" .
.
',.
-
....
_._
..
~.'.,
.
~o ••••••• ,
Page 18
~7 8
Page 5

OPERATING YOUR FIRE
The control knob is situated behind the cast iron fret door.
This fire is fitted with a flame failure safety cut out device which will
automatically shut the gas off if the pilot light goes out and will therefore
prevent any gas build up.
The control knob has four settings: OFF, IGNITION-PILOT, HIGH & LOW
To operate turn on the gas supply to the fire press the control knob in and
turn anti-clockwise to ignition position and hold for a few seconds for gas
to pass through, to pilot which should now ignite.
Once the pilot is lit (visable at centre front tray) hold control knob pressed
in for 10 - 15 seconds and then release, if the pilot goes out at this point
turn control knob back to off and wait 3 minutes before lighting.
if the pilot stays lit press the control knob in and turn anti-clockwise to the
low position and main gas will ignite after 2 - 3 seconds.
To turn to high setting press control knob in and cont~nue turning anti-
clockwise.
To turn fire off press the control knob in and turn clockwise to reach the off
position at the bottom. You may hear a light popping sound when the fire is
extinguished, This is quite normal
See Fig 1 for control markings.
FIG 1. Data Badge
-...-.
..•...
~~T'_ 7:0l<\Il
8A8JWlft.Y
ue(a)
ua~ ••••
-.cT1III _ O~79M
~ CAUlMlRY •••
:=T& ••••
.....,...
-. __ CUIIC
ATn....-u. rlDDS_.
DJ.
~T"" VARWiICC lE>
CVft
•••• Qa.ov
G~, •
-
.
'
.,..\.
,
",
.'
"','
'''''',~.\,'',
,
.
'
~.
"
..•.•..
' ;
. .'..
, '
" '.OFF
AiOEND<MERIT
-- It
1
tI_
PUU.:IWE
1
fUME PIC1VRE
Fig 2. Operation of variable flame
control etc. (Page 23)
Page 19
Page 6

CLEANING
Do not attempt to clean the fire when turned on or still warm from use.
Ensure the fire is completely cold. Any dust and soot that may collect on the
fire should be removed from time to time. Do not use a vacuum cleaner
directly on fibres this may cause damage to the ceramic materials .
•• • I~ • I' •
~
..
Protect the pilot with a cloth while cleaning.
Remove the coals and check for any signs of damage or splits (replace any
where necessary) and carefully dust them with a soft brush ( a dry 1
11
paintbrush is ideal for this) Replacement of coals must be in accordance with
manufacturing instruction.
Remove the cloth protecting the pilot and replace the coals as shown in the
diagrams on pages 24, 25,&26 (repeat of pages 12, 13&14)
Should ignition fail to light pilot, press control knob in and turn anti-clockwise
to ignition posistion and hold for a few seconds, place lighted match or taper
between pilot vent and spark electrode, once pilot is a light, continue on as
previously described - see operating your fire: page 21
Under no circumstances should extra coals, different shaped coals over and
above those supplied with the appliance be used. Replacement parts must
be authorised spares. WARNING: Ignoring this advice could cause
incomplete clearance of the products of combustion with consequent health
hazards.
A list of
USER
replacement parts available refer to page 18. Items marked
*
items 5,6,7,8,9.14 & 15.
Any brass fittings can be cleaned with a non-abrasive brass cleaner.
Black cast iron frets just need dusting with a brush.
This appliance is intended for decorative purposes only.
This appliance is protected by a spillage monitoring system which will cut
off the pilot and shut down the fire if combustion products are not clearing
from the appliance. If pilot outage occurs, Relight as per lighting instructions.
If the fault recurs a specialist should be contacted, Le gas engineer to solve
the problem.
Page 20
Page 7

COAL LAYOUT
Fig 3
Back
Wall
C/
Side Elevation
1st l..ayer
Front Burner DIE
Coals
-ln~
6mm
Pina-!-
J,
(4 oflJ
Spacer,s
'Over Pins
Ceramic Base
~ . . Installalion
Air Gap
Place the ceramic base (F) in the burner compartment. The bottom
of the front edge of the coal base should locate behind the recess
in the burner plaques. Side walls (A&B) slide down against right
hand side of the base. (C) Place against back wall. Front burner
coals are located on tw06mm pipes either side of the pilot (E&D).
There will be a air gap between the rear of the front coals and the
the front bottom edge of the ceramic base.
C
Fig;3. A.lst layer
Page 21.
57998
Page 8
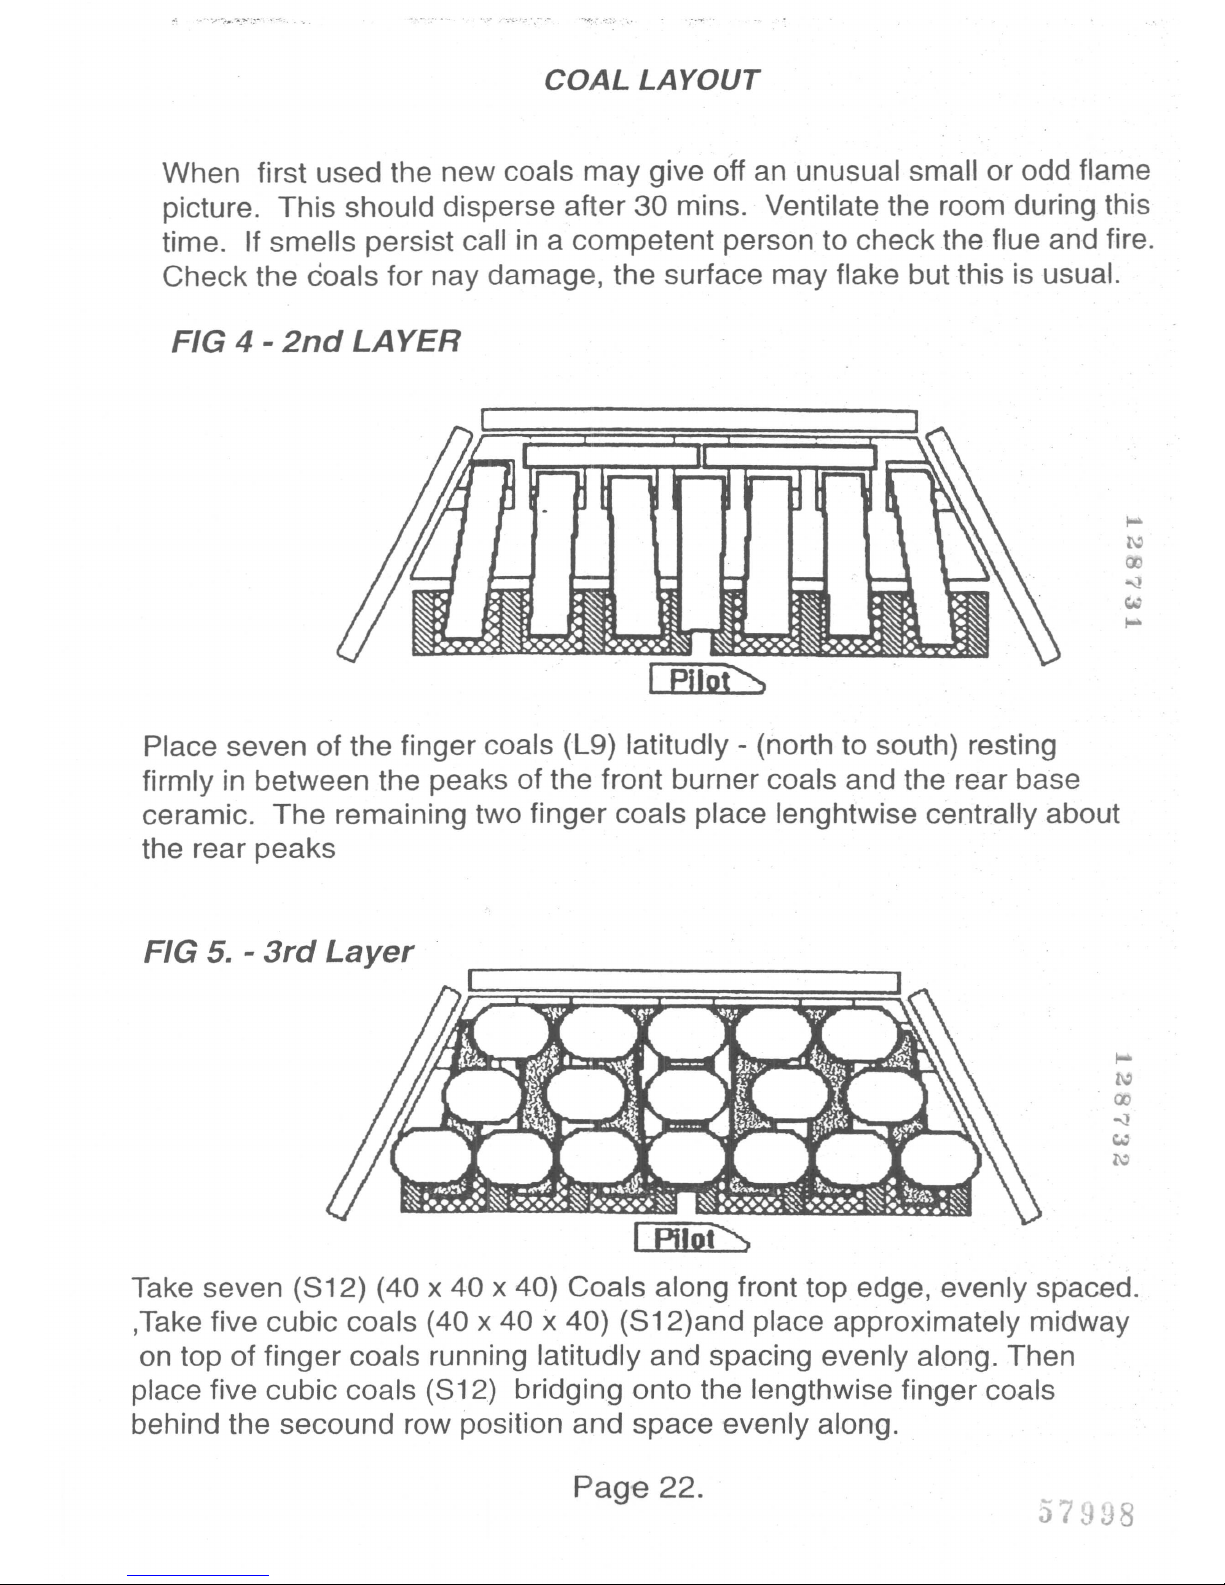
When first used the new coals may give off an unusual small or odd flame
picture. This should disperse after 30 mins. Ventilate the room during this
time. If smells persist call in a competent person to check the flue and fire.
Check the coals for nay damage, the surface may flake but this is usual.
Place seven of the finger coals (L9) latitudly - (north to south) resting
firmly in between the peaks of the front burner coals and the rear base
ceramic. The remaining two finger coals place lenghtwise centrally about
the rear peaks
FIG 5. - 3rd Layer .
Take seven (812) (40 x 40 x 40) Coals along front top edge, evenly spaced.
,Take five cubic coals (40 x 40 x 40) (812)and place approximately midway
on top of finger coals running latitudly and spacing evenly along. Then
place five cubic coals (812) bridging onto the lengthwise finger coals
behind the secound row position and space evenly along.
Page 22.
Page 9

COAL LAYOUT
FIG
6. -
4th la'yer
The remaining nine coals (812) place on top centrally about
and be evenly spaced between the three rows already
positioned in fig 5.
TOP ROW FRONT - FIVE COALS EVENLY SPACED.
TOP ROW REAR - FOUR COALS EVENLY SPACED
Operation of the variable flame control is by a small round knob situated next to the data badge.
Pull forwards to open (Blue flame picture). Push to close (Yellow flame picture). See fig 2 on page
19.
,The effect of the flame picture using the variable ,flame control will vary
according to the'type of flue application in use at that time. Atmosphere
conditions and position of chimney will differ in some locations. This however will not effect the
performance of the fire in anYway
Page 23.
Page 10

TROUBLESHOOTING GUIDE (Rotary type)
No
gastofire: check Isolators are open
Plpework blockage clean out
AIr not fully purged re-purge supply or wait longer
Spark earthIngtometalwork reset gap correctly
Blocked pilot: clean out
Severe restrIctIon In gas supply clear obstrU&tlf"'
Faulty thermocouple replace pilot unit :;
Hold control knob In for longer -._
-.-.-------eheckdataptatl!~iouch knol"- -
HT lead detached
Spark gap
too
large reset gap
Faulty plezo unit replace
Debris shortlng out electrode clean
Excessive room draught or flue pUll rectify pr~m
Loose or faulty thermocouple rectify .-
ODSsystem workIng
FIrebox grommet not sealed rectify
Poor gas flowtofire check pressure with fire olfhlgh
If pressure Is low remove any restrictIons In plptwork or valve
Check all Isolators are adequately sized and fUlty open
Check meter pressure Is adequate
AIr leak under base of firebox rectify
Newness smell from brand new appliance
Spillage occurrIng carry out spillage test and rectify problem
Low temperature sealants or combustible materIals used In
Incorrect posItIons
AIr leak under base of firebox rectIfy
Page 24
·~)7qn8
., • t..
iJ
Page 11
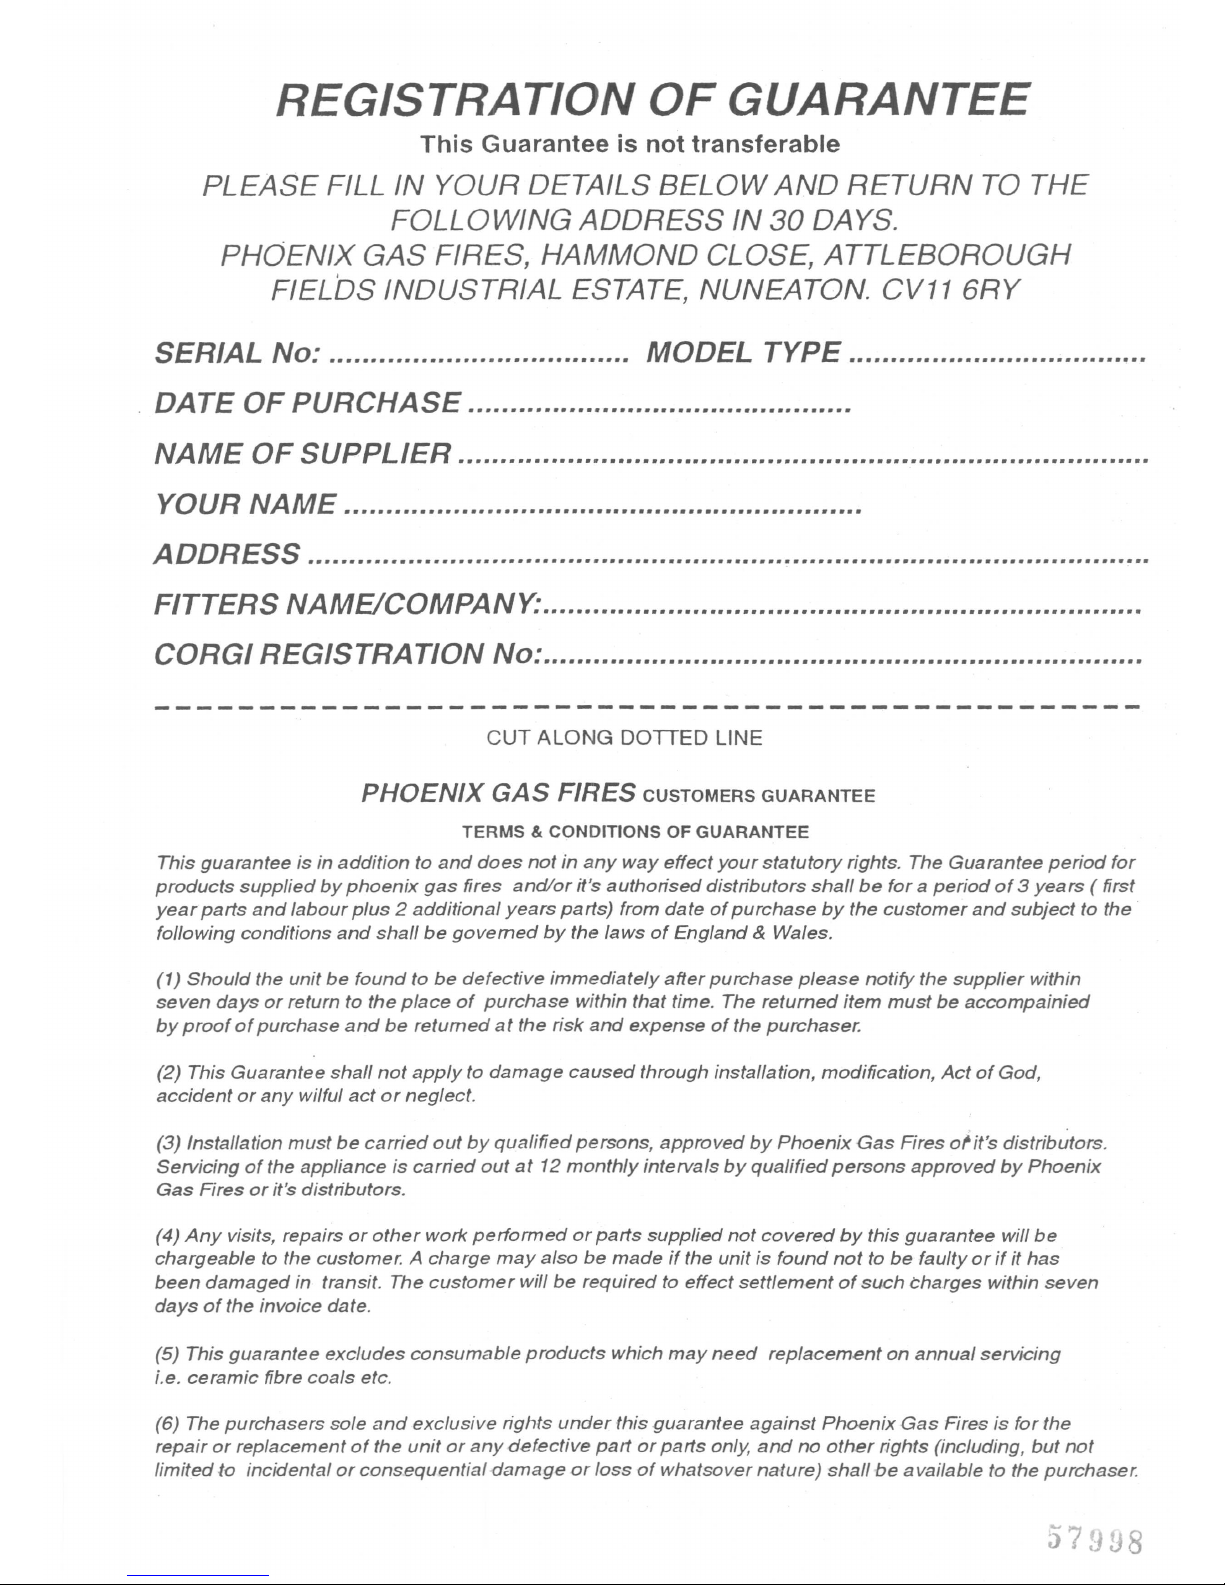
REGISTRATION OF GUARANTEE
PLEASE FILL IN YOUR DETAILS BELOW AND RETURN TO THE
FOLLOWING ADDRESS IN
30
DAYS.
PHOENIX GAS FIRES, HAMMOND CLOSE, ATTLEBOROUGH
FIELDS INDUSTRIAL ESTATE, NUNEATON. CV11 6RY
TERMS&CONDITIONS OF GUARANTEE
This guarantee is in addition to and does not in any way effect your statutory rights. The Guarantee period for
products supplied by phoenix gas fires and/or it's authorised distributors shall be for a period of3years (first
year parts and labour plus2additional years parts) from date of purchase by the customer and subject to the
following conditions and shall be governed by the laws of England&Wales.
(1) Should the unit be found to be defective immediately after purchase please notify the supplier within
seven days or return to the place of purchase within that time. The returned item must be accompainied
by proof of purchase and be returned at the risk and expense of the purchaser.
(2) This Guarantee shall not apply to damage caused through installation, modification, Act of God,
accident or any wilful act or neglect.
(3) Installation must be carried out by qualified persons, approved by Phoenix Gas Fires of it's distributors.
Servicing of the appliance is carried out at12monthly intervals by qualified persons approved by Phoenix
Gas Fires or it's distributors.
(4) Any visits, repairs or other work performed or parts supplied not covered by this guarantee will be
chargeable to the customer.Acharge may also be made if the unit is found not to be faulty or if it has
been damaged in transit. The customer will be required to effect settlement of such charges within seven
days of the invoice date.
(5) This guarantee excludes consumable products which may need replacement on annual servicing
i.e. ceramic fibre coals etc.
(6) The purchasers sole and exclusive rights under this guarantee against Phoenix Gas Fires is for the
repair or replacement of the unit or any defective part or parts only, and no other rights (inclUding, but not
limited to incidental or consequential damage or loss of whatsover nature) shall be available to the purchaser.
57998
 Loading...