

Phoenix JDGT-0001 User Manual
• Verify the positive lead and ground of cart.
23451
• When routing the Power Harness cable make sure the cable does not interfere with cart
operation.
• The cable should be isolated of working parts of the cart.
• Two installers are required to remove seat to avoid back injuries.
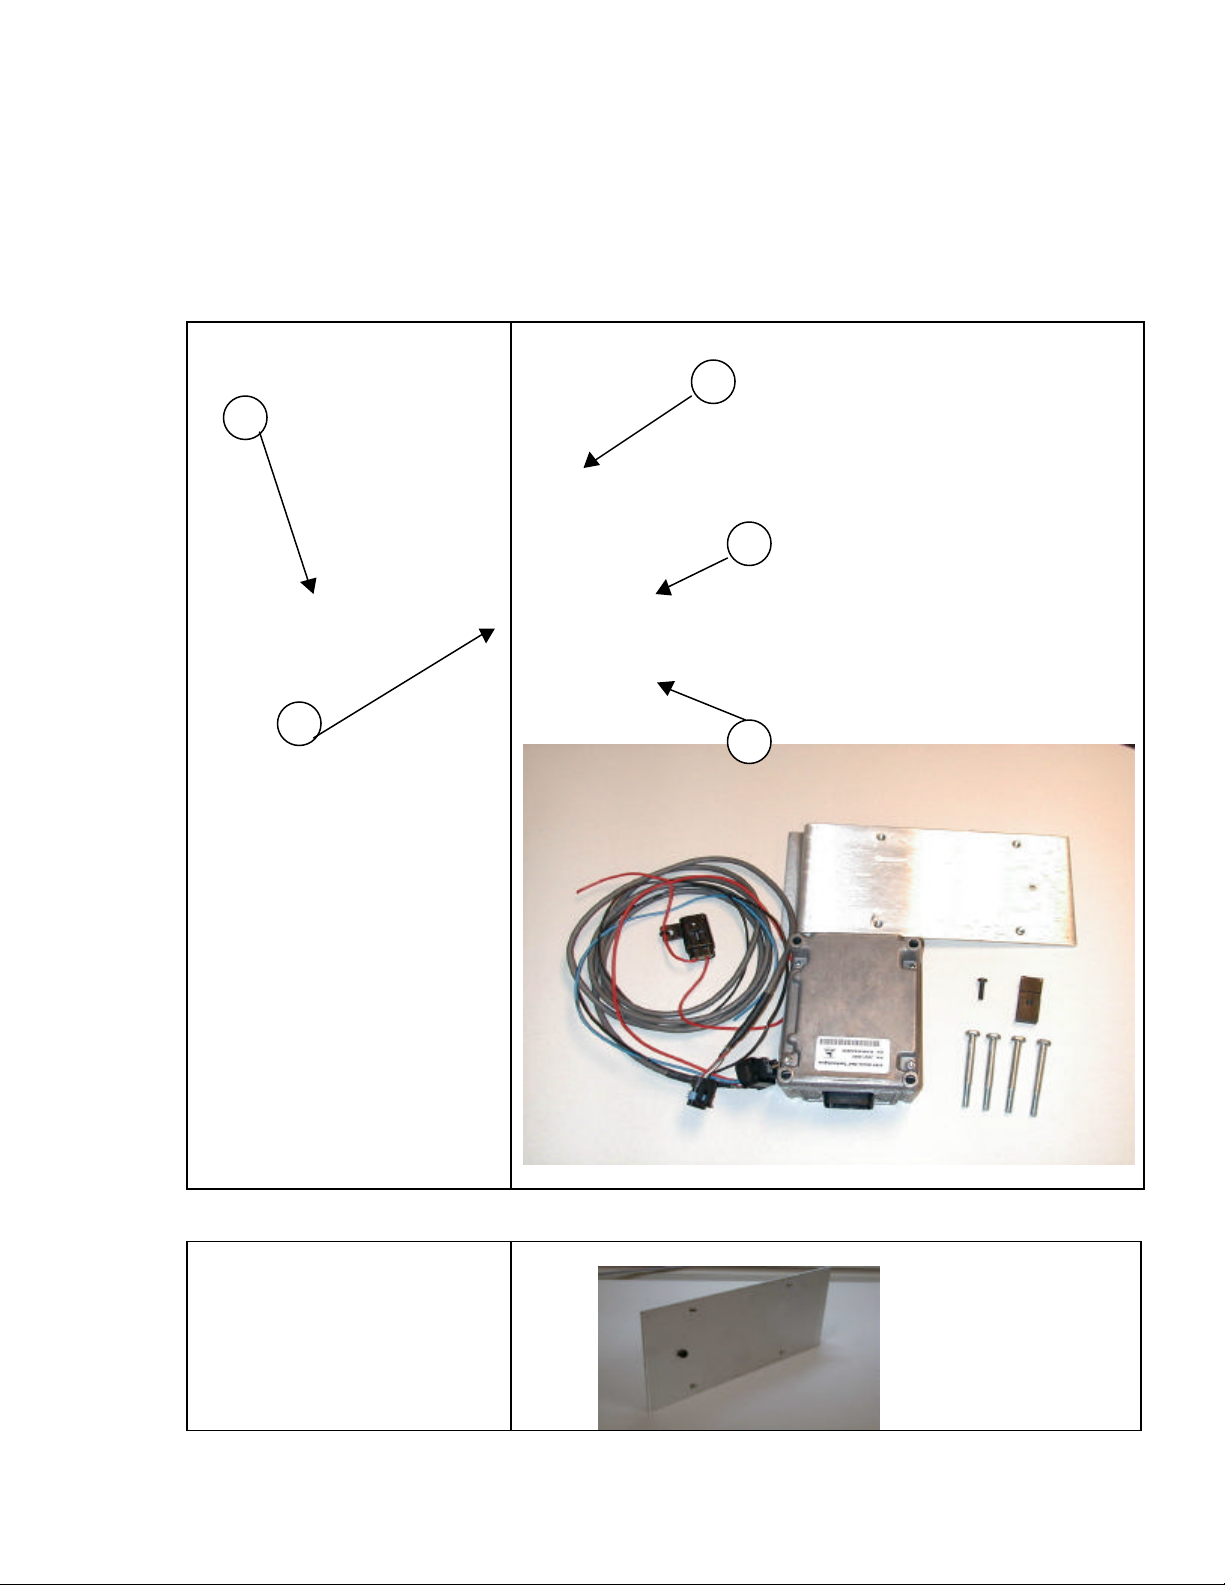
Parts Required for Assembly of Power Supply Bracket and Mounting Power Supply
1. Power Harness
2. Power Supply Bracket
3. Clamp / Phillip head
Screw
4. Bolt (4)
5. Power Supply
Assembly of Power Supply Bracket and Mounting Power Supply
1. Insert screw into hole on
flat side of Power Supply
Bracket
2. Start screw into clamp
Note: Notch of clamp should
be to the inside towards power
supply bracket.
Future picture of power supply mounted on
bracket
132
3. Mount Power Supply onto
bracket using four bolts.
Note: Power Supply connector
should be facing towards
beveled end of power supply
bracket.
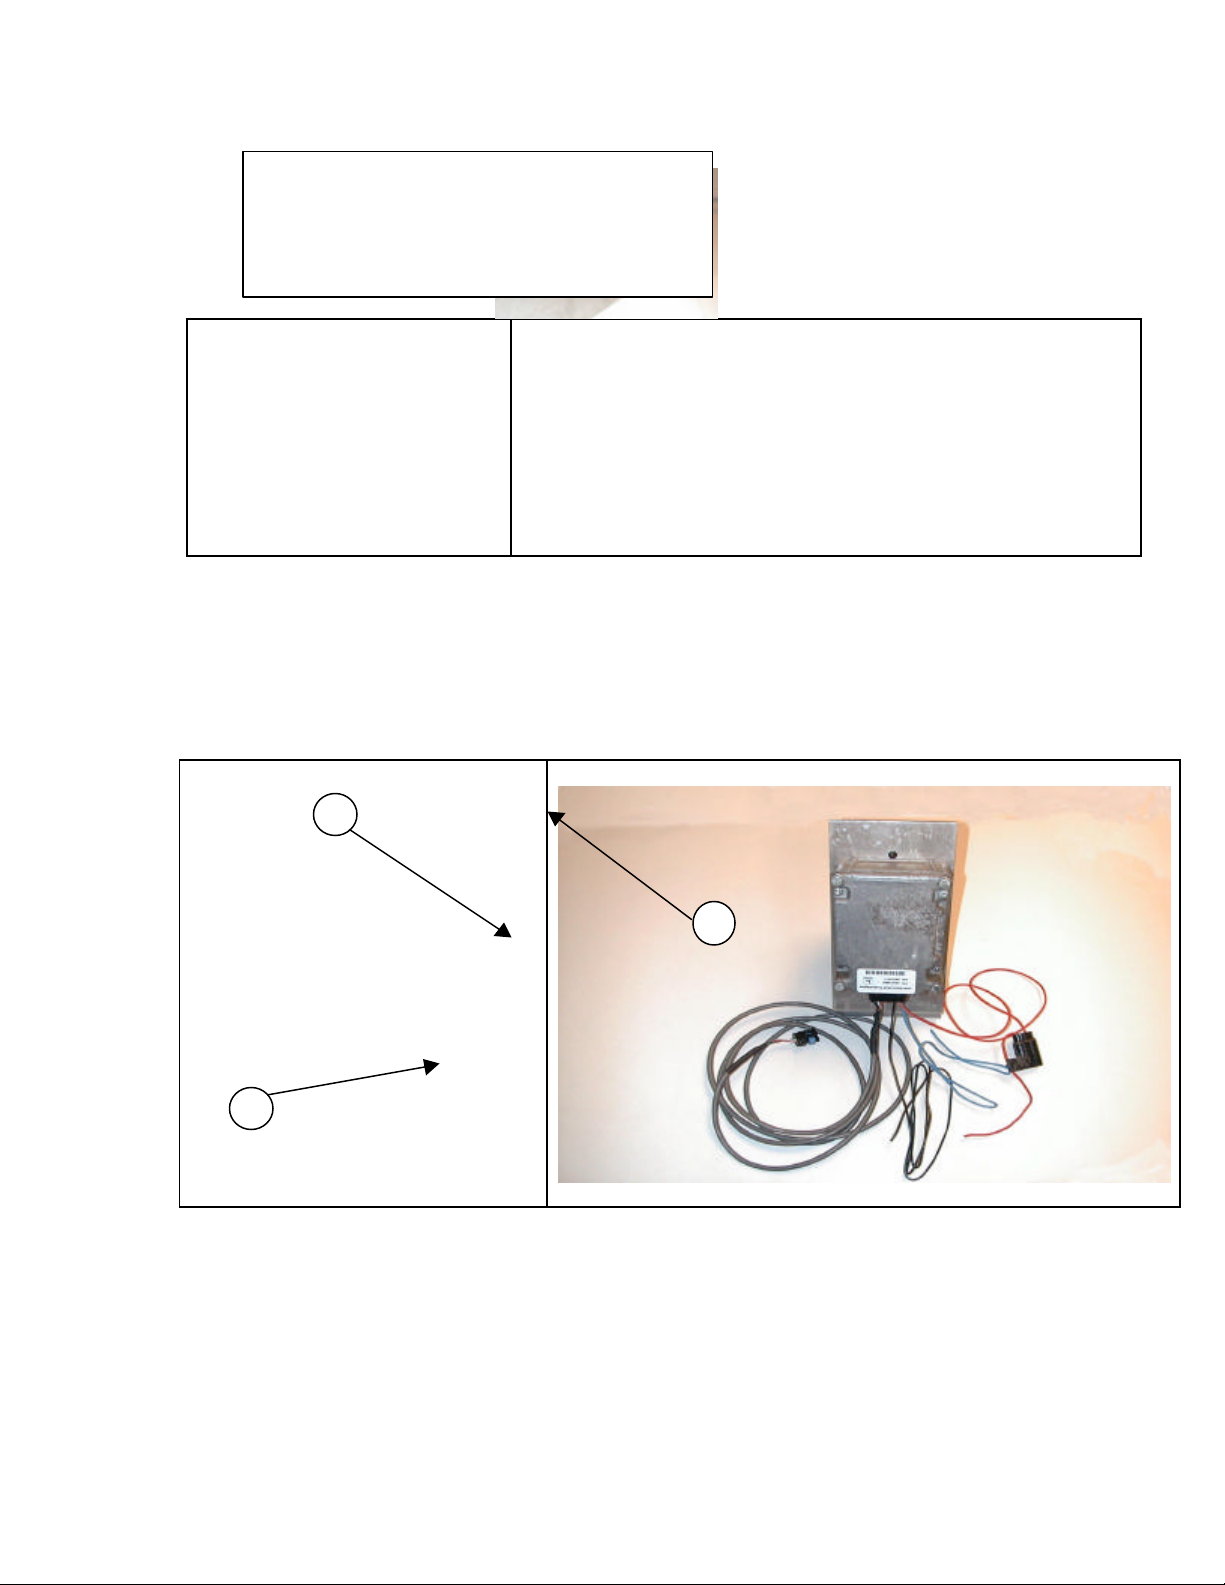
Club Car Power Harness Installation Parts
1. Power Supply
2. Power Harness
3. Power Supply Bracket
Pre Assembled
Club Car Completed Power Harness Installation

Future Picture of Club Car Cart with completed Power Harness Installed

Club Car Power Harness Installation

Note: Two Persons Should be
used to Remove Seat.
1. Remove Seat
Note: Be Careful of Battery Acid
Build up Around Battery
Terminals
Note: Frame Ground- Do Not
Allow tools to contact from
when disengaging battery cable.
Never allow a Positive wire to
touch the cart frame.
2. Remove Nut on Positive
Terminal Lead of battery
3. Attach the Red Ring
terminal of power harness
to battery
4. Secure the nut back onto
Positive Terminal Lead of
the battery
5. Secure Fuse holder to cart
Note: Make Sure Fuse Holder is
in a Vertical Position with Leads
Facing Toward the Ground, and
the Fuse Holder is Accessible
6. Route Black lead of power
harness behind plastic
guard of cart
7. Remove the nut on the
Ground terminal lead of
battery
8. Attach Black Ring terminal
of power harness to
battery
9. Secure nut back on to
ground terminal lead
10. Secure Power Harness
connector to Power Supply
11. Mount Power Supply
Bracket to cart. Location
is left side of battery
Future picture of installing black wire of power harness
Future picture of Power Supply location on Club Car.
Future picture of seat being removed
Future picture of installing red wire of power harness
Future picture of power supply being connected to power
harness.
compartment, in front of
batteries.
12. Install blue wire to
electrical system for key
switch.
MORE to ADD
Mike C.
13. Route Power Harness
cable along frame of cart.
Securing with tie straps.
Note: The cable should be
isolated of working parts of the
cart.
14. Replace the Seat
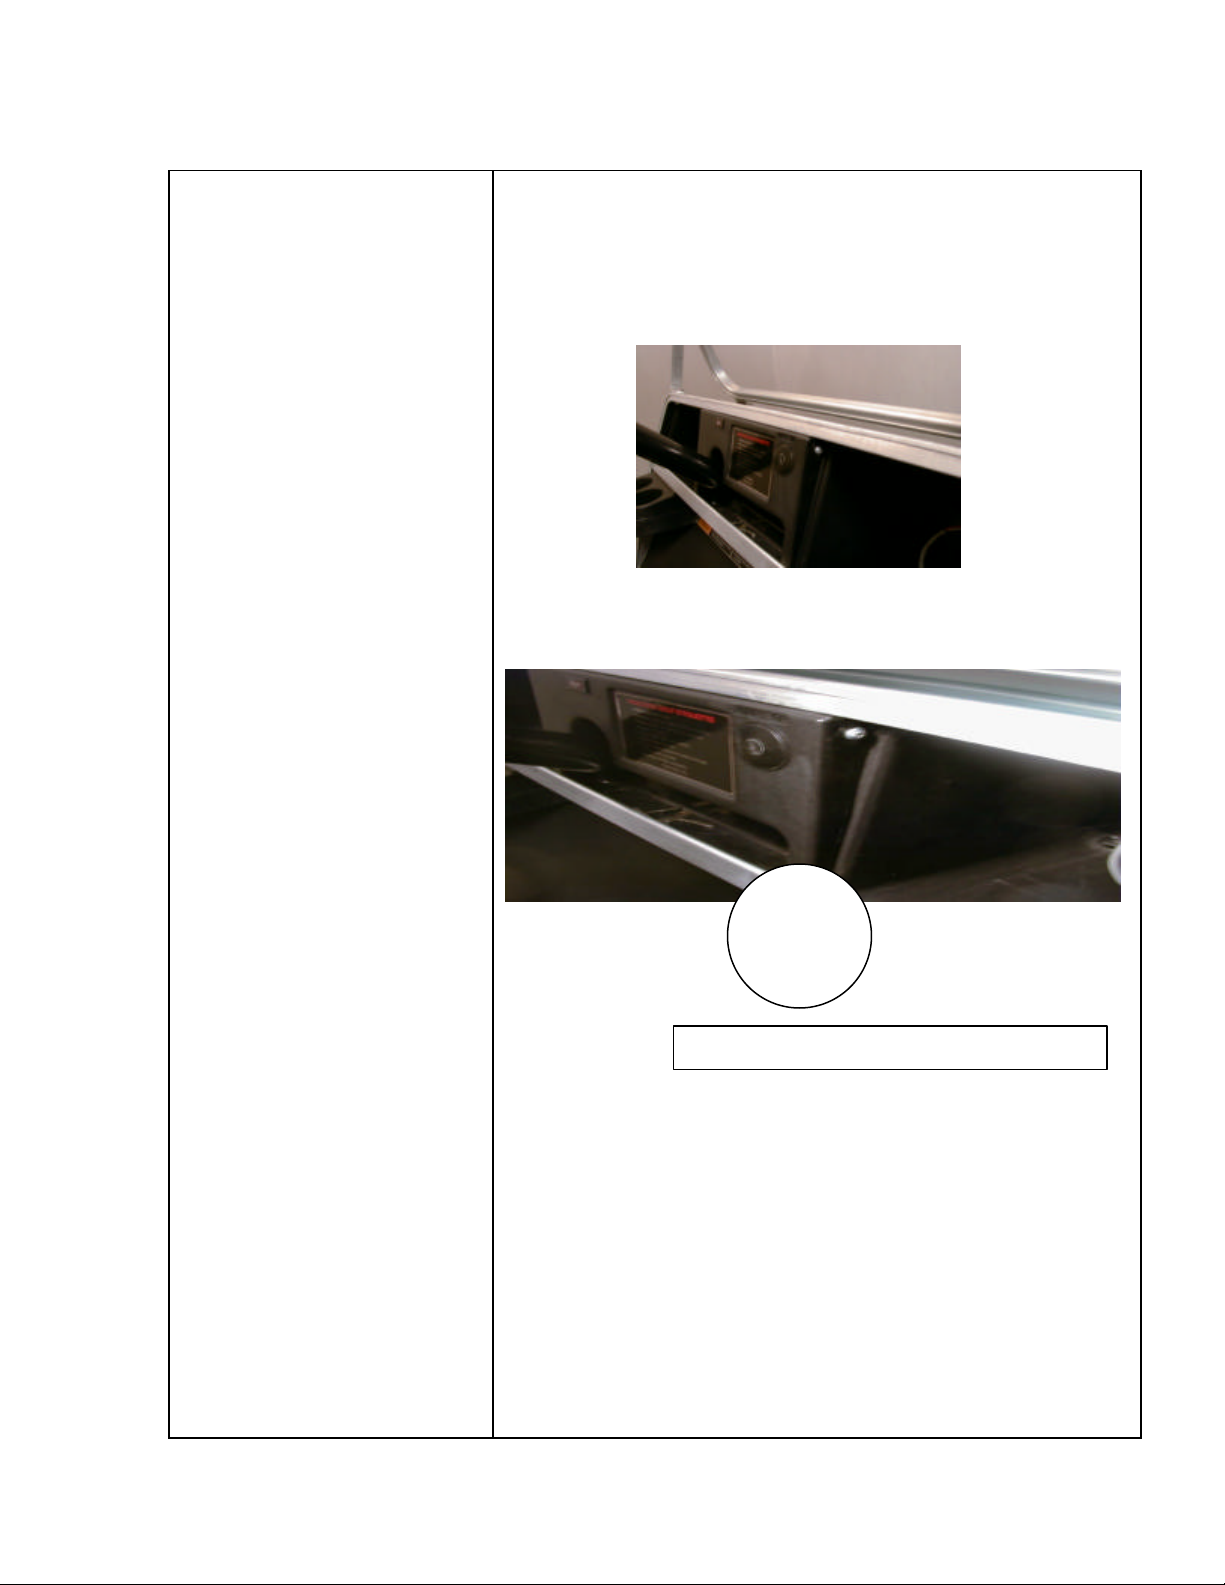
15. Remove screw caps on
the side of dashboard,
and save
16. Loosen screws securing
dashboard
17. Pop off top of dashboard
by running screwdriver
along the top of dash and
below frame of cart
18. Bend top right corner of
dash inward to get key
switch assembly out of
dash
Note: DO NOT LET KEY
SWITCH COME IN CONTACT
WITH FRAME OF CART
19. Run screwdriver along
bottom side of dashboard
to finish removing
20. Sitting on the seat Clip a
½” x ½” notch in the lower
right corner of the
dashboard. This is to
allow enough clearance
for the power cable to be
ran into the bracket and
attach to the head unit.
Bend corner inward to get key switch past frame
Future picture depicturing route of cable.
B. Loosen screw
D. Loosen screw
A. Remove cap
21. Insert bottom of
dashboard back into
place
Note: BE CAREFUL NOT TO
ALLOW THE KEYSWITCH TO
COME IN CONTACT WITH THE
CART FRAME.
22. Pull about 1’ 6” of cable
out to be ran for the
Display Unit
C. Insert screwdriver here to remove dash.
D. Run screwdriver along white line
C. Remove cap
23. Bend right corner inward
to allow key switch room
to be inserted
24. Place left corner in place
25. Push top part of dash into
place
26. Tighten screws
27. Replace caps

EZ-GO Power Harness Installation Parts
Future picture of Power harness, Power supply
bracket, clamp, Phillips head screw, and four bolts.
1. Power Harness
2. Power Supply Pre-Assembled
3. Tie Strap
EZ-GO Completed Power Harness Installation

Future Picture of Club Car Cart with completed Power Harness Installed

EZ-GO Power Harness Installation
Process has not been defined at this
time.
 Loading...