

Page 1
MODEL: P00230/P00231
IMPORTANT SAFETY INSTRUCTIONS PARTS ENCLOSED:
• These instructions are provided for your safety. It is important that they are read carefully
and completely before installing the Pandent light.
• THIS PRODUCT MUST BE INSTALLED IN ACCORDANCE WITH
APPLICABLE INSTALLATION CODES BY A PERSON FAMILIAR WITH THE
CONSTRUCTION AMD OPERATION OF THE PRODUCT AND THE
HARZARDS INVOLVED.
• We strongly recommend that an authorized and certified electrician install all direct wire
fixtures.
• This fixture has been rated from 1x 60watt Max E26 standard bulb(not included).To avoid
the risk of fire, do not exceed the recommended wattage.
• The light fixture is meant for indoor use. DRY LOCATION ONLY. It must be connected
only to 3-wire. Single-phase electrical systems (provided with Ground wire or equivalent
protection system).
• Keep it away from children.
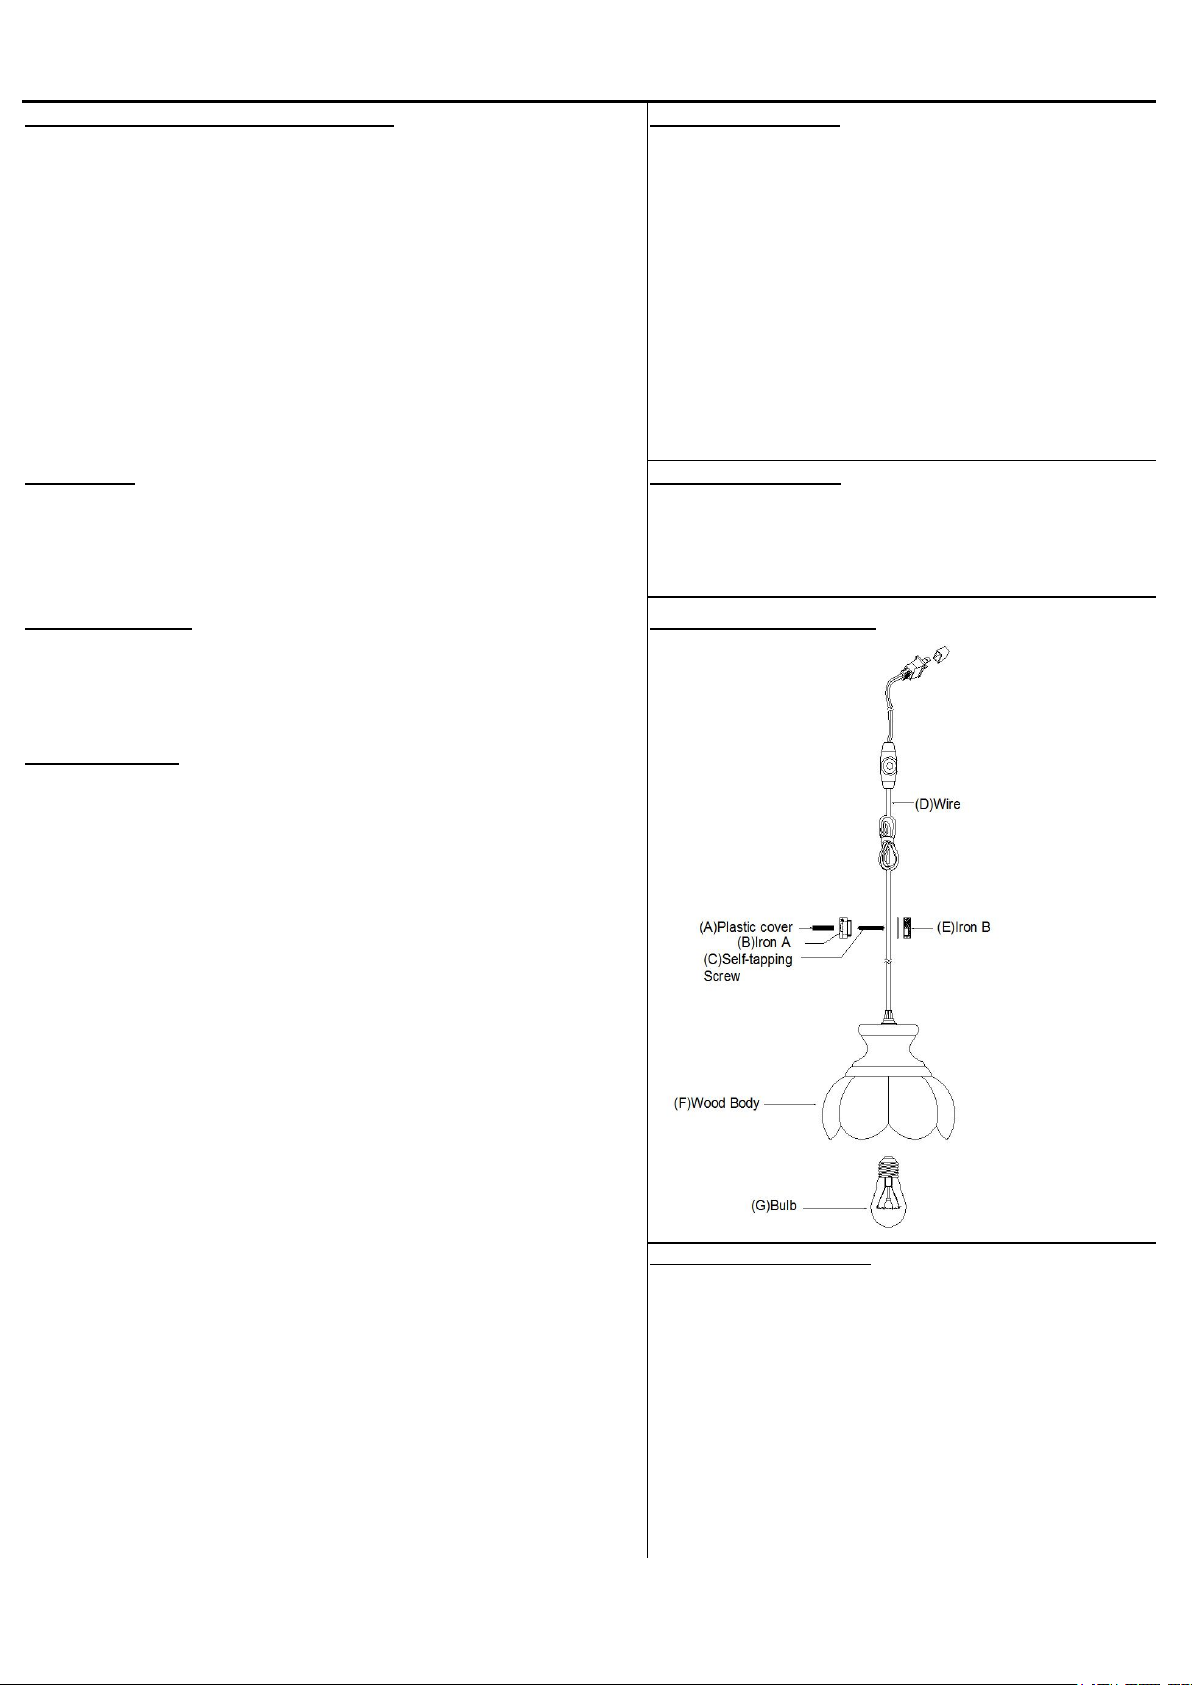
(A)Plastic Cover (1)
(B)Iron A (1)
(C)Self-tapping Screw (1)
(D)Wire (1)
(E)Iron B (1)
(F)Wood Body (1)
(G)Bulb (1)
WARNING: TOOLS REQUIRED:
• Turn-off electricity supply at main circuit panel before installing. Do not connect electricity supply
until your ceiling light is fully assembled and installed.
• To reduce the risk of fire, electrical shock, or personal injury, always turn off the chandelier and allow
it to cool Prior to replacing light bulb. Do not touch bulb when fixture is turned on or look directly at
light bulb.
· Philips screwdriver
· Electrical tape
· Wire cutters
PRE-ASSEMBLY: MODEL: P00230/P00231
• Remove all parts and hardware from box along with plastic protective packaging. Do not
discard any contents until after assembly is complete to avoid accidentally discarding small
parts or hardware.
• For your safety and convenience, assembly by two people is recommended
TO ASSEMBLY:
SHUT OFF THE MAIN ELECTRICAL SUPPLY FROM THE MAIN FUSE BOX/CIRCUIT
BREAKER.
1. Carefully unpack all parts and hardware and lay out on a clear workspace.
2.Drill a small hole in the wall and insert the plastic cover (A) into the wall,then attach iron A(B)
to the wall with self - tapping screw(C).
3.Clip the wire(D) at the bayonet of piece A(B) and tighten it with piece B(E)
4. Install the E26 bulb (Bulbs not included).
CARE INSTRUCTIONS
:
1. Make sure that power is turned off and bulb has cooled before handling.
2.Wipe clean with a dry cloth/mid soapy solution. Do not use corrosive
cleaners.
3.The cable/cord of the chandelier cannot be replaced. If the cable is
damaged, do not use the light.
 Loading...