

Page 1

Page 2

目录
1 欢迎
2 重要须知
3 您的数码录音笔
4 开始使用
5 录音
6 语音模式
7 音乐模式
8 调频模式
9 无线接收模式
10 无线麦克风使用说明
11 系统设置
12 常见问题
13 技术参数
Page 3

1 欢迎
欢迎来到飞利浦世界!您能选择和购买飞利浦的产品,我们
非常高兴。您可在我们的官方网站上获得飞利浦公司的全方位技
术支持,如:使用手册、软件下载、保修信息等。
www.philips.com
产品特点
• 一键录音: 仅仅拨上录音开关即可实现录音,拨下保存录音。
• 数字降噪:能有效地对录音环境周围的噪声给予滤除,从而
可以清晰地记录有效的声音。(此功能只建议在嘈杂的环境中
使用)
• 高清扬声器 : 采用高品质振动喇叭,无论播放录音文件或音
乐文件,都让人身临其境的享受。
• 数字降噪用 WAV 格 式录音,其他均以常见的 MP3 格式录
音。
• 使用高速 USB2.0 快速存取录音和数据。
• 声控录音功能。
• 可作为大容量的 USB 存储设备,确保最大的兼容性。
3
Page 4

2 重要须知
安全
• 为了避免短路,切勿将产品放置在触水受潮处。
• 不要将产品放在加热设备附近或阳光直射的地方。
• 请注意,切勿挤压电缆,特别是插头处。
特别声明:使用本产品前请仔细阅读本说明书,如因人为操作或
不可抗拒因素而导致数据丢失,本公司一概不予负责。特别提醒
用户小心操作,注意将资料另外备份。
听力保护
使用耳机时请遵守下列原则:
• 调整至合适的音量,切勿长时间使用耳机。
• 特别需要注意,切勿将音量调至耳朵所能承受的范围之外。
• 切勿将音量调至盖过周边环境的声音。
• 在危险情况下请小心或暂停使用耳机。
• 在驾驶汽车、骑自行车、玩滑板时,切勿使用耳机。否则会
导致交通意外,且违反法律法规。
4
Page 5

3 您的数码录音笔
供货范围:
概览:
Page 6

1. 耳机插孔
2. USB 接口
3. 电源开/关、播放/暂停
4. 快退、上一曲、更改菜单项
5. 菜单键
6. 录音/播放指示灯
7. 显示屏
8. 停止键,文件夹切换键
9. 音量加(+)、选择菜单项键
10. 快进、下一曲,更改菜单项
11. 音量减(-)、选择菜单项键
12. 删除键
13. 麦克风插孔、Linein 插孔
14. 录音键
15. 锁定键(HOLD)
16. 内置麦克风
17. 扬声器
18. 电池盖
6
Page 7

4 开始使用
放入电池
(1) 打开电池盖。
(2) 将电池放入,请注意电池极性。
(3) 关闭电池盖。
当把电池放入机器时,机器将自动上电开机,然后显示
“PHILIPS”,如下图所示:
然后机器进入录音文件停止播放界面,如下图所示。
在此界面长按 MENU 键约 2 到 3 秒钟,机器返回主界面。
在主界面中包含有五个模块。下面五张图片分别代表:语音、音
乐、调频、无线接收和系统设置模块。
7
Page 8

注:除了录音过程中,在其他任何界面下,长按 MENU 键约 2
到 3 秒可返回到主界面。
开/关机
在关机状态,长按“播放”键开机,直至屏幕上显示开机画
面“PHILIPS”。
在机器停止播放界面,长按“播放” 键关机,直至屏幕上
显示“BYEBYE” 字样。
提示
• 如果长时间不使用录音笔,请取出电池,电池泄露会损坏录
音笔。
• 如果录音笔无法正常工作,请取出电池,并再次放入。
• 更换电池前,请先关闭录音笔。录音笔工作时取出电池会损
8
Page 9

坏文件。
按键锁定(HOLD 功能)
(1) 将“锁定”开关向上推至锁定位置,锁定录音笔上除了拨动
录音键的所有按键。然后屏幕上短暂显示 “Hold”后,随
即消失,如下图所示。
(2) 要解除按键锁定,请将“锁定”开关向下推至 Off 位置。
连接电脑
录音笔可作为大容量的 USB 存储设备,并可方便地对文件
进行存储、备份和移动。可使用 USB 数据线将录音笔与电脑相
连,且无须安装软件,录音笔会自动显示为可移动设备,连接电
脑图标如下图所示。
9
Page 10

提示:
在文件移入或移出录音笔时,请不要断开录音笔与电脑的连
接。
当录音笔连接电脑时,手动操作无效。
10
Page 11

5 录音
当您初次使用录音笔录音时,请注意本节中的内容说明!
(1) 在语音模式停止状态下,按“停止”键,选择所需文件夹。
注意:在停止状态下,按停止键,可以在 A,B,C,D 和
MUSIC 五个文件夹之间进行转换。录音文件可以在 A,B,
C,D 这四个文件夹中进行存储,每个文件夹能存储 99 个录
音文件,当一个录音文件夹存满 99 个后,系统会把随后录入
的文件自动存储在下一个文件夹中,如果四个文件夹全部录
满,要再进行录音,请先删除一些不必要的文件再录。
(2) 把录音键拨到录音状态开始录音;“ 录音/ 播放”指示灯将亮
红灯; 请将内置麦克风对准音源。
(3) 按“播放”键暂停录音,“录音/ 播放” 指示灯闪烁,显示
屏显示“录音暂停”。
(4) 再次按下“播放”键,继续录音。
(5) 把录音键拨到停止状态结束录音,并回到当前录音文件的停
止播放界面。
录音参考界面如下如所示:
11
Page 12

录音界面说明:
注意:电池标记符显示空格时,表明低电。低电时系统会自
动关机。如果正在录音,系统自动保存录音文件后再关机。电量
不足时,请及时更换电池。低电关机提示的参考图标如下所示。
提示:
(1) 录音前,请先设置所需的声控功能和录音类型。
(2) 请先测试录音,以确保录音笔设置正确。
(3) 每个目录最多可存储 99 个文件,总共可容纳 396 个文件
(99 文件 x4 目录)。
(4) 当录音时间超过录音笔可用容量或达到最大 396 个文件数
量的上限时,录音停止。请删除部分录音或将其移至电脑 。
12
Page 13

(5) 录音时请勿取出电池。这会导致录音笔故障,录音文件丢失
或录音文件损坏等问题。
(6) 如果需要长时间录音,请在录音前更换电池。
(7) 新电池最长可以支持 9 小时录音。
使用外置麦克风录音
当您使用外置麦克风录音时,请先将麦克风插入 Linein 插
座,并按照内置麦克风的录音程序进行录音。当您连接到外置麦
克风时,内置麦克风将自动关闭。注意外置麦克风的接口一定要
是双声道接口,如下图所示。
13
Page 14

6 语音模式
在主界面下,你可以使用“ ”和“ ”选择语音模式,然
后短按菜单键确认进入。语音停止界面参考图片如下图所示:
语音文件播放界面说明:
语音播放:
(1) 在录音文件停止播放模式下,按“停止”键,选择所需文件
夹。
(2) 按“ ”或“ ”键,选择要播放的文件。
(3) 按“播放” 键开始播放,“录音/ 播放”指示灯将亮绿灯。
(4) 使用 “+”和“–”键调节音量。
(5) 按“停止”键结束播放。在停止播放状态下,长按“菜单”
键约 2 秒返回到主界面。
14
Page 15
(6) 播放过程中,按“播放”键暂停播放,“录音/ 播放”指示
灯绿灯闪烁;再次按下“播放”键,将继续先前位置的播放。
(7) 播放时长按“
”或“ ”键,可快进或快退当前正在播
放的文件。
提示:
当耳机插入插孔内,录音笔扬声器被停止工作。
播放模式
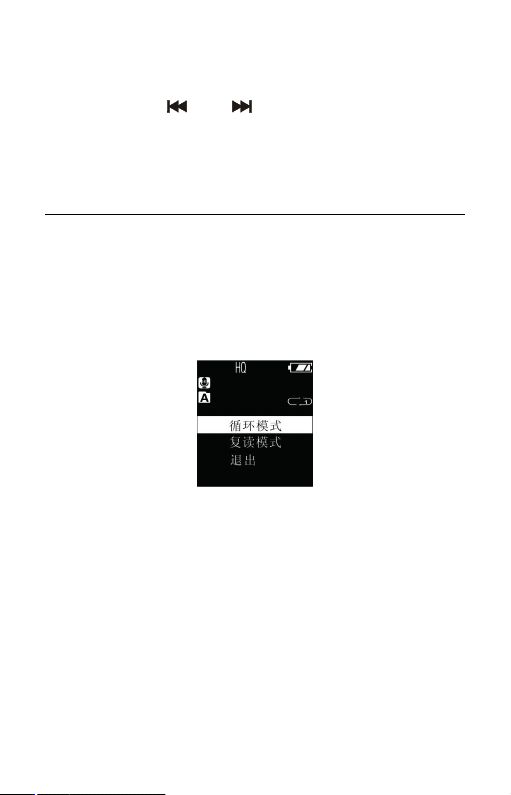
选择要播放的录音文件后,短按播放键播放,在 播放过程中,
短按菜单键,弹出如下播放菜单列表:循环模式,复读模式。参
考界面如下:
(1) 循环模式
如上图选中“循环模式”菜单,再按菜单键,将会进入到循
环模式选择菜单,你可以选择你需要的循环模式,参考界面如下
图所示:
15
Page 16

目录播放:顺序播放选中目录的文件,全部播放完一遍当前目录
的文件后自动停止播放。
目录循环:循环播放选中目录的文件。
单曲循环:一直循环播放选中的当前曲文件。
随机播放:随机播放当前选中目录的文件。
(2) 复读模式
在播放菜单列表中选择“复读模式”菜单,再按菜单键将进
入复读模式,参考界面如下图所示:
A-B 复读的具体操作请参考“ 音乐播放”部分的 A-B 复读操
作部份。
16
Page 17

删除文件
在停止播放录音文件界面下,按住删除键约 2 秒,将会显示
如下第一张图所示界面。下面为执行删除操作的相关参考图片:
在左边界面,使用“+ ”或“-”键选择删除单个文件或所
用文件;在右边界面,使用“+”和“-”选择“是”确认删除,
“否”保持文件;按菜单键执行命令。
个性化设置
你可根据个人喜好进行以下相应设定。
在语音播放停止界面下,短按菜单键,将会弹出功能菜单列
表,功能包括:录音类型、数字降噪、声控设置、监听设置、系
统时间、定时录音、分段录音。相关参考图片如下图所示:
17
Page 18

(1) 录音类型(HQ、SP、SLP)
在功能菜单中,选择“录音类型”菜单,再按菜单键进入录
音类型菜单。在录音类型菜单中有四种录音类型可供选择:“立
体声录音,标准录音,长时录音,Linein 录音”。相关参考图片
如下:
立体声录音:MP3 格式,高音质,比特率为 128kbps。
标准录音:MP3 格式,音质好,比特率为 32kbps。
长时录音:MP3 格式,普通音质,比特率为 8kbps。
Linein 录音:MP3 格式,录音文件比特率由上面三种录音类型
决定。
电话录音:
将外接电话线及附送的电话连线分别接入电话录音转接器,
操作方式和使用麦克风录音相同。
18
Page 19

Line-in 录音:
Line-in 录音是通过双声道音频线,将本机与外部音源设备
的音频输出接口正确连接,即可将外部音源的声音转录至本机
(音源设备如收音机、CD、VCD、DVD等)。正确操作方法为使
用附送的双声道音频线,一端连接外部音源输出口,另一端接本
机的“ Linein ”插孔。录音操作方式和使用麦克风录音相同。
Linein 录音前,请把外部音源调到一个适度值,否则录出来的
文件声音失真。
(2) 数字降噪(
)
开启数字降噪时,录音过程中系统可以对音源的噪声部分给
予有效滤除,然后我们就可以得到清晰的有效声音信息。参考界
面图片如下:
19
Page 20

注:此功能只建议在嘈杂的环境中使用。
(3) 声控设置(
)
声控功能一旦被启用,录音过程中,当机器检测到有声音时,
录音笔会自动开始录音;当未检测到声音时,录音笔在 3 秒后
将自动暂停录音;再次检测到声音时,录音笔又会自动开始录音。
声控设置参考界面图片如下:
(4) 监听设置( )
监听功能打开后,你可以插入耳机检测是否有声音输入。监
听设置参考界面图片如下:
(5) 系统时间设置
系统时间设置界面,参考图片如下:
20
Page 21

在此界面下,你可设置系统的时间格式、设定日期和设置时
间。
例如:选择时间格式“时间格式”菜单 ,将会显示如下参考界面:
此界面下有两种时间显示格式可供选择即 12小时制和 24小
时制。系统默认的是 12 小时制。
例如:选择 “设定日期” 菜单,将会显示如下参考界面:
在此界面下,按“+”或“-”与“ ”和“ ”可以设定
日期。按“
”和“ ”选择年﹑月﹑日;按“+”或“-”改
21
Page 22
变相应位置数值。
例如:选择 “设定日期” 菜单,将会显示如下参考界面:
在此界面下,按“+”或“-”与“ ”和“ ”可以设置
时间。按“ ”和“ ”选择时﹑分;按“+”或“-”改变相
应位置数值。
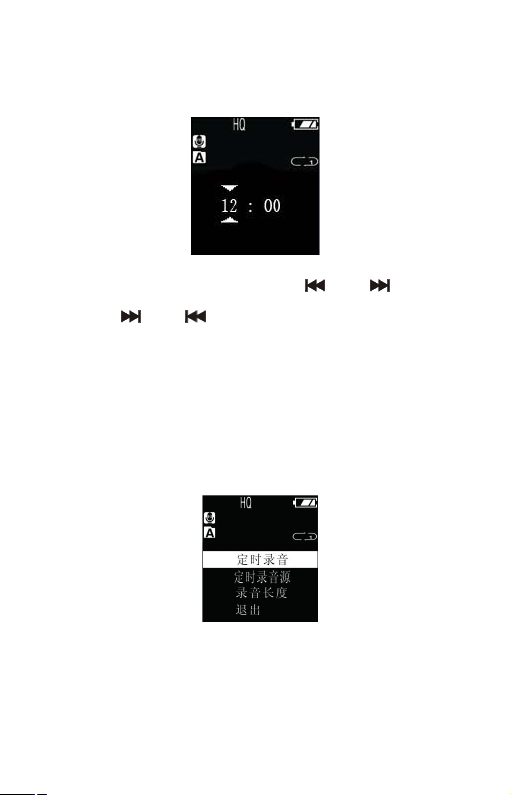
(6) 定时录音设置
定时录音:先预设一个时间,当系统时间到达预设时间时 ,
系统将会自动录音。在功能菜单中,选择 “定时录音”菜单,再
按菜单键进入定时录音设置菜单,。参考界面如下图所示:
第一个功能是定时录音时间设置功能。定时录音时间设置参
考界面如下图所示:
22
Page 23

在此界面下,你可以设置一个时间,当系统时间到达设定时
间时,系统将自动开始录音。
例如:选择 “设定日期” 菜单,将会显示如下参考界面:
在此界面下,按“+”或“-”与“ ”和“ ”可以设定
日期。按“
”和“ ”选择年﹑月﹑日;按“+”或“-”改
变相应位置数值。
例如:选择 “设定日期” 菜单,将会显示如下参考界面:
23
Page 24

在此界面下,按“+”或“-”与“
时间。按“
”和“ ”选择时﹑分;按“+”或“-”改变相
”和“ ”可以设置
应位置数值。
第二个功能是录音源选择功能。你可以选择咪头或者收音电
台作为录音源,按“+”和“-”切换选择,系统默认录音源是
咪头录音。录音源选择参考界面如下图所示:
如果选择收音电台作为录音源,如果系统里有保存好的电
台,将会弹出如下参考界面;如果系统里没有保存好的电台,将
会提示没保存好的电台,但会把电台默认在 94.2MHZ。
01 是你已经保存好的收音电台,02、03、04 是还没保存的
电台,选择你要录入的电台,再按菜单键确认。
录音时,请确保录音笔已插上耳机,开启收音电台接收。
时间长度设置功能:
24
Page 25
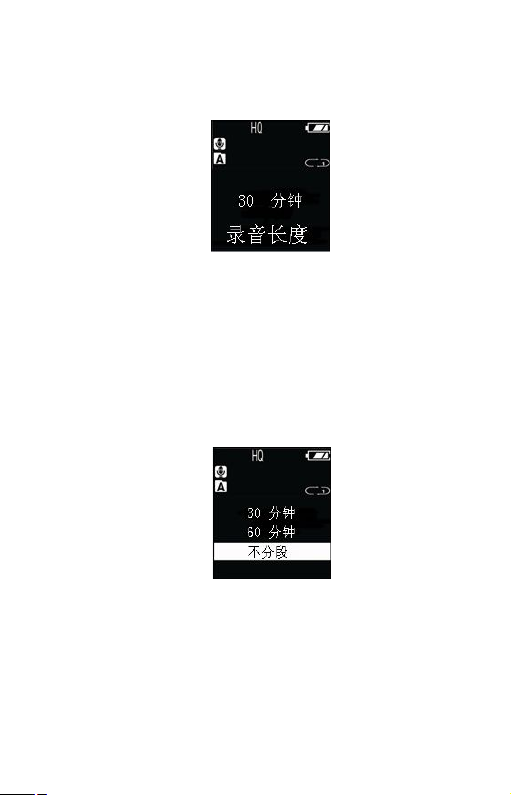
你可以设置 30 分钟,60 分钟,120 分钟或者没限定录音时
长来设置定时录音时长。时间长度设置参考界面如下:
注意:设定定时录音时,在关机状态一定要保证机器电源开
关在 ON 状态,否则定时录音时间到时,无法执行定时录音。
(7) 分段录音
在录音过程中,分段录音功能可在每 30 或 60 分钟自动将
录音文件分段保存并自动进入下一个文件录音。分段录音功能参
考界面如下图所示:
25
Page 26

7 音乐模式
在主界 面中,我们可以通过“ ”和“ ”键选择音乐模
块,然后,短按菜单进入此模块;或者在语音模式下,通过文件
夹切换键切换到音乐文件夹。音乐播放参考界面如下图所示:
注意:音乐文件只能放在“MUSIC”文件夹里面进行播放。
音乐播放界面说明:
播放模式:
你可以使用“
”和“ ”选择你想听的歌曲,按播放键播
放。播放过程中短按菜单键,弹出如下播放菜单列表:循环模式,
音效模式,复读模式,复读次数,复读间隔。参考界面如下图所
示:
26
Page 27

(1) 循环模式
当选中其中一个菜单时,相应的区域将会变成白色。如上图
选中“循环模式”菜单,再按菜单键,将会进入到循环模式选择
菜单,你可以选择你需要的循环模式,参考界面如下图所示:
目录播放:顺序播放选中目录的文件,全部播放完一遍当前目录
的文件后自动停止播放。
目录循环:循环播放选中目录的文件。
单曲循环:一直循环播放选中的一曲文件。
随机播放:随机播放当前选中目录的文件。
(2) 音效模式
在播放菜单列表中选择“音效模式”菜单,再按菜单键将进
入音效模式,音效模式包括以下音效:“自然、摇滚、流行、古
典、柔和、爵士、重低音”,参考界面如下图所示:
27
Page 28

在音效模式中,你可以使用“+”和“-”选择相应模式,再
按菜单键确认。
(3) 复读模式
在播放菜单列表中选择“复读模式”菜单,再按菜单键将进
入复读模式。
设置 AB 复读
• 设置复读起点
在播放状态下,短按“菜单”键进入播放菜单,然后短按“+”
键或“-”键选择“复读模式”选项,再按“菜单”键返回
到播放状态,但此时 LCD 屏中“A-B”的“A”在闪烁,等
待确定复读起点 A,短按“
”确定复读起点 A。
• 设置复读终点
设置复读起点 A 后,此时 LCD 屏中“A-B”的 B 在闪烁,
再短按“
”键,设置复读终点 B,此时 LCD 显示“A-B”。
当复读图标固定“A-B”,开始 AB 点间的反复播放,到达设
定的 次数后,闪烁图标“ A-B”中的“A”,等待确 定起点 A,
这时播放返回正常播放,如不再需要设定复读,可通过以下
28
Page 29

方式退出复读模式。
• 取消复读:短按“播放”键,将之前设置 AB 复读取消,并
暂停播放。短按“停止”键,将之前设置 AB 复读取消,并
停止播放。短按“菜单”键,将之前设置 AB 复读取消,并
返回正常播放状态。
(4) 复读次数
在播放菜单列表中选择“复读次数”菜单,再按菜单键将进
入复读次数设置菜单,通过“+”,“-”键调整次数。参考界面如
下图所示:
(5) 复读间隔
复读间隔意思是两次复读之间的时间间隔。你可以在播放菜
单列表中选择“复读间隔”菜单,再按菜单键将进入复读间隔设
置。通过“+”,“-”键调整复读间隔。
删除文件
此操作去请参照语音文件的删除文件部分。
歌词同步显示
产品支持“*.lrc”歌词文件,实现歌词与歌曲同步播放。
29
Page 30

注意:
(1) 歌词文件的名称与歌曲文件的名称需保持一致。
(2) 若有歌词匹配,长按“菜单”键进入歌词界面,接着会出现
歌词显示界面。若需退出时短按“菜单”键返回歌曲模式。
30
Page 31

8 调频模式
在主界面下,选择调频模式,再按菜单键进入调频模式。调
频模式参考界面如下图所示:
注意:启用调频模式时,请插入耳机。声音只能通过耳机听
到。
在调频模式下,短按“
”或“ ” 键选择频点;短按菜
单键,将会弹出如下子菜单,包括:自动搜台、保存电台、电台
录音、删除电台、删除全部。
当自动搜台菜单被选择时,系统将会自动搜索电台,当一个
电台被检测到时,这个电台将会被自动保存,并把电台号显示在
屏幕上。你也可以通过选择保存电台菜单手动保存电台。选择删
除电台菜单和删除所有电台菜单可以删除当前保存的某一电台
和所有保存的电台。机器最多只能保存 40 个电台,当保存的电
31
Page 32

台数量多于 1 个后,短按“播放/暂停”键依次以递增的方式切
换所保存的电台;短按“停止”键依次以递减的方式切换所保存
的电台。
如果你选择电台录音菜单,系统将会执行电台录音功能。电
台录音参考界面如下图所示:
32
Page 33

9 无线接收模式
在主界面下,选择无线接收模式,再按菜单键进入无线接收,
确认无线麦克风已经开启。系统内置两个频道可供选择。在使用
前请分别将机器和无线麦克风的频道设定好 ,例如:如果设定了
机器的工作频道为频道 1,那么也请将无线麦克风的工作频道设
定至频道 1。如果二者不对应,就会出现机器无法接收到无线麦
克风声音的问题。无线接收参考界面如下图所示频道 1 频道 2。
注意:启用无线模式时,请插入耳机。声音只能通过耳机听
到。
在此界面下,请通过按“
”键或“ ”切换频道。当频
道设定好后,按“播放”键,系统将会进入无线接收录音模式。
进行无线录音,前提是无线麦克风在工作且在对应的频道 。无线
接录音模式参考界面如下图所示:
33
Page 34

无线录音的最大范围是 20-30 米,建议在此范围内使用,且
尽量不要有障碍物遮挡;如果超出使用范围,或者在一些特殊场
景,如:有射频干扰源、大型机械作业、变电站等地点,有可能导
致无线接收效果变差。无线录音时可用耳机实时监听录入的声
音。
34
Page 35

10 无线麦克风使用说明
无线麦克风使用说明:
开/关机:将开关拨动到“ON”处开机,同时工作指示灯显
示蓝色。将开关拨动到“OFF”处关机,工作指示灯熄灭。
充电:该无线麦克风可用录音笔充电器或电脑进行充电,一
般充电时间约为 2 小时。充电时请将“ON/OFF” 开关拨动到
“OFF”位置,工作指示灯显示为红色,充满电后红灯熄灭。
使用距离:在无阻隔的条件下,无线麦克风有效工作距离约
为 20-30 米。
工作时间:充满电后,无线麦克风可连续工作约 7 小时左右。
无线麦克风使用注意事项:
• 第一次使用无线麦克风时,请先将机器充电 2 小时后使用,
以保证机器有电工作。
35
Page 36

• 在不使用无线麦克风时,请将“ON/OFF”开关拨到“OFF”
位置。
• 为了获得更好的信号 ,使用无线麦克风时请将天线伸展拉直。
• 在使用过程中发现工作指示灯不亮或无线麦克风不工作,请
使用充电器或使用 USB 连接线连接电脑充电,充电后方可使
用。
• 请勿在充电过程中使用无线麦克风。
36
Page 37

11 系统设置
在主菜单下,选择系统设置模块,再按菜单键,系统将会进
入系统设置界面。系统设置界面相关参考图片如下图所示,包括:
背光时间、语言选择、关机设定、对比调节、储存状况、固件版
本、格式化磁盘。
(1) 背光时间
背光时间有五种时长可供选择:15 秒,30 秒,45 秒,60
秒和恒亮。如果在设定的时间内没对机器做任何操,背光将会自
动灭。如果选择恒亮,背光将会恒亮。背光设置参考图片如下:
(2) 语言选择
在语言选择菜单中,你可以选择一种语言作为系统语言。语
言选择参考界面如下:
37
Page 38

(3) 自动关机
如果在设定的时间内没对机器做任何操作,系统将会自动关
机。如果时长设为 0,将不会自动关机。自动关机设置参考界面
如下:
(4) 对比调节
使用此功能,你可以随时查看存储器的剩余容量。参考图片
如下:
38
Page 39

(5) 存储状况
使用此功能,你可以随时查看存储器的剩余容量。参考图片
如下:
(6) 固件版本
使用此功能,你可以查看此机器的软件版本。参 考图片如下:
(7) 格式化磁盘
使用此功能,你可以格式化本机器内存。参考图片如下:
39
Page 40

12 常见问题
此处列举了常见问题的解答,可帮助解决录音笔出现的简单
问题。如果故障仍无法排除,请咨询经销商或访问我们的官方网
站:www.philips.com/support
无法启动录音笔:
电池电量已耗尽或电池未正确放放。更换新电池,并检查电
池是否正确放入。
录音笔无法录音:
超出录音笔允许的最大文件数量或录音笔存储空间已满。请
删除部分录音或将其移至外部存储设备。
录音笔无法播放录音:
(1) 录音笔可能处于锁定模式 (HOLD)。将 “锁定” 开关推至
“Off” 位置。
(2) 电池电量已耗尽或电池未正确放入。更换新电池,并检查电
池是否正确放入。
录音笔无法停止、暂停、播放或录音:
录音笔可能处于锁定模式 (HOLD)。将 “锁定” 开关推至
“Off” 位置。
40
Page 41

13 技术参数
存储器
内置存储空间
参考录音时间(4GB):长时间录音模式约 1080 小时、标准录音
模式约 280 小时,高音质录音模式约 68 小时。
参考录音时间(8GB):长时间录音模式约 2160 小时、标准录音
模式约 560 小时,高音质录音模式约 136 小时。
内置存储器类型:NANDFlash 闪存
移动存储器 (PC):是
使用新电池时,最长录音时间可达 9小时。
尺寸和重量
宽×高×深:35×105×15(mm)
重量(含电池):57g
系统要求
操作系统:Windows7/Vista/XP/2000,MacOSX,Linux
接口:USB 接口
录音
录音格式:MP3、WAV
立体声录音(HQ):比特率为 128kbps,格式为 MP3
标准录音(SP):比特率为 32kbps,格式为 MP3
长时录音(SLP):比特率为 8kbps,格式为 MP3
降噪录音(DNR):比特率为 384kbps,格式为 WAV
运行条件
温度:5°–45°C
空气湿度:10% – 90%, 不凝结
41
Page 42

Content
1 Welcome
2 Important
3 YourVoiceTracerdigitalrecorder
4 StarttoUse
5 Record
6 VoiceMode
7 MusicMode
8 RadioMode
9 WirelessMode
10Thewirelessmicrophoneusermanual
11SettingMode
12FrequentlyAskedQuestions
13TechnicalParameters
42
Page 43

1 Welcome
WelcometotheworldofPhilips!Wearehonoredbyyourchoice
and purchase of Philips’ products. You can have Philips’
comprehensivetechnicalsupportsfromourwebsite,e.g.user’s
manuals,softwaredownloadingandwarrantyinformationetc.
www.philips.com
ProductFeatures
• One-touchRecording:Justturnontherecordingswitchtostart
recording,turnofftosavefile.
• DigitalNoiseReduction:Effectivelyfiltertheambientnoiseinthe
recordingenvironment,toenablecrystalclearrecording.This
featureshouldonlybeusedinnoisyenvironment.
• HighFidelitySpeaker:Equippedwithvibrationspeaker,whetherit
playsrecordedfilesormusicfiles,itgivesyouexcellentsound
quality.
• DigitalNoiseReductionrecordinWAVformat,theothersrecord
inMP3format.
• USB2.0highspeeddataaccess.
• Voice-activatedrecording.
• USBmassstorage,ensuringmaximumcompatibility.
43
Page 44

2 Important
Safety
(1) Toavoidashortcircuit,donotexposetheproducttorainor
water.
(2) Donotexposethedevicetoexcessiveheatcausedbyheating
equipmentordirectsunlight.
(3) Protectthecablesfrombeingpinched,particularlyatplugs.
Attention!BeforeusingthedevicepleasereadthisUser’s
Manualcarefully.Thecompanyshallnotbeliableforanydata
lossduetoerroneousoperationorcausesofaforcemajeure
nature. Special attention should be given to correct
operationsandbackingupfiles.
Hearingsafety
Observethefollowingguidelineswhenusingyourheadphones:
• Adjusttosuitablevolume,donotusetheearphoneforalong
time.
• Pleaserememberthatdonotturnthevolumeupbeyondyour
tolerance.
• Donotturnupthevolumesohighthatyoucan’thearwhat’s
aroundyou.
• Whenindangerous environment, pleasecarefully usethe
earphonesorstopusing.
44
Page 45

• Do not use the earphones when driving, cycling, and
skateboardingtoavoidtrafficaccidentandviolatinglawsand
regulations.
45
Page 46

3 YourVoiceTracerdigitalrecorder
What’sinthebox?
Overview:
46
Page 47

1. EarphoneJack
2. USBPort
3. PowerOn/Off,Play/Pause
4. FastRewind,PreviousTrack,MenuSelection
5. MenuButton
6. Record/PlayingIndicator
7. Display
8. StopButton,FileFolderSwitchButton
9. VolumeUp,MenuSelection
10. FastForward,NextTrack,MenuSelection
11. VolumeDown,MenuSelection
12. Delete
13. MicrophoneJack,LineinJack
14. RecordButton
15. HOLD
16. Built-inMicrophone
17. Speaker
18. BatteryCover
47
Page 48

4 StartToUse
InsertBattery
(1)Openthebatterycover.
(2)Insertthebattery,pleasebecarefulwiththepolarity.
(3)Closethebatterycover.
Afterthebatteryisinserted,thedevicepowersonandthendisplays
“PHILIPS” asfollows:
Thenthedevicedisplaysthestoppedplayinginterface.
ThenpressMENUbuttonfor2or3secondstoreturntothemain
interface.Themaininterfaceincludesfivemodes.Thefollowingfive
picturesshowthemodesrespectively:Voice,Music,Radio,Wireless
andSettingMode.
48
Page 49

Note:Whennottakingvoicerecording,onanyotherinterface,
userscanpressMENUbuttonfor2or3secondstoreturntomain
interface.
PowerOn/Off
Wheninthepower-offstate,pressdownthePLAYbuttonuntilthe
startuplogo “PHILIPS” isdisplayed.
Whenthedevicedisplaysthestoppedplayinginterface,pressdown
thePLAYbuttonuntilthe “BYEBYE” isdisplayed,andthenthedevice
ispoweroff.
Note:
• Pleasetakeoutthebatteryifthedevicewillbeidleforalong
49
Page 50

time.Batteryleakagemaydamagethedevice.
• Intheeventthatthedevicecannotworknormally,pleasetake
outthebatteryandputtheminagain.
• Beforereplacingthebattery,pleasefirstpoweroffthedevice.
Takingoutthebatterywiththedeviceisswitchedonmay
damagethefiles.
KeyLock(HOLDFunction)
(1)SlidetheHOLDswitchtolockpositiontolockallthebuttonson
thedevice,excepttheslideswitchofrecording.Then “Hold” is
displayedforawhileanddisappearsasshowninthefollowing
picture.
(2)Tounlockbuttons,pleaseslidetheHOLDswitchtoOFF.
PCConnection
ThedevicecanbeusedasaUSBmassstoragetoconvenientlystore,
backupandmovefiles.LinkthedevicetoacomputerwithaUSB
cable.Thevoicerecordercanautomaticallyberecognizedasamass
50
Page 51

storagedevicewithouttheneedtoinstallanysoftware.
Note:
Whenmovingfilesintooroutofthedevice,pleasedonot
disconnectthedevicefromthecomputer.
Whilethedeviceisconnectedtoacomputer,itcannotbeoperated
manually.
51
Page 52

5 Recording
Before using the device, please read carefully the following
instructions.
(1)Inthestopstateofvoicemode,pressSTOPbuttontoselect
thefolderyouprefer.Note:WhenintheStopstate,pressSTOP
buttontoswitchbetweenfoldersA,B,C,DandMUSIC.The
recordedfilecanbestoredinanyoftheA,B,C,Dfolder;each
foldercanstoreupto99audiofiles.Ifonefolderisfullwith99
files,thesystemautomaticallystoresthesubsequentfilesinthe
nextfolder.Inthecasethatallfourfoldersarefull,pleasedelete
someunwantedfilestoenablerecording.
(2)SlidetherecordingswitchtoRECtostartrecording;the
“Record/Play” indicatorflickersred;pleaseplacethebuilt-in
microphonetowardsthesourceofsound.
(3)PressPLAYbuttontopauserecording,the “Record/Play”
indicatorflickers,andthedisplayshows “Pause”.
(4)PressPLAYbuttonagaintoresumerecording.
(5)SlidetherecordingswitchtoSTOPtoendrecording,thedevice
returnstotheStopinterfaceofcurrentrecordedfile.
52
Page 53

RecordingInterfaceReference:
IllustrationofRecordingInterface:
Note: Whenthelowbatteryiconoccurs,itmeansthebatteryis
nearlyemptyandthesystemwillautomaticallyshutdown.Ifthe
deviceisrecording,thesystemwillautomaticallysavetherecorded
filethenshutdown.Ifthedevicehaslowbattery,pleasechange
batterypromptly.Afterthedeviceshutsdownonlowbattery,the
followingiconwilldisplay.
53
Page 54

Note:
(1)Priortorecording,pleasepresettherecordtypeyouneedand
thevoiceactivationfunction.
(2)MakeatestrecordingtomakesurethattheVoiceTracer
settingsarecorrect.
(3)Eachfoldercanstore99filesatmost,totally396files(99filesx
4folders).
(4)Iftherecordingtimeexceedstheusablestorageofthedeviceor
thenumberoffilesreachesthelimitof396,therecordingstops.
Pleasedeletepartofrecordingormoveittoacomputer.
(5)Whenrecording,donottakeoutthebattery,whichmaycause
malfunction,lossordamageofrecordedfileandsoonmaybe
resulted.
(6)Ifneedtorecordforalongtime,pleasereplacetheoldbattery
withnewones.
(7)Newbatterieswillallowyoutorecordforapprox9hours.
54
Page 55

UseanExternalMicrophonetoRecord
Whenusinganexternalmicrophonetorecord,pleasefirstplugit
intothemicrophoneinjack,andthenrecordaccordingtothe
proceduresofbuilt-inmicrophone.Afteryouconnecttheexternal
microphone,thebuilt-inmicrophoneisdisabled.Pleasenotethatthe
plugoftheexternalmicrophonemustbestereoplugasshowninthe
picturebelow.
55
Page 56

6 VoiceMode
Onthemaininterfaceyoucanselectthevoicemodewith “ ” and
“ ” buttons,andthenshortlypressthemenubuttontoenter.
PleaserefertotheVoiceModeStopinterfacebelow:
VoicePlaybackInterfaceSpecification:
VoicePlayback
(1)IntheStopModeofrecordedfile,pressSTOPbuttontoselect
thefolderyouprefer.
(2)Press “
” or “ ” toselectafiletoplay.
(3)PressPLAYtostartplaying,and “Record/Play” indicatorflickers
green;
(4)Use “+” or “–” buttontoadjustvolume.
(5)PressSTOPtostopplaying.Whentheplayingisstopped,press
56
Page 57

theMENUbuttonforabout2secondstoreturntothemain
interface.
(6)Whenplaying,pressPLAYtopause, “Record/Play” indicator
flickersgreen;pressPLAYagaintocontinueplaying.
(7) Whenplaying,press “ ” or “ ” forafewsecondstofast
forwardorbackward.
Note:
Iftheearphoneispluggedin,thespeakerisdisabled.
PlayingModes
Aftertheaudiofileisselected,pressthePLAYbuttonshortlytoplay.
Whenplaying,pressshortlytheMENUbuttontopopupthe
followingplayingmodes:Repeat,A-BReplay.Seethebelowinterface
reference:
(1)Repeat
SelectRepeatshowninabovepicture,andthenpressMENUbutton
toenterrepeatmodeselectionmenu.Youcanchoosetherepeat
modefromthemenuasshowninthefollowingpicture:
57
Page 58

Sequence:Playtrackssequentiallyinselectedfolder.Afterplayingall
thetracksinthecurrentfolder,theplayingstopsautomatically.
Repeatfolder:Repeattracksonaplaylist.
Repeatone:repeatcontinuouslythecurrenttrack.
Random:Playrandomlytracksinselectedfolder.
(2)A-BReplay
Choose “A-BReplay” fromthePlayingMenu,thenpressMENU
buttontoenterA-BReplay.Seethebelowinterfacepicture:
ForoperationsofA-BReplaypleaserefertoA-BReplaysectionin
“Musicplayback”.
58
Page 59

DeleteFiles
Ontheinterfacewithstoppedplaying,presstheDELETEbuttonfor
about2seconds,theinterfaceofthefirstpicturewillappear.Below
arethepicturesofthedeletionoperations:
Ontheinterface’sleftside,use “+ ”or “-” buttontoselectanddelete
individualorallfiles;ontheinterface’srightside,use “+” or “-” to
choose “Yes” toconfirmdeletion, “No ” tokeepthefile;pressMENU
buttontoexecute.
RecordSettings
Youcanchangesettingsaccordingtoyourpreference.
Ontheinterfacewithstoppedplaying,shortlypresstheMENU
59
Page 60

buttontopopupFunctionsMenu,thefunctionsinclude:Recordtype,
DigitalN.R,VAControl,ListenIn,Systemtime,Recordtimer,Auto
divide.Seethebelowrelatedreferencepictures:
(1)Recordtype(HQ、SP、SLP)
FromtheFunctionsMenuselect “Recordtype”,thenpressMENU
buttontoenterRecordtypeMenu,inwhichtherearefourRecord
typestoselect:” StereoREC,StandardREC,LongREC,Linein
REC ”.Seethebelowrelatedreferencepictures:
StereoREC:MP3format,highsoundquality,bitrate:128kbps.
StandardREC:MP3format,goodsoundquality,bitrate:32kbps.
LongREC:MP3format,ordinarysoundquality,bitrate:8kbps.
LineinREC:MP3format,bitrateoftherecordingfiledependson
60
Page 61

theabovethreetypesofrecordtypes.
TelephoneRecord:
Connectthetelephonecableprovidedwiththedeviceandthe
externaltelephonecabletothetelephonerecordingadapter.
Accordingtothedrawing,theoperationisthesameasrecording
withmicrophone.
LineinRecord:
LineinRecordingisawayofrecordingsoundbyconnectingthe
devicetoanaudioequipment’saudiooutputviaastereoaudiocable
(audioequipmentssuchasradio,CD,VCD,DVDetc.).Usethe
stereoaudiocableprovidedwiththedevicetoconnecttheaudio
equipment’saudiooutputwith “Linein” jackofthedevice.The
recordingoperationisthesameasrecordingwithmicrophone.
BeforerecordingwithLineinjack,pleaseadjustthevolumeofthe
soundsourcetoasuitablelevel,otherwisetherecordedsoundmay
lackfidelity.
61
Page 62

(2)DigitalNoiseReduction(
)
WhentheDigitalNoiseReductionisenabled,thesystemcan
effectivelyfilterthenoisefromsoundsourceduringrecording,and
thenyoucanhaveclearrecordedsound.Seethefollowingpicture:
Note: Thisfunctionshouldonlybeusedinnoisyenvironment.
(3)Voice-activatedRecording( )
Thisisapracticalfunctionofrecording,nobuttonoperationis
needed.Whenthefunctionisenabled,inthecourseofrecording,if
novoiceisdetected,thedevicewillautomaticallypauserecording
after3seconds;ifvoiceisdetectedagain,thedeviceresumes
recording.Seethebelowrelatedreferencepicture:
(4)TheListenInfunction( )
62
Page 63

AfteractivatingtheListenInfunctionyoucanconnectinan
earphonetolistentothesoundwhichistoberecorded.Seethe
ListenInfunctionsettinginterfacepictureasfollows:
(5)SystemTimeSetting
SeetheSystemTimesettinginterfaceasfollows:
Onthisinterface,youcansetdate、 settimeandsetthedisplay
format.
Forexample:select “TimeFormat” toshowthefollowingmenu:
63
Page 64

Thereare2timeformatstochoose,namely12-hourformatand
24-hourformat.Thesystemdefaultis12-hourformat.
Forinstance:choose “Setdate”,thefollowinginterfacewillpopup:
Onthisinterface,press “ ” or “ ” tosettime.Press “ ” or
” toselectyear,monthandday;press“+” or “-”tochangethe
“
relevantnumbers.
Forinstance:choose “Settime”,thefollowinginterfacewillpopup:
64
Page 65

Onthisinterface,press “ ” or “ ” tosettime.Press “ ” or
“ ” toselecthourandminute;press“+” or “-”tochangethe
relevantnumbers.
(6)Recordtimersetting
Recordtimersetting:firstpre-setalengthoftime,whensystemtime
reachesthepre-settime,thesystemautomaticallystartsrecording.
Onthefunctionsmenu,choosethe “recordtimer”,thenpressthe
MENUbuttontoenter “recordtimer” setting.Seethebelow
referencepicture:
Thefirstfunctionistosetthetimetostartrecording.Forsetting
pleaserefertothebelowpicture:
Onthisinterface,youcansetatime,asthesystemtimeturnstheset
65
Page 66

time,thesystemautomaticallystartsrecording.
Forinstance:choose “Setdate”,thefollowinginterfacewillpopup:
Onthisinterface,press “ ” or “ ” tosettime.Press “ ” or
“ ” toselectyear,monthandday;press“+” or “-”tochangethe
relevantnumbers.
Forinstance:choose “Settime”,thefollowinginterfacewillpopup:
Onthisinterface,press “ ” or “ ” tosettime.Press “ ” or
“
” toselecthourandminute;press“+” or “-”tochangethe
relevantnumbers.
ThesecondfunctionisRECsourceselection.Youcanchoose
microphoneorradiochannelassoundsource.Press “+” and “-” to
select.Thesystemdefaultsoundsourceismicrophone.Forchoosing
66
Page 67

soundsourcepleaserefertothebelowpicture:
IfchoosetheradiochannelasaRECsourceandtherearesaved
channelsinthesystem,thebelowinterfacewillshow;ifthere’sno
savedradiochannelinthesystem,thesystemwillnotifythatno
savedchannelavailable,andsetthechannelat94.2MHZasdefault.
Channel1issavedchannel,channel2,channel3andchannel4are
notsavedchannels.Selecttheoneyouwanttorecord,thenpress
MENUbuttontoconfirm.
Atthetimeofrecording,makesuretohavetheearphones
connectedtothedevicetoenableradioreception.
Thethirdfunctionistherecordingduration.Youcansetthe
recordingdurationto30,60,120minutesorinfinite.Therecording
67
Page 68

durationsettingasfollows:
Note: whenusingrecordtimesetting,mustmakesurethepower
switchisinONpositionwhenthesystemisoff.Otherwisethe
recordtimecan’tbestartedatthesettime.
(7)Autodivide
Duringthecourseofrecording,theautodividefeatureautomatically
recordsintoanewfileevery30or60minutes.Theautodivide
interfaceisasfollows:
68
Page 69

7 MusicMode
Fromthemaininterface,youcanchoosemusicmodewith “ ” and
“ ” buttons,andthenshortlypresstheMENUbuttontoenter;or
inthevoicemode,usetheswitchbuttonstoswitchtothemusic
folder.Musicplaybackinterfaceisasfollows:
Notice:musicfilescanonlybeplayedwhentheyarein “MUSIC ”
folder.
MusicplaybackInterfaceillustration:
PlayingMode
Youcanselectthetrackyouwantbypressing “
69
” and “ ”,then
Page 70

pressPLAYtoplay.Whenplaying,shortlypresstheMENUbutton,
thebelowplayingmodemenupopsupwithmodesof:Repeat,
Equalizer,A-BReplay,Replaytimes,andReplaygap.Seetheinterface
asfollows:
(1)Repeat
Asillustrated, “Repeat” isselected,thenpressMENUbuttonto
entertheRepeatModesSelectionMenu.Youcanchoosethe
preferredrepeatmodeasfollows:
Sequence:Playsequentiallytracksinselectedfolder.Afterplayingall
thetracksinthecurrentfolder,theplayingstopsautomatically.
Repeatfolder:Repeattracksontheselectedplaylist.
Repeatone:repeatcontinuouslytheselectedtrack.
70
Page 71

Random:Playrandomlytracksinselectedfolder.
(2)Equalizer
Select “Equalizer”,pressMENUbuttontoenter.TheEqualizer
include:Normal,Rock,Pop,Classic,Soft,Jazz,andDBB”.Seethe
belowpicture:
IntheEqualizerMode,youcanchoosemodewith “+” and “-”
buttons,pressMENUbuttontoconfirm.
(3)A-BReplay
FromthePlayingMenuselectthe “A-BReplay”,pressMENUbutton
toenter.
SetA-BReplay
• Setthestartmark:Whenplaying,shortlypressMENUbutton
todisplayPlayingMenu,thenshortlypress “+” or “-” toselect
“A-BReplay” mode,thenpressMENUbuttontoenterand
returntoPlayingMenu.The “A ” in “A-B” onLCDdisplayflickers,
71
Page 72

ifthestartpointAarrives,shortlypress “ ” toconfirmthe
markA.
• Setthefinishmark.AftersettingmarkA,the “B” in “A-B” on
LCDdisplayflickers,shortlypress “ ” tosetthefinishmark.
The “A-B” isdisplayedontheLCD.Asthereplaymarksarefixed
on “A-B”,thesectionbetweenmarkAandBwillbereplayedfor
specifiedtimes.Afterplayingspecifiedtimes,the “A ” in “A-B”
flickerstowaitforsettingmarkA,andthesystemresumes
normalplaying.IfA-BReplayisnotneeded,usethefollowing
methodtocanceltheA-BReplaymode.
• Cancellation:Shortlypress “PLAY” buttontocanceltheAB
marksandpauseplaying.
• Shortlypress “STOP” buttontocanceltheABmarksandstop
playing.
• Shortlypress “MENU ” buttontocanceltheABmarksand
continueplaying.
(4)Replaytimes
FromthePlayingMenuselectthe “Replaytimes ”,thenpressMENU
buttontoenterreplaytimessetting.Use “+” and “-” tochangetimes.
Seethebelowinterfacepicture:
72
Page 73

(5)Replaygap
Replaygapmeansthetimegapbetweentworepeats.Youcanchoose
the “Replaygap” fromthePlayingMenuthenpressMENUbuttonto
enterReplaygapsetting.Use “+” and “-” toadjustReplaygapsetting.
DeleteFiles
RefertotheDeleteFilesinvoiceplaybacksection.
Thelyricsdisplayed
Thisproductsupports"*.lrc"lyricsfiles,realizingsynchronous
broadcastingofthesongandlyrics.
Note:
(1)Lyricsfile'snameandthenameofthesongfilesneedtobe
consistent.
(2)Ifthelyricsmatch,longpressthe"menu"buttontoenterthe
lyricsinterface,lyricsdisplaywillappeared.Toexit,shortpress
"menu"buttontoreturntotheMusicMode.
73
Page 74

8 RadioMode
FromthemainmenuselectRadioMode,pressMENUbuttonto
enter.SeethebelowpictureofRadioMode:
Note:pleaseplugintheearphones.Theyallowradioreception.
Soundcanonlybeheardintheearphones.
IntheRadioMode,press “ ”or“ ”buttontochooseradio
frequency ; pressMENUbuttontodisplaythefollowingmenu,
including:Autosearch,SaveChannel,FMrecord,Delete,DeleteAll.
AfterAutosearchisselected,thesystemautomaticallysearches
radiochannels.Whenachannelisfound,thechannelwillbesaved
automaticallyandthechannelnumberisshownonthedisplay.You
canuseSaveChanneltosaveit.UseDeleteorDeleteAlltodeletea
currentsavedchannelorallsavedchannels.Thedevicecanstore40
74
Page 75

radiochannelsatmost.Aftermorethanoneradiochannelisstored,
shortpress “PLAY” or “STOP” toswitchamongsavedradiochannels
insequence.IfyouchooseFMrecord,thesystemstartsrecording
thechannel,seetheinterfacepicturebelow:
75
Page 76

9 WirelessMicrophoneMode
SelectWirelessModeonthemaininterface,pressMENUtoenter.
MakesuretoswitchwirelessMICon.Therearetwobuilt-in
frequencychannelsavailableinthesystem.Pleasesetthedevice’s
workingchannelandtheworkingchannelofthewirelessmicrophone
tothesamechannel,forexample:ifthedevice’sworkingchannelis
setatChannel1,thenthewirelessmicrophone’sworkingchannelhas
tobesetatChannel1too.Ifthechannelsdon’tmatch,thedevice
cannotrecordsoundfromthewirelessmicrophone.
Wirelessreceptioninterfacepictureasfollows:
Note:pleaseplugintheearphones.Theyallowradioreception.
Soundcanonlybeheardintheearphones.
Onthisinterface,press “ ” or “ ” toswitchchannel.Afterthe
channelisset,press “PLAY” buttontoenterrecordingmodethrough
wirelessreception.Inordertostartwirelessrecording,thewireless
microphonemustbeworkingonthesamechannelwiththedevice.
SeethebelowinterfacepictureofWirelessMode:
76
Page 77

Themaximumworkingrangeofwirelessrecordingisbetween20to
30meters.Thus,thewirelessrecordingwithinthisrangeissuggested,
andpleasetrytoavoidanybarriersthatmayweakenthesignal.If
wirelessrecordingworksbeyondthereceptionrange,orthewireless
recordinghappensinspecialoccasionsnearbyradiofrequency
interference,largesizedworkingmachinesorsubstationsarearound,
recordingswithlowsoundqualitymayberesulted.Duringthe
courseofwirelessrecording,earphonecanbepluggedintomonitor
thesoundbeingrecorded.
77
Page 78

10Thewirelessmicrophoneusermanual
Thewirelessmicrophoneinstructions:
PowerON/OFF:slidetheswitchtothepositionof “ON” to
switchonthedevice.Whenthedevicepowerson,indicatorlight
turnsblue.Whenslidetheswitchtothepositionof “OFF”,indicator
lightturnsoffandthedevicepowersoff.
Charging:pleaseusethechargerforvoicerecorderorconnect
thedevicewithPCviaUSBcabletochargethedevice.Whenthe
deviceischargingpower,pleaseslidetheswitchtothepositionof
“OFF”.Thegeneralchargingtimeforthedeviceisabouttwohours.
Indicatorlightturnsredwhenthedeviceischargingpowerandturns
offafterthedevicebeingfullycharged.
Workingdistance:underthebarrier-freeenvironment,the
effectiveworkingdistanceforthedeviceisbetween20and30
78
Page 79

meters.
Workingtime:thedevicecanworkcontinuouslyforaround7
hoursafterbeingfullycharged.
Noticeforthewirelessmicrophone:
• Pleasechargethedevicefortwohoursbeforeusingitforthe
firsttime,inordertoensurethedeviceworkproperly.
• Pleaseslidethe “ON/OFF” switchtothepositionof “OFF”
whenthedeviceisnotinuse.
• Pleasestretchtheantennastraighttoensurebettersignal
transmission.
• Iftheindicatorlightorthedeviceisnotworkingwhenbeing
used,pleaserechargethedeviceandtrytopoweritonagain.
• Donotusethedevicewhenitischargingpower.
79
Page 80

11SettingMode
FromthemainmenuselectSettingmode,pressMENUbuttonto
enter.TheSettingmodeinterfaceincludesBacklight,Language,Auto
off,ContrastSetting,memoryinfo,FirmwareVersionandClear
memory.
(1)BacklightTime
Thebacklightfunctioncanbesetat:15,30,45,60secondsand
Constant.Ifthere’snooperationonthedeviceforthesettime,the
backlightturnsoffautomatically.IfyouselectConstant,thebacklight
isonconstantly.SeethebelowpictureofBacklightTimesetting:
(2)Language
FromtheLanguagemenuyoucanchoosealanguageassystem
language.Seethefollowinginterfacepicture:
80
Page 81

(3)Autooff
Ifthere’snooperationonthedeviceforasettime,thesystem
automaticallyshutsdown.Ifthetimeissetat0,thesystemwillnot
automaticallyshutdown.Seethebelowautooffpicture:
(4)Contrast
Thehigherthecontrast,thewhiteristheLCDdisplay.Seethebelow
interfacepictureofadjustingcontrast:
81
Page 82

(5)Memoryinfo
Usethisfunctiontochecktheremainingstoragecapacityanytime.
Seethefollowingpicture:
(6)FirmwareVersion
Youcancheckthedevice’sfirmwareversionbyusingthisfunction.
Seethebelowpicture:
(7)Clearmemory
Youcanformatthedevice’sinternalstoragebyusingthisfunction.
Seethebelowpicture:
82
Page 83

12FrequentlyAskedQuestions
Answerstothefrequentlyaskedquestionsarelistedheretosolve
simpleproblemsthatmayoccurwiththerecordingpen.Ifthe
problemcannotbesolved,pleasecontactthedealerorvisitour
officialwebsite: www.philips.com/support
Cannotpoweronthedevice:
Batteriesareemptyorinsertedincorrectly.Replacetheoldbattery
withnewone,andcheckifbatteriesarecorrectlyinserted.
Cannotrecordwiththedevice:
Themaximumfilenumberisexceededorthedevice’smemoryisfull.
Pleasedeletesomerecordingsormovethemtootherstorage.
Thedevicecannotplayrecordedaudio:
(1) Thedevicemaybeinlockmode(HOLD).SlidetheHOLD
switchtoOFFposition.
(2) Batteriesareemptyorinsertedincorrectly.Replacetheold
batterieswithnewones,andcheckifitiscorrectlyinserted.
Thedevicecannotstop,pause,playorrecord:
Thedevicemaybeinlockmode(HOLD).SlidetheHOLDswitchto
OFFposition.
83
Page 84

13TechnicalParameter
Storage
Internalstorage
Estimatedrecordingtime(4GB):approximately1080hourswith
LongRecordingmode,280hourswithStandardRecordingmode,68
hourswithHighQualityRecordingmode.
Estimatedrecordingtime(8GB):approximately2160hourswith
LongRecordingmode,560hourswithStandardRecordingmode,
136hourswithHighQualityRecordingmode.
Typeofinternalstorage:NANDFlash
Portablestorage(PC):Yes
Recordingtimewithnewbattery:approx.9hours.
DimensionsandWeight
Wide × Long × High:35×105×15(mm)
Weight(with):57g
Systemrequirement
OperatingSystem:Windows7/Vista/XP/2000,MacOSX,Linux
Port:USB
Recording
AudioFormat:MP3、WAV
StereoREC(HQ):bitrate:128kbps,format:MP3
StandardREC(SP):bitrate:32kbps,format:MP3
LongREC(SLP):bitrate:8kbps,format:MP3
DigitalN.R(DNR):bitrate:384kbps,format:WAV
84
Page 85

Operatingconditions
Temperature:5°–45°C
Humidity:10% – 90%,nocondensation
85
Page 86

Page 87

 Loading...