

Philips vs0040/00 Instruction Manual

User manual and Service Manual
Scanned, ocr’ed and converted to PDF by HansO, 2001
Introduction
This monitor is designed for use as an
alphanumerical and graphic screen with
a
Philips MSX computer. This monitor is
of course also suitable for
use with every other home or personal
computer.
The monitor screen is anti-reflective,
thus giving optimal legibility. The
monitor is
fitted with a composite video signal
input and an audio signal input.
See the technical specifications section
for further information.
Connection to the mains supply
Your new monitor is designed to operate
from an a.c.mains supply of 220 or 240
volts, 50 Hz. Stabilising circuits ensure
satisfactory performance within normal
supply variations.
IMPORTANT:
This apparatus must be earthed. This can
be achieved by fitting a 3 pin plug.
The wires in the mains lead are coloured
according to the following code:
BLUE NEUTRAL
BROWN LIVE
GREEN/YELLOW EARTH
If the mains plug (or adaptor) contains a
fuse, the value of this fuse should be 3
Amp. Alternatively, if another type of
plug (not fused) is used, the fuse at the
distribution board should not be greater
than 5 Amp.
If the colours of the wires in the mains
lead do not correspond with the coloured
markings identifying the terminals in
your plug, proceed as follows ... The
BLUE wire should be connected to the
terminal marked 'N' or coloured black.
The BROWN wire should be connected
to the terminal marked 'L' or coloured
red. The GREEN and YELLOW wire
must be connected to the terminal in the
plug marked by 'E' or the earth symbol 4,
or coloured green or green and yellow.
Before replacing the plug cover, make
certain that the cord grip is clamped over
the sheath of the lead - not simply over
the three wires.
Positioning/Ventilation
In order to prevent overheating, ensure
that the ventilation openings in the
monitor are not covered.
The monitor should not be placed near a
source of heat.
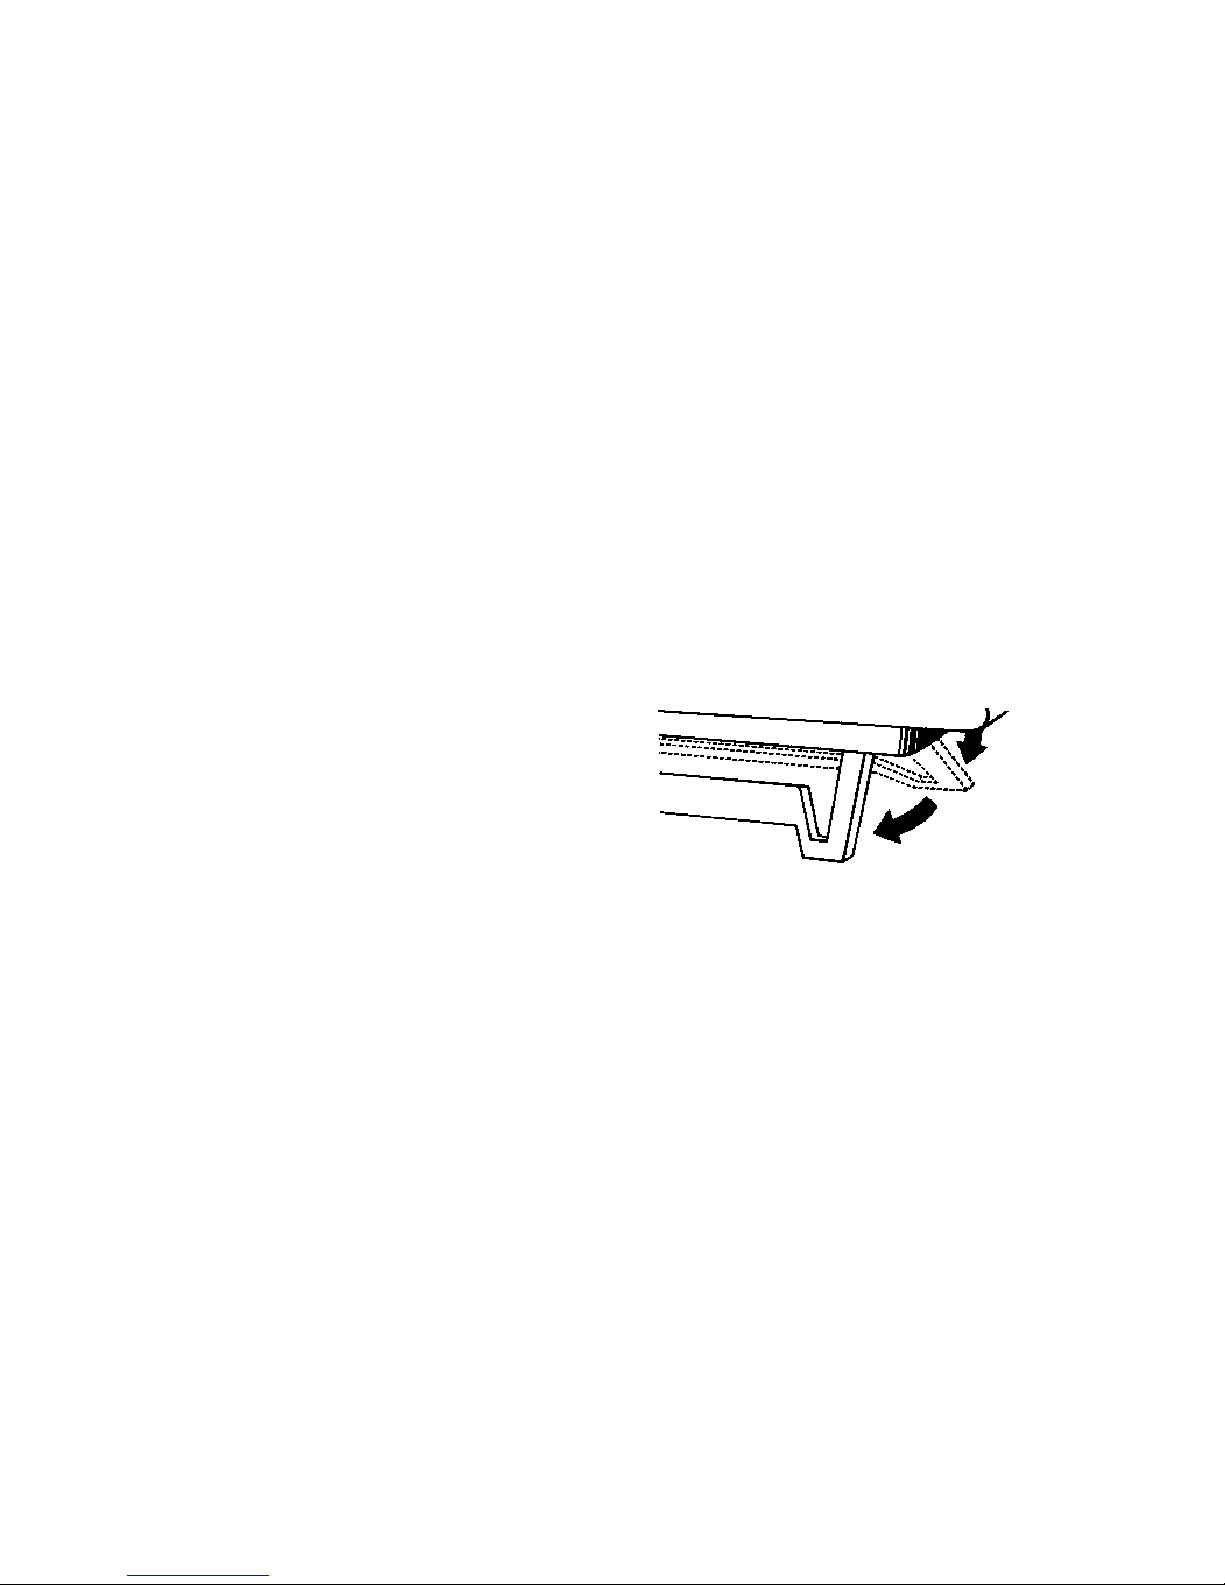
Movable support
You can tilt the monitor into a
convenient position with regard to the
computer by using the movable support.
Connection to the mains supply
The monitor should be connected to a
mains voltage of 220 V/50 Hz (for U.K.
240 V/50 Hz). If your home has a
different mains voltage, consult your
dealer. When you put the plug into the
wall socket, the mains voltage is
transformed inside the monitor to a 12 V
DC voltage. This is done before you
switch the system on with the on/off
button
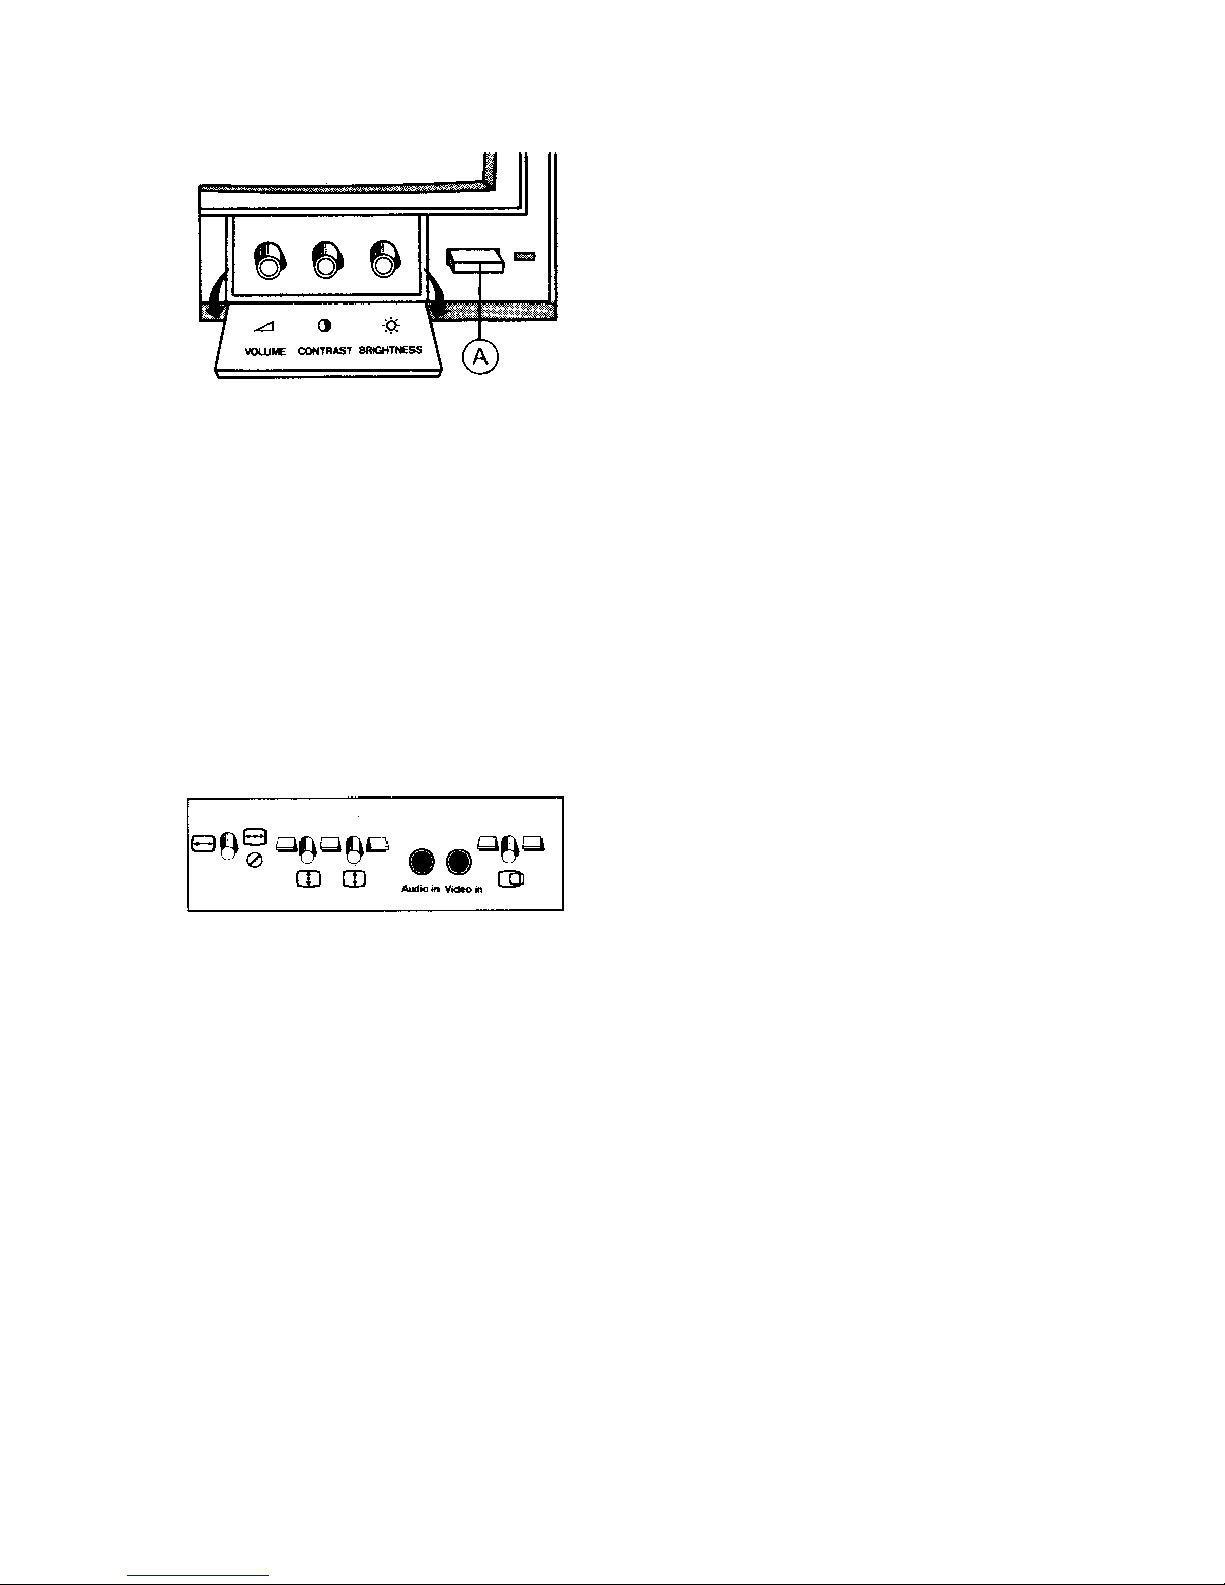
Operation
Switching on
• Press button A (LED lights up).
Picture
• Adjust brightness with knob .
• Adjust contrast with knob N.B. The
image has been set correctly when the
background is no longer visible and you
can only see the characters.
Sound (if available)
Adjust volume with knob
Using this cable, the Phono socket on the
monitor can be connected to the DIN
socket on the Philips MSX computer. If
you connect your monitor to a different
home or personal computer, in most
cases it will not be possible to use the
connection cable supplied. Connection
cables for most types of home and
personal computers are available from
your dealer.
General
• If the picture is not as desired, check
whether all controls are in the correct
position.
• If there is a bright white line on the
screen, switch the monitor off and
consult your dealer.
• The rear panel should only be removed
by a service technician.
• If necessary, clean with a damp
sponge. Do not use alcohol, spirits or
ammonia.
Controls (rear panel)
• Image width can be adjusted with
knob
• With the help of a screwdriver control
& can be adjusted to straighten the
image.
• If the image starts to slip, it can be
stabilised with knob
• You can adjust the image height with
knob
• You can move the image to the left or
the right with knob
Connections (rear panel)
The monitor is fitted with two Phono
sockets for audio and video input. A
connection cable type AV 7101 0001 is
supplied with monitor VS 0040/00.
 Loading...