

Page 1

-3-
T
ABLE OF
C
ONTENTS
Description of Controls......................
Front Panel ..................................................................... 4-5
Rear Panel ...................................................................... 4-5
On-Screen Display ......................................................... 4-5
Display Window................................................................ 6
Remote Control ................................................................. 6
Getting Connected Up .......................
VCR to TV Connection Using RF Cable........................... 7
VCR to TV Connection Using AUDIO/VIDEO Cable...... 7
Setting Up .....................................
Setting the V ideo Channel................................................. 8
Menu Operations............................................................... 9
Initial Set Up ..................................................................... 9
Automatic Channel Setting ............................................... 9
Manual Channel Setting.................................................. 10
Basic Operations .............................
Selecting Colour Mode ................................................... 11
Playback .......................................................................... 11
Recording........................................................................ 12
Automatic Operations ..................................................... 12
Index Search.................................................................... 12
Rec(ord) End Search ....................................................... 13
Child Lock ...................................................................... 13
One Touch Recording (OTR) .......................................... 13
Main Features (Tape List) ..................
Find a Title ...................................................................... 14
Title Editing .................................................................... 15
To Turn Off Tape List...................................................... 15
Advanced Operations........................
Using On-Screen Display ............................................... 16
SmartPicture.................................................................... 16
Tracking Adjustment....................................................... 16
D.S.P .C............................................................................ 17
Selecting Monitor Sound ................................................ 17
Special Effect Playbacks................................................. 18
G-CODE® Set Up ............................................................... 20
Timer Recording Using the G-
CODE System.................... 21
Timer Recording ............................................................. 22
Turbo Timer .................................................................... 23
Tape Duplication............................................................. 25
Operating TV.....................................................................................................................26
Before Requesting Service.................................................................................................27-28
Specifications....................................................................................................................29
○○○○○○○○○○○○○○○○○○○○○○○○○○○○○○○○○○○○○○○○○○○○○○
620/75 01.5.11, 4:42 PM3
Page 2
-12-
B
ASIC
O
PERATIONS
(CONTINUED)
○○○○○○○○○○○○○○○○○○○○○○○○○○○○○○○○○○○○○○○○○○○○○○
Auto playback
When a tape is inserted, the VCR turns on. If the
record tab is removed, playback begins.
Auto rewind
When a tape reaches its end during playback or
fast forwarding, the VCR rewinds the tape and
stops.
Memory rewind power off
When you press POWER during rewinding, the
VCR turns off after rewinding is completed.
Eject cassette
You can eject the tape simply by pressing EJECT
0
even while the VCR is turned off.
When you press EJECT 0, the VCR automatically turns on, ejects the tape, then turns off.
Repeat Playback
When you press and hold PLAY 3 for more than
5 seconds, you can play back the same tape
repeatedly (100 times).
When the tape runs to its end, the VCR automatically rewinds the tape, and starts playback.
Automatic Operations
Recording
When using this VCR, an index mark is always
marked at the beginning of every recording. This
index marks make it easier for you to search for
the beginning of the recordings. See "Index
Search" on the next column.
Make sure....
• The record tab on the cassette is not removed.
1On TV
1 Turn on the TV.
2 Select the video channel (or external video
input).
2On VCR
Insert a cassette with the record tab in place.
The VCR turns on.
• If a cassette is already in the VCR, turn on the VCR.
To rewind the tape, press REW 1.
To reset the time counter, press CLEAR on the
remote.
3 Select Tape Speed
Press ALT/ SPEED until the desired tape speed
SP, LP or SLP appears on the screen.
SP, LP : For PAL signal
SP, SLP: For NTSC signal
4Select a Channel
Press CH 5 / ∞ or Number buttons to select
the channel to record.
5Start Recording
Press REC/OTR ●.
To pause recording
Press STILL/SLOW briefly (or STILL/
PAUSE 8 on the front panel).
To resume recording, press the same button
again.
To stop recording
Press STOP 7.
To watch another TV programme
while recording
Select a different channel you want to watch on
the TV.
Y ou can locate an index marked at the beginning
of each recording on a tape recorded on this VCR
(or an indexed tape).
Press ¢ or 4 repeatedly until the appropriate
number is displayed on the TV screen before
starting play.
Rapid forward or reverse search begins.
When it finds the designated index, playback
starts automatically.
• Locate an index number by pressing the button
repeatedly, indicating how many index marks ahead
of or behind that recording you want is from the
tape’s current position.
• Up to ±9th index mark from the current position on
the tape can be located.
Index Search
You can watch the programme of the selected
channel on the TV, without affecting recording
on the VCR.
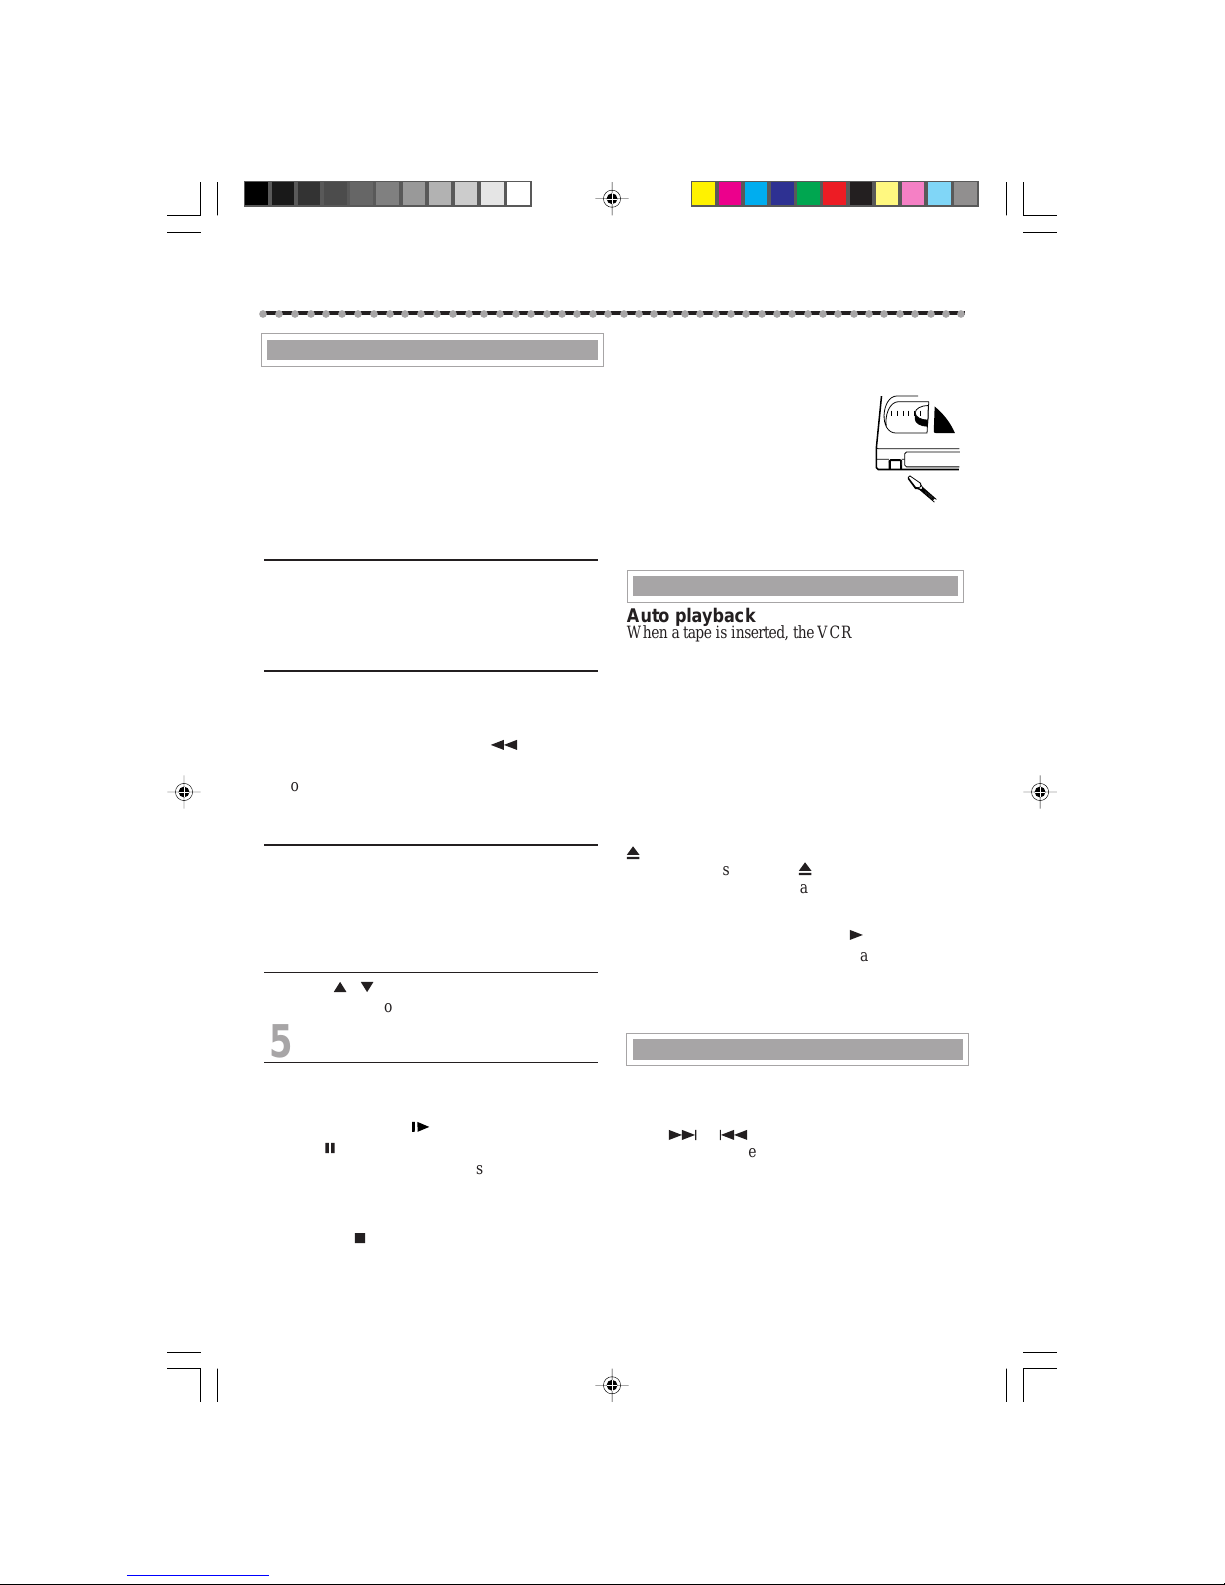
Erase protection
Cassettes have the record tab to
ensure that recordings are not
accidentally erased.
T o prevent accidental erasure:
Break off the record tab with a screwdriver .
To record again, cover the opening with
adhesive tape.
620/75 01.5.11, 4:42 PM12
Page 3
-20-
A
DVANCED
O
PERATIONS
(CONTINUED)
○○○○○○○○○○○○○○○○○○○○○○○○○○○○○○○○○○○○○○○○○○○○○○
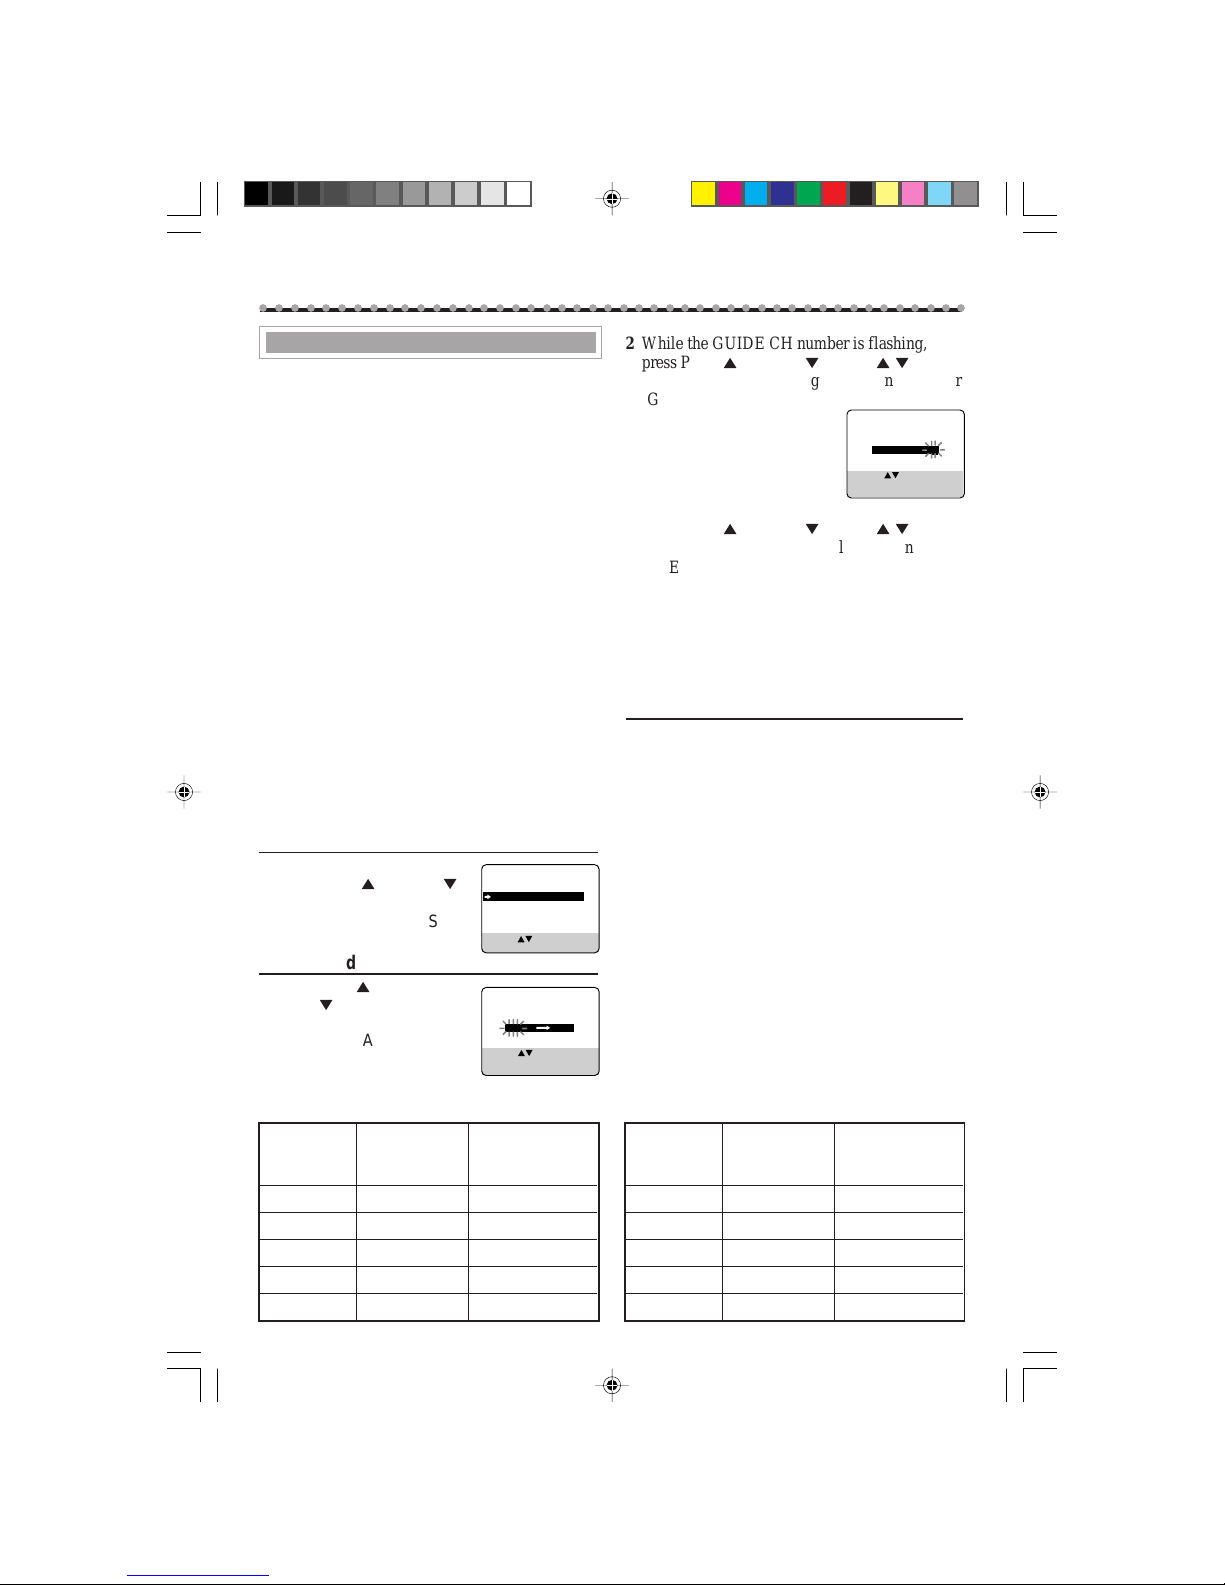
2 While the GUIDE CH number is flashing,
press PLAY5 or STOP ∞ (or CH 5/∞) or
Number buttons to enter guide channel number
(GUIDE CH) then press OK/STATUS.
• For example, for guide channel
number 9, press 0, 9.
Always enter “0” before any
single number entries.
3 While the space for the user CH is flashing,
press PLAY5 or STOP ∞ (or CH 5/∞) or
Number buttons to enter local channel number
(USER CH), then press OK/STATUS.
• For example, for local channel number 9, press 0, 9.
Always enter “0” for empty digits.
4 Repeat the above procedures until you set the
guide channel for all the receivable local
channels.
3Finish Setting
Press MENU.
To correct a user channel number and/or a
guide channel number, repeat the same
procedures explained above. This time, enter the
correct user channel number and/or the correct
guide channel number.
You can simplify the programming method of
timer recording by using the
G-
CODE
system.
Whenever you want to record a TV program, all
you need to do is to find out the programme’s
G-
CODE
number.
You can easily find out this number by checking
the TV programme list of your local newspaper or
TV guide magazine.
Simply entering the programme’s
G-
CODE
number using the remote control will
make the VCR record the programme.Before
using the
G-
CODE
system for the first time, you
need to set the guide channel number for each
local channel number. The local channel (user
channel) number is the number you select on
the VCR to record a programme, while the guide
channel number is the one assigned to that local
channel and you can also find it in the TV
programme list of your local newspaper or TV
guide magazine.
• You can use the tables below to note your local
TV (or Cable) channel numbers and their guide
channel numbers.
1Select VCR Set Up Mode
1 Press MENU.
2 Press PLAY 5 or STOP
∞
to select “INITIAL SET UP”
then press OK/STATUS.
2Set Guide Channels
1 Press PLAY5 or
STOP ∞ to select “GUIDE
CHANNEL SET UP” then
press OK/STATUS.
ABC2 Ch 2 Ch 2
ATN7 Ch 7 Ch 7
TCN9 Ch 9 Ch 9
TEN10 Ch 10 Ch 10
SBS28 Ch 28 Ch 28
Local TV
Station’s
Name
Local Channel
No.
(USER CH)
G-CODE ® Set Up
G-CODE
Guide Channel No.
(GUIDE CH)
ABC2 Ch 2 Ch 2
ATN7 Ch 7 Ch 7
TCN9 Ch 9 Ch 9
TEN10 Ch 10 Ch 10
SBS28 Ch 28 Ch 28
G-CODE
Guide Channel No.
(GUIDE CH)
Local TV
Station’s
Name
Local Channel No.
(USER CH)
SET CLOCK
GUIDE CHANNEL SET UP
SELECT: CONFIRM: OK
END: MENU
GUIDE CHANNEL SET UP
GUIDE CH USER CH
254 - 255 - 01 05
02 02
03 03
SELECT: OR 0-9
CONFIRM: OK
END: TIMER
GUIDE CHANNEL SET UP
GUIDE CH USER CH
254 - 255 01
01 02
02 03
03 04
SELECT: OR 0-9
CONFIRM: OK
END: MENU
620/75 01.5.11, 4:42 PM20
Page 4
-21-
Timer Recording Using the
G-
CODE System
By entering the
G-
CODE
number for a particular
TV programme, you can easily programme a
timer recording.
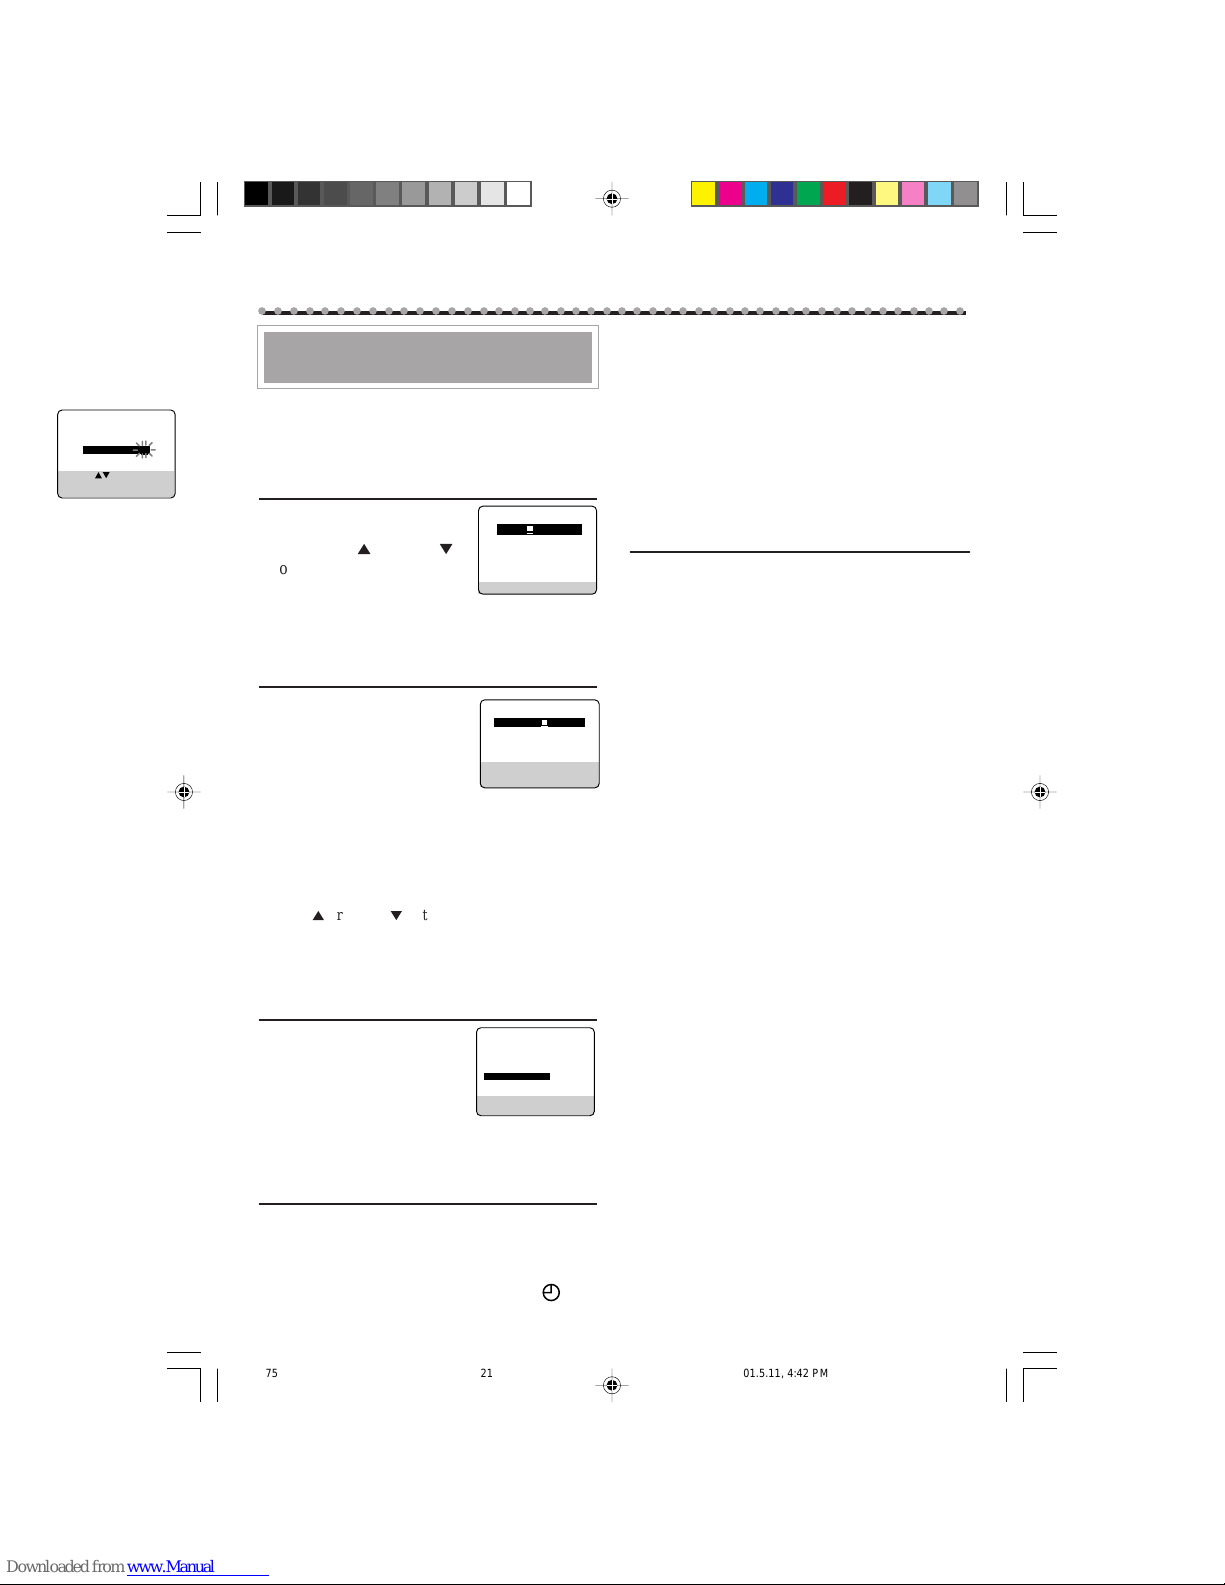
1Select G-CODE Mode
1 Press VCR.
2 Press TIMER.
3 Press PLAY5 or STOP
∞
to select“G-
CODE” then
press OK/STATUS.
The
G-
CODE
entry menu appears on the TV
screen.
2Enter G-CODE Number
1 Press Number
buttons to enter the
G-
CODE
number assigned to
the TV programme you
want to record.
2 Press OK/STATUS.
• If “ERROR-RE-ENTER CODE” appears on the TV,
you have entered an incorrect
G-
CODE
number. If
this happens, press CLEAR to erase the number, then
enter the correct number.
• If you have not yet set the user channel, the “GUIDE
CHANNEL SET UP ” screen will appear. Press
PLAY
5
or STOP ∞ buttons repeatedly or number
buttons to enter the USER CH number which the
broadcast for the
G-
CODE
number is received on the
VCR, then press OK/STATUS.
3Select Tape Speed
Press ALT/SPEED.
• Each time you press the button,
the tape speed alternates between “SP”, “LP”, or “SLP”.
SP, LP : For PAL signal
SP, SLP : For NTSC signal
• To change the stop time, press STOP +/– (number 2
or 5 button).
4Confirm Programme
Press OK/STATUS or TIMER.
“PROGRAM WAS COMPLETED” appears on
the TV screen.
After 5 seconds, the above message disappears,
and the normal TV picture resumes. The
(timer) indicator lights up on the display.
• If “PROGRAM NOT COMPLETED” appears, try
again from step 1.
• If “PROGRAM OVERLAPPED” appears, the timer
recording you just programmed overlaps another
timer recording. The Program Review screen will
appear with a magenta line blinking. To change any
item on the overlapping programs, see page 23.
If you want to store other programmes, repeat
steps 1 to 4.
5Finish the Settings
Press POWER to turn off the VCR.
The VCR must be turned off for a timer recording
to take place. If you forget to turn off the VCR,
“PLEASE TURN OFF VCR FOR TIMER
RECORDING” flashes on your TV screen two
minutes before a timer recording starts. To
remove the message, press the CLEAR button.
If you want to record the same programme
daily, press DAILY (Number button 8) at step 3
(Press the button again to cancel).
The VCR will record a TV programme every day
(Monday through Friday) at the same time and
length. (Daily Recording)
If you want to record the same programme
weekly, press WEEKLY (Number button 9) at
step 3 (Press the button again to cancel).
The VCR will record a TV programme once a
week at the same day, time, and length. (Weekly
Recording)
If you want to cancel the currently set programme, press CLEAR button.
Note:
• Even if a power failure occurs, the VCR keeps your
timer programs. However, the clock time and other
menu settings are lost if it lasts for more than 3
minutes. As a result, when the power is supplied
again to this VCR after the power failure, set the
clock time and turn off the VCR.
Each timer program you have made will start unless
its start time already passes.
ONE TIME PROGRAM
PROGRAM 1
CHANNEL+/–
START +/– 08 : 00 PM
STOP +/– 10 : 00 PM
REC SPEED LP
DATE +/– – –/– –/– –
DAILY: 8 WEEKLY: 9
CONFIRM: OK END: TIMER
12
G-CODE PROG.
NO.
END: TIMER
G-CODE PROG.
NO. 123
CONFIRM: OK
CORRECT: CLEAR
END: TIMER
GUIDE CHANNEL SET UP
GUIDE CH USER CH
254 - 255 - 01 05
02 02
03 03
SELECT: OR 0-9
CONFIRM: OK
END: TIMER
S
○○○○○○○○○○○○○○○○○○○○○○○○○○○○○○○○○○○○○○○○○○○○○○
620/75 01.5.11, 4:42 PM21
Page 5
-25-
RF OUT
ANT.IN
IN
OUT
R
L
AUDIO
VIDEO
RF OUT
ANT.IN
IN
OUT
R
L
AUDIO
VIDEO
○○○○○○○○○○○○○○○○○○○○○○○○○○○○○○○○○○○○○○○○○○○○○○
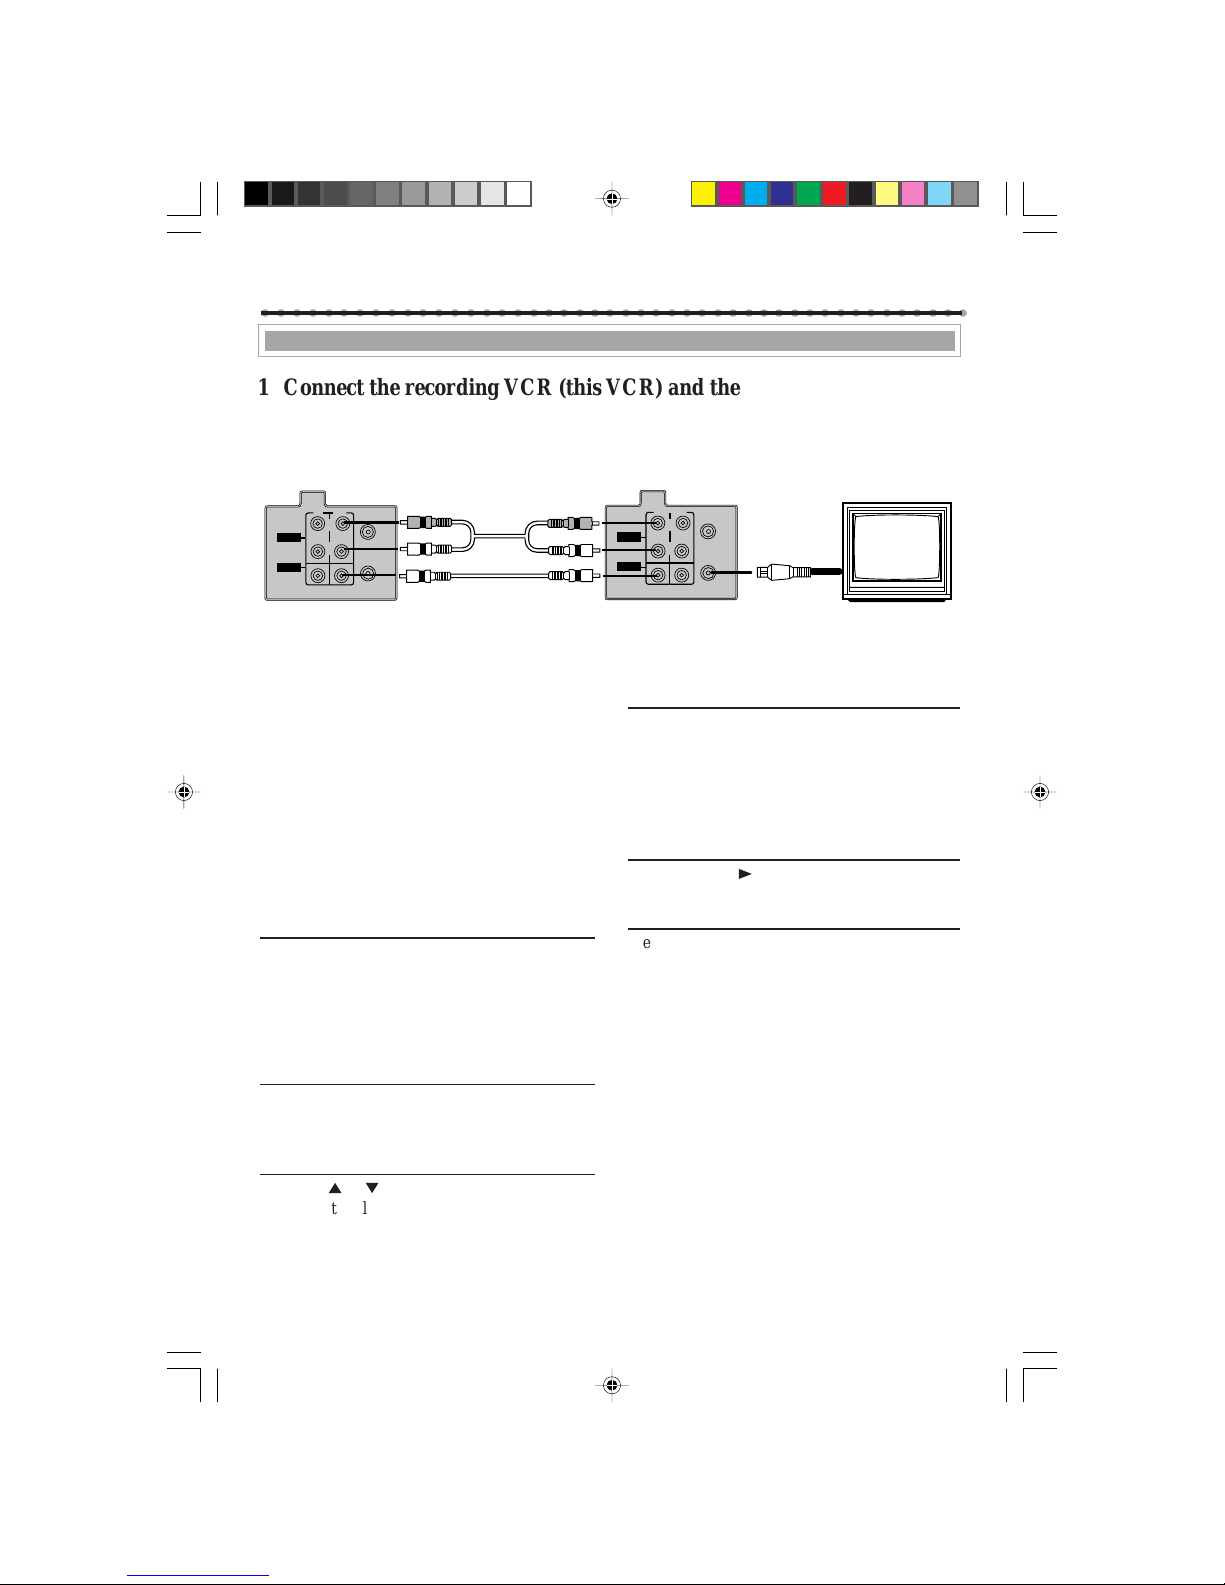
1 Connect the recording VCR (this VCR) and the playing VCR.
2 Connect the recording VCR (this VCR) to the TV.
Dubbing from any VCR (or video camera) to
another is simple. Explanations on this page uses
this VCR as the recording VCR.
Refer also to the manual supplied with the other
VCR (for playback).
• You can also use the front AUDIO/VIDEO
input jacks.
• The remote control operation mode is set
correctly for operating your target component.
– Press VCR to operate the VCR.
1On VCRs
Insert a source tape in the playing VCR and a
blank tape in the recording VCR.
• If a tape without the record tab is inserted in the playing VCR, playback automatically starts. In this case,
press the STOP button.
2On TV
Turn the channel on the TV to your video
channel.
3Select Line Input
Press CH 5 or ∞, pointing the remote control at
this VCR, to select the external line input.
• For rear jacks, select “L-1” on the display or “A/V
IN” on the TV screen.
• For front jacks, select “L-F” on the display or
“F-A/V IN” on the TV screen.
4Select Tape Speed
Press ALT/SPEED, pointing the remote control
at this VCR, until the desired tape speed (SP, LP
or SLP) appears on the screen.
SP, LP: For PAL signal.
SP, SLP: For NTSC signal.
5Play Back Tape
Press the PLAY 3 button on the playing VCR.
6Record (Copy) Tape
Press REC/OTR q at this VCR.
Remember: Press the buttons in steps 5 and 6
simultaneously to avoid missing any of the
recording.
Recording VCR (this VCR)Playing VCR
To RF OUT
TV
From audio out to AUDIO IN
From video out to VIDEO IN
Tape Duplication
A
DVANCED
O
PERATIONS
(CONTINUED)
620/75 01.5.11, 4:42 PM25
Page 6
-27-
B
EFORE
R
EQUESTING
S
ERVICE
Check the following points once again if you are having some difficulties with your VCR.
IMPORTANT
Periodic maintenance is required in order to maintain the VCR’s continuous excellent performance.
After a period of time the video heads will require replacement. If cleaning or replacement of the
video heads is required, this service should be performed at an authorized video system service
center.
Power
No power.
Recording & Playback
TV programme cannot be recorded.
Timer recording cannot be performed.
There is no playback picture, or the playback
picture is noisy or contains streaks.
During a still or slow motion picture, the
picture may contain some vertical jitter when
using a TV which has an automatic vertical
hold control.
Correction
✦ Make sure the AC power cord is
correctly connected to an AC outlet.
✦ Make sure the VCR is turned on.
Correction
✦ Check the connections between the
VCR, the antenna, and the TV.
✦ Make sure that the record tab on the
back of the cassette is not removed.
(✈P.12)
✦ Set the timer on-time and timer off-
time correctly. (✈P.22)
✦ Make sure that the VCR is turned off
after setting is made. (✈P.21, P.22)
✦ Timer recording may not be per-
formed or stopped if a power
interruption occurs before or during
timer recording.
✦ Select your video channel correctly.
(✈P.8)
✦ Adjust the tracking slowly in either
direction. (✈P.16)
✦ Try to change to another tape, you
may not have this problem.
○○○○○○○○○○○○○○○○○○○○○○○○○○○○○○○○○○○○○○○○○○○○○○
620/75 01.5.11, 4:42 PM27
 Loading...