

Philips VR401BMG99, VR401BMG User Manual
VCR
Video Cassette Recorder
Video Cassette Recorder
Hookup Pages
Hookup Pages
VR401BMG
VR601BMG
CH3CH4
OUT
IN
ANT
AUDIO
R
L
VIDEO
OUT
IN
INOUT
OR
CH3
CH4
OUT
IN
ANT
AUDIO
R
L
VIDEO
OUT
IN
IN
OUT
75V
ANT /
CABLE
OR
75
ANT /
CABLE
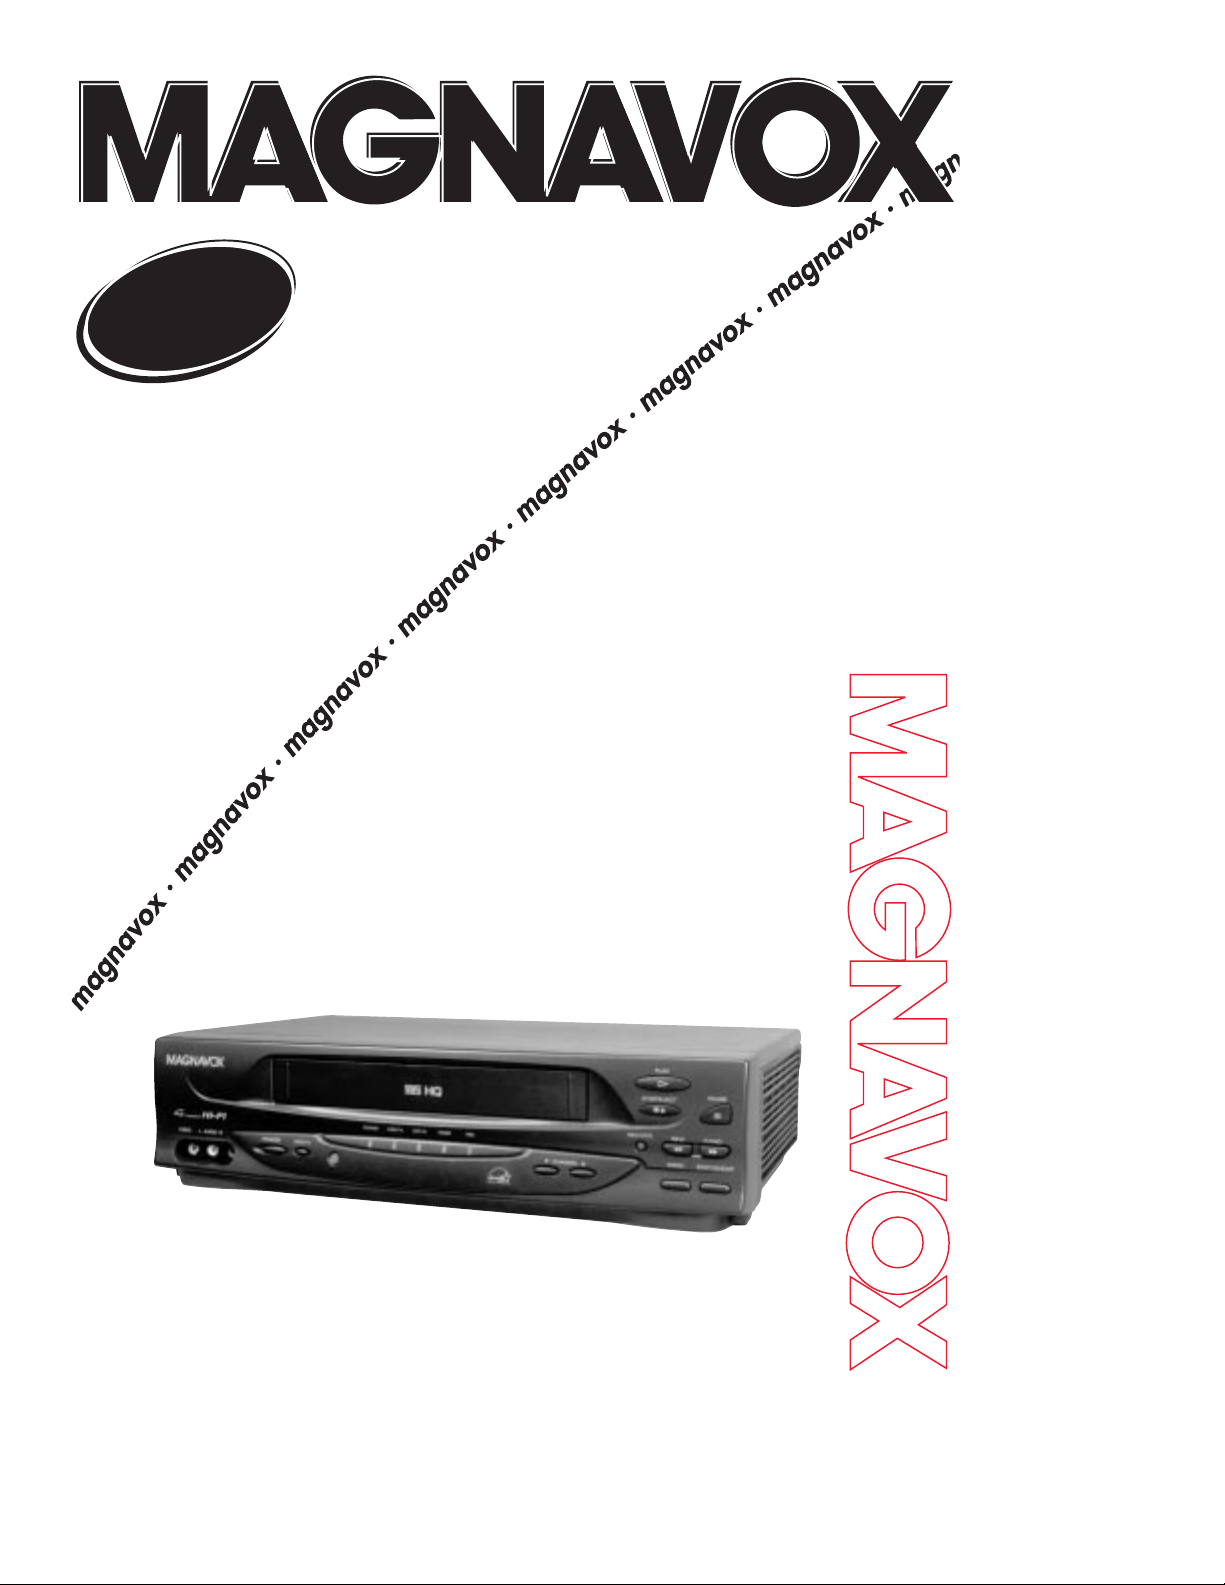
6 Hookups Without a Cable Box/Direct Broadcast System
The basic VCR/TV connection – antenna/cable to VCR to TV – is shown below. If you have a
Cable Box or a Direct Broadcast System, please see pages eight-nine. If you have a Stereo
TV, please see page 10. After you hook up the VCR, go to page 11 to turn on the VCR.
(The VR601BMG is illustrated here. The VR401BMG has single AUDIO IN/OUT jacks.)
ANTENNA IN
Jack
(on back of TV)
Cable
(75 ohm)
Back of VCR
Antenna
Indoor/Outdoor
(300 ohm)
1
Disconnect the antenna or cable from your TV.
2
Connect the antenna or cable to the ANT(enna) IN Jack of your VCR.
Cable
(75 ohm)
Antenna
Indoor/Outdoor
(300 ohm)
CH3CH4
OUT
IN
ANT
AUDIO
R
L
VIDEO
OUT
IN
INOUT
CH 4
or
CH 3
CH3
CH4
OUT
IN
ANT
CH3 / CH4
Switch
CH3 CH4
AUDIO
R
L
VIDEO
OUT
IN
IN
OUT
CH3CH4
OUT
IN
ANT
AUDIO
R
L
VIDEO
OUT
IN
INOUT
75V
ANT /
CABLE
75
ANT /
CABLE
CH3
CH4
OUT
IN
ANT
AUDIO
R
L
VIDEO
OUT
IN
IN
OUT
RF coaxial cable
Antenna
or Cable
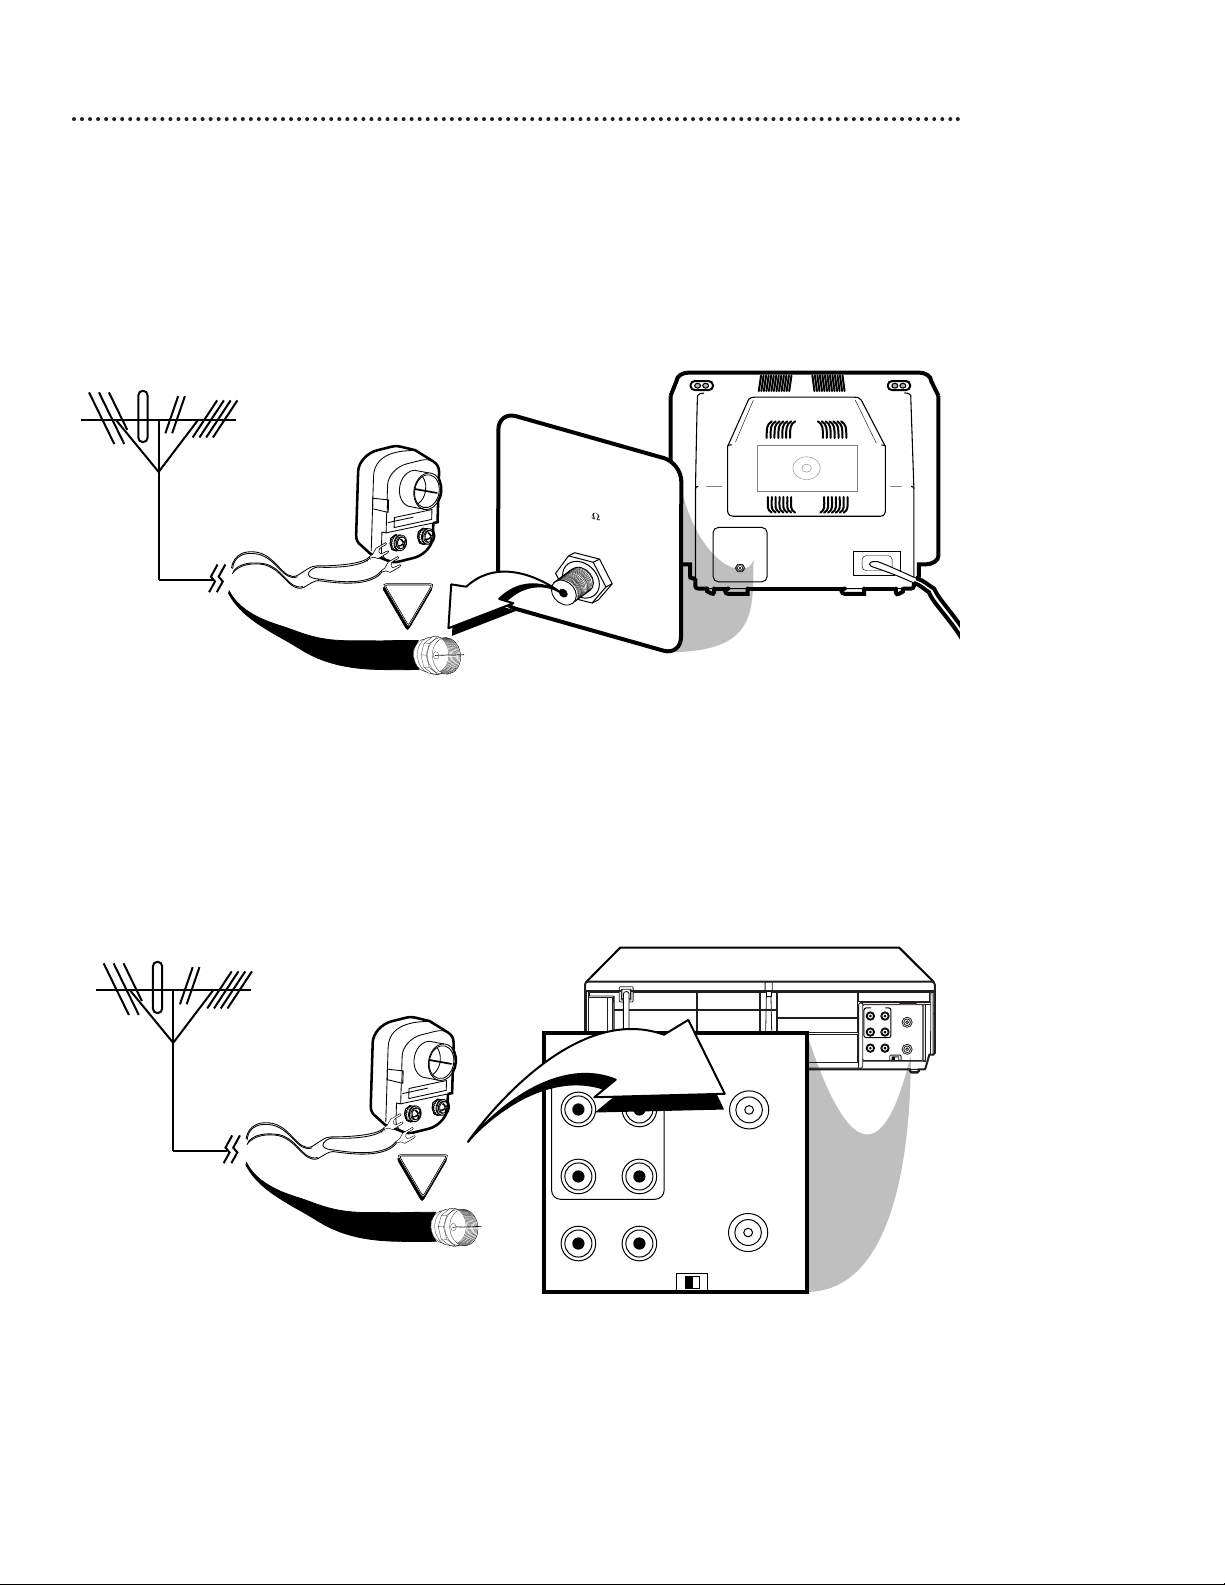
3
Connect the RF coaxial cable (supplied) to the OUT Jack on the back of the
VCR and to the ANTENNA IN Jack on the TV. (You may use either a snap-on
type (supplied) or screw-on type of coaxial cable, whichever you prefer.)
5
Set the CH3/CH4 switch on the back of the VCR to CH3 or CH4, whichever
channel is not used or least used in your area. Set the TV to the same channel. For
example, when playing a tape, if the CH3/CH4 switch is set to CH3, the TV should be on
channel 03.
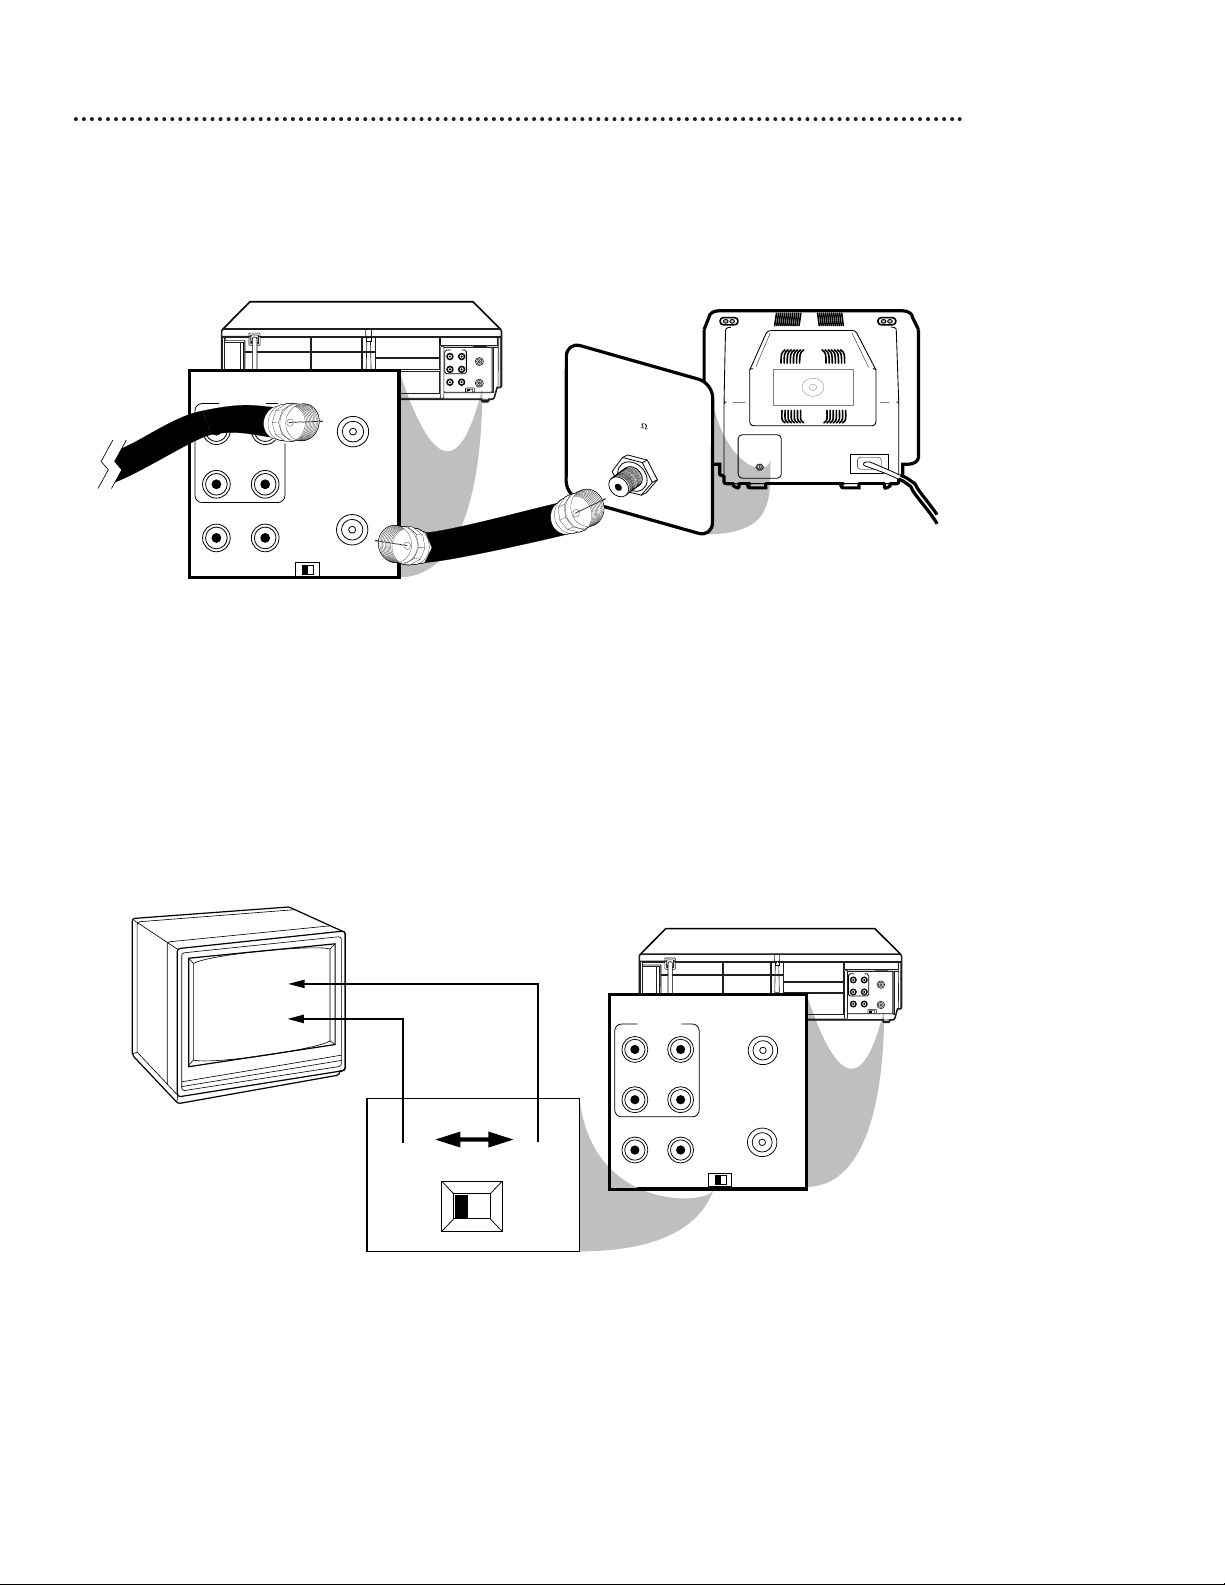
Hookups Without a Cable Box/Direct Broadcast System (cont’d) 7
ANTENNA IN Jack
(on back of TV)
example only
4
Plug in the TV and the VCR.
6
You are ready to turn on the VCR. Please go to page 11 before turning on the
VCR.
 Loading...