

Page 1
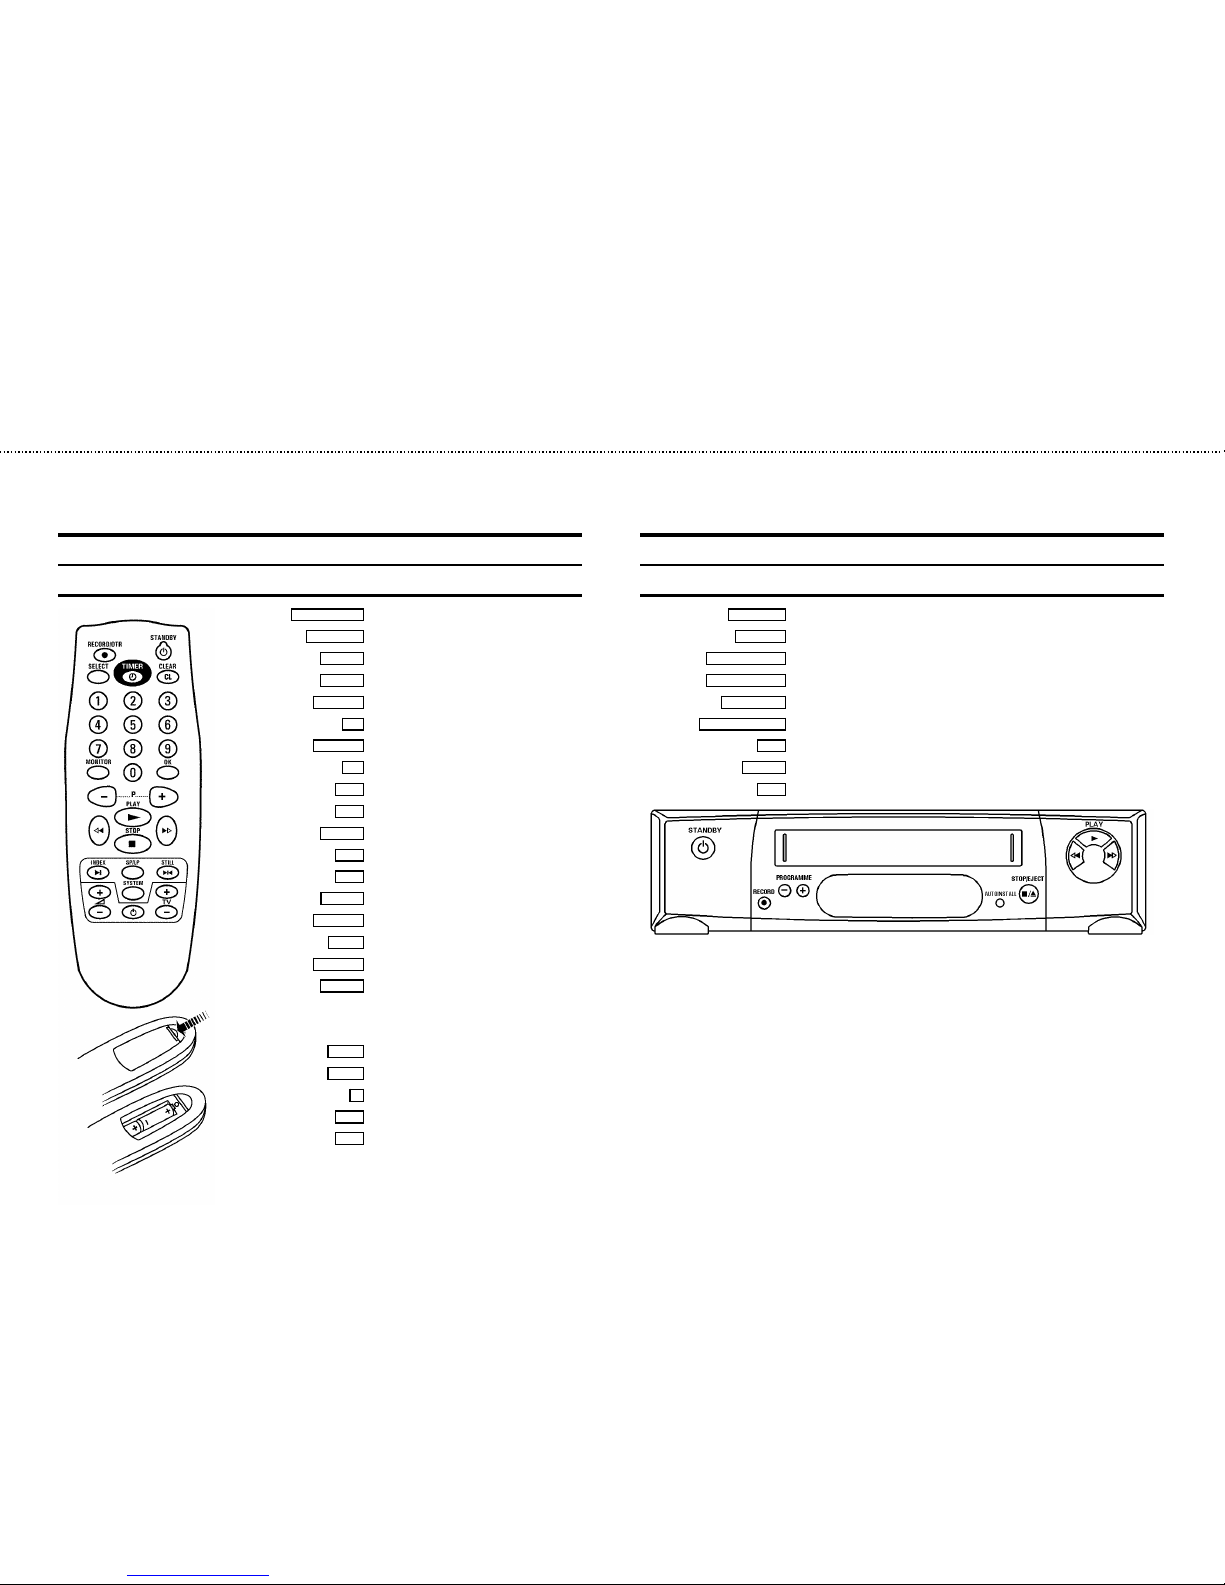
The remote control
RECORD/OTR n
Record
STANDBY m
Standby
SELECT
Function selector
TIMER k
’VIDEOPlus’ / ’TIMER’ programming
CLEAR (CL)
Reset, clear
0-9
Digit buttons 0-9
MONITOR
TV monitor function
OK
Confirm button
P r
Down, number minus
P q
Up, number plus
PLAY G
Playback
H
Rewind/Reverse scanning
I
Forward wind/ Forward scanning
STOP h
Pause/Stop, Tuner-mode
INDEX E
Index search
SP/LP
SP/LP selection
STILL R
Still picture
SYSTEM
Special function
Additional TV functions: Only function with televisionswith the same
remote control code.
Sq
TV volume plus
Sr
TV volume minus
m
Switch off TV
TV q
Programme number +
TV r
Programme number -
Front of the video recorder
STANDBY m
Standby
RECORD n
Record
PROGRAMME r
Down/Minus, number
PROGRAMME q
Up/Plus, number
AUTOINSTALL
Installation
STOP/EJECT ?
Stop/Cassette eject
H
Rewind/Reverse scanning
PLAY G
Playback
I
Forward wind/ Forward scanning
OPERATING INSTRUCTIONS IN BRIEF
&
Page 2
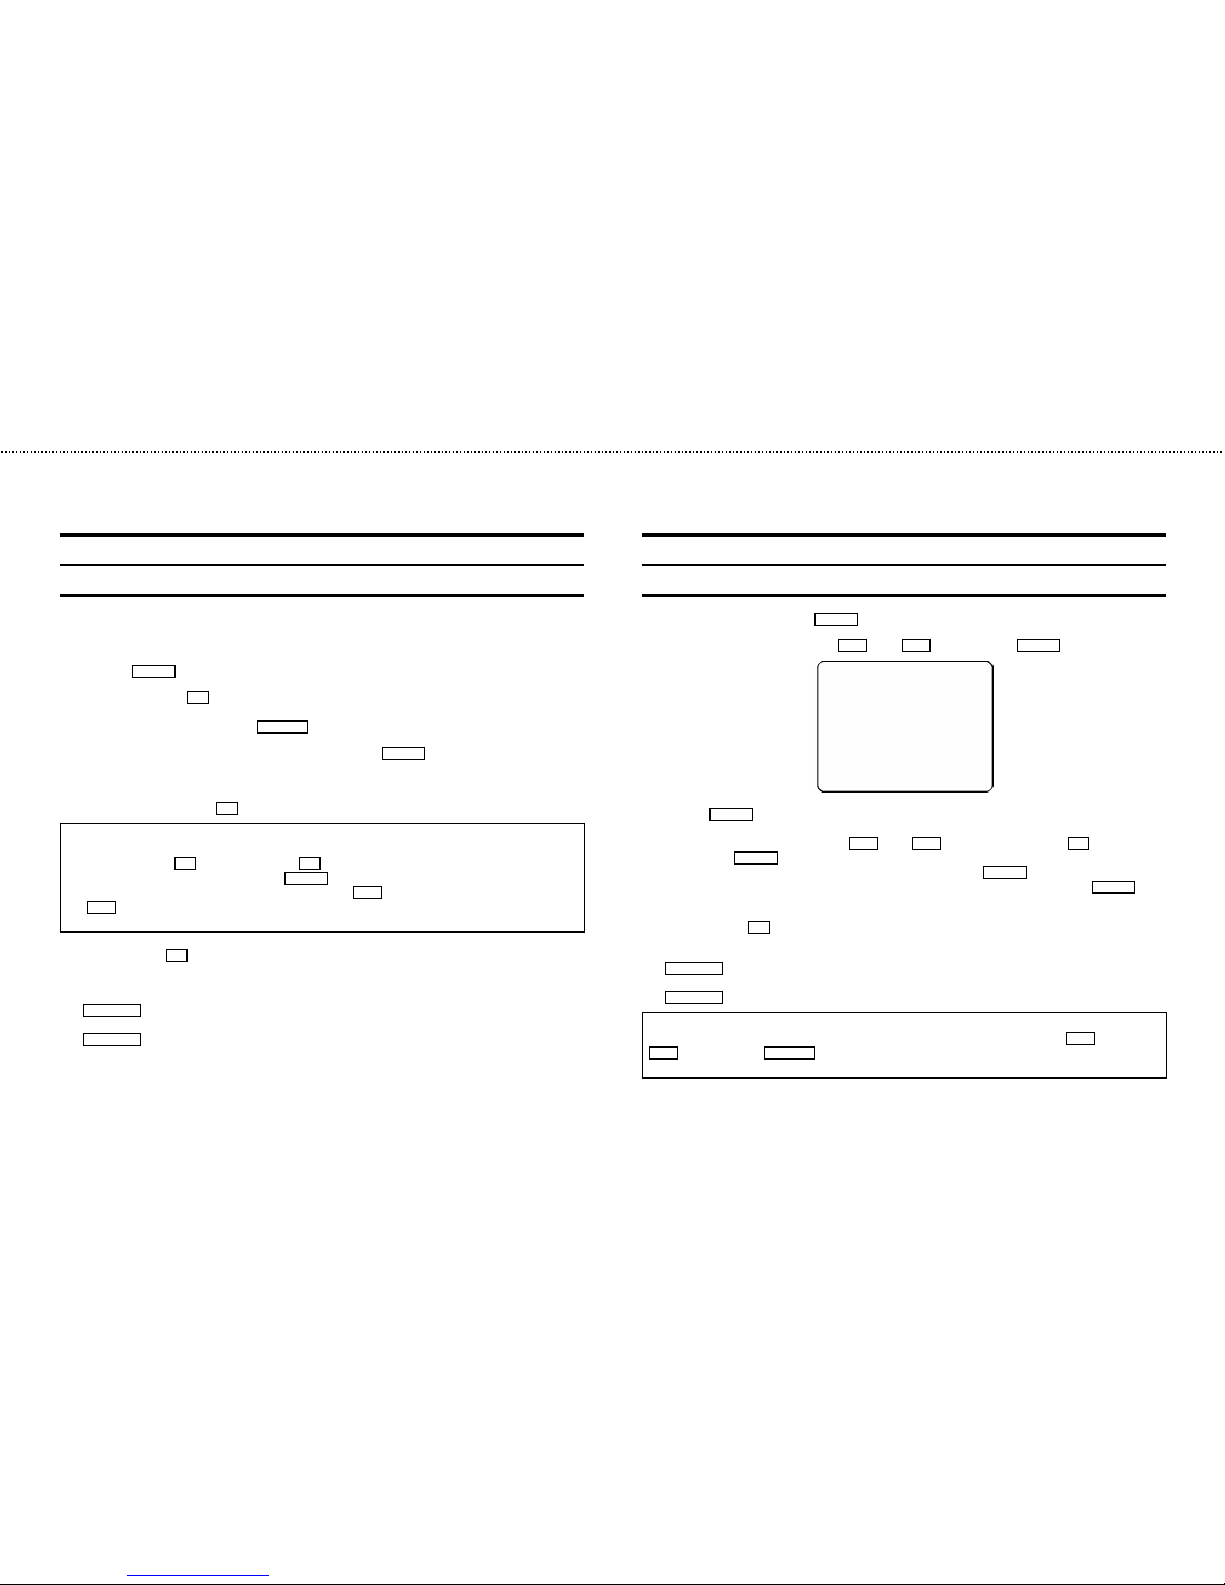
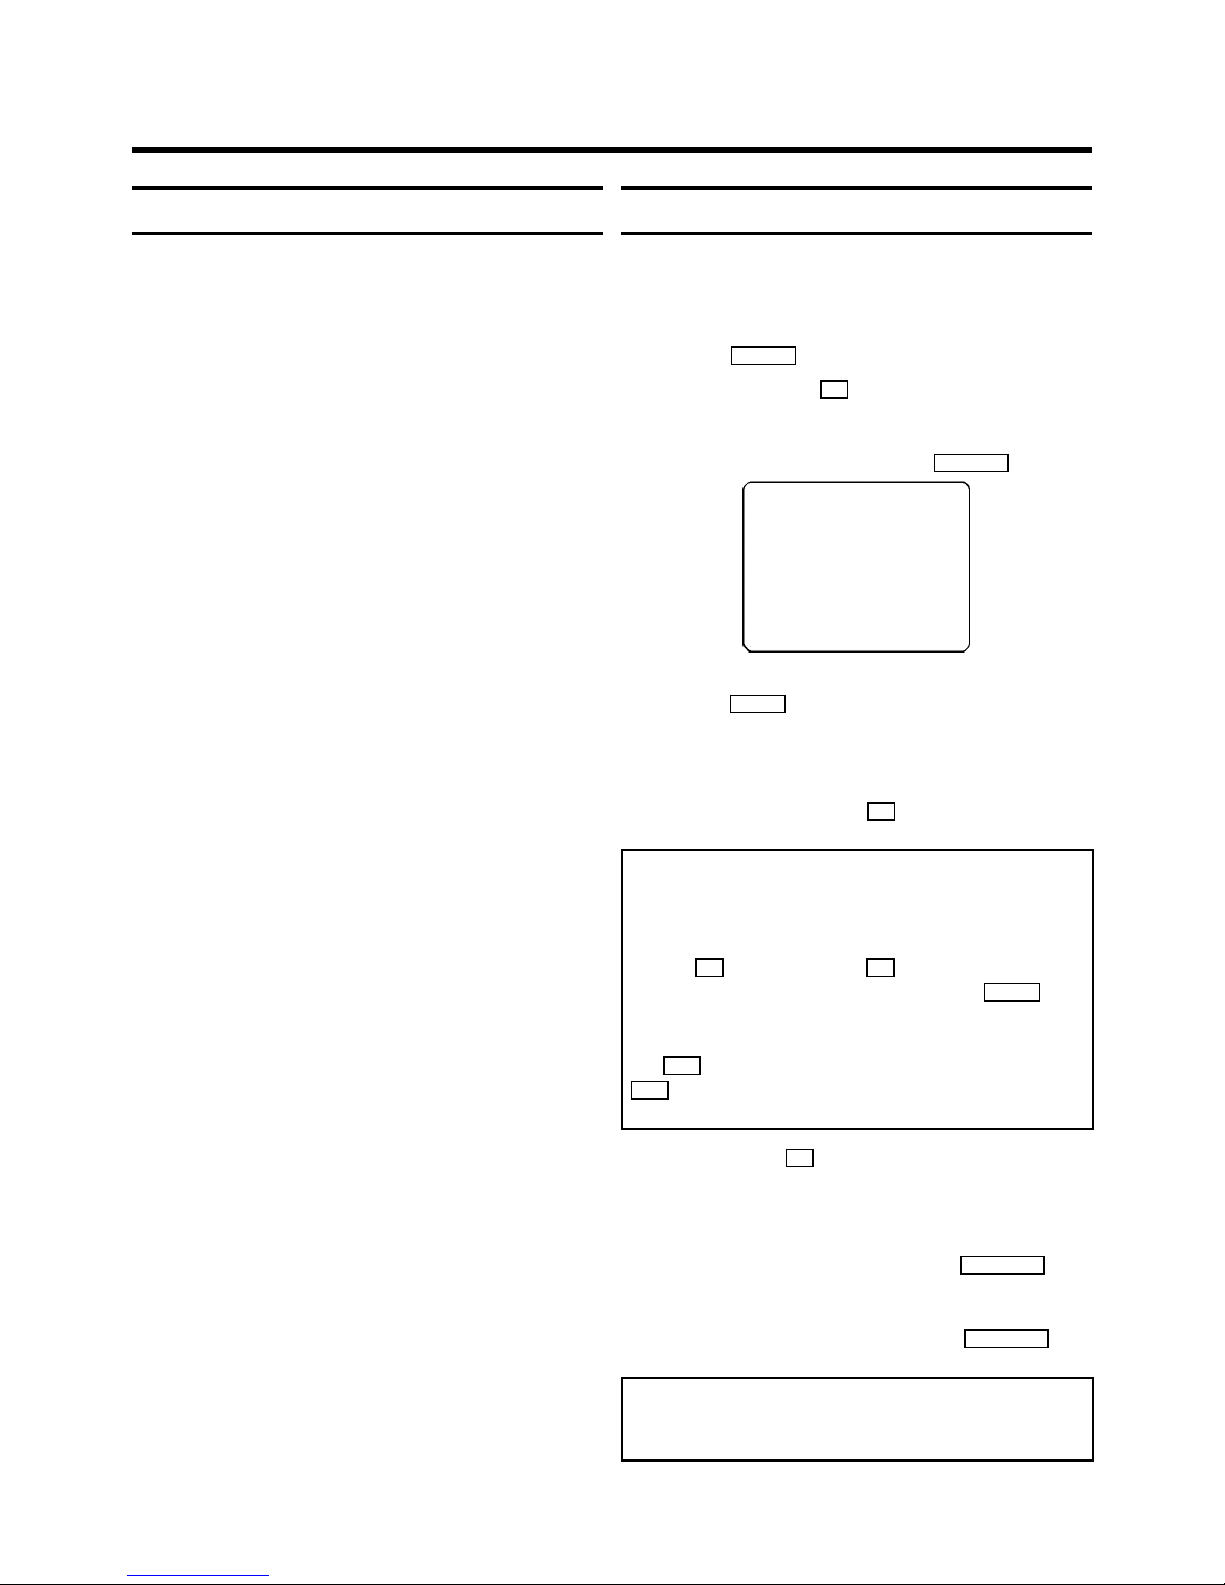
Programming with ’VIDEOPlus+’
All the information required for a programming is encoded in the VIDEOPlus+code.
1 Switch on the TV set.
2 Press the TIMER k button on the remote control.
3 With the digit buttons 0-9 , enter the VIDEOPlus+ code (up to 9 digits) printed in your TV guide next to the
start time of a TV programme.
If you make a mistake, clear with the CLEAR (CL) button.
4 If you want to programme at daily or weekly intervals, press the SELECT button until ’D-DAILY’ (daily inter-
vals) or ’W-WEEKLY’ (weekly intervals) appears in the display. The ’dailyintervals’ function can only be used
for recordings to be made from Mondays to Fridays inclusive.
5 Confirm the entries with the OK button . The resultant data appears on the TV screen.
Note: If you use VIDEOPlus+ for the first time forthis TV channel, the line ’SELECT PROG’ appears when you
confirm the VIDEOPlus+ code. Instead of ’E2’, select the programmenumber for this particular TV channel,
using the digit buttons 0-9 and confirm with the OK button.
* Switch ’VPS’ or ’PDC’ (V/P) onor off with the SELECT button.
* If you wish to set a later end time for a recording, press the P q button at step 5 . Each time you press
the P q button you will add 15 minutes to the end time.
* If e.g.: ’20:00’ flashes in the display, please set the clock.
6 Finally, press the OK button. Programming is now complete.
The data has been stored in a TIMER block.
7 Make sure that a cassette without erase protection has been loaded. Switch tostandby with the
STANDBY m button.
A programmed recording will only function when the video recorder is switchedto standby with the
STANDBY m button.
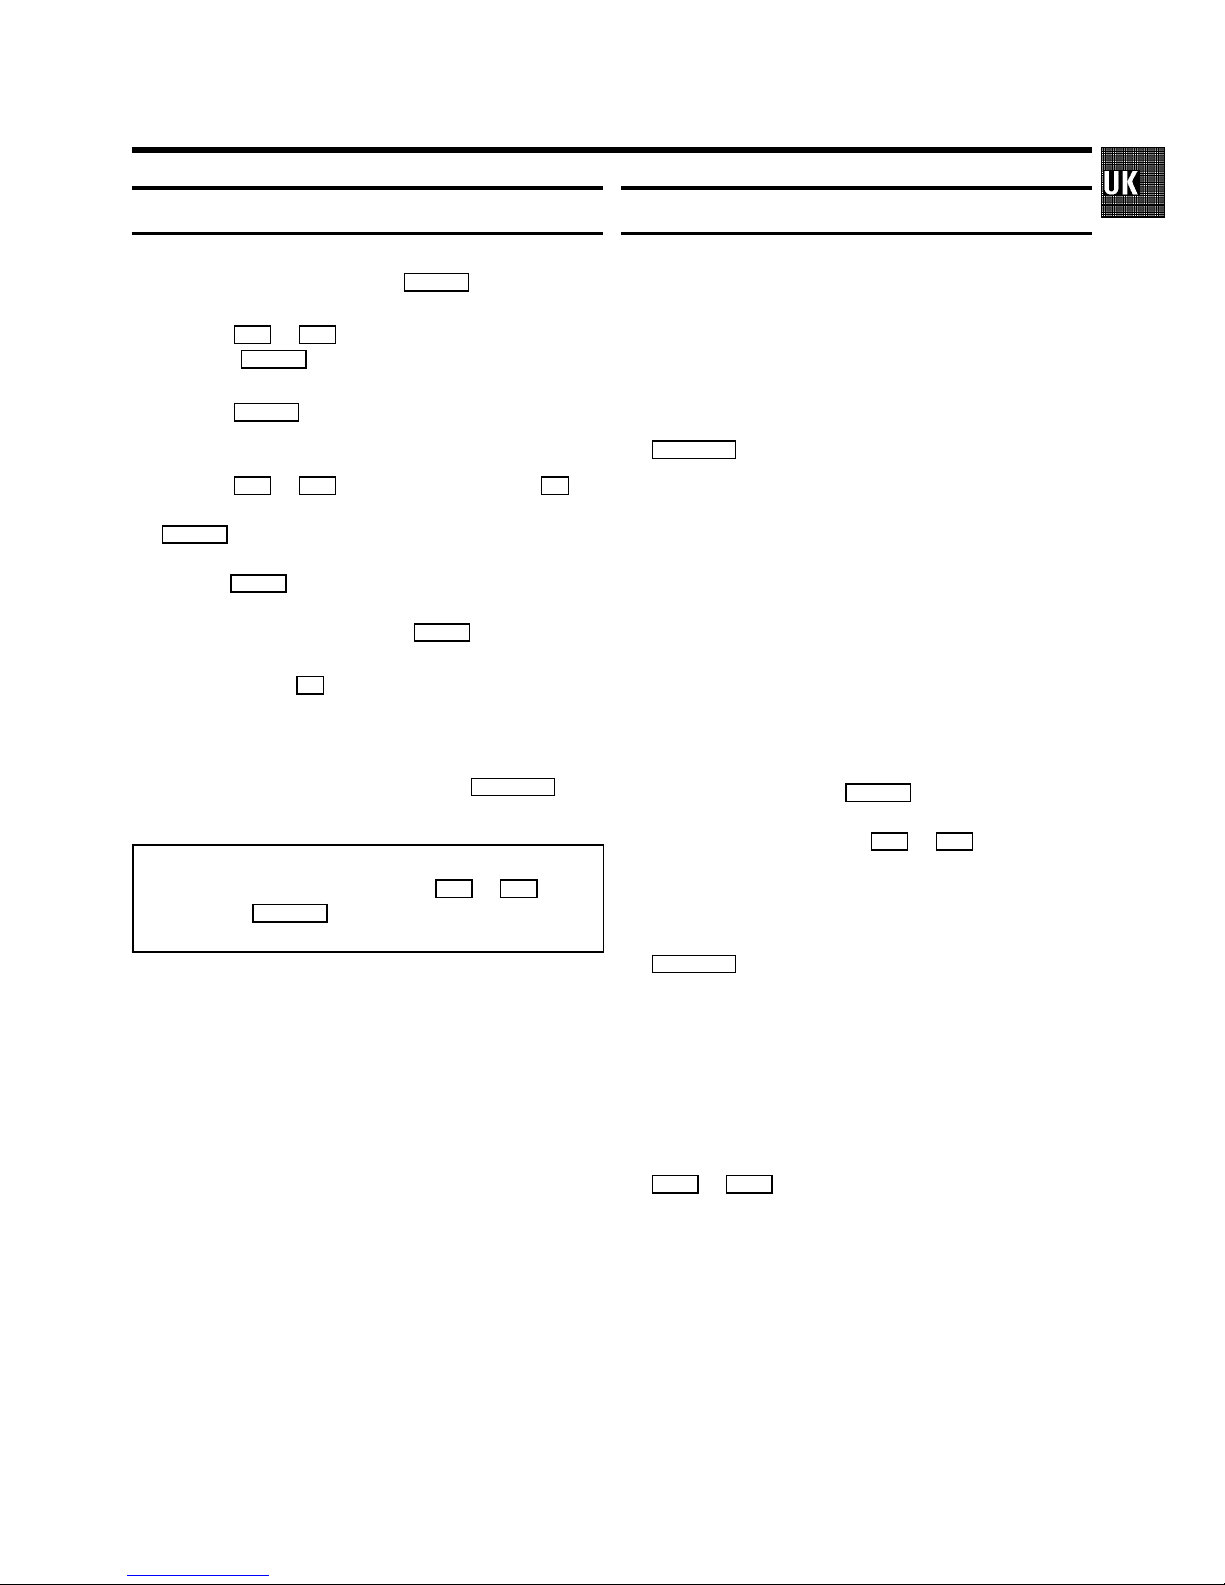
How to programme a recording manually
1 Switch on the TV set. Press the TIMER k button twice.
2 Select a free TIMER block, using the P q or the P r button. Press the TIMER k button.
DATE PROG START V/P END
01 01 20:00 21:30
-----------------------NEXT gTIMER CLEAR gCL
-/+ 0-9 D/WgSELECT OK
3
With the TIMER k button you select between the entries ’DATE’ (date), ’PROG’(programme number),
’START’ (start time) and ’END’ (stop time).
You can enter or adjust data, using the P q or the P r button or the digit buttons 0-9 . Confirm each
entry with the TIMER k button.
You can switch ’VPS/PDC’ (’V/P’) on and offat step ’START’ with the SELECT button.
You can select between ’D’ (daily intervals) or ’W’ (weekly intervals)at step ’DATE’ with the SELECT button.
4 Finally, press the OK button. Programming is now complete.
5 Make sure that a cassette without erase protection has been loaded. Switch tostandby with the
STANDBY m button.
A programmed recording will only function when the video recorder is switchedto standby with the
STANDBY m button.
Note:
* Clear a TIMER-block: After step 1, select the TIMER blockyou want to clear with the P q or the
P r button. Press the CLEAR (CL) button.
* If e.g.: ’20:00’ flashes in the display, the clock must be set.
&
Page 3

Congratulations on the purchase of one of the most sophisticated and simple-to-use video recorders (VCR) on the market.
With this VCR you can record and play VHS-standard
cassettes.
Please take the time to read this operating manual before
using your video recorder.
Safety instructions and other notes
• Danger: High voltage!
Do not remove the top cover as there is a risk of an electrical
shock!
• The video recorder does not contain any components that can be
repaired by the customer. When the appliance is connected to
the power supply there are some components that are constantly
operational. To switch off the video recorder completely you
must disconnect it from the power supply.
• Note that this power pack is designed for a power supply of
220-240V/50Hz.
• Ensure that air can circulate freely through the ventilation slots
on the video recorder.
• Ensure that no objects or liquids enter the video recorder. If liquid
is spilt into it, disconnect the video recorder immediately from the
power supply and call the After-sales Service for advice.
• The video recorder should not be used immediatelyafter
transportation from a cold to a hot area or vice versa, or in
conditions of extreme humidity.
After unpacking the video recorder, it should be allowed to
acclimatize for at least three hours before installation.
• These operating instructions have been printed on nonpolluting
paper.
• Deposit old batteries at the relevant collection points.
• Please make use of the facilities available in your country for
disposing of the packaging of the video recorder in a way that
helps to protect the environment.
• This electronic equipment contains many materials that can be
recycled. Please inquire about the possibilitiesfor recycling your
old set.
• VIDEOPlus+ and PlusCode are trademarks of Gemstar Development Corporation. The VIDEOPlus+ system is manufactured
under licence from Gemstar Development Corporation.
ContentsPage 1 INSTALLATION 2 2 00 1 Connecting
VCR with scart cable 2 2 00 1 Connecting
VCR without scart cable 2 3 00 1 Adjusting
the modulator frequency 2 3 00 1 Automatic
adjustment of modulator frequency 2 3 00 1
Switching off the modulator 2 3 00 1
Important notes for operation 2 3 00 1 Saving
energy 2 4 00 1 Connecting additional
equipment 2 4 00 1 Emergency interrupt 2 4
00 1 User guide 2 4 00 1 Autoinstall 2 5 00 1
Setting the clock 2 5 00 1 Manual Channel
Number Allocation 2 6 00 1 Monitor function
2 6 00 2 PLAYBACK FUNCTIONS 2 7 00 2
Picture scanning 2 7 00 2 Instant View 2 7 00
2 Still picture 2 7 00 2 Tape position/Index
search 2 7 00 2 Continuous playback 2 8 00 2
Eliminating picture interference 2 8 00 2
Tracking 2 8 00 3 RECORDING FUNCTIONS 2
9 00 3 Long play function 2 9 00 3 Some
general notes for recording 2 9 00 3
Recording from external sources 2 9 00 3
OTR - Recording 2 9 00 3 Erase protection 2
9 00 3 Auto-assembling 2 9 00 3 PDC / VPS 2
10 00 3 Programming with ’VIDEOPlus+’ 2 10
00 3 Programming a recording manually 2 11
00 3 Clear a TIMER block 2 11 00 3 Important
programming notes 2 11 00 4 SPECIAL
FEATURES 2 12 00 4 Tuner mode 2 12 00 4
Externally controlled recording 2 12 00 4 On
Screen Display (OSD) 2 12 00 4 Channel
number or frequency display 2 12 00 4
Manual channel search 2 12 00 4 Allocating
a decoder 2 12 00 4 Before you call an
engineer 2 13 00
OPERATING INSTRUCTIONS PHILIPS VR 285
1
Page 4
Important for the United Kingdom
This apparatus is fitted with an approved moulded 13 Amp
plug. To change a fuse in this type of plug proceed as follows:
1 Remove fuse cover and fuse.
2 Fix new fuse which should be a BS1362 3A, A.S.T.A. or BSI
approved type.
3 Refit the fuse cover.
If the fitted plug is not suitable for your socket outlets, it should
be cut off and an appropriate plug fitted in its place.
If the mains plug contains a fuse, this should have a value of
3A. If a plug without a fuse is used, the fuse at the distribution
board should not be greater than 5A.
Note: * The severed plug must be destroyed to avoid a
possible shock hazard should it be inserted into a 13A
socket elsewhere.
How to connect a plug:
The wires in the mains lead are coloured in accordance with
the following code:
BLUE - ’NEUTRAL’ (’N’)
BROWN - ’LIVE’ (’L’)
1 The BLUE wire must be connected to the terminal which is
marked with the letter ’N’ or coloured BLACK.
2 The BROWN wire must be connected to the terminal
which is marked with the letter ’L’ or coloured RED.
3 Do not connect either wires to the earth terminal in the
plug which is marked with the letter ’E’ or by the safety
earth symbol \or coloured green or green-and-yellow.
Before replacing the plug cover, make certain that the cord
grip is clamped over the sheath of the lead - not simply over
the two wires.
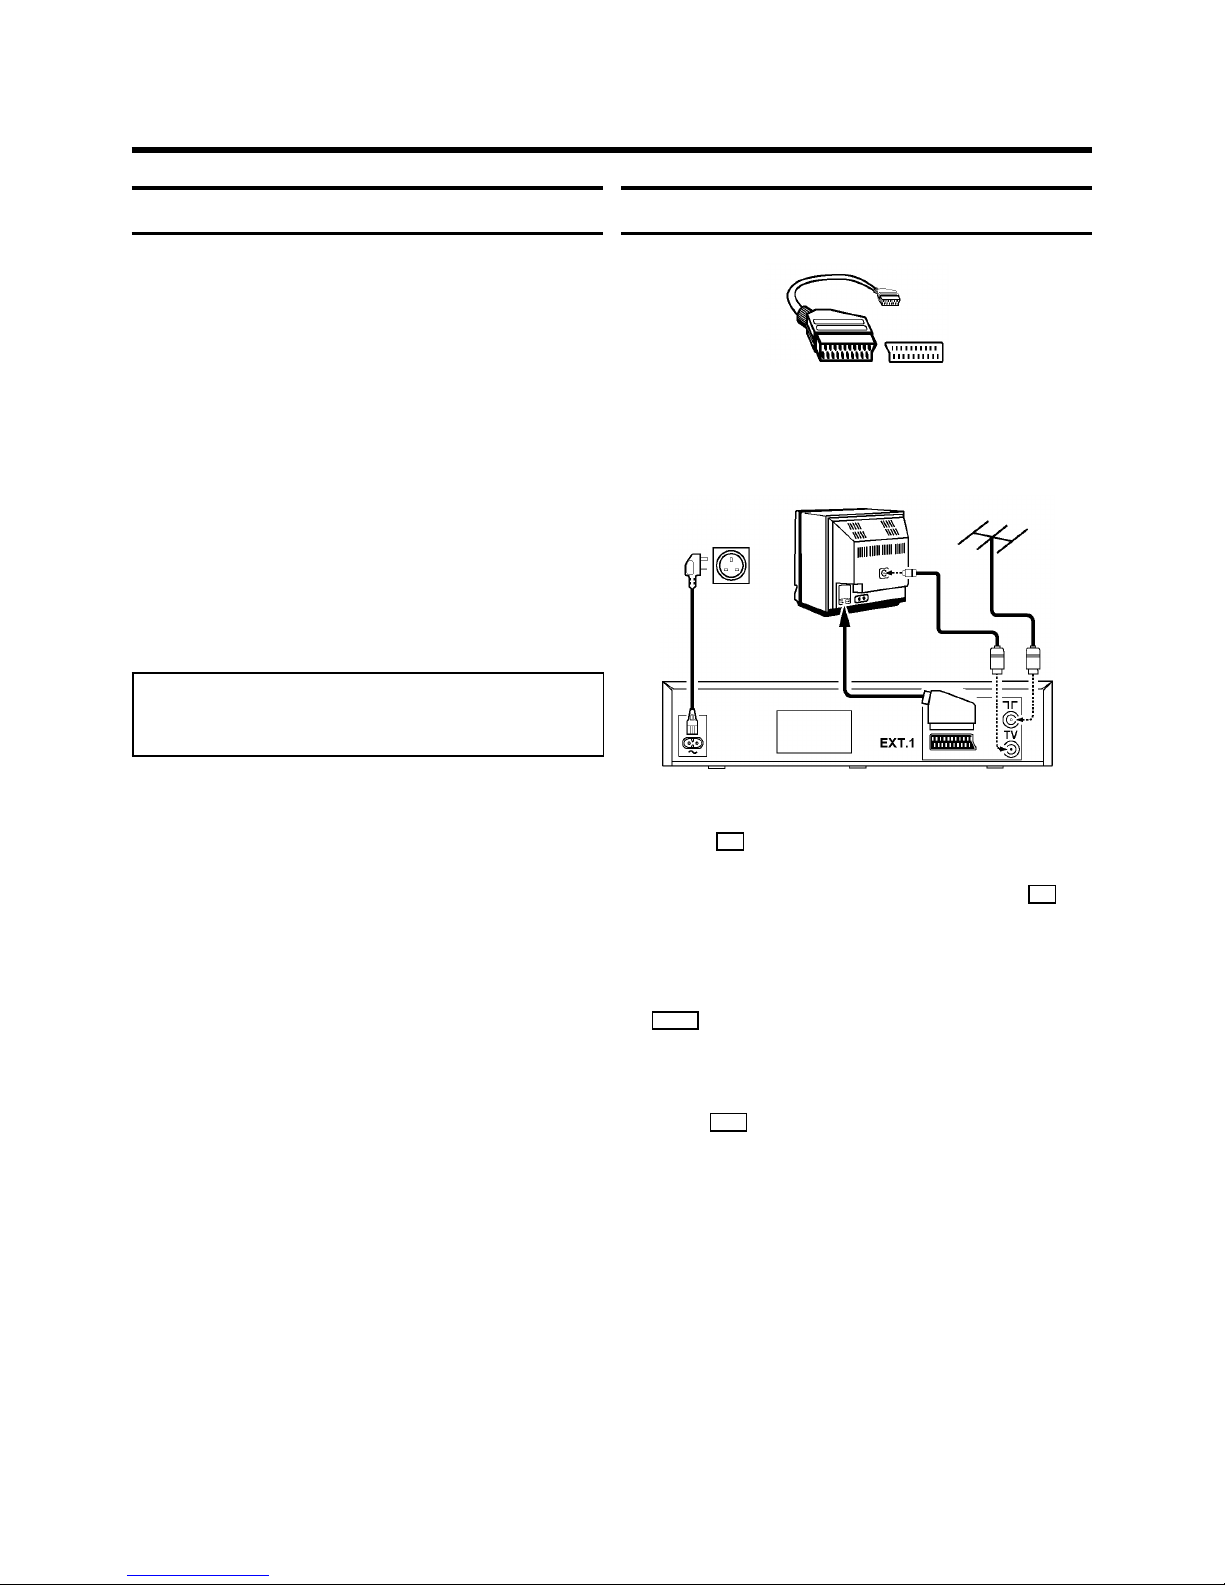
Connecting VCR with scart cable
If your television does not have a scart (AV-Euro) socket,
please do not read further here, but turn to the next paragraph
’Connecting VCR without scart cable’.
1 Remove the aerial cable plug from your TV set and insert it
into the 2 socket at the back of the video recorder.
2 Plug one end of the aerial cable provided into the 3
socket on the video recorder and the other end into the
aerial input socket on your TV set.
3 Insert the plug of a scart cable into the scart socket
EXT.1 at the back of your video recorder. Connect the
other plug to the TV set.
4 Insert the female plug of the mains cable into the mains
socket 4 at the back of the video recorder.
5 Plug the other end of the mains cable into the wall socket.
1. INSTALLATION
2
Page 5
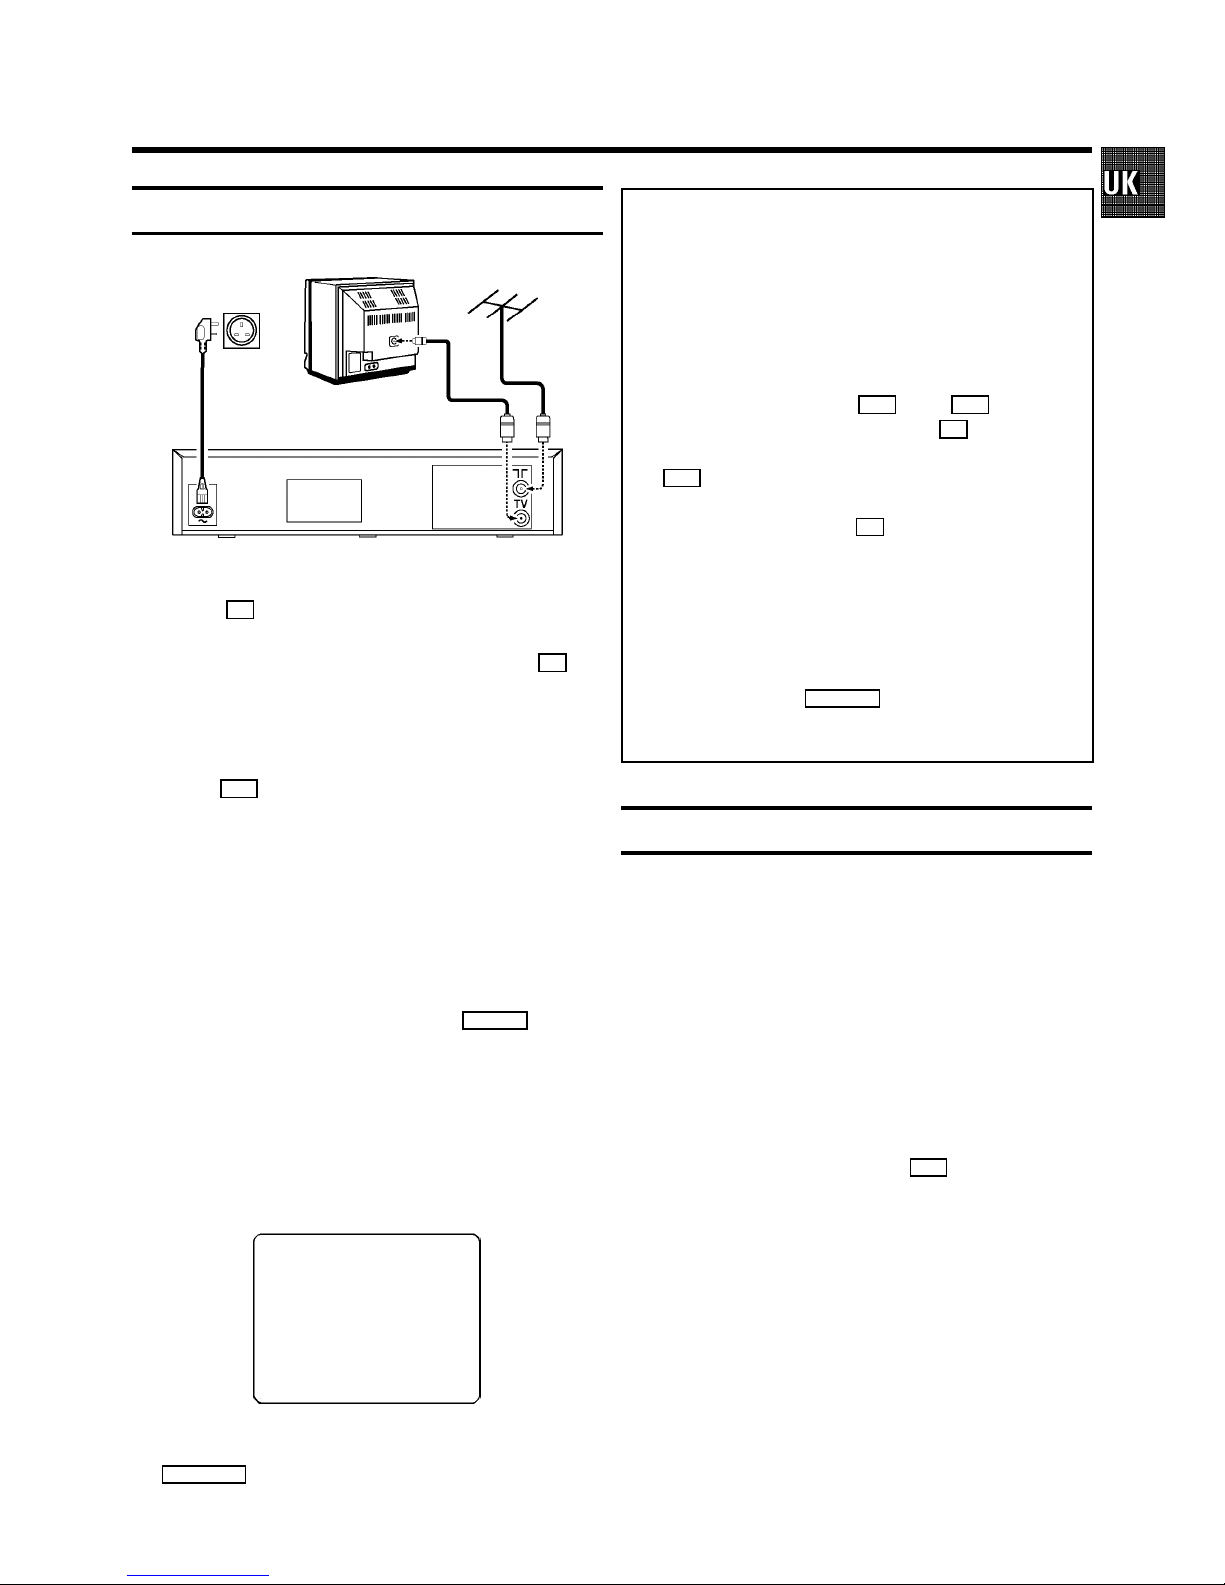
Connecting VCR without scart cable
1 Remove the aerial cable plug from your TV set and insert it
into the 2 socket at the back of the video recorder.
2 Plug one end of the aerial cable provided into the 3
socket on the video recorder and the other end into the
aerial input socket on your TV set.
3 Insert the female plug of the mains cable into the mains
socket 4 at the back of the video recorder.
4 Plug the other end of the mains cable into the wall socket.
5 Switch on your TV set and select the programme number
that you have chosen for video playback (see operating
manual for your TV set).
6 Ensure that no cassette has been loaded. With the video
recorder switched to standby, hold the SYSTEM button
for a few seconds until a modulator frequency e.g.: ’M583’
(583MHz or UHF-channel 35 ) appears in the display. The
video recorder transmits a test picture on this UHFchannel.
7 Tune in the TV set in the UHF wave band until this picture
appears.
MODULATOR 583
------------------------
-/+
ON/OFF gCL OK
8 Switch the video recorder to standby with the
STANDBY m button.
Note: This modulator frequency (583MHz or UHFchannel 35 ) might already be being used by another TV
station in your reception area, e.g. ’Channel 5’. In this case
the picture quality on your TV set will be poor when
receiving one or more TV channels.
* Adjusting the modulator frequency: If the picture quality
only deteriorates when the video recorder is switched on,
adjust the modulator frequency. The frequency can be
adjusted at step 6 with the P r or the P q button.
Confirm the adjusted frequency with the OK button.
*Automatic adjustment of modulator frequency: If you press
the I button in step 6 , the next optimal modulator
frequence will be selected automatically. Confirm the
frequency displayed with the OK button.
* Switching off the modulator: If you cannot eliminate
picture or sound interference using the above method you
can switch off the built-in modulator. You should only do this
if you have connected the video recorder to the TV set with
a scart cable. ’Connecting VCR without scart cable’ is not
possible when the modulator is switched off.
At step 6 , press the CLEAR (CL) button for several seconds until ’MOFF’ (modulator switched off) appears in the
display. You can switch back again in the same way.
Important notes for operation
• Many televisions automatically switch to programme
number ’EXT’ (EXTernal) or ’AV’ (Audio/Video) when a
video cassette is played back.
If the television does not switch automatically, select
programme number e.g.: ’EXT’, ’0’, or ’AV’ on the TV set
manually.
• Keep your video recorder connected to the mains at all
times to ensure that programmed recordings can be made
and that the television functions normally. The power
consumption required will only be approximately 6 W
(save energy mode).
• The video recorder switches on automatically as soon as
you insert a cassette or press the P q button.
• If the video recorder is not used for a few minutes, it
switches to standby automatically (except in tuner-mode).
• If the video recorder is disconnected from the mains, TV
channel information will be stored for about 1 year and
clock and Timer information will be stored for about 7
hours.
3
Page 6
Saving energy
You can choose between two methods of switching to
standby.
Normal method: Switch to standby using the STANDBY m but-
ton. The clock time remains displayed. If the clock has not
been set, ’--:--’ appears in the display.
To save energy: Press the STANDBY m button twice. The clock
time disappears from the display.
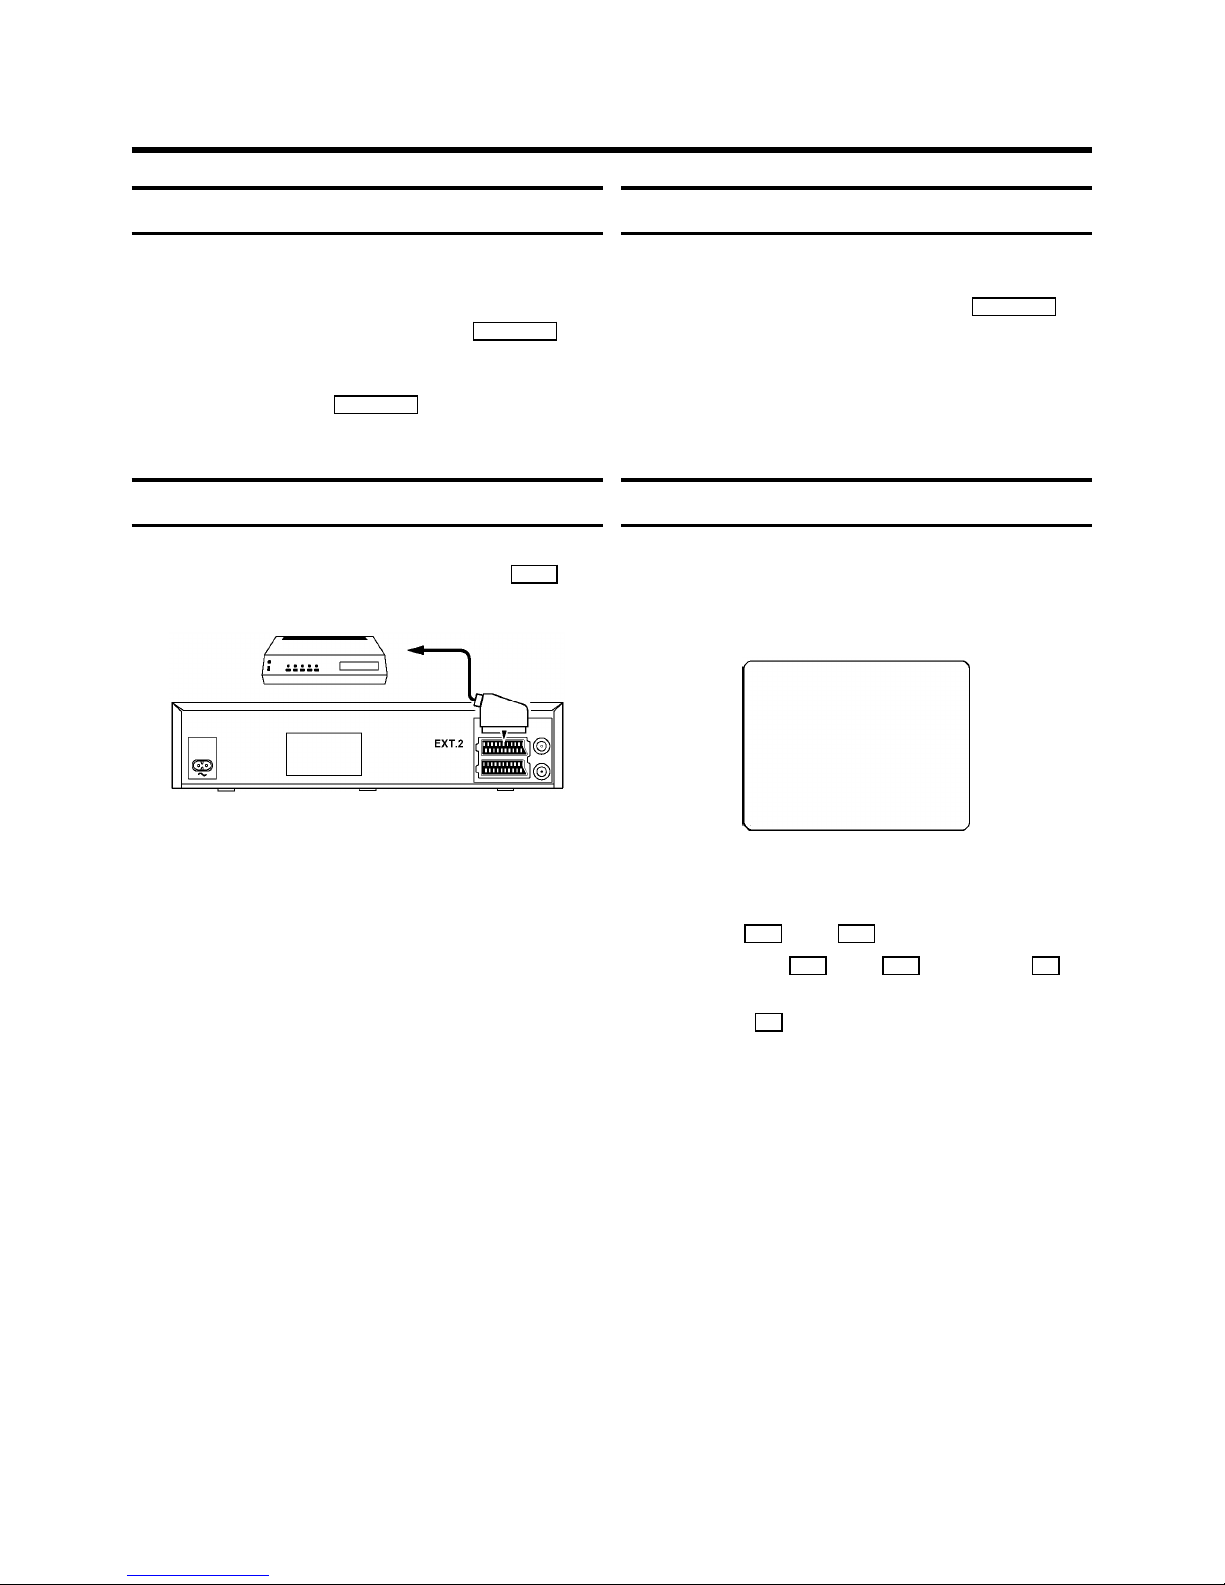
Connecting additional equipment
You can also connect additional equipment to the EXT.2 socket. For instance: satellite receiver, decoder or camcorder.
Emergency interrupt
Both the video recorder and the remote control have an
’Emergency interrupt’ button. You can use the STANDBY m button to interrupt any function.
Whenever you have operating problems you can simply
interrupt the function and start again.
You can practise operating your set without any worries. No
matter which buttons you press, you cannot damage it.
User guide
With OSD (On Screen Display) the corresponding functions
appear on the TV-screen. The most important button-functions
are displayed at the bottom of the screen. For instance:
DATE PROG START V/P END
01 01 20:00 21:30
-----------------------NEXT gTIMER CLEAR gCL
-/+ 0-9 D/WgSELECT OK
Throughout this instruction manual, use the following buttons
for these functions: ’Select’, ’Enter’/’Adjust’, ’Confirm’.
Select: Use the P r or the P q button.
Enter/Adjust: Use the P r or the P q button, or the 0-9
buttons.
Confirm: Use the OK button.
4
Page 7

Autoinstall
The video recorder will search for all TV channels. It stores TV
channels found in the following sequence: BBC 1, BBC 2, ITV,
CH 4, CH 5, SKY, others.
1 Switch on the TV set. Press the AUTOINSTALL button on
the video recorder. If TV channels have already been
stored, select the line ’AUTOINSTALL’, using the P q or
P r button.
2 Confirm with the OK button.
’AUTOINSTALL’ starts. On the TV screen appears:
AUTOINSTALL 00
Wait until all TV channels have been found. This can take
several minutes.
3 When Autoinstall is complete, ’READY’ will appear in the
display. Date and clock information have been set.
How to search for a TV channel manually, you can read in
chapter 4 ’SPECIAL FEATURES’, ’Manual channel search’.
How to allocate a TV channel manually, you can read in the
next paragraph, ’Manual Channel Number Allocation’.
Note: With the OK button you can interrupt the automatic
channel search. All TV channels found will remain stored.
* If a TV channel transmits a ’TV channel identification’ (e.g.
’BBC1’), it appears in the display.
Setting the clock
If a TV channel which transmits TXT/PDC is stored with
programme number ’P 01’, time (from TXT) and date (from PDC)
will automatically be taken from the TXT/PDC information. If
the time in the video recorder display is not correct or if ’--:--’
appears in the display, please set the clock manually.
1 Switch on the TV set.
2 Press the AUTOINSTALL button on the video recorder.
3 Confirm the line ’CLOCK’ with the OK button.
4 Adjust ’TIME’, ’YEAR’, ’MONTH’, ’DATE’ if required, using
the P q or P r button or the digit buttons 0-9 .
TIME 20:00
YEAR 1998
MONTH 01
DATE 01
------------------------
-/+ OK
5 Confirm each entry with the OK button.
5
Page 8

Manual Channel Number Allocation
You can give any desired programme number to the TV
channels stored.
1 Switch on the TV set. Press the AUTOINSTALL button on
the video recorder.
2 Select ’CHANNEL ALLOCATION’ with the P q or P r
button.
Confirm with the OK button.
3 Use the P r or P q button to select the TV channel on
the TV screen to which you wish to allocate a programme
number (starting with ’P 01’).
4 Confirm this allocation with the OK button.
If you wish to allocate further programme numbers, repeat
step 3 and step 4 until you allocated a programme
number to all the required TV channels.
5 To end, press the STANDBY m button.
Note: If you want to delete an unwanted TV channel, press
the CLEAR (CL) button at step 3 .
* Monitor function: You can switch to and fro between TV
reception and video recorder reception with the
MONITOR button. This only functions when you used a scart
cable to connect the video recorder to your TV set and if
your TV set responds to this switch-over.
6
Page 9
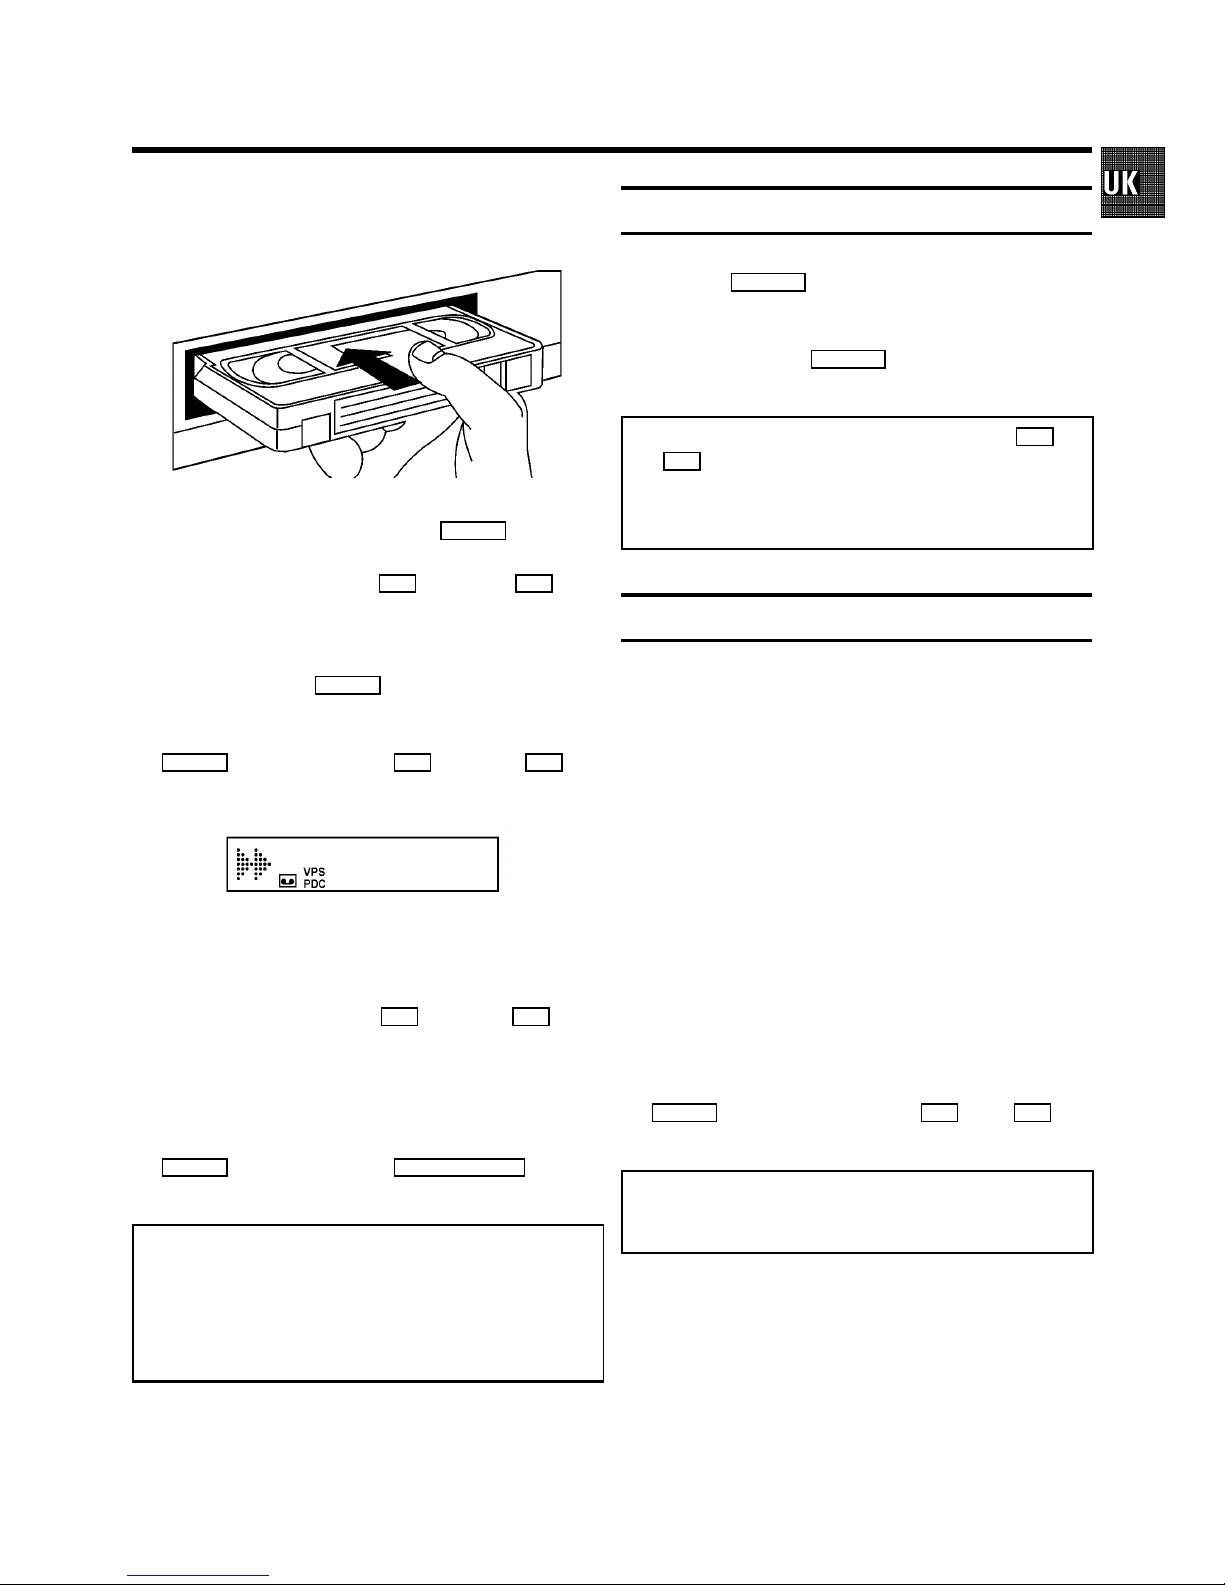
1 Insert the cassette into the cassette slot. vappears in the
display.
2 Playback: Press the playback button PLAY G .
3 Picture scanning: Press the H (reverse) or I (for-
ward) button once or several times. You have a choice of
several picture scanning speeds.
4 Interrupt: Press the STOP h button.
5 Wind and rewind: Interrupt the playback function with the
STOP h button and press the H (rewind) or I
(wind) button. In the display appears:
0:20
If, during wind/rewind, you want to have a quick access to
picture scanning, use the ’Instant View’ function.
6 Instant View: If you hold the H (rewind) or I (wind)
button during wind or rewind, you will switch to picture
scanning. If you release the button, the video recorder will
automatically switch back to rewind or wind again.
7 Eject a cassette: Interrupt the playback function with the
STOP h button and press the STOP/EJECT ? button on
the video recorder.
Notes: Some functions switch off automatically after a while
(e.g.: pause, still picture, picture scanning). This helps to
protect the cassette and prevent unnecessary power
consumption.
* The picture quality will deteriorate during picture scanning. The sound is turned off.
Still picture
1 Press the STILL R button. You see a still picture. Inter-
ference stripes will appear on the screen.
2 Each time you press STILL R again, the picture will
move on one step.
Note: If the still picture vibrates vertically, hold the P r or
the P q button at step 1 until the vibration is minimal.
This setting will be stored automatically.
Please note, however, that interference may still occur with
poor quality cassettes.
Tape position/Index search
Tape position: The elapsed playback time, given to the hour
and minute, appears in the display.
When you load a cassette, the video recorder must first
calculate the playing time. Therefore, ’-:--’ appears first and
only after the tape has been running for a few seconds the
playing time will be shown.
The playback time displayed can be incorrect when using
camcorder cassettes or with cassettes made for NTSC-VHS
equipment.
Index search: At the beginning of each recording, the video
recorder marks the tape with a code mark. You can search for
these code marks on the tape. Once the video recorder finds
the code mark or a blank space, it will automatically switch to
playback.
1 To select the next or the previous code mark, press the
INDEX E button and then press the I or the H but-
ton.
Note: You cannot use the function ’Index search’ with
recordings made on another video recorder that does not
have this code mark function.
2. PLAYBACK FUNCTIONS
7
Page 10
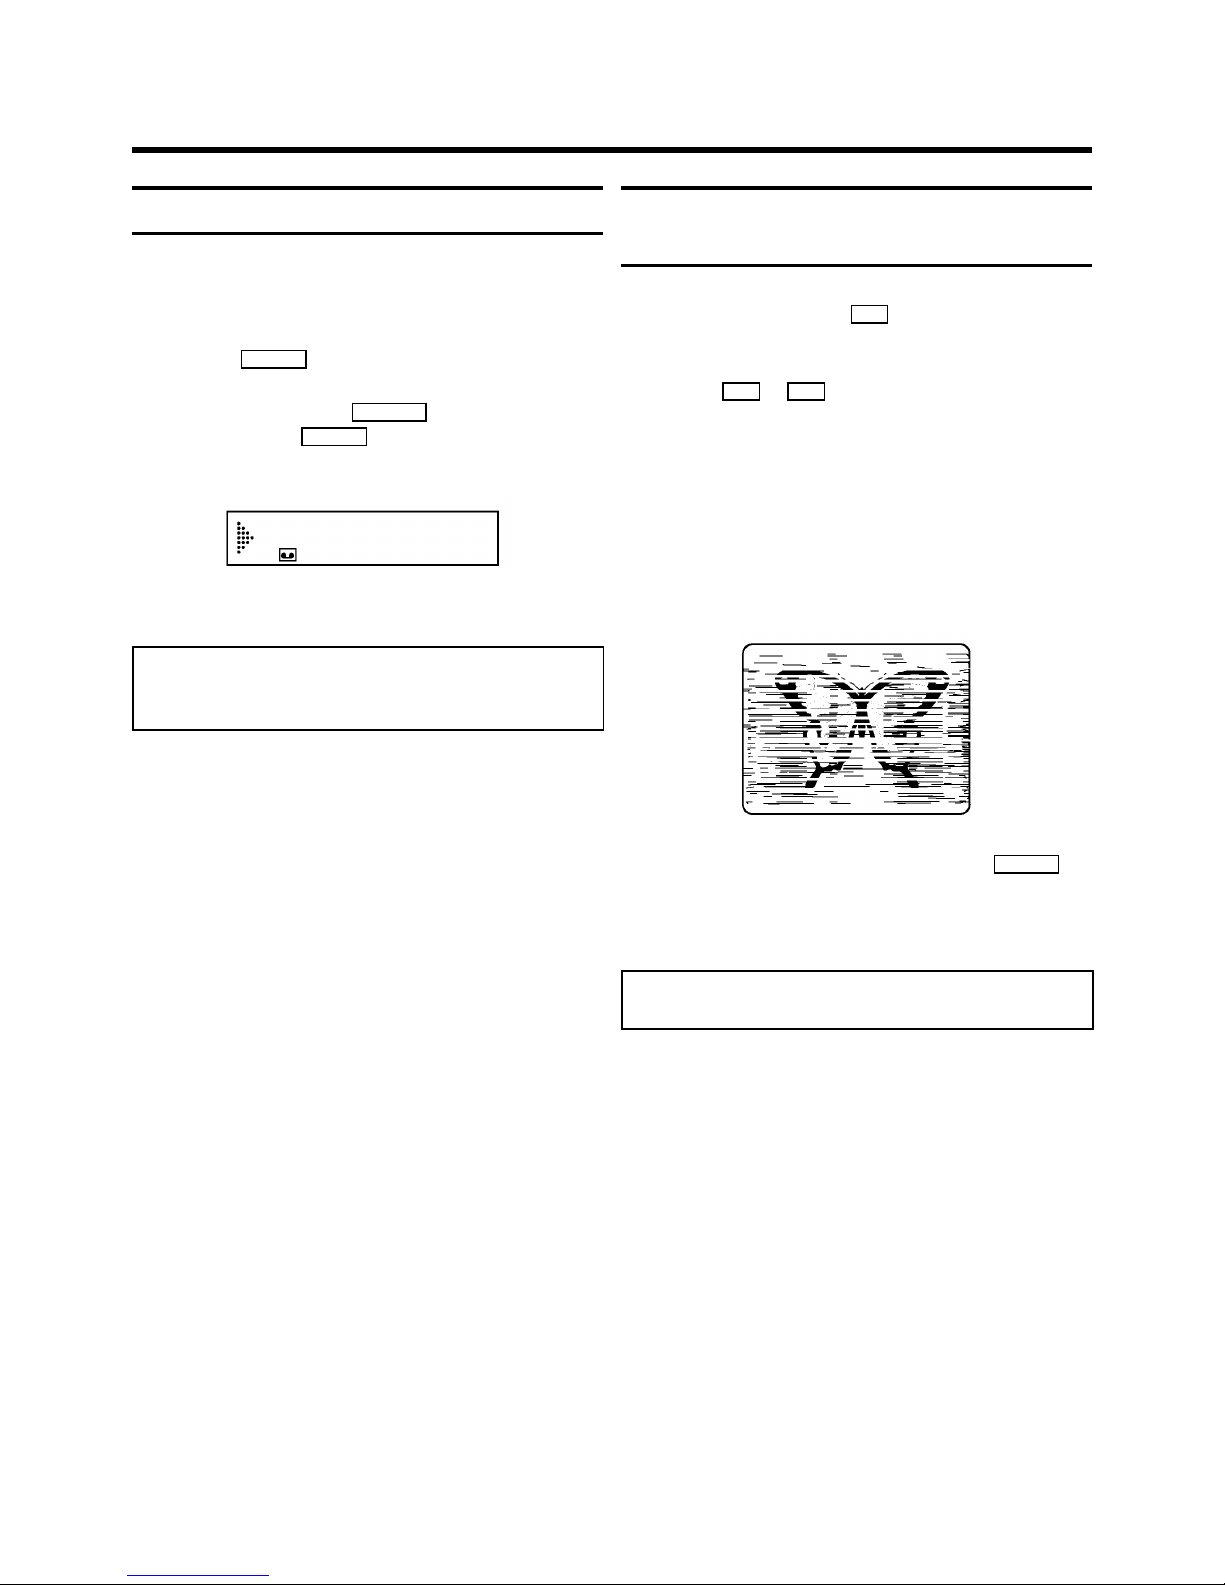
Continuous playback
You can continuously replay a cassette. When the end of the
tape has been reached, it rewinds and begins again.
1 Press the PLAY G button.
2 Whilst holding down the MONITOR button on the remote
control, press the PLAY G button on the video recorder.
In the display appears:
REP
3 If you want to cancel the function, repeat step 2 .
Note: No other button will react during continuous
playback. After a power failure, playback will automatically
start again.
Eliminating picture interference/
Cleaning function
1 During playback, hold the P q button until ’TRAC’(track-
ing) appears in the display.
2 Hold the P q or P r button until the playback quality is
at its best.
3 Wait a few seconds, until ’TRAC’ disappears from the
display. This setting will remain until you remove the
cassette.
4 If horizontal lines still appear on the screen, use the
Cleaning function:
Cleaning function: During playback, hold the PLAY G
button until ’HEAD’ (video head cleaning) appears in the
display. The video heads are being cleaned. The video
recorder automatically switches back to playback.
Note: Some hired cassettes may have a poor picture/sound
quality. This is not a fault in your video recorder.
8
Page 11
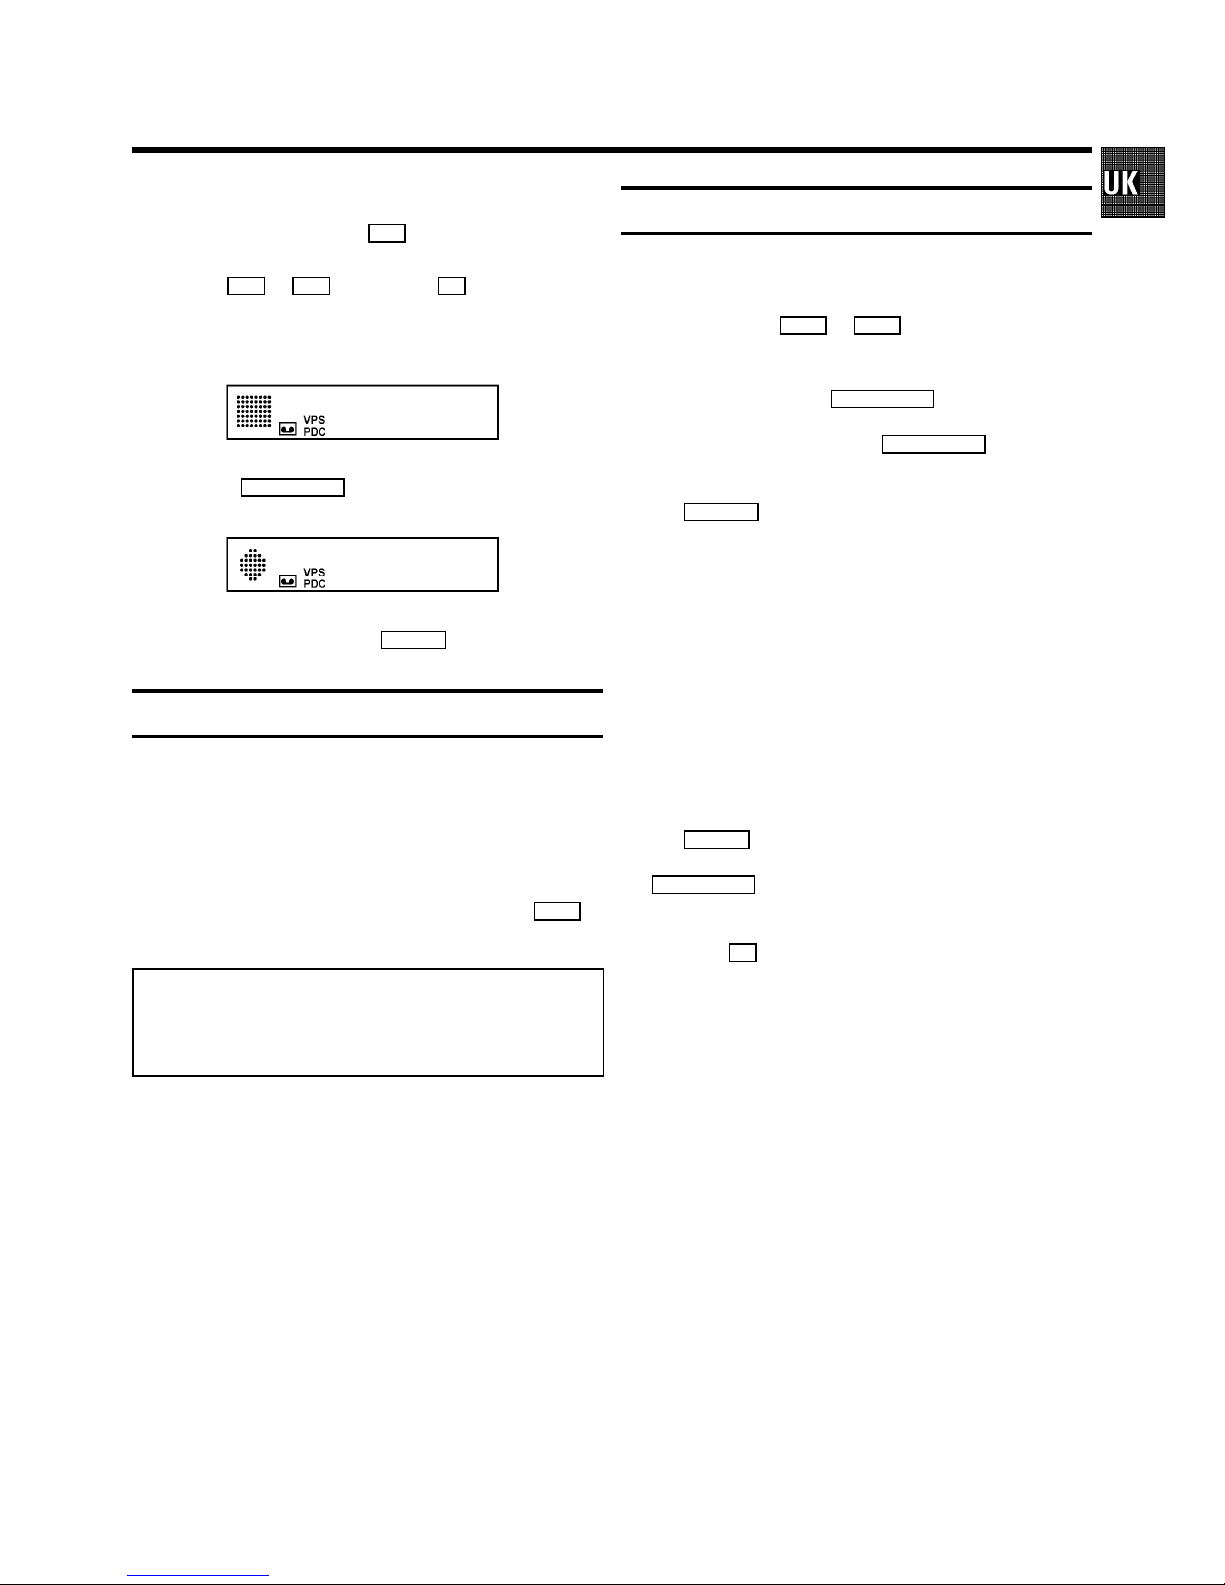
1 Insert a cassette into the video recorder or switch the
video recorder on with the P q button.
2 Use the P r or P q button or the 0-9 buttons to select
the programme number from which you wish to record,
e.g. ’P 01’. In the display appears:
BBC1
3 Press the RECORD/OTR n button. In the display appears:
0:00
4 To stop recording, press the STOP h button.
Long play function
You can reduce the recording speed by half. This makes it
possible to record, for example, 8 hours instead of 4 hours on
an ’E240’ cassette.
Before recording, with the video recorder switched on, select
the ’LP’ (=LongPlay) recording speed by pressing the SP/LP
button. ’LP’ will appear in the display.
Note: During picture scanning, still picture and slow motion
colour playback may be poor.
* You will obtain the best picture quality when recording at
standard speed (’SP’).
Some general notes for recording
• Recording from external sources: Programme numbers
’E1’ and ’E2’ are provided for recording from external
sources (via the EXT.1 or EXT.2 scart socket).
• OTR - recording: If you do not want to record to the end of
the cassette, press the RECORD/OTR n button again. The
display shows at what time the recording will stop. With
each subsequent press of the RECORD/OTR n button you
can add 30 minutes to this time.
You can return to the normal recording status by pressing
the CLEAR (CL) button.
• Erase protection: So that you don’t accidentally delete an
important recording, you can remove the special tab
(erase protection) on the narrow side of the cassette with
a screwdriver or slide the special tab to the left.
Later, if you no longer want the cassette to be erase
protected, you can seal the gap again with adhesive tape
or slide the special tab to the right.
• Auto-assembling: You can use the auto-assembling func-
tion to join individual recordings without any major picture
disturbance between the recordings. During playback,
search for the correct position on the tape and then press
the STOP h button. 9will appear in the display. Now you
can start recording as usual by pressing the
RECORD/OTR n button.
During Stop hor Pause 9you can switch between the
display for TV-channel identification and tape position,
using the OK button.
3. RECORDING FUNCTIONS
9
Page 12
How to programme a recording
The video recorder needs the following information for every
programmed recording:
* the date on which the recording is to be made
* the programme number for the TV programme
* the start and stop time of the recording
* ’PDC’ or ’VPS’ on or off
The video recorder stores all the information mentioned above
in a TIMER block. You can programme up to 6 TIMER blocks,
one month in advance.
With ’PDC’ (Programme Delivery Control) or ’VPS’ (Video
Programming System), the TV station controls the beginning
and the length of the programmed recording. This means that
the video recorder switches itself on and off at the right time
even if a TV programme you have programmed begins earlier
or finishes later than expected.
Usually the start time is the same as the PDC or VPS time. If,
however, a different PDC or VPS time is given, e.g.: ’20.15 (PDC
or VPS 20.14)’, you have to enter ’20.14’ as the start time
exactly to the minute.
If you want to enter a time that differs from the PDC or VPS
time, you have to switch off ’PDC’ or ’VPS’.
Programming with ’VIDEOPlus+’
All the information required for a programming is encoded in
the VIDEOPlus+ code.
1 Switch on the TV set.
2 Press the TIMER k button on the remote control.
3 With the digit buttons 0-9 , enter the VIDEOPlus+ code (up
to 9 digits) printed in your TV guide next to the start time of
a TV programme.
If you make a mistake, clear with the CLEAR (CL) button.
VIDEOPLUS
53124----
ONCE
-----------------------D/WgSELECT CLEAR gCL
0-9 OK
4 If you want to programme at daily or weekly intervals,
press the SELECT button until ’D-DAILY’ (daily intervals) or
’W-WEEKLY’ (weekly intervals) appears on the TV screen.
The ’daily intervals’ function can only be used for
recordings to be made from Mondays to Fridays inclusive.
5 Confirm the entries with the OK button. The resultant data
appears on the TV screen.
Note: If you use VIDEOPlus+ for the first time for this TV
channel, the line ’SELECT PROG’ appears when you confirm
the VIDEOPlus+ code. Instead of ’E2’, select the programme
number for this particular TV channel, using the digit
buttons 0-9 . Confirm with the OK button.
* Switch ’PDC’ or ’VPS’ (V/P) on or off with the SELECT button.
* If you wish to set a later end time for a recording, press
the P q button at step 5 . Each time you press the
P q button you will add 15 minutes to the end time.
* If e.g.: ’20:00’ flashes in the display, please set the clock.
6 Finally, press the OK button. Programming is now com-
plete.
The data has been stored in a TIMER block.
7 Make sure that a cassette without erase protection has
been loaded. Switch to standby with the STANDBY m button.
A programmed recording will only function when the video
recorder is switched to standby with the STANDBY m button.
Note: * VIDEOPlus+ Aerial-code numbers: With this video
recorder, VIDEOPlus+ aerial-code numbers will be allocated
automatically.
10
Page 13
Programming a recording manually
1 Switch on the TV set. Press the TIMER k button twice.
2 With the P q or P r button, select a free TIMER block.
Press the TIMER k button.
3 With the TIMER k button you can select between the
entries ’DATE’ (date), ’PROG’ (programme number),
’START’ (start time) and ’END’ (stop time).
With the P q or P r button or the digit buttons 0-9 ,
you can enter or adjust data. Confirm each entry with the
TIMER k button.
You can switch ’VPS/PDC’ (V/P) on and off at step ’START’
with the SELECT button.
You can select between ’D’ (daily intervals) or ’W’ (weekly
intervals) at step ’DATE’ with the SELECT button.
4 Finally, press the OK button. Programming is now com-
plete.
5 Make sure that a cassette without erase protection has
been loaded. Switch to standby with the STANDBY m button.
Note: * Clear a TIMER block: At step 1 select the TIMER
block that you want to clear, using the P q or P r button. Press the CLEAR (CL) button.
If e.g.: ’20:00’ flashes in the display, the clock must be set.
Important programming notes
• When recordings have been programmed, kappears in
the display.
• The programmed recording will always be made at the
recording speed (SP/LP) that at the time has been
selected on the video recorder.
• You cannot operate the video recorder manually while a
programmed recording is being made. If you want to
interrupt the programmed recording, press the
STANDBY m button.
• If the video recorder is switched on a few minutes before
a programmed recording is due to take place, ’TIMER
RECORD’ will flash on the TV screen.
• If the end of the cassette is reached during a programmed
recording, the video recorder automatically ejects the
cassette.
• If you forget to load a cassette, after programming the
recording, ’NO CASSETTE’ will appear on the TV screen
for a few seconds.
• If you insert a cassette with erase protection, after
programming the recording, ’PROTECTED CASSETTE’ will
appear on the TV screen for a few seconds.
The cassette will then be ejected.
• When, after pressing the TIMER k button ’TIMER FULL’
appears on the TV screen, all TIMER blocks have been
programmed. Then, with the P q or P r button, select
the TIMER block you want to adjust or clear.
• If ’CODE ERROR’ appears on the TV screen, the
VIDEOPlus+ code was incorrect or the date was incorrectly entered. Repeat the entry or end with the
STANDBY m button.
With programming at daily intervals, the first recording
must take place within a week.
• If ’DAILY ERROR’ appears on the TV screen, the date was
incorrectly entered. Programming at daily intervals can
only be used for recordings to be made from Mondays to
Fridays inclusive.
• Programme numbers ’E1’ and ’E2’ are provided for
programmed recordings from external sources (via the
EXT.1 or EXT.2 scart socket).
11
Page 14

Tuner mode
You can also use your video recorder as a TV receiver (tuner).
1 Hold the STOP h button, until +appears in the display.
2 Select the required programme number with the P r or
P q button or with the 0-9 buttons.
3 Switch the video recorder to standby by pressing the
STANDBY m button when you no longer want to watch
television.
Externally controlled recording
Do you have another device, e.g. a satellite receiver, which
can control other equipment by a ’programming’ function? You
can connect this device to the video recorder with a scart
cable, at socket EXT.2 .
1 Insert a cassette. Switch to standby with the STANDBY m
button.
2 Hold the MONITOR button until ’REC.P’ appears in the
display.
3 If you want to interrupt this function before the recording
has actually started, hold the MONITOR button until
’REC.P’ disappears from the video recorder display.
4 If you want to interrupt this function while a recording is
being made, press the STANDBY m button.
On Screen Display (OSD)
You can switch the On Screen Display (OSD) on or off.
1 Switch on the TV set. Press the AUTOINSTALL button on
the video recorder.
2 With the P q or P r button, select ’OSD’. Confirm with
the OK button.
3 With the P q button, select ’ON’ or ’OFF’. Confirm with
the OK button.
Note: With the OK button you can superimpose the actual
operating mode on the TV screen.
Channel number or frequency display
You can switch between the display for ’channel number’ or
’frequency’ for manual channel search.
1 Press the AUTOINSTALL button.
2 With the P q or P r button, select
’CHANNEL/FREQUENCY’. Confirm with the OK button.
3 With the P q button. select ’CHANNEL’ or ’FREQUENCY’.
Confirm with the OK button.
Manual channel search
In certain cases the ’Automatic channel search’ may not be
able to find all of the TV channels (e.g. coded TV channels). In
that case, use this manual method to set the TV channels.
1 Switch on the TV set. Press the AUTOINSTALL button on
the video recorder.
2 With the P q ot P r button, select ’MANUAL SEARCH’.
Confirm with the OK button.
3 Hold the P q button until you have found the right TV
channel. A changing channel number or frequency will
appear on the TV screen.
4 Confirm with the OK button.
5 With the P q or P r button or the digit buttons 0-9 ,
select the programme number that you wish to give to this
TV channel (e.g.: ’P 01’).
6 Confirm with the OK button.
If you want to allocate more TV channels, repeat steps 3
to 6 until all TV channels have been stored.
7 To end, press the STANDBY m button.
Note: Channel number or frequency can also be entered
directly at step 3 , using the 0-9 buttons.
* Allocating a decoder: If you want to allocate a decoder,
press the INDEX E button at step 3 until ’DEC’ appears in
the display.
4. SPECIAL FEATURES
12
Page 15

Before you call an engineer
If, contrary to expectation, you experience any difficulty in
operating this video recorder, it may be caused by one of the
reasons mentioned below. You can also call the customer
service in your country.
You will find the telephone numbers in the enclosed guarantee
leaflet.
The set does not respond to any button being pressed:
• No power supply.
• A programmed recording is currently being made.
• Technical disturbance: disconnect from the mains for 30 sec-
onds, then re-connect. If this does not have any effect, you can:
1. Disconnect from mains.
2. Re-connect to mains whilst holding down the
STANDBY m
button on the video recorder. All stored data will be reset
(cleared).
Cassette jammed:
• Don’t use force. Pull out the mains plug for a moment.
Remote control does not operate:
• Remote control not pointed toward the video recorder.
• Batteries are exhausted.
No playback from video recorder:
• No recording on the cassette.
• The VCR programme number on the TV set was incorrectly
selected or incorrectly set.
• The connecting cable between the TV set and the video recorder
has come loose.
Poor playback from video recorder:
• TV set not properly adjusted.
• Cassette badly worn or of poor quality.
• Read the section about ’How to eliminate picture disturbance’ in
chapter ’PLAYBACK FUNCTIONS’.
No recording possible:
• TV channel not stored or wrongly selected.
• Cassette with erase protection has been loaded.
Programmed recording does not function:
• TIMER not set properly.
• Time/date wrongly programmed.
• A cassette with erase protection has been loaded.
• ’PDC’ or ’VPS’ switched on but ’PDC/VPS time’ wrong. Check
aerial.
Picture or sound interference on TV reception e.g. when
tuned to ’CH5’:
• Turn to Chapter 1 ’INSTALLATION’ and read in the section
’Connecting VCR without scart cable’ the note ’Adjusting the
modulator frequency’ , ’Automatic adjustment of modulator
frequency’ as well as the note ’Switching off the modulator’.
• Have your aerial checked.
Enter the serial number of your appliance here:
MODEL NO./TYPE VR 285
PROD.NO.:/SER.NR. .....
This product complies with the requirementsof the Directive
73/23/EEC + 89/336/EEC + 93/68/EEC.
Interference
The Department of Trade and Industry operates a Radio
Investigation Service to help TV licence holders improve
reception of BBC and ITC programmes where these are being
spoilt by interference.
If your dealer cannot help, ask at a Main Post Office for the
booklet ’How to Improve Television and Radio Reception’.
13
Page 16

14
3103 166 20111
8131/001 VR 285
(WwnnNNNwwnwNNnwnWwnNNnwwNWnnnW)
 Loading...