

Page 1
1
LODGING (PLAND TL) MAIN ON-SCREEN MENU CONTROLS
N
ote: Depending on the model and its features, some or all of the displays and features described below will be avail-
able. To perform setup operations for the TV Commercial mode, a RG4172BK remote with its TV Setup, Guest, and
Data Communication mode capabilities can be used. Press TV SETUP, then press RECALL, to determine whether the TV is
in Commercial mode. If the TV is in Consumer mode, press TV SETUP, 02, 49, 95, then M(enu), then use the +/– buttons to
select Commercial mode. (See RG4172BK Remote Control Instructions, part number IB7166E002, for details.)
LANGUAGE ENGLISH/ESPANOL/FRANÇAIS
CHANNEL INSTALL ©
CABLE TUNING ON/OFF
BRIGHTNESS 27
COLOR 27
CONTRAST 27
SHARPNESS 27
TINT 2
NOISE REDUCTION ON/OFF
AVL ON/OFF
VOLUME BAR ON/OFF
MIN VOLUME 3
MAX VOLUME 40
SWITCH ON VOLUME 25/STANDARD
SWITCH ON CHANNEL TV Channels 1-125/STANDARD
POWER ON STANDARD/FORCED
CHANNEL DISPLAY NUMBER/LABEL/ALL/NONE
KEYBOARD LOCK ON/OFF
ESP 1-99/OFF
AUDIO/VIDEO MUTE OFF/BLACK/BLUE
WELCOME MESSAGE ©
CHANNEL GUIDE POWER ON/OFF/ON
REMINDER ON/OFF
3 DIGIT ENTRY ON/OFF
A/CH - A/V SWITCH ON/OFF
CC OFF/CC-1/CC-2/CC ON MUTE
SAVE CC ON/OFF
V-CHIP MENU ITEM ON/OFF
SAVE V-CHIP ON/OFF
V-CHIP SETUP ©
SLEEPTIMER OFF/15/30/45/60/90/120/180/240
SECURITY STANDARD/HIGH
EXIT ©
3135 015 16021
Page 2
2
CHANNEL INSTALLATION
CHANNEL TV 1-125 (CHANNEL)
CHANNEL RING SAVED/DELETED
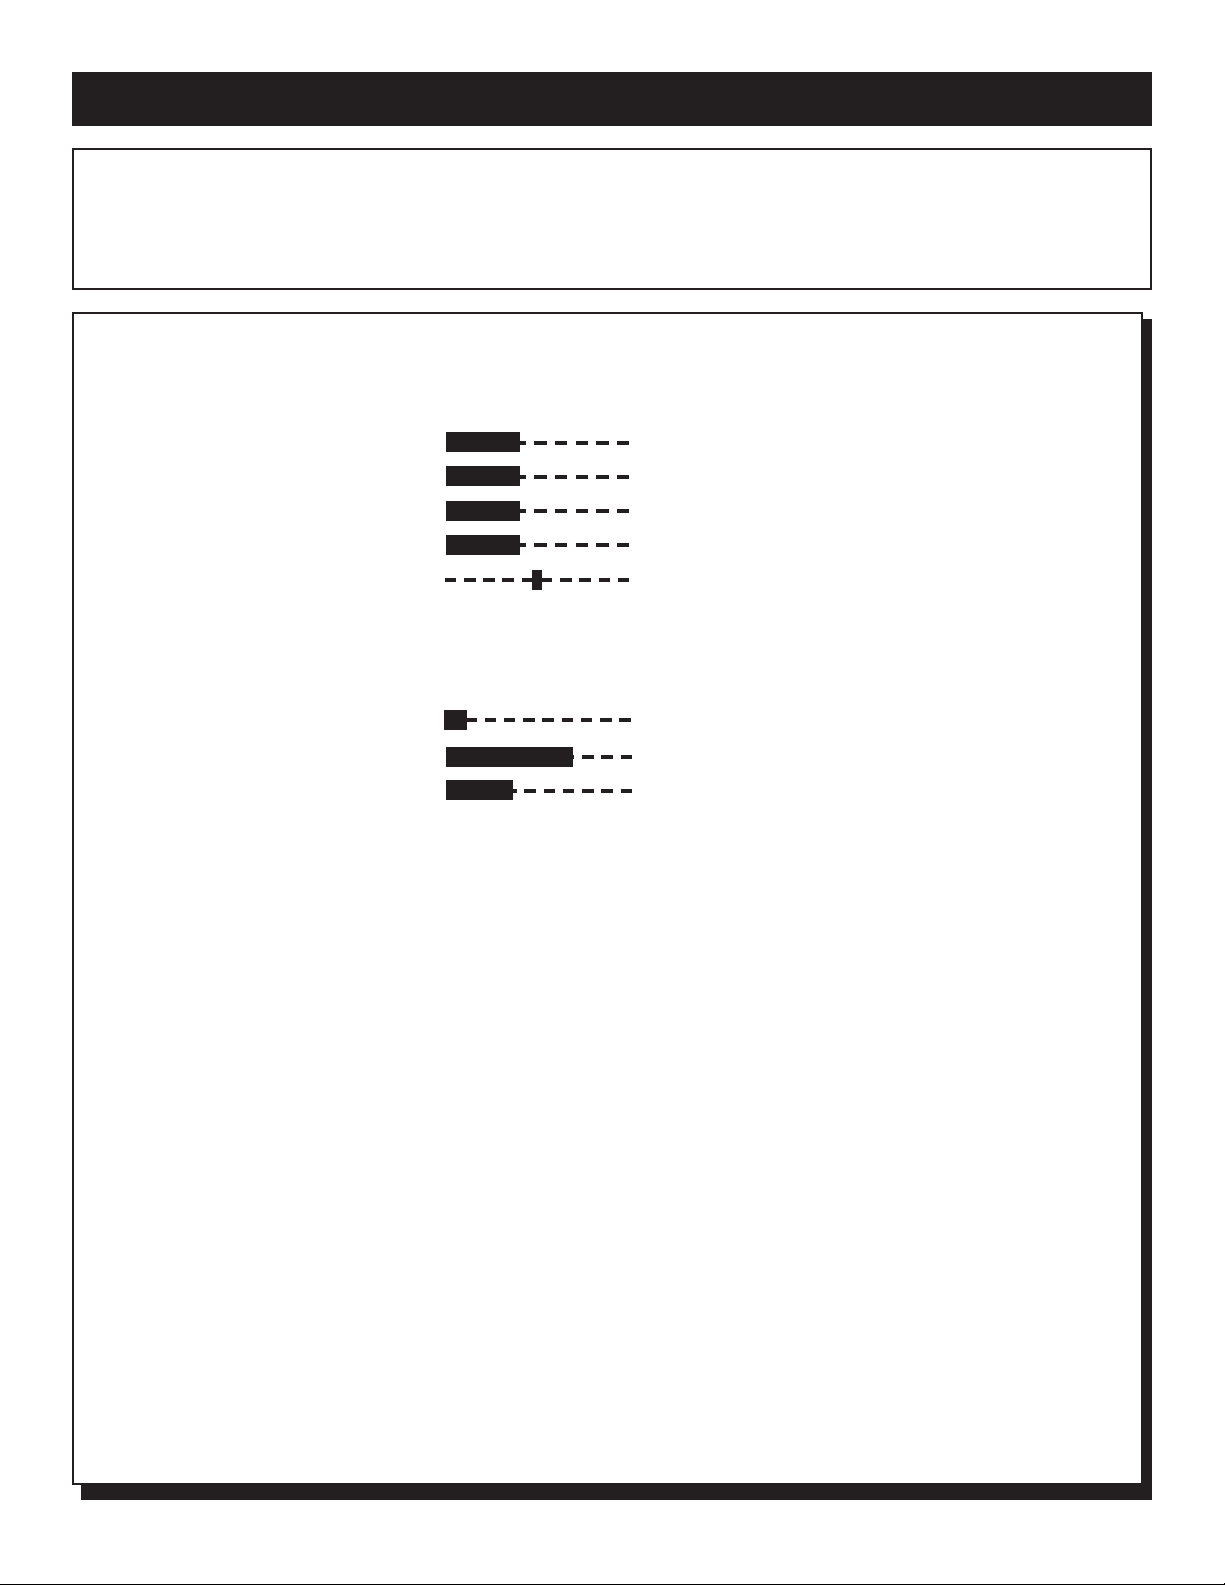
LABEL (- - - - - - - -) Example; CHAN 004
VIDEO BLANK ON/OFF
AUDIO BLANK ON/OFF
AUTO PROGRAM ©
EXIT ©
ON-SCREEN SUB-MENU CONTROLS
WELCOME MESSAGE
MESSAGE ON/OFF
LINE 1 (- - - - - - - - - - - -)
LINE 2 (- - - - - - - - - - - -)
CLEAR ©
EXIT ©
V CHIP SETUP
MASTER DISABLE ON/OFF
TV RATINGS ©
MOVIE RATINGS ©
EXIT ©
MOVIE RATINGS
G VIEW/BLOCK
PG VIEW/BLOCK
PG-13 VIEW/BLOCK
R VIEW/BLOCK
NC-17 VIEW/BLOCK
X VIEW/BLOCK
NR VIEW/BLOCK
EXIT ©
TV RATINGS
TV RATINGS ALL V S L D
TV-Y [__]
TV-Y7 [__] [__]
TV-G [__]
TV-PG [__] [__][__][__][__]
TV-14 [__] [__][__][__][__]
TV-MA [__] [__][__][__]
EXIT ©
TO SELECTA FEATURE IN THE ON-SCREEN MENU
Press the POWER button on the remote control. Next, press the TV SETUPbutton. Then, press the M(enu) button. The TV’s on-screen
menu will appear. Now, use the ▲ / ▼ buttons to scroll to and highlight the feature you want to adjust. Finally, use the § or © buttons to
make the changes. Remember, the TV must be in Commercial mode.
Page 3

3
LANGUAGE - Highlight LANGUAGE, then press the § or © button to
select ENGLISH, ESPANOL, or FRANÇAIS. The Menu and some onscreen displays will now appear in English, Spanish, or French. The language of the Labels and the Channel Guide will not change.
CHANNEL
INSTALL- Highlight to display the CHANNEL INSTAL-
LATION MENU. This menu contains the following adjustable items: Auto
Program, Channel, Channel Program, Input, Label, Video Blank, Audio
Blank and Exit. Refer to CHANNEL INSTALLATION Sub-Menu descriptions.
CABLE
TUNING - Highlight CABLE TUNING, then press the § or ©
button to select ON or OFF. When ON is selected the TV will be set to
receive Cable TV signals. When OFF is selected the TV is set to receive
normal Antenna TV signals.
BRIGHTNESS, COLOR, CONTRAST
, SHARPNESS, TINT -
(Picture Controls) - Highlight the Picture Control you want to adjust, then
press the § or © button to adjust the picture control to the desired level.
NOISE
REDUCTION - Highlight NOISEREDUCTION and press the ©
button to turn the control ON or OFF. Noise Reduction will help to eliminate signal noise (speckle, snow, etc.) from the TV’s picture.
A
VL - Highlight AVL, then press the © button to turn the control ON or
OFF. When ON, AVL will level out the sound being heard, for more consistent listening by reducing the peaks and valleys that occur during program
changes or commercial breaks.
V
OLUME BAR - Highlight VOLUME BAR, then press the © button to
select ON. When you press the VOL(ume) ▲/ ▼ buttons, a bar appears
on the screen, showing the change in sound. (DISPLAYS must be set to
ALL.) Or, press the § button to select OFF. The bar will not appear when
you adjust the volume.
MIN
VOLUME (Minimum Volume) - Highlight MIN VOLUME, then
press the § or © button to set the minimum allowable volume.
MAX
VOLUME (Maximum Volume) - Highlight MAX VOLUME, then
press the § or © button to set the maximum allowable volume.
SWITCH
ON VOLUME - Highlight SWITCH ON VOLUME, then press
the § or © button to select a volume level. The volume will be at this
level every time you turn on the TV. If STANDARD is selected, the last
volume level setting will be used.
SWITCH
ON CHANNEL - Use this feature to have the TV tune to the
same channel every time you turn on the TV. Highlight SWITCH ON
CHANNEL, then press the § or © button to select any channel, 1 - 125.
(Or, use the Number buttons to select a channel between 1 and 99. Enter a
zero before single-digit numbers.) Every time you turn on the TV, the TV
will tune to the channel you selected. Or, press the § button to select
STANDARD. When in STANDARD the TV will tune to the channel it was
on when it turned off.
POWER ON
- Highlight POWER ON, then press the © button to select
FORCED. This disables the POWER button on the front of the TV. The TV
is now activated when the AC power cord is plugged into an outlet. The
SLEEP TIMER feature is disabled on both the remote control and the TV’s
front panel. With a consumer remote, the TV will not turn off or on. Or,
press the § button to select STANDARD. The TV will return to normal
operation. (Make sure KEYBOARD is set to ON.)
CHANNEL
DISPLAY - Highlight CHANNELDISPLAY, then press the
© button to select NONE. This disables any on-screen displays, except
SLEEP TIMER and MUTE. Or, press the § button to select ALL. All onscreen displays (such as the Channel Number, Channel Label, or Channel
Guide) will reappear. Press the © button again to select NUMBER or
LABEL. With NUMBERselected, only the channel number will be displayed. With LABELselected the display will appear as set in the LABEL
control under the CHANNEL INSTALLATION menu.
KEYBOARD LOCK
- Highlight KEYBOARD LOCK, then press the ©
button to select ON or OFF. ON disables all the buttons on the front panel
of the TV. OFF re-enables the buttons on the front panel of the TV.
ESP
- This feature allows you to select a time when the TVwill automatically turn off. The TVmust remain on continuously during the amount of
time you select. If the power is switched off, the ESPtimer will be reinitialized. Highlight ESP, then press the § or © button to select the number of
hours (1 - 99) before the TV turns off. (You also may use the Number buttons to enter the number of hours. For example, press 0, then 6, for six
hours. Enter a zero before single-digit numbers.) Or, press the § button to
select OFF (or press 0, 0). The TVwill not shut off automatically.
AUDIO/VIDEO MUTE
- Highlight AUDIO/VIDEO MUTE, then press
the § or © buttons to select OFF, BLACK, or BLUE. If BLACK or
BLUE is selected, the screen will be solid black or blue when the TVis on
a channel that is not receiving a signal. The sound will be muted on that
channel. Press the § button to select OFF. The normal background static
will appear when the TV is on a channel that is not receiving a signal.
WELCOME
MESSAGE - Highlight WELCOME MESSAGE, then press
the © button to display the Welcome Message Sub-Menu. Within this
Sub-Menu the WELCOME MESSAGE can be turned ON or OFF. Two
lines (LINE 1 and LINE 2) on information can be set to be displayed on the
screen when the TV is powered ON. Use the cursor ▲ ▼ buttons to scroll
characters for the message lines. Clear will eliminate any message written.
CHANNEL
GUIDE - Highlight CHANNEL GUIDE, then press the § or
© button to select OFF, ON, or POWER ON. If you select POWER ON,
the Channel Guide (a list of channels that are labeled) will appear when you
turn on the TV. The Channel Guide will appear also when you press the CH
GDE (Channel Guide) button. If you select ON, the Channel Guide will
appear only when you press the CH GDE button. (Also, if you select
POWER ON or ON, make sure CHANNEL DISPLAYis set to ALL.) If
you select OFF, the Channel Guide will not appear when you press the CH
GDE button. Remember, only the programmed channels that are labeled
(within the CHANNEL INSTALLATION MENU) will appear in the
Channel Guide.
REMINDER
- Highlight REMINDER, then press the © button to select
ON. The current channel number (and Label, if assigned) will appear onscreen at all times. (Make sure CHANNEL DISPLAY is set to ALL and
Closed Captioning is set to OFF.) Or, press the § button to select OFF. The
channel number will appear briefly when the channel is selected, then disappear.
3 DIGIT
ENTRY- Highlight 3 DIGITENTRY, then press the § or ©
button to select ON or OFF. With ONselected the 3 digits can be entered to
select channels above 99.
A/CH-A/V SWITCH - When highlighted, press the § or © button to
select ON or OFF. When ON is selected, pressing the A/CH button will
toggle between the currently viewed channel and the last viewed channel.
CC
- Highlight CC, then press the © button to select the Closed Caption
Mode. The choices are OFF, CC-1, CC-2, or CC on MUTE. CC-1 is the
most common choice for broadcasters. The CC on MUTE will display the
Closed Captioning material when ever the Mute button is pressed.
SA
VE CC (Save Closed Captioning) - Highlight SAVE CC, then press the
© button to select YES. The Closed Captioning mode you selected will be
saved, even if you turn off the TVpower. Or, press the § button to select
NO. Closed Captioning will be turned OFF when you turn off the TV
power.
V
-CHIP MENUITEM (Censoring Control) - Highlight V-CHIP MENU
ITEM, then press the © button to select ON or OFF. When ON, the VCHIP menu options for the user controls will be shown. When OFF is
selected, the user controls will not display the V-CHIP blocking options.
SA
VE V-CHIP (Censoring Control) - Highlight SAVE V-CHIP, then press
the © button to select ON or OFF. ON will save the current V-CHIP settings within the TV’s memory.
V
-CHIP SETUP (Censoring Control) - Highlight V-CHIP SETUP, then
press the © button to display the V-CHIP SETUPSub-Menu. Within this
Sub-Menu, certain types of programming maybe set to VIEWor BLOCK.
See the V-CHIP SETUP Sub-Menu Descriptions for more details.
SLEEPTIMER
- Highlight the SLEEPTIMER, then press the § or ©
button to scroll and select a preset time for the TVto turn itself off. The
options are OFF, 15, 30, 45, 60, 90, 120, 180 or 240 minutes.
SECURITY
- Highlight SECURITY, then press the § or © button to
select STANDARD or HIGH. With STANDARD selected, an IR sequence
(31, 97, 53, MUTE) will access the SETUP MENU. If HIGH is selected,
access to SETUP is only allowed with a Setup Remote.
EXIT
- Highlight EXIT, then press the © button to remove the on-screen
menu from the TV’s screen.
DESCRIPTION OF MAIN ON-SCREEN MENU CONTROLS
Page 4

4
CHANNEL INSTALLATION Sub-Menu
CHANNEL
- When highlighted, enter the desired channel number
using the NUMBERED buttons you wish to edit. The following controls within the CHANNEL INSTALLATION menu will effect the
channel chosen.
CHANNEL
RING - When highlighted, press the § or © buttons to
choose SAVED or DELETED. When the SAVED option is selected, the
channel will remain or be added to the TV’s memory. When the
DELETED option is selected, the channel will be dropped from the
TV’s memory and will not appear when the channels are scanned with
the Channel ▲ or ▼ buttons.
LABEL
- When LABEL is highlighted, press the © button to highlight
the first digit area. Then, press the ▲ or ▼ buttons to scroll a list of
characters (A-Z, 0-9). Press the © button to highlight the next digit and
repeat until the desired label has been entered. When channel changes
occur the label chosen will be displayed.
VIDEO
BLANK - When highlighted, press the § or © buttons to turn
the VIDEO BLANK control ON or OFF. When ON, NO VIDEO will
be shown when this specific channel is tuned. When OFF is selected,
normal viewing will take place.
AUDIO
BLANK - When highlighted, press the § or © buttons to turn
the AUDIO BLANK control ON or OFF. When ON, NO SOUND will
be heard when the channel is tuned. When OFF is selected, the channels
sound will be normal.
AUT
O PROGRAM - Highlight CHANNEL INSTALL, then press the
© button to display the CHANNEL INSTALLATION Sub-Menu.
Highlight AUTOPROGRAM, then press the © button. The TV will
automatically search the signal being received for all available channels. Any channels found will be held in the TV’s memory and can be
accessed using the Channel ▲ or ▼ buttons.
EXIT
- Highlight EXIT, then press the © button to return to the main
menu screen.
WELCOME MESSAGE Sub-Menu
MESSAGE
- Highlight MESSAGE, then press the § or © button to
toggle the Message control ON or OFF. When ON and a message line
has been entered, the Message will be displayed whenever the TV is
powered on. The Message will not time out. A press of any button on
the remote will remove the Message from the screen.
LINE
1 - When highlighted, press the © button to highlight the first
digit of the line. Use the s or t buttons to scroll a list of available characters (A-Z, 0-9). Press the © button to highlight the next character and
repeat the scrolling process until the message has been entered.
LINE
2 - Use to add a second message or extend the first message. Use
the same process as described in LINE 1.
CLEAR
- When highlighted, press the © button to clear or delete any
messages that might be entered in the TV’s memory.
EXIT
- Highlight EXIT, then press the © button to return to the main
menu screen.
V CHIP SETUP Sub-Menu
MASTER
DISABLE - When highlighted, press the § or © buttons to
turn the MASTER DISABLE control ON or OFF. When ON, any
blocked programming will be viewable making the V-CHIP censoring
inoperable.
TV
RATINGS - When highlighted, press the © button to display
another sub-menu with the TV RATING Options. Press the § or ©
buttons to set each rating to VIEW or BLOCK.
TV-Y - (All children -- This program is designed to be appropriate for all children.)
Designed for a very young audience, including children ages 2-6. This type of programming is not expected to frighten younger children.
TV-Y7 - (Directed to Older Children -- This program is designed for children age 7
and above.) It may be more appropriate for children who have acquired the develop-
ment skills needed to distinguish between make-believe and reality. This programming may include mild fantasy and comic violence (FV).
TV-G - (General Audience -- Most parents would find this program suitable for all
ages.) This type of programming contains little or no violence, no strong language,
and little or no sexual dialogue or situations.
TV-PG - (Parental Guidance Suggested -- This program contains material that parents may find unsuitable for younger children.) This type of programming contains
one or more of the following: Moderate violence (V), some sexual situations (S),
infrequent coarse language (L), or some suggestive dialogue (D).
TV-14 - (Parents Strongly Cautioned -- This program contains some material that
many parents would find unsuitable for children under 14 years of age.) This type of
programming contains one or more of the following: intense violence (V), intense
sexual situations (S), strong coarse language (L), or intensely suggestive dialogue (D).
TV-MA - (Mature Audience Only -- This program is specifically designed to be
viewed by adults and therefore may be unsuitable for children under 17.) This type of
programming contains one or more of the following: graphic violence (V), explicit
sexual situations (S), or crude indecent language (L).
MOVIE RATINGS - When highlighted, press the © button to display
another sub-menu with the MOVIE RATING Options. Press the § or
© buttons to set each rating to VIEW or BLOCK.
G: General Audience - All ages admitted. Most parents would find this program
suitable for all ages. This type of programming contains little or no violence, no
strong language, and little or no sexual dialogue or situations.
PG: Parental Guidance Suggested - This programming contains material that par-
ents may find unsuitable for younger children. It may contain one or more of the following: Moderate violence, some sexual situations, infrequent coarse language, or
some suggestive dialogue.
PG-13: Parents Strongly Cautioned - This programming contains material that par-
ents may find unsuitable for children under the age of 13. It contains one or more of
the following: violence, sexual situations, coarse language, or suggestive dialogue.
R: Restricted -This programming is specifically designed for adults. Anyone under
the age of 17 should only view this programming with an accompanying parent or
adult guardian. It contains one or more of the following: intense violence, intense
sexual situations, strong coarse language, or intensely suggestive dialogue.
NC-17: No one under the age of 17 will be admitted. - This type of programming
should be viewed by adults only. It contains graphic violence, explicit sex, or crude
indecent language.
X: Adults Only - This type of programming contains one or more of the following:
very graphic violence, very graphic and explicit or indecent sexual acts, very coarse
and intensely suggestive language.
NR: Not Rated - This is programming without rating encoding. This could be such
programming as commercials, etc.
EXIT - Highlight EXIT, then press the © button to return to the main
menu screen.
DESCRIPTION OF ON-SCREEN SUB-MENU CONTROLS
Page 5

5
CONTROLES DEL MENU PRINCIPAL DE PANTALLA
N
ota: Según el modelo y sus funciones, estarán disponibles todas o algunas de las pantallas y funciones que se
describen a continuación. Para realizar las operaciones de configuración del modo TV Commercial, se puede
usar un control remoto RG4172BK con sus capacidades de modo TV Setup, Guest y Data Communication. Oprima TV
SETUP y luego RECALL para determinar si el televisor está en el modo Commercial. En caso afirmativo, oprima TV
SETUP, 02, 49, 95 y M (menú) y luego los botones +/– para seleccionar el modo Commercial (si desea conocer los
detalles, consulte Instrucciones del Control Remoto RG4172BK, número de parte IB7166E002).
IDIOMA ENGLISH/ESPANOL/FRANÇAIS
INSTAL. CANALES ©
SINTONIA DE BANDA SI/NO
BRILLO 27
COLOR 27
CONTRASTE 27
NITIDEZ 27
TINTE 2
REDUCTION DE RUIDOS SI/NO
NIVELES DE A/V SI/NO
BARRA DE VOLUMEN SI/NO
VOLUMEN MINIMO 3
VOLUMEN MAXIMO 40
CAMBIO DE VOLUMEN 25/ESTANDAR
ACTIVAR CANALES TV CANALES 1-125
ENCENDIDO ESTANDAR/ENFORZADO
EXHIBIR CANALES NUMERO/NOMBRE/TODO/NINGUNO
DESACTIVAR PANEL SI/NO
PROG ENERGIA 1-99/NO
A/V DESACTIVADO NO/NEGRO/AZUL
MENSAJE BIENVENIDA ©
GUIA DE CANALES ENCENDIDO/NO/SI
RECORDATORIO SI/NO
REQ. 3 DIGITOS SI/NO
A/CH A/V SWITCH SI/NO
SUBTITULOS NO/CC-1/CC-2/MUDO
GUARDAR CC SI/NO
V-CHIP ACTIVADO SI/NO
GUARDAR V-CHIP SI/NO
V-CHIP SETUP ©
APAGADO AUTO NO/15/30/45/60/90/120/180/240
SEGURIDAD ESTANDAR/ALTA
SALIDA ©
Page 6

6
INSTALACION DEL CANAL
CANAL TV 1-125 (CANAL)
SORTIJA DE CANALES AGREGADO/BORRADO
ETIQUETA (- - - - - - - -) CANAL 004
DESACTIVAR VIDEO SI/NO
DESACTIVAR AUDIO SI/NO
AUTO PROG. ©
SALIDA ©
CONTROLES DE LOS SUBMENÚS DE PANTALLA
MENSAJE BIENVENIDA
MENSAJE SI/NO
LINEA 1 (- - - - - - - - - - - -)
LINEA 2 (- - - - - - - - - - - -)
BORRAR ©
SALIDA ©
V CHIP SETUP
DESHAB MAESTRO SI/NO
PAUTAS-PADRES ©
CLASIF.PELICULAS ©
SALIDA ©
CLASIF.PELICULAS
G VER CANAL/BLOQUEADO
PG VER CANAL/BLOQUEADO
PG-13 VER CANAL/BLOQUEADO
R VER CANAL/BLOQUEADO
NC-17 VER CANAL/BLOQUEADO
X VER CANAL/BLOQUEADO
NR VER CANAL/BLOQUEADO
SALIDA ©
PAUTAS-PADRES
PAUTAS-PADRES ALL V S L D
TV-Y [__]
TV-Y7 [__][__]
TV-G [__]
TV-PG [__][__][__][__][__]
TV-14 [__][__][__][__][__]
TV-MA [__][__][__][__]
SALIDA ©
PARA SELECCIONAR UNA FUNCIÓN EN EL MENÚ DE PANTALLA
Oprima el botón POWER (encendido) del control remoto. Acontinuación, oprima el botón TV SETUP y luego el botón
M (menú). Aparecerá el menú en la pantalla del televisor. Use entonces los botones ▲ / ▼ para desplazarse y destacar la
función que desea ajustar. Finalmente, use los botones § o © para efectuar los cambios. Recuerde: el televisor debe
estar en modo Commercial.
Page 7

IDIOMA – Destaque este control y oprima luego los botones
§ o ©
para seleccionar ENGLISH (inglés), ESPAÑOL o FRANÇAIS (francés). El menú y algunas
indicaciones en pantalla aparecerán en inglés, español o francés. El idioma de las
etiquetas y de la Guía de Canales no cambia.
INST
AL. CANALES – Destaque este botón para ver el menú de instalación de
canales. Este menú contiene los siguientes elementos ajustables: Canal, Sortija De
Canales, Entradas, etiqueta, Desactivar Video, Desactivar Audio, Auto Prog., o
Salida. Consulte las descripciones del submenú INSTAL. CANALES.
SINTONIA DEBANDA -
Destaque
SINTONIADE BANDA,
y oprima los
botones
§ o ©
para activar (SI) o desactivar (NO) el control
. Cuándo SI se
escoge la TELEVISION se pondrá a recibir las señales de la TELEVISION de
Cable. Cuándo NO se escoge la TELEVISION se pone a recibir las señales normales de la TELEVISION de Antena.
BRILLO, COLOR, CONTRASTE, NITIDEZ y TINTE (Controles de imagen)
– Destaque el control de imagen que desea ajustar y oprima los botones
§ o ©
para ajustar el control de imagen al nivel deseado.
REDUCTION DE RUIDOS
– Destaque REDUCTION DE RUIDOS y oprima
el botón
©
para activar (SI) o desactivar (NO) el control. Este control ayuda a
eliminar el ruido de señal (fondo punteado, lluvia, etc.) de la imagen del televisor.
NIVELES DE
A/V – Destaque NIVELES DE A/V y oprima luego el botón
©
para activar o desactivar el control. Cuando se activa, el control AVL nivela el
sonido para hacerlo más uniforme reduciendo las diferencias entre los niveles del
programa y de los comerciales.
BARRA
DE VOLUMEN – Destaque BARRA DE VOLUMEN y oprima luego
el botón
©
para activarla. Cuando usted oprime los botones VOL (volumen)
▲ /
▼
, aparece en la pantalla una barra que muestra el cambio del sonido (el control
DISPLAYS se debe configurar como TODO). Si no desea ver la barra cuando
ajuste el volumen, oprima el botón
§
para desactivar el control.
V
OLUMEN MÍNIMO – Destaque VOLUMEN MINIMO y oprima luego los
botones
§ o ©
para obtener el mínimo volumen permisible.
V
OLUMEN MÁXIMO – Destaque VOLUMEN MAXIMO y oprima luego los
botones
§ o ©
para obtener el máximo volumen permisible.
CAMBIO DE
VOLUMEN – Destaque CAMBIO DE VOLUMEN y oprima
luego los botones
§ o ©
para seleccionar un nivel de volumen. El volumen se
mantendrá en este nivel cada vez que usted encienda el televisor. Si selecciona
ESTANDAR, se usará el último nivel de volumen configurado.
ACTIV
AR CANALES – Use esta función para que el televisor se sintonice al
mismo canal cada vez que usted lo encienda. Destaque ACTIVAR CANALES y
oprima luego los botones
§ o ©
para seleccionar cualquier canal del 1 al 125.
(También puede usar los botones de números para seleccionar un canal del 1 al
99. Ingrese un cero antes de los números de un solo dígito.) Cada vez que encienda el televisor, el receptor se sintonizará al canal que usted seleccionó. En cambio,
si oprime el botón
§
, seleccionará ESTANDAR. En el modo ESTANDAR, el
televisor se sintonizará al último canal sintonizado antes de apagarlo.
ENCENDIDO
– Destaque ENCENDIDO y oprima luego el botón ©para selec-
cionar ENFORZADO. De esta forma, se desactiva el botón POWER del frente del
televisor y el aparato se activará cuando el cable de alimentación de AC se
enchufe a un tomacorriente. La función APAGADO AUTO se inhibe tanto en el
control remoto como en el panel frontal del televisor. El aparato ya no se encenderá o apagará con el control remoto. Oprima el botón
§
para seleecionar
ESTANDAR. El televisor volverá al modo de operación normal (asegúrese de que
la opción DESACTIVAR PANEL esté configurada en SI).
EXHIBIR CANALES
– Destaque EXHIBIR CANALES y oprima luego el
botón
©
para seleccionar NINGUNO. De esta forma, se inhiben todas las visualizaciones en pantalla, excepto APAGADO AUTO y MUDO. Si oprime en cambio
el botón
§
para seleccionar TODO, reaparecerán todas las visualizaciones en
pantalla (tales como el número y la etiqueta del canal y la Guía de Canales).
Oprima nuevamente el botón
©
para seleccionar NUMERO o NOMBRE. Si
selecciona NUMERO, sólo se mostrará el número de canal. Si selecciona NOMBRE, la pantalla mostrará lo que se configuró en el control NOMBRE del submenú INSTAL. CANALES.
DESACTIV
AR PANEL– Destaque DESACTIVAR PANEL y oprima luego el
botón
©
para seleccionar SI u NO. La opción SI desactiva todos los botones del
panel frontal del televisor. La opción NO vuelve a activar esos botones.
PROG ENERGIA
– Esta función permite seleccionar la hora de apagado
automático del televisor. El aparato debe permanecer continuamente encendido
durante el período que usted seleccione. Si se interrumpe la alimentación eléctrica,
el temporizador ESP se reinicializa. Destaque ESP y oprima luego los botones
§
o ©
para seleccionar la cantidad de horas (1 al 99) antes de que el televisor se
apague. (Usted puede usar también los botones de números para ingresar la cantidad de horas. Ingrese un cero antes de los números de un solo dígito. Por ejemplo,
para seleccionar 6 horas oprima 0 y 6.) Para que el televisor no se apague
automáticamente, oprima el botón
§
y seleccione NO (o oprima 0, 0). El televi-
sor no se apagará automáticamente.
A/V
DESACTIVADO – Destaque A/V DESACTIVADO y oprima luego los
botones
§ o ©
para seleccionar NO, NEGRO o AZUL. Si selecciona NEGRO o
AZUL, la pantalla se verá totalmente negra o azul cuando el televisor esté en un
canal que no recibe señal. El sonido se silenciará al sintonizar ese canal. Oprima el
botón
§
para seleccionar NO. Cuando el televisor esté en un canal que no recibe
señal, se verá el fondo de estática normal.
MENSAJE BIENVENIDA
– Destaque MENSAJE BIENVENIDA (mensaje de
bienvenida) y oprima luego el botón
©
para ver el submenú de mensaje de bienvenida. Dentro de este submenú, se puede activar y desactivar el mensaje de bienvenida. Se pueden configurar dos líneas (LINEA 1 y LINEA 2) de información
para ver en la pantalla cuando se enciende el televisor. Use los botones de cursor
▲ / ▼
para recorrer los caracteres de las líneas del mensaje. El control BORROR
elimina todos los mensajes escritos.
GUIA
DE CANALES – Destaque GUIADE CANALES y oprima luego los
botones
§ o ©
para seleccionar NO, SI o ENCENDIDO. Si selecciona
ENCENDIDO, aparecerá la Guía de Canales (una lista de los canales con etiquetas) cuando encienda el televisor. La Guía de Canales aparecerá también cuando
oprima el botón CH GDE (Guia de Canales). Si selecciona SI, la Guía de Canales
sólo aparecerá cuando usted oprima el botón CH GDE (cuando seleccione
ENCENDIDO u SI, asegúrese de que la opción EXHIBIR CANALES esté configurada en TODO). Si selecciona NO, cuando usted oprima el botón CH GDE no
aparecerá la Guía de Canales. Recuerde: sólo aparecen en la Guía de Canales los
canales programados a los que se asignaron etiquetas (en el menú INSTAL.
CANALES).
RECORDA
TORIO – Destaque RECORDATORIO y oprima luego el botón
©
para seleccionar SI. El número del canal actual (y la etiqueta, si se le asignó)
aparecerán en la pantalla en todo momento (asegúrese de que la opción EXHIBIR
CANALES esté configurada en ALLy la función de subtítulos electrónicos en
NO). En cambio, si oprime el botón
§
para seleccionar OFF, el número de canal
sólo aparecerá brevemente cuando se seleccione el canal y luego desaparecerá.
REQ. 3 DIGIT
OS – Destaque REQ. 3 DIGITOS y oprima luego los botones
§
o ©
para seleccionar SI u NO. Si selecciona SI, se pueden ingresar tres dígitos
para elegir los canales superiores al 99.
A/CH -
A/V SWITCH – Destaque esta función y oprima los botones
§ o ©
para seleccionar SI u NO. Si selecciona SI, al oprimir el botón A/CH el televisor
conmutará entre el canal que se está visualizando y último canal visualizado.
SUBTITULOS
– Destaque SUBTITULOS y oprima luego el botón ©para
seleccionar el modo de subtítulos electrónicos. Las opciones son NO, CC-1, CC-2
o MUDO. CC-1 es la opción más común para los programas de estaciones de televisión. La opción MUDO muestra el material de subtítulos electrónicos cuando se
oprime el botón MUTE (MUDO).
GUARDAR CC
(Guardar subtítulos electrónicos) – Destaque GUARDAR CC y
oprima luego el botón
©
para seleccionar SI. Se guardará así el modo de subtítulos electrónicos que usted seleccionó, aun si desconecta la alimentación del televisor. Si oprime el botón
§
para seleccionar NO, los subtítulos electrónicos se
desactivarán cuando usted apague el televisor.
V
-CHIPACTIVADO (Control de censura) – Destaque V-CHIPACTIVADO y
oprima luego el botón
©
para seleccionar SI u NO. Si selecciona SI, se mostrarán
las opciones del menú V-CHIP para los controles del usuario. Si selecciona NO,
los controles del usuario no mostrarán las opciones de bloqueo de V-CHIP.
GUARDAR
V-CHIP(Control de censura) – Destaque GUARDAR V-CHIP y
oprima luego el botón
©
para seleccionar SI u NO. La opción SI guarda la configuración actual de V-CHIP en la memoria del televisor.
V
-CHIP SETUP (Control de censura) – Destaque V-CHIP SETUP y oprima
luego el botón
©
para ver el submenú V-CHIP SETUP. Dentro de este submenú,
ciertos tipos de programación se pueden configurar como VER CANAL o BLOQUEADO. Si desea más detalles, consulte las descripciones de este submenú.
AP
AGADO AUTO– Destaque la función APAGADO AUTO y oprima luego los
botones
§ o ©
para desplazarse y seleccionar el tiempo preprogramado de apagado automático del televisor. Las opciones son NO, 15, 30, 45, 60, 90, 120, 180
ó 240 minutos.
SEGURIDAD
– Destaque SEGURIDAD y oprima luego los botones
§ o ©
para seleccionar ESTANDAR o ALTA. Si selecciona ESTANDAR, la secuencia
de IR (31, 97, 53, MUDO) accederá al menú SETUP. Si selecciona ALTA, el
acceso a SETUP se permite solamente con un control remoto de configuración.
SALIDA
– Destaque SALIDA y oprima luego el botón ©para eliminar el menú
de la pantalla del televisor.
DESCRIPCIÓN DE LOS CONTROLES DEL MENÚ PRINCIPAL DE PANTALLA
7
Page 8

Submenú INSTAL. CANALES
CANAL – Destaque esta función y, usando los botones de números, ingrese
el número de canal que desea editar. Los siguientes controles del submenú
INSTAL. CANALES afectan al canal elegido.
SORTIJA DE CANALES – Destaque esta función y oprima los botones §
o © para elegir AGREGADO o BORRADO. Si selecciona la opción
AGREGADO, el canal permanecerá o se agregará a la memoria del televisor. Si selecciona la opción BORRADO, el canal se borrará de la memoria
del televisor y no aparecerá cuando se recorran los canales con los botones
de canal
▲ / ▼.
ETIQUET
A – Destaque esta función y oprima el botón © para destacar el
área del primer dígito. Oprima luego los botones
▲ / ▼ para desplazarse
por una lista de caracteres (A-Z, 0-9). Oprima el botón
© para destacar el
dígito siguiente y repita la operación hasta ingresar la etiqueta deseada.
Cuando se cambie de canal, aparecerá la etiqueta elegida.
DESACTIV
AR VIDEO – Destaque esta función y oprima los botones § o
© para activar o desactivar DESACTIVAR VIDEO. Si se activa, NO se
verá VIDEO cuando se sintonice ese canal en específico. Cuando está
desactivado, la visualización es normal.
DESACTIV
AR AUDIO – Destaque esta función y oprima los botones § o
© para activar o desactivar DESACTIVAR AUDIO. Si se activa, NO se
escuchará SONIDO cuando se sintonice ese canal. Cuando está desactivado,
el sonido de los canales será normal.
PROG
AUTO – Destaque INSTAL. CANALES y oprima luego el botón ©
para ver el submenú INSTAL. CANALES. Destaque PROG AUTO y oprima luego el botón
©. El televisor buscará automáticamente la señal que se
recibe en todos los canales disponibles. Todos los canales hallados se
retendrán en la memoria del televisor y se podrán sintonizar con los botones
de canal
▲ / ▼.
SALIDA
– Destaque SALIDA y oprima luego el botón © para volver al
menú principal de pantalla.
Submenú MENSAJE BIENVENIDA
MENSAJE – Destaque MENSAJE y oprima luego los botones § o © para
conmutar entre activación y desactivación del mensaje. Si se activa el control y se ingresa una línea de mensaje, el mismo se verá cada vez que se
encienda el televisor. El mensaje no desaparece automáticamente de la pantalla, sino cuando se oprima cualquier botón del control remoto.
LINEA
1 – Destaque esta opción y oprima el botón © para destacar el
primer dígito de la línea. Use los botones
▲ / ▼ para desplazarse por una
lista de los caracteres disponibles (A-Z, 0-9). Oprima el botón
© para
destacar el siguiente carácter y repita el proceso de desplazamiento hasta
ingresar el mensaje completo.
LINEA
2 – Use esta opción para agregar un segundo mensaje o comple-
mentar el primero. Ejecute el mismo proceso descripto para LINEA 1.
BORRAR – Destaque esta función y oprima el botón © para borrar o
suprimir los mensajes ingresados a la memoria del televisor.
SALIDA
– Destaque SALIDA y oprima luego el botón © para volver al
menú principal de pantalla.
Submenú V-CHIP SETUP
DESHAB MAESTRO – Destaque esta función y oprima los botones § o ©
para activar o desactivar DESHAB MAESTRO. Si se activa, se podrá visualizar toda la programación bloqueada; el control de censura V-CHIP queda
anulado.
P
AUTAS-PADRES – Destaque esta función y oprima el botón © para ver
otro submenú con las opciones de TV RATING. Oprima los botones
§ o ©
para configurar cada clasificación de estaciones de TV como VER CANAL o
BLOQUEADO.
TV-Y– (Todos los niños – Estos programas están producidos para que resulten apropiados para todos los niños.) Están concebidos para una audiencia de
muy corta edad, incluidos los niños de 2 a 6 años. No se considera que este
tipo de programas pueda asustar a los niños más pequeños.
TV-Y7 – (Dirigido a niños mayores – Estos programas están producidos para
niños de 7 años de edad o más.) Pueden resultar más apropiados para niños
que ya desarrollaron la capacidad necesaria para distinguir entre la ficción y la
realidad. Estos programas pueden incluir un nivel moderado de fantasía o violencia en dibujos animados (indicado por “FV”).
TV-G – (Audiencia general – La mayoría de los padres consideran que estos
programas son apropiados para todas las edades.) Este tipo de programas
prácticamente no incluyen violencia, diálogos o situaciones sexuales y el
lenguaje no es fuerte.
TV-PG – (Orientación paterna sugerida – Estos programas contienen material que los padres pueden considerar poco apropiado para los niños más
pequeños.) Este tipo de programas incluyen uno o más de los siguientes ele-
mentos: violencia moderada (indicada por “V”), algunas situaciones sexuales
(“S”), lenguaje grosero poco frecuente (“L”) o algunos diálogos sugestivos
(“D”).
TV-14 – (Advertencia estricta a los padres – Estos programas contienen material que muchos padres no consideran apropiado para niños de menos de 14
años de edad.) Este tipo de programas incluyen uno o más de los siguientes
elementos: violencia intensa (indicada por “V”), situaciones sexuales intensas
(“S”), lenguaje fuerte y grosero (“L”) o diálogos intensamente sugestivos
(“D”).
TV-MA– (Audiencia adulta solamente – Estos programas están específicamente producidos para adultos; por lo tanto, pueden ser inapropiados para
niños menores de 17 años.) Este tipo de programas incluyen uno o más de los
siguientes elementos: violencia gráfica (indicada por “V”), situaciones sexuales
explícitas (“S”) o lenguaje crudo e indecente (“L”).
CLASIF
. PELICULAS – Destaque esta función y oprima el botón © para
ver otro submenú con las opciones de CLASIF. PELICULAS. Oprima los
botones
§ o © para configurar cada clasificación cinematográfica como VER
CANAL o BLOQUEADO.
G: Audiencia general – Apto para todas las edades. La mayoría de los padres
consideran que este programa es adecuado para todas las edades. Este tipo de
programas prácticamente no contiene violencia, diálogos o situaciones sexuales
y el lenguaje no es objetable.
PG: Guía paterna sugerida – Estos programas contienen material que los
padres pueden considerar no adecuado para los niños más pequeños. Pueden
incluir uno o más de los siguientes elementos: violencia moderada, algunas
situaciones sexuales, lenguaje grosero poco frecuente o algunos diálogos sugestivos.
PG-13: Advertencia estricta a los padres – Estos programas contienen material que muchos padres no consideran adecuado para niños menores de 13 años
de edad. Incluyen uno o más de los siguientes elementos: violencia, situaciones
sexuales, lenguaje grosero o diálogos sugestivos.
R: Restringido – Estos programas están específicamente producidos para adultos. Los menores de 17 años sólo deben verlos en compañía de sus padres o de
adultos responsables. Incluyen uno o más de los siguientes elementos: violencia intensa, situaciones sexuales intensas, lenguaje muy grosero o diálogos
intensamente sugestivos.
NC-17: No se admiten menores de 17 años – Este tipo de programas sólo
debe ser vistos por adultos. Incluyen violencia gráfica, sexo explícito o lenguaje crudo e indecente.
X: Sólo para adultos – Este tipo de programas contienen uno o más de los
siguientes elementos: violencia muy gráfica, actos sexuales muy gráficos y
explícitos o indecentes, lenguaje muy grosero e intensamente sugestivo.
NR: Sin clasificación – Esta programación no tiene codificación de clasificación. Se trata de programas tales como anuncios comerciales, etc.
EXIT
– Destaque EXIT y oprima luego el botón © para volver al menú prin-
cipal de pantalla.
DESCRIPCIÓN DE LOS CONTROLES DE LOS SUBMENÚS DE PANTALLA
8
 Loading...