

Philips ThumbCam DMVC1300K, DMVC1300K/00 Instructions For Use Manual
Instructions for use
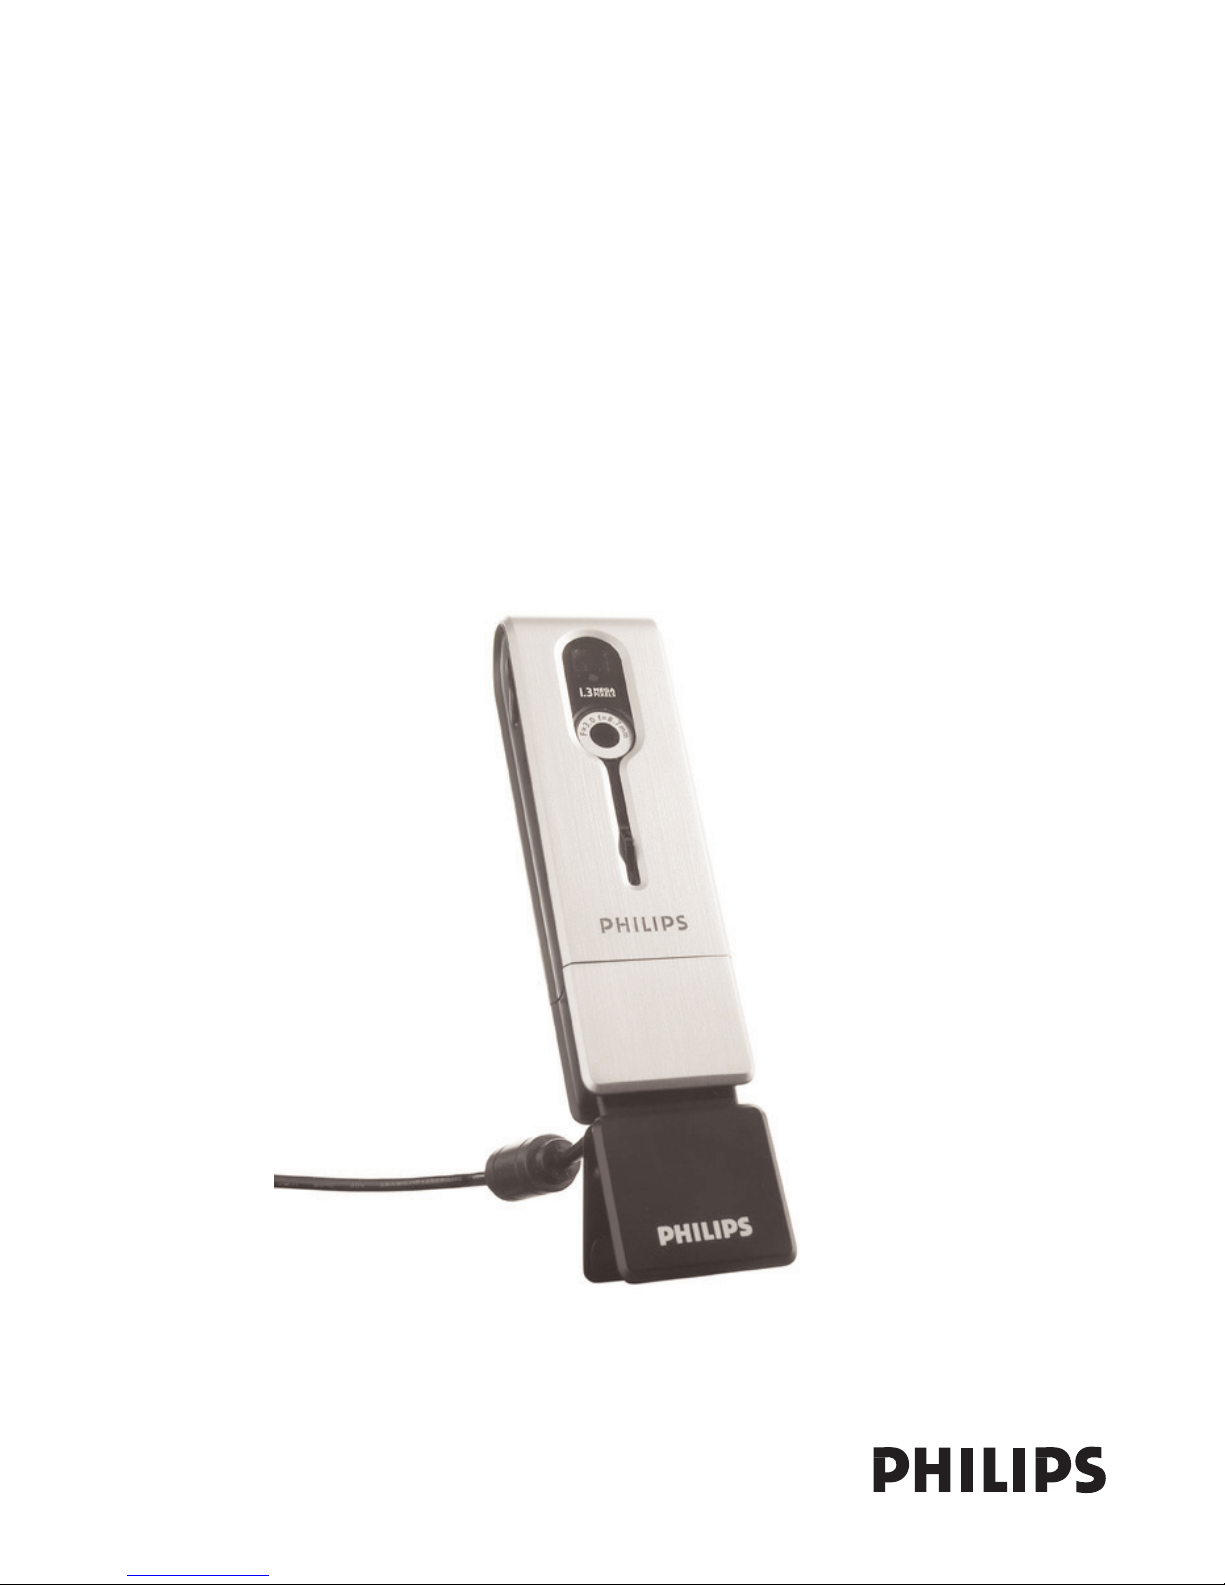
Philips ThumbCam for laptops

ENGLISH2
Introduction
Philips ThumbCam for laptops
The Philips ThumbCam for laptops you have just purchased is manufactured to the highest
standards and will give you years of trouble-free use.This new digital camera is the most
advanced means of recording quality movies or still photos quickly and easily on your laptop.
After installation the camera can be used as a:
• laptop camera for video chat and video mail;
• digital camera for taking high quality photos;
• video camera for capturing video clips;
• 128 MB removable memory drive.
Please read the following instructions carefully.They provide a step-by-step description of the
installation process and explain how to use the Philips ThumbCam.

Contents
Introduction......................................................................................................................2
1.Things you should know.............................................................................................................................................5-6
Safety precautions........................................................................................................................................................................5
Copyright..........................................................................................................................................................................................5
Pack contents.................................................................................................................................................................................6
2. Quick start...............................................................................................................7-10
3. Functional overview .............................................................................................11-12
4. Installation.............................................................................................................13-18
Installing the camera software....................................................................................................................................13-14
Connecting the camera to your laptop.......................................................................................................................15
Connecting the neck strap..................................................................................................................................................15
Recharging the battery ..........................................................................................................................................................16
Camera settings..................................................................................................................................................................16-18
5. Operating the camera..........................................................................................18-24
Tu r ning the camera on and off.........................................................................................................................................18
Taking photos ..............................................................................................................................................................................19
Setting the self-timer...............................................................................................................................................................19
Making a video recording.....................................................................................................................................................20
Clearing photos and video recordings..................................................................................................................20-21
Tr anferring photos/video clips to your laptop..................................................................................................21-23
Using the camera as a removable memory drive- USB mode .....................................................................23
Using the camera as a laptop-camera- PC mode .................................................................................................23
Switching from PC mode to USB mode while connected to the laptop...............................................24
Switching from USB mode to PC mode while connected to the laptop...............................................24
6. Using the applications..........................................................................................25-29
Philips VLounge...........................................................................................................................................................................25
Video Chat............................................................................................................................................................................26-27
Microsoft®Netmeeting .........................................................................................................................................26-27
Microsoft
®
MSN Messenger and Yahoo!®Messenger...............................................................................27
Image.........................................................................................................................................................................................27-28
Philips Photo Manager............................................................................................................................................27-28
Video.........................................................................................................................................................................................28-29
Philips VRecord ...........................................................................................................................................................28-29
7. Problem solving..........................................................................................................30
8.Technical specifications..............................................................................................31
ENGLISH 3

9. Important information.........................................................................................32-33
Disclaimer......................................................................................................................................................................................32
FCC compliance ........................................................................................................................................................................32
End of life directives................................................................................................................................................................33
System requirement................................................................................................................................................................33
Disclaimer of warranty...........................................................................................................................................................33
Limitation of damages............................................................................................................................................................33
10. Helpline.....................................................................................................................34
11.Warranty ...................................................................................................................35
ENGLISH4

1.Things you should know
• Please read the following instructions carefully, and retain them for future reference.
• It may be helpful to have the instructions for use for the laptop at hand for reference.
Safety precautions
Observe the following guidelines to ensure that the camera will operate safely and to prevent
defects.
• Do not use your camera in environments outside the following range: temperature: 0°C
to 40°C, relative humidity: 45% ~ 85%.
• Do not use or store your camera in/under:
– direct sunlight exposure;
– very humid and dusty environment;
– near any kind of heat sources;
• If your camera gets wet, dry it with soft cloth as soon as possible.
• Salt seawater may cause severe camera damage.
• If the lens or viewfinder is dirty, please use the lens brush or soft cloth to clean the lens.
Do NOT touch the lens with your fingers.
• Clean the outside of the camera with a soft cloth.
• Do NOT use cleaning fluids based on alcohol, methylated spirit, ammonia, etc.
• Do NOT attempt to disassemble or repair your camera by yourself. Do not open the
camera. In the event of technical difficulties return it to your Philips retailer.
• Do NOT use your camera outdoors when it is raining or snowing.
• Do NOT use your camera in the water.
•Protect the camera from oil, vapour, steam, moisture, and dust.
•Never point the camera lens at the sun.
Copyright
Copyright© 2003 by Philips Consumer Electronics B.V. All rights reserved. No part of this
publication may be reproduced, transmitted, transcribed, stored in a retrieval system or translated
into any language or computer language, in any form or by any means, electronic, mechanical,
magnetic, optical, chemical, manual or otherwise, without prior written permission from Philips.
Brands and product names are trademarks or registered trademarks of their respective
companies.
ENGLISH 5
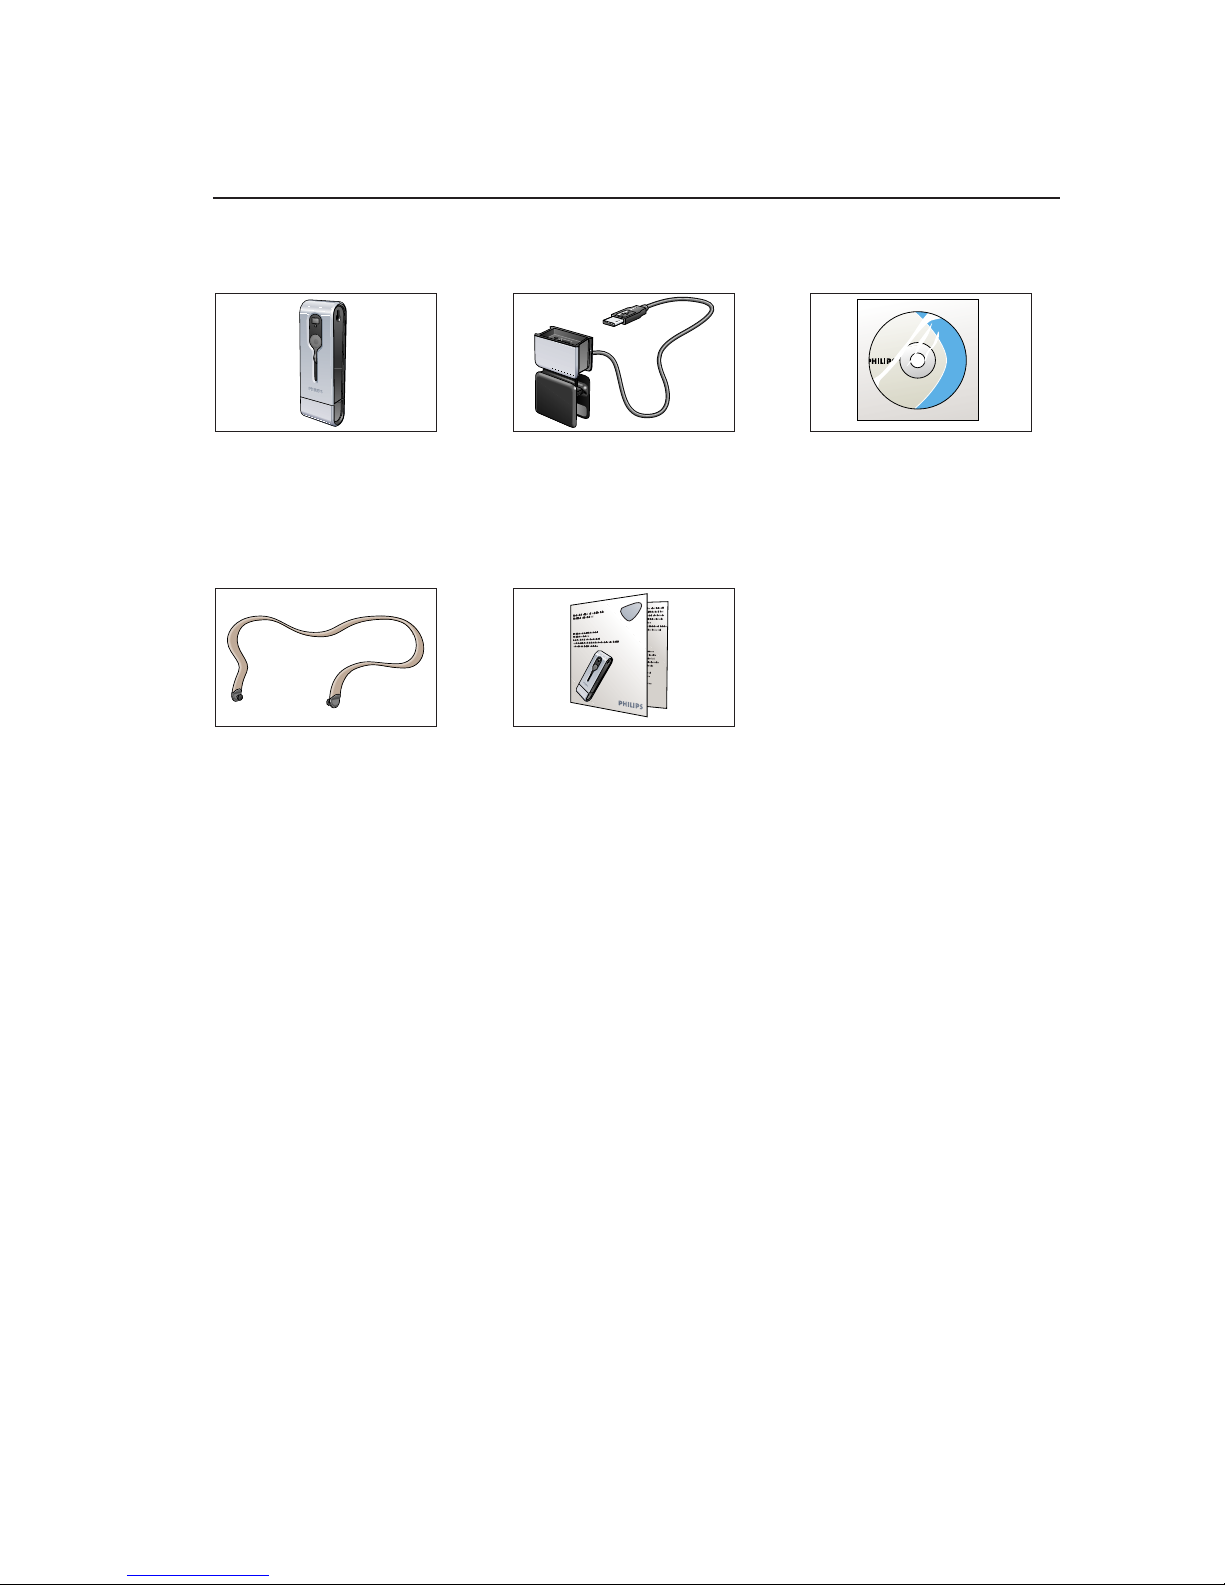
Pack contents
Please check that the following items are packed in the Philips ThumbCam box.
They are provided to help you set up and use your Philips ThumbCam.
The Philips ThumbCam Laptop clip with CD-ROM containing
for laptops USB cable attached the Philips installation
software, application
software and manual
Neckstrap Quick Installation Guide
Thum
bCam
Thumb
Cam
ThumbCam
iioiioiioi oiiioi oi ioioiiio ioio
iioiiiiioi oiiioiioi ioi
iioiiiiioioo
1 iioiiiiioioo oioioi io
2 ioioiio oioioiii
3 oioiioioi ioioioioi oioiioioiioioiooi
oiiooiiii oiio iioiiioi ioioiioiioo
iioiioiioi
ENGLISH6
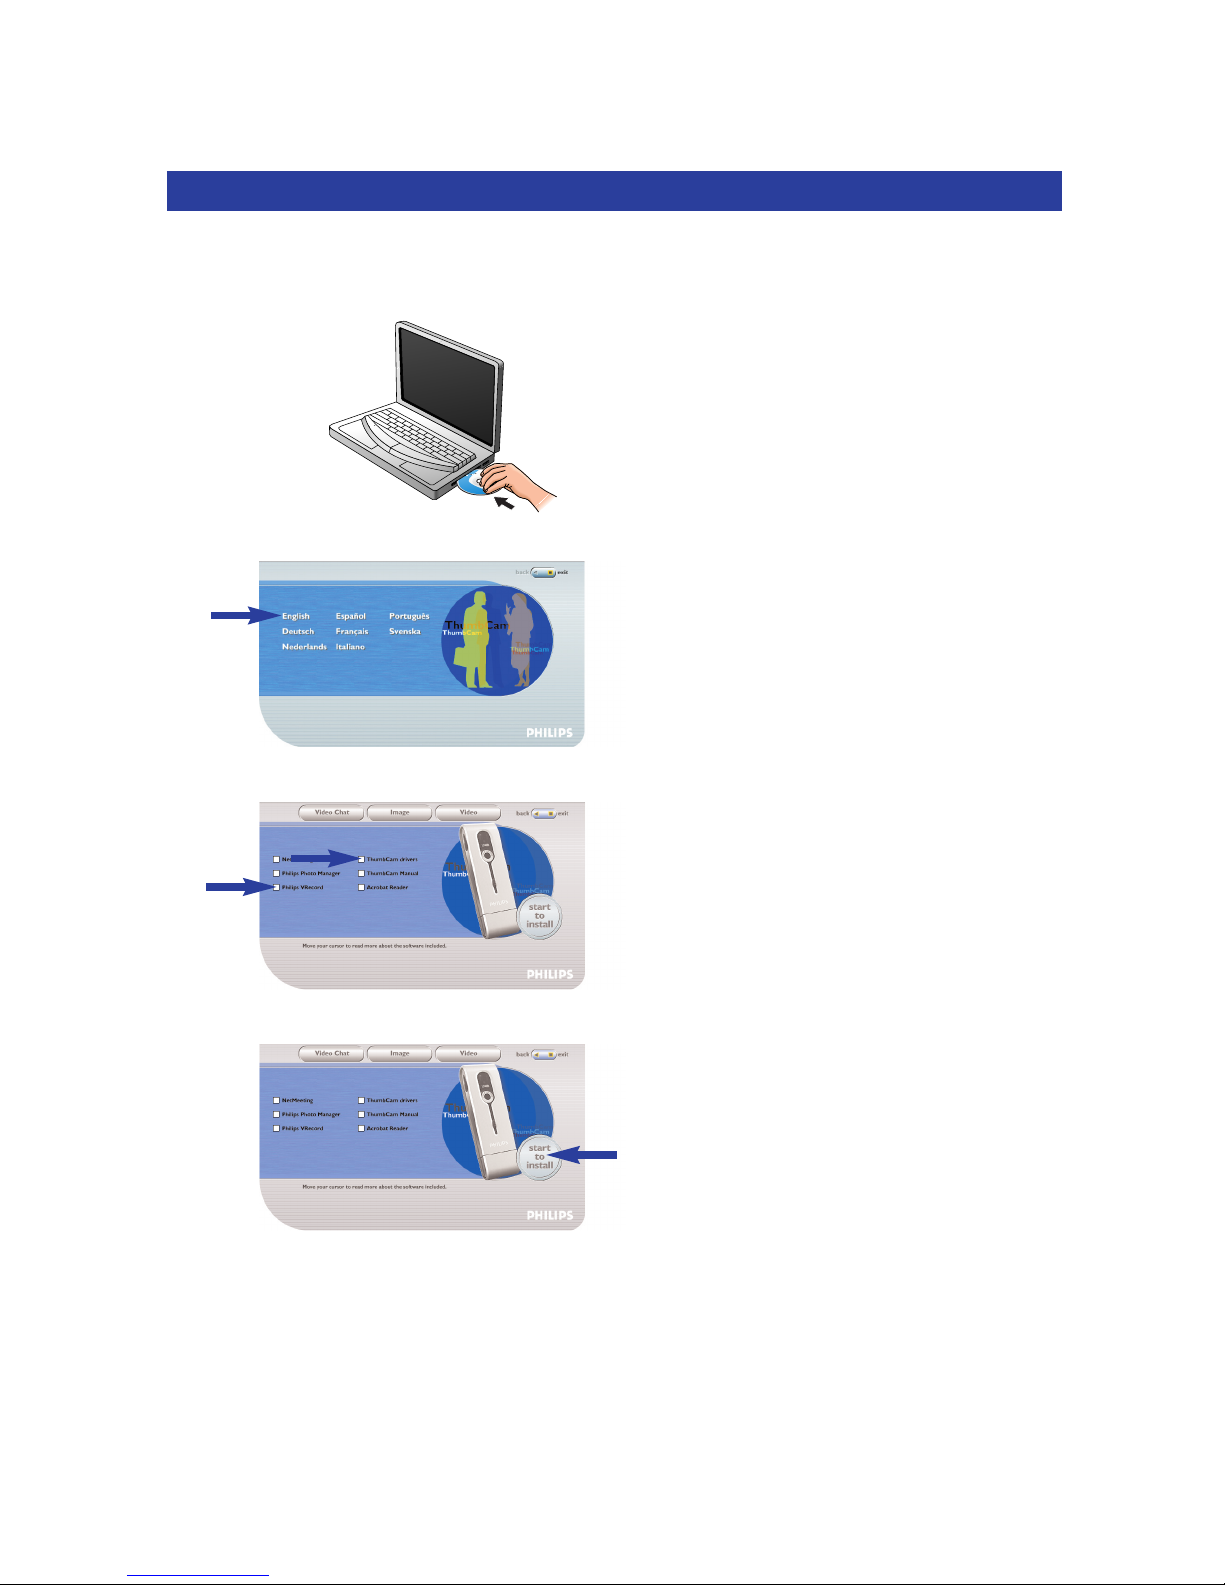
2. Quick start
Installation
1 Unplug all your USB devices (except USB keyboard and USB mouse).
2 Place the installation CD-ROM in your computer’s CD-ROM-/DVD drive.
3 Select your language.
4 Select at least ‘ThumbCam drivers’ and ‘Philips Photo Manager’.
5 Click ‘Start to install’ to start installation.
Note! If the the ‘Language Selection’ screen does not appear automatically, open Windows Explorer
and double-click the ‘Autorun.exe’ icon in the CD-ROM directory.
ENGLISH 7

Charging
1 Turn on the laptop.
2 Be sure to run the installation CD-ROM first, before connecting the camera to the laptop.
3 Slide the lens cover downwards.
4 Connect the camera USB connector directly to the USB port of the laptop.
> appears on the display.The battery will now be charged.
Taking photos
1 Slide the lens cover downwards.
2 Press the Mode button to turn on the camera.
3 Frame the subject though the viewfinder.
US8
ENGLISH8
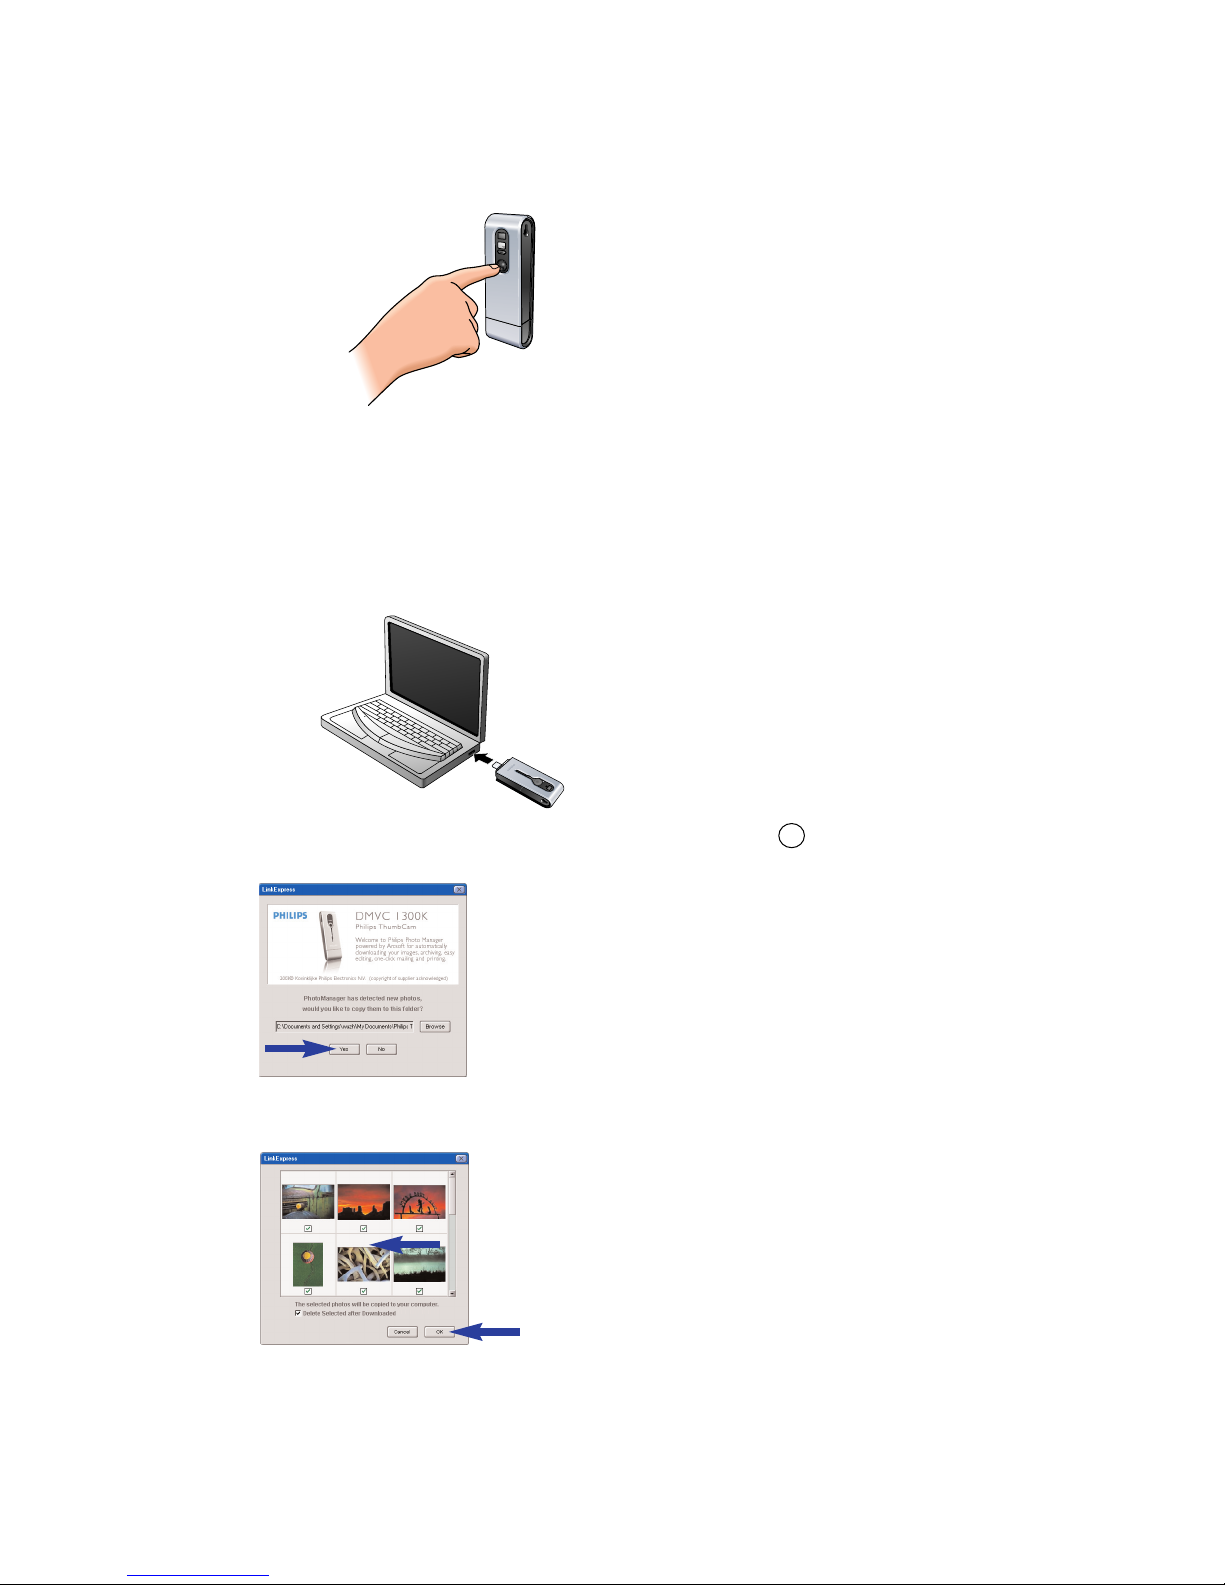
4 Press the Shutter button.
> The Timer LED blinks once (red).
> You will hear a beep when the photo is taken.
Transferring photos/video clips to your laptop
1 Make sure the PC is turned on and that ‘ThumbCam drivers’ and ‘Philips Photo Manager’
are installed.
2 Connect the camera USB connector directly to the USB port of the laptop.
> The camera turns on automatically and the display shows .
> The following screen will appear.
4 If you wish to start transferring press ‘YES’.
>The following screen will appear.
5 Select the photos you wish to transfer and press ‘OK’.
US8
ENGLISH 9

> If the transfer is complete the following screen will appear.
Notes!
– If the ‘Philips ThumbCam’ screen does not appear, you can start Philips Photo Manager and click on
the 'Get Photo' icon. Select you camera (‘Philips ThumbCam’) to start the transfer.
– For more information on transferring/viewing photos and video clips see chapter ‘Transferring
photos/video clips to your laptop’ under ‘5. Operating the camera’.
ENGLISH10
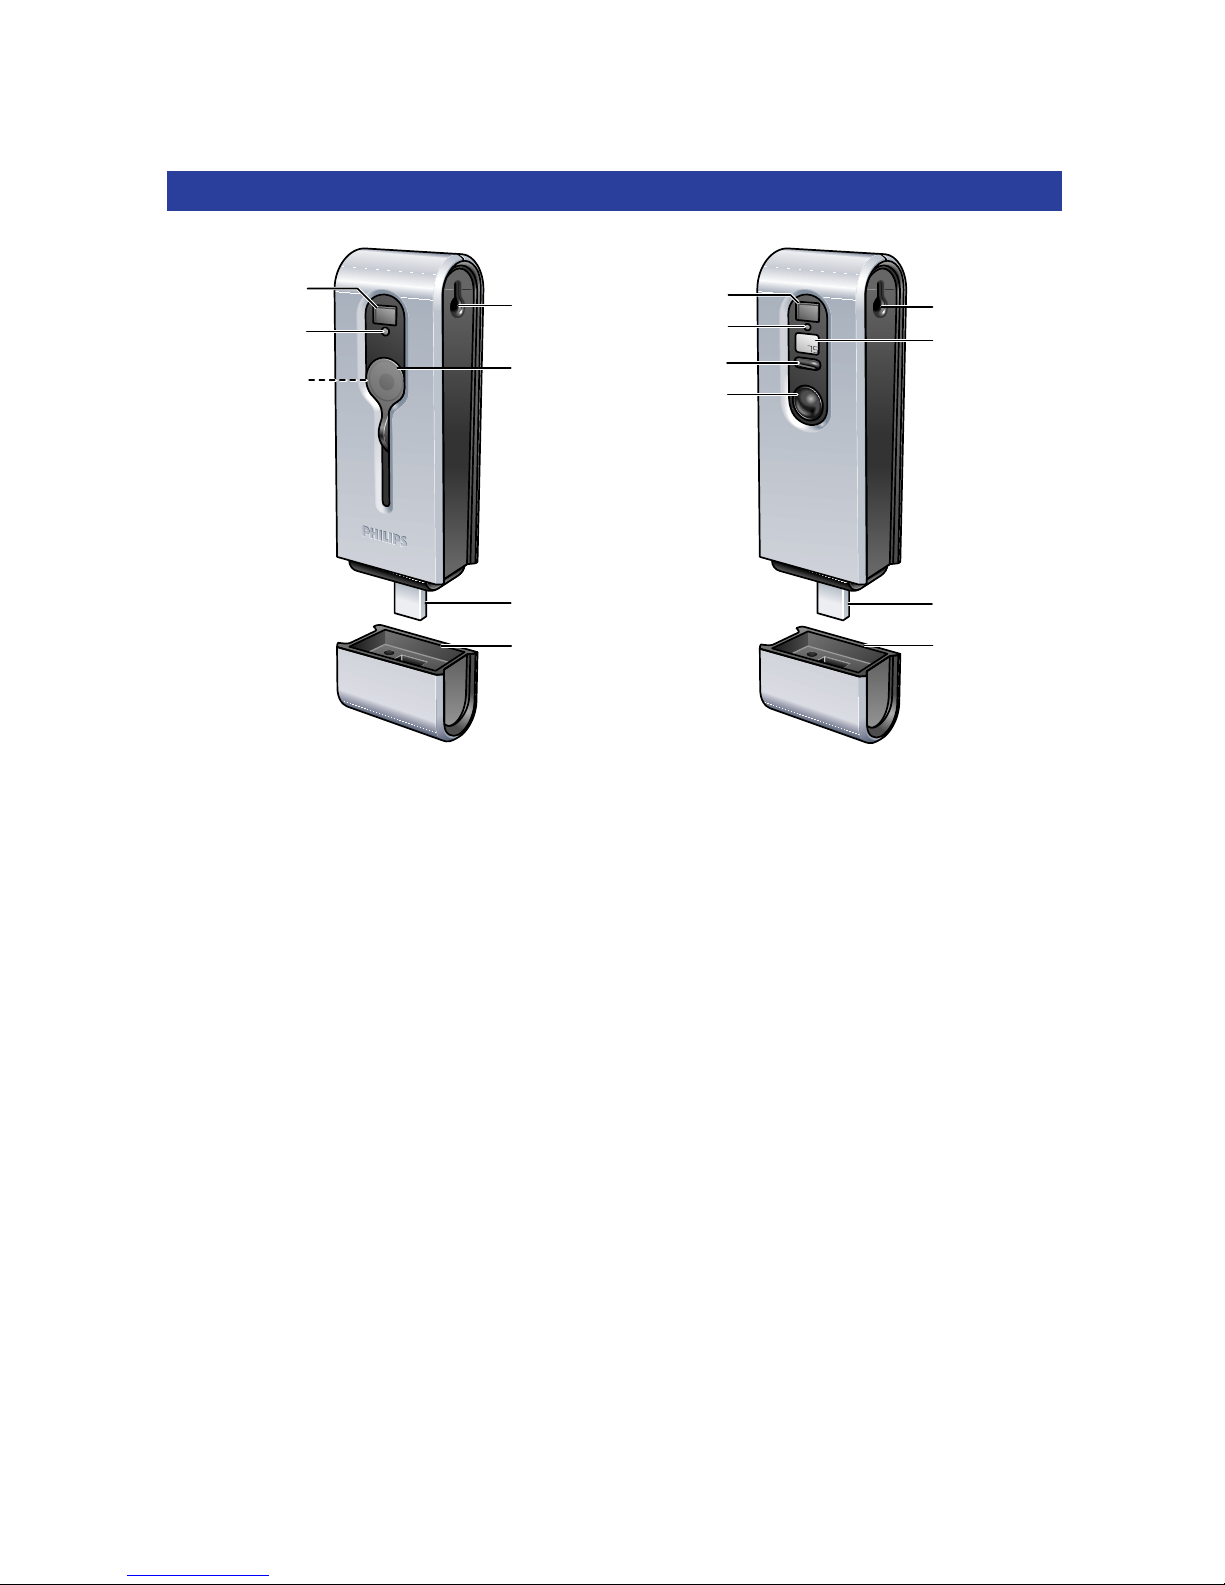
3. Functional overview
1 Viewfinder
for framing you photo subject
2 Timer LED
– blinks red for 10 seconds when the self-timer has been set
– blinks red once when a photo is taken
3 Lens
4 Strap hole
5 Lens cover
6 USB connector
for connecting the camera to the USB connector in the laptop clamp or
directly to the USB port of the laptop
7 USB cover
8 Charge LED
blinks blue when the battery is being recharged
9 Mode button
– for turning the camera on and off
– for changing camera settings
10 Shutter button
for taking photos and making video recordings
0
4
7
6
9
1
8
!
1
2
3
4
5
7
6
ENGLISH 11
 Loading...