How it Works
Log In / Sign Up
Buy Points
How it Works
FAQ
Contact Us
Questions and Suggestions
Users
Philips
Loading...
T
TAVS300/00
32
TAVS300/93
3
TAVS500
3
TAVS500/00
32
TAVS500/93
3
TAVS510/93
2
TAVS700
7
TAVS700/10
30
TAVS700/61
3
TAVS700/93
4
TAVS700/98
3
TAW6205/10
34
TAW6505
4
TAW6505/10
32
TAW8506/10
34
TAX3206/37
3
TAX3206/67
2
TAX3206/70
2
TAX3206/73
TAX3206/78
5
TAX3206/94
TAX3206/98
2
TAX3305/73
2
TAX3305/78
3
TAX3705/73
2
TAX3705/78
3
TAX4105/94
2
TAX4205/94
2
TAX4207/10
3
tax5206
TAX5206/37
3
TAX5206/67
2
TAX5206/70
2
TAX5206/73
TAX5206/78
5
TAX5206/94
TAX5206/98
2
TAX7207/10
35
TAZ5000
TAZ6000
TB216
TBH318
TBS047
TBS068
TBS105
TBS147
TBS160
TBS 166
TBS257
TBS260
TBS288
2
TBS299
TBS315
TBS318
2
TBS330
TBS340
TBS460
TBS490
TBS528
TBS600
TBS690
TBS741
TBS869
TC
TC118
TC20
TC27PV2
2
TC309815
TC30PV2
2
TC3236S
TC32PV2
2
TC349815
TC34981599
TC34PV2
2
TC 36PV2
2
TC 36PV2 U
TC4.1U
TC5.1L
TC60IX1
TC60XX1
TC70
TC7.1U CA
TC8275X
2
TC8276
TC8276X
TC8277
TC8277X
2
TC8278
TC8278X
TC8500
TC8600
TC8800
TC9225C
TCD128
TCD128/B0AFAAAC
TCD128/B0AFAAAD
TCD128/BUAFAAAA
TCD128/HDAEAAGP
11
TCD138
TC-P42X1X
Loading...
Loading...
Nothing found
TBS288
Brochure
120 pgs
14.57 Mb
0
User Guide
4 pgs
2.2 Mb
0
Table of contents
Loading...
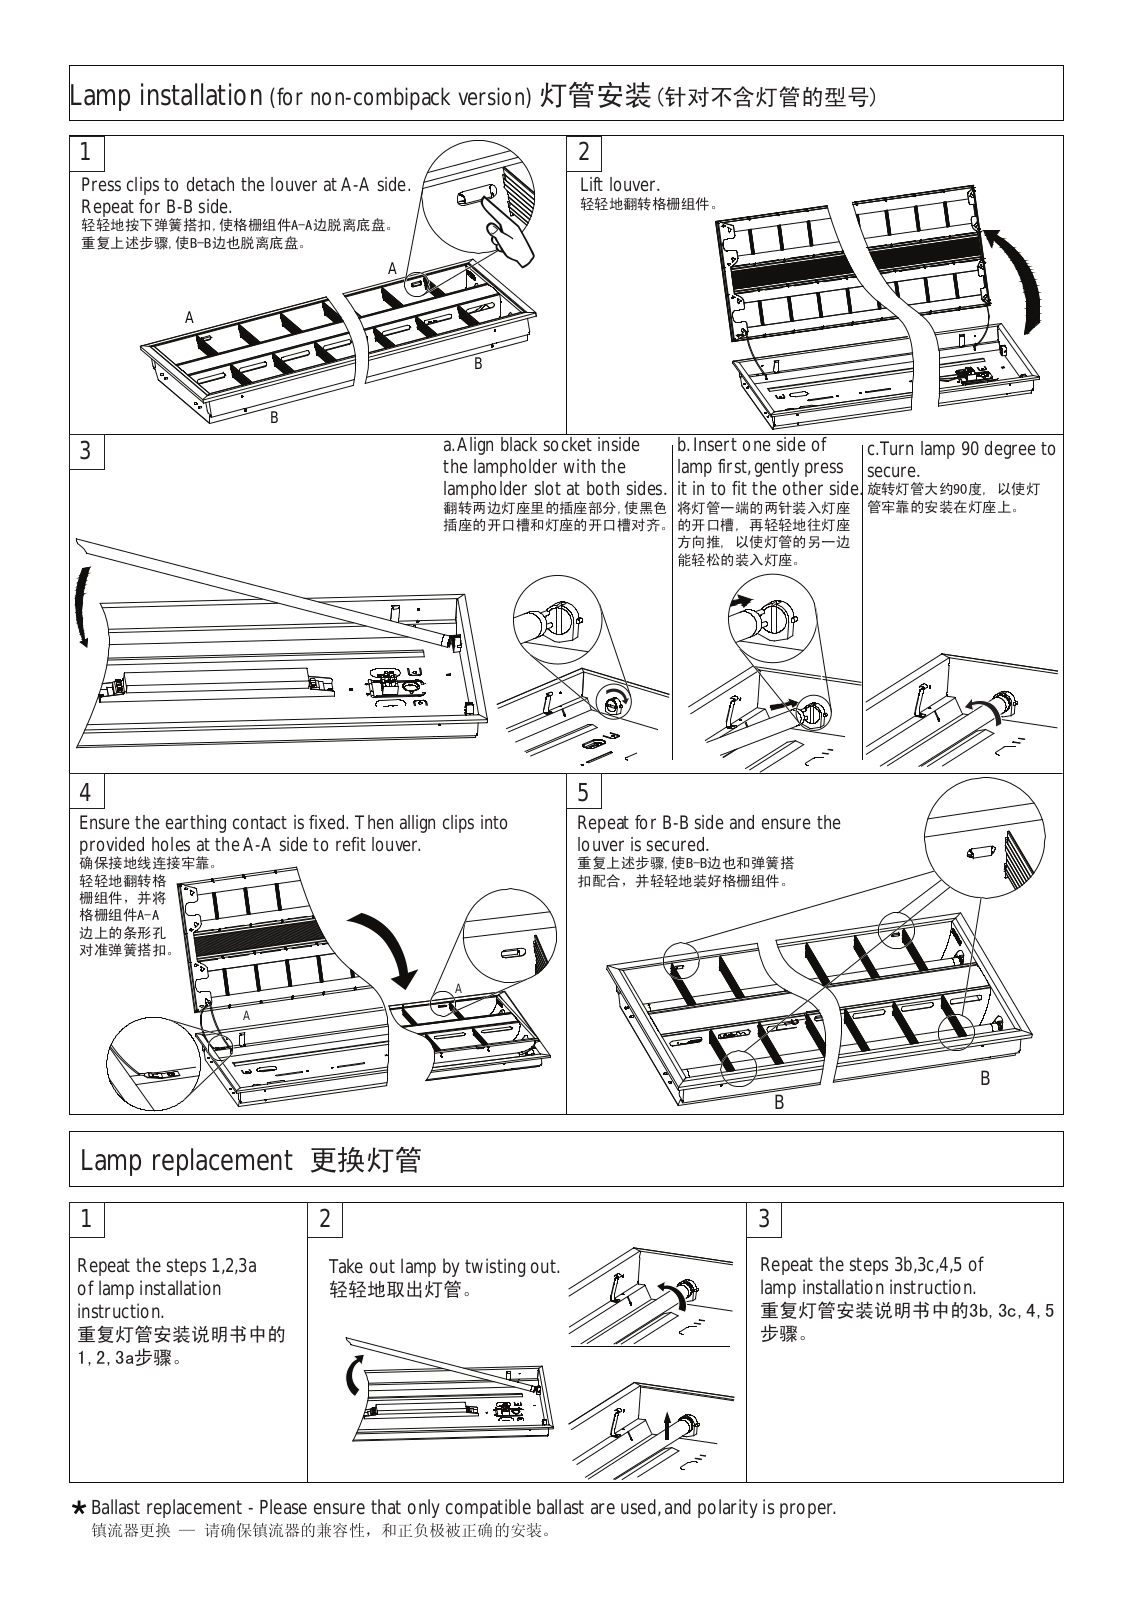
Philips TBS288 User Guide
...
Philips User Guide
Download
Specifications and Main Features
Frequently Asked Questions
User Manual
Download
Page 1
Page 2
Page 3
Page 4
Loading...
+
hidden pages
Unhide
You need points to download manuals.
1 point = 1 manual.
You can buy points or you can get point for every manual you upload.
Buy points
Upload your manuals
 Loading...