

Philips SWW1890/27 Quick Start Guide
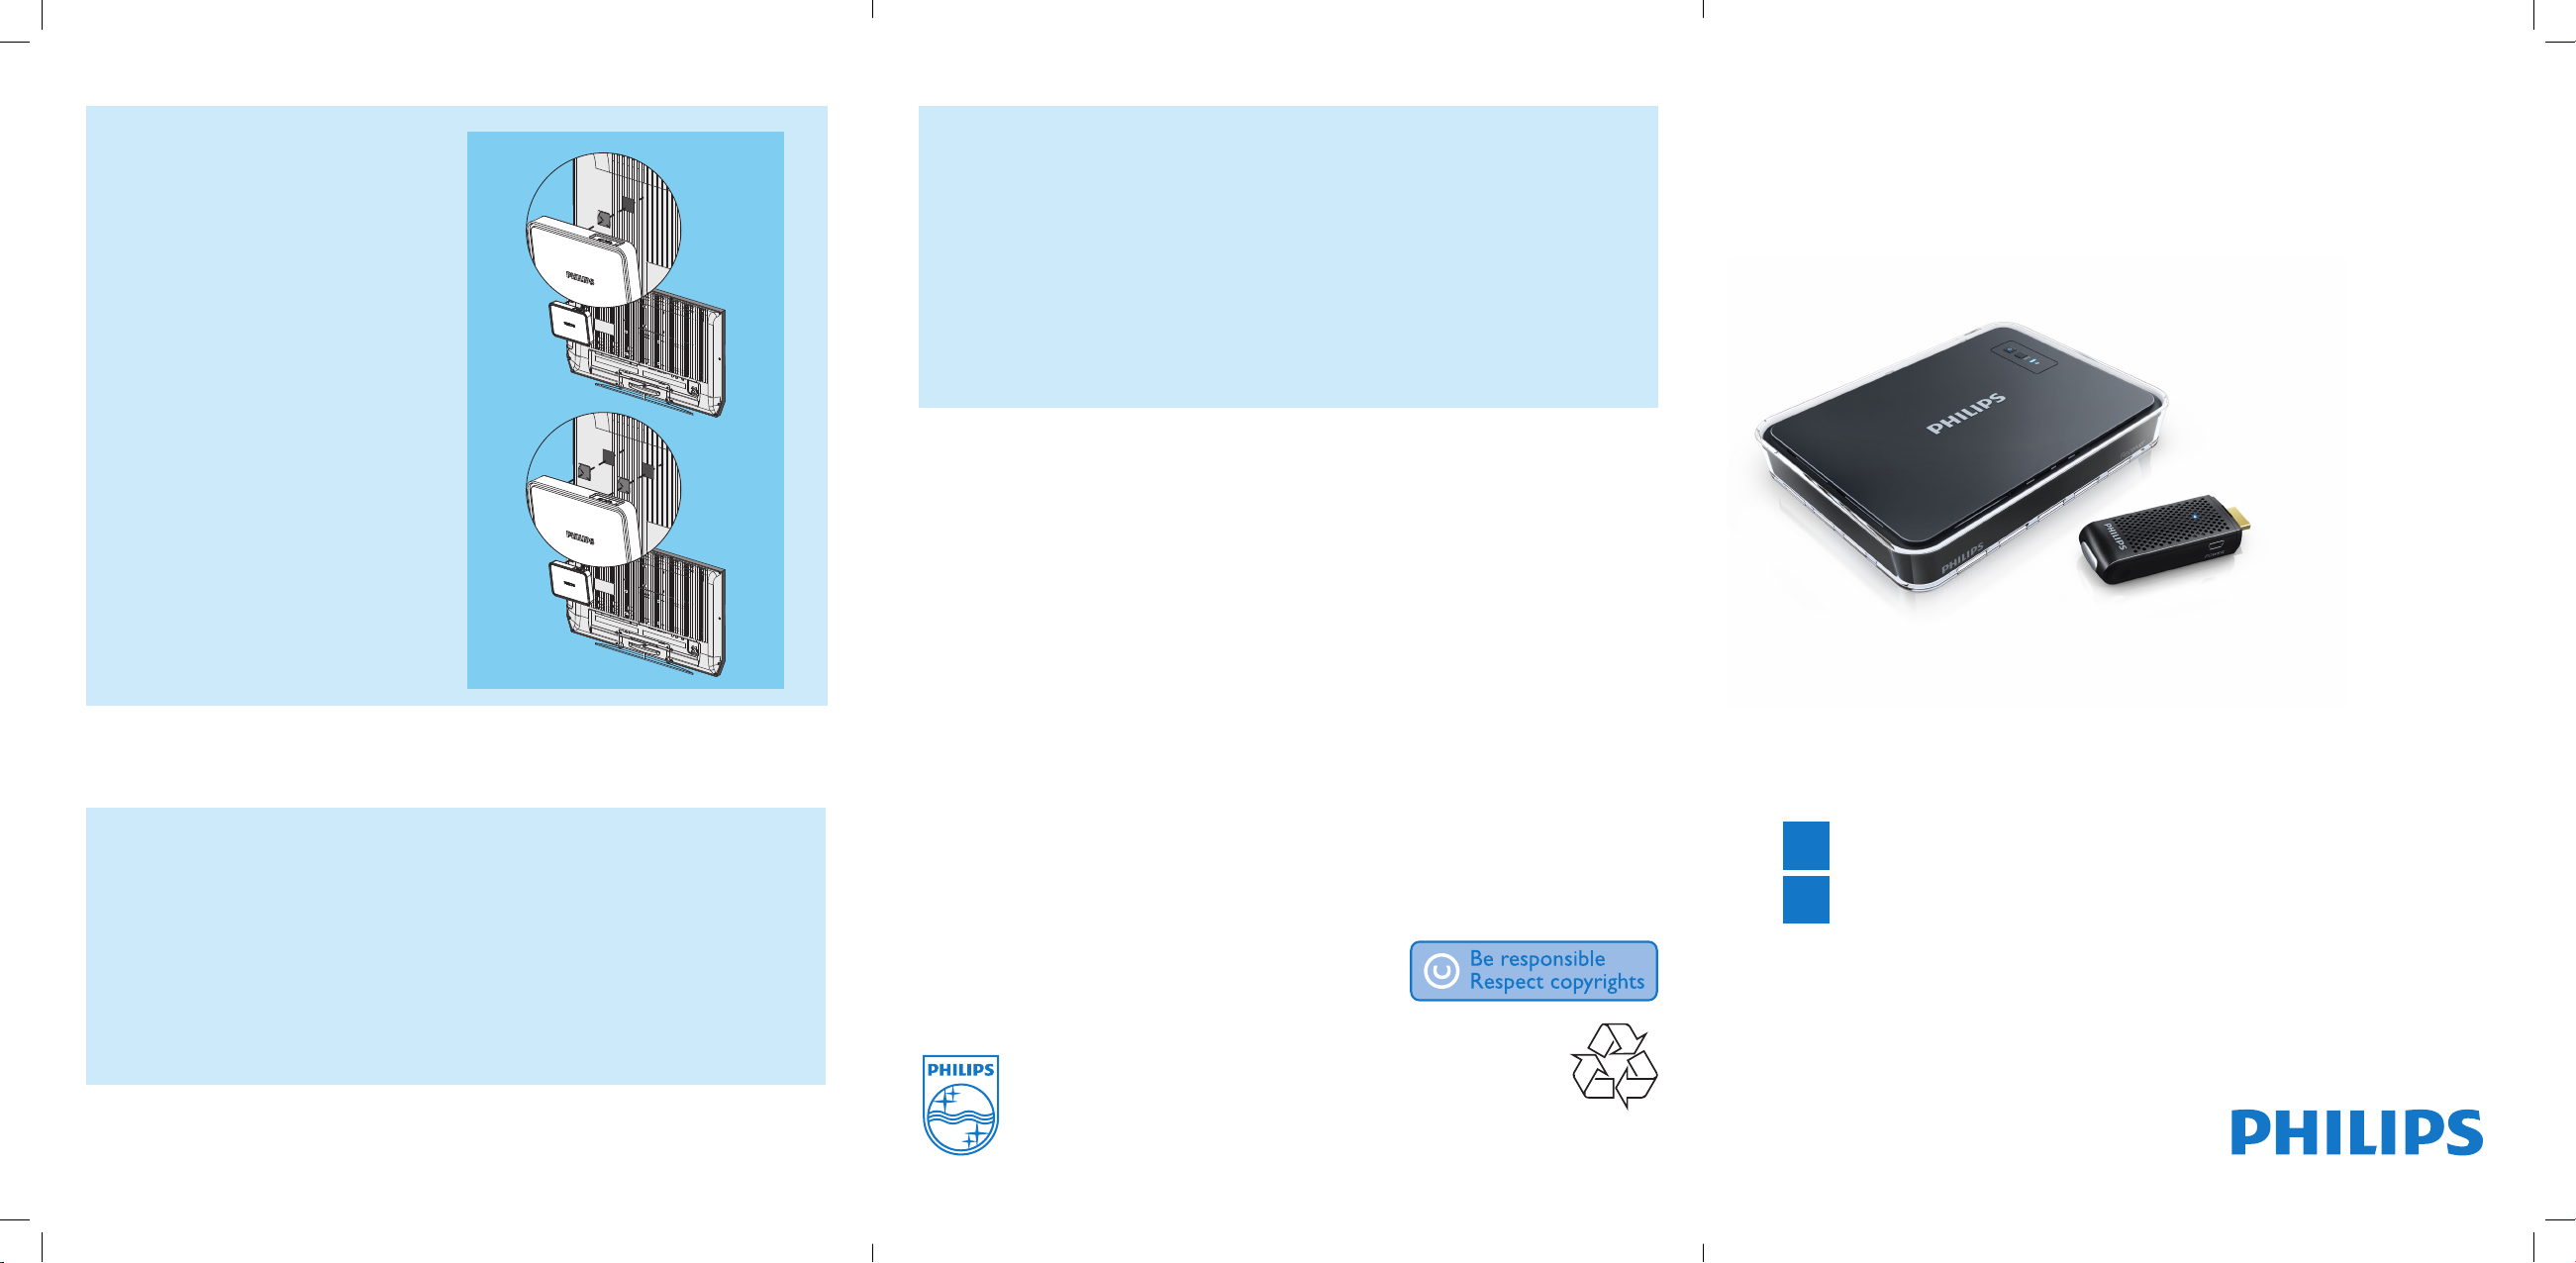
Mount your receiver on the back of
the HDTV
1 Remove the white protective lm from
one of the supplied adhesive tapes.
2 Secure the glued side of the adhesive tape
and attach it to the central bottom area of
the receiver.
3 Select a at location on the rear side of
th e HDT V.
4 Remove the white protective lm from
the other adhesive tape.
5 Secure the glued side of the adhesive tape
and attach it to the selected rear side of
th e HDT V.
6 Align the adhesive tape on the receiver
with the one on the HDTV until both the
receiver and HDTV are mounted together
rmly.
There is no video displayed on my TV screen.
• Make sure that the appropriate cables are selected and inserted to the transmitter, receiver,
an d HDT V.
• Make sure that you select HDMI as the input source on your HDTV.
• Check the power LED and status LED on the receiver.
I cannot hear any sound or the sound is poor, what do I do?
• Make sure that the TV volume is adjusted correctly.
• Make sure that the TV volume is not set to minimum or the sound is not muted.
• Make sure that the audio volume of your computer is turned up.
• Make sure that the audio bit rate is suppor ted.
• Make sure that the audio output of your computer is set to HDMI output.
Welcome to Philips
Register your product at www.philips.com/welcome
Register your product and get support at
www.philips.com/welcome
SWW1890
Need help?
User manual
Troubleshooting
The laptop screen image is not full screen on my TV.
Refer to the User Manual that came with your SWW1890.
Online help
www.philips.com/support
1 Right-click on an open space on your desktop.
2 Select Graphics Options > Output to > Digital Television (Now the laptop image will only
appear on your TV).
3 Once again, right-click on an open space on your desktop.
4 Select Screen Resolution.
5 On the pop-up box increase the resolution settings till the laptop image better ts your TV
screen.
6 Select OK and KEEP CHANGES when you are satised with your image size.
sww1890_QSG_27_en.indd 5-1 24/11/2011 17:52:27
© 2011 Koninklijke Philips Electronics N.V.
All rights reserved.
Reproduction in whole or in part is prohibited without the
written consent of the copyright owner.
Trademarks are the property of Koninklijke Philips
Electronics N.V. or their respective owners.
SWW1890_27_EN_QSG_V2.1
WK11474
Quick Start Guide
Install
1
Enjoy
2
What’s in the box
Install
1
2
Enjoy
Receiver Transmitter User manual
Quick Installation Guide
Power adapter x 1 USB cable for the power supply
of the transmitter x 1
HDMI cable Adhesive tape x 2 Anchors x 2
Screws x 2
Note
• Make sure you have all these items in the box. Contact your dealer for
any missing or damaged items.
Quick Start Guide
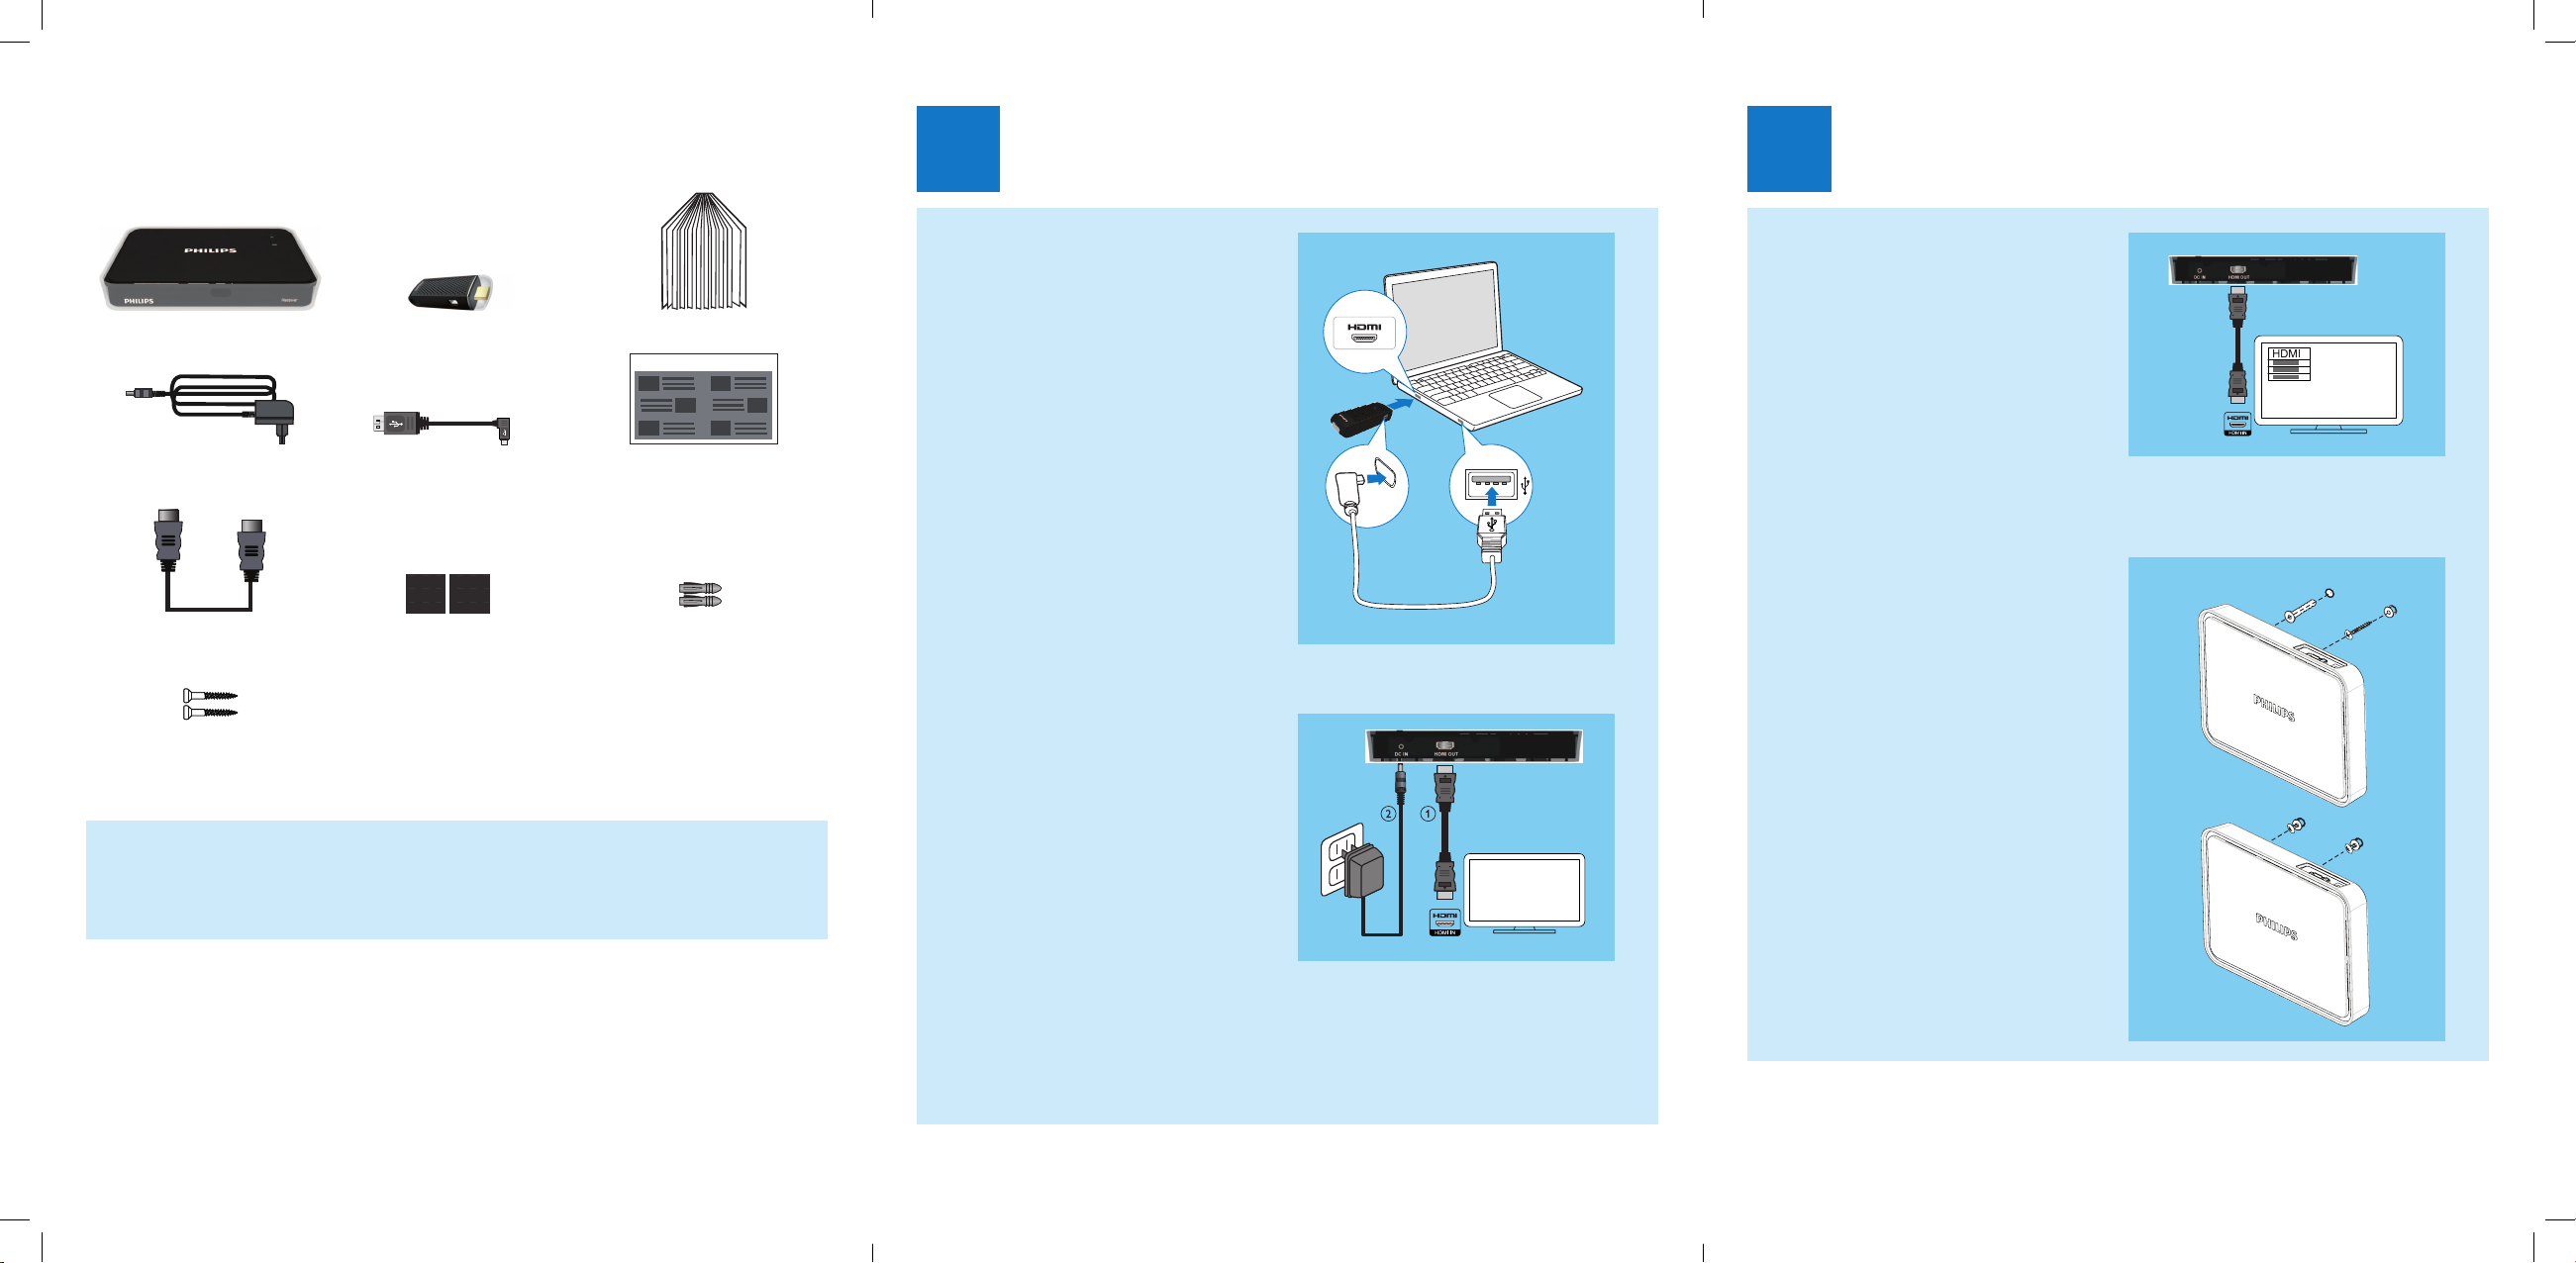
Connect the transmitter to your
computer
1 Connect the transmitter to the HDMI
port of the computer.
2 Connect the small end of the USB cable
to the POWER jack of the transmitter;
3 Connect the other end of the USB cable
to your the USB por t of your computer.
»The power LED indicator of the
transmitter ashes in blue, then turns
into solid blue when the connection is
established.
Note
• For some computers, the HDMI and USB
ports are located in different sides of the
computer. It is not recommended to use the
USB por t that sits right next to the HDMI
port. There may not be enough space for
both connectors.
Connect the receiver to the HDTV set
1 Connect the transmitter to the HDMI
port of the computer:
• Connect one end of the HDMI cable
to HDMI OUT connector of the
receiver.
• Connect the other end of the HDMI
cable to the HDMI in connector of
your H DTV.
2 Connect the supplied power adapter to
the receiver:
• Connect one end of the power
adapter to the DC IN connector of
the receiver.
• Connect the other end of the power
adapter to a power socket.
b
a
Turn on the power of your HDTV
1 Go to the source menu under the settings
menu of your HDTV.
HDMI
2 Select the HDMI input to which the
receiver is connected.
HDMI
c
Activate the wireless link
Switch on the transmitter and receiver.
When there is power supply for the transmitter
and receiver, they are on automatically.
»The link between the transmitter and
receiver is established (within 15-20
seconds).
Mount your receiver
You can either mount the receiver on the wall
or on the back of the HDTV.
Mount your receiver on the wall
1 Select a spot near the HDTV.
2 Drill two holes in the wall. Make sure that
the distance between the two holes is
25
1
/32” (45mm) and the diameter of the
3
hole is
HDMI
/16” (5mm).
3 Punch the supplied two anchors into the
two holes on the wall.
4 Put the two screws into the anchors and
1
leave
HDMI
/8” (3mm) to mount the receiver on.
5 Hook the key holes at the back of the
receiver on the screws.
sww1890_QSG_27_en.indd 2-4 24/11/2011 17:52:31
 Loading...