

Philips SWW1810/27 User manual
Register your product and get support at
www.philips.com/welcome
SWW1810
EN User manual 3


Contents
1 Important 4
Safety 4
2 Your Wireless HD AV Connect 6
What is in the box 6
3 Overview 7
The transmitter 7
The receiver 7
The remote control 8
4 Installation 9
Connect the transmitter to your HD devices 9
Connect the receiver to the HDTV set 9
Connect the IR blaster and IR sensor
extender cables 10
Install remote control batteries 10
5 Activate your Wireless HD AV
Connect and set up the link 11
Turn on the power of your HDTV 11
Activate the wireless link 12
6 Mount your receiver 13
Mount your receiver on the wall 13
Mount your receiver on the back of the
HDTV 14
English
7 Technical data 15
Supported resolution 15
Product specications 15
8 Notice 16
Notice for USA 16
Notice for Canada 16
Recycling 17
Disposal of your old product and batteries 17
One Year Limited Warranty 17
9 Frequently asked question 18
EN
3

1 Important
Safety
This ‘bolt of lightning’ indicates uninsulated
material within your unit may cause an electrical
shock.
The ‘exclamation mark’ calls attention to
features for which you should read the enclosed
literature closely to prevent operating and
maintenance problems.
e Do not use this apparatus near water.
f Clean only with dry cloth.
g Do not block any ventilation openings.
Install in accordance with the
manufacturer’s instructions.
h Do not install near any heat sources such
as radiators, heat registers, stoves, or
other apparatus (including ampliers) that
produce heat.
i Do not defeat the safety purpose of
the polarized or grounding-type plug. A
polarized plug has two blades with one
wider than the other. A grounding type
plug has two blades and a third grounding
prong. The wide blade or the third prong
are provided for your safety. If the provided
plug does not t into your outlet, consult
an electrician for replacement of the
obsolete outlet.
Warning
•
To reduce the risk of re or electric shock, this
apparatus should not be exposed to rain or moisture
and objects lled with liquids, such as vases, should not
be placed on this apparatus.
Caution
To prevent electric shock, fully insert the plug. (For
•
regions with polarized plugs: To prevent electric shock,
match wide blade to wide slot.)
Important Safety Instructions
a Read these instructions.
b Keep these instructions.
c Heed all warnings.
d Follow all instructions.
4
EN
j Protect the power cord from being
walked on or pinched, particularly at plugs,
convenience receptacles, and the point
where they exit from the apparatus.
k Only use attachments/accessories specied
by the manufacturer..
l Use only with the cart, stand, tripod,
bracket, or table specied by the
manufacturer or sold with the apparatus.
When a cart is used, use caution when
moving the cart/apparatus combination to
avoid injury from tip-over.
m Unplug this apparatus during lightning
storms or when unused for long periods of
time.

n Refer all servicing to qualied service
personnel. Servicing is required when
the apparatus has been damaged in any
way, such as power-supply cord or plug
is damaged, liquid has been spilled or
objects have fallen into the apparatus, the
apparatus has been exposed to rain or
moisture, does not operate normally, or
has been dropped.
o Battery usage CAUTION – To prevent
battery leakage which may result in bodily
injury, property damage, or damage to the
unit:
• Do not mix batteries (old and new or
carbon and alkaline, etc.).
• Remove batteries when the unit is not
used for a long time.
p Apparatus shall not be exposed to
dripping or splashing.
q Do not place any sources of danger on the
apparatus (e.g. liquid lled objects, lighted
candles).
Warning
•
Use only the provided power adapter.
English
EN
5
2 Your Wireless
HD AV Connect
Congratulations on your purchase and welcome
to Philips!
To fully benet from the support that Philips
offers, register your product at www.philips.
com/welcome.
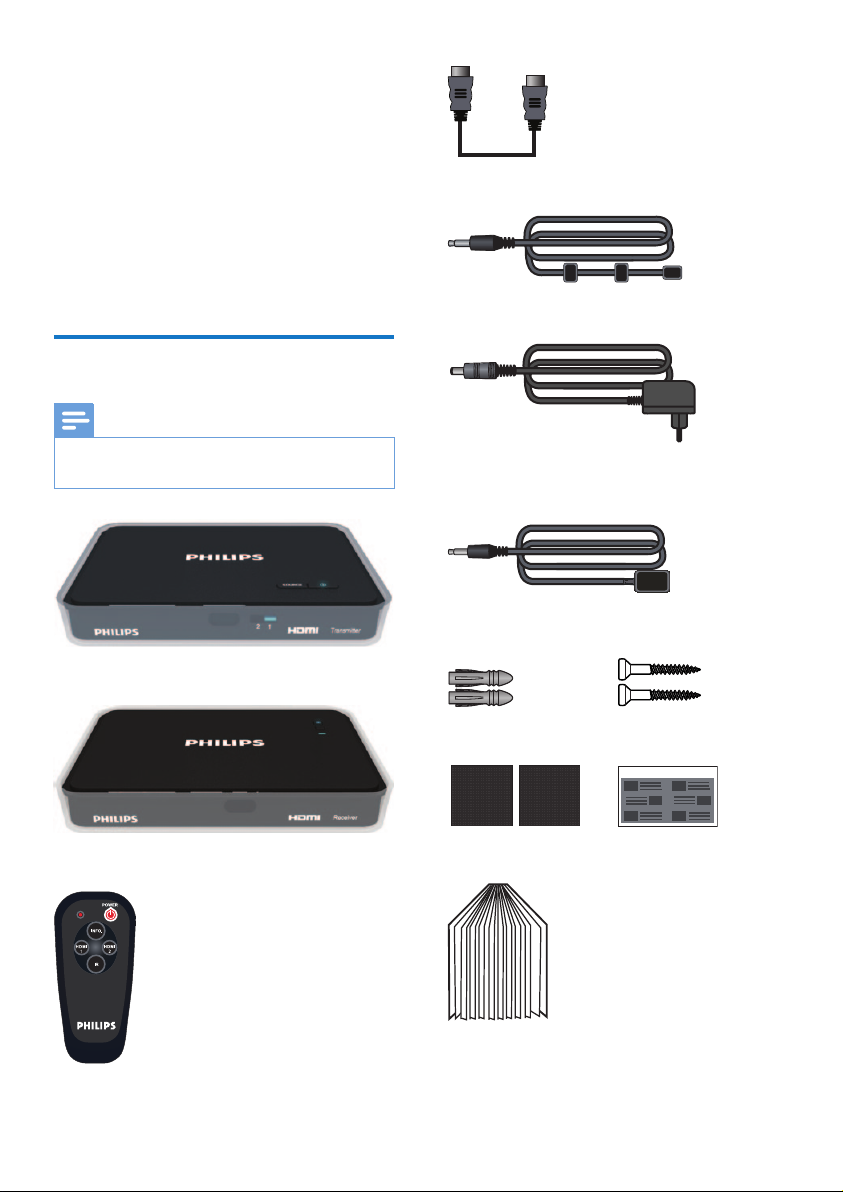
What is in the box
Note
Make sure you have all these items in the box. Contact
•
your dealer for any missing or damaged items.
Transmitter
HDMI cable
IR blaster extender cable
Power adapter for the transmitter and receiver
x 2
IR sensor extender cable
Receiver
Remote control
6
EN
Anchors x 2 Screws x 2
Adhesive tape x 2 Quick start guide
User manual
Quick Installation Guide

3 Overview
The receiver
The transmitter
Front view
1 Source LEDs It displays the current
source input.
2 SOURCE
button
3 Power button
with the LED
indicator
Rear view
Press to switch the
source input of the
transmitter.
Press to turn the
transmitter on/off
Top view
1 Source LEDs Indicators for HDMI1
2 Power
button with
the LED
indicator
3 Source
button
and HDMI2
Press to turn the receiver
on/off.
Press to select the
source input.
Rear view
English
POWER
1 DC IN jack Connect the power
adapter of the transmitter.
2 & 3 HDMI IN
adapters
4 IR OUT
blaster
extender
jack
Connect the HD audio/
video device with the
HDMI cables.
Plug in the IR blaster
extender cable.
1 DC IN
jack
2 HDMI
OUT
adapter
3 IR IN jack Plug in the IR sensor
Connect the power adapter
of the receiver.
Connect the HDTV with an
HDMI cable.
extender cable.
EN
7
 Loading...