

Page 1
Register your product and get support at
www.philips.com/welcome
SWW1800/27
Quick Start Guide
Connect
1
Install
2
Enjoy
3
Page 2
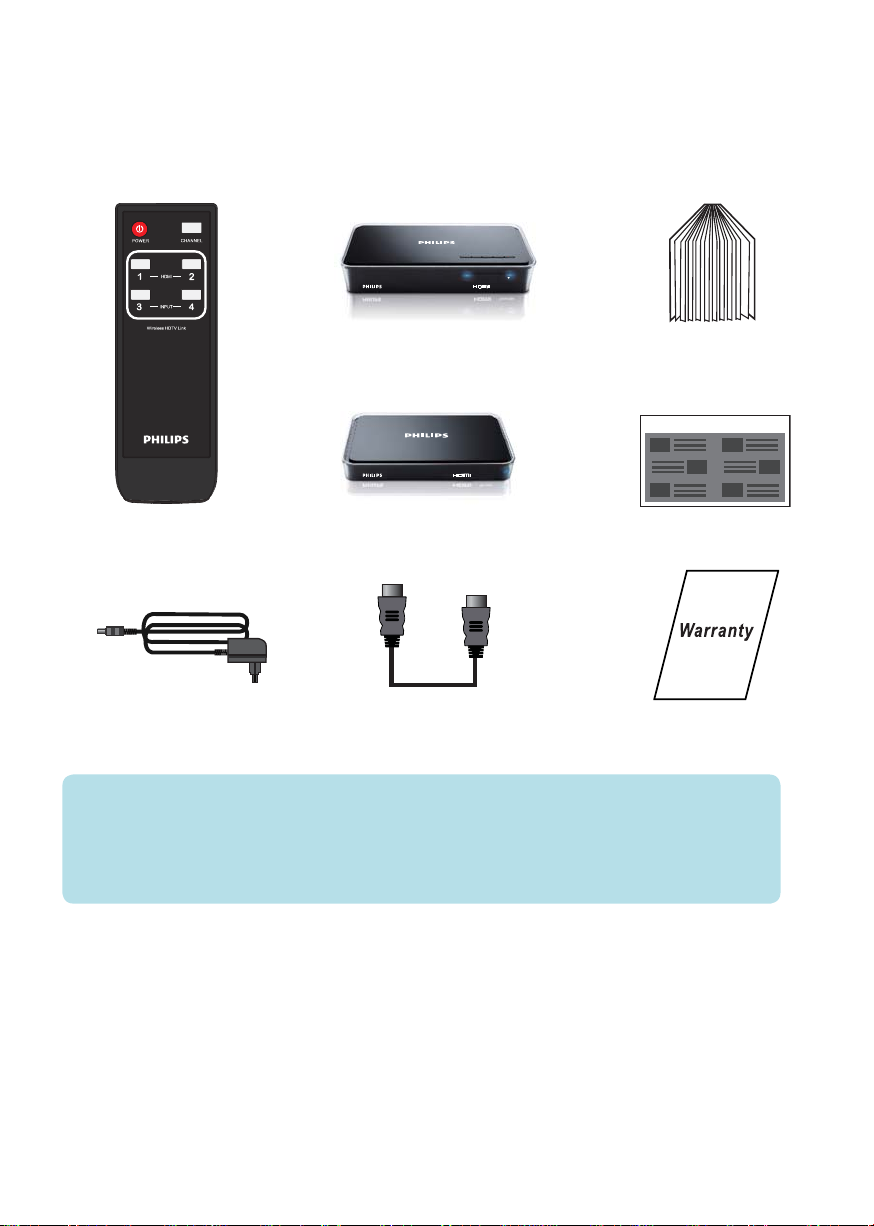
What’s in the box
SOURCE 1 SOURCE 2 SOURCE 3 SOURCE 4
234
1
ranmitter
Remote control
Power adaptor x 2
Note
Make sure you have all these items in the box. Contact your dealer for any missing •
or damaged items.
Transmitter
Receiver
HDMI cable
User manual
Quick Intallation Guide
Receiver
Quick Start Guide
Warranty
Page 3

1
Connect
DC IN 5V
HDMI OUT
HDMI OUT
1
Transmitter Receiver
DC 5V
2
Connect the transmitter to your HD devices
1 Connect video source to the transmitter using the HDMI cable
Connect one end of the HDMI cable (included) to the HDMI connector of the •
transmitter.
2 Connect the video source to the transmitter using the component cables
Connect one end of the RCA (green, blue and red) cables to the Y/Pb/Pr IN •
connectors of the transmit ter. Connect the other end of the RCA cables to the
corresponding Y/Pb/Pr OUT connectors of your HD devices.
Connect one end of the set of audio cables to the AUDIO L/R IN connectors •
of the transmitter. Connect the other end to the corresponding AUDIO L/R
OUT connectors of your HD devices.
3 Connect the power adaptor to the transmitter
Connect one end of the power adapter (included) to the DC IN connector •
of the transmitter. Connect the other end of the power adaptor to a power
socket.
The power LED indicator lights up in solid red. »
The HDMI devices and analog devices with the component and stereo RCA start connecting. »
Connect the receiver to your HDTV set
1 Connect the receiver with an additional HDMI cable (not included):
Connect one end of the HDMI cable to the receiver. •
Connect the other end to the HDMI OUT connector of your HDTV. •
2 Connect the power adaptor to the receiver:
Connect one end of the power adapter (included) to the DC IN connector of •
the receiver.
Connect the other end of the power adaptor to a power socket. •
Page 4

2
DC 5V
Install remote control batteries
1 Open the battery compartment.
2 Inser t two AAA batteries with correct
3 Close the battery compartment.
Install
polarity (+/-) as indicated.
3
Turn on the power of your
HDTV
1 Go to the source menu under the settings menu of your HDTV.
2 Select the HDMI input to which the receiver is connected.
Note
You cannot control the receiver with the supplied remote control and the •
receiver follows the transmitter’s status to enter/exit the standby mode.
The synchronization of standby between the HDTV and the receiver •
depends on the capability of the HDTV.
Enjoy
DC 5V
Page 5

Switch on the transmitter
Press on the remote control or transmitter in standby mode to turn it on.
Select the source on the transmitter
Press the source buttons: 1 HDMI , 2 HDMI , 3 INPUT , 4
INPUT on the remote control or transmitter until you
see the available video from your device.
Note
In standby mode, a red power LED displays on the •
transmitter .
Depending on equipment and the input selected, •
between input selection/star t-up and being able
to see the image on your T V can take up to 15
seconds.
Wallmount the receiver
You can either place the receiver near the HDTV or mount
it on the wall.
1 Choose a spot near the TV.
2 Drill two holes in the wall. Ensure the distance
between the two holes is 4.5mm.
3 Punch the supplied plastic wall anchors into the two
holes on the wall.
4 Put the two screws into the plastic wall anchors and
leave 3.2mm to mount the receiver on.
5 Hook the receiver on the wall.
Page 6

Troubleshooting
There is no video displayed on my TV screen.
Verify the POWER LED and SOURCE LED indicator on the transmitter: •
I cannot hear any sound or the sound is poor, what do I do?
Ensure the TV volume control is adjusted correctly. •
Ensure the TV volume is not set to minimum or the sound is not muted. •
Ensure the audio cables of the transmitter are connected correctly. •
Ensure the Audio format is recognized/supported. •
Long switching time due to the channel switching on a satellite/cable set-top box.
Select video scaling if your set-top box supports this feature so as to keep the output •
resolution constant.
Tip
For more information, see the user manual. •
Welcome to Philips
Register your product at www.philips.com/welcome
Need help?
User Manual
Refer to the User Manual that came with your SWW1800.
Online help
www.philips.com/support
© 2009 Koninklijke Philips Electronics N.V. All rights reserved. Reproduction in whole
or in part is prohibited without the written consent of the copyright owner.
Trademarks are the proper ty of Koninklijke Philips
Electronics N.V. or their respective owners.
0682
SWW1800_27_EN_QSG_V1.1Printed in Taiwan
 Loading...