

Page 1
SW6700
© & ™ Lucaslm Ltd.
© Disney
Page 2
Page 3
1
2
3
4
5
6
7
8
9
10
11
13
12
Page 4

empty page before TOC
Page 5

English 6
Čeština 28
Eesti 50
Hrvatski 72
Latviešu 95
Lietuviškai 117
Magyar 139
Polski 162
Română 186
Shqip 210
Slovenščina 231
Slovensky 252
Srpski 275
Български 296
Македонски 321
Русский 343
Українська 366
Қазақша
388
Page 6

English
6
Introduction
Congratulations on your purchase and welcome to
Philips! To fully benefit from the support that
Philips offers, register your product at
www.philips.com/welcome.
Please read this user manual, as it contains
information about the features of this shaver as
well as some tips to make shaving easier and more
enjoyable.
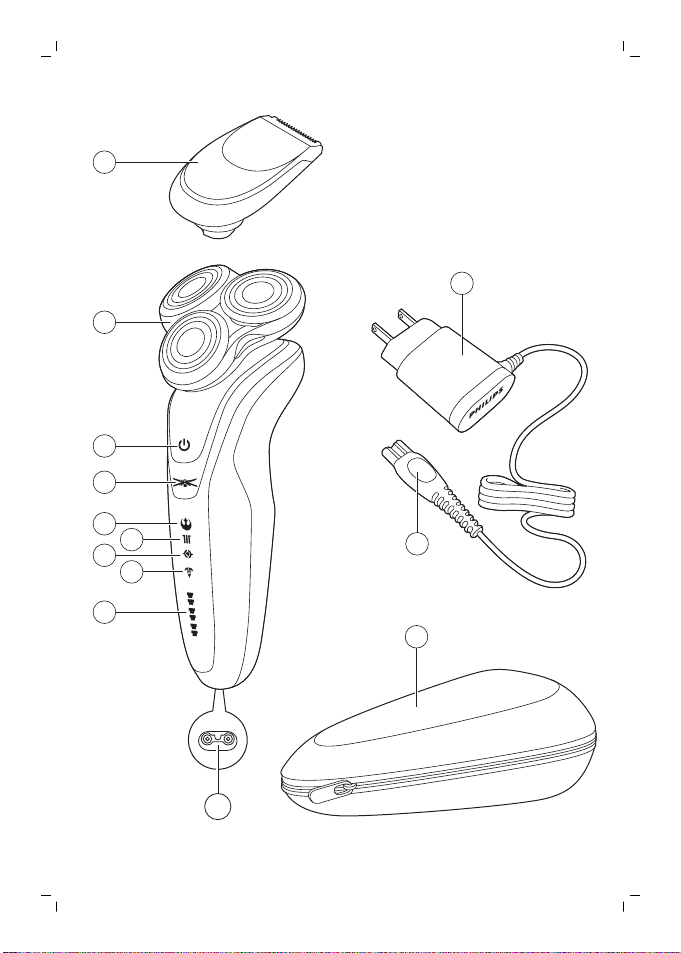
General description (Fig. 1)
1 Click-on precision trimmer attachment
2 Shaving unit with hair chamber
3 On/off button
4 Turbo+ button
5 Replacement reminder
6 Cleaning reminder
7 Travel lock symbol
8 Unplug for use symbol
9 Battery charge indicator
10 Socket for small plug
11 Supply unit
12 Small plug
13 Pouch
Important safety information
Read this important information carefully before
you use the appliance and its accessories and save
it for future reference. The accessories supplied
may vary for different products.
English
Page 7

English
Danger
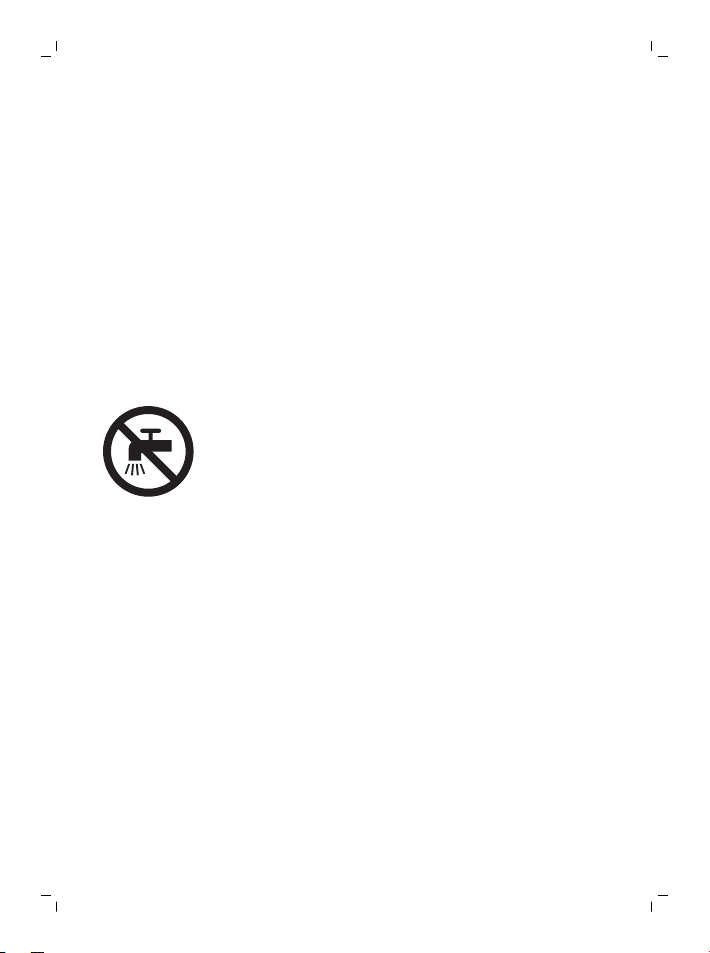
- Keep the supply unit dry.
Warning
- To charge the battery, only use the
detachable supply unit (HQ8505) provided
with the appliance.
- The supply unit contains a transformer. Do
not cut off the supply unit to replace it with
another plug, as this causes a hazardous
situation.
- This appliance can be used by children aged
from 8 years and above and persons with
reduced physical, sensory or mental
capabilities or lack of experience and
knowledge if they have been given
supervision or instruction concerning use of
the appliance in a safe way and understand
the hazards involved. Children shall not play
with the appliance. Cleaning and user
maintenance shall not be made by children
without supervision.
7
Page 8
English
8
- Always unplug the shaver before you clean
it under the tap.
- Always check the appliance before you use
it. Do not use the appliance if it is damaged,
as this may cause injury. Always replace a
damaged part with one of the original type.
- Do not open the appliance to replace the
rechargeable battery.
Caution
- Never immerse the cleaning
system or the charging stand in
water and do not rinse it under
the tap.
- Never use water hotter than
60°C to rinse the shaver.
- Only use this appliance for its
intended purpose as shown in
the user manual.
- For hygienic reasons, the
appliance should only be used
by one person.
Page 9

English
- Never use compressed air,
scouring pads, abrasive
cleaning agents or aggressive
liquids such as petrol or
acetone to clean the appliance.
- If your shaver comes with a
cleaning system, always use the
original Philips cleaning fluid
(cartridge or bottle, depending
on the type of cleaning system).
- Always place the cleaning
system on a stable, level and
horizontal surface to prevent
leakage.
- If your cleaning system uses a
cleaning cartridge, always make
sure the cartridge compartment
is closed before you use the
cleaning system to clean or
charge the shaver.
- When the cleaning system is
ready for use, do not move it to
prevent leakage of cleaning
fluid.
9
Page 10
English
10
- Water may drip from the socket
at the bottom of the shaver
when you rinse it. This is normal
and not dangerous because all
electronics are enclosed in a
sealed power unit inside the
shaver.
- Do not use the supply unit in or
near wall sockets that contain
an electric air freshener to
prevent irreparable damage to
the supply unit.
Electromagnetic fields (EMF)
This Philips appliance complies with all applicable
standards and regulations regarding exposure to
electromagnetic fields.
General
- This shaver is waterproof. It is suitable for use in
the bath or shower and for cleaning under the
tap. For safety reasons, the shaver can
therefore only be used without cord.
- The supply unit is suitable for mains voltages
ranging from 100 to 240 volts.
- The supply unit transforms 100-240 volts to a
safe low voltage of less than 24 volts.
- Maximum noise level: Lc = 69dB(A)
Page 11
The display
Start-up sequence
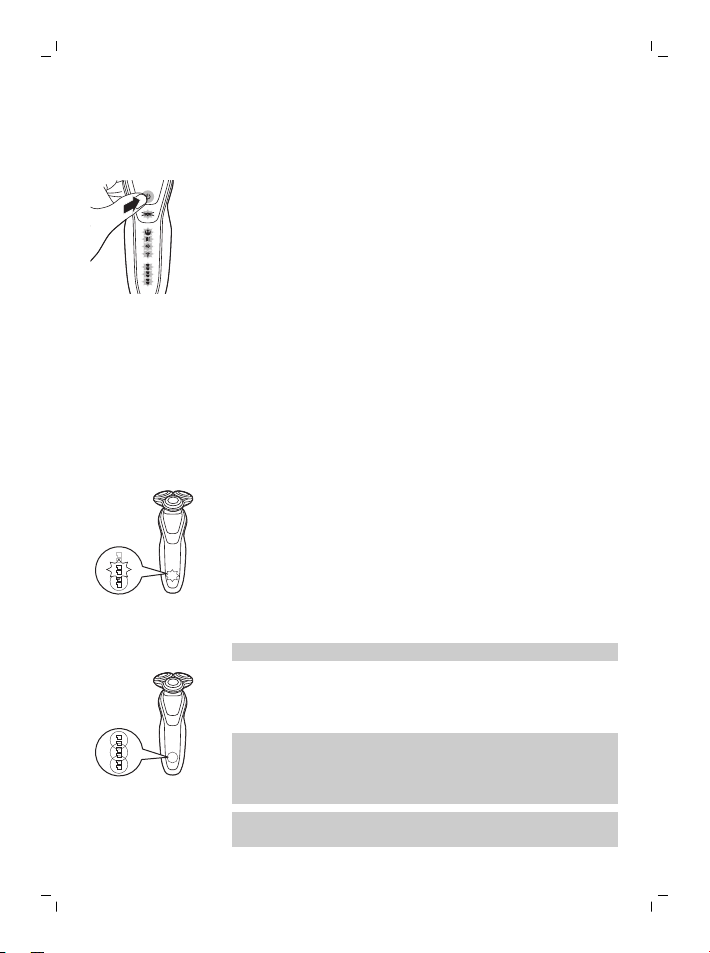
When you press the on/off button for the very first
time, all display indications light up in sequence.
Charge the shaver before use.
Battery charge indicator
Quick charge: When the battery is empty and you
connect the shaver to a wall socket, the lights of
the battery charge indicator light up white one
after the other repeatedly. When the battery
contains enough energy for one shave, the bottom
light of the battery charge indicator starts flashing
white slowly.
While the shaver continues to charge, first the
bottom light of the battery charge indicator flashes
white and then lights up white continuously. Then
the second light flashes and lights up continuously,
and so on until the shaver is fully charged.
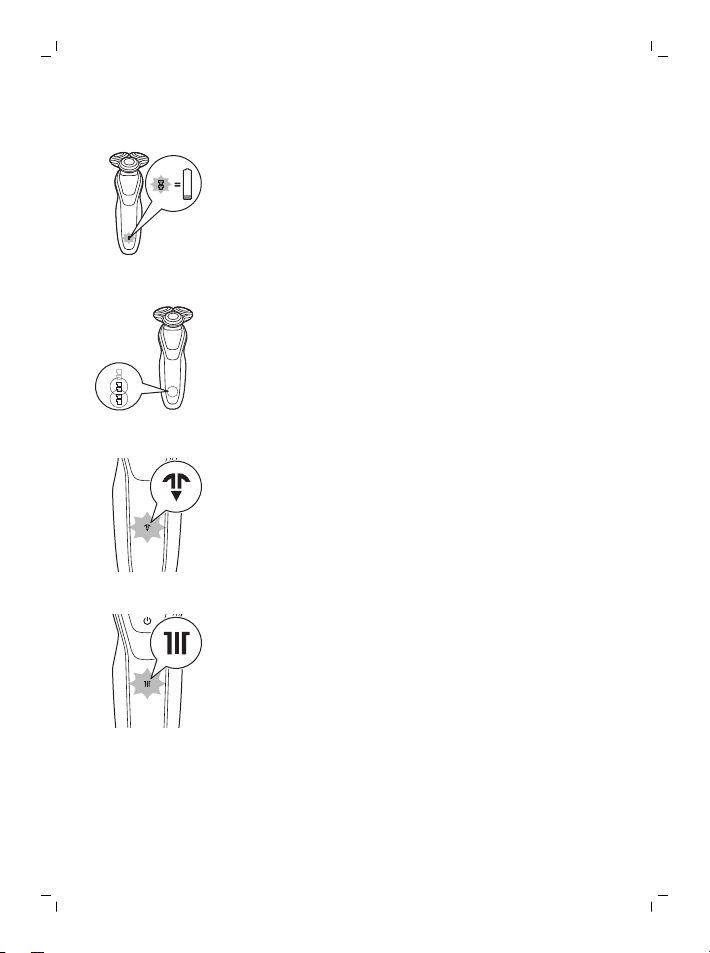
Battery fully charged
Note: This shaver can only be used without a cord.
When the battery is fully charged, all lights of the
the battery charge indicator light up white
continuously.
Note: When you press the on/off button during or
after charging, the 'unplug for use' symbol lights up
to indicate that the shaver is still connected to the
wall socket.
Note: When the battery is full, the display switches
off automatically after 30 minutes.
English
11
Page 12
English
12
Battery low
When the battery is almost empty, the bottom light
of the battery charge indicator flashes red.
Remaining battery charge
The remaining battery charge is shown by the
lights of the battery charge indicator that light up
continuously.
’Unplug for use’ reminder
The ‘unplug for use’ symbol flashes to remind you
to disconnect the shaver from the wall socket
before you can switch it on.
Cleaning reminder
Clean the shaver after every shave for optimal
performance (see 'Cleaning and maintenance').
When you switch off the shaver, the cleaning
reminder flashes to remind you to clean the
shaver.
Page 13
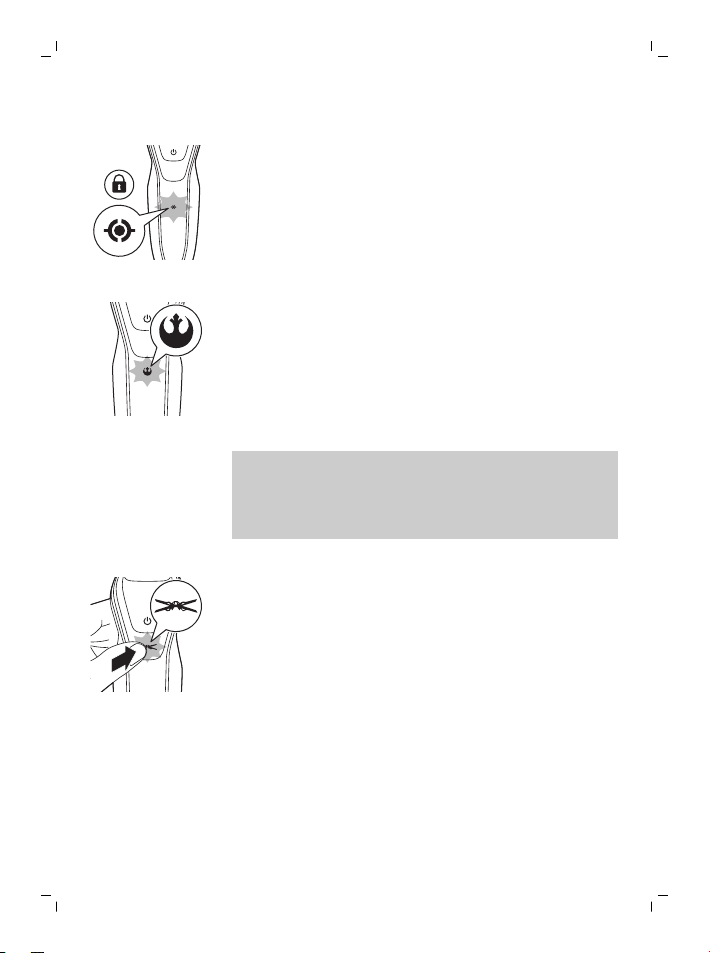
Travel lock
You can lock the shaver when you are going to
travel. The travel lock prevents the shaver from
being switched on by accident (see 'Activating the
travel lock').
Replacing shaving heads
For maximum shaving performance, replace the
shaving heads every two years. The shaver is
equipped with a replacement reminder which
reminds you to replace the shaving heads. The
replacement reminder flashes to indicate that you
have to replace the shaving heads (see 'Replacing
the shaving heads 'Replacement').
Note: After replacing the shaving heads, you can
reset the replacement reminder by pressing the
on/off button for 7 seconds. If you do not reset the
replacement reminder, the shaver resets
automatically after 9 shaves.
Turbo+ setting
This setting allows you to shave through dense
parts of the beard. The Turbo+ button flashes
irregularly to indicate that Turbo+ setting is
activated (see 'Shaving with Turbo+ setting').
English
13
Charging
Charge the shaver before you use it for the first
time and when the display indicates that the
battery is almost empty.
Charging takes approx. 1 hour. A fully charged
shaver has a shaving timeof up to 60 minutes.
Page 14
English
14
Note: You cannot use the shaver while it is
charging.
Charging with the supply unit
1 Make sure the shaver is switched off.
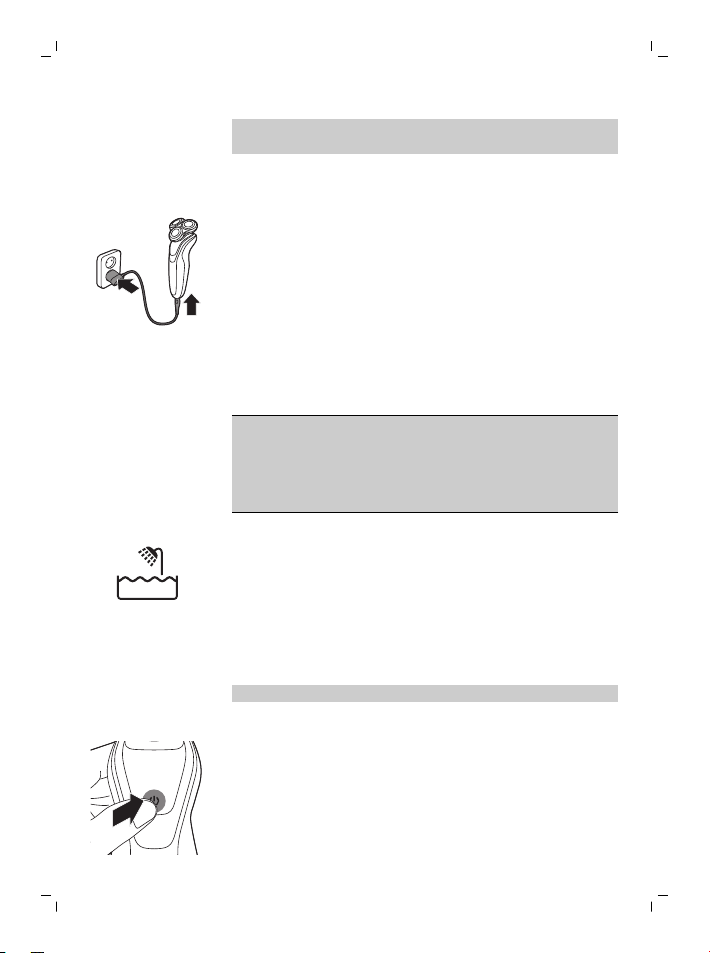
2 Put the small plug in the shaver and put the
supply unit in the wall socket.
The display of the shaver indicates that the
shaver is charging.
3 After charging, remove the supply unit from the
wall socket and pull the small plug out of the
shaver.
Using the shaver
Always check the shaver and all accessories
before use. Do not use the shaver or any
accessory if it is damaged, as this may cause
injury. Always replace a damaged part with one of
the original type.
This symbol indicates that the shaver can be used
in the bath or shower.
- Use this shaver for its intended household use
as described in this manual.
- For hygienic reasons, the shaver should only be
used by one person.
- Trimming is easier when the skin and hairs are
dry.
Note: This shaver can only be used without cord.
Switching the shaver on and off
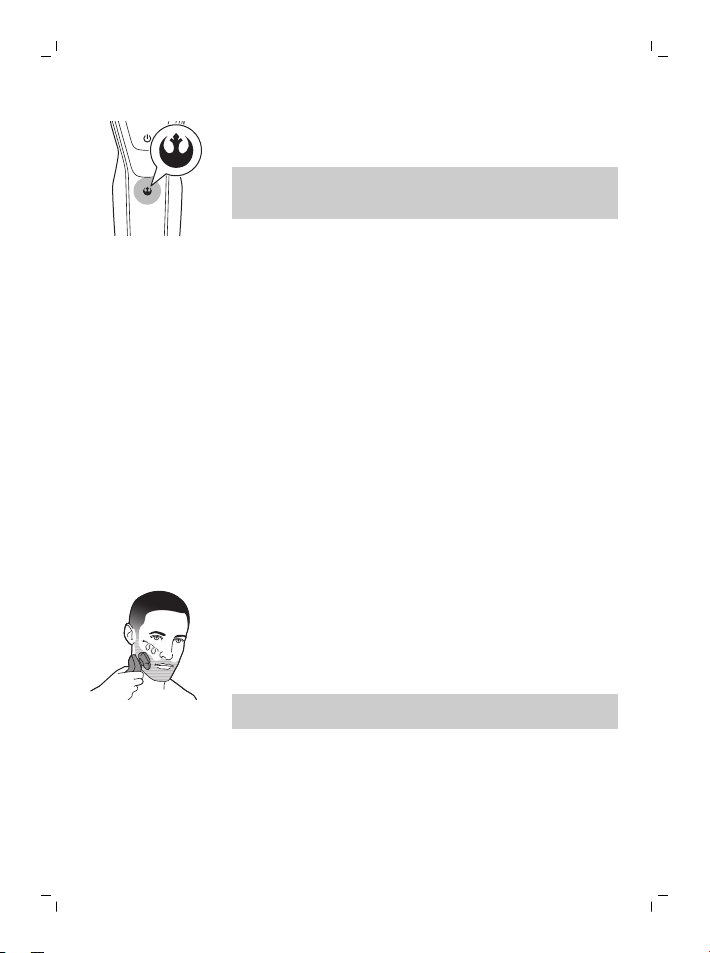
1 To switch the shaver on or off, press the on/off
button once.
Page 15
Shaving
English
The replacement symbol lights up continuously
when the shaver is switched on.
Note: When the replacement reminder flashes it
indicates that you have to replace the shaving
heads
15
Skin adaptation period
Your first shaves may not bring you the result you
expect and your skin may even become slightly
irritated. This is normal. Your skin and beard need
time to adapt to any new shaving system. To allow
your skin to adapt to this new appliance, we advise
you to shave regularly (at least 3 times a week) and
exclusively with this appliance for a period of 3
weeks.
- For the best results on skin comfort, pre-trim
your beard if you have not shaved for 3 days or
longer.
Dry shaving
1 Switch on the shaver.
2 Move the shaving heads over your skin in
circular movements to catch all hairs growing in
different directions. Make sure each shaving
head is fully in contact with the skin. Exert
gentle pressure for a close, comfortable shave.
Note: Do not press too hard, this can cause skin
irritation.
3 Switch off and clean the shaver after each use.
The battery charge indicator lights up for a few
seconds to show the battery status.
Page 16
16
English
Wet shaving
For a more comfortable shave, you can also use
this shaver on a wet face with shaving foam or
shaving gel.
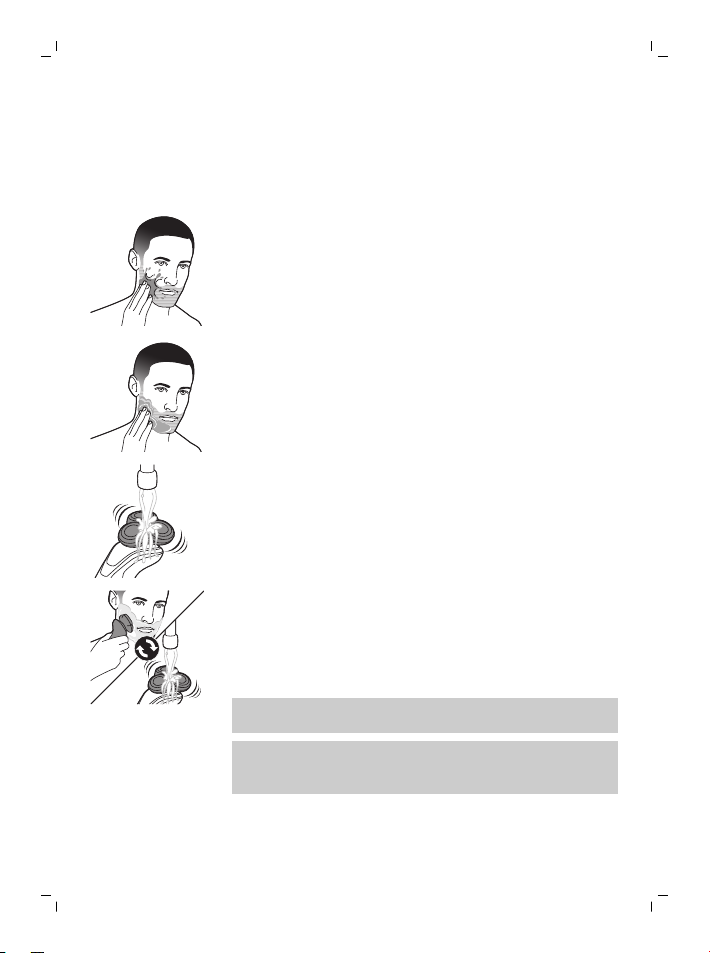
1 Apply some water to your skin.
2 Apply shaving foam or shaving gel to your skin.
3 Rinse the shaving unit under the tap to ensure
that the shaving unit glides smoothly over your
skin.
4 Switch on the shaver.
5 Move the shaving heads over your skin in
circular movements to catch all hairs growing in
different directions. Make sure each shaving
head is fully in contact with the skin. Exert
gentle pressure for a close, comfortable shave.
Note: Do not press too hard, this can cause skin
irritation.
Note: Rinse the shaving unit regularly to ensure
that it continues to glide smoothly over your
skin.
6 Dry your face.
7 Switch off the shaver and clean it after each
use.
Page 17
English
Note: Make sure that you rinse all foam or shaving
gel off the shaver.
Shaving with Turbo+ setting
1 Switch on the shaver.
2 Press the Turbo+ button once if you want to
shave areas with dense hair more quickly.
Note: The Turbo+ button flashes irregularly to
indicate that Turbo+ setting is activated.
3 Move the shaving heads over your skin in
circular movements to catch all hairs growing in
different directions. Make sure each shaving
head is fully in contact with the skin. Exert
gentle pressure for a close, comfortable shave.
Note: Circular movements provide better
shaving results than straight movements.
4 Turn off the Turbo+ mode by pressing the
Turbo+ button once.
Using click-on attachments
Removing or attaching the click-on attachment
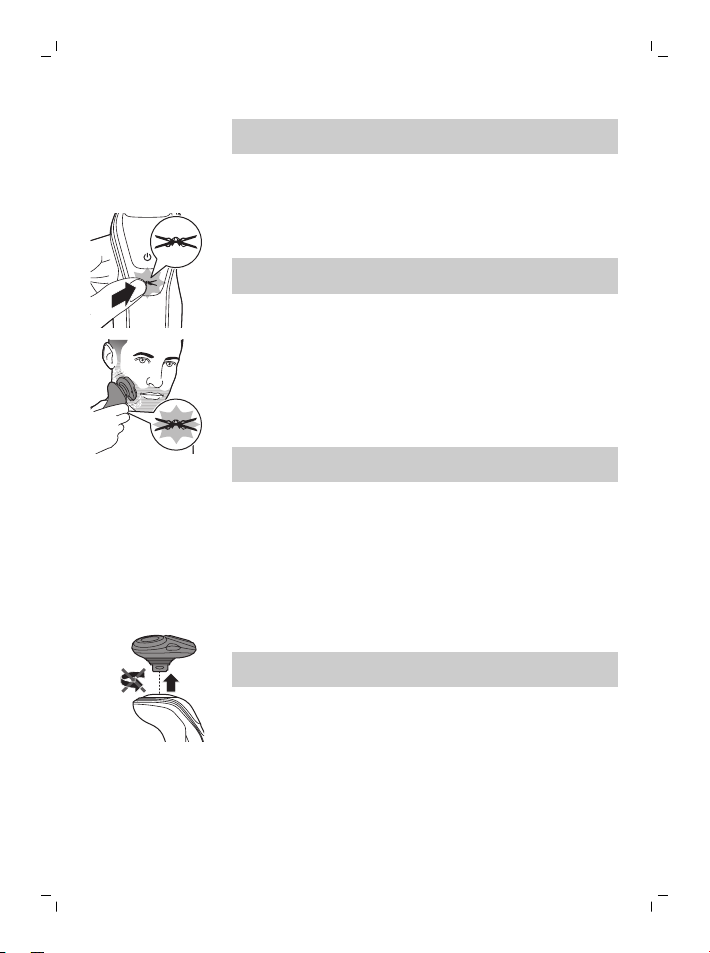
1 Make sure the shaver is switched off.
2 Pull the attachment straight off the shaver.
Note: Do not twist the attachment while you
pull it off the shaver.
17
Page 18
3 sec.
English
18
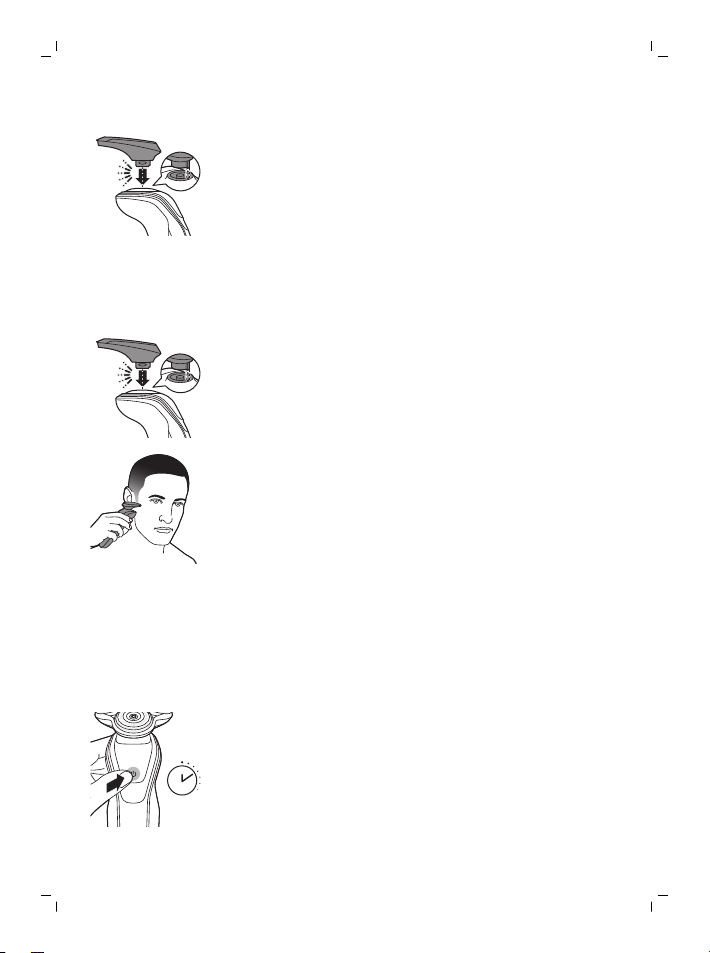
3 Insert the lug of the attachment into the slot in
the top of the shaver. Then press down the
attachment to attach it to the shaver (‘click’).
Using the precision trimmer attachment
You can use the precision trimmer to touch up
your beard, sideburns and moustache.
1 Attach the trimmer to the shaver ('click').
2 Switch on the shaver.
3 Hold the trimmer perpendicular to the skin and
move it downwards while exerting gentle
pressure.
4 Switch off and clean the trimmer after use.
Travel lock
You can lock the shaver when you are going to
travel. The travel lock prevents the shaver from
being switched on by accident.
Activating the travel lock
1 Press the on/off button for 3 seconds to enter
the travel lock mode.
Page 19
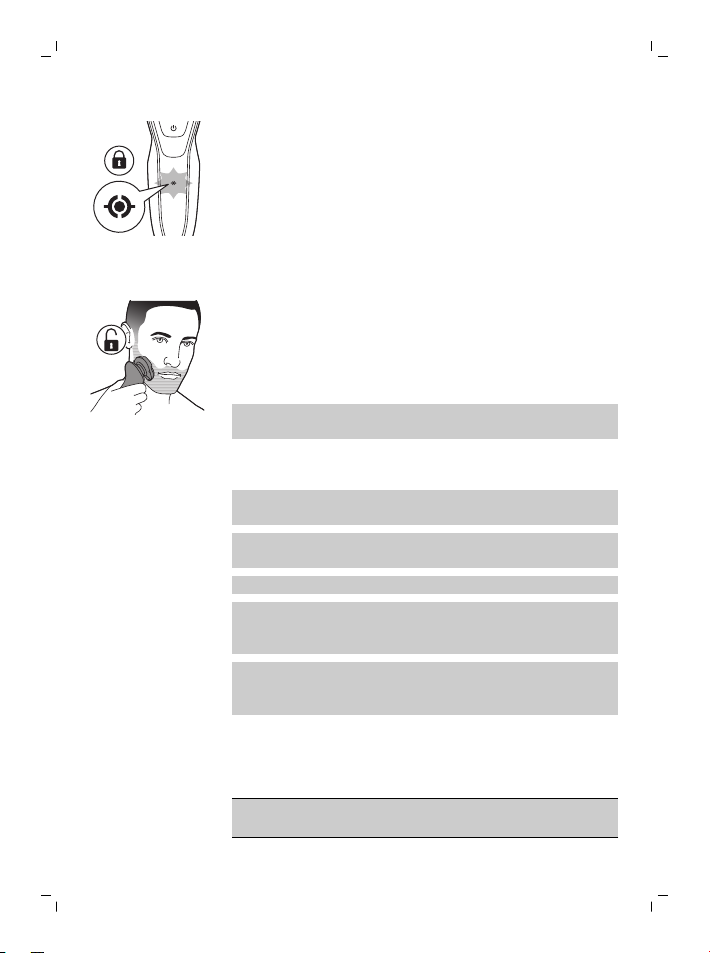
While you activate the travel lock, the
indications on the display light up briefly. When
the travel lock is activated, the travel lock
symbol flashes.
Deactivating the travel lock
1 Press the on/off button for 3 seconds.
While you deactivate the travel lock, the
indications on the display light up briefly. When
the travel lock is deactivated, the travel lock
symbol flashes and goes out. The shaver
switches on and is now ready for use again.
Note: The shaver unlocks automatically when it is
connected to wall socket.
Cleaning and maintenance
Regular cleaning guarantees better shaving
results.
Never clean, remove or replace the shaving
unit while the shaver is switched on.
Do not apply pressure to shaving head combs.
Do not touch shaving heads with hard objects
as this may dent or damage the precisionmade slotted combs.
Do not use abrasives, scourers or aggressive
liquids such as gasoline or acetone to clean
the shaver.
Cleaning the shaver under the tap
Clean the shaver after every shave for optimal
performance.
Always check if the water is too hot, to prevent
burning your hands.
English
19
Page 20
20
English
Never dry the shaving unit with a towel or tissue,
as this may damage the shaving heads.
While rinsing shaving unit, water may drip out of
the base of shaver. This is a normal occurrence.
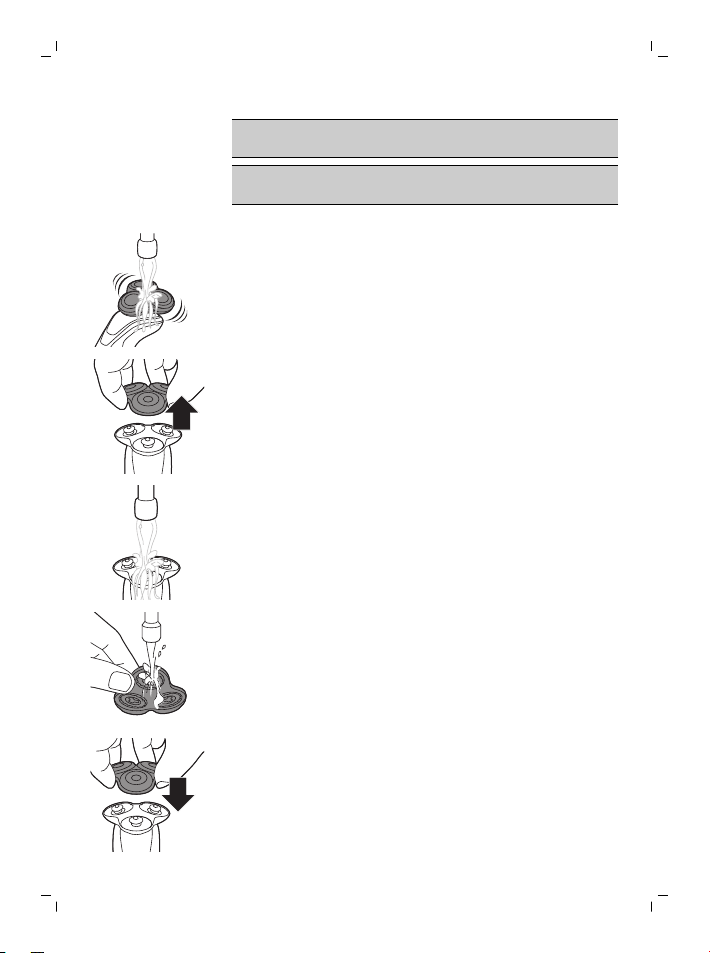
1 Switch on the shaver.
2 Rinse the shaving unit under a warm tap.
3 Switch off the shaver. Pull the shaving head
holder off the bottom part of the shaving unit.
4 Rinse the hair chamber under the tap.
5 Rinse the shaving head holder under a warm
tap.
6 Carefully shake off excess water and let the
shaving head holder air-dry completely.
7 Attach the shaving head holder to the bottom
part of the shaving unit (‘click’).
Page 21
Cleaning the precision trimmer attachment
Never dry the trimmer with a towel or tissue, as
this may damage the trimming teeth.
Clean the trimmer after each use.
1 Switch on the shaver.
2 Rinse the trimmer under a warm tap.
3 After cleaning, switch off the shaver.
4 Carefully shake off excess water and let the
attachment air-dry completely.
Tip: For optimal performance, lubricate the
teeth of the attachment with a drop of sewing
machine oil regularly.
Replacement
Replacing the shaving heads
For maximum shaving performance, we advise you
to replace the shaving heads every two years.
Replace damaged shaving heads immediately.
Always replace the shaving heads with original
Philips shaving heads.
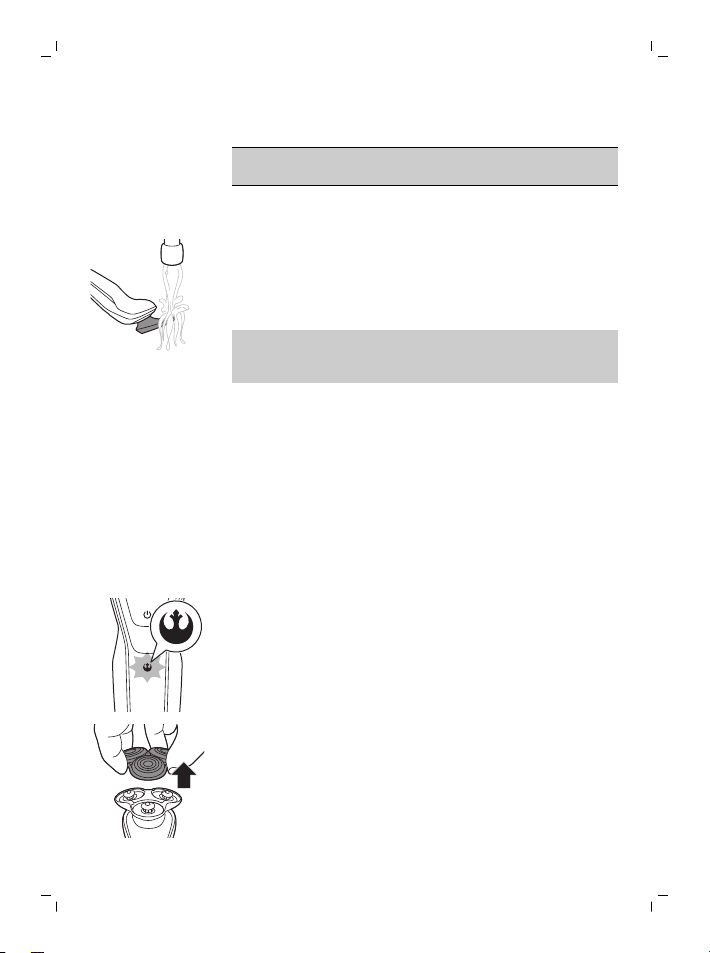
Replacement reminder
The replacement reminder indicates that the
shaving heads need to be replaced.The
replacement reminder flashes when you switch the
shaver off.
1 Switch the shaver off.
English
21
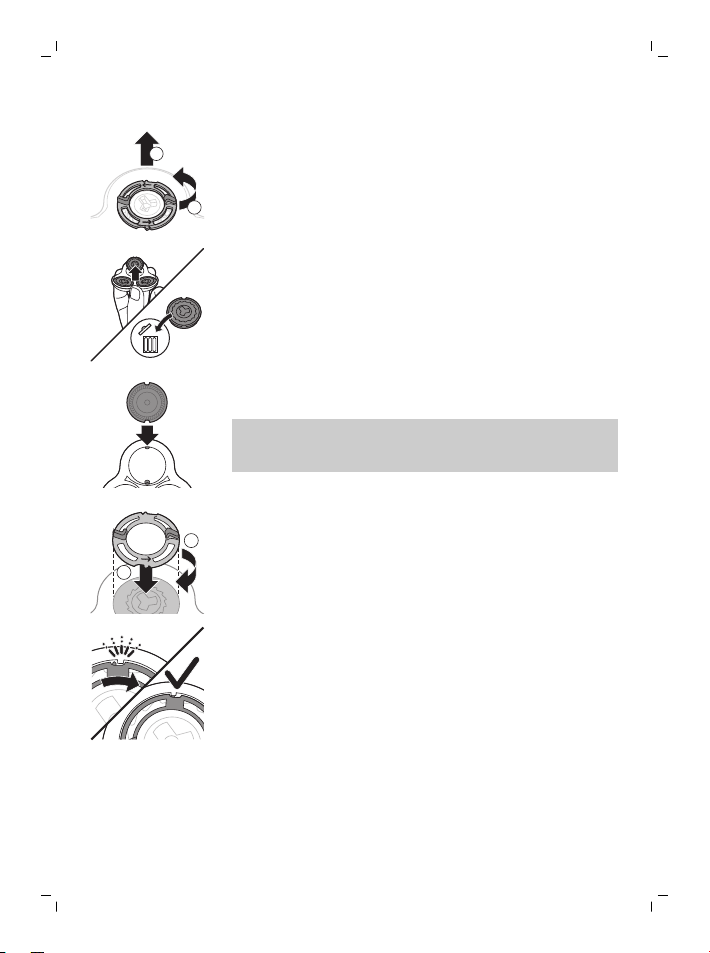
2 Pull the shaving head holder off the bottom
part of the shaving unit.
Page 22
1
2
2
1
22
English
3 Turn the retaining ring anticlockwise and lift it
off the shaving head.
Repeat this process for the other retaining rings.
Place them aside in a safe place.
4 Remove the shaving heads from the shaving
head holder.
Discard the used shaving heads immediately to
avoid mixing them with the new shaving heads.
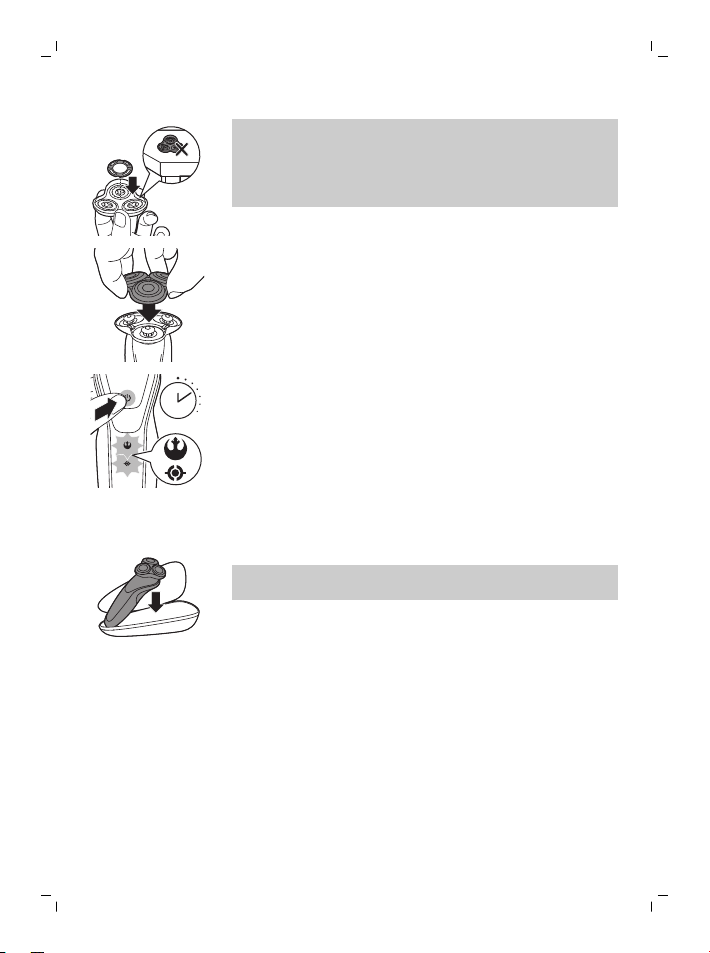
5 Place the new shaving heads in the shaving
head holder.
Note: Make sure the notches on both sides of
the shaving heads fit exactly onto the
projections in the shaving head holder.
6 Place the retaining ring on the shaving head
and turn it clockwise to reattach the retaining
ring.
Repeat this process for the other retaining rings.
- Each retaining ring has two recesses that fit
exactly around the projections of the shaving
head holder. Turn the ring clockwise until you
hear a click to indicate that the ring is fixed.
Page 23
1
7 sec.
Storage
English
Note: Hold the shaving head holder in your
hand when you reinsert the shaving heads and
reattach the retaining rings. Do not place the
shaving head holder on a surface, as this may
cause damage to the shaving heads.
7 Attach the shaving head holder to the bottom
part of the shaving unit (‘click’).
8 To reset the replacement reminder, press and
hold the on/off button for approx. 7 seconds.
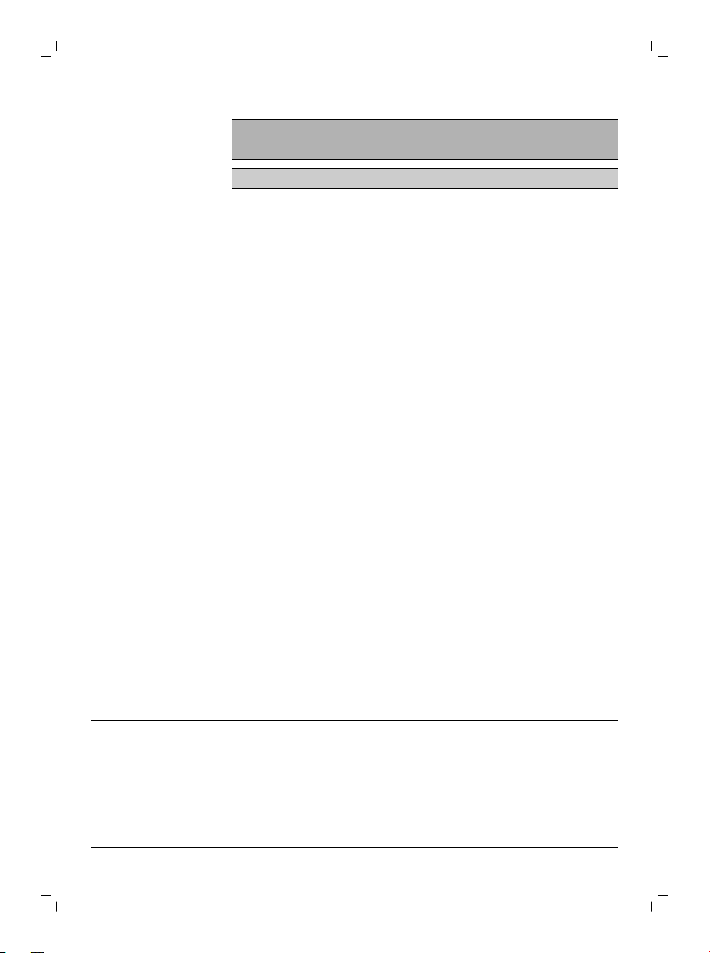
Store the shaver in the pouch.
Note: Always let the shaver dry before you store it
in the pouch.
23
Ordering accessories
To buy accessories or spare parts, visit
www.shop.philips.com/service or go to your
Philips dealer. You can also contact the Philips
Consumer Care Center in your country (see the
international warranty leaflet for contact details).
The following accessories are available:
- SH90 Philips shaving heads
Page 24

English
24
Recycling
- RQ111 Philips beard styler
- RQ585 Philips cleansing brush
- RQ560, RQ563 Philips cleansing brush heads
- HQ8505 supply unit
Note: The availability of the accessories may differ
by country.
- This symbol means that this product shall not
be disposed of with normal household waste
(2012/19/EU).
- This symbol means that this product contains a
built-in rechargeable battery which shall not be
disposed of with normal household waste
(2006/66/EC). Please take your product to an
official collection point or a Philips service
center to have a professional remove the
rechargeable battery.
- Follow your country’s rules for the separate
collection of electrical and electronic products
and rechargeable batteries. Correct disposal
helps prevent negative consequences for the
environment and human health.
Removing the rechargeable shaver battery
Only remove the rechargeable battery when
you discard the shaver. Before you remove
the battery, make sure that the shaver is
disconnected from the wall socket and that
the battery is completely empty.
Take any necessary safety precautions
when you handle tools to open the shaver
Page 25
and when you dispose of the rechargeable
battery.
Be careful, the battery strips are sharp.
1 Insert the screwdriver into the slot between the
front and back panel in the bottom of the
appliance. Remove the back panel.
2 Remove the front panel.
3 Unscrew the two screws at the top of the inner
panel and remove the inner panel.
4 Bend aside the battery lips, which hold the
battery, by placing a screwdriver between the
battery and the lips.
5 Remove the battery.
Warranty and support
If you need information or support, please visit
www.philips.com/support or read the
international warranty leaflet.
Warranty restrictions
The shaving heads (cutters and guards) are not
covered by the terms of the international warranty
because they are subject to wear.
Troubleshooting
Shaver
Problem Possible cause Solution
English
25
The appliance
does not work
when I press the
on/off button.
The appliance is still
attached to the wall
socket. For safety
reasons, the
appliance can only
be used without
cord.
Unplug the appliance and
press the on/off button to
switch on the appliance.
Page 26
English
26
Problem Possible cause Solution
Theapplianced
oes not shave as
well as it used to.
The rechargeable
battery is empty.
The travel lock is
activated.
The shaving unit is
soiled or damaged
to such an extent
that the motor
cannot run.
The shaving heads
are damaged or
worn.
Hairs or dirt
obstruct the shaving
heads.
Recharge the battery.
Press the on/off button for
3 seconds to deactivate the
travel lock.
Clean the shaving heads
thoroughly or replace them.
Also see 'Hairs or dirt
obstruct the shaving heads'
for a detailed description of
how to clean the shaving
heads thoroughly.
Replace the shaving heads.
Clean the shaving heads in
the regular way or clean
them thoroughly.
To clean the shaving heads
thoroughly, remove the
shaving heads from the
shaving head holder one
by one (see 'Replacement').
Then separate the cutter
from its guard and rinse
each matching set under
the tap. After rinsing, place
the cutter back into its
corresponding guard.
Finally, put the shaving
heads back into the
shaving head holder (see
'Replacement').
Page 27
Problem Possible cause Solution
English
27
I replaced the
shaving heads,
but the
replacement
reminder is still
showing.
Water is leaking
from the bottom
of the appliance.
You have not reset
the replacement
reminder.
During cleaning,
water may collect
between the inner
body and the outer
shell of the
appliance.
To reset the replacement
reminder, press and hold
the on/off button for
approx. 7 seconds.
This is normal and not
dangerous because all
electronics are enclosed in
a sealed power unit inside
the appliance.
Page 28

Čeština
28
Úvod
Společnost Philips Vám gratuluje ke koupi a vítá
Vás! Chcete-li využívat všech výhod podpory
nabízené společností Philips, zaregistrujte svůj
výrobek na stránkách www.philips.com/welcome.
Přečtěte si tuto uživatelskou příručku. Naleznete
vní informace ofunkcích tohoto holicího strojku
iněkolik tipů, díky nimž bude holení snazší a
radostnější.
Všeobecný popis (obr. 1)
1 Nasazovací nástavec pro přesné zastřihování
2 Holicí jednotka skomorou na odstřižené vousy
3 Vypínač
4 Tlačítko Turbo+
5 Připomenutí výměny
6 Připomenutí čištění
7 Symbol cestovního zámku
8 Symbol odpojení přístroje kpoužití
9 Kontrolka nabíjení baterie
10 Zásuvka pro malou zástrčku
11 Napájecí jednotka
12 Malá zástrčka
13 Pouzdro
Důležité bezpečnostní informace
Před použitím přístroje ajeho příslušenství si
pečlivě přečtěte tuto příručku sdůležitými
informacemi auschovejte ji pro budoucí použití.
Dodané příslušenství se může pro různé výrobky
lišit.
Čeština
Page 29
Čeština
Nebezpečí
- Zdroj udržujte vsuchu.
Varování
- Knabíjení baterie používejte pouze
odnímatelnou napájecí jednotku (HQ8505)
dodávanou stímto přístrojem.
- Zdroj obsahuje transformátor. U zdroje
nikdy neodřezávejte a nenahrazujte
zástrčku. Mohlo by tak dojít knebezpečné
situaci.
- Tento přístroj mohou používat děti od 8let
věku. Osoby somezenými fyzickými,
smyslovými nebo duševními schopnostmi
nebo nedostatkem zkušeností aznalostí jej
mohou používat, pokud jsou pod dohledem
nebo byly poučeny obezpečném používání
přístroje apokud chápou související rizika.
Děti si spřístrojem nesmí hrát. Děti nesmí
provádět bez dozoru čištění auživatelskou
údržbu.
- Holicí strojek před čištěním pod tekoucí
vodou vždy odpojte od sítě.
29
Page 30
Čeština
30
- Před použitím přístroj vždy zkontrolujte.
Přístroj nepoužívejte, je-li poškozený, aby
nedošlo ke zranění. Poškozenou součástku
vyměňujte vždy za původní typ.
- Neotvírejte přístroj, ani se nepokoušejte
vyměnit akumulátor.
Upozornění
- Čisticí systém ani nabíjecí
stojan neponořujte do vody, ani
je neoplachujte pod tekoucí
vodou.
- Pro oplachování holicího
strojku nikdy nepoužívejte vodu
teplejší než 60°C.
- Přístroj používejte pouze
kúčelu, ke kterému je určen, jak
je vyobrazeno vuživatelské
příručce.
- Zhygienických důvodů by měla
přístroj používat pouze jedna
osoba.
Page 31

Čeština
- Kčištění přístroje nikdy
nepoužívejte stlačený vzduch,
kovové žínky, abrazivní ani
agresivní čisticí prostředky, jako
je například benzín nebo
aceton.
- Pokud je holicí strojek vybaven
čisticím systémem, vždy
používejte originální čisticí
kapalinu Philips (kazetu nebo
lahvičku vzávislosti na typu
čisticího systému).
- Čisticí systém pokládejte vždy
na stabilní vodorovný povrch,
aby nedocházelo kúniku
kapaliny.
- Pokud čisticí systém používá
čisticí kazetu, před jeho
použitím pro čištění nebo nabití
holicího strojku se vždy ujistěte,
že je přihrádka pro kazetu
uzavřena.
31
Page 32

Čeština
32
- Když je čisticí systém připraven
kpoužití, nepohybujte sním,
aby nedocházelo kúniku čisticí
kapaliny.
- Po opláchnutí holicího strojku
může ze zásuvky vjeho spodní
části vytékat voda. Je to
normální a nepředstavuje to
žádné nebezpečí, protože
veškerá elektronika je uzavřena
vizolované napájecí jednotce
uvnitř holicího strojku.
- Nepoužívejte zdroj vzásuvce,
ve které je zapojen elektrický
osvěžovač vzduchu, ani vjejí
blízkosti. Předejdete tak
nenapravitelnému poškození
zdroje.
Elektromagnetická pole (EMP)
Tento přístroj Philips odpovídá všem platným
normám a předpisům týkajícím se vystavení
účinkům elektromagnetických polí.
Page 33

Obecné informace
- Tento holicí strojek je voděodolný. Je vhodný
- Napájecí jednotku lze připojit do sítě onapětí
- Zdroj transformuje 100V až 240V na bezpečné
- Maximální hladina hluku: Lc = 69dB(A)
Displej
Sekvence zapnutí
Při úplně prvním stisknutí vypínače se postupně
rozsvítí všechny kontrolky na displeji.
Holicí strojek před použitím nabijte.
Nabíjení
Rychlé nabíjení: Pokud je baterie prázdná astrojek
zapojíte do elektrické zásuvky, kontrolky stavu
nabíjení baterie se budou jedna po druhé
opakovaně rozsvěcet bílým světlem. Když je holicí
strojek dostatečně nabitý na jedno holení, začne
spodní kontrolka nabíjení baterie pomalu blikat
bílým světlem.
Pokud budete vnabíjení strojku pokračovat,
spodní kontrolka stavu nabíjení nejprve blikne
bílým světlem apoté se rozsvítí trvale. Potom
začne blikat a následně se trvale rozsvítí druhá
kontrolka. Tak to pokračuje, dokud není přístroj
zcela nabitý.
Čeština
pro použití ve vaně nebo sprše a pro čištění
pod tekoucí vodou. Holicí strojek lze proto
zbezpečnostních důvodů používat pouze bez
napájecího kabelu.
vrozmezí 100 až 240V.
nízké napětí nižší než 24V.
33
Page 34

Čeština
34
Baterie je plně nabitá
Poznámka: Tento holicí strojek lze používat pouze
bez kabelu.
Když je baterie plně nabitá, všechny kontrolky
nabití baterie svítí bílým nepřerušovaným světlem.
Poznámka: Jestliže stisknete vypínač během
nabíjení nebo po nabíjení, rozsvítí se symbol „Pro
použití odpojit“, který vás upozorňuje, že holicí
strojek je stále zapojen do zásuvky.
Poznámka: Když se baterie plně nabije, displej se
po 30minutách automaticky vypne.
Vybitá baterie
Když je baterie téměř vybitá, spodní kontrolka
ukazatele stavu baterie bliká červeně.
Zbývající úroveň nabití baterie
Zbývající úroveň nabití baterie zobrazují kontrolky
nabití baterie, které trvale svítí.
Připomenutí odpojení přístroje kpoužití
Symbol „Před použitím odpojit“ blikáním
připomíná, že je nutné nejprve vypojit holicí strojek
ze zásuvky, ateprve potom jej bude možné
zapnout.
Page 35

Připomenutí čištění
Po každém holení strojek čistěte, aby byl zajištěn
jeho optimální výkon (viz 'Čištění aúdržba'). Když
holicí strojek vypnete, zabliká kontrolka čištění, aby
vám připomněla, že je třeba jej vyčistit.
Cestovní zámek
Před cestováním lze holicí strojek uzamknout.
Cestovní zámek zabraňuje nechtěnému zapnutí
holicího strojku (viz 'Aktivace cestovního zámku').
Výměna holicích hlavic
Aby byl zajištěn maximální holicí výkon, vyměňte
holicí hlavice každé dva roky. Holicí strojek je
vybaven funkcí připomenutí výměny, která
upozorňuje na potřebu výměny holicích hlavic.
Bliká připomenutí výměny, které upozorňuje, že je
třeba vyměnit holicí hlavice (viz 'Výměna holicích
hlavic 'Výměna').
Poznámka: Po výměně holicích hlav je třeba funkci
připomenutí výměny resetovat podržením tlačítka
vypínače po dobu sedmisekund.
Nastavení Turbo+
Toto nastavení vám umožňuje prostřihnutí
hustších partií vašeho vousu. Nepravidelné
zablikání tlačítka Turbo+ oznamuje, že nastavení
Turbo+ bylo aktivováno (viz 'Holení snastavením
Turbo+').
Čeština
35
Page 36

Čeština
36
Nabíjení
Holicí stroje nabijte před prvním použitím a
vpřípadě, že displej ukazuje, že je baterie téměř
vybitá.
Nabíjení trvá přibližně 1hodinu. Plně nabitý holicí
strojek vystačí až na60 minut holení.
Poznámka: Během nabíjení nelze holicí strojek
používat.
Nabíjení pomocí napájecí jednotky
1 Přesvědčte se, že je přístroj vypnutý.
2 Malou zástrčku zasuňte do holicího strojku
anapájecí jednotku zapojte do elektrické
zásuvky.
Displej holicího strojku ukazuje, že se holicí
strojek nabíjí.
3 Po nabití vytáhněte napájecí jednotku
zelektrické zásuvky amalý konektor zholicího
strojku.
Používání holicího strojku
Před použitím vždy zkontrolujte holicí strojek
a veškeré příslušenství. Holicí strojek ani
příslušenství nepoužívejte, jsou-li poškozené,
protože by mohlo dojít k úrazu. Poškozenou
součástku vždy nahraďte součástkou původního
typu.
Tento symbol znamená, že holicí strojek lze
používat ve vaně nebo ve sprše.
- Tento holicí strojek používejte kzamýšlenému
domácímu používání, které je popsáno vtéto
příručce.
- Zhygienických důvodů by měla holicí strojek
používat pouze jedna osoba.
Page 37

- Zastřihování je jednodušší, jsou-li pokožka a
chloupky suché.
Poznámka: Tento holicí strojek lze používat pouze
bez kabelu.
Zapínání avypínaní holicího strojku
1 Holicí strojek zapnete/vypnete jedním
stisknutím vypínače.
Když je holicí strojek zapnutý, symbol výměny
nepřetržitě svítí.
Poznámka: Pokud připomenutí výměny bliká,
znamená to, že je třeba vyměnit holicí hlavice.
Holení
Čas pro přizpůsobení pleti
Prvních několik holení nemusí přinést požadované
výsledky avaše pleť může být dokonce lehce
podrážděná. To je normální. Vaše pleť a vousy
potřebují určitou dobu, aby si zvykly na nový holicí
systém. Doporučujeme vám holit se pouze tímto
strojkem, a to pravidelně (nejméně třikrát týdně)
po dobu třítýdnů, aby si pokožka na nový přístroj
zvykla.
- Pokud jste se 3dny nebo déle neholili,
doporučujeme vám, vzájmu co nejlepšího
výsledku apohodlí pro pokožku, vousy před
holením zkrátit.
Holení za sucha
1 Zapněte holicí strojek.
Čeština
37
Page 38

38
Čeština
2 Pohybujte holicími hlavami po pokožce
krouživými pohyby, abyste zachytili všechny
chloupky rostoucí různými směry. Působením
lehkého tlaku dosáhnete přesného pohodlného
oholení.
Poznámka: Na přístroj příliš netlačte. Mohlo by
dojít kpodráždění pokožky.
3 Po každém použití holicí strojek vypněte
avyčistěte.
Kontrolka nabíjení baterie se na několik sekund
rozsvítí aukáže stav baterie.
Mokré holení
Tento holicí strojek lze použít ina mokrou tvář
spěnou nebo gelem na holení, snimiž bude holení
příjemnější.
1 Zvlhčete pokožku trochou vody.
2 Naneste na pokožku pěnu nebo gel na holení.
3 Propláchněte holicí jednotku pod tekoucí
vodou. Zajistíte, že bude hladce klouzat po kůži.
4 Zapněte holicí strojek.
Page 39

Čeština
5 Pohybujte holicími hlavami po pokožce
krouživými pohyby, abyste zachytili všechny
chloupky rostoucí různými směry. Působením
lehkého tlaku dosáhnete přesného pohodlného
oholení.
Poznámka: Na přístroj příliš netlačte. Mohlo by
dojít kpodráždění pokožky.
Poznámka: Holicí jednotku pravidelně
proplachujte pod tekoucí vodou. Zajistíte, že
bude stále hladce klouzat po kůži.
6 Osušte si tvář.
7 Po každém použití holicí strojek vypněte
avyčistěte.
Poznámka: Nezapomeňte zholicího strojku
opláchnout veškerou pěnu nebo gel.
Holení snastavením Turbo+
1 Zapněte holicí strojek.
2 Jestliže chcete rychleji holit oblasti shustšími
vousy, stiskněte jednou tlačítko Turbo+.
Poznámka: Nepravidelné zablikání tlačítka
Turbo+ oznamuje, že nastavení Turbo+ bylo
aktivováno.
3 Pohybujte holicími hlavami po pokožce
krouživými pohyby, abyste zachytili všechny
chloupky rostoucí různými směry. Působením
lehkého tlaku dosáhnete přesného pohodlného
oholení.
Poznámka: Krouživé pohyby zajistí lepší
výsledek holení než přímé pohyby.
4 Režim Turbo+ vypnete jedním stisknutím
tlačítka Turbo+.
39
Page 40

Čeština
40
Použití nasazovacího nástavce
Sejmutí a připevnění nasazovacího nástavce
1 Přesvědčte se, že je přístroj vypnutý.
2 Přímo sejměte nástavec zholicího strojku.
Poznámka: Při snímání zholicího strojku
nástavec neohýbejte.
3 Nasaďte výstupek nástavce do zářezu vhorní
části holicího strojku. Poté nástavec zatlačením
nasaďte na holicí strojek (ozve se zaklapnutí).
Použití nástavce pro přesné zastřihování
Nástavec pro přesné zastřihování lze použít
kúpravě vousů, kotlet akníru.
1 Nasaďte zastřihovací nástavec na holicí strojek
(ozve se zaklapnutí).
2 Zapněte holicí strojek.
3 Podržte zastřihovací nástavec kolmo kekůži as
jemným přítlakem pohybujte přístrojem
směrem dolů.
4 Po použití přístroj vypněte azastřihovací
nástavec vyčistěte.
Page 41

Cestovní zámek
3 sec.
Před cestováním lze holicí strojek uzamknout.
Cestovní zámek zabraňuje nechtěnému zapnutí
holicího strojku.
Aktivace cestovního zámku
1 Režim cestovního zámku aktivujete podržením
vypínače po dobu třísekund.
Při aktivaci cestovního zámku se krátce rozsvítí
kontrolky na displeji. Když zapnete cestovní
zámek, zabliká symbol cestovního zámku.
Deaktivace cestovního zámku
1 Podržte vypínač po dobu 3sekund.
Při deaktivaci cestovního zámku se krátce
rozsvítí kontrolky na displeji. Když deaktivujete
cestovní zámek, symbol cestovního zámku
zabliká azhasne. Holicí strojek se zapne aje
nyní opět připraven kpoužití.
Poznámka: Při zapojení do zásuvky se holicí strojek
automaticky odemkne.
Čeština
41
Čištění a údržba
Pravidelné čištění vám pomůže dosáhnout
lepších výsledků holení.
Nikdy nečistěte, neodstraňujte ani
nevyměňujte holicí jednotku, pokud je holicí
strojek zapnutý.
Page 42

Čeština
42
Neaplikujte příliš velký tlak na hřebenové
nástavce holicí hlavice.
Nedotýkejte se holicích hlavic tvrdými
předměty, protože by mohly vylomit zuby
nebo poškodit přesně vyrobené drážkované
hřebeny.
K čištění holicího strojku nepoužívejte žádné
abrazivní čisticí prostředky a agresivní
tekutiny, např. benzín nebo aceton.
Čištění holicího strojku tekoucí vodou
Po každém holení strojek čistěte, aby byl zajištěn
jeho optimální výkon.
Vždy zkontrolujte, zda není voda příliš horká,
abyste si neopařili ruce.
Holicí jednotku nikdy nesušte ručníkem nebo
jinou tkaninou, vyvarujete se tak poškození
holicích hlavic.
Při oplachování holicí jednotky může z holicího
strojku kapat voda. To je zcela normální.
1 Zapněte holicí strojek.
2 Holicí jednotku opláchněte pod tekoucí teplou
vodou.
3 Vypněte holicí strojek. Vysuňte držák holicích
hlav ze spodní části holicí jednotky.
Page 43

4 Vypláchnětekomoru na odstřižené vousy pod
tekoucí vodou.
5 Vypláchněte držák holicích hlav pod teplou
tekoucí vodou.
6 Zbylou vodu důkladně vytřepejte adržák
holicích hlav nechte důkladně vyschnout.
7 Zasuňte držák holicích hlav do spodní části
holicí jednotky (ozve se zaklapnutí).
Čištění nástavce pro přesné zastřihování
Zastřihovač nikdy nesušte ručníkem nebo jinou
tkaninou. Vyvarujete se tak poškození
zastřihovacích zubů.
Po každém použití zastřihovač vyčistěte.
1 Zapněte holicí strojek.
2 Opláchněte zastřihovač pod teplou tekoucí
vodou.
3 Po čištění holicí strojek vypněte.
4 Zbylou vodu důkladně vytřepejte anechte
všechny nástavce vyschnout.
Tip: Aby byl zajištěn optimální výkon, pravidelně
kápněte na zuby nástavce kapku oleje na šicí
stroje.
Čeština
43
Page 44

1
2
Čeština
44
Výměna
Výměna holicích hlavic
V zájmu zajištění maximálního holicího výkonu
doporučujeme holicí hlavy měnit každé dva roky.
Poškozené holicí hlavy ihned vyměňte. Holicí
hlavice nahrazujte vždy výhradně originálními
holicími hlavicemi Philips.
Připomenutí výměny
Připomenutí výměny informuje onutnosti výměny
holicích hlavic. Při vypnutí holicího strojku symbol
výměny bliká.
1 Holicí strojek vypněte.
2 Vysuňte držák holicích hlav ze spodní části
holicí jednotky.
3 Otočte zajišťovací kroužek proti směru
hodinových ručiček aodtáhněte jej směrem od
holicí hlavice.
Opakujte postup pro ostatní zajišťovací kroužky.
Odložte je stranou na bezpečné místo.
4 Sejměte holicí hlavy z držáku holicích hlav.
Použité holicí hlavy hned vyhoďte, aby nedošlo
k záměně s novými holicími hlavami.
Page 45

2
1
1
Čeština
5 Do držáku holicích hlavic vložte nové holicí
hlavice.
Poznámka: Zkontrolujte, že drážky na obou
stranách holicí hlavy přesně zapadají na
výstupky držáku holicí hlavy.
6 Nasaďte zajišťovací kroužek zpět na holicí
hlavici aotočte jím ve směru hodinových
ručiček, čímž jej znovu upevníte.
Opakujte postup pro ostatní zajišťovací kroužky.
- Na každém zajišťovacím kroužku jsou dva
otvory, které při nasazení přesně dosednou na
výstupky držáku holicích hlavic. Otáčejte
kroužkem po směru hodinových ručiček, dokud
se neozve zacvaknutí ohlašující upevnění
kroužku.
Poznámka: Při opětovném vložení holicí hlavy
do držáku a opětovném připevnění
zajišťovacích kroužků držte držák holicích hlav
vdlani. Nikam jej nepokládejte, mohlo by dojít
kpoškození holicích hlav.
7 Zasuňte držák holicích hlav do spodní části
holicí jednotky (ozve se zaklapnutí).
45
Page 46

7 sec.
Čeština
46
8 Pokud chcete funkci připomenutí výměny
resetovat, stiskněte vypínač a přibližněsedm
sekund jej podržte.
Skladování
Holicí strojek uchovávejte vdodaném pouzdru.
Poznámka: Před uložením do pouzdra nechte
holicí strojek vždy vyschnout.
Objednávání příslušenství
Chcete-li koupit příslušenství nebo náhradní díly,
navštivte adresu www.shop.philips.com/service
nebo se obraťte na prodejce výrobků Philips.
Můžete se také obrátit na středisko péče
ozákazníky společnosti Philips ve své zemi
(kontaktní údaje naleznete na letáčku
scelosvětovou zárukou).
Lze zakoupit následující příslušenství:
- holicí hlavice Philips SH90
- nástavec na zastřihování vousů RQ111 Philips
- čisticí kartáček RQ585 Philips
- hlavice čisticího kartáčku RQ560, RQ563 Philips
- napájecí jednotka HQ8505
Poznámka: Dostupnost příslušenství se může lišit
podle země.
Page 47

Čeština
Recyklace
- Tento symbol znamená, že výrobek nelze
likvidovat sběžným komunálním odpadem
(2012/19/EU).
- Symbol na výrobku znamená, že tento výrobek
obsahuje vestavěný dobíjecí akumulátor, který
nemůže být likvidován společně sběžným
domácím odpadem (2006/66/ES). Odneste
prosím výrobek do oficiálního sběrného dvora
nebo do servisního střediska společnosti Philips
apožádejte tamního odborníka ovyjmutí
nabíjecí baterie.
- Dodržujte předpisy vaší země týkající se sběru
tříděného odpadu elektrických a elektronických
výrobků a také akumulátorů. Správnou likvidací
pomůžete zabránit negativním dopadům na
životní prostředí a lidské zdraví.
Vyjmutí nabíjecího akumulátoru holicího strojku
Až budete holicí strojek likvidovat, vyjměte
z něj nabíjecí baterii. Před vyjmutím baterie
ověřte, zda je holicí strojek odpojený od
elektrické zásuvky a zda je tato baterie
zcela vybitá.
Při manipulaci s nástroji potřebnými
k otevření holicího strojku a při likvidaci
nabíjecí baterie dbejte všech nezbytných
bezpečnostních zásad.
Pozor, pásky od baterie jsou ostré.
47
Page 48

Čeština
48
1 Vložte šroubovák do drážky mezi předním a
zadním panelem ve spodní části přístroje.
Sejměte zadní panel.
2 Sejměte přední panel.
3 Uvolněte dva šroubky na horní části vnitřního
panelu a sejměte vnitřní panel.
4 Vyjměte nabíjecí baterii pomocí šroubováku.
Záruka a podpora
Potřebujete-li další informace či podporu,
navštivte web www.philips.com/support nebo si
prostudujte záruční list s mezinárodní platností.
Omezení záruky
Na holicí hlavy (planžety a kryty) se nevztahují
podmínky mezinárodní záruky, neboť podléhají
opotřebení.
Řešení problémů
Holicí strojek
Problém Možná příčina Řešení
Strojek po
stisknutí tlačítka
vypínače
nefunguje.
Přístroj je stále
připojen kelektrické
zásuvce. Přístroj lze
z bezpečnostních
důvodů používat
pouze bez
napájecího kabelu.
Nabíjecí baterie je
vybitá.
Cestovní zámek je
zapnutý.
Odpojte přístroj od sítě a
zapněte ho stisknutím
vypínače.
Nabijte baterii.
Cestovní zámek
deaktivujete podržením
vypínače po dobu
třísekund.
Page 49

Problém Možná příčina Řešení
Čeština
49
Strojekneholíta
k dobře jako
dříve.
Vyměnil jsem
holicí hlavice, ale
stále se
zobrazuje
připomenutí
výměny.
Ze spodní části
přístroje
prosakuje voda.
Holicí jednotka je
znečištěná nebo
poškozená do té
míry, že motor nelze
spustit.
Jsou poškozené
nebo opotřebované
holicí hlavy.
Holicí hlavy jsou
ucpány vousy nebo
nečistotami.
Neresetovali jste
připomenutí
výměny.
Během čištění se
může mezi vnitřním
tělem a vnějším
obalem přístroje
nahromadit voda.
Holicí hlavice důkladně
vyčistěte nebo je vyměňte.
Podrobný popis toho, jak
správně vyčistit holicí
hlavice, naleznete včásti
„Holicí hlavice ucpané
vousy nebo nečistotami“.
Vyměňte holicí hlavice.
Vyčistěte holicí hlavice
standardním způsobem
nebo je důkladně vyčistěte.
Chcete-li důkladně vyčistit
holicí hlavice, vyjměte je
postupně (viz 'Výměna')
zdržáku holicích hlavic.
Poté oddělte nožový věnec
od holicí korunky a
opláchněte jednotlivé páry
pod tekoucí vodou. Po
opláchnutí vložte nožový
věnec zpět do odpovídající
holicí korunky. Poté vložte
holicí hlavice zpět do
držáku holicích hlavic (viz
'Výměna').
Pokud chcete funkci
připomenutí výměny
resetovat, stiskněte vypínač
a přibližněsedm sekund jej
podržte.
Je to normální a
nepředstavuje to žádné
nebezpečí, protože veškerá
elektronika je uzavřena
vizolované napájecí
jednotce uvnitř přístroje.
Page 50

Eesti
50
Sissejuhatus
Õnnitleme ostu puhul ja tervitame Philipsi poolt!
Philipsi pakutava tootetoe eeliste täielikuks
kasutamiseks registreerige oma toode veebisaidil
www.philips.com/welcome.
Palun lugege see pardli omadusi tutvustav
kasutusjuhend läbi. Sellest leiate ka nõuandeid
raseerimise kergemaks ja nauditavamaks
muutmise kohta.
Üldine kirjeldus (joon. 1)
1 Klõpsake täppispiirli tarvikul
2 Pardlipea koos karvakambriga
3 Toitenupp
4 Turbo+ nupp
5 Väljavahetamise meeldetuletus
6 Puhastamise meeldetuletus
7 Reisiluku sümbol
8 Märgutuli "Kasutamiseks ühendage
elektritoitest lahti"
9 Aku laetuse näit
10 Väikese pistiku pesa
11 Toiteplokk
12 Väike pistik
13 Kott
Tähtis ohutusteave
Enne seadme ja selle tarvikute kasutamist lugege
antud oluline teave hoolikalt läbi ja hoidke see
edaspidiseks alles. Toote juurde kuuluvad tarvikud
võivad olenevalt tootest erineda.
Eesti
Page 51

Eesti
51
Oht
- Hoidke toiteplokk kuivana.
Hoiatus
- Kasutage aku laadimiseks ainult äravõetavat
toiteplokki (HQ8505), mis on seadmega
kaasas.
- Toiteplokis on trafo. Ärge lõigake toiteplokki
ära, et asendada seda mõne teise pistikuga,
kuna see põhjustabohtliku olukorra.
- Seda seadet võivad kasutada lapsed alates
8. eluaastast ning füüsiliste puuete ja
vaimuhäiretega isikud või isikud, kellel
puuduvad kogemused ja teadmised, kui
neid valvatakse või neile on antud juhendid
seadme ohutu kasutamise kohta ja nad
mõistavad sellega seotud ohte. Lapsed ei
tohi seadmega mängida. Ärge laske lastel
seadet järelevalveta puhastada ja hooldada.
- Võtke alati pistik pistikupesast välja enne
pardli kraani all pesemist.
Page 52

Eesti
52
- Kontrollige alati enne seadme kasutamist
selle korrasolekut. Vigastuste vältimiseks
ärge kasutage seadet, kui see on
kahjustatud. Vahetage alati kahjustatud osa
originaalvaruosa vastu välja.
- Ärge avage seadet, et laetavaid akusid ise
välja vahetada.
Ettevaatust
- Ärge kastke puhastussüsteemi
või laadimisalust vette ega
loputage neid voolava vee all.
- Pardli loputamiseks ei tohi
kunagi kasutada üle 60°C vett.
- Kasutage seda seadet üksnes
selleks ettenähtud otstarbel
kasutusjuhendi kohaselt.
- Hügieenilistel põhjustel peaks
seadet ainult üks isik kasutama.
- Ärge kunagi kasutage seadme
puhastamiseks suruõhku,
küürimiskäsna, abrasiivseid
puhastusvahendeid ega ka
sööbivaid vedelikke nagu
bensiin või atsetoon.
Page 53

Eesti
- Kui pardel on varustatud
puhastussüsteemiga, kasutage
alati originaalset Philipsi
puhastusvedelikku (kassett või
pudel, sõltuvalt
puhastussüsteemi tüübist).
- Pange puhastussüsteem
lekkimise ärahoidmiseks alati
kindlale, tasasele ja
horisontaalsele pinnale.
- Kui teie süsteem kasutab
puhastuskassetti, veenduge
alati enne puhastussüsteemi
kasutamist või pardli laadimist,
et kasseti kamber on suletud.
- Ärge kasutusvalmis
puhastussüsteemi pesuvahendi
lekkimise ärahoidmiseks teise
kohta paigutage.
53
Page 54

Eesti
54
- Loputamise ajal tilgub seadme
põhjal olevast pesast vett välja.
See on normaalne ega ole
ohtlik, sest kogu elektroonika
on pardli sees olevas
hermeetiliselt suletud
toiteallikas.
- Toiteploki pöördumatu
kahjustamise vältimiseks ärge
kasutage seda sellises
pistikupesas või sellise
pistikupesa lähedal, mis
sisaldab elektrilist
õhuvärskendit.
Elektromagnetväljad (EMF)
See Philips seade vastab kõikidele
elektromagnetiliste väljadega kokkupuudet
käsitlevatele kohaldatavatele standarditele ja
õigusnormidele.
Üldteave
- See pardel on veekindel. Sobib kasutamiseks
vannis või duši all ning puhastamiseks kraani all.
Ohutuse tagamiseks saab pardlit vaid juhtmeta
kasutada.
- Toiteplokki sobib kasutada elektrivõrgu
toitepingel 100–240 volti.
- Toiteplokk muundab 100–240 voldise pinge
trafo abil ohutuks 24-voldiseks pingeks.
- Maksimaalne müratase: Lc = 69dB(A).
Page 55

Ekraan
Tegevuste järjekord käivitamisel
Kui vajutate toitenuppu esimest korda, süttivad
järjest kõik näidiku märgutuled.
Laadige pardlit enne kasutamist.
Laadimine
Kiirlaadimine: Kui aku on tühi ja te ühendate pardli
pistikupessa, süttivad aku laetuse näidu
märgutuled korduvalt üksteise järel valgelt. Kui
akus on piisavalt energiat üheks raseerimiseks,
hakkab aku laetuse näidu alumine märgutuli
aeglaselt valgelt vilkuma.
Kui pardel laadimist jätkab, vilgub aku laetuse
näidu alumine märgutuli kõigepealt valgelt ja jääb
siis pidevalt valgelt põlema. Seejärel vilgub
järgmine märgutuli ja jääb pidevalt põlema, kuni
pardel on täielikult laetud.
Aku on täielikult laetud
Märkus. Pardlit saab kasutada ainult ilma
toitejuhtmeta.
Kui aku on täielikult laetud, jäävad kõik aku laetuse
näidu märgutuled püsivalt valgelt põlema.
Märkus. Kui vajutate toitenuppu laadimise ajal või
pärast laadimist, süttib märgutuli "Kasutamiseks
ühendage elektritoitest lahti", mis näitab, et pardel
on veel pistikupesaga ühendatud.
Märkus. Kui aku on täis, lülitub näidik 30 minuti
pärast automaatselt välja.
Eesti
55
Page 56

Eesti
56
Aku on tühi
Kui aku on peaaegu tühi, vilgub aku laetuse näidu
alumine märgutuli punaselt.
Aku laetuse tase
Aku laetuse taset näitavad aku laetuse näidu
märgutuled, mis põlevad püsivalt.
Meeldetuletus „Kasutamiseks ühendage elektritoitest lahti"
Märgutuli „Kasutamiseks ühendage elektritoitest
lahti" vilgub meeldetuletuseks, et enne, kui pardlit
saab sisse lülitada, tuleb see pistikupesast lahti
ühendada.
Puhastamise meeldetuletus
Optimaalse tulemuse saavutamiseks puhastage
pardlit pärast iga raseerimiskorda (vaadake
'Puhastamine ja hooldus'). Pardli väljalülitamisel
vilgub puhastamise meeldetuletus pardli
puhastamise meeldetuletamiseks.
Page 57

Reisilukk
Kui lähete reisile, saate pardli lukustada. Reisilukk
ei lase pardlit kogemata (vaadake 'Reisiluku
sisselülitamine') sisse lülitada.
Raseerimispeade vahetamine
Maksimaalse raseerimistulemuse saavutamiseks
tuleb raseerimispäid vahetada iga kahe aasta järel.
Pardel on varustatud väljavahetamise
meeldetuletusega, mis tuletab meelde
raseerimispeade asendamist. Väljavahetamise
meeldetuletus vilgub, et tuletada meelde
raseerimispeade (vaadake 'Raseerimispeade
vahetamine 'Osade vahetamine') asendamise
vajadust.
Märkus. Pärast raseerimispeade väljavahetamist
peate asendamise meeldetuletuse lähtestama,
vajutades toitenuppu 7 sekundi jooksul.
Režiim Turbo+
See režiim võimaldab raseerida läbi habeme
tihedate osade. Ebaregulaarselt vilkuv Turbo+
nupp näitab, et režiim Turbo+ on sisse lülitatud
(vaadake 'Raseerimine režiimil Turbo+').
Eesti
57
Laadimine
Laadige pardlit enne esmakasutust ja siis, kui
ekraan näitab, et aku on peaaegu tühi.
Laadimine kestab umbes 1 tund. Täielikult laetud
akuga pardel võimaldab habet ajadakuni 60
minutit.
Page 58

Eesti
58
Märkus. Laadimise ajal ei saa pardlit kasutada.
Toiteplokiga laadimine
1 Kontrollige, et pardel on välja lülitatud.
2 Pange väike pistik pardlisse ja toiteplokk seina
pistikupessa.
Pardli näidik näitab, et pardel laadib.
3 Pärast laadimist eemaldage toiteplokk seina
pistikupesast ja tõmmake väike pistik pardlist
välja.
Pardli kasutamine
Enne kasutamist tuleb alati kontrollida, et pardel
ja kõik tarvikud on töökorras. Kahjustatud pardlit
või tarvikuid ei tohi kasutada, sest see võib
põhjustada vigastusi. Asendage kahjustatud osa
alati originaalvaruosaga.
See sümbol näitab, et pardlit saab kasutada vannis
või duši all.
- Kasutage pardlit ettenähtud viisil
kodumajapidamises, nagu on kirjeldatud selles
kasutusjuhendis.
- Hügieeni tagamiseks tohib pardlit kasutada
ainult üks inimene.
- Piiramine on lihtsam, kui nahk ja karvad on
kuivad.
Märkus. Pardlit saab kasutada ainult ilma
toitejuhtmeta.
Pardli sisse- ja väljalülitamine
1 Pardli sisse- või väljalülitamiseks vajutage üks
kord toitenuppu.
Page 59

Raseerimine
Eesti
Kui pardel on sisse lülitatud, jääb väljavahetamise
märgutuli pidevalt põlema.
Märkus. Kui väljavahetamise meeldetuletus vilgub,
näitab see, et peate raseerimispead välja
vahetama.
Naha kohanemise periood
Teie esimesed habemeajamised ei pruugi teile
soovitud tulemust anda ning võivad teie nahka
kergelt ärritada. See on normaalne. Teie nahk
vajab ükskõik millise uue raseerimissüsteemiga
harjumiseks aega. Lubamaks oma nahal uue
seadmega harjuda, soovitame raseerida
regulaarselt (vähemalt 3 korda nädalas) ja ainult
selle seadmega 3 nädala vältel.
- Kui te ei ole 3 päeva või kauem raseerinud,
piirake enne habet, et nahal oleks mugav.
Kuivraseerimine
1 Lülitage pardel sisse.
2 Raseerimispäid tuleb ringikujuliste liigutustega
mööda nahka liigutada, et haarata kõik karvad,
mis kasvavad eri suundades. Suruge kergelt, et
tagada nahalähedane ja mugav raseerimine.
Märkus. Ärge suruge liiga tugevalt, see võib
põhjustada nahaärritust.
3 Pärast iga kasutamist lülitage pardel välja ja
puhastage seda.
Aku laetuse näidu märgutuli süttib paariks
sekundiks aku seisundi näitamiseks.
Märgraseerimine
Mugavama raseerimise tagab pardli kasutamine
märjal näol koos raseerimisvahu või -geeliga.
59
Page 60

60
Eesti
1 Tehke nahk märjaks.
2 Määrige nahale raseerimisvahtu või -geeli.
3 Loputage pardlipead kraani all, et kindlustada
pardlipea sujuv libisemine nahal.
4 Lülitage pardel sisse.
5 Raseerimispäid tuleb ringikujuliste liigutustega
mööda nahka liigutada, et haarata kõik karvad,
mis kasvavad eri suundades. Suruge kergelt, et
tagada nahalähedane ja mugav raseerimine.
Märkus. Ärge suruge liiga tugevalt, see võib
põhjustada nahaärritust.
Märkus. Loputage pardlipead regulaarselt
kraanivee all, et see libiseks sujuvalt üle teie
naha.
6 Kuivatage oma nägu.
7 Pärast iga kasutamist lülitage pardel välja ja
puhastage seda.
Märkus. Veenduge, et kogu vaht või raseerimisgeel
on pardlilt maha loputatud.
Raseerimine režiimil Turbo+
1 Lülitage pardel sisse.
Page 61

Eesti
2 Kui soovite tiheda karvaga habemeosi kiiremini
raseerida, vajutage üks kord Turbo+ nuppu.
Märkus. Ebaregulaarselt vilkuv Turbo+ nupp
näitab, et režiim Turbo+ on sisse lülitatud.
3 Raseerimispäid tuleb ringikujuliste liigutustega
mööda nahka liigutada, et haarata kõik karvad,
mis kasvavad eri suundades. Suruge kergelt, et
tagada nahalähedane ja mugav raseerimine.
Märkus. Ringikujulised liigutused tagavad
parema raseerimistulemuse kui sirged
liigutused.
4 Režiimi Turbo+ väljalülitamiseks vajutage
nuppu Turbo+ üks kord.
Kinniklõpsatava tarviku kasutamine
Kinniklõpsatava tarviku kinnitamine ja eemaldamine
1 Kontrollige, et pardel on välja lülitatud.
2 Tõmmake tarvik otse pardli küljest lahti.
Märkus. Ärge väänake tarvikut pardli küljest
lahtitõmbamise ajal.
61
3 Asetage tarviku ühenduskoht pardli ülaosas
asuvasse pessa. Seejärel suruge tarvikut
allapoole, et see pardli külge kinnituks (kuulete
klõpsatust).
Täppispiirli tarviku kasutamine
Täppispiirlit saate kasutada habeme, põskhabeme
ja vuntside piiramiseks.
Page 62

3 sec.
Eesti
62
1 Kinnitage piirel pardli külge (klõps).
2 Lülitage pardel sisse.
3 Hoidke piirlit nahaga risti ja liigutage seda kerge
survega allapoole.
4 Pärast kasutamist lülitage piirel välja ja
puhastage see.
Reisilukk
Kui lähete reisile, saate pardli lukustada. Reisilukk
ei lase pardlit kogemata sisse lülitada.
Reisiluku sisselülitamine
1 Reisilukurežiimi sisenemiseks vajutage 3
sekundi jooksul toitenuppu.
Reisiluku sisselülitamisel süttivad lühidalt
märgutuled näidikul. Kui reisilukk on sisse
lülitatud, siis reisiluku sümbol vilgub.
Reisiluku väljalülitamine
1 Vajutage kolme sekundi jooksul toitenuppu.
Page 63

Reisiluku väljalülitamisel süttivad lühidalt
märgutuled näidikul. Kui reisilukk on välja
lülitatud, siis reisiluku sümbol vilgub ja kustub.
Pardel lülitub sisse ja on nüüd valmis uuesti
kasutamiseks.
Märkus. Pardli lukustus vabaneb automaatselt
selle ühendamisel elektritoitega.
Puhastamine ja hooldus
Regulaarne puhastamine tagab paremad
raseerimistulemused.
Raseerimisüksust ei tohi kunagi puhastada,
eemaldada ega välja vahetada sisselülitatud
pardli korral.
Raseerimispea kammidele ei tohi survet
avaldada.
Raseerimispäid ei tohi puudutada kõvade
esemetega, sest see võib täppisvalmistatud
piludega kamme mõlkida või kahjustada.
Pardli puhastamiseks ei tohi kasutada
abrasiivaineid, terasnuustikuid ega agressiivse
toimega vedelikke (nt bensiin või atsetoon).
Pardli puhastamine kraani all
Optimaalse tulemuse saavutamiseks puhastage
pardlit pärast iga raseerimiskorda.
Kontrollige alati, et vesi ei ole liiga tuline, sest
muidu võite käsi põletada.
Ärge kunagi kuivatage pardlipead käteräti või
salvrätikuga, sest see võib raseerimispäid
kahjustada.
Pardlipea loputamisel võib vett pardli korpusest
välja tilkuda. See on loomulik.
1 Lülitage pardel sisse.
Eesti
63
Page 64

64
Eesti
2 Loputage pardlipead sooja kraanivee all.
3 Lülitage pardel välja. Tõmmake raseerimispea
hoidja pardlipea alumise osa küljest ära.
4 Loputage karvakambrit kraani all.
5 Loputage raseerimispea hoidjat sooja kraanivee
all.
6 Raputage liigne vesi ettevaatlikult maha ning
laske raseerimispea hoidikul õhu käes täielikult
kuivada.
7 Pange raseerimispea hoidja pardlipea alumise
osa külge (klõpsatus!).
Täppispiirli tarviku puhastamine
Ärge kuivatage habemepiirlit käte- ega
salvrätiga, sest see võib lõiketerasid kahjustada.
Puhastage piirlit pärast iga kasutuskorda.
Page 65

1 Lülitage pardel sisse.
2 Loputage piirlit sooja kraanivee all.
3 Lülitage pardel pärast puhastamist välja.
4 Raputage liigne vesi ettevaatlikult maha ja laske
tarvikul õhu käes täielikult kuivada.
Nõuanne. Optimaalse jõudluse tagamiseks
määrige tarviku hambaid regulaarselt tilga
õmblusmasinaõliga.
Osade vahetamine
Raseerimispeade vahetamine
Maksimaalse raseerimisjõudluse saavutamiseks
soovitame lõikepäid vahetada iga kahe aasta
tagant. Kahjustatud raseerimispead tuleb
viivitamata välja vahetada. Asendage
raseerimispead alati Philipsi
originaalraseerimispeadega.
Väljavahetamise meeldetuletus
Väljavahetamise meeldetuletus näitab, et
raseerimispead tuleb asendada. Pardli
väljalülitamisel jääb väljavahetamise sümbol
vilkuma.
1 Lülitage pardel välja.
2 Tõmmake raseerimispea hoidja pardlipea
alumise osa küljest ära.
Eesti
65
Page 66

1
2
2
1
66
Eesti
3 Keerake lukustusrõngast vastupäeva ja tõstke
see raseerimispealt ära.
Korrake seda toimingut teiste
lukustusrõngastega. Pange need kindlasse
kohta hoiule.
4 Eemaldage raseerimispead raseerimispea
hoidja küljest.
Vältimaks vanade raseerimispeade segamini
ajamist uutega, visake need kohe minema.
5 Paigaldage uued raseerimispead raseerimispea
hoidikusse.
Märkus. Veenduge, et lõikepeade mõlemal
küljel olevad sooned sobituksid täpselt lõikepea
hoidja eenditega.
6 Asetage lukustusrõngas raseerimispeale ja
keerake seda päripäeva, et lukustusrõngas
tagasi kinnitada.
Korrake seda toimingut teiste
lukustusrõngastega.
- Igal lukustusrõngal on kaks soont, mis sobivad
täpselt raseerimispea hoidiku eendite ümber.
Keerake rõngast päripäeva, kuni kuulete
klõpsatust, mis kinnitab rõnga fikseerumist.
Page 67

1
7 sec.
Hoiustamine
Eesti
Märkus. Hoidke raseerimispea hoidikut
raseerimispeade ja lukustusrõngaste
tagasipanekul käes. Ärge asetage raseerimispea
hoidikut pinnale, sest see võib kahjustada
raseerimispäid.
7 Pange raseerimispea hoidja pardlipea alumise
osa külge (klõpsatus!).
8 Asendamise meeldetuletuse lähtestamiseks
hoidke toitenuppu u 7 sekundit all.
Hoidke pardlit kotis.
Märkus. Enne pardli kotti panemist laske sel alati
ära kuivada.
67
Tarvikute tellimine
Seadme jaoks tarvikute või varuosade ostmiseks
minge veebilehele www.shop.philips.com/service
või külastage Philipsi edasimüüjat. Samuti võite
pöörduda oma riigi Philipsi klienditoe keskusesse
(vt kontaktandmeid ülemaailmse garantii lehelt).
Saadaval on järgmised tarvikud:
- SH90 Philipsi raseerimispead
Page 68

Eesti
68
- RQ111 Philipsi habemepiirel
- RQ585 Philipsi puhastushari
- RQ560, RQ563 Philipsi puhastusharja pead
- HQ8505 toiteplokk.
Märkus. Tarvikute saadavus võib riigiti erineda.
Ringlussevõtt
- See sümbol tähendab, et seda toodet ei tohi
visata tavaliste olmejäätmete hulka
(2012/19/EL).
- See sümbol tähendab, et käesolev toode
sisaldab sisseehitatud akupatareid, mida ei tohi
visata tavaliste olmejäätmete hulka
(2006/66/EÜ). Viige toode Philipsi ametlikku
kogumispunkti või teeninduskeskusesse, et
akupatarei asjatundjal eemaldada lasta.
- Järgige oma riigi elektriliste ja elektrooniliste
toodete ning akupatareide lahuskogumist
reguleerivaid eeskirju. Õigel viisil kasutusest
kõrvaldamine aitab ära hoida kahjulikke
tagajärgi keskkonnale ja inimeste tervisele.
Akupatarei eemaldamine
Eemaldage akupatarei seadmest vaid siis,
kui pardli kasutusest kõrvaldate. Enne aku
eemaldamist kontrollige, et pardli pistik
oleks seinakontaktist välja võetud ja et aku
oleks täiesti tühi.
Rakendage kõiki vajalikke ohutusmeetmeid,
kui käsitsete pardli avamisel tööriistu ja kui
kõrvaldate laetava aku kasutusest.
Ettevaatust, aku klemmiribade ääred on teravad.
Page 69

1 Pange kruvikeeraja ots seadme põhjas olevasse
esi- ja tagapaneeli vahelisse pessa. Eemaldage
tagumine paneel.
2 Eemaldage esipaneel.
3 Keerake kaks sisemise paneeli ülaosas olevat
kruvi lahti ja eemaldage sisemine paneel.
4 Eemaldage kruvikeeraja abil aku.
Garantii ja tootetugi
Kui vajate teavet või abi, külastage Philipsi
veebilehte www.philips.com/support või lugege
läbi üleilmne garantiileht.
Garantiipiirangud
Raseerimispeade (nii lõiketerade kui ka
juhtvõrede) asendamine pole rahvusvaheliste
garantiitingimustega reguleeritud, sest need on
kuluvad osad.
Veaotsing
Pardel
Tõrge Võimalik põhjus Lahendus
Eesti
69
Seade ei tööta,
kui ma vajutan
toitenuppu.
Seade on endiselt
ühendatud seina
pistikupesaga.
Ohutuskaalutlustel
saab seadet
kasutada ainult ilma
toitejuhtmeta.
Laetav aku on tühi. Laadige uuesti akut.
Reisilukk on
aktiveeritud.
Ühendage seade
vooluvõrgust lahti ning
vajutage selle
sisselülitamiseks
toitenuppu.
Reisiluku väljalülitamiseks
vajutage 3 sekundi jooksul
toitenuppu.
Page 70

Eesti
70
Tõrge Võimalik põhjus Lahendus
Seadeei raseeri
enam nii hästi
nagu varem.
Vahetasin
raseerimispead
välja, kuid
väljavahetamise
meeldetuletust
kuvatakse
endiselt.
Pardlipea on sellisel
määral määrdunud
või kahjustunud, et
mootor ei hakka
tööle.
Raseerimispead on
kahjustatud või
kulunud.
Karvad või mustus
on raseerimispead
ummistanud.
Te ei lähtestanud
väljavahetamise
meeldetuletust.
Puhastage raseerimispäid
põhjalikult või vahetage
need välja.
Raseerimispeade põhjaliku
puhastamise kohta vaata
tekstiosa „Karvad või
mustus on raseerimispead
ummistanud”.
Vahetage raseerimispead
välja.
Puhastage raseerimispäid
tavapäraselt või võtke ette
põhjalikum puhastus.
Raseerimispeade
põhjalikuks puhastamiseks
tuleb need ükshaaval
(vaadake 'Osade
vahetamine') raseerimispea
hoidikust eemaldada.
Seejärel eemaldage lõikur
kaitsekattest ning
puhastage iga komplekti
kraani all. Pärast loputamist
pange lõikur tagasi vastava
kaitsekatte külge.
Viimasena tuleb
raseerimispead asetada
tagasi raseerimispea
hoidikusse (vaadake
'Osade vahetamine').
Asendamise
meeldetuletuse
lähtestamiseks hoidke
toitenuppu u 7 sekundit all.
Page 71

Tõrge Võimalik põhjus Lahendus
Eesti
71
Vesi lekib
seadme põhjast.
Puhastamise ajal
võib koguneda vesi
seadme
sisekorpuse ja
väliskesta vahele.
See on normaalne ega ole
ohtlik, sest kogu
elektroonika on seadme
sees olevas hermeetiliselt
suletud toiteallikas.
Page 72

Hrvatski
72
Uvod
Čestitamo na kupnji i dobro došli u Philips! Kako
biste potpuno iskoristili podršku koju nudi tvrtka
Philips, registrirajte svoj proizvod na
www.philips.com/welcome.
Molimo, pročitajte ovaj korisnički priručnik jer
sadrži informacije o mogućnostima ovog aparata
za brijanje kao i neke savjete koji će brijanje učiniti
lakšim i ugodnijim.
Opći opis (sl. 1)
1 Pričvršćivanje nastavka na precizni trimer
jednim potezom
2 Jedinice za brijanje s komorom za dlačice
3 Gumb za uključivanje/isključivanje
4 Gumb Turbo+
5 Podsjetnik za zamjenu
6 Podsjetnik za čišćenje
7 Simbol putnog zaključavanja
8 Simbol „iskopčaj prije korištenja”
9 Indikator napunjenosti baterije
10 Utičnica za mali utikač
11 Jedinica napajanja
12 Mali utikač
13 Torbica
Važne sigurnosne informacije
Pažljivo pročitajte te važne informacije prije nego li
se budete koristili uređajem i njegovim dodacima
te ih pohranite za buduću upotrebu. Isporučeni
dodaci mogu se razlikovati za različite proizvode.
Hrvatski
Page 73

Hrvatski
Opasnost
- Održavajte jedinicu za
napajanje suhom.
Upozorenje
- Za punjenje baterije, koristite samo odvojivu
jedinicu za napajanje (HQ8505) dostavljenu
s uređajem.
- Jedinica za napajanje sadržava
transformator. Nikada nemojte odrezati
jedinicu za napajanje da biste postavili drugi
utikač jer to stvara opasnu situaciju.
- Ovaj aparat mogu koristiti djeca od 8 ili više
godina te osobe sa smanjenim fizičkim,
osjetilnim ili mentalnim sposobnostima ili
nedostatkom iskustva i znanja, ako su pod
nadzorom ili su dobile upute o sigurnom
korištenju aparata i ako razumiju moguće
opasnosti. Djeca se ne smiju igrati aparatom.
Djeca bez nadzora ne smiju obavljati
čišćenje i korisničko održavanje.
- Uvijek isključite aparat za brijanje iz
napajanja prije čišćenja pod mlazom vode.
73
Page 74

Hrvatski
74
- Aparat obavezno provjerite prije uporabe.
Nemojte se koristiti uređajem ako je oštećen
jer to može prouzročiti ozljedu. Uvijek
zamijenite oštećeni dio dijelom originalne
vrste.
- Ne otvarajte uređaj da zamijenite punjivu
bateriju.
Oprez
- Sustav za čišćenje ili postolje za
punjenje nikada nemojte
uranjati u vodu niti ispirati pod
slavinom.
- Za ispiranje aparata za brijanje
nikada ne koristite vodu
temperature više od 60 °C.
- Aparat koristite isključivo za
svrhu kojoj je namijenjen, kao
što je prikazano u korisničkom
priručniku.
- Iz higijenskih razloga, aparat bi
trebala koristiti samo jedna
osoba.
Page 75

Hrvatski
- Za čišćenje aparata nikada
nemojte upotrebljavati zračni
mlaz, spužvice za ribanje,
abrazivna sredstva za čišćenje
ili agresivne tekućine poput
benzina ili acetona.
- Ako ste uz aparat za brijanje
dobili i sustav za čišćenje,
obavezno koristite originalnu
tekućinu za čišćenje tvrtke
Philips (u spremniku ili bočici,
ovisno o vrsti sustava za
čišćenje).
- Sustav za čišćenje uvijek
stavljajte na stabilnu, ravnu i
vodoravnu površinu kako biste
spriječili curenje tekućine.
- Ako se vaš sustav za čišćenje
koristi spremnikom za čišćenje,
pobrinite se da odjeljak za
spremnik uvijek bude zatvoren
prije uporabe sustava za
čišćenje ili punjenja aparata za
brijanje.
75
Page 76

Hrvatski
76
- Kad je sustav za čišćenje
spreman za uporabu, nemojte
ga pomicati kako ne bi došlo do
curenja tekućine za čišćenje.
- Voda može kapati iz utičnice na
dnu aparata za brijanje tijekom
ispiranja. To je normalno i
potpuno bezopasno jer je sva
elektronika aparata zaštićena u
zatvorenoj jedinici za napajanje
unutar aparata za brijanje.
- Ne koristite jedinicu napajanja u
ili blizu zidnih utičnica koje
sadrže električni ovlaživač zraka
da spriječite nepopravljivu štetu
jedinice napajanja.
Elektromagnetska polja (EMF)
Ovaj Philips aparat zadovoljava sve važeće
standarde i propise u vezi izlaganja
elektromagnetskim poljima.
Općenito
- Ovaj je aparat za brijanje vodootporan.
Pogodan je za upotrebu u kadi ili tušu te za
čišćenje pod slavinom. Stoga se aparat za
brijanje zbog sigurnosnih razloga može
upotrebljavati samo bez kabela.
- Jedinica napajanja prikladna je za napone od
100 do 240 V.
Page 77

- Jedinica za napajanje pretvara napon od 100 –
240 volti u sigurni niski napon manji od 24 volta.
- Maksimalna razina buke: Lc = 69dB(A)
Zaslon
Redoslijed pokretanja
Kada prvi put pritisnete gumb uključi/isključi, svi
indikatori na zaslonu zasvijetlit će u nizu.
Aparat za brijanje napunite prije korištenja.
Punjenje
Brzo punjenje: Kada aparat za brijanje prikopčate
na zidnu utičnicu zbog toga što je baterija prazna,
svjetla indikatora napunjenosti baterije uzastopno
zasvijetle jedno za drugim u bijeloj boji. Kada
baterija ima dovoljno energije za jedno brijanje,
donje svjetlo indikatora napunjenosti baterije
počne polako treperiti u bijeloj boji.
Kada se aparat za brijanje nastavi puniti, donje
svjetlo indikatora napunjenosti baterije najprije
treperi u bijeloj boji, a zatim neprekidno svijetli u
bijeloj boji. Zatim drugo svjetlo treperi pa
neprekidno zasvijetli i tako dalje, dok se aparat za
brijanje potpuno ne napuni.
Potpuno napunjena baterija
Napomena: Ovaj se aparat za brijanje može
upotrebljavati samo bez kabela.
Hrvatski
77
Page 78

Hrvatski
78
Kada je baterija potpuno napunjena, svi indikatori
napunjenosti baterije neprekidno svijetle u bijeloj
boji.
Napomena: Kada pritisnete tipku za
uključivanje/isključivanje tijekom ili nakon
punjenja, zasvijetlit će simbol „iskopčaj prije
korištenja” koji će označiti da je aparat za brijanje
još spojen na zidnu utičnicu.
Napomena: Kada se baterija napuni, zaslon se
automatski isključuje nakon 30 minuta.
Prazna baterija
Kada je baterija gotovo prazna, donje svjetlo
indikatora napunjenosti baterije treperi u crvenoj
boji.
Preostala napunjenost baterije
Preostali kapacitet baterije prikazan je svjetlima
indikatora napunjenosti baterije koja neprekidno
svijetle.
Podsjetnik „iskopčaj prije korištenja”
Simbol „iskopčaj prije korištenja” treperi kako bi
vas podsjetio da aparat za brijanje iskopčate iz
zidne utičnice prije nego što ga uključite.
Page 79

Podsjetnik za čišćenje
Kako biste postigli optimalnu učinkovitost (vidi
'Čišćenje i održavanje'), aparat za brijanje očistite
nakon svakog brijanja. Kada isključite aparat za
brijanje, podsjetnik za čišćenje treperit će kako bi
vas podsjetio da trebate očistiti aparat.
Putno zaključavanje
Kada idete na putovanje, aparat za brijanje možete
zaključati. Putno zaključavanje sprječava
nehotično (vidi 'Aktiviranje putnog zaključavanja')
uključivanje aparata.
Zamjena glava za brijanje
Za najbolji učinak brijanja mijenjajte glave za
brijanje svake dvije godine. Aparat za brijanje
opremljen je podsjetnikom za zamjenu koji vas
podsjeća da zamijenite glave za brijanje.
Podsjetnik za zamjenu treperi kako bi označio da
morate zamijeniti glave (vidi 'Zamjena glava za
brijanje 'Zamjena dijelova') za brijanje.
Napomena: Nakon zamjene glava za brijanje,
morate poništiti podsjetnik za zamjenu
pritiskanjem tipke za uključivanje/isključivanje na 7
sekundi.
Postavka Turbo+
Ova postavka omogućuje vam brijanje gustih
dijelova brade. Gumb Turbo+ treperi u nepravilnim
razmacima kako bi označio da je postavka Turbo+
aktivirana (vidi 'Brijanje s pomoću postavke
Turbo+').
Hrvatski
79
Page 80

Hrvatski
80
Punjenje
Napunite aparat za brijanje prije prve uporabe i
kada se na zaslonu pokaže da je baterija skoro
prazna.
Punjenje traje približno 1 sat. Aparat za brijanje
napunjen do kraja može brijatido 60 minuta.
Napomena: Aparat za brijanje ne možete koristiti
tijekom punjenja.
Punjenje s pomoću jedinice napajanja
1 Provjerite je li aparat za brijanje isključen.
2 Mali utikač umetnite u aparat za brijanje i
jedinicu napajanja ukopčajte u zidnu utičnicu.
Na zaslonu aparata za brijanje naznačeno je da
se aparat puni.
3 Nakon punjenja isključite jedinicu za napajanje
iz zidne utičnice i izvucite mali utikač iz aparata
za brijanje.
Uporaba aparata za brijanje
Aparat za brijanje i sve dodatke uvijek provjerite
prije uporabe. Aparat za brijanje ili neki drugi
dodatak nemojte koristiti ako je oštećen jer biste
se mogli ozlijediti. Oštećeni dio uvijek zamijenite
originalnim dijelom.
Ovaj simbol pokazuje da se brijač može koristiti u
kadi ili pod tušem.
- Ovaj aparat za brijanje koristite samo za
uporabu u kućanstvu, kao što je opisano u
ovom korisničkom priručniku.
- Iz higijenskih razloga, aparat za brijanje bi
trebala koristiti samo jedna osoba.
- Podrezivanje će biti jednostavnije ako su koža i
dlačice suhi.
Page 81

Hrvatski
Napomena: Ovaj se aparat za brijanje može
upotrebljavati samo bez kabela.
Uključivanje i isključivanje aparata za brijanje
1 Jednom pritisnite gumb za
uključivanje/isključivanje kako biste aparat za
brijanje uključili ili isključili.
Kada se aparat za brijanje uključi, simbol zamjene
neprekidno svijetli.
Napomena: Kada podsjetnik za zamjenu treperi to
znači da morate zamijeniti glave za brijanje.
Brijanje
Razdoblje prilagodbe kože
Prva brijanja možda neće donijeti rezultate koje
očekujete i koža može biti čak blago iziritirana. To
je uobičajeno. Koži i bradi treba vremena da se
prilagode novom sustavu brijanja. Da bi se koža
prilagodila ovom novom uređaju, savjetujemo da
se brijete redovito (najmanje 3 puta tjedno) i
izričito ovim uređajem u razdoblju od 3 tjedna.
- Ako se niste brijali 3 dana ili duže, bradu
prethodno podrežite kako bi brijanje bilo
ugodno za kožu.
Suho brijanje
1 Uključite aparat za brijanje.
81
Page 82

82
Hrvatski
2 Pomičite glave za brijanje po koži kružnim
pokretima kako biste zahvatili sve dlačice koje
rastu u različitim smjerovima. Nježno pritisnite
za prianjajući, ugodno brijanje.
Napomena: Aparat nemojte prejako pritiskati jer
to može izazvati iritaciju kože.
3 Nakon svake uporabe aparat za brijanje
isključite i očistite.
Indikator napunjenosti baterije svijetlit će
nekoliko sekundi kako bi pokazao stanje
baterije.
Vlažno brijanje
Radi ugodnijeg brijanja ovaj aparat za brijanje
možete također koristiti i na mokrom licu, s pjenom
ili gelom za brijanje.
1 Nanesite nešto vode na Vašu kožu.
2 Nanesite pjenu ili gel za brijanje na Vašu kožu.
3 Isperite jedinicu za brijanje pod pipom da
osigurate da jedinica za brijanje glatko prelazi
preko Vaše kože.
4 Uključite aparat za brijanje.
Page 83

Hrvatski
5 Pomičite glave za brijanje po koži kružnim
pokretima kako biste zahvatili sve dlačice koje
rastu u različitim smjerovima. Nježno pritisnite
za prianjajući, ugodno brijanje.
Napomena: Aparat nemojte prejako pritiskati jer
to može izazvati iritaciju kože.
Napomena: Redovito ispirite jedinicu za brijanje
da osigurate da nastavi glatko prelaziti preko
kože.
6 Osušite lice.
7 Nakon svake uporabe aparat za brijanje
isključite i očistite.
Napomena: Pazite da s aparata za brijanje isperete
svu pjenu ili gel za brijanje.
83
Brijanje s pomoću postavke Turbo+
1 Uključite aparat za brijanje.
2 Ako područja s gustom bradom želite brže
brijati, jednom pritisnite gumb Turbo+.
Napomena: Gumb Turbo+ treperi u nepravilnim
razmacima kako bi označio da je postavka
Turbo+ aktivirana.
3 Pomičite glave za brijanje po koži kružnim
pokretima kako biste zahvatili sve dlačice koje
rastu u različitim smjerovima. Nježno pritisnite
za prianjajući, ugodno brijanje.
Napomena: Kružni pokreti daju bolje rezultate
brijanja od ravnih pokreta.
4 Jednim pritiskom na gumb Turbo+ isključuje se
način rada Turbo+.
Page 84

Hrvatski
84
Uporaba nastavka koji se pričvršćuje jednim potezom
Uklanjanje ili stavljanje nastavka koji se pričvršćuje jednim potezom
1 Provjerite je li aparat za brijanje isključen.
2 S aparata za brijanje skinite nastavak.
Napomena: Nemojte okretati nastavak dok ga
vadite iz aparata za brijanje.
3 Umetnite spojnu ušicu nastavka u utor na
gornjem dijelu aparata za brijanje. Zatim
nastavak pritisnite kako biste ga pričvrstili na
aparat za brijanje („klik”).
Uporaba nastavka za precizni trimer
Precizni trimer možete koristiti za uređivanje
brade, zalisaka i brkova.
1 Trimer pričvrstite na aparat za brijanje („klik”).
2 Uključite aparat za brijanje.
3 Trimer držite okomito prema koži i nježno
pritišćući pomičite ga prema dolje.
4 Nakon uporabe, trimer isključite i očistite.
Page 85

Putno zaključavanje
3 sec.
Kada idete na putovanje, aparat za brijanje možete
zaključati. Putno zaključavanje sprječava
nehotično uključivanje aparata.
Aktiviranje putnog zaključavanja
1 Pritisnite tipku za uključivanje/isključivanje na 3
sekunde i uđite u režim putnog zaključavanja.
Tijekom aktiviranja putnog zaključavanja na
zaslonu će kratko zasvijetliti indikatori. Kad je
putno zaključavanje aktivirano, simbol putnog
zaključavanja treperi.
Deaktiviranje putnog zaključavanja
1 Gumb za uključivanje/isključivanje držite
pritisnutim 3 sekunde.
Tijekom deaktiviranja putnog zaključavanja na
zaslonu će kratko zasvijetliti indikatori. Kada je
putno zaključavanje deaktivirano, simbol
putnog zaključavanja zatreperi i zatim se
isključi. Aparat za brijanje se uključi i sada je
ponovno spreman za uporabu.
Napomena: Aparat za brijanje automatski se
otključa kada se ukopča u zidnu utičnicu.
Hrvatski
85
Čišćenje i održavanje
Redovito čišćenje jamči najbolje rezultate
brijanja.
Page 86

Hrvatski
86
Jedinicu za brijanje nikada nemojte čistiti,
uklanjati ili mijenjati dok je aparat za brijanje
uključen.
Češljeve glave za brijanje nemojte pritiskati.
Glave za brijanje nemojte dodirivati tvrdim
predmetima jer to može udubiti ili oštetiti
precizne proreze na češljevima.
Za čišćenje aparata za brijanje nemojte
koristiti abrazivna sredstva ili agresivne
tekućine poput benzina ili acetona.
Čišćenje aparata pod mlazom vode
Kako biste postigli optimalnu učinkovitost, aparat
za brijanje očistite nakon svakog brijanja.
Uvijek provjerite je li voda prevruća kako ne biste
opekli ruke.
Nikada nemojte sušiti jedinicu za brijanje
frotirskim ili papirnatim ručnikom jer to može
oštetiti glave za brijanje.
Tijekom ispiranja jedinice za brijanje, iz donjeg
dijela aparata za brijanje može kapati voda. To je
uobičajena pojava.
1 Uključite aparat za brijanje.
2 Isperite uređaj za brijanje pod toplom vodom iz
pipe.
3 Isključite aparat za brijanje. Povucite držač
glave za brijanje s donjeg dijela aparata za
brijanje.
Page 87

4 Isperite komoru za dlake pod pipom.
5 Isperite držač glave za brijanje pod toplom
vodom iz pipe.
6 Pažljivo otresite višak vode i ostavite držač
glave aparata za brijanje da se potpuno osuši
na zraku.
7 Pričvrstite držač glave za brijanje na donji dio
jedinice za brijanje („klik”).
Čišćenje nastavka za precizni trimer
Zupce trimera nikada nemojte sušiti ručnikom ili
papirnatom maramicom jer ih to može oštetiti.
Trimer očistite nakon svakog korištenja.
1 Uključite aparat za brijanje.
2 Trimer isperite pod mlazom tople vode.
3 Nakon čišćenja isključite aparat za brijanje.
4 Pažljivo otresite višak vode i nastavak ostavite
da se potpuno osuši na zraku.
Savjet: Za optimalan rad, redovito podmazujte
zupce nastavka kapljicom ulja za strojeve za
šivanje.
Hrvatski
87
Page 88

1
2
Hrvatski
88
Zamjena dijelova
Zamjena glava za brijanje
Za maksimalne performanse brijanja. savjetujemo
Vam da mijenjate glave za brijanje sveke dvije
godine. Odmah zamijenite oštećene glave za
brijanje. Glave za brijanje uvijek mijenjajte
originalnim glavama za brijanje tvrtke Philips.
Podsjetnik za zamjenu
Podsjetnik za zamjenu označava da treba
zamijeniti glave za brijanje. Podsjetnik za zamjenu
treperi kada isključite aparat za brijanje.
1 Isključite aparat za brijanje.
2 Povucite držač glave za brijanje s donjeg dijela
aparata za brijanje.
3 Zaporni prsten okrenite u smjeru suprotnom od
smjera kretanja kazaljki na satu i podignite ga s
glave za brijanje.
Postupak ponovite za ostale prstene za
pričvršćivanje. Stavite ih sa strane na sigurno
mjesto.
4 Uklonite glave za brijanje iz držača glave za
brijanje.
Odmah bacite korištene glave za brijanje da
izbjegnete miješanje s novim glavama za
brijanje.
Page 89

2
1
1
Hrvatski
5 Stavite nove glave za čišćenje u držač.
Napomena: Pazite da zarezi na obje strane
glave za brijanje točno odgovaraju projekcijama
na držaču glava za brijanje.
6 Zaporni prsten postavite na glavu za brijanje i
okrenite ga u smjeru kretanja kazaljki na satu
kako biste ga ponovno pričvrstili.
Postupak ponovite za ostale prstene za
pričvršćivanje.
- Svaki zaporni prsten ima dva utora koji točno
pristaju izbočinama na držaču glave za brijanje.
Okrećite prsten u smjeru kretanja kazaljki na
satu dok ne začujete zvuk klika koji označava
da je prsten fiksiran.
Napomena: Držite držač glave za brijanje u ruci
dok ponovno umećete glave za brijanje i dok
ponovno pričvršćujete pridržne prstene.
Nemojte postavljati držač za brijanje na
površinu jer to može oštetiti glave za brijanje.
7 Pričvrstite držač glave za brijanje na donji dio
jedinice za brijanje („klik”).
89
Page 90

7 sec.
Hrvatski
90
8 Da biste poništili podsjetnik za zamjenu,
pritisnite i držite tipku za
uključivanje/isključivanje oko 7 sekundi.
Pohranjivanje
Aparat za brijanje spremite u torbicu.
Napomena: Aparat za brijanje uvijek ostavite da se
osuši prije nego što ga spremite u torbicu.
Naručivanje dodatnog pribora
Da biste kupili dodatke ili rezervne dijelove,
posjetite www.shop.philips.com/service ili se
obratite dobavljaču tvrtke Philips. Također se
možete obratiti centru za potrošače tvrtke Philips u
svojoj državi (pogledajte međunarodni jamstveni
list radi detalja o kontaktu).
Dostupan je sljedeći dodatni pribor:
- SH90 Philips glave za brijanje
- Nastavak za oblikovanje brade RQ111 tvrtke
Philips
- Četkica za čišćenje Philips RQ585
- Glave četkice za čišćenje Philips RQ560/RQ563
- HQ8505 jedinica napajanja
Napomena: Dostupnost nastavaka može varirati
ovisno o državi.
Page 91

Hrvatski
Recikliranje
- Ovaj simbol znači da se proizvod ne smije
odlagati zajedno s običnim kućanskim otpadom
(2012/19/EU).
- Ovaj simbol znači da proizvod sadržava
ugrađenu punjivu bateriju koja se ne odlaže s
uobičajenim kućanskim otpadom
(2006/66/EC). Svoj proizvod odnesete na
službeno mjesto za prikupljanje otpada ili u
servisni centar tvrtke Philips kako bi stručnjak
uklonio punjivu bateriju.
- Pridržavajte se pravila vaše zemlje o odvojenom
prikupljanju električnih i elektroničkih proizvoda
i punjivih baterija. Pravilno odlaganje otpada
pomaže u sprječavanju negativnih posljedica za
okoliš i ljudsko zdravlje.
Vađenje baterije koja se može puniti iz aparata
Uklonite punjivu bateriju tek kada uklonite
aparat za brijanje. Prije nego uklonite
bateriju, pazite da je aparat za brijanje
isključen iz zidne utičnice i da je baterija
prazna do kraja.
Poduzmite potrebne mjere opreza kada
rukujete alatima da biste otvorili aparat za
brijanje i kada zbrinjavate punjivu bateriju.
Budite oprezni, trake baterija su vrlo oštre.
1 Stavite odvijač u utor između prednje i stražnje
ploče na donjem dijelu uređaja. Skinite stražnju
ploču.
91
Page 92

Hrvatski
92
2 Odvojite prednju ploču.
3 Odvijte dva vijka na vrhu unutarnje ploče i
uklonite unutarnju ploču.
4 Punjivu bateriju izvadite pomoću odvijača.
Jamstvo i podrška
Ako su Vam potrebne informacije ili podrška,
molimo posjetite www.philips.com/support ili
pročitajte brošuru o međunarodnom jamstvu.
Ograničenja jamstva
Uvjeti međunarodnog jamstva ne pokrivaju glave
za brijanje (rezače i štitnike) jer su one podložne
trošenju.
Rješavanje problema
Aparat za brijanje
Problem Mogući uzrok Rješenje
Aparat se ne
uključuje kad
pritisnem gumb
za
uključivanje/isklj
učivanje.
Uređaj je još
priključen na zidnu
utičnicu. Zbog
sigurnosnih razloga,
uređaj se može
koristiti samo bez
kabela.
Punjiva baterija je
prazna.
Putno zaključavanje
je aktivirano.
Isključite uređaj s napajanja
i pritisnite tipku za
uključivanje/isključivanje
da uključite aparat.
Napunite bateriju.
Za deaktivaciju putnog
zaključavanja gumb za
uključivanje/isključivanje
držite pritisnutim 3
sekunde.
Page 93

Problem Mogući uzrok Rješenje
Hrvatski
93
Uređajne brije
jednako dobro
kao prije.
Glave za brijanje
su zamijenjene,
ali podsjetnik za
zamjenu još
uvijek svijetli.
Aparat za brijanje je
prljav ili oštećen do
te mjere da motor
ne može raditi.
Glave za brijanje su
oštećene ili
istrošene.
Dlačice i prljavština
ometaju rad glava
za brijanje.
Niste ponovno
postavili podsjetnik
za zamjenu.
Temeljito očistite glave za
brijanje ili ih zamijenite.
Također pogledajte
odjeljak „Dlačice i
prljavština ometaju rad
glava za brijanje” za
detaljan opis kako temeljno
očistiti glave za brijanje.
Zamijenite glave za brijanje.
Očistite glave za brijanje na
uobičajeni način ili ih
detaljno očistite.
Za detaljno čišćenje glava
za brijanje, uklonite glave
za brijanje s držača, jednu
po jednu (vidi 'Zamjena
dijelova'). Zatim odvojite
nož s njegovog štitnika i
isperite svaki odgovarajući
komplet pod mlazom vode
iz slavine. Nakon ispiranja,
vratite nož natrag u njegov
odgovarajući štitnik. Na
kraju, stavite glave za
brijanje natrag u držač (vidi
'Zamjena dijelova') glava za
brijanje.
Da biste poništili podsjetnik
za zamjenu, pritisnite i
držite tipku za
uključivanje/isključivanje
oko 7 sekundi.
Page 94

Hrvatski
94
Problem Mogući uzrok Rješenje
Voda curi iz
donje strane
uređaja.
Tijekom čišćenja,
voda se može
nakupiti između
unutarnjeg kućišta i
vanjske školjke
uređaja.
To je normalno i
bezopasno jer je sva
elektronika zatvorena u
posebnoj zabrtvljenoj
jedinici za napajanje unutar
uređaja.
Page 95

Ievads
Apsveicam ar pirkumu un laipni lūdzam Philips! Lai
pilnvērtīgi izmantotu Philips piedāvātā atbalsta
iespējas, reģistrējiet produktu vietnē
www.philips.com/welcome.
Lūdzu, izlasiet šo lietotāja rokasgrāmatu, jo tajā ir
ietverta informācija par šī skuvekļa iespējām, kā
arīdažādi padomi, kā padarīt skūšanos daudz
patīkamāku.
Vispārīgs apraksts (1. att.)
1 Uzspraužamais precīzā trimmera uzgalis
2 Skūšanās bloks ar matiņu nodalījumu
3 Ieslēgšanas/izslēgšanas poga
4 Turbo+ poga
5 Nomaiņas atgādinājums
6 Tīrīšanas atgādinājums
7 Ceļojuma bloķētāja simbols
8 Simbols “atvienot pirms lietošanas”
9 Akumulatora uzlādes indikators
10 Mazās kontaktdakšas kontaktligzda
11 Barošanas bloks
12 Mazais spraudnis
13 Somiņa
Svarīga informācija par drošību
Pirms ierīces un tās piederumu lietošanas rūpīgi
izlasiet šo svarīgo informāciju un saglabājiet to
turpmākām uzziņām. Komplektā iekļautie
piederumi dažādiem produktiem var atšķirties.
Latviešu
95
Latviešu
Page 96

Latviešu
96
Bīstami
- Glabājiet adaptera bloku
sausumā.
Brīdinājums
- Lai uzlādētu akumulatoru, izmantojiet tikai
noņemamo barošanas bloku (HQ8505), kas
piegādāts kopā ar ierīci.
- Barošanas blokā ir iebūvēts strāvas
pārveidotājs. Nenogrieziet barošanas bloku,
lai pievienotu tam citu spraudni, jo tādējādi
tiek radīta bīstama situācija.
- Šo ierīci var izmantot bērni no 8 gadu
vecuma un personas ar ierobežotām
fiziskajām, uztveres vai garīgajām spējām vai
bez pieredzes un zināšanām, ja šīm
personām tiek nodrošināta uzraudzība vai
sniegti norādījumi par ierīces drošu
lietošanu un tās saprot iespējamo
bīstamību. Bērni nedrīkst rotaļāties ar ierīci.
Bērni bez uzraudzības nedrīkst tīrīt ierīci vai
veikt tās tehnisko apkopi.
Page 97

Latviešu
97
- Pirms skuvekļa tīrīšanas mazgājot zem krāna
vienmēr izvelciet barošanas kontaktdakšu
no elektrotīkla sienas kontaktligzdas.
- Pirms ierīces lietošanas vienmēr pārbaudiet
to. Nelietojiet bojātu ierīci, jo tā var gūt
savainojumus. Vienmēr nomainiet bojātu
detaļu ar oriģinālu detaļu.
- Neatveriet ierīci un nemēģiniet nomainīt
atkārtoti uzlādējamo akumulatoru.
Ievērībai
- Nekādā gadījumā
neiegremdējiet tīrīšanas
sistēmu vai lādēšanas statīvu
ūdenī, kā arī neskalojiet tos
tekošā krāna ūdenī.
- Nekad neskalojiet skuvekli ar
ūdeni, kura temperatūra
pārsniedz 60°C.
- Izmantojiet šo ierīci tikai
paredzētajiem mērķiem, kā
norādīts lietotāja rokasgrāmatā.
- Ievērojot higiēnas prasības,
ierīci ir ieteicams lietot tikai
vienam cilvēkam.
Page 98

98
Latviešu
- Ierīces tīrīšanai nekad
nelietojiet saspiestu gaisu,
tīrīšanas drāniņas, abrazīvus
tīrīšanas līdzekļus vai kodīgus
šķidrumus, piemēram, benzīnu
vai acetonu.
- Ja jūsu skuveklim ir tīrīšanas
sistēma, vienmēr izmantojiet
oriģinālo Philips tīrīšanas
šķidrumu (kasetne vai pudele
atkarībā no tīrīšanas sistēmas
tipa).
- Lai izvairītos no noplūdēm,
vienmēr novietojiet tīrīšanas
sistēmu uz stabilas, līdzenas un
horizontālas virsmas.
- Ja tīrīšanas sistēma izmanto
tīrīšanas kasetni, vienmēr
pārliecinieties, vai kasetnes
nodalījums ir aizvērts pirms
izmantot tīrīšanas sistēmu
skuvekļa tīrīšanai vai uzlādei.
Page 99

- Kad tīrīšanas sistēma ir
sagatavota lietošanai, lai
nenotiktu tīrīšanas šķidruma
noplūde, to nedrīkst pārvietot.
- Skalojot ierīci, no kontaktligzdas
skuvekļa apakšdaļā var pilēt
ūdens. Tā ir normāla parādība
un nav bīstama, jo visi
elektroniskie komponenti ir
ietverti noblīvētā barošanas
blokā skuvekļa iekšpusē.
- Neizmantojiet barošanas bloku
kontaktligzdās vai blakus
kontaktligzdām, kurās pašlaik ir
ievietots vai ir bijis ievietots
elektriskais gaisa
atsvaidzinātājs. Pretējā
gadījumā var neatgriezeniski
bojāt barošanas bloku.
Elektromagnētiskie lauki (EML)
Šī Philips ierīce atbilst visiem piemērojamajiem
standartiem un noteikumiem, kas attiecas uz
elektromagnētisko lauku iedarbību.
Latviešu
99
Page 100

Latviešu
100
Vispārīgi
- Šis skuveklis ir ūdensizturīgs. Ierīce ir piemērota
- Šī ierīce ir paredzēta elektrotīklam ar spriegumu
- Barošanas bloks transformē 100–240 voltu
- Maksimālais trokšņa līmenis: Lc=69dB(A)
Displejs
Uzsākšanas secība
Pirmo reizi nospiežot ieslēgšanas/izslēgšanas
pogu, visi displeja indikatori iedegas pēc kārtas.
Pirms lietošanas skuveklis jāuzlādē.
Uzlāde
Ātrā uzlāde: Kad baterija ir izlādējusies un
skuveklis tiek pieslēgts sienas kontaktligzdai,
akumulatora uzlādes indikatora lampiņas viena
pēc otras atkārtoti izgaismojas baltā krāsā. Ja
baterijai pietiek enerģijas vienai skūšanās reizei,
apakšējā akumulatora uzlādes indikatora lampiņa
sāk lēni mirgot baltā krāsā.
Kamēr skuveklis tiek uzlādēts, apakšējā
akumulatora uzlādes indikatora lampiņa vispirms
mirgo baltā krāsā un pēc tam deg baltā krāsā
nepārtraukti. Pēc tam mirgo otrā lampiņa un tad
izgaismojas bez pārtraukuma; tā tas turpinās, līdz
skuveklis ir pilnībā uzlādēts.
izmantošanai vannā vai dušā un tīrīšanai zem
tekoša krāna ūdens. Drošības apsvērumu dēļ
skuvekli drīkst lietot tikai bez vada.
no 100līdz 240voltiem.
spriegumu uz drošu spriegumu, kas ir mazāks
par 24 voltiem.
 Loading...