

Page 1
CON|UI№liEl£C'mONICS
□ *000000 004616
PHILIPS
PHILIPS
ailia
EuiOSrypI Q ^
STU 901
WmAim RECEIVER
SATELUTTUNER
PH ^ ^
cwwcapROGSAu saECTiCN
H- UACPAL SATELUTE RECET.^ MATCHIi/LINE
1 MODE
|SAT § 1 D TV
KT-V-J i J
///u
KEADPKO^iES I
SELECT 1 I.!1X 1
f.< Lauv: ►J
SATELLIT TUNER
SATELLITTMOTTAKER
Page 2

<H) OPERATING INSTRUCTIONS
Attention! Open this front flap to see diagrams of your
Receiver and its Remote Control.
Open the rear flap to see how to use the On-Screen-
Displays (OSD).
Ci:> BRUKSANVISNING
® BETJENING
® BRUKSANVISNING
OBS! Vik alltid ut denna flik samtidigt som du laser
bruksanvisningen.
Vik aven ut den sista fliken, dar det beskrivs hur du
använder On-Screen-Dlsplay (OSD).
Bemaerk! Áben denne folde-ud side for at kunne se
oversigterne pá Deres modtager og dens
fjernbetjening.
Áben den bageste foide-ud side for at se hvorledes
On-Screen-Display (OSD) benyttes.
OBS! Brett ut forste side for ä se tegningene over
mottakeren og fjernkontrollen.
Brett ut siste side for ä se hvordan “ On-screen
displayene” (OSD) brukes.
Page 3

i
STU 901 SATELLITE TELEVISION UNIT
RECEIVER
PHILIPS
I
___
r 1
Eun^Srypt Q ^
(D-
STEREO
UJ
14 15
99
PR ^
CKA.'CS'SUPROGRAM £LECTfON
© ©
MO DE
SAT §
O T V
f T CJCT AN w> A 1 C-^
D2- MACPAL SATELUTE RECEIVER MATCHlIiLINE
///l,
HEADPH ONES
SEL ECT
MIX
----------
?19Ì
r
Page 4

LEGEND
REMOTE CONTROL
1 Remote control for Philips TVs
2 Teletext on/off
3 TV/SAT selection
4 Standby (Off)
5 Antenna positioning
6 Numeric keypad
7 TV set volume
8 Menu buttons for On-Screen-Displays
9 Sound mixing and subtitling
10 (these buttons not used)
11 Teletext buttons
RECEIVER FRONT PANEL RECEIVER REAR PANEL
12 POWER ON/OFF 20
Slot for EuroCrypt Card
13
Standby indication 22 Satellite dish 2 input
14
Stereo indication 23
15
Programme number indication 24 Polarizer connections
16
Programme controls 25
17
Headphone controls
18
Headphone socket
19
TV antenna connection - out
21 Satellite dish 1 input
Baseband decoder output
TV antenna or cable connection
Tuning control
26
S-VHS recorder connection
27
Antenna power control
28
Audio amplifier connections
29
Euroconnector for TV/monitor
30
31
Euroconnector for VCR
32 Type & voltage plate
Mains cable
33
Page 5

CONTENTS
1. BEFORE YOU START
General
Safety instructions
Mains connection
HOW TO CONNECT YOUR RECEIVER
Position your STU 901 Receiver
Insert batteries in the remote control
Connect your satellite dish antenna
Connect your Receiver:
A. To a TV only, using a Euroconnector 3
B. To a TV only, using a coaxial cable
C. To a TV and a VCR, using Euroconnectors 4
D. To a TV and a VCR, using coaxial cables 5
E. To a TV and an S-VHS VCR 5
Connect the Polarizer (if applicable) 6
Aim your dish
Adjust the Polarizer 6
Additional connections
Filmnet decoder 6
HOW TO WATCH SATELLITE TV
Switch on/Switch off
Select a programme
Change the sound volume 7
The TV/SAT button
Control your Philips TV remotely 7
The MENU buttons on your remote control 7
Check which programme you are viewing (D2-MAC) 8
Selecting other transmitted languages (D2-MAC) 8
Mix mode (D2-MAC) 8
Switching on subtitles (D2-MAC)
Selecting other transmitted subtitles (D2-MAC) 8
Display the time (D2-MAC) g
View D2-MAC Teletext
Use headphones (optional) 9
Record programmes on your VCR 9
Record laserdisk programmes on your VCR 10
Playback from a VCR 10
4. PARENTAL CONTROL & CONDITIONAL ACCESS
2 Introduction
2
2
3
3
3 Using the EuroCrypt Card
3
4
6
6
7 Changing colour saturation and contrast
7
7
8 Give it a programme number
9 Storing a station
Using the Parental lock 10
What is Parental Control?
How to change your Secret Code 11
How to check the current Parental Control setting 11
How to change and lock the Parental Control setting
What is Conditional Access (CA)? 12
How to watch an encrypted programme
How to use Consultation
To see your Subscription details
To see Prebooked Pay Per View details 13
To see Impulse PPV per program details
To set the Consultation lock
To set the Pay Per View lock 14
To view Impulse Pay Per View programmes 14
Renewing your authorisation 15
5. 'PERSONALISING' YOUR RECEIVER
Introduction
Changing the menu language
Adjusting the picture
(D2-MAC programmes only) 16
Changing the picture display format
Changing your preferences for D2-MAC sound 17
Changing your preferences for D2-MAC subtitling
Sound selection with PAL/SECAM programmes
Introduction to programming 18
Search for a station... 19
... or Direct Channel Selection
Naming a station 19
To check the programme list
Notes
Using Teletext (D2-MAC only)
Introduction 20
Switching on Teletext 20
Selecting a Teletext page
To switch off Teletext temporarily
To select double height text 20
To show concealed information 20
To stop automatic page changes (of 'rotating' pages) 20
To see Teletext and a TV programme simultaneously
(D2-MAC only)
To quit Teletext 20
To store Teletext personal preference pages
10
10
12
12
12
13
13
14
14
16
16
16
17
18
18
19
19
19
20
20
20
20
20
20
20-21
6. SPECIFICATION 22
7. FAULTFINDING 23
CsE> 1
Page 6

BEFORE YOU START
1
General
With this Philips STU 901 Sateliite Receiver you can receive
sateiiite programmes broadcast in the PALySECAM and
D2-MAC transmission standards.
The operation of the Receiver differs slightly depending on
whether you are receiving PAL/SECAM or D2-MAC signals.
Both are covered in these instructions.
The drawings in the text are accompanied by numbers in
brackets, e.g.(1) These correspond to the numbers on the
drawings on the front fold-out flap. Bold numbers without
brackets - like this 1 - refer to numbers on the remote control
keypad (6).
Fold out the rear flap to see how to use the on-screen
displays.
Safety Instructions
To avoid short-circuits, which may cause fire or electric shock,
do not expose this Philips STU 901 Satellite Receiver to rain or
moisture.
Dangerous voltage inside. Do not open the cabinet.
There are no user serviceable parts inside.
Repairs should be carried out by qualified service personnel only.
NEVER connect or modify cables while the Receiver is con
nected to the mains. Switch off using switch (12).
Ensure that no objects or fluids pass through the ventilation
openings.
If liquid is spilt into the Receiver, disconnect the Receiver from
the mains and consult a qualified service technician.
Do not put your Receiver close to an external source of heat
(radiator, etc.).
Ensure that air can circulate freely through the ventilation
openings of the Receiver.
Avoid using the Receiver on soft surfaces or near appliances
generating strong magnetic fields (e.g. motors, transformers).
Do not use your Receiver in dusty places or where it may be
subject to vibration.
Avoid using your Receiver immediately after moving from a cold
to a warm location and vice versa, or under conditions of high
humidity.
If you have to transport your Receiver, avoid violent shocks.
Your Receiver supplies 14 or 18 V DC voltage to your satellite
dish antenna.
Make sure you only connect your satellite dish to the satellite
dish inputs, (21 and 22) and nothing else.
For cleaning, use a damp chamois leather - never use an
abrasive.
Mains connection
Before connecting the Receiver to the mains, check that the
mains supply voltage corresponds to the voltage printed on the
type plate (32) on the rear panel of your Receiver.
If the mains voltage is different, consult your dealer.
Do not connect the Receiver to the mains yet, but continue
reading these Operating Instructions!
NEVER connect or modify cables while the Receiver is
connected to the mains. Ensure that the mains plug is not
plugged in to the mains supply before proceeding further.
2 CiD
Page 7
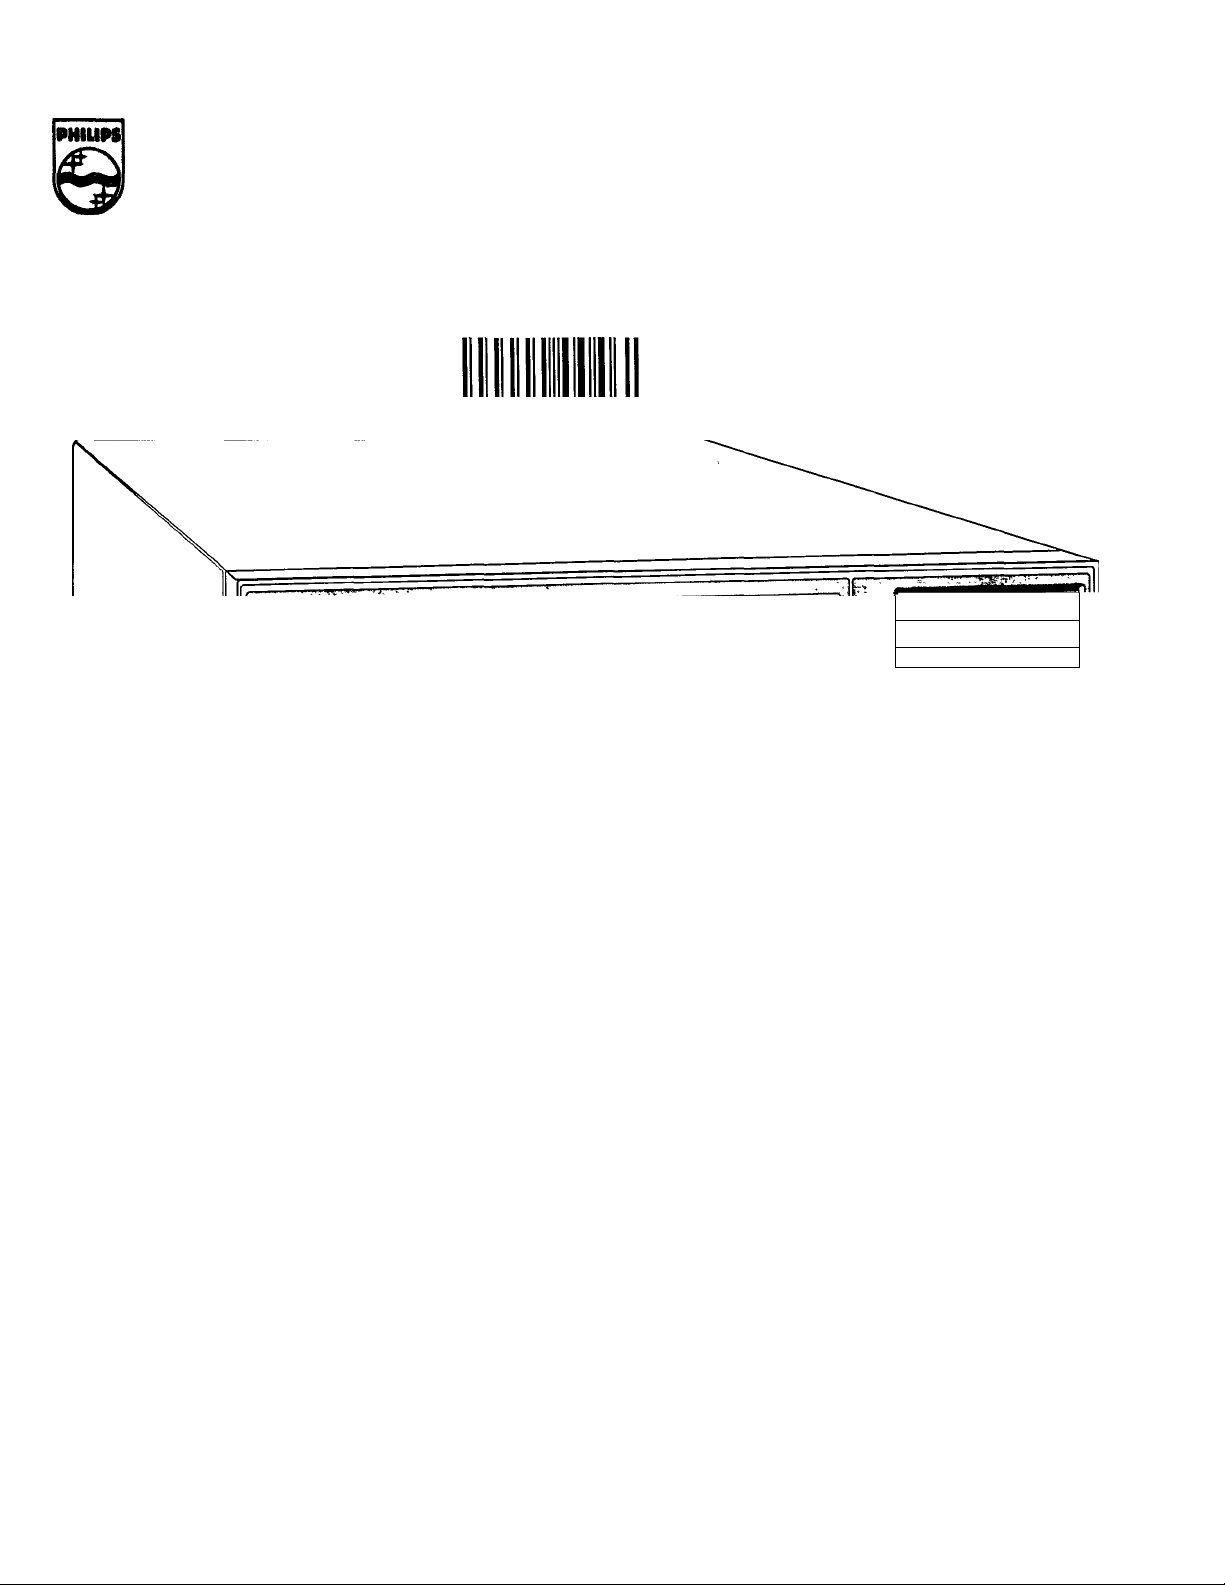
Position your Philips STU 901 Satellite Receiver
The STU 901 is intended for use in a domestic environment
only and should never be operated or stored in excessively hot or
humid atmospheres.
Choose a position at some distance
away from radiators or other sources
of heat.
Connecting your Receiver
This section tells you how to connect the Philips STU 901
Satellite Receiver to the equipment you already have, such as a
TV and Video Cassette Recorder (VCR).
There are many connection options of which the most common
are:
A. To a TV only, using a Euroconnector.
Leave a clear space of at least 3 cm
all around the set for ventilation.
Make sure that curtains, cupboards,
etc. cannot obstruct air flow through
the ventilation openings.
Insert batteries in the remote control
Remove the battery cover
located on the back of the
remote control handset.
three batteries
(type R03S1.5V).
Replace the battery cover.
Insert
Connect your satellite dish antenna
First, install the dish antenna and its receiving element - the Low
Noise Converter (LNC) - according to the manufacturer’s
instructions.
You must only set the Antenna
Control (28) to the required position
POWER jz:
when the Receiver is switched off.
If necessary, press POWER (12) to
switch the Receiver off.
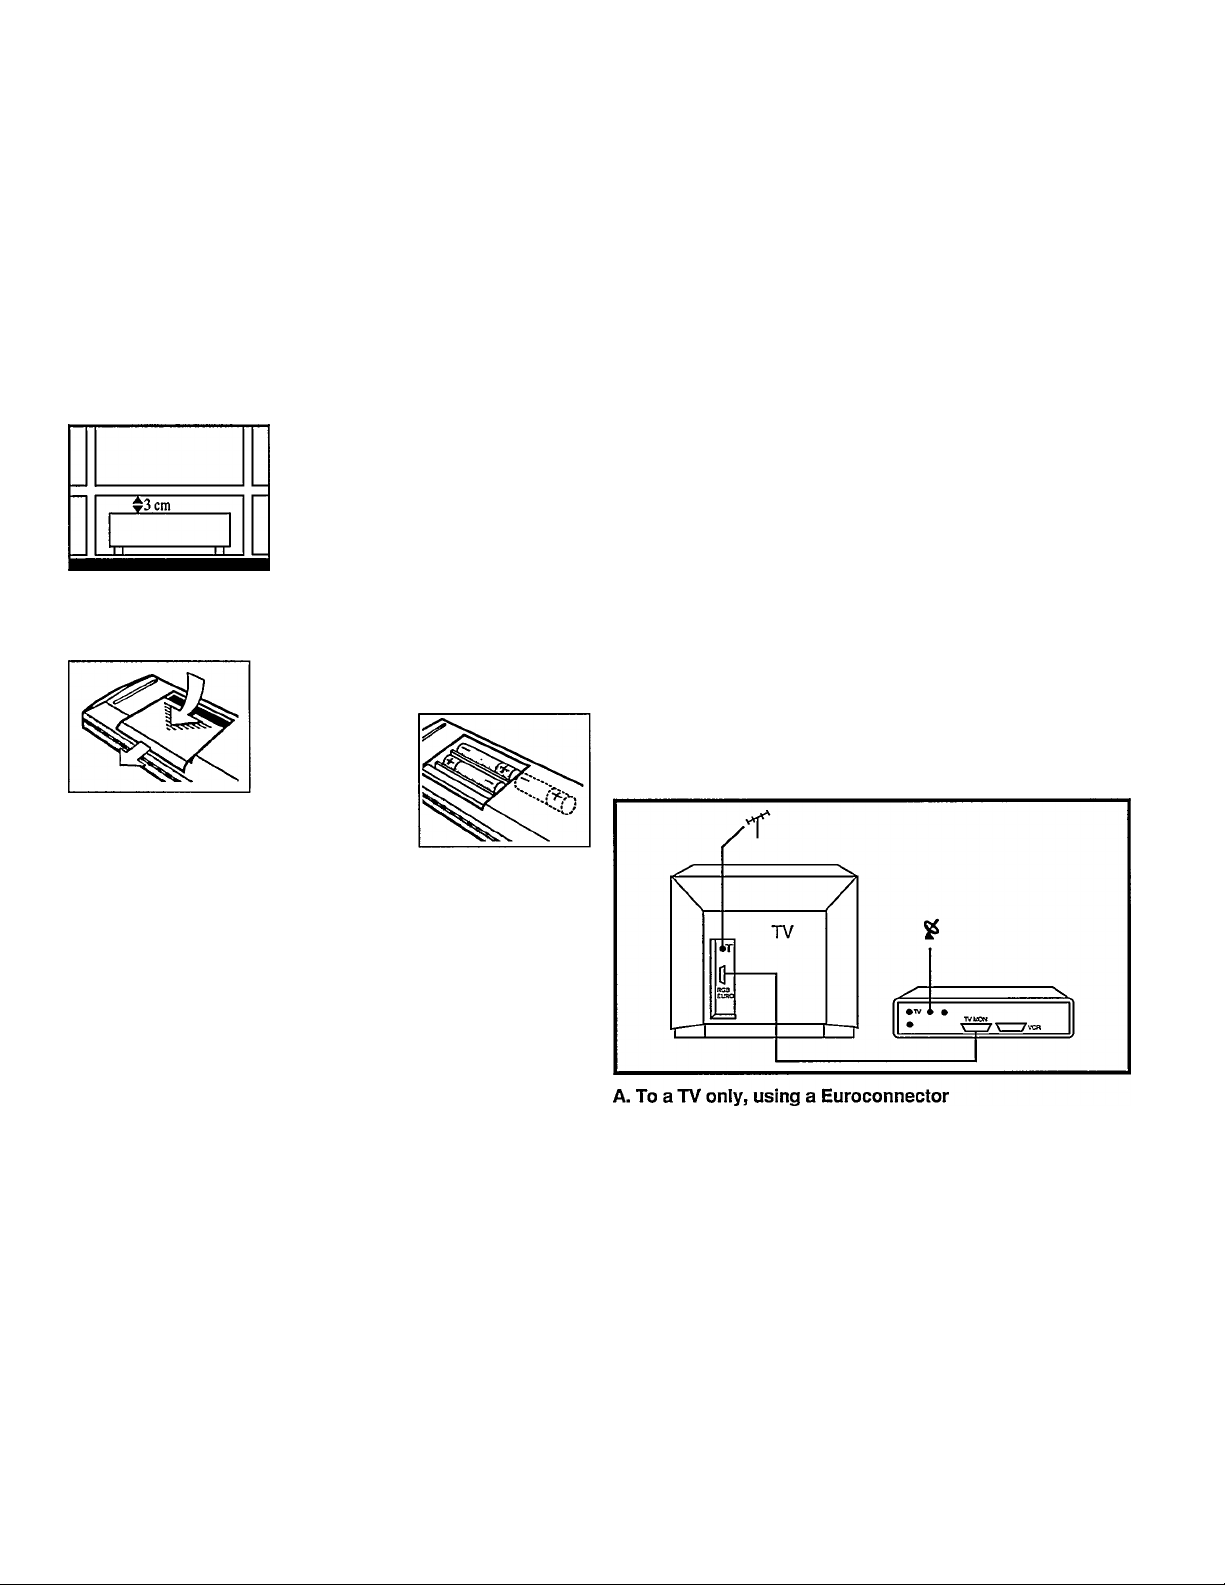
B. To a TV only, using a coaxial cable
C. To a TV and a VCR, using Euroconnectors
D. To a TV and a VCR using coaxial cables
E. To a TV and an S-VHS VCR
Option A is the best if you have a TV only because it gives the
best picture and sound quality - especially with D2-MAC
programmes. You will obtain even better sound if you connect
the Receiver to your hi-fi system.
See Additional Connections below.
Select one of the connection options, then follow the step-by-step
instructions below:
A
ANTENNA
CONTROL
w
1 2 3
Position 1
No power is supplied to the LNC! Use
this position if the distance (cable
length) between the Receiver and the
dish antenna is more than 30 meters.
You may need an extra amplifier in
the cable from your Receiver to the
dish - ask your dealer for advice.
Position 2
If you have one or two LNCs.
This is the usual situation. In this
case, the Receiver supplies the LNC
via the cable (14 or 18 V,300 mA
max).
Position 3
Not used.
1. Make the connections as shown in the drawing using the
Euroconnector supplied with your Receiver.
2. Connect your Receiver to the mains socket.
3. Switch your TV ON.
4. Switch your Receiver ON (12)
5. Press button number 0 on the Receiver remote control (6).
The programme number indicator (16) on your Receiver will
show 0. Press the MENU button (8) on the remote control.
You should now see the MAIN MENU on your screen
(see rear flap).
If not, you may have to select the AN input on your TV.
6. Press MENU OFF and go to the section Aim your dish.
<5b) 3
Page 8
B. To a TV only, using a coaxial cable
1.
Make the connections as shown in the drawing using the
coaxial cable supplied with your Receiver.
2.
Connect your Receiver to the mains socket.
3. Switch your TV ON.
4.
Switch your Receiver ON (12)
5.
Press button number 0 on the Receiver remote control (6).
The programme number indicator (16) on your Receiver will
show 0. Press the MENU button (8) on the remote control.
6.
Switch your TV to each of its programme numbers in turn to
check that your Receiver is not causing interference with
normal programmes.
7.
If there is patterning, or any other interference on the
screen, adjust the TUNE control (26) on the back of the
Receiver until you have a good picture. Only a small
adjustment, sufficient to remove the patterning, should be
made at a time.
8.
Continue this procedure until you have checked ail the
programme numbers on your TV.
Select a spare programme number on your TV which you
will always use for satellite programmes - this is now your
‘Satellite Receiver number*. Tune your TV until you find a
picture from the Receiver. You will know that you are
looking at a picture from the Receiver Vi/hen you see the
MAIN MENU appear on your TV screen (see rear flap).
C. To a TV and a VCR, using Euroconnectors
1. Make the connections as shown in the drawing.
Connect your Receiver to the mains socket.
Switch your TV ON.
Switch your Receiver ON (12)
Press button number 0 on your Receiver remote control (6).
The programme number indicator (16) on your Receiver will
show 0. Press the MENU button (8) on the remote control.
You should now see the MAIN MENU on your screen
(see rear flap).
If not, you may have to select the AN input on your TV.
6. Switch the Receiver to Standby using button (4).
Play a video cassette in your VCR. If you do not see a
picture from the VCR, check the connections as above.
7. Switch your VCR off.
8. Press 0 on your Receiver remote control, press
MENU and go to the section Aim your dish.
10.
If the reception is poor, use a small screwdriver to turn the
TUNE control (26) on the Receiver until the reception is
good. Go back to Step 6.
11. Go to the section Aim your dish.
4 <GB)
Page 9
1. Make the connections as shown in the drawing using the
cable supplied with your Receiver.
2. Connect your Receiver to the mains socket
and switch ON (12).
3. Switch your TV ON.
4 Switch your VCR ON.
5. Press button number 0 on your Receiver remote control.
The programme number indicator (16) on your Receiver will
show 0. Press the MENU button (8) on the remote control.
6. Switch your TV to each of its programme numbers in turn to
check that your Receiver is not causing interference with
normal programmes.
7. If there is [Datteming, or any other interference on the
screen, adjust the TUNE control (26) on the back of the
Receiver until you have a good picture. Only a small
adjustment, sufficient to remove the patterning, should be
made at a time.
8. Continue this procedure until you have checked all the
programme numbers on your TV.
9. Select a spare programme number on your TV which you
will always use for satellite programmes - this is now your
‘Satellite Receiver number". Tune your TV until you find a
picture from the Receiver. You will know that you are
looking at a picture from the Receiver when you see the
MAIN MENU appear on your TV screen (see rear flap).
10. If the reception is poor, use a small screwdriver to turn the
TUNE control (26) on the Receiver until the reception is
good. Go back to Step 6.
11. On your TV, select the programme number you use to
watch your VCR.
14. If there is patterning, or any other interference on the
screen, adjust the TUNE control (26) on the back of the
Receiver until you have a good picture. Only a small
adjustment, sufficient to remove the patterning, should be
made at a time.
Now check all the VCR programmes for possible patterning.
Select your Satellite Receiver number on your TV and check
again the TV programme for possible patterning.
If a problem occurs, go back to step 7.
15. Go to the section Aim your dish.
1.
Make the connections as shown in the drawing.
2.
Connect your Receiver to the mains socket.
3. Switch your TV ON.
4. Switch your Receiver ON (12)
5. Press button number 0 on your remote control (6). The
programme number indicator (16) on your Receiver will
show 0. Press the MENU button (8) on the remote control.
You should now see the MAIN MENU on your screen (see
rear flap). If not, you may have to select the AN input on
your TV.
6. Switch the Receiver to Standby using button (4). Play a
video cassette in your VCR. If you do not see a picture from
the VCR, check the connections as above.
7. Press 0, then MENU on your Satellite Receiver remote
control and go to the section Aim your dish.
NOTE:
Only D2-MAC programmes will be recorded via the S-VHS
connection; PAL7SECAM programmes will only be recorded via
the Euroconnector between your Satellite Receiver and your
VCR.
12. Select a spare programme number on your VCR which you
will always use for satellite programmes. It is a good idea to
use the same programme number as your TV ‘Satellite
Receiver number’.
13. Tune your VCR until you find a picture from the Receiver.
You will know that you are looking at a picture from the
Receiver when you see the MAIN MENU appear on your TV
screen (see rear flap).
CgB) 5
Page 10

Connect the Polarizer (if applicable)
Signals from a satellite are transmitted with different
polarizations. There are 4 kinds of polarizations:
Direct Broadcast Satellites DBS (TV satellites like TDF and
TELE-X) transmit with circular polarization:
left hana circular = L, or right hand circular = R.
All other satellites (such as ASTRA) transmit with linear polariza
tion: horizontal = H or vertical = V.
For proper reception, you need a device called a Polarizer which
is located in the LNC assembly of your dish antenna. This must
be connected to the STD 901 so that the right polarization is
selected automatically each time you change channels.
To make this happen, connect the 3 small leads from your
antenna cable to the POLARIZER connectors (24) on the back of
your Satellite Receiver:
GND +5V XL
POLARIZER
' the black lead to GND
* the red lead to +5 V
• the white lead to xl (pulse)
Aim your dish
Check that you still have the MAIN MENU on your screen (see
rear flap). If not, follow the first steps for the Connection Option
you have chosen. Press MENU OFF on your remote control.
Consult the Satellite Programme Guide supplied with your
Receiver and choose a programme number on the satellite at
which you will aim your dish, eg TV3, Programme 3, on ASTRA
1-A; RTL plus. Programme 37, on TV-SAT2 etc
NOTE:
With single reflector satellite dishes, the SELECT
POLARISATION settings LEFT and RIGHT may need to be
reversed i.e. if the correct setting is LEFT, you may need to
select RIGHT.
The preset values have been set for the Philips High
Performance dual reflector antenna.
Additional connections
AUDIO L/R (29)
if you wish to use your hi-fi installation to listen to satellite
programmes then you must connect it to the audio sockets (29).
These sockets are also used to connect an S-VHS recorder.
• Connect the output sockets AUDIO L (left
channel) and AUDIO R (right channel) to a
pair of left and right input sockets on your
hi-fi installation. If you have a Filmnet
decoder, connect AUDIO L to AUDIO IN
of that decoder.
DO NOT connect AUDIO L / R to the PHONO sockets of your
hi-fi instaliation.
Filmnet DECODER
If you have a Filmnet decoder, connect
BASEBAND (23) to VIDEO IN of the
Filmnet decoder.
(The antenna output of the Filmnet
decoder should be used for connection to
your TV or VCR).
Now install your dish following the instructions supplied with the
dish. If you cannot obtain a satisfactory picture, see Section 7,
“FAULT FINDING”.
Adjust the Polarizer
- select the Programme Number you want to optimise
- press the MENU button (8) on the remote control
- press 7 to select INSTALLATION
- press 2 to select SATELLITE PROGRAMMES
- press 2 to select ANTENNA SETTINGS
- if necessary, press 2 for SELECT POLARISATION and use
- + to highlight the polarization for the programme you have
selected (see your Satellite Programme Guide)
- press 3 to select ADJUST POLARISATION (the menu
disappears)
- use - + to get the best picture (as you press - +, look at the
Programme Number Indication (16), you will see changing
numbers from 0 to 20)
- press MENU twice to return to SATELLITE PROGRAMMES
- press 7 to STORE your settings
- press MENU OFF
6 (g^
Page 11

HOW TO WATCH
SATELLITE TV
3
For normal viewing, your Philips STD 901 Satellite Receiver is
operated entirely from its remote control unit.
The following instructions are for,‘normal operation’ - to get you
started quickly - and assumes that you are happy with all the
factory-set conditions. If you wish to change any of these later,
go to Section 5 “PERSONALISING YOUR RECEIVER”
You will find it helpful to fold-out the flaps at the front and rear of
this manual. The front flap contains drawings of your Receiver
and gives the numbers used in these instructions. The rear flap
shows you how to use the on-screen displays.
Switch on
Have you connected your system
correctly, following the instructions in
Section 2? If so, proceed as follows:
^ POWER ^
Press the POWER switch on the
Receiver (12)
If you do not get good reception, see
‘Poor reception’ in the Section 7 “FAULT
FINDING’’
Switch off
Press the stand-by switch (4) on your
Receiver Remote Control. This puts the
Receiver in standby mode enabling you to
switch it on again directly from the remote
control. The power consumption in
standby mode is very low - only 7 W.
(NB. You should not leave the Receiver in
standby mode if your home is empty for
long periods or during thundery weather.)
Select a programme
Press any of the buttons in group (6). To
select programmes 1 to 9, press the
number only; to select programmes from
10 to 99, first press the button . /.., then
the first digit followed by the second digit.
For example, to select programme 34,
press . /.. followed by 3 and 4.
Q
0
m
0
©
© ©
The TV/SAT button (3)
With some TV sets it may be impossible to
select a normal TV programme while the
Receiver is switched on. This may happen
when you have your Receiver connected to your
TV by means of an AN connector cable.
If this occurs, you should press the TV/SAT
button (3) on your Remote Control once. Now you can select
and watch normal TV programmes.
To return to satellite programmes, press the TV/SAT button (3)
once again.
If you have no problem changing TV channels while your
Receiver is switched on, you will not need to use the TV/SAT
button.
Control your Philips TV remotely
At the top left side of your Receiver Remote
Control unit is a hidden switch (1). If you press
this in, and continue to hold it down, your
Receiver Remote Control can act as a TV
remote control for Philips TVs. You can then
change TV programmes by pressing the
programme numbers on the Receiver Remote
Control (6).
This function may not work with some older Philips TV sets.
The MENU buttons on your remote control (8)
The MENU buttons, located in the red
field (8) on your Remote Control let you
control a number of additional features of
your Receiver. For example, they enable
you to adjust the picture contrast settings.
See Section 5 “PERSONALISING YOUR RECEIVER” for more
details.
The MENU buttons are used to select the On-Screen-Displays
(OSD).
0
©
©
©
You can "zap" from programme to programme using the
"P" buttons.
Once you are in “two-digit mode”, you
will not need to press the . /.. button
again to select numbers from 10 to 99.
To return to “single digit mode”, press the
. /.. button again.
Change the sound volume
If you have a Philips TV you may be able
to control the volume of the sound with
G
may not be possible with some older Philips TV sets. With most
other makes of TV sets the volume button on your Satellite
Receiver Remote Control will have no effect.
]
your Receiver remote control, (7). This
7
Page 12

Check which programme you are viewing (D2-MAC)
To check which programme you are viewing, press the ©
button in the MENU area (8). The dispiay, shown here, wiii
appear at the top right of your TV picture. This dispiay wiii not
appear if you have switched on subtities.
SAT PR3 TV3
STEREO Mix
SOUND SVENSKA
TEXT DANSK
Mix (D2-MAC;
In the MIX mode, you can listen to a second sound in addition to
the main sound, if the transmitted signal makes this possible, for
example the broadcast of a football match. You can then hear the
‘original’ noise of the crowd mixed with the voice of the commen
tator in your language.
To do this, select menu item 9 MIX and highlight ON by pressing
the - + key.
Press the © button (8) again to switch off the programme
indication.
Selecting other transmitted languages
(D2-MAC)
- press the MENU button (8) on the remote controi
- press 2 to seiect SOUND
- press 1 - 8 for the language you want
- press MENU OFF
You can also select the transmitted sound simply by pressing the
l-ll button on the remote control several times.
D2 MAC SOUND SELECTION
1 DANSK
2 ENGLISH
3 ITALIANO"
4 POLSKIE
5 SUOMI
6 RADIO 1
7i RADIO 2
8 BACKGROUND
1 DANSK
2 ENGLISH
3 ITALIANO
4 POLSKIE
.Select: I
9 MIX OFF №
- +
5 SUOMI
6 RADIO 1
7 RADIO 2
8 BACKGROUND
back: menu
Switching on subtitles (D2-MAC)
- press the 0 button in section (9) on your remote control.
Your most preferred subtitles transmitted will appear on the
screen after a few moments. If you want to change your preferred
subtitles see section 5 “Changing your preferences for
D2-MAC subtitling”.
- press the 0 button again to switch the subtitles off.
If you would like to have subtitles automatically appear (if trans
mitted), do the following:
- press the MENU button (8) on the remote control
- press 6 to select SPECIAL FEATURES
- press 3 to select CONTINUOUS SUBTITLING
- press + to select ON (if necessary)
- press MENU OFF
In this case the © button (8) will not react, because priority is
given to subtities, even if no subtitles are transmitted.
Selecting other transmitted subtitles (D2-MAC)
This procedure is similar to “Selecting other transmitted
languages”.
8 (GB)
back: menu
- press the MENU button (8)
- press 3 to select SUBTITLE
- press 1 to 8 for the language you want
- press MENU OFF
Page 13

Display the time (D2-MAC)
Press the clock button on the Teletext controls (11). If
transmitted, the correct time will appear at the top right
of your TV picture. Press the ciock button again to
switch it off.
View D2-MAC Teletext
You can watch Teletext pictures from a D2-MAC
sateilite transmission whether or not your TV has a
Teietext function buiit-in. With PAL/SECAM sateilite
broadcasts, you can oniy watch Teletext transmissions
if you have a TV set fitted with Teletext.
If you are watching a D2-MAC programme you can view Teietext
by pressing button (2). You then change pages by using the
keypad buttons in (6). Press button (2) again to switch off the D2MAC Teletext function.
For more information on using Teietext, please refer to the item
“USING TELETEXT’ in Section 5, “PERSONALISiNG YOUR
RECEiVER”
Use headphones (optional)
You can use headphones to iisten to sateiiite TV and radio
programmes.
Connect a stereo headphone with an impedance from 8
to 600 Ohm and a 6.3 mm jack-type piug into socket
(19).
Press VOLUME (18) to adjust the sound ievel.
With D2-MAC programmes, you can change and mix the sound
signals available:
- press SELECT to choose the headphone language.
- press MIX to select mixed or unmixed mode.
(this is to select a combination of the various sound signais
availabie - such, as background and commentary).
With PAL programmes, you can oniy Select in the MONO mode
(when the green Stereo light (15) is out).
Mix has no function.
Recording programmes on your VCR
You can record programmes from non-satellite sources just as
you have always done; but there are some differences when
recording satellite programmes.
You can use your VCR to record sateilite TV programmes in
three main ways:
- to record a sateilite programme whiie you watch it
- to record a satellite programme while watching another TV
programme (not another satellite programme).
- to record a satellite programme while the TV is switched off
In all cases, select the satellite programme you want to record on
our Receiver. If you are not using Euroconnectors, switch your
'CR to your “Receiver number” as described earlier in the “HOW
V'
TO CONNECT YOUR RECEIVER" section.
- press the MENU button (8) on the remote control
- press 6 to select SPECIAL FEATURES
- press 1 to select RECORD SELECTION
- press - to select SAT (if necessary)
- press MENU OFF
Now foilow your usuai recording procedure.
If you wish, you can now watch another TV programme or switch
your TV off.
(GB> 9
Page 14

PARENTAL CONTROL &
CONDITIONAL ACCESS
1
Record LaserDisk programmes on your VCR
(when a LaserDisk player is connected to the second
Euroconnector socket on your TV)
- press the MENU button (8) on the remote control
- press 6 to select SPECIAL FEATURES
- press 1 to select RECORD SELECTION
- press + to select TV
Now follow your usual recording procedure.
Playback from a VCR
- Press POWER (12) to switch the STU 901 on.
If you have made all connections using coaxial cables, just select
on your TV your 'VCR programme number'.
If you have used Euroconnectors, the following may be the case:
If you are watching the STU 901 picture, this picture will
disappear and you will see the picture of the VCR automatically.
When you stop the VCR, the STU 901 picture will return.
If the STU 901 is in standby, also then the picture of the VCR will
arrive on your screen automatically. If not, you may have to
select the AN input on your TV.
NOTE;
If power (12) is switched off, you will not be able to watch your
VCR, assuming you made the connections as mentioned in the
section 2 'HOW TO CONNECT YOUR RECEIVER'.
Introduction
Modern satellite TV programmes not only give you greater choice
and better sound and pictures - with D2-MAC - they also offer
you many improvements to make viewing more pleasurable and
to give you greater control over what you watch.
The key element are Parental Control and Conditional Access.
In all cases, you make extensive use of the On-Screen-Display
(OSD) functions of the Receiver. All changes are made using the
MENU buttons and the On-Screen-Displays.
This makes the procedures fast and easy.
Study the diagram on the rear flap and the explanations carefully.
You will then be able to make any changes you want simply by
following the instructions in the various OSD menus.
Using the Parental Lock
If you want your children only to watch one specific programme,
you can set the Receiver to show that programme only Children’s Channel, for example.
To set the Parental lock,
- first select the programme to lock using the button (6) on the
remote control
- press the MENU button (8) on the remote control
- press 6 to select SPECIAL FEATURES
- press 2 to select PARENTAL LOCK
- press + to select ON
- press MENU OFF
The programme number cannot now be changed on the Receiver
itself but can, of course, be changed using the remote control. To
prevent this, take the remote control with you or hide it in a
secure place.
The Parental Lock works with all programmes - D2-MAC, PAL
and SECAM - whether they are encrypted or not.
You do not need a EuroCrypt card to use the Parental Lock.
10 <GB>
What is Parental Control?
The Receiver 901 has a Parental Control mode which you can
use to stop your children watching certain types of programmes.
Many satellite programme providers rate programmes by their
contents of sex, violence etc and transmit Parental Code
Numbers with their encrypted D2-MAC transmissions. The STU
901 can detect these numbers - and lets you programme your
Receiver so your children only watch programmes you think are
suitable.
Movies are often rated according to their suitability for particular
age groups;
- U = Universal
- PG = Parental Guidance
-12,15 and 18 = suggested viewing ages.
You can stop your children watching certain categories by using
a Secret Code.
Parental Control works only with D2-MAC encrypted
programmes for which you have a EuroCrypt card and when
the broadcaster transmits Parental Code Numbers.
Page 15

When first delivered, a EuroCrypt card is able to receive all
programmes without restriction and the Secret Code is
preset to 0000.
I
1 CONSULTATION
2 CHANGE SECRET CODE
3 PAY PER VIEW LOCK iS!3J ON
4 CONSULTATION LOCK 1813^ ON
5 PARENTAL CONTROL
U PG 12 15
6 STORE
CHANGE SECRET CODE TO ACTIVATE LOCKS
Sdcci: I - () back: menu
EURACCESS
How to change your Secret Code
Insert a EuroCrypt card into slot (13) at the front of your
Receiver.
ENTER NEW SECRET CODE:
FOR VERIFICATION
DO NOT FORGET YOUR SECRET CODE!
Select: 0 - 9
Do not forget your Secret Code! If you do, you will have to
contact your dealer or the programme provider for
assistance.
NOTE:
The factory pre-set code of 0000 means that there is no
Secret Code in the Eurocrypt card. Once you change this,
no-one can change (store) any locks or change the parental
control settings without knowing your Secret Code.
-----------
back: menu stop: olT
Do not change your Secret Code too often - this uses up memory
in the EuroCrypt card.
change the setting to one of your own choice.
Here is how you do it.
11
Page 16

How to change and lock the Parental Con
trol setting
EuroCrypt conditional access system.
Note that some programmes are encrypted with another
conditional access system.
Have you entered your own Secret Code (not 0000)? If not, you
will see a message at the bottom of the ACCESS menu:
CHANGE SECRET CODE TO ACTIVATE LOCKS
To do this, see "How to change your Secret Code” above.
Select menu item 5 PARENTAL CONTROL and, when the text
has changed to yellow, press the - + key to move through the
available settings. Stop on the setting you want - when it is
highlighted.
- press 6 STORE
- enter your Secret Code
How to watch an encrypted progranune
If you want to watch a programme encrypted to the EuroCrypt
standard, you will first have to contact the programme provider.
They will register you as an authorised viewer - sometimes
asking payment of a fee - and will provide you with a EuroCrypt
card. You insert this into the Smart Card reader* (13) on your
Receiver and you can then watch the programme or
programmes, for which you have been authorised.
You can leave your EuroCrypt card in the slot at all times but
it only works with D2-MAC EuroCrypt programmes. It has no
effect on other programmes.
Using a EuroCrypt card
A EuroCrypt card has a small micro-processor built in. This is
used by the programme provider to ‘tell’ the system which
programmes you are authorised to watch and, in the case of
subscription channels, how long you have paid for.
When you first receive your EuroCrypt card, you will want to
enter your own Secret Code to stop others changing your
choices (a EuroCrypt card is supplied with the code set at 0000,
which means there is no Secret Code). To put in your own code,
see “How to change your Secret Code” above.
The new Parental Control setting takes effect and cannot be
changed unless you enter your Secret Code on request.
Notice that you can always use the - + key to highlight other
PARENTAL CONTROL settings, but they do not operate until
you STORE, which requires you to first enter your Secret Code.
Changing the secret code back to 0000 will cancel all locks.
What is Conditional Access (CA)?
Satellite TV signals can be received in many different areas and
countries and are either ‘free’ or ‘subscription’. ‘Free’ channels
can normally be viewed without restriction.
To comply with international copyright requirements, and enable
programme providers (the broadcasters of programmes) to
obtain payment for subscription channels, a system of condi
tional access has been developed. This uses a process known
as encryption.
An encrypted programme will usually appear on your screen as
an unrecognisable picture with no sound. You can only view the
programme if you are authorised to do so and have a valid
EuroCrypt card.
Your Philips STU 901 is fitted as standard v;ith a EuroCrypt card
reader (13) to let you view programmes encrypted with the
12 • INNOVATRON S.A. Ucence
I
1 CONSULTATION
2 CHANGE SECRET CODE
3 PAY PER VIEW LOCK
4 CONSULTATION LOCK
5 PARENTAL CONTROL
U PG
6 STORE
Selecl: I - 6
EURACCESS
1
slop: nil
Page 17

How to use Consultation
To see your Subscription details
- press the MENU button (8) on the remote control
- press 4 to select ACCESS
- press 1 to select CONSULTATION
(wait for the CONSULTATION menu to appear)
1 TV-3
2 TV-1000
3
4
5
6
Selecl: 1 - 6
press a number to select the Programme you wish to consult Xo See Prebooked Pay Per View details
back: menu
- press 1 to select SUBSCRIPTION
You will see a screen display like this.
The details will depend on your actual subscription.
SUBSCRIPTION
TO
01 NOV 90
01 DEC 90
01 DEC 90
07 JAN 91
+ NEXT PAGE
- FIRST PAGE
- press 2 to select PREBOOKED PAY PER VIEW
You will see a screen display like this where the numbers
correspond to the programme numbers listed in your TV guide.
The details will depend on your actual subscription.
31 OCT 91
31 DEC 91
28 FEB 91
07 JAN 91
THEME
DOCUMEN.
MINISER. 3
SPORT 12
SPECIAL
back: menu
I
CREDIT LEFT:
AUTHORISED OVERDRAFT:
1 SUBSCRIPTION
2 PREBOOKED PAY PER VIEW
3 IMPULSE PPV PER PROGRAMME
ScIcci: I . .1
Just below the main title, you see eg.:
CREDIT LEFT: 325TOKENS
AUTHORISED OVERDRAFT 0 TOKENS
This information concerns IMPULSE PPV PER PROGRAM
CONSULTATION TV-3
325 TOKENS
0 TOKENS
back: menu stop: olT
1
back: menu
(gb5 13
Page 18

To see Impulse PPV per Program details
To view Impulse Pay Per View programmes
- press 3 to select IMPULSE PPV PER PROGRAM
You will see a screen display like this where the CREDIT LEFT
shows how many tokens you have left in your EuroCrypt card
from your original purchase. AUTHORISED OVERDRAFT shows
To set the Consultation lock
You may wish to stop others looking at the details on your
EuroCrypt card. To do this, proceed as follows:
- press the MENU button (8) on the remote control
- press 4 to select ACCESS
- press 4 to select CONSULTATION LOCK
- press - or + to select ON
- press 6 STORE
- enter your Secret Code (which should not be 0000)
If you are an Impulse Pay Per View (PPV) subscriber, and want
to watch a specific programme, proceed as follows;
- select the programme number using the buttons (6) on
your remote control. You will see the following On-Screen
Display:
The number of tokens will be deducted from your Credit in the
EuroCrypt card and you can watch the programme.
If you have no credits left, you will see the message:
OVERDRAFT REACHED
If you have no subscription, you will see the message:
NO ACCESS
Now no-one can look at the details on your EuroCrypt Card
unless they first enter your Secret Code.
To set the Pay Per View lock
As an impulse Pay Per View (PPV) subscriber, you may wish to
stop others viewing and therefore purchasing the programmes.
To do this, proceed as follows:
- press the MENU button (8) on the remote control
- press 4 to select ACC ESS
- press 3 to select PAY PER VIEW LOCK
- press - or + to select ON
- press 6 STORE
- enter your Secret Code (which should not be 0000)
Now no-one can watch an impulse PPV programme unless they
first enter your Secret Code.
14 Cg|>
Page 19

Renewing your authorisation
When the period for which you have been authorised runs out,
you wili see a screen message like this: NO ACCESS.
Contact the Programme Provider to arrange a new authorisation.
CgD 15
Page 20

Introduction
Your Philips STU 901 is pre-programmed at the factory with
station names, numbers etc as well as ‘preferences’ for sound,
language, subtitling, etc. in the following section, you will find out
how to change these to suit your individual wishes.
All changes are made using the MENU buttons and the OnScreen-Displays. This makes the procedures fast and easy.
Changing the menu language
The STU 901 is delivered so that the menu items are in the
language normally used in your country or area. If you want to
change this, proceed as follows.
’PERSONALISING' YOUR
RECEIVER
5
Open out the rear flap to see how to use the On-Screen-Displays.
- press the MENU button (8) on the remote control
- press 7 to select INSTALLATION
- press 1 to select MENU LANGUAGE
- press the number for the language you want
- press MENU OFF
Your new choice of menu language is stored automatically.
1 MENU LANGUAGE
2 SATELLITE PROGRAMMES
3 D2-MAC SOUND LANGUAGE
4 D2-MAC SUBTITLING LANGUAGE
5 D2-MAC TELETEXT
Scleci: I - 5
stop: olT
Adjusting the picture
- press the MENU button (8) on the remote control
- press 1 to select PICTURE.
Follow the instructions below to change the settings.
1 SATURATION
2 CONTRAST
3 PICTURE DISPLAY FORMAT
STANDARD
THE PICTURE WILL BE
CORRECTLY DISPLAYED ON
ANY STANDARD TV SCREEN
i .Selecl: 1 - 3
—
+
back; menu
Slop: oil 1
16 CsD
Changing colour saturation and contrast
(D2-MAC programmes only)
Colour saturation and contrast have been set to a standard value
in the factory. To change them
- press either 1 SATURATION or 2 CONTRAST
- press the - + key of the MENU buttons (8).
The red and blue bars will grow longer or shorter.
- release the - + key when you have the picture you like.
NOTE:
Do not change the Saturation and Contrast settings too far to the
left or right - you may get poor recording of programmes on your
video recorder.
Page 21

Changing the picture display format
The TV pictures we are used to seeing use a format which was
set more than 50 years ago to match the movie fiims of the time.
Since then, movie screens have grown wider but TV pictures
have not.
When you watch a wide-screen movie on a normai TV you either
see aii the picture but with biack bars at top and bottom or you
see the picture fuli-screen but with the sides removed.
r
INSTALLATION
Now D2-MAC brings wide-screen pictures to TV and new wide
screen TV sets are appearing on the market. They use a format
of 16:9 compared with the 'old' 4:3 format you are used to.
If you have one of the new wide-screen sets, you should set the
picture display format to WIDE as follows:
- press the MENU button (8) on the remote control
- press 1 to select PICTURE
- press 3 to select PICTURE DISPLAY FORMAT
- use the - + key to highlight WIDE
- press MENU OFF
Make sure your TV set is set to the wide-screen position when
receiving wide-screen transmissions.
Changing your preferences for D2-MAC
sound
With D2-MAC programmes you can set the language you prefer
for the main sound and subtitling. If the broadcaster is transmit
ting these languages, your STU 901 will automatically select the
ones you prefer.
You can select two other languages which you would like if your
first choice is not being broadcast. Your Receiver will handle this
automatically.
If none of your language preferences are being broadcast, you
see and hear the original language of the programme, often
called ‘Main sound’ or ‘Background’.
1 MENU LANGUAGE
2 SATELLITE PROGRAMMES
3 D2-MAC SOUND LANGUAGE
4 D2-MAC SUBTITLING LANGUAGE
5 D2-MAC TELETEXT
Select: 1 - 5
press 1 for your first priority
press - -h to select the language you want
press 2 for your second priority
press - -1- to select the language you want
press 3 for your third priority
press - -h to select the language you want
when you have the selections you want, press MENU
press 4 to STORE your new selections
press MENU OFF
stop: olT
To change your preferences for D2-MAC language sound:
press the MENU button (8) on the remote control
press 7 to select INSTALLATION
press 3 to select D2-MAC SOUND LANGUAGE
Select; 1 - 4
—
+
back: menu
CgD 17
Page 22

Changing your preferences for D2-MAC subtitling
Press the MENU button (8) and select the menu item 7
INSTALLATION.
Press 4 to select D2-MAC Subtitling language. Now you can
follow the same procedure as you have used for D2-MAC Sound.
To change the sound settings with PAL and SECAM MONO
programmes,
- press the MENU button (8) on the remote control
- press 7 to select INSTALLATION
- press 2 to select SATELITE PROGRAMMES
- press 6 to select PAL7SECAM AUDIO SETTINGS
- press 1 to select MONO
- press 1 to select TUNE
- press - + until you hear clearly the sound you want
- if necessary, press 2 to select the correct DEVIATION (see the
Satellite Programme Guide, or select what sounds the best)
- if necessary, press 3 to select the correct DEEMPHASIS (see
the Satellite Programme Guide, or select what sounds the best)
- press MENU twice to return to SATELLITE PROGRAMMES
- if you wish, press 7 to STORE your new settings
- press MENU OFF
To change the sound settings with PAL and SECAM STEREO
programmes or multilingual programmes,
- press the MENU button (8) on the remote control
- press 7 to select INSTALLATION
- press 2 to select SATELITE PROGRAMMES
- press 6 to select PAL/SECAM AUDIO SETTINGS
- press 2 to select STEREO/LANGUAGE/RADIO
- press numbers 0 -9 until you find the sound you want
- press MENU twice to return to SATELLITE PROGRAMMES
- if you wish, press 7 to STORE your new settings
- press MENU OFF
Sound selection with
PAL/SECAM programmes
Your programme guide may tell you which languages are
available for the programmes you like to watch.
SATELLITE PROGRAMMES
1 CHANNEL SELECTION + SHOW PICTURE
2 ANTENNA SETTINGS
3 SEARCH
4 PROGRAMME NUMBER
5 PROGRAMME NAME
6 PALySECAM AUDIO SETTINGS
7 STORE
8 PROGRAMME LIST
Select: I - S
Back ; Menu
stop: oil'
Introduction to Programming
TV stations transmit their programmes on channels. Channel
numbers are indicated by two-digit numbers (e.g. CH 09).
Each station can be stored under a programme number (1 to 98).
Programme numbers have one or two digits (e.g. PR 7 or PR
17). The factory-set programme numbers can be found in the
Satellite Programme Guide delivered with your Receiver.
When searching for stations, you will find that some are broad
casting the new D2-MAC signals while others are using the ‘old'
PAL/SECAM signals.
With D2-MAC signals, you can obtain information on the
programme you are watching by pressing the + key (8) on your
remote control. An information block appears at top right of your
TV screen. This information block is not available when PAD
SECAM signals are being received.
For PAL/SECAM signals, the sound may have to be pro
grammed separately. See 'Sound selection with PAL/SECAM
programmes' above. So, if you have a good picture but bad
sound, just continue programming.
18 (GB)
Page 23

Search for a station...
Naming a station
To find a station not aiready programmed into your Receiver first
check its technicai details and make sure your dish is pointing at
the right satellite. Then proceed as follows:
- press the MENU button (8) on the remote control
- press 7 to select INSTALLATION
- press 2 to select SATELLITE PROGRAMMES
- press 2 to select ANTENNA SETTINGS
- if necessary, press 1 to select INPUT ANTENNA SELEC
TION and use -+ to select INPUT 1 (21) or INPUT 2 (22)
- If necessary, press 4 to select POWER LNC and use - + to
select 14 V or 18 V:
• for a single band LNC select 18 V
• for dual Band LNC's select 14 V for the low band
(usually band I, see page 4 of the satellite programme
guide) or 18 V for the high band (usually band II)
• for voltage controlled polarisation dishes (type Marconi),
select 14 V for Vertical, or 18 V for Horizontal polarisation
- if necessary, press 2 for SELECT POLARIZATION and use + to highlight the polarization you need
- press MENU to return to SATELLITE PROGRAMMES
- press 3 to SEARCH. The menu will disappear.
The Receiver will search until it finds a station.
MAC programme = menu plus picture
PAL programme = menu only
- select 1 to show picture
- press MENU to go back and see the menu
... or Direct Channel Selection
- press the MENU button (8) on the remote control
- press 7 to select INSTALLATION
- press 2 to select SATELLITE PROGRAMMES
- press 1 to select CHANNEL SELECTION
- enter a number between 01 and 40 (or use - + to change the
number)
- press MENU to return to SATELLITE PROGRAMMES menu
Press 5 to select the programme name menu as shown:
Select in turn the digit buttons 1-5, and after each selection use
the - or + button to see all the possible letters of the alphabet,
numbers or a space that can be used to give the name to the TV
station.
To check the programme list
Press 8 to select programme list.
The following programme list, for example is shown:
Give it a programme number
- when you find the programme you want, press 4 to select
PROGRAM NUMBER
- enter a number between 1 and 98 (or use -+ to change the
number)
- press MENU to return to SATELLITE PROGRAMMES menu
PROGRAMME LIST
NAME NR NAME NR NAME
NR
SCREE
01
02 RTL+
TV3
03
04 EUROS 21
05 UFES 22
06 SATl
07 TIOOO 24
OS SKYl
09 TCLUB
10 3SAT
11 FILMN
12 NEWS
13 RTL4
14 PRO 7
15 MTV 32
16 MOVIE
17 SKYR
To see the list for programme numbers 51-98, press the + button.
Press the MENU button to return to the satellite programmes
menu, or OFF to quit the menus.
(off)
RTLR
18
EUROS
19
1-B 1
20
1-B2
1-B3
1-B 4
23
1-B 5
1-B 6
25
1-B 7
26
1-B 8
27
1-B 9
28
1-B 10
29
1-B 11
30
1-B 12
31
1-B 13
1-B 14
33
1-B 15
34
35
36
37
38
39
40
41
42
43
44
45
46
47
48
49
50
51
back; nic'ini
1-B 16
TV4
RTL +
3SAT
SATl
IPLUS
CANAL
LA7
EUROM
SPORT
CULTU
INTER
BBC
RAI
SATl
TELEC
3SAT
(OB) 19
Page 24

storing a station
To select double height text
- press 7 to STORE your settings
- press 3 to continue searching (see above) or press MENU
OFF to exit
NOTES:
- A maximum of 98 stations can be stored in the memory.
- If a bad picture appears it is possible that your dish antenna is
not precisely directed at the satellite and needs adjustment.
- Programme numbers (PR) 00 and 99 are reserved for specific
functions:
1) On PR 00, D2-MAC signals received from a VCR are pro
cessed by the Receiver for replaying on your TV screen. This
is the case when your VCR is able to record and playback D2MAC signals.
2) On PR 99, D2-MAC signals received by your TV are pro
cessed by the Receiver for playing on your TV screen. This is
the case when you have a MAC-capable TV set.
Using Teletext (D2-MAC only)
Introduction
Your STU 901 Receiver allows you to see Teletext information
pages from D2-MAC satellite TV broadcasts - even if your set
does not have Teletext.
Switching on Teletext
-Select the programme number for a satellite
programme that transmits Teletext.
-Press the m button. Usually the index page (e.g.
screen remains black, no teletext is transmitted.
page 100) can then be seen on the screen. If the
Selecting a Teletext page
-Press 3 digit buttons (e.g. 6 then 5 then 0 for
page 650). This starts then page indicator.
CD (D CD
CD (D CDCD CD CD'
CD m
When the page indicator is the same as the
required page number it stops and the Teletext
page is shown on the screen. If the Teletext
page you have chosen is not available, then the
page indicator continues, until you select a
Teletext page that can be found. You may also
select pages using the - + buttons.
Press the (S) button to return to page 100.
Note: If the Teletext page is updated the top half of the page is
automatically selected.
-Press the © button to see the top half
of the Teletext page enlarged on the
screen.
-Press the © button to see the bottom
half of the Teletext page enlarged on the
screen.
-If you want to return to normal height text press the ©
button again.
To show concealed information
Some Teletext pages contain quizes or riddles.
-Press the ? button to show the concealed
information.
-Press the ? button again to hide this
information.
To stop automatic page changes (of
‘rotating’ pages)
Some information in Teletext needs more than
one page. Each page is shown automatically in
sequence.
-Press the ® button to stop the page
changing automatically.
-Press the ® button to return to normal Teletext use.
To see Teletext and a TV programme simultaneously (D2-MAC only)
-Press the @ button to superimpose teletext
(M) ®
over the TV programme.
- Press the @ button again to return to normal
teletext use.
To quit Teletext
MD -Press the g) button
To store Teletext personal preference pages
You can store up to 20 Teletext pages that you frequently use.
Note: Teletext must not be switched on.
To switch off Teletext temporarily
-Press the X button. Only the page number is
(x) (M)
20 <gB>
shown on the screen when the page is updated.
-If you want to switch on Teletext again press
the X button.
- Press MENU button (8) on the remote control
- Press 7 to select INSTALLATION
- Press 5 to select D2-MAC Teletext
- Press 1 to SELECT
If Teletext page numbers have not been previously stored then
an empty list is shown:
Page 25

Then,
(1) Select the programme number (2 digits) for the TV station
then the Teietext page number (3 digits). The iast selected
page is shown in red.
(2) If you want to select more Teletext pages you can move up or
down using the - or + button. Then repeat step (1).
MENU
L
(4) Press the © button to delete a personal preference page
from the list.
(5) - Press 2 to store.
The compiete list of selected Teletext pages is shown in red
on the screen untii they are stored in the sateliite Receiver.
- Press MENU OFF.
(3) Press the MENU button so that the TXT
PAGE NUMBERS menu is shown.
dD 21
Page 26

GENERAL
TECHNICAL SPECIFICATIONS
RECEPTION
• Multi-standard Satellite Television Receiver for
D2-MAC, PAL and SECAM signals
• Remote control of all main functions
• On-Screen-Displays (OSD) for easy operation
• EuroCrypt conditional access system
• D2-MAC Teletext
• Dual Band LNC control
PICTURE QUALITY
• Digital video processing
• Widescreen pictures with an aspect ratio of 16:9, improved
resolution and suppression of cross colour effects through
MAC transmission
• Compatible with future High Definition transmissions
(HD-MAC)
• RGB output for high quality pictures
• S-VHS output
SOUND QUALITY
• Digital HIFI sound with MAC transmissions
• Up to 8 sound channels for different languages
• Ambient/background sound mixable with each transmitted
sound
• Separate headphone language selection with MAC
transmissions
• Up to 6 audio channels with PAL reception for
stereo/multi-lingual/radio reception
OPERATION
All functions remote controlled
Operation and Installation completely menu-controlled via
On Screen Display (OSD)
Fluorescent Tube Display for channel/programme indication
98 Presets
Integrated EuroCrypt Conditional Access system
Integrated EuroCrypt card reader for Conditional Access
Polarizer setting programmable per preset
Factory pre-programmed
RECEPTION
Frequency range
Input level
Audio frequency range
(PAL/SECAM)
Stereo sound carrier frequencies
(PAL)
De-emphasis switchable
SOUND
Frequency response (DIN 45500) : 20 Hz -15 kHz
VIDEO
Video Output
Video Bandwidth (D2-MAC)
Video Bandwidth (PAL/SECAM)
CONNECTIONS
Headphone (6.3 mm jack, front)
1 RGB Euroconnector for TV
1 RGB Euroconnector for VCR
S-VHS output for D2-MAC reception
2 Satellite antenna inputs (lEC 9.5 mm) with 0/14/18 VDC output
Baseband output (DIN, PAL, de-emphasis)
Audio outputs left/right (CINCH)
Terrestrial antenna input 75 £2 coax
Terrestrial antenna output 75 £2 coax
Polarizer control (5.6 V, pulse, GND ; click-fit)
MISCELLANEOUS
Operating temperature range
Mains input
Power consumption
Weight
Dimensions (h x w x d)
Dimensions packaged
ACCESSORIES
1 Euroconnector cable
1 Terrestrial antenna cable
1 Male connector for satellite dish antenna Input 1
1 Remote control type RC 5914
Directions for use with satellite programme guide
: 950 -1750 MHz
: -60 to -30 dBm, 75Q
5.5 to 8.5 MHz
7.02 - 7.20 - 7.38
7.56 - 7.74 - 7.92 MHz
50-75ps/J17
1 Vpp into 75 Q
8.4 MHz (-3 dB‘
4.8 MHz (-3 dB'
: +5 to +40°C
: 220 - 240 V, AC ±10%, 50 Hz
: 45 W (stand-by 7 W)
:5Kg
: 90 X 420 x 330 mm
: 210x550x470 mm
22
Page 27

FAULT
Receiver does not operate
If the Receiver does not give the desired result when used
CAUSE AND ACTION
check the power connection
check the satellite dish antenna and/or AN connections
check the position of the ANTENNA CONTROL SWITCH (28).
verify that the batteries of the remote control are not
exhausted.
if you have any of the faults shown, take the required action and,
if this does not achieve the required result.
Cannot select TV programmes when Receiver is switched
on.
With some TV sets it may be impossible to select a normal TV
programme while the satellite Receiver is switched on. This may
be the case if, for example, you have your satellite Receiver
connected to your TV by means of an AN connector cable and
you want to make a recording of a satellite programme while
watching a normal TV programme.
Poor reception
If you have followed carefully the instructions in Section 2 “HOW
TO CONNECT YOUR RECEIVER”, you should get good
pictures and sound.
Scrolling picture
consult your dealer.
If this occurs, you should press the TV/SAT button (3) on your
remote control once. Now you can select and watch TV
programmes.
If you wish to return to the satellite programmes, press the same
TV/SAT button (3) again.
If you have no problem changing TV channels while your satellite
Receiver is switched on, you do not need to use the TV/SAT
button.
If not, first check the section 'Adjust the Polarizer' carefully.
- Check dish position
If this does not improve things, then the problem may be due to
objects such as buildings or trees between your dish and the
satellite. Ask your dealer for advice.
The picture is not stable, scrolls or disappears and appears all
the time.
Do the following:
- press the MENU button (8) on the remote control
- press 7 to select INSTALLATION
- press 2 to select SATELLITE PROGRAMMES
- press 1 to select CHANNEL SELECTION
The menu will disappear. Press - and + once and see if the
channel comes in. If not, you may be tuned to a programme with
conditional access for which you have no authorisation.
- press MENU to go back to the menu
- press 7 to STORE your settings
- press MENU OFF to exit
Repeat this procedure for other programmes if necessary.
Note: If with any of these above mentioned actions you do not achieve the required
result, you should consult your dealer.
(GB) 23
Page 28

You select On-Screen-Displays by
pressing the MENU button (8) of your
remote control unit. You see the MAIN
MENU first.
If you then press the number 1 on the
numeric keypad (6) of your remote
control, you will see a display similar to
the one below.
HOW TO USE
THE ON-SCREEN DISPLAYS
MAIN MENU
1 PICTURE
2 SOUND
3 SUBTITLE
4 ACCESS
5 PROGRAMME-LIST
6 SPECIAL FEATURES
7 INSTALLATION
I
Title bar
Select the menu item
you want by pressing
its number on the
remote control
keypad (6). The
selected menu item
will change colour
from white to yellow.
Shows you how to
select the items in
the menu above - by
pressing numbers on
the remote control
keypad (6).
EXAMPLE
1 SATURATION
2 CONTRAST
3 PICTURE DISPLAY FORMAT
STANDARD
THE PICTURE WILL BE
CORRECTLY DISPLAYED ON
ANY STANDARD TV SCREEN
- +
You selec
options like
STANDARD or WIDE in the
menu above by first pressing
the number 3 on the remote
control keypad (6), then
pressing the E±] key of the
menu buttons (8).
When you see the
|stop:off indication at
' bottom right, you can
switch off the OnScreen-Display and
return to normal
satellite TV viewing.
Press the OFF button
of the MENU controls
(8).
'When you see
back:menu, you can
return to the previous
menu by pressing the
MENU button (8).
You can also use the E3 key
to change the Saturation and
Contrast after you select
menu items 1 and 2.
Page 29

Page 30

|Â_ÿ %_•
■M». ê
<^|) IDENTmVCARD
GERÄTE
KENNKARTE
CARTE
D'ID E^m ПCA TION
<¡Ñ L) ID ENHRCATIEK AAR T
(ff!) CAR TE
D'ID ENT IRCA ZIONE
TAR JET A DE
IND ENTIRCA CÍON
CARTAO DE
IND EmiRCAÇAO
<oB ) I.D .KOR T Dett e kort, ud fyldt af D eres forhandle r, e r tilstækk elig
<T^ IDEMTIR KAS JOSKORT Det te ko rt, sammen m ed g aratil>8tingels ene (som De fàr av
IDE WnR ERlN GSK ORT Det te Ko rt tiilsam man s me d ga rantivillkoren, som Du fâr av
<|f > TUNNIS TUSKOR TTI
This car d, together vW th the te rms of gu aran tee ( to be provided by
you r d e aler) . forms th e full cer tifica te of guarante e for this app lianc e.
Diese Karte ist, zusam men mil den Garantieb estim mungen , die Ihr
Hän dler ihen en aushä ndigt, Ihr Garantiesche in für dieses Gerät
Ass oc é e aux con ditio ns d e garantie (qu i vou s so nt re mise s par le
revende ur), cette carte con stitu te le certificat de g aran tie d e cet
app areil.
Dez e l<aart v ormt sam en m et d e garantievoo rwaa rden (welke d oor
uw dealer ve rstre kt worden), het garantiebev Wjs voor dit a ppar aaat
Questa carto lina rappresenta in siem e al le co ndizioni di garanzìa (da
con segn are dal v ostro rive nditore) il docume nto di garanzia pe r
que sto apparecchio.
La garantía d e es te ap arato se compone de e sta tarjeta y d e las
con dicio nes de g arantía que le entregará su conc esionario .
Este car tao, em c onju nto c om as co ndiç oes de garant ía em vigor
(explicadas pello seu vend edor) con stitu em o certificado d e ga rantía
do seu a pare lho.
garantid okumentation for dette apparat.
foib andleren ) utg jor g arantibev isit for de tte a ppar at.
radiohand'ar en, u tgor ett fullstandig t garantiebev is for den na p rodu kL
Tam án l aitteen ta kuutodistus m uodostuu tas ta ko rtista ja
takuush doista Qa lleen myy ja an taa rruka an).
V
PHILIPS
i
lÉé
B
3111 176 44311
 Loading...