

Page 1

PHILIPS
Page 2

CONTENTS
J MODEL NO: STU811/02G j
CONTENTS
REMEMBER-SAFETY FIRST ....................................................................................................................2
CONNECTION TO THE MAINS SUPPLY .................................................................................................2
MAINS LEAD PLUG CONNECTIONS (UK AND EIRE) ................................................................................2
MAINS LEAD PLUG CONNECTIONS (CONTINENTAL EUROPE)
INTRODUCTION TO SATELLITE TELEVISION........................................................................................3
FRONT AND REAR PANEL DRAWINGS .................................................................................................4
FRONT PANEL OPERATION.....................................................................................................................4
INTRODUCTION .........................................................................................................................................5
On-screen Menus .........................................................................................................................5
Menu Languages ..........................................................................................................................5
Programmes ................................................................................................................................5
INSTALLATION OVERVIEW......................................................................................................................5
Connecting Up..............................................................................................................................5
Tuning In .....................................................................................................................................5
Antenna and LNC Settings ............................................................................................................ 5
Viewing Programmes.....................................................................................................................5
Handset Overview.........................................................................................................................5
Sv/itching In and Out of Standby Mode .........................................................................................5
UHF TUNING (If Receiver is Conncted to TV Using Coaxial Cable)
HANDSET OPERATION............................................................................................................................. 6
CHANGING THE BAHERIES................................................................................................................... 6
SELECTING PROGRAMMES ...................................................................................................................6
Selecting Satellite Programmes with SCART Interconnection ...........................................................6
Selecting Satellite Programmes with Coaxial Interconnection
Charging Satellite Programme........................................................................................................7
Svritching Behveen Terrestrial and Satellite Reception ....................................................................7
CHANGING THE AUDIO MODE ............................................................................................................. 7
DISPLAYING THE PROGRAMME STATUS ...............................................................................................7
SEHING THE SLEEP TIMER................................................................................................................... 8
ON-SCREEN MENU OPERATION ............................................................................................................ 8
Menu Background ........................................................................................................................8
Menu Languages ..........................................................................................................................8
Menu Structure ............................................................................................................................9
Displaying and Moving Through the Menus...................................................................................10
Moving Around Each Menu to Select an Option
Changing the Value of Each Menu Option ....................................................................................10
Storing the Information .............................................................................................................. 10
Abandoning a Menu Without Storing.............................................................................................10
FUNCTIONS AT THE MAIN MENU..........................................................................................................11
Using Favourite Programme Mode ...............................................................................................11
Skipping Programmes................................................................................................................. 11
TIMER MENU ............................................................................................................................................12
Setting Up Timerblock 1 ..............................................................................................................12
Setting Up Further Timerblocks....................................................................................................13
Cancelling Timerblocks ................................................................................................................13
PARENTAL CONTROL MENU ................................................................................................................13
Locking a Programme..................................................................................................................13
Unlocking a Programme...............................................................................................................14
Locking and Unlocking the Menus.................................................................................................14
Changing the PIN........................................................................................................................14
FAVOURITE PROGRAMMES LIST MENU .............................................................................................14
Setting Up the Favourite Programmes List.....................................................................................14
PROGRAMME EDIT MENU......................................................................................................................15
Swapping Programmes ...............................................................................................................15
Inserting a Programme ...............................................................................................................15
Deleting a Programme.................................................................................................................16
................................................................
...................................................
..........................................................
.............................................................................
3
6
7
10
Page 3

J
PROGRAMME INSTALL MENU ..............................................................................................................16
STORING PROGRAMME INFORMATION ...............................................................................................16
COPYING A PROGRAMME ...................................................................................................................16
CHANGING A PROGRAMME NAME .......................................................................................................16
FIND PROGRAMMES MENU..................................................................................................................17
Setting the Frequency..................................................................................................................17
Searching the Frequencies to Rnd New Programmes .....................................................................17
Setting the Polarity ..................................................................................................................... 17
Setting the Satellite......................................................................................................................17
Storing the Find Programmes Information ....................................................................................18
AUDIO SEHINGS MENU ......................................................................................................................18
Setting the Audio Mode ...............................................................................................................18
Setting the Audio Frequency.........................................................................................................18
Customising the Audio Frequency.................................................................................................18
Selecting Blank Screen Radio Mode...............................................................................................18
Customising the De-emphasis for Mono Modes..............................................................................18
Storing the Audio Settings Information..........................................................................................18
EXTERNAL DECODER MENU ............................................................................................................... 19
Setting the Baseband ..................................................................................................................19
Setting the Audio and Video Source..............................................................................................19
Storing the External Decoder Information .....................................................................................19
GLOBAL SEHINGS MENU........................................................................................................................19
UHF TUNING......................................................................................................................................19
UHF Fine Tuning .........................................................................................................................19
ANTENNA SEHINGS MENU...................................................................................................................20
Setting the Positioner ..................................................................................................................20
LNCINSTALUTIONMENU .....................................................................................................................20
Setting the Input ........................................................................................................................ 20
Scanning the Frequencies to Find a Satellite..................................................................................20
Setting AFC for the LNC Offset.....................................................................................................21
Setting the LNC Offset Manually ..................................................................................................21
SEHING THE CONTRAST ....................................................................................................................21
SETTING THE BACKGROUND COLOUR ................................................................................................21
SET CLOCK MENU ..............................................................................................................................21
Setting the Current Time..............................................................................................................21
SEHING THE MENU LANGUAGE ..........................................................................................................21
INSTALLATION .........................................................................................................................................22
Connecting to a TV Using Coaxial Cable
Connecting to a TV and a VCR Using Coaxial Cable........................................................................22
Connecting to a TV and VCR Using SCART Leads ..........................................................................23
Connecting an External Decoder ..................................................................................................23
Connecting a Philips Dish Positioner .............................................................................................23
Connecting Stereo Equipment ......................................................................................................24
OUTLINE SPECIFICATION ......................................................................................................................25
Resetting the Factory Set PIN ......................................................................................................25
PIN DESIGNATIONS FOR SCART CONNECTORS ...............................................................................27
........................................................................................
CONTENTS
I
(
22
Page 4

BEFORE YOU START
//
/
\\
REMEMBER - SAFETY FIRST
This satellite receiver has been designed and built to provide years of trouble-free
I
service. The receiver has been manufactured to meet international safety standards
but, as with any electrical equipment, you must take care if you want to obtain the best
results and operate your receiver safely.
We recommend that your satellite system be installed by a qualified satellite TV
installation engineer; this manual does, however, contain instructions on how to
install your receiver in case you wish to do this yourself.
To obtain the best results from your receiver, it is important that you read this manual
completely, especially the safety instructions below.
SAFE USE OF EQUIPMENT
• Ensure that all electrical connections are properly made in accordance with the
manufacturer's instructions (see below - Connection to the Mains Supply).
TO AVOID THE RISK OF A FATAL ELECTRIC SHOCK:
• DO NOT REMOVE THE COVER OF THE UNIT WITHOUT FIRST
DISCONNECTING THE RECEIVER FROM THE MAINS SUPPLY.
• NEVER ALLOW ANYONE, ESPECIALLY CHILDREN, TO PUSH ANYTHING
INTO HOLES, SLOTS OR ANY OTHER OPENING IN THE CASE.
• Do not obstruct the receiver's ventilation slots; never stand the receiver on soft
furnishings or carpets.
• Do not use or store the receiver in excessively hot, cold, damp or dusty conditions.
• Always put the receiver into standby mode when it is not in use.
• If you have any doubts about the installation, operation or safety of the receiver,
please consult your dealer.
J
CONNECTION TO THE MAINS SUPPLY
This apparatus operates within the range of 220-240 V AC, 50 Hz mains supplies.
DO NOT CONNECT IT TO DC MAINS. The lead is supplied terminated at one end
with a connector to be inserted into the mains input socket on the rear panel of the
apparatus.
MAINS LEAD PLUG CONNECTIONS (UK AND EIRE)
The mains lead supplied may or may not have a non-rewireable (moulded) plug.
Please see the section marked with an asterisk (*) if the supplied mains lead does not
have a non-rewireable plug fitted.
Mains leads fitted with a non-rewireable (moulded) plug incorporate a fuse, the value
of which is indicated on the pin face of the plug. Should the fuse need to be replaced,
an ASTA or BSI approved BS 1362 fuse must be used of the same rating, marked
thus:
If the fuse cover is detachable always refit the cover after replacing the fuse. NEVER
use the plug with the fuse cover omitted.
If the fitted plug is not suitable for your socket outlets it should be cut off, after having
first removed the fuse, and an appropriate plug fitted in its place. If this new plug
contains afuse its value should be the same as that removed from the non-rewireable
plug.
The severed plug must be destroyed immediately to avoid the possible shock hazard
should it be inserted into a 13 A socket elsewhere.
*IF YOU NEED TO FIT A MAINS PLUG THEN FOLLOW THE INSTRUCTIONS
GIVEN BELOW:
Important: The wires in the mains lead are coloured in accordance with the
following code:
BLUE - Neutral (N) BROWN - Live (L)
As these colours may not correspond with the coloured markings identifying the
terminals in your plug, proceed as follows:
Page 5

J
The wire coloured BLUE must be connected to the terminal marked with the letter N
or coloured BLUE or BLACK.
The wire coloured BROWN must be connected to the terminal marked with the letter
L or coloured BROWN or RED.
On no account connect either of these wires to the terminal marked E or coloured
GREEN or GREEN and YELLOW.
Before replacing the plug cover, make certain that the cord grip is clamped over the
sheath of the lead; not simply over the two wires.
A fused plug must be fitted with a 3 A fuse complying with BS 1362. If you are using
a non-fused plug, an external fuse must not exceed 5 A.
MAINS LEAD PLUG CONNECTIONS (CONTINENTAL EUROPE)
The mains lead is supplied already fitted with a 2-pin moulded plug. This mains lead
must not be used in the UK.
IF IN DOUBT CONSULT A COMPETENT ELECTRICIAN.
INTRODUCTION TO SATELLITE TELEVISION
Your satellite system consists of several component parts, some of which are
optional. As a minimum it will comprise the following items:
• A dish antenna. This is outside your house and it contains the low noise block
converter (LNC). The LNC converts the satellite signal from its incoming fre
quency of around 11 GHz to a signal at about 1 GHz. This lower frequency signal
then passes through a cable to your satellite receiver indoors.
• The satellite receiver. This receives the satellite transmissions and allows you
to set up and select the satellite programmes you wish to watch. Several pieces
of equipment can be connected to your receiver, but only your television is
essential. The front panel of your receiver contains push-buttons (under the
cover) which allow you to bring your receiver out of standby mode and to select
the programmes, but the handset allows you much greater control.
• The television. So that you can view the transmissions, one of the TV channels
needs to be allocated to satellite reception.
• The handset. This allows you to operate your satellite receiver and set up all the
required parameters. Some of these operations are carried out using a system of
menus (lists) which are displayed on your TV screen.
You can enhance your satellite system by connecting additional components
such as:
• A video recorder (VCR). This allows you to record satellite transmissions. You
may also wish to use the receiver's Timer Menu in conjunction with your VCR to
record programmes while you are out.
• Stereo equipment. Your satellite receiver is fitted with the PANDA 1™ noise
reduction system to enhance its audio performance. PANDA 1 is a trademark of
Wegener Communications Inc. To get the maximum performance from your
receiver, you can connect it to a stereo TV or a stereo amplifier.
• A decoder. You can connect an external decoder to the receiver via a rear panel
SCART socket. With a decoder you are able to receive satellite transmissions
which have been scrambled, providing you have paid a subscription.
• A dish positioner. You may have a dish antenna which is capable of being
moved around to receive transmissions from different satellites. A compatible
dish positioner can be connected to your receiver via the DECODER SCART
connector. You can still also connect an external decoder.
BEFORE YOU START
I
(
Page 6
INTRODUCTION
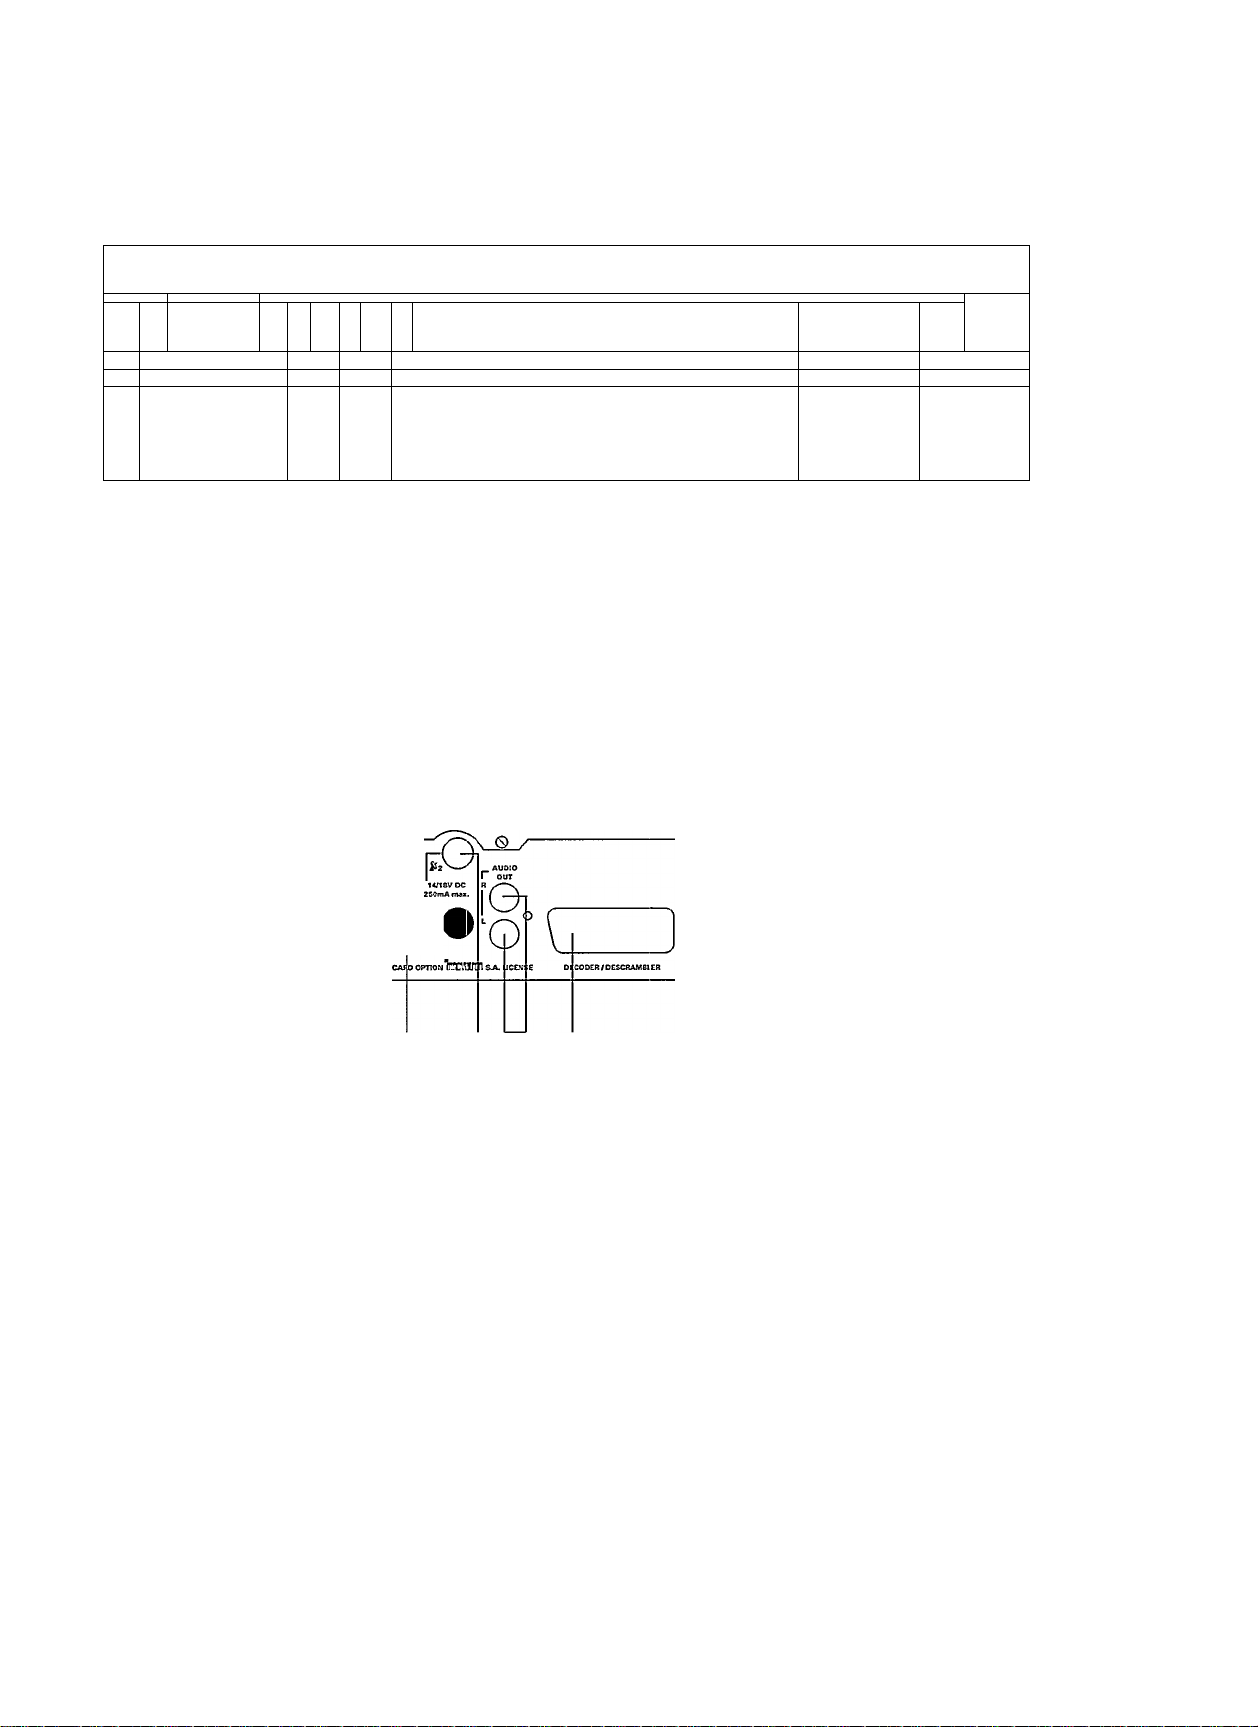
FRONT AND REAR PANEL DRAWINGS
1
j
PHILIPS
<!:
n"
+
2
> '
i ^
1. STANDBY button
2. This button has no function
3. PROGRAMME DOWN (-) button
4. PROGRAMME UP (+) button
o
M_K
220-240V COKx T
3SW MAX. L
MA.\UrACTUREOI*4THE IX SMART
rsa TV AERIAL I .
I o -ir ill
O '
CTCREOjIOATCUJtTC RCCClVCFl &
5 3
5. 3-character dispiay
6. Infra-red receive window
VTARNINGi OrSCOKNECT
FROM MAINS EUPPLY BEFORE
REMOVtNQ COVER
ACKTUNC- VOR AB.NAKME
OES CERÄTEOECXCIS •
r.'ETZSTECXER ZIEHEN!
V
1
O
10 11 12
7. MAINS INPUT socket
8. TV coaxial socket
AERIAL coaxial socket
9.
10. LNC input connector
AUDIO OUT L/R phono sockets
11.
NOTE: A label giving the model number and other product information is on the base of the unit.
13
12. DECODER SCART socket
13. TV SCART socket
14. VCR SCART socket
14
FRONT PANEL OPERATION
The receiver is designed to be operated with your handset. Without it, you cannot display the menus or select options
on them. You can put the receiver in and out of standby mode by pressing the (!) button. You can also browse through
the programmes, one at a time, by pressing the + button (which increments the programme number by one) or the button (which decrements the number).
Page 7

J
INTRODUCTION
Ori'Screen Menus
You can operate this receiver very easily using a simple menu structure which you
access by pressing the MENU key on the handset. The whole structure and each
menu are described in detail in this manual.
Menu Languages
This product has been designed so that you can have the on-screen menus in English
or German. If, when you press the MENU key to enterthe menu system, you find that
the menus are not in your desired language, press the 8 key, then the 7 key and finally
press either the blue + or the red - on the rocker key directly below the MENU key. This
will cause the menu language to change.
Programmes
You can set up 199 “programmes”, each programme containing information about a
particular satellite channel, such as its name, frequency etc. When it is new, your
receiver has already been programmed with most of the satellite channels. See the
list supplied separately. Using the Programme Edit and Programme Install Menus you
can alter the programmes and set up new programmes for additional satellite
transmissions that you tune in to.
INSTALLATION OVERVIEW
We recommend that a qualified satellite TV installation engineer carries out the
installation of your satellite system. If, however, you install it yourself, proceed as
follows:
INTRODUCTION
J
Connecting Up
Do not plug your receiver into the mains straight away.
Refer to the installation procedures on page 22 to make all the necessary connections
and then plug the receiver into the mains.
Tuning In
Refer to the UHF Tuning section overleaf, and make all the necessary adjustments
until the Global Settings Menu appears on your TV screen.
Antenna and LNC Settings
At the Global Settings Menu, press the 3 key to select the Antenna Settings Menu.
Refer to the procedures starting on page 20 to set up your receiver to be compatible
with your antenna and its LNC.
Viewing Programmes
When you have finished setting up, abandon the menu by pressing the OFF key. If you
have installed your receiver successfully, you can now view all the programmes which
have been pre-programmed into it at the factory.
Handset Overview
Before you start to alter the programmes or set up new ones, we recommend that you
learn howto select the existing programmes and familiarise yourself with the handset
keys (see also overleaf).
Important:
To set up your handset so that it controls only your satellite receiver, press the
SAT key once.
To set up your handset so that it controls only a PHILIPS TV set, press the TV
key once.
At any time you can use the VCR keys on your handset to control a PHILIPS VCR.
(
Switching In and Out of Standby Mode
Standby mode is shown by a dash on the receiver's front panel display.
To bring it out of standby mode, press one of the 0-9 keys or the P+ or P- key.
To put the receiver into standby mode, press the (!) key.
Page 8
OPERATION
GLOBAL SETTINGS
TV/VCR CHANNEL 38
ANTENNA SETTINGS
CONTRAST 4
BACKGROUND COLOUR 4
6 SET CLOCK
7 MENU LANGUAGE ENGLISH
Contribute to
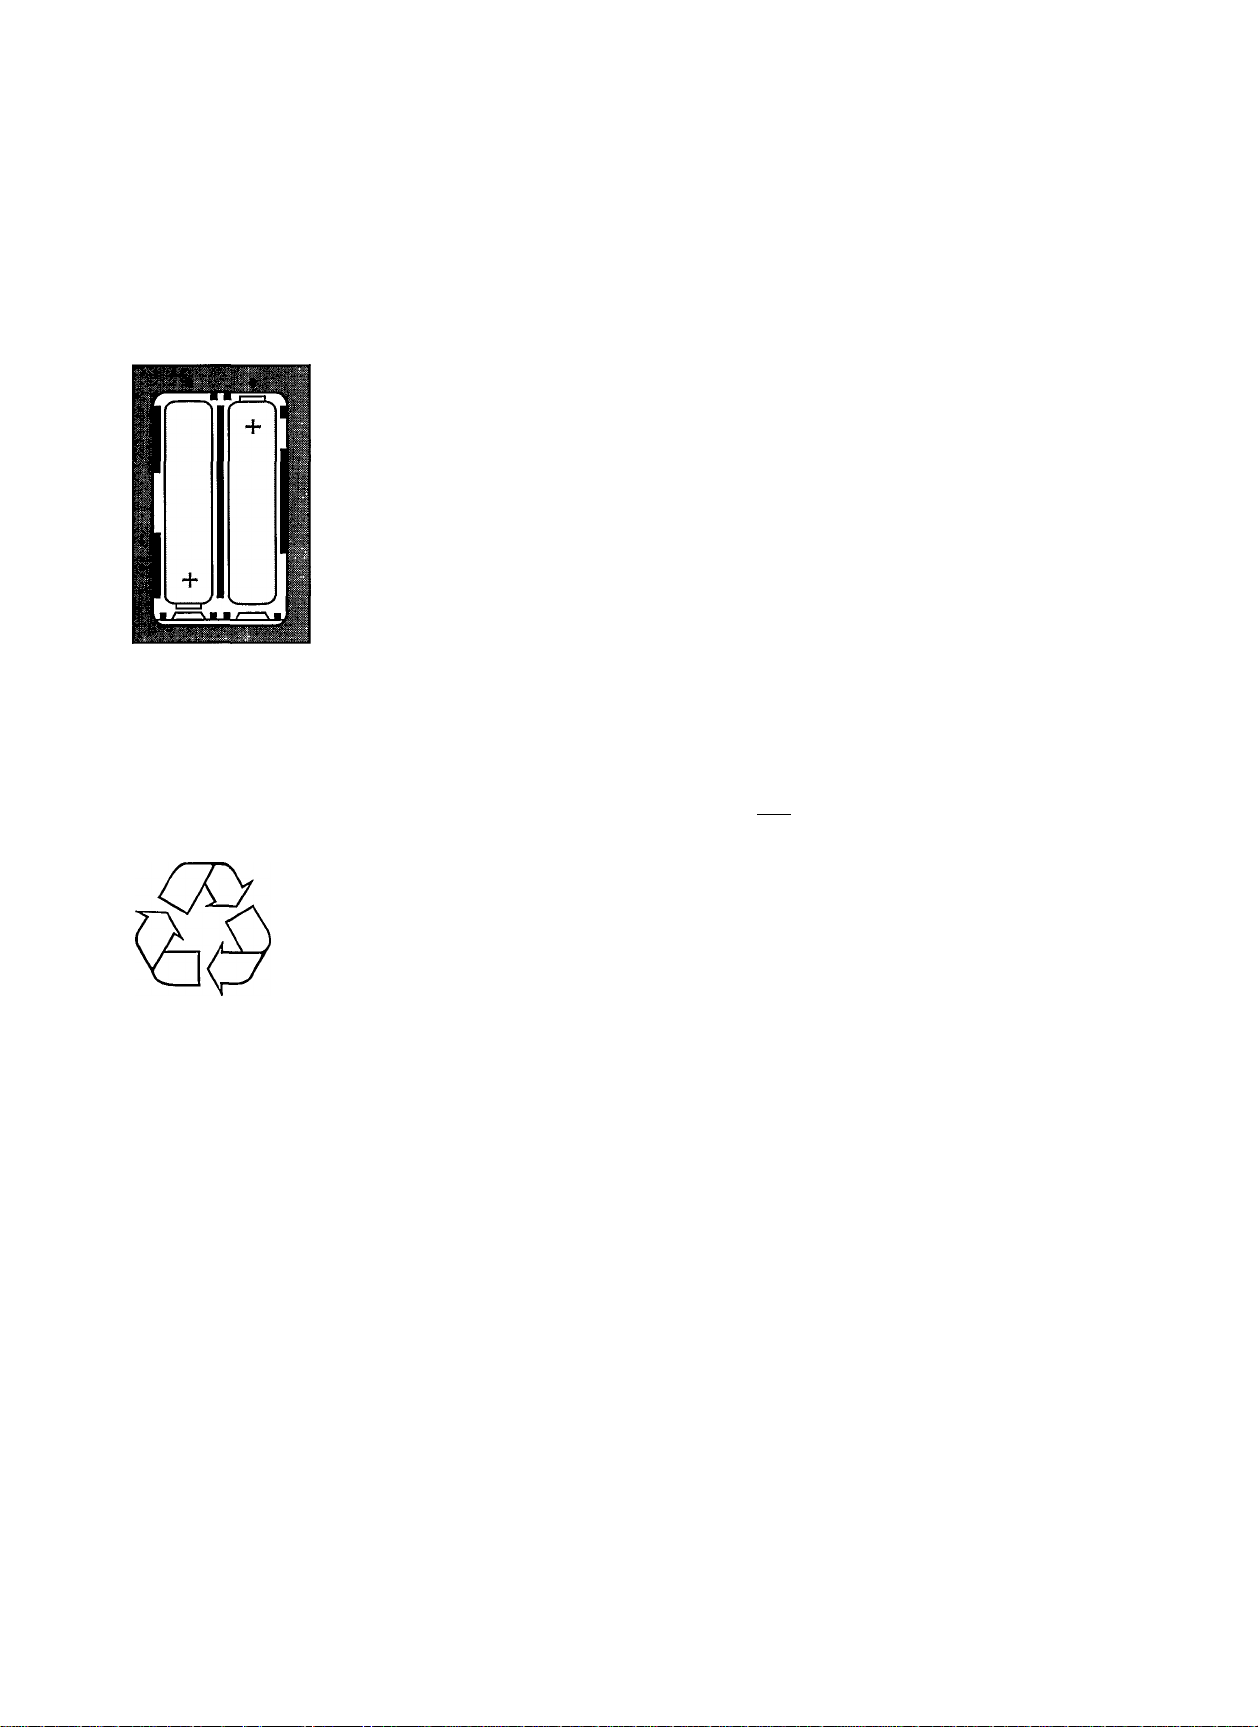
environmental
protection!
After use, please give
batteries and accumulators
with the recycling symbol
- round cells containing
mercury
- nickel-cadmiumaccumulators
- small accumulators
back to the retailer, so that
they can be properly
recycled.
All other household
batteries without the
recycling symbol and
Philips batteries with the
markings “green LINE”,
“green ALKALINE” or
“EXTRA” need not be given
back. They are extremely
low in pollutants and
environmentally friendly
and can therefore be
disposed of with the
household rubbish.
UHF TUNING (If Receiver is Connected to TV Using Coaxial Cable)
After the equipment has been installed, you will need to tune in your receiver to a
I
particular TV channel if it is connected to the TV using coaxial cable. If it is connected
using the SCART connector this will not be necessary.
The receiver is shipped with the channel number set to 38 PAL G, therefore channel
□TV/VCR FINE TUNE
38 is an appropriate TV channel to choose. Channel 38 PAL G may, however, already
be assigned to something else (e.g. your VCR), in which case you must set your TV
to a different channel number and adjust your receiver accordingly. The TV channel
that you choose must be clear of any other broadcasting.
Foliow the instructions in your TV manual to set your TV to the required channel
number (in the range 21 to 69) and to assign this channel number to a specific numeric
key on your TV handset.
On your satellite receiver handset, press the MENU key followed by the 8 key to put
the receiver into UHF tuning mode.
You will see the channel number, preceded by the letter C, on the front panel of the
satellite receiver.
If you set your TV to channel 38 PAL G, you will see the Global Settings Menu on the
screen and your receiver is now tuned in to TV channel 38 PAL G.
If you did not set your TV to channel 38 PAL G, it is unlikely that you will be able to see
the Global Settings Menu on the screen initially, this will appear as tuning progresses.
To tune in, press the blue + key or the red - key to go through the channel numbers
one at a time until you can see a good quality picture of the Global Settings Menu on
the screen. Your chosen TV channel number should be visible in iine 1 of the menu.
You can also fine tune at the menu, but as this feature is not often required, it is described,
along with the other options in the Global Settings Menu, on page 19 of this manual.
J
HANDSET OPERATION
The handset is shown right, on page 7. The keys in the top half of the handset are used
to select both satellite TV programmes and terrestriai programmes on a Philips TV and
to switch between terrestrial and satellite reception.
The four keys in the centre, labelled MENU, OFF, f~+1 and the rocker key with the red
- and the blue +, are used to operate the menu system for satellite TV. They are
described in detail starting on page 8.
The handset works by sending an infra-red beam to your receiver, therefore be sure
to point it towards the infra-red receive window on the front of the receiver. Do not place
any objects which may block the beam between the window and the handset.
These instructions assume that all the equipment has been properly installed and
powered on. Consult the Installation section on page 22 of this manual.
NOTE: Whan you have to press several keys in succession, you must press each
successive key within a certain (short) time, otherwise the receiver will revert to normal
viewing mode.
CHANGING THE BATTERIES
The handset runs from two LR03 (AAA or UM4) batteries located under a cover on the
underside of the handset. These batteries will need replacing from time to time. You
should do this as soon as the handset fails to operate from the normal viewing distance.
Insert your fingernails or other thin object along the left hand edge of the battery cover
and lever the cover off. Remove the old batteries and put in the new ones in the
orientation shown in the figure. Snap the cover back into position.
NOTE: Never leave flat batteries in the handset, as they may leak and corrode the
metal contacts.
SELECTING PROGRAMMES
When you first power on your receiver it will be in standby mode. To bring it out of
standby mode press the P+ or P- key or one of the numeric keys 0 to 9. A programme
will then appear on the screen. Whether this programme is a terrestrial or satellite
programme depends on the way your TV and satellite receiver are connected together
and on the programme you were last viewing, as described below.
Selecting Satellite Programmes with SCART Interconnection
If your satellite receiver and TV are interconnected by a SCART cable, and providing
your TV recognises pin 8 of the SCART connector, then when you bring the receiver
out of standby a satellite programme wili be automaticaliy displayed on the TV screen.
You can then change satellite programme as described opposite.
Page 9

J
Selecting Satellite Programmes with Coaxial Interconnection
If your satellite receiver and TV are interconnected by a coaxial cable, then when you
bring the receiver out of standby, you will get a satellite programme displayed on the
TV screen if you had been watching satellite TV when you last put the receiver into
standby and have not, in the meantime, been watching terrestriai TV. You can then
change programme as described below.
If the last programme you were watching before bringing the receiver out of standby
was a terrestrial TV programme, then a terrestrial TV programme will be displayed
when you bring the satellite receiver out of standby. To get satellite TV, press the
numeric key on yourTV handset which you have assigned to satellite TV. (For a Philips
TV you need to press the TV key on this handset, followed by the numeric key which
you have assigned to satellite TV.) Finally, press the SAT key at the top of your
handset to make the handset suitable for selecting satellite programmes. You can
then change programme as described below.
Changing Satellite Programme
You can browse through the programmes one at a time by pressing the P+ or P- key. The
P+ key increments the programme number by one; the P- key decrements it by one. There
is a ‘Vvrap" at both ends, e.g. pressing the P+ key at programme 199 gives programme 1.
You can also key in the programme number directly using the numeric keys. Press the
numeric key for the first digit of your required programme number. You will see that
number, followed by a cursor, displayed at the top of the screen. While the cursor is
still displayed, key in the second digit of your required programme number. The
second digit, again followed by a cursor, appears on the screen. While the cursor is
still displayed, key in the third digit of your required programme number.
Example: Keying in to select programme number 134.
Pressthe 1 key. 1-appears on the screen. Immediately press the 3 key. 13-appears
on the screen. Immediately press the 4 key. 134 appears on the screen and
programme number 134 is thereby selected.
If your programme number has only one (or two) digits then do nothing when the first
(or second) cursor appears. After a short time the cursor will disappear and you will,
therefore, have selected your required one (or two) digit number.
Switching Between Terrestrial and Satellite Reception
If your receiver is connected to yourTV using a SCART lead, then you will be able to
switch between terrestrial and satellite reception providing your TV recognises pin 8
of the SCART socket.
Press the TV/SAT key to toggle between terrestrial and satellite reception.
OPERATION
ISI
(ZD (ZD CD
RADIO
CD
Q
(S (ED
VCR
CZD CED
PHILIPS
J
I-II
CHANGING THE AUDIO MODE
Some audio modes provide commentary in different languages; some provide
satellite radio stations. There are two ways of changing a programme's audio mode.
One way is to use the on-screen menu (the Audio Settings Menu - see page 18). At
this menu the audio mode can also be customised to give a Mono V or Stereo V mode.
The second way is to use the i-ii key on the handset. Press this key to select the
next audio mode from the preset modes Mono 1 to 9 or Stereo A to D (see the list in
the specification on page 26). If the programme had a customised audio mode, this
will remain as one of the available audio modes as you press the i-ii key to step
through the modes in turn.
NOTE: You cannot use the i-ii key within the menu structure.
DISPLAYING THE PROGRAMME STATUS
The programme status is the programme number and name (if it is named), and this
can be displayed at the top of the TV screen for approximately 4 seconds. If the
receiver's clock has been set, the time is also displayed at the bottom of the screen.
To display the programme status, press the C3 key.
NOTE: If the programme has not been given a name then only the programme number
will be displayed. If the receiver's clock has not been set, a flashing time will appear
on the bottom of the screen.
Press the I +l key twice to display the programme status permanently.
The programme name will be permanently displayed in the top right hand corner of
the screen; for programmes which have not been named, no status information will
be displayed.
T0 remove the permanent programme status from the screen, press the key twice
again.
Page 10

OPERATION
SLEEP TIMER
SUN 00:25:24
STOP; 00:55
Press -/+ to
decrease/increase tíme.
Press SLEEP TIMER to set.
Press OFF to cancel.
L
/_
SETTING THE SLEEP TIMER
NOTE: You can use the sleep timer even if the receiver's clock has not been set.
J
Setting the sleep timer is a useful way to switch off your receiver at a later time and
is a handy method to use when you instantly record with your VCR.
Press the 9 key.
The menu shown left will appear on the screen. The time of the receiver's clock is
displayed under the menu title and this will be flashing if it has not been set since the
receiver was powered up - see page 21 - Set Clock Menu. Even if the clock has not
been set, its current value will increment every second and the receiver assumes that
this is the actual time.
The stop time displayed when you first enter the menu is the receiver's current time
plus 30 minutes. If you want the receiver to switch off after a length of time other than
30 minutes, press the + key to increase the stop time by 15 minutes for each press.
Press the - key to decrease the stop time by 15 minutes for each key press. Press the
9 key to store this sleep timer information.
The message SLEEP TIMER ON will be displayed briefly. The programme you were
viewing will remain on the screen until the receiver's clock reaches the same value as
the stop time you set, then the receiver will go into standby mode. While the sleep timer
is set, the timer display (the letter t - see left) on the receiver's front panel will be lit.
If you wish to leave the Sleep Timer Menu before storing, press the OFF key.
NOTE: When the receiver's sleep timer has been set, all handset commands will be
ignored (except that pressing the key will display the stop time on the screen).
If you want to return to normal operation before the stop time, press the ^ key again.
The message SLEEP TIMER OFF will appear briefly on the screen.
The sleep timer can be used to instantly record in conjunction with your VCR.
Start recording with your VCR, then carry out the instructions above to setthe stop time
for the receiver.
You will need to set your VCR to stop recording at the same stop time, otherwise it will
continue to record a blank (or distorted and noisy) screen after the receiver has gone
into standby mode. For further information on recording satellite programmes, see the
Timer Menu section on page 12.
J
MAIN MENU
1 FAVOUHITE PROGR. OFF (ON)
S SKIP PROGR. OFF [ON]
3 TIMER
4 PARENTAL CONTROL
5 FAVOURITS PROGR. UST
6 PROGRAMME EDIT
7 PROGRAMME INSTALL
S GLOBAL SETTINGS
ON-SCFIEEN MENU OPERATION
Many of the functions of your receiver can be set up using on-screen menus, most of
which are contained in the menu structure spreading out from the Main Menu as
shown on the next page. The Main Menu is also shown left.
This short section describes the general features of the menu system. The subse
quent sections then give a detailed description of each menu in turn. The Global
Settings Menu is described last, because, if, as we recommend, a qualified satellite
TV installation engineer has installed your satellite system, then he/she will have used
this menu to set up the system parameters. You should not, therefore, need to use it
unless you install the system yourself, add to it or need to correct any information in
this menu which has be altered from its correct value. You may have difficulty using
the other menus if the Global Settings Menu contains the wrong values.
Menu Background
Most of the menus are displayed on a plain, coloured background, but some (those
where you need to see the programme or picture quality) are displayed on top of the
current programme. In the LNC Installation Menu and at the CONTRAST option of the
Global Settings Menu, you may need to change programme. To do this, use the P+
or P- key.
Sometimes, when there is a distorted picture on the screen, the menu may be difficult
to read. In such cases press the CD key to give a plain coloured background to the
menu. Press the (3) key again to remove the plain background.
Menu Languages
This product has been designed so that you can have the on-screen menus in English
or German. If, when you press the MENU key to enter the menu system, you find that
the menus are not in your desired language, press the 8 key, then the 7 key and finally
press either the blue + or the red - on the rocker key directly below the MENU key.
This will cause the menu language to change.
8
Page 11

J
Menu Structure
OPERATION
J
(
Page 12

OPERATION
Displaying and Moving Through the Menus
To put the Main Menu on the screen, press the MENU key.
J
To select the next menu down the menu structure, press the appropriate numeric key,
(for example, if you press the 3 key, the Timer Menu will appear on the screen).
The numeric keys are therefore used to move down the menu structure.
To move back up the structure, one menu at a time, press the MENU key. If you press
the MENU key at the Main Menu, the receiver returns to normal viewing mode.
To move out of any of the menus and back to normal viewing mode at any time, press
the OFF key.
Moving Around Each Menu to Select an Option
When you are in any of the lowest menus in the structure, each of the menu options
(the items listed in the menu) generally has a value associated with it. Press the
appropriate numeric key to select an option. When an option is selected, its value
flashes.
For some menu options, selecting the option immediately causes a specific action to
be carried out. These options are described in detail when their menus are described.
Changing the Value of Each Menu Option
When an option is selected and its value is flashing, you can alter the value.
To select each of the available values in turn, press the blue+or the red -on the rocker
key (which is just below the Menu key on the handset). In all subsequent descriptions,
these will be called the + key and - key.
With each press of the + key, the value displayed on the screen will change to the next
available value. Pressing the - key moves back to the previous available value and
both keys '\vrap” when they reach the end of the range. If you hold down the + or key, the receiver will go through the values more quickly.
J
Storing the Information
In most menus, the values become current as soon as you alter them, and the values
are automatically stored when you leave the menu by pressing the MENU or OFF key.
In some menus, such as the Swap, Insert and Delete Programme Menus there is a
STORE or CONFIRM option which causes actions to be carried out.
In the Programme Install Menu, there is a STORE PROGRAMME option. This is used
to store all the information which you have set at the Find Programmes, Audio Settings
and External Decoder Menus against a particular programme number.
Abandoning a Menu Without Storing
At a menu which has a STORE option, you can abandon the changes you have made
by leaving the menu (by pressing the MENU or OFF key) before you select the
STORE option. You can also abandon changes you have made in the Find Pro
grammes, Audio Settings and External Decoder Menus providing you leave the menu
system before you store this information at the Programme Install Menu. In all other
menus all the settings you make a'"e stored automatically.
10
Page 13

J
FUNCTIONS AT THE MAIN MENU
Using Favourite Programme Mode
Using favourite programme mode saves you having to do a lot of key pressing to select
those programmes you view most often. It also allows you to group together
programmes covering common topics e.g. sports, films etc. The favourite pro
grammes list Is a list of your ten favourite programmes which you can edit (as
described on page 14) by selecting option 5 at the Main Menu. In a new receiver, the
factory set favourite programmes will be programmes 1 to 10.
If, at the Main Menu, the first option says FAVOURITE PROGR. OFF then the receiver
is already in favourite programme mode. If the first option says FAVOURITE PROGR.
ON, press the 1 key to put the receiver into favourite programme mode.
The receiver displays the programme which was displayed when you last left favourite
programme mode, or it displays favourite programme 1 if the receiver has been
powered down since it was last in favourite programme mode.
To select one of your favourite programmes, press the appropriate numeric key (1 to
0). The receiver's front panel display will show the favourite programme number
preceded by an F.
If you wish to see your favourite programme list on screen, press the key twice.
The favourite programme numbers are given in the first column. A typical list is shown
right.
NOTE: To display the status permanently in favourite programme mode, press the
C3 ksy three times.
When you use the P+ and P- keys to browse in favourite programme mode, you will
just cycle through the 10 programmes in the list rather than all the programmes.
To return to normal viewing mode from favourite programme mode, press the MENU
key. The Main Menu will be displayed and option 1 will say FAVOURITE PROGR.
OFF. Press the 1 key to turn off favourite programme mode. The receiver will display
the programme you were viewing In favourite programme mode, but the receiver will
actually now be in normal viewing mode.
OPERATION
1
PI SKY1
P2
a
3 P41
P12
4
P5
5
P7
6
PS
7
8 P110
9 P3
0 P6
J
SKY2
SKY5
ESPORT
MTV
RTL LOCKED
Skipping Programmes
You can use the skip function to designate specific programmes as having "SKIP ON”.
These programmes will then be skipped when you use the P+ and P- keys to browse
through the programmes. The only way you can enter a skipped programme is to use
the numeric keys.
To put skip onto a programme, select the programme, then press the MENU key to
display the Main Menu.
If, at the Main Menu, the second option says SKIP PROGR. OFF then the programme
already has “SKIP ON”. If the second option says SKIP PROGR. ON, press the 2 key
to put skip onto the programme. The message PROGR. SKIP ON will appear briefly
on the screen.
T0 remove the skip from a programme, select the programme using the numeric keys,
then press the MENU key. The Main Menu will be displayed and option 2 will say SKIP
PROGR. OFF. Press the 2 key to turn the skip off.
The message PROGR. SKIP OFF will appear briefly on the screen. The receiver will
then display the programme you were viewing, but it will no longer be skipped when
you browse.
(
11
Page 14

OPERATION
TIWIER
MON 10:15:55
START HRS
1
START MIN
s
3 STOP HRS 11.15
4 STOP MIN
5 DAY 2ND-M0N
P11
B
TIMERBLOCK 1
7
8 TIMER
10.30
vox
OFF
L
TIMER MENU
Important:
J
• The Timer Menu is shown left. The current day and time, as given by the receiver's
clock, is shown beneath the menu title and this will increment as time elapses. If
the clock has not been set, a flashing time will be displayed. You must set the
receiver's clock for the Timer Menu to be effective (see page 21 - Set Clock Menu).
• You use the menu to record satellite programmes in conjunction with your VCR
while you are out. You can record without using this menu, but it that case you
could only record transmissions on one programme number and you would have
to leave your receiver running on that programme while you were out. Using the
Timer Menu you can record several different programmes and leave your receiver
in standby when you go out.
• The clocks in your receiver and your VCR must be set to the same time, and the
start and stop recording times that you set at this Timer Menu must be the same
as those that you set on your VCR.
• If you have connected your VCR using a SCART lead, in order to record from the
receiver you will need to select AUX or AV on the VCR as the programme to record.
When replaying the VCR through the receiver, you will need to switch the receiver
into standby mode or select TV using the TV/SAT key; this method of replaying is,
however, only possible if the TV is also connected using a SCART lead. See also
the Installation section on page 22.
• You cannot record one satellite orogramme while you are watching a different one.
If you are watching a programme, at the start time a flashing clock symbol will
appear at the bottom of the screen and the timer display (as the letter t - see left)
on the receiver's front panel will flash. After one minute the receiver will automati
cally switch to the programme you have set to record. After the recording has
finished, the receiver will go into standby mode.
• If you press the handset keys while a timerblock is being recorded, they will have
no effect on the receiver (except that you can cancel during a recording - see the
next page).
• To record instantly with your VCR, you can use the Sleep Timerfunction (see page
8 - Setting the Sleep Timer).
• When you first enter the Timer Menu, the timerblock number will be 1, the
programme will be the programme you were viewing and the start time's hours
value will be flashing. The start and stop times will show the time which was on the
receiver's clock when you entered the menu. If the programme has been given a
name, this is shown to the right of the programme number.
• You will not be able to turn on the timer for a particular timerblock unless the start
time is later than the receiver clock's current time and unless the start and stop
times are set to different values. If the stop time is earlier than the start time, the
stop time is assumed to be on the next day.
• If the programme is locked, the message LOCKED will be displayed adjacent to
the programme number. If you want this programme to be recorded, unlock it.
• You can preset up to 8 timerblocks up to 28 days in advance.
• You must specify all the times in terms of a 24-hour clock e.g. 8 pm is 20.00 hours.
J
12
Setting Up Timerblock 1
When you enter the menu, the start hours value will be flashing. Press the + key or
- key to set the required value. Press the 2 key and the start minutes value will start
to flash. Press the + key or - key to set the required value.
Press the 3 key to select option 3. The stop time will change automatically to a time
two hours later than the start time, but you can alter this if you wish by using the + key
or - key. Press the 4 key and the stop minutes value will flash. Press the + key or -
key to set the required value.
Press the 5 key then press the + key or - key to go through the weeks and days one
at a time until the correct day is displayed.
The current day is shown as TODAY. Subsequent days are shown by the day of the
week prefixed by 1 ST, 2ND, 3RD or 4TH to show the relevant week.
Press the 6 key and the programme number will flash. Press the + key or- key to set
the required number.
Press the 8 key followed by the + key or- key to turn the timer to ON rather than OFF.
You have now done ail that is required to set up timerblock 1. If you want to programme
more than one timerblock, do not leave the menu, but continue as described opposite.
Page 15

J
Setting Up Further Timerblocks
Select the TIMERBLOCK option and press the + key to set it to 2.
As soon as you do this the start and stop times will reset themselves to the receiver's
current time. Enter the start and stop times, day and programme information required
for the second timerblock. Press the 8 key followed by the + key or - key to turn the
timer to ON for the second timerblock.
Continue in this manner until you have set up all the timerblocks you require and then
leave the menu.
When you leave the menu and put the receiver into standby mode, the timer (t)
display on the receiver’s front panel will be lit until the recording has finished.
If any of the recording times conflict with each other, they are detected and the
message TIMERBLOCK OVERLAP is displayed on the screen for a short time.
If you wish to rectify the overlap, re-enter the menu and correct the appropriate start
and/or stop times. If you do not rectify it, the end of the overlapped timerblock will be
lost.
Cancelling Timerblocks
If you decide you no longer want to record one of the programmes that you set up
in the Timer Menu, you can turn off the appropriate timerblock.
Enter the Timer Menu and select the timerblock you wish to cancel, then press the
8 key followed by the + key or - key to turn the timer OFF.
To cancel during the recording of a timerblock, press the (!) key quickly followed by
the OFF key.
OPERATION
J
PARENTAL CONTROL MENU
Important:
• The menu is shown right. If the programme/menus are currently unlocked, the
menu will read LOCK PROGRAMME/MENUS. If they are currently locked, it will
read UNLOCK PROGRAMME/MENUS and there will be the message MENUS
LOCKED at the bottom of the Parental Control Menu and the Main Menu.
• In this menu you need to key in your personal identification number (PIN). You only
have a short time to enter the 4 digits. If you do not enter them within this time, the
receiver will revert to normal viewing mode, briefly displaying the programme
number and name (if named) at the top of the screen as it does so.
• If, at any time, you key in the wrong PIN, the message NOT VALID PIN appears
and you will have to try again.
• The value of the factory set PIN (as in a new receiver) is given on page 25.
We recommend that you customise your PIN, as described in the section
Changing the PIN overleaf, rather than use the factory set value.
Locking a Programme
To lock a programme, select the programme, display the Parental Control Menu, then
press the 1 key.
The message TO LOCK PROGRAMME ENTER PIN: appears on the screen with the
programme number and name (if it is named) displayed above it.
Key in your PIN.
If you have entered the correct PIN, the message PROGRAMME LOCKED appears
on the screen; if you have entered an incorrect PIN, the message NOT VALID PIN
appears.
The programme you have just locked will remain on screen so that you can continue
viewing, but if you leave this programme and go to another, you will not be able to
return to your locked programme unless you key in your PIN.
If you try to select a locked programme, the message PROGRAMME LOCKED
ENTER PIN: appears.
Key in your valid PIN and the programme will appear on the screen.
PAREIMTAL CONTROL
1 (UN)LOCK PROGRAMME
S [UNJLOCK MENUS
3 CHANGE PIN
P11
TO (UN]LOCK PROGRAMME
ENTER PIN:
VOX
(
13
Page 16

OPERATION
TO (UNJLOCK MENUS
ENTER PIN;
TO CHANGE PIN
ENTER PIN:
Unlocking a Programme
To unlock a programme, key in the programme number.
I
When the message PROGRAMME LOCKED ENTER PIN: appears, key in your PIN.
You have now temporarily unlocked the programme.
To unlock It permanently, display the Parental Control Menu, then press the 1 key.
When the messageTO UNLOCK PROGRAMME ENTER PIN: appears on the screen,
key in your PIN.
The programme will be permanently unlocked and the message PROGRAMME
UNLOCKED is displayed.
Locking and Unlocking the Menus
If you lock the menus, the Main Menu comprises only the first four options. You are
not able to enter the Favourite Programme List, Programme Edit, Programme Install
and Global Settings Menus.
To lock the menus, display the Parental Control Menu, then press the 2 key.
When the message TO LOCK MENUS ENTER PIN: appears, key in your PIN.
If you have entered the PIN correctly, the message MENUS LOCKED appears.
To unlock the menus, display the Parental Control Menu, then press the 2 key.
When the message TO UNLOCK MENUS ENTER PIN: appears, key in your PIN.
If you have entered the PIN correctly, the message MENUS UNLOCKED appears.
Changing the PIN
NOTE: We recommend that you customise the PIN. If you forget it, consult page 25
for detaifs on how to restore the factory set PIN.
To change the PIN, display the Parental Control Menu and then press the 3 key.
The message TO CHANGE PIN ENTER PIN: appears.
Key in the existing PIN (note that you only have about 4 seconds to do this and for a
new receiver you will need to key in the factory set PIN).
The message NEW PIN: appears.
Key in four numbers of your choice.
The message CONFIRM PIN: appears.
Key in again the four numbers wh ch make up your new PIN.
Providing you have typed in the same PIN at the CONFIRM PIN message as at the
NEW PIN message, your new PIN will now be valid and the message CONFIRMED
is displayed briefly.
If there is a discrepancy between the PINs you keyed in, the new PIN will not be
accepted. The message FAILED will appear and you will need to repeat the whole
procedure.
J
1 PI
2
P2
3
P41
4
P12
5 P5 SKY5
6 P7
7 P9
8 P110
9
P3
0
PS
14
SKY1
SKY2
ESPORT
MTV
RTL LOCKED
FAVOURITE PROGRAMMES LIST MENU
Important:
• The Favourite Programmes List Menu is shown left. You use it to set up the 10
programmes which you can access quickly when you are in favourite programme
mode (see page 11).
• The first column gives the favourite programme numbers; the second gives the
actual programme numbers; the third gives the programme name, if it has one. If
the programme is locked, the word LOCKED appears in the fourth column.
• All 10 favourite programme numbers must contain information, but if you do not
want to cycle through ail 10 options when you are in favourite programme mode,
you can always put a “skip” on those you do not require.
Setting Up the Favourite Programmes List
Press the appropriate numeric key to select the favourite programme numbers in turn
and use the + key or - key to change the programme number you wish to assign to
each. When you leave this menu the list will automatically be stored.
Page 17

J
PROGRAMME EDIT MENU
Important;
• The Programme Edit Menu and its three sub-menus are shown right. You use
them to change the sateilite channei information assigned to each of the pro
gramme numbers.
• You can also “copy” the channel information from one programme number to
another so that this new information overwrites any information which was on that
programme number. This is, however, done from the Programme Install Menu, as
described on page 16.
• It is important to take account of the fact that when the information is deleted or
inserted, the channel information “moves” to fill up the “empty” programme
numbers, as shown in the examples on the right (where example programmes 1
to 6 are listed). For each example, the starting point is the first list headed
STARTING POINT.
• Be careful before you delete a programme (i.e. delete the satellite channel
information from a programme number). If you later want to restore this pro
gramme and do not have the same channel information on another programme
number (so that you can insert or copy it from there), you will have to set up the
programme again from scratch using the Programme Install Menu.
• As you change the programme numbers, the relevant programme will be dis
played as the background to the menu (unless the programme is locked, in which
case the existing programme remains displayed).
Swapping Programmes
When you enter the Swap Programme Menu, option 1 gives the number of the
programme you are viewing and option 2 does not contain a programme number.
Select option 1 and use the + key or - key to alter the number if required.
Select option 2 and use the + key or - key to enter the number.
Press the 3 key to store this change.
The message INFORMATION STORED appears briefly on the screen.
If you were now to leave the menu and browse through the programmes you would
find that the satellite channel which was at one programme number is now at the other
programme number and vice versa, as shown in the example. All other programmes
remain unchanged.
if you remain in the menu after storing, the menu reverts to giving the original
programme number in option 1 and no programme number in option 2. You can then
perform further swaps if you wish before leaving the menu.
Inserting a Programme
When you enter the Insert Programme Menu, option 1 gives the number of the
programme you are viewing and option 2 does not contain a programme number.
Select option 1 and use the + key or - key to alter the number if required.
Select option 2 and use the + key or - key to enter the number.
Press the 3 key to store this change.
The message INFORMATION STORED appears briefly on the screen.
If you were now to leave the menu and browse through the programmes you will find
that the satellite channels assigned to several of the programme numbers will have
changed.
Consider the example shown right, where programme 2 is inserted at programme 5.
The satellite channel (SKY2) which was at programme 2 is now at programme 5. The
satellite channels at programme numbers 3 and 4 have also changed (effectively
shifted along by one programme number) with the result that the channel (SKY2)
which was at 2 is now after the channel (VOX) which was at 5. If, instead, programme
5 had been inserted at programme 2, VOX would be before SKY2 in the list. All
programme information before 2 and after 5 remains unchanged.
If you find that you have “miscalculated by one” when inserting programmes, you can
always use the SWAP option to rectify the problem.
If you remain in the menu after storing, the menu reverts to giving the original
programme number in option 1 and no programme number in option 2. You can then
perform further insertions if you wish before leaving the menu.
OPERATION
J
PROGHAIVIME EOtT
1 SWAP PROGRAMME
Z INSERT PROGRAMME
3 DELETE PROGRAMME
SWAP PROGRAMME
1 SWAP PROGRAMME: 2
a WITH PROGRAMME: 5
3 STORE
INSERT PROGRAMME
1 INSERT PROGRAMME: 2
2 AT PROGRAMME: 5
3 STORE
DELETE PROGRAMME
1 DELETE PROGRAMME: 2
2 CONFIRM
If the STARTING POINT is always:
Prog No. Channel Info.
SKY1
SKY 2
ESPORT
MTV
VOX
SKY3
Swapping Prog. 2 with Prog. 5 gives:
Prog No.
1
2
3
4
5
6
inserting Prog. 2 at Prog. 5 gives:
Prog No.
1
2
3
4
5
6
Deleting Prog. 2 gives:
Prog No.
1
2
3
4
5
6
(FILMNT was previously at Prog. 7)
Channel Info.
SKY1
VOX
ESPORT
Pi/TTV
SKY 2
SKY3
Channel Info.
SKY1
ESPORT
MTV
VOX
SKY 2
SKY3
Channel Info.
SKY1
ESPORT
MTV
VOX
SKY3
FILMNT
(
15
Page 18

OPERATION
PROGRAMME INSTALL
FIND PROGRAMMES
1
AUDIO SETTINGS
s
EXT DECODER
3
PROGRAMME NUMBER 11
4
5
NAME
STORE PROGRAMME
6
vox
Deleting a Programme
When you enter the Delete Programme Menu, option 1 gives the number of the
I
programme you are viewing.
Select option 1 and use the + key or - key to alter the number if required.
Press the 2 key to confirm the deletion.
The message INFORMATION STORED appears briefly on the screen.
It is important to realise that you do not actuaily delete the programme, as there are
always 199 programmes. You are deleting the satellite channel information from a
particular programme number. This does not leave that programme number “empty";
all the channel information assigned to the subsequent programmes will effectively
be shifted along by one, as shown in the exampie. For this reason the deletion
process may take some time, and the handset will remain inoperable during this
period.
PROGRAMME INSTALL MENU IMPORTANT:
• The Programme Install Menu is shown left. From this menu you can open up
various sub-menus, all of which are concerned with setting up individual pro
grammes on your receiver. At this menu you can aiso name a programme or
change its name and you can copy channel information from one programme
number to another.
• When you enter the Programme Install Menu, the programme number shown at
option 4 is that of the programme you were viewing when you entered the menu.
• When your receiver is new, it has aiready been programmed with most of the
satellite channels. A separate list of preset programmes 1 to 199 is provided with
this manual.
• You will need to use the Programme Install Menu to tune in to and specify new
programmes, or to alter the existing settings on a per-programme basis. You may
wish to look up satellite transmission information in the current issue of a sateliite
TV magazine while you are using the Programme Install Menu and its sub-menus.
• In any of these menus, you can see the current programme number on the
receiver's front panei display.
J
STORING PROGRAMME INFORMATION
If you leave this menu or any of its sub-menus by pressing the MENU or OFF key, any
information you have changed wili be lost unless you store it first.
To store the information (against the programme number shown in option 4), press the
6 key at the Programme Install Menu. The message INFORMATION STORED will be
displayed briefly.
COPYING A PROGRAMME
You can copy the satellite channel information from one programme number to a
different programme number. The programme you are copying from remains the
same and the programme you are copying to is overwritten with the new information,
so that the two programme numbers end up containing the same satellite channel. All
other programmes remain unaffected.
In normal viewing mode, select the programme you wish to copy from, then press the
MENU key followed by the 7 key to display the Programme Install Menu.
Press the 4 key so that the programme number flashes and press the + key or - key
until the number of the programme you wish to copy to is displayed.
If required, select option 5 and alter the programme name (as described below).
Press the 6 key to store the copy to its new programme number.
CHANGING A PROGRAMME NAME
If, when you entered the Programme Install Menu, the programme you were viewing
already had a name, this wili be shown in the menu. The name can be up to 6
characters long; it can contain spaces, but each space counts as one character.
Select option 5.
The first character of the name wiil flash, or there will be a flashing cursor at the position
for the first character.
Press the + key or - key to go through all the available characters, until the required
first character is displayed.
16
Page 19

J
During this process, the numbers 0 to 9, foliowed by the ietters of the aiphabet and
finaily a space are shown, one at a time.
When you seiected option 5, the message “Press 5 again to advance to next
character” appeared at the bottom of the menu.
Press the 5 key to move to the position of the second character and use the + key or
- key to set it. Continue in this manner untii ail of the required characters have been
changed or entered.
Press the 6 key to store this as the name of the programme number shown in option 4.
FIND PROGRAMMES MENU Important:
• The Find Programmes Menu is shown right.
• The SATELLITE option is only relevant if you have installed a compatible dish
positioner and will only be present in this menu if you have set the POSITIONER
option at the Antenna Settings Menu to ON (see page 20).
Setting the Frequency
Set the required frequency value by pressing the + key or - key to go through the
frequency values one at a time.
NOTE: If the frequency value shown In this menu does not seem to correspond with
the frequency value given In a satellite TV magazine for the satellite transmission you
are viewing, then the INPUT option in the LNC Installation Menu is probably set to the
incorrect value (see page 20 - the LNC Installation Menu).
NOTE: If you have entered the correct frequency but see a plain coloured screen
rather than a picture, the signal may be too weak to disable this plain screen (perhaps
because your dish antenna is out of alignment). Alternatively, you may have pressed
the C3 key to force a plain screen, so press CD to check this.
OPERATION
FIND PROGRAMMES
FREQ 11.318
1
2 SEARCH
3 POLARITY
4 SATELLITE 1
I
UP
V
Searching the Frequencies to Find New Programmes
If you want to set up a new programme, but do not know its frequency, you first need
to locate the required satellite channel, and to do this you turn on the frequency search.
Press the 2 key to select option 2 and the search will start immediately.
The frequency value given in option 1 will keep changing and then stop when the next
satellite transmission frequency is reached. The background to the menu will be a
solid colour until the transmission frequency is reached, then a programme appears
as the menu's background.
If this is a transmission frequency you wish to allocate to a programme number, exit
the scan by selecting another option on the menu.
This frequency may, however, be one which is already allocated to an existing
programme number, or it may be a transmission that you are not interested in, so you
can continue the scan by pressing the + key or the - key. Press the + key to continue
the search up the frequency band to higher frequencies; press the - key to search
down the band. There will be a wrap at the end of the band.
Setting the Polarity
For a voltage-switching polarizer, there are two possible polarity values: H (for
horizontally polarized) and V (for vertically polarized).
Select the POLARITY option and press the + key or - key to set the required value.
Setting the Satellite
If you have connected a dish positioner to your receiver, you should set the
POSITIONER option at the Antenna Settings Menu to ON (see page 20). This will
cause the SATELLITE option to appear in the Find Programmes Menu. If you do not
have a positioner, you should set the POSITIONER option to OFF.
If you have a Philips dish positioner, such as the SCC224, you can set it up to point
the dish antenna at different satellites. The SATELLITE option in the Find Pro
grammes Menu allows you to specify these dish antenna positions on a perprogramme basis, so that when the receiver and positioner are connected together
via a SCART lead, the dish antenna can move when programmes are selected at the
receiver. The SATELLITE option can have any value between 1 and 128, but the
relevant values depend on the settings on your dish positioner.
Find out which satellite transmits the programme, check on your dish positioner which
position this satellite has, then set this value at the SATELLITE option using the + key
or - key.
(
17
Page 20

OPERATION
AUDIO SETTINGS
1
MODE
s FREQ LEFT 7.02
3
RADIO ND
DEiMPHASIS PANDA
FSS, DBS end T-COM Bands
Stereo A
Stereo B 7.38 a 7.58 MHz
Stereo C
Stereo D
Mono 1
Mono S
Mono 3
Mono 4
Mono 5
Mono 6
Mono 7
Mono 8
Mono 9
C-Bond
Stereo A
Stereo B
Stereo C
Stereo D
Mono 1
Mono S
Mono 3 6 80 MHz
Mono 4
Mono 5
Mono 6
Mono 7
Mono 8 6.66 MHz
Mono 9 6.84 MHz
7.02 S 7.20 MHz
7.74 a 7.92 MHz
8.10 a 8.28 MHz
6.50 MHz (50 us)
7.02 MHz
7.20 MHz
7.38 MHz
7.56 MHz
7.74 MHz
7.92 MHz
8.10 MHz
8.28 MHz
5.58 a 5.76 MHz (PANDA 1)
5.94 a 6.12 MHz
6.30 a 6.48 MHz
6.66 a 6.84 MHz
6.60 MHz (50 us)
6.65 MHz
5.94 MHz (PANDA 1)
6.12 MHz
6.30 MHz
6.48 MHz
STEREO A
RIGHT 7.20
(PA^DA1)
•*
(PANDA 1)
"
"
"
-
**
•
•
-
-
•
•
•
Storing the Find Programmes Information
The values you have set at this menu can be stored using the STORE PROGRAMME
option at the Programme Install Menu. Before you do this, however, you can, if
J
required, alter the audio settings and external decoder information as described
below.
AUDIO SETTINGS MENU Important:
• The Audio Settings Menu is shown left. It is used to set the audio mode for each
programme. Some modes provide commentaries in different languages; some
provide satellite radio stations. Consult a channel listing in a satellite TV magazine
for details.
• The values for options 1 and 2 are interdependent. It is also possible to customise
an audio mode.
• Stereo modes always have PANDA de-emphasis, therefore the DE-EMPHASIS
option cannot be selected for these modes, although it will remain (without a
preceding number) on the screen.
• All the mono modes except MONO 1 are preset to have PANDA de-emphasis;
MON01 is preset to 50 ps. You can change the de-emphasis if you customise a
mono mode, therefore when the mono modes are selected the DE-EMPHASIS
option gains a preceding number and can therefore be selected.
Setting the Audio Mode
Use the + key or-key to go through the available values one at a time until the required
mode is displayed.
The mode can have any of the preset values STEREO A to D or MONO 1 to 9 (see
the tables).
Setting the Audio Frequency
As you change the audio mode at option 1, the frequency shown in option 2 will
automatically change to the appropriate value. The audio frequencies are given in
megahertz (MHz).
NOTE: Using the + key or - key to change the frequency will customise it (see
opposite).
Customising the Audio Frequency
At option 2, press the + key or - key to change the frequency by 0.01 MHz at a time
to set it in the range 5.00 to 9.00 MHz.
As soon as you customise the frequency, the mode value (whether MONO or
STEREO) will have the suffix V rather than a ietter or number. For stereo modes, as
you customise the ieft frequency, the right frequency will change accordingly, so that
their frequency difference is always 0.18 MHz (180 kHz).
J
Selecting Blank Screen Radio Mode
The RADIO option allows you to blank the screen so that you can listen to satellite
radio channels without having to view a picture on the screen.
Press the + key or - key to toggle the blank screen radio mode between YES (on) or
NO (off).
Customising the De-emphasis for Mono Modes
If you have selected a MONO mode at option 1, you can customise the de-emphasis.
At the DE-EMPHASIS option, press the + key or- key to go through available values.
De-emphasis can be PANDA, 50 ps or J17. As soon as you change the de-emphasis
from the preset value, the mode will become MONO V.
Storing the Audio Settings Information
The values you have set at this menu can be stored using the STORE PROGRAMME
option at the Programme Install Menu. Before you do this, however, you can, if
required, alter the information at the Find Programmes and External Decoder Menus.
18
Page 21

J
EXTERNAL DECODER MENU
Important:
• The External Decoder Menu is shown right. Attaching an external decoder to your
receiver will allow you to view scrambled transmissions.
• Although your receiver is a PAL satellite receiver, an external MAC decoder will
allow you to watch MAC as well as PAL/SECAM transmissions. You will, however,
need to set the baseband provided by this DECODER SCART connector to the
correct value and select the source of the audio and video signals.
Setting the Baseband
At the BASEBAND option, press the + key or - key to set PAL/SECAM or MAC.
Setting the Audio and Video Source
At the AV SOURCE option, press the + key or- key to go through the three available
values until the required one is displayed.
AUTO is automatic audio and video loop-through to the receiver's TV SCART
connector, which will occur if the decoder recognises pin 8 of the receiver's DE
CODER SCART connector.
If your decoder does not control pin 8 of the receiver's DECODER SCART connector,
you need to setthe audio and video source to one of the external values EXT-V or EXT-
AV. These force a loop-through from the receiver's DECODER SCART connector to
its TV SCART connector; EXT-V loops only the video signal, whereas EXT-AV loops
the audio and video signals (sound and picture).
NOTE: If you select one of the EXT values and you do not have an external decoder
fitted, the picture will disappear from your screen.
OPERATION
EXT DECQOER
BASEBAND PAL/SECAM
2 AV SOURCE
J
AUTO
Storing the External Decoder Information
The values you have set at this menu can be stored using the STORE PROGRAMME
option at the Programme Install Menu. Before you do this, however, you can, if
required, alter the information at the Find Programmes and Audio Settings Menus.
GLOBAL SETTINGS MENU IMPORTANT:
• The Globa! Settings Menu is shown right. From this menu you can open up sub
menus, all of which are used to set up system (rather than programme) param
eters. You can also perform UHF tuning and set the contrast and background
colour.
• There is a hidden option at this menu. Pressing the 8 key will display the Download
Facility Menu. This menu has been included to assist dealers and is not designed
for receiver users. If you should accidentally display the Download Facility Menu,
press the MENU key to redisplay the Global Settings Menu or press the OFF key
to revert to normal viewing mode.
UHF TUNING
Options 1 and 2 of the Global Setting Menu are concerned with UHF tuning.
Option 1 is used to tune your satellite receiver into the chosen channel on your TV,
if your receiver and TV are connected via coaxial cable. Initially the menu is not likely
to be seen; it becomes visibie as tuning progresses.
See page 6, where this UHF tuning is described in detail.
UHF Fine Tuning
The second option can be used for fine tuning, although this is not often required.
Select option 2 and press the + key or - key to go through the values one at a time
until the best quality picture of the menu can be seen on the screen.
Fine tune can have any value between -15 and +16. As you fine tune, the value will
also be displayed on the receiver's front panel.
The fine tune values “wrap” in a special way at the ends of their range. If there is a fine
tune value of +16, then when you press the + key the fine tune value will become -15
and the channel number (shown in option 1 of the menu) will be incremented by 1. If
there is a fine tune value of -15, then when you press the - key the fine tune value will
become +16 and the channel number (shown in option 1 of the menu) will be
decremented by 1.
(
GLOBAL SETTINGS
1 TV/VCR CHANNEL 38
2 TV/VCR FINE TUNE 0
3 ANTENNA SERINGS
4 CONTRAST 4
5 BACKGROUND COLOUR 4
G SET CLOCK
7 MENU LANGUAGE ENGLISH
I8 DOWNLOAD FACIUTY)
19
Page 22

OPERATION
ANTENNA SETTINGS
1 LNC INSTALLATION
2 POSITIONER ON
LWC IIMSTALLATION
P11 vox
1 INPUT
FIND SATELUTE OFF
2
3 AFC
OFFSET INPUT
4
INPUT: 1
10.000 FSS B
OFF
ANTENNA SETTINGS MENU
The Antenna Settings Menu is shown left. Option 1 is used to enterthe LNC Installation
J
Menu which is described in its own section, starting below.
Setting the Positioner
If you have attached a compatible dish positioner (such as the Philips SCC224) to your
receiver, select the POSITIONER option and use the + or - key to set it to ON.
If you are not using a positioner set this option to OFF.
When this POSITIONER option is set to ON, the SATELLITE option will be present
in the Find Programmes Menu (see pages 17 and 18).
LNC INSTALLATION MENU Important:
• The LNC Installation Menu is shown left. It is always displayed on top of a
programme, and you can use the P+ and P- keys to change the displayed
programme. The current programme's number and name (if it has one) are given
at the top of the menu under the title.
• The menu states that the programme is received at input 1. There is only one input,
but note that it is labelled as 2 on the receiver’s rear panel.
-5
• Option 4 only appears on this menu if the AFC at option 3 is set to OFF.
• Before making adjustments at the LNC Installation Menu, leave the receiver
powered up for a few minutes to ensure the LNC has reached its operating
temperature.
Setting the Input
Some LNCs cover more than one band. The input option allows you to set one of the
following five frequency bands:
Setting
9.750 FSS A
10.000 FSS B 10.950 - 12.050
10.750 DBS
11.475 T-COM
5.150 CBAND
The numbers shown before the band names are the local oscillatorfrequencies of your
LNC in GHz.
The value set here will influence the frequency value displayed in the Find Pro
grammes Menu (see page 17). There, for example, if you tune into SKY NEWS (which
comes from the Astra satellite) and can see this programme on the screen, the correct
frequency value of 11.377 GHz will not be displayed unless you have set the input to
the correct band (i.e. FSS B) at this LNC Installation Menu. You can continue to watch
SKY NEWS, but the frequency veJue displayed will be incorrect.
You must, therefore, decide the frequency range of the programmes and ensure that
the LNC is capable of receiving this band.
Atthe INPUT option, pressthe + key or-keytogothroughthe frequency band options
until the required band is displayed.
Freq. Range (GHz) Typical Satellites
10.700 - 11.800 Astra 1A,B,C,D/lntelsat/Eutelsat
Astra 1A,B,C/lntelsat/Eutelsat
11.700 - 12.800
12.425
3.050
- 13.525
- 4.200
TDF/TVSAT/HISPASAT
TELECOM
Asiasat
J
20
Scanning the Frequencies to Find a Satellite
The FIND SATELLITE option can be used to help you adjust the position of your dish
antenna in order to find the transmissions from a particular satellite.
This feature is very useful when you first align your dish antenna and the signal is too
weak to disable the plain background in normal frequency search mode (see page 17
for details of this search mode).
At the LNC Installation Menu, press the 2 key to start the scan and move your dish
antenna during the scanning until you obtain a stronger signal and better picture.
The receiver will scan quickly through the whole frequency range and there will always
be a picture (although this will sometimes be noisy and distorted) as the menu's
background, rather than a plain coloured background.
When you have aligned the dish antenna sufficiently to obtain a stronger signal, press
any key to turn off the scan.
NOTE: Although anykey will stop the scan, certain keys will, at the same time, start
other actions (e.g. select other options or menus) therefore pressing the+keyor-key
is the best way to stop the scan.
Page 23

J
Setting AFC for the LNC Offset
LNC offset is adjusted to correct for variations in the LNC output frequency. In practical
terms, it is used to optimise the picture to get it as free from “sparklies” as possible.
The receiver can compensate automatically for variations in the LNC's frequency
using a feature called AFC (automatic frequency control)
Select option 3 and press the + key or the - key to toggle AFC ON and OFF.
If you turn AFC off, a fourth option will appear at the bottom of the menu enabling you
to set the LNC offset manually, as described below.
Setting the LNC Offset Manually
Occasionally you may need to set an actual value forthe offset, if you do not see a good
quality picture with AFC. To do this, proceed as follows.
Turn off AFC as described in the preceding section.
Option 4 will appear on the menu.
Select option 4 then press the + key or - key to go through the available values until
you get the clearest picture on the screen.
The offset can have any value between -15 and 15.
SETTING THE CONTRAST
To set the contrast, select option 4 of the Global Settings Menu.
The menu will then be displayed on a programme rather than on its usual plain
background.
View the picture on the screen and press the + key or - key to go through the values
until you get the optimum contrast. Possible values are 1 to 8; the factory set value is
4.
Although you cannot set contrast on a per-programme basis, you can change
programme using the P+ or P- key while the CONTRAST option is selected. This
means that you can check the result of your contrast setting over a number of
programmes, and adjust it if necessary to get the best compromise.
OPERATION
J
SETTING THE BACKGROUND COLOUR
To set the background colour, select option 5 of the Global Settings Menu and press
the + key or - key to go through the values until you get the required colour.
The colour can have any value between 1 and 8, as shown in the table right. The
factory setting is 4 (blue).
SET CLOCK MENU Important:
• If you turn off the power to your receiver the clock information will be lost, therefore
you should turn off your receiver by placing it in standby mode.
• If the clock is not set, you will see a flashing time when you press the C+) key or
enter the Timer Menu. You do not need to set the clock for the sleep timer.
• The clock must be set as a 24-hour clock (e.g. 8 pm is 20.00).
Setting the Current Time
The Set Clock Menu is shown right.
Press 1 key and the day will flash. Press the + key or - key until the correct day is
displayed.
Press 2 key and the hours will flash. Press the + key or - key until the correct hours
value is displayed.
Press 3 key and the minutes will flash. Press the+key or- key until the correct minutes
value is displayed.
SETTING THE MENU LANGUAGE
The menus in the menu system can be in English or German.
Select option 7 at the Global Settings Menu then press the + key or - key to toggle
between the two languages.
NUMBER
1
2
3
4
5
6
7
8
1 DAY
S HRS
3 MIN
COLOUR
Rod
Khaki Green
Bottle Green
Blue
Violet
Brown
Moss Green
Purple
SET CLOCK
SUN 10:15
(
21
Page 24

INSTALLATION
INSTALLATION
Important:
I
• Do not turn on the power to your receiver, TV, VCR etc. until you have made the
necessary cable interconnections.
• These instructions and diagrams show the UHF (TV) aerial connected to the
receiver (i.e. looped-through the receiver). If you install it in this way, you should
put the receiver into standby, rather than power it off, when it is not in use,
otherwise you will not be able to view terrestrial TV programmes.
• You can connect the UHF aerial directly to the TV or VCR if you connect your TV
to your receiver using a SCART lead.
• When you have carried out one of the installation schemes described below, refer
to the Global Settings Menu section on page 19 of this manual. The LNC
Installation Menu contains a FIND SATELLITE option which can be used to help
in the positioning of the dish antenna.
• If the receiver is connected to the TVA^CR using coaxial cable, stereo sound will
not be available from your TV.
• If there is a short-circuit in the cable which connects the LNC to your receiver, the
receiver will not work and may generate clicking noises.
Connecting to a TV Using Coaxiai Cabie
Connect the cable from the dish antenna to the LNC socket on the rear panel of the
receiver.
Connect the UHF (TV) aerial to the AERIAL socket on the receiver.
Connect a coaxial cable from the TV socket on the receiver to the aerial socket on your
TV.
J
Connecting to a TV and a VCR Using Coaxiai Cabie
Connect the cable from the dish antenna to the LNC socket on the rear panel of the
receiver.
Connect the UHF (TV) aerial to the AERIAL socket on the receiver.
Connect a coaxial cable from the TV socket on the receiver to the aerial socket on your
VCR.
Connect a coaxial cable from the TV socket on your VCR to the aerial socket on your
TV.
22
Page 25

J
Connecting to a TV and VCR Using SCART Leads
Connect the cable from the dish antenna to the LNC socket on the rear panel of the
receiver.
Connect the UHF (TV) aerial either by looping it through the receiver and VCR (as
shown on the previous page) or by connecting it to the TV or VCR directly (as shown
below).
Connect a SCART lead from the TV SCART connector on your receiver to the SCART
connector on your TV.
Connect a SCART lead from the VCR SCART connector on your receiver to the
SCART connector on your VCR.
NOTE: If you have connected your TV using a SCART lead, then you can use the TV/
SAT key on your handset to switch between terrestrial and satellite reception,
providing your TV recognises pin 8 of the SCART socket.
NOTE: If you have connected your VCR using a SCART lead, to record from the
receiver you will need to select AUX orAVon the VCR as the programme to record.
When replaying the VCR through the receiver, you will need to switch the receiver to
standby mode or select TV using the TV/SAT key; this method of replaying is,
however, only possible if the TV is also connected using a SCART lead.
INSTALLATION
SATELLITE RECEIVER
(Back view)
J
Connecting an External Decoder
If you wish to view scrambled transmissions you will need to connect an external
decoder.
Connect the decoder to the receiver's DECODER SCART connector.
Refer to the External Decoder Menu under the Programme Install Menu to set the
baseband and the audio and video source for each programme you receive via the
external decoder. If the decoder does not recognise pin 8 of the DECODER SCART,
then you need to set up the audio and video source to be external.
Connecting a Philips Dish Positioner
Connect the Philips dish positioner (such as the SCC224) to your receiver’s DE
CODER SCART socket and then refer to the Antenna Settings Menu on page 20 to
set the POSITIONER option and to the Find Programmes Menu on page 17 to set up
the SATELLITE option on a per-programme basis.
If you wish to connect an external decoder as well as the dish positioner, connect the
dish positionerto your receiver's DECODER SCART socket and the external decoder
to the decoder SCART socket on the dish positioner. It is important that you use fully
specified SCART cable.
(
23
Page 26

INSTALLATION
Connecting Stereo Equipment
To obtain the maximum performance from your receiver, we recommend that you
connect your receiver to a stereo TV or to a stereo ampiifier (for exampie, in a hi-fi
J
system).
To connect a stereo TV, connect your receivertoyourTV (and VCR, if required) using
a SCART iead, as described on page 24, then select AV or AUX on your TV.
To connect to a stereo amplifier, firstly connect your receiver to your TV (and VCR,
if required) using either a SCART lead or a coaxial cable, as described earlier in this
section. Place the speakers either side of the TV and connect the phono leads from
the AUDIO OUT sockets on your receiver to the appropriate audio input sockets on
your amplifier. Switch your amplifier to Auxiliary Input.
J
FROM R/L AUDIO SOCKETS TO AUDIO INPUT SOCKETS
24
Page 27

J
OUTLINE SPECIFICATION
GENERAL
Number of Programmes 199
Front Panel Indicators
Front Panel Control Buttons
UHF Modulator
Operating Voltage
Power Consumption
Dimensions
Weight
Green, 3-character, 7-segment display for Standby,
Timer and Programme/Channel No.
Standby, Programme Up, Programme Down
CCIR PAL System G, Ch. 21 to 69, preset to Ch. 38
187-264 VAC, 50 Hz
35 W (max.)
H = 66 mm, W = 360 mm, D = 210 mm
2.5 kg (typical, when packed)
CONNECTORS
TV
VCR
DECODER
AUDIO OUT
MAINS INPUT
AERIAL
TV
LNC
SCART (RGB and CVBS)
SCART (CVBS)
SCART, (Baseband Output,
AudioAfideo Input/Output, RGB in)
Phono (L and R)
2-pin reversible
lEC female
lEC male
F-type
TUNER
Receiving Frequency Range
Polarity Switching
Input Impedance
I. F.
I. F. Bandwidth
Input Level
Image Rejection
Static Threshold
Energy Dispersion Removal
950 - 2050 MHz
Vertical 12.1 V -14.0 V, Horizontal 17.15 V -19.6 V
0 - 400 mA
75 Q
479.5 MHz
27 MHz
-60 dBm to -30 dBm
40 dB (typically)
6 dB (typically)
35 dB (min.)
SCART SOCKETS
Video Output Level
Video Output Impedance
Video Frequency Range
Video De-emphasis (PAL)
Baseband Output Level
Baseband Frequency Range
Baseband De-emphasis
Audio Frequency Range
Audio Output Level
1 V p-p (±2 dB)
75 Q
25 Hz-4.8 MHz (±1.5 dB)
to CCIR 405.1 (625 lines)
1 V p-p (±2 dB)
25 Hz-10.5 MHz (±1.5 dB)
PAL/SECAM or MAC, software selectable
30 Hz-15 kHz
500 mV rms into 600 Q
SPECIFICATION
J
(
nplesetting the Factory Set PIN
If you wish, you can cut this section from the manual to prevent children (for
example) from learning the factory setting of the PIN and how to reset this factory
value. Iftheydonotknowthis PIN they will be unable to view programmes you have
locked because you considerthem unsuitable for children. Neither will they be able
to access menus you have locked. You can lock menus to prevent children from
altering receiver and programme settings.
The factory setting for the PIN is 1234. If you have customised your PIN (see
Parental Control Menu on page 13) and then forget what it is, you can resetthe PIN
to its factory value as follows. Pull the mains plug on your receiver out of its socket,
then press and hold down the (!) key while you put the mains plug back into the
socket. You need to hold down the key as long as the characters DP are displayed
on the front panel. Note that this action also unlocks any programmes you had
[ locked and unlocks the menus if you had locked them.
П
__
|
25
Page 28

SPECIFICATION
OPERATING/STORAGE CONDITIONS
Operating Temperature Range 5 - 40 °C
J
Operating Humidity Range
Storage Temperature Range
Storage Humidity Range
AUDIO
Audio Bandwidth
Tuning Frequency Range
20 - 80% non-condensing at 25 "C
-20 - +50 °C
10 - 90% non-condensing at 25 °C
280 kHz wide band
(mono de-emphasis PANDA 1,50 ps or J17)
5.00 - 9.00 MHz in 10 kHz steps
J
FSS, DBS and T-COM Bands
Preset Stereo Subcarriers
Stereo A 7.02 & 7.20 MHz (PANDA1)
Stereo B
7.38 & 7.56 MHz
Stereo C 7.74 & 7.92 MHz
Stereo D 8.10& 8.28 MHz
Preset Mono Subcarriers
Mono 1 6.50 MHz
Mono 2 7.02 MHz (PANDA 1)
Mono 3
Mono 4
Mono 5
Mono 6
7.20 MHz
7.38 MHz
7.56 MHz
7.74 MHz
Mono 7 7.92 MHz
Mono 8 8.10 MHz
Mono 9
8.28 MHz
It
n
ti
(50 ps)
II
If
It
II
II
II
II
C-Band
Preset Stereo Subcarriers
Stereo A 5.58 & 5.76 MHz
Stereo B
Stereo C
Stereo D 6.66 & 6.84 MHz
Preset Mono Subcarriers
Mono 1 6.60 MHz
Mono 2 6.65 MHz
Mono 3 6.80 MHz
Mono 4
Mono 5
Mono 6 6.30 MHz
Mono 7 6.48 MHz
Mono 8
Mono 9
5.94 & 6.12 MHz
6.30 & 6.48 MHz
5.94 MHz (PANDA 1)
6.12 MHz
6.66 MHz
6.84 MHz
(PANDA 1)
II
It
It
(50 ps)
11
"
It
11
11
n
26
Page 29

J
PIN DESIGNATIONS FOR SCART CONNECTORS
Pin DECODER SCART TV SCART VCR SCART
R Audio Out
1
R Audio In
2
L Audio Out L Audio Out L Audio Out
3
4 Audio Ground Audio Ground Audio Ground
5 Blue Ground Blue Ground Ground
6 L Audio In N/C L Audio In
7 Blue In Blue Out N/C
8 Ext. Decoder Status In
9 Green Ground Green Ground Ground
10
N/C N/C
11 Green In Green Out N/C
12
Serial Data I/O Port N/C N/C
13
Red Ground
14 N/C N/C N/C
15
Red In Red Out/SVHS Chroma SVHS Chroma
16
RGB Status In RGB Status Out N/C
17
Video Ground Video Ground Video Ground
18 Ground Ground
19 Baseband Video Out
20 Video In
21 Ground (Casing) Ground (Casing) Ground (Casing)
R Audio Out
N/C R Audio In
AV Status Out AV Status In
Red Ground
Video Out Video Out
N/C
R Audio Out
N/C
Ground
Ground
Video In
SPECIFICATION
J
(
27
Page 30

Page 31

<@)
IDENTITY CARD
This card, together with the terms of guarantee (to be provided by
your dealer), forms the full certificate of guarantee for this appliance.
PHILIPS
GERÄTE
<$>
KENNKARTE
CARTE
CD
D'lDENTlRCAZIONE
TARJETA DE
CD
INDENTIFICACION
Diese Karte Ist, zusammen mit den Garantiebestimmungen, die Ihr
Händler ihnen aushändigt. Ihr Garantieschein für dieses Gerät.
Questa cartolina rappresenta insieme alle condizioni di garanzia (da
consegnare dal vostro rivenditore) il documento di garanzia per
questo apparecchio.
La garantía de este aparato se compone de esta tarjeta y de las
condiciones de garantía que le entregará su concesionario.
502-0900130
 Loading...